Home>Garden Essentials>How To Grow Zinnias From Seed

Garden Essentials
How To Grow Zinnias From Seed
Modified: August 16, 2024
Learn how to grow beautiful zinnias in your garden from seed. Find step-by-step instructions and expert tips for a successful zinnia garden.
(Many of the links in this article redirect to a specific reviewed product. Your purchase of these products through affiliate links helps to generate commission for Storables.com, at no extra cost. Learn more)
Introduction
Growing zinnias from seed is a rewarding and cost-effective way to bring vibrant colors and beauty to your garden. Zinnias are popular annual flowers that come in a wide range of colors, shapes, and sizes. They are known for their long-lasting blooms and their ability to attract butterflies and beneficial insects. Whether you are a beginner or an experienced gardener, growing zinnias from seed is a relatively easy and enjoyable process.
Before you get started, it’s important to understand that zinnias thrive in warm weather and require full sun to grow and bloom to their full potential. They are also versatile plants, making them suitable for various gardening styles, including flower beds, borders, containers, and cutting gardens.
In this article, we will guide you through the steps of growing zinnias from seed, from choosing the right varieties to harvesting the beautiful blooms. So roll up your sleeves, grab your gardening tools, and let’s get started!
Key Takeaways:
- Growing zinnias from seed is a colorful and rewarding experience, suitable for all gardeners. With proper care and attention, zinnias will bring vibrant beauty to any garden.
- From choosing the right varieties to harvesting blooms, growing zinnias from seed is an enjoyable journey. With patience and care, you can cultivate stunning zinnias in your garden.
Read more: How Do You Save Zinnia Seeds
Choosing the Right Zinnia Varieties
When it comes to choosing zinnia varieties for your garden, you’ll be spoilt for choice. Zinnias come in an array of colors, including vibrant shades of red, orange, pink, purple, yellow, and white. They also vary in size, ranging from dwarf varieties that grow to be around 6 inches tall, to tall varieties that can reach up to 3 feet in height.
Here are a few popular zinnia varieties to consider:
- Zinnia elegans: This is the most common and widely available zinnia species. It features large, daisy-like flowers in a variety of colors. The ‘Benary’s Giant’ series is a popular choice within this species, known for its big, double-petaled blooms.
- Zinnia haageana: This species, commonly known as Mexican zinnia, is renowned for its compact size and heat tolerance. It produces small, but vibrant flowers in shades of orange, yellow, and red.
- Zinnia angustifolia: Also known as narrow-leaf zinnia, this species is valued for its disease resistance and heat tolerance. It produces small, single-flowered blooms in a range of colors.
- Zinnia marylandica: This species is a hybrid of Zinnia angustifolia and Zinnia elegans. It is known for its disease resistance, compact growth, and abundant blooms.
Consider the available space in your garden and your desired color scheme when selecting zinnia varieties. Additionally, take into account the local climate and the length of your growing season. Some varieties may be more suited to cooler climates, while others thrive in hot and humid conditions.
You can find zinnia seeds at your local garden center or order them online from reputable seed suppliers. Look for seeds that are fresh and of high quality to ensure the best germination and growth rates.
Now that you know the different zinnia varieties to choose from, it’s time to prepare the soil for sowing the seeds. Read on to learn more in the next section.
Preparing the Soil
Preparing the soil is an essential step in growing zinnias successfully. Zinnias prefer well-draining soil that is rich in organic matter. Here are some steps to follow when preparing the soil:
- Clear the area: Start by clearing the area where you plan to plant the zinnias. Remove any existing weeds, grass, or debris. This will create a clean and open space for the zinnias to grow.
- Loosen the soil: Use a garden fork or a tiller to loosen the soil to a depth of about 8-12 inches. This will improve drainage and make it easier for the zinnia roots to penetrate the soil.
- Amend the soil: Zinnias thrive in soil that is rich in organic matter. Incorporate compost or well-rotted manure into the soil to improve its fertility and provide essential nutrients. Aim to add about 2-4 inches of organic matter and mix it thoroughly with the existing soil.
- Level the soil: After adding organic matter, level the soil using a rake or garden tool. Smooth out any uneven patches and create a flat surface for sowing the zinnia seeds.
- Test the soil pH: Zinnias prefer slightly acidic soil with a pH between 6.0 and 7.0. You can use a soil testing kit to determine the pH of your soil. If the pH is too high or too low, you can adjust it by adding lime to raise the pH or sulfur to lower the pH.
By taking the time to properly prepare the soil, you will provide the zinnia seeds with a favorable environment for germination and growth. Once the soil is ready, it’s time to sow the zinnia seeds. Read on to learn how in the next section.
Sowing Zinnia Seeds
Sowing zinnia seeds is an exciting step in the process of growing these beautiful flowers. Here’s a step-by-step guide on how to sow zinnia seeds:
- Choose the right time: Zinnia seeds should be sown after the danger of frost has passed and the soil temperature has reached around 70°F (21°C) or above. Depending on your location, this is usually in late spring or early summer.
- Prepare the seeds: If you are using packaged zinnia seeds, you can sow them directly without any special treatment. However, if you have harvested the seeds from existing zinnia plants, it is recommended to remove the dried petals and debris from the seeds before sowing.
- Mark the planting area: Use small stakes or markers to divide the planting area into sections or rows. This will help you keep track of different zinnia varieties if you are sowing multiple types.
- Sow the seeds: Make shallow furrows or small holes in the prepared soil. The depth of the furrows or holes should be about 1/4 inch (0.6 cm). Space the furrows or holes according to the spacing requirements mentioned on the seed packet, typically around 6-12 inches (15-30 cm) apart. Drop the zinnia seeds into the furrows or holes, making sure to space them evenly.
- Cover and water: Gently cover the seeds with a thin layer of soil and lightly press it down. Water the planted area gently using a watering can or a misting nozzle on a hose. Avoid overwatering, as it can lead to the seeds being washed away or rotting. Keep the soil evenly moist until the seeds germinate, which usually takes around 7-10 days.
- Thin the seedlings: Once the zinnia seedlings have grown a few inches tall, thin them out to ensure proper spacing. This will allow the remaining seedlings to have enough space to grow and develop healthy root systems. Remove the weakest and least vigorous seedlings, leaving only the healthiest ones.
Remember to check the specific instructions on the seed packet for any variations or additional steps. With patience and care, you will soon see your zinnia seeds sprouting and growing into beautiful plants. In the next section, we will discuss the process of transplanting zinnia seedlings into the garden.
Transplanting Seedlings
Once your zinnia seedlings have grown a few inches tall and have developed a few sets of true leaves, it’s time to transplant them into the garden. Transplanting seedlings gives them more space to grow and allows them to establish stronger root systems. Here’s a step-by-step guide on how to transplant zinnia seedlings:
- Select the right location: Choose a sunny spot in your garden with well-drained soil for transplanting the zinnia seedlings. Zinnias require at least 6-8 hours of direct sunlight per day to thrive.
- Prepare the soil: Just like when sowing the seeds, prepare the soil in the planting area by removing any weeds or debris and loosening it with a garden fork or tiller. Amend the soil with compost or well-rotted organic matter to improve its fertility.
- Make holes for transplanting: Dig small holes in the prepared soil, spaced according to the specific spacing requirements for your zinnia variety. The holes should be deep enough to accommodate the root ball of the seedlings.
- Gently remove the seedlings: Carefully lift the seedlings from their containers or seed trays, being mindful not to damage their tender roots. If the seedlings are root-bound, gently tease apart the roots to encourage proper growth.
- Plant the seedlings: Place each zinnia seedling into a hole, ensuring that the top of the root ball is level with the soil surface. Backfill the holes with soil, gently pressing it down to secure the seedlings in place.
- Water the seedlings: Give the transplanted seedlings a thorough watering to settle the soil and help them establish. Be careful not to overwater, as excessive moisture can lead to root rot. Ensure that the soil remains evenly moist in the following weeks to support the seedlings’ growth.
It’s important to note that zinnias are generally not fond of being transplanted. Therefore, it’s advisable to start the seedlings in biodegradable pots or peat pots that can be planted directly into the soil, thus minimizing disturbance to the roots. This way, the seedlings can continue to grow without experiencing transplant shock.
By following these transplanting steps, you will give your zinnia seedlings the best chance to flourish in their new garden home. In the next section, we will discuss the essential care that zinnia plants require to thrive.
To grow zinnias from seed, sow them directly into well-drained soil after the last frost. Keep the soil moist and provide full sun for best results.
Read more: How To Grow Okra From Seed
Caring for Zinnia Plants
Caring for zinnia plants is relatively straightforward, but it’s important to provide them with proper care to ensure healthy growth and abundant blooms. Here are some key aspects to consider when caring for your zinnia plants:
- Watering: Zinnias prefer moderate and consistent moisture. Water the plants deeply when the top inch of soil feels dry. Avoid overwatering, as it can lead to root rot and other fungal diseases. Water at the base of the plants, rather than overhead, to keep the foliage dry and prevent foliar diseases.
- Fertilizing: To encourage robust growth and blooming, fertilize your zinnias regularly. Use a balanced, water-soluble fertilizer according to the instructions on the package. Apply the fertilizer every 4-6 weeks during the growing season. Be careful not to over-fertilize, as excessive nitrogen can result in lush foliage but fewer blooms.
- Staking: Tall zinnia varieties may benefit from staking to provide support and prevent them from falling over. Install the stakes when the plants are still young to avoid damage to the root system. Secure the plants to the stakes gently with soft plant ties, allowing room for growth and airflow.
- Deadheading: To encourage continuous blooming, regularly remove faded flowers by deadheading. This will divert the plant’s energy from seed production to the development of new blooms. Pinch or cut off the spent flowers just above a set of healthy leaves to stimulate new growth.
- Weeding: Regularly weed around your zinnia plants to minimize competition for nutrients and water. Be gentle when weeding to avoid damaging the shallow root systems of the zinnias.
- Pest and disease control: Zinnias are generally resistant to pests and diseases. However, common pests such as aphids, spider mites, and Japanese beetles can occasionally be a problem. Monitor your plants regularly and take appropriate measures, such as handpicking or using organic insecticides, if necessary. Ensure adequate airflow around the plants to reduce the risk of foliar diseases.
- Mulching: Applying a layer of organic mulch around the base of your zinnia plants can help conserve soil moisture, suppress weed growth, and regulate soil temperature. Use materials such as straw, shredded bark, or compost, and apply a layer about 2-3 inches thick. Keep the mulch a few inches away from the plant stems to prevent moisture-related diseases.
By following these care guidelines, you will ensure healthy and vibrant zinnia plants that will reward you with an abundance of colorful blooms throughout the growing season. In the next section, we will address common pests and diseases that may affect zinnias and how to deal with them.
Dealing with Common Zinnia Pests and Diseases
Zinnias are generally resilient plants that are resistant to many pests and diseases. However, like any garden plant, they can still face certain issues. Here are some common pests and diseases that may affect zinnias and how to deal with them:
- Aphids: Aphids are small, soft-bodied insects that suck the sap from plants, causing leaf distortion and stunted growth. To control aphids, you can spray the affected plants with a strong stream of water to dislodge them or use insecticidal soap or neem oil as a natural and effective treatment.
- Spider mites: Spider mites are tiny pests that feed on the undersides of leaves, causing yellowing, stippling, and webbing. Regularly misting the foliage with water can help deter spider mites. If an infestation occurs, use insecticidal soap or neem oil to control them.
- Japanese beetles: Japanese beetles are metallic green beetles that chew on the leaves, flowers, and buds of zinnias. Handpick the beetles and drop them into a bucket of soapy water to control their population. Alternatively, you can use traps or apply an approved insecticide.
- Powdery mildew: Powdery mildew is a common fungal disease that appears as a white, powdery coating on the leaves of zinnias. To minimize the risk of powdery mildew, provide good air circulation around the plants by spacing them adequately. If powdery mildew appears, remove the affected leaves and treat the plants with a fungicide specifically formulated for powdery mildew control.
- Botrytis blight: Botrytis blight, or gray mold, is a fungal disease that causes grayish-brown spots on the leaves and flowers of zinnias. Remove and discard infected plant parts and avoid overhead watering to prevent the spread of spores. Applying a fungicide labeled for botrytis blight control can help manage the disease.
Prevention is key when it comes to dealing with pests and diseases. Providing proper care and maintaining a healthy growing environment for your zinnias can go a long way in preventing these problems. Regularly inspect your plants for any signs of pests or diseases, and take prompt action to address them.
Remember, each garden may have its unique challenges, so it’s important to stay vigilant and adapt your pest and disease control strategies accordingly. By being proactive, you can keep your zinnias healthy and thriving. In the next section, we will explore the process of harvesting zinnia flowers.
Harvesting Zinnia Flowers
Harvesting zinnia flowers is an exciting and rewarding part of growing these vibrant blooms. Zinnias are known for their long-lasting cut flowers, making them a popular choice for floral arrangements and bouquets. Here’s a guide on how to harvest zinnia flowers:
- Choosing the right time: Zinnias should be harvested when the flowers are fully open but before they start to fade and wither. The petals should be vibrant and show no signs of browning or wilting.
- Use clean, sharp shears: Before harvesting, make sure your cutting tools are clean and sharp. This helps ensure clean cuts and minimizes damage to the plants. Blunt or dirty tools can crush the stems and increase the risk of disease.
- Select the stems: Choose strong, healthy stems that have multiple buds or flowers. Make your cuts at an angle, about ¼ to ½ inch above a bud or side shoot. This encourages the plant to produce more blooms.
- Remove excess foliage: Strip away any leaves or foliage that would be submerged or placed below the waterline in a vase. This prevents the leaves from decomposing in the water and helps extend the vase life of the flowers.
- Place in water immediately: After cutting the zinnias, place them in a clean container filled with lukewarm water. This helps hydrate the flowers and prevents wilting. Consider adding flower preservative or a few drops of bleach to the water to prolong the vase life.
- Repeat the process: Zinnias are prolific bloomers, so you can continue to harvest flowers as new blooms open throughout the growing season. Regularly removing the faded flowers also helps stimulate the plant to produce more blooms.
Zinnias can last for a week or longer in a vase if cared for properly. To extend the vase life, change the water every few days, recut the stems at an angle, and remove any wilted or decaying petals. Display your zinnia arrangements in a cool spot away from direct sunlight, drafts, and ripening fruit, which can produce ethylene and shorten the flowers’ lifespan.
Don’t forget to enjoy the beauty and vibrant colors of your freshly harvested zinnia flowers. In the final section, we will discuss the process of saving zinnia seeds for future use.
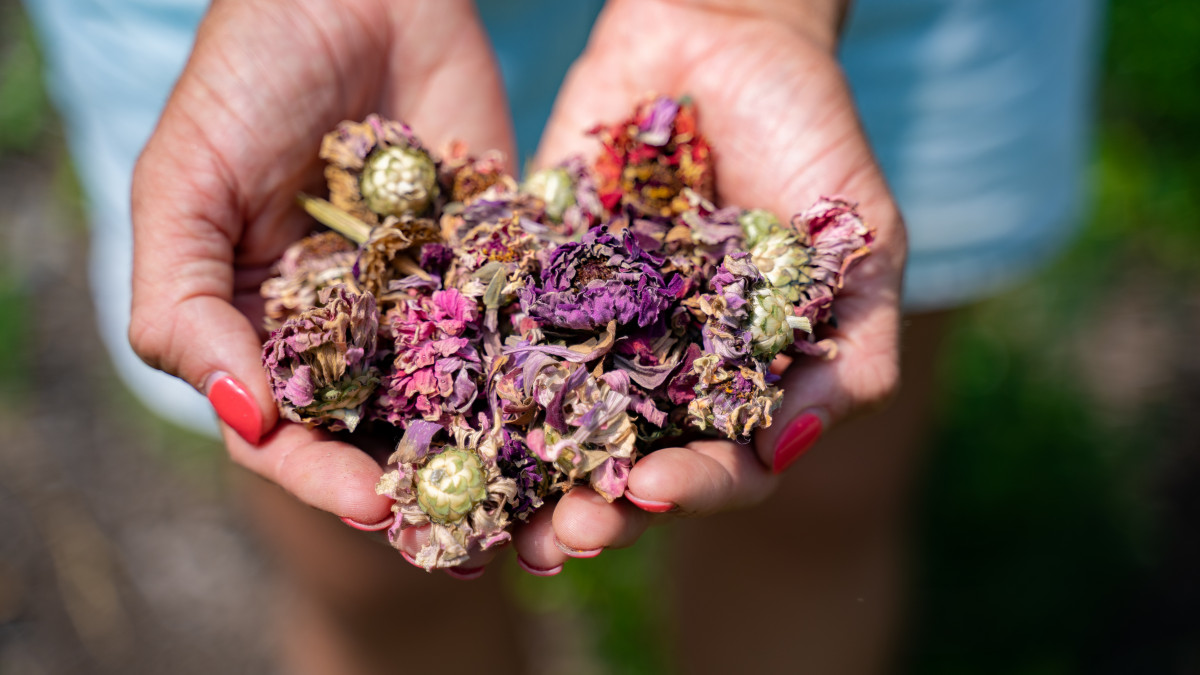
Saving Zinnia Seeds
Saving zinnia seeds is not only a cost-effective way to grow zinnias in future seasons, but it also allows you to preserve specific varieties or unique characteristics that you particularly love. Here’s how you can save zinnia seeds:
- Choose mature flowers: Select fully mature zinnia flowers for seed saving. Look for flowers that have dried out on the plant and have begun to turn brown or crispy. Avoid harvesting seeds from flowers that are still fresh or show any signs of disease or damage.
- Collect the seed heads: Cut the seed heads from the zinnia plants, leaving a few inches of stem attached. Place the seed heads in a paper bag or a brown paper envelope to allow them to dry further and catch any loose seeds that may fall out during the drying process.
- Dry the seed heads: Hang the paper bag or envelope upside down in a cool, dry, and well-ventilated area. Avoid exposure to direct sunlight or high humidity. Allow the seed heads to dry completely for about 2-3 weeks. Ensure that the seeds are fully dry before moving on to the next step.
- Remove the seeds: Once the seed heads are dry, gently rub them between your fingers or use a sieve to separate the seeds from the dried flower parts. Discard any debris or chaff and keep only the clean seeds.
- Store the seeds: Place the zinnia seeds in a clean, airtight container, such as a glass jar or a seed envelope. Label the container with the date and the variety of zinnia seeds. Store in a cool, dark, and dry location, such as a basement or a refrigerator. Properly stored zinnia seeds can remain viable for several years.
Remember to select seeds from open-pollinated or heirloom zinnias if you want to maintain the characteristics of a particular variety. Hybrid zinnias, on the other hand, may not produce offspring that are true to the parent plant.
Saving zinnia seeds from your own garden allows you to continue the cycle of growth and beauty year after year. It also gives you the opportunity to share seeds with fellow gardeners or trade them for different varieties. With proper storage and care, you can enjoy the benefits of saved zinnia seeds for years to come.
Congratulations! You now have a complete guide to growing zinnias from seed, caring for the plants, and saving seeds. With these instructions, you will be able to cultivate beautiful zinnias in your garden and enjoy their vibrant colors and lovely blooms. Happy gardening!
Read more: How To Grow A Tree From A Seed
Conclusion
Growing zinnias from seed is a delightful and rewarding experience for any gardener. These vibrant and versatile flowers bring a burst of color and beauty to any garden or floral arrangement. By following the steps outlined in this guide, you can successfully grow zinnias from seed and enjoy their stunning blooms throughout the growing season.
From choosing the right zinnia varieties to preparing the soil, sowing the seeds, and caring for the plants, each step plays an important role in the success of your zinnia garden. Providing adequate watering, fertilizing, staking, and pest control will ensure healthy and vigorous plants. Harvesting zinnia flowers at the right time and saving seeds for future use will allow you to enjoy their beauty year after year.
Whether you have a small garden, a large flower bed, or even containers on a balcony, zinnias can thrive in various settings. Their versatility and resilience make them suitable for gardeners of all skill levels, from beginners to experienced enthusiasts. With their striking colors and ability to attract beneficial insects, zinnias also contribute to a biodiverse and eco-friendly garden ecosystem.
So, why wait? Roll up your sleeves, gather your gardening tools, and embark on the journey of growing zinnias from seed. Experiment with different varieties, mix and match colors, and create stunning floral displays to brighten up your outdoor space. Remember to share your love for zinnias with fellow gardeners, spreading the joy and beauty of these magnificent flowers.
With proper care, attention, and a little bit of patience, zinnias will reward you with their vibrant and long-lasting blooms. So, let your garden come alive with the splendor of zinnias and enjoy the beauty they bring to your outdoor sanctuary.
Happy gardening and may your zinnia garden flourish!
Frequently Asked Questions about How To Grow Zinnias From Seed
Was this page helpful?
At Storables.com, we guarantee accurate and reliable information. Our content, validated by Expert Board Contributors, is crafted following stringent Editorial Policies. We're committed to providing you with well-researched, expert-backed insights for all your informational needs.


0 thoughts on “How To Grow Zinnias From Seed”