Home>Garden Essentials>How To Grow Orchids From Seed

Garden Essentials
How To Grow Orchids From Seed
Modified: August 17, 2024
Learn the art of growing beautiful orchids from seed in your garden and create a stunning floral display. Discover expert tips and techniques to nurture your orchids from start to bloom.
(Many of the links in this article redirect to a specific reviewed product. Your purchase of these products through affiliate links helps to generate commission for Storables.com, at no extra cost. Learn more)
Introduction
Welcome to the wonderful world of growing orchids from seed! Orchids are coveted for their exotic beauty and delicate fragrances, and being able to grow them from seed is a truly rewarding experience. Whether you’re a seasoned gardener or a beginner, this article will guide you through the process of growing orchids from seed, step by step.
Unlike many other plants, orchids require a bit more attention and care during the germination and early growth stages. But don’t let that discourage you! With the right knowledge and preparation, you can successfully cultivate your very own orchids and watch them bloom into stunningly vibrant flowers.
Before we dive into the specifics of growing orchids from seed, it’s important to understand that this process requires patience and time. Orchids are not known for their fast growth, and it may take months or even years before you see your first blossom. But rest assured, the journey itself is incredibly rewarding, and the end result will be well worth the wait.
So, let’s get started on this exciting adventure of growing orchids from seed!
Key Takeaways:
- Growing orchids from seed is a patient and rewarding journey. Choose the right seeds, provide optimal conditions, and watch tiny seeds transform into beautiful orchids with care and dedication.
- Orchid seedlings need gentle care. Provide proper watering, lighting, and air circulation. Transplant them when they outgrow their containers to promote healthy growth.
Read more: How To Grow Monkey Face Orchids From Seeds
Selecting the Orchid Seeds
Choosing the right orchid seeds is crucial to the success of your growing endeavor. When it comes to selecting orchid seeds, you have two options: buying pre-packaged seeds or harvesting them yourself.
If you decide to purchase pre-packaged orchid seeds, make sure to buy them from reputable suppliers. Look for seeds that are fresh and viable, as old or low-quality seeds may have a lower germination rate. It’s also a good idea to choose seeds from orchid varieties that thrive well in your climate or growing conditions.
On the other hand, if you want to harvest orchid seeds from your own plants, you’ll need to wait for your orchids to produce seed pods. Once the seed pods have formed, you can carefully collect the ripe pods and extract the seeds. This method allows you to propagate and preserve the characteristics of your favorite orchid varieties.
Regardless of whether you choose to buy or harvest orchid seeds, keep in mind that orchids come in a wide variety of species and hybrids. Each type has its own specific care requirements, so it’s important to research and choose seeds that are suitable for your level of expertise and the conditions in your growing area.
When selecting orchid seeds for cultivation, it’s also worth considering the expected bloom time. Some orchids may take longer to mature and produce flowers, while others may bloom more quickly. If you’re looking for faster results, prioritize orchid varieties with shorter maturation periods.
Remember, the selection process is an exciting opportunity to explore the vast world of orchids and discover unique varieties. By choosing the right seeds, you’re setting the stage for a successful growing experience.
Preparing the Growing Container
Once you have selected your orchid seeds, the next step is to prepare a suitable growing container. The container you choose will play a crucial role in providing the optimal environment for the seeds to germinate and grow.
First and foremost, ensure that the growing container has proper drainage. Orchids are susceptible to root rot if they’re kept in standing water, so it’s essential to prevent waterlogged conditions. You can achieve this by using containers with drainage holes or by layering the bottom of the container with a well-draining medium like orchid bark or perlite.
The size of the container is also important. Orchid seeds are tiny and delicate, so a shallow container is ideal to allow for better air circulation and prevent excessive moisture retention. A plastic or glass container with a clear lid can be a good choice as it allows you to monitor the moisture levels and observe the seedlings’ growth.
To create a suitable growing medium, orchid seeds require a nutrient-rich and well-draining material. One common option is to use a mixture of finely ground sphagnum moss and orchid bark. This combination provides a balanced environment that retains moisture without suffocating the seeds.
Prior to sowing the orchid seeds, it’s beneficial to sterilize the growing container and the growing medium to minimize the risk of fungal or bacterial infections. To do this, you can soak the container in a diluted bleach solution and rinse it thoroughly. The same process can be applied to the growing medium, ensuring that it’s free from any pathogens that could harm the delicate seedlings.
Remember to label your growing containers to keep track of the orchid varieties you’ve planted. This will be helpful as you monitor their growth progress and care for them in the future.
By carefully preparing the growing container, you’re creating an ideal environment for the orchid seeds to germinate and establish strong roots. This step is crucial for setting the foundation of healthy and thriving orchid seedlings.
Sowing the Orchid Seeds
Now that you have your growing container prepared, it’s time to sow the orchid seeds. Sowing orchid seeds is a delicate process that requires precision and attention to detail.
Start by moistening the growing medium in your container. It should be damp but not waterlogged. Gently spread a thin layer of the moistened medium evenly across the bottom of the container.
Next, take a pair of sterilized tweezers or a similar tool and carefully pick up a few orchid seeds. Orchid seeds are extremely small and can be challenging to handle, so take your time to avoid dropping or losing them. Sprinkle the seeds evenly over the surface of the growing medium, making sure to distribute them as evenly as possible.
After sowing the seeds, it’s important to cover them lightly with a thin layer of the growing medium. This will help protect the seeds and maintain the necessary moisture levels. Avoid burying the seeds too deeply, as they need light to germinate.
Once the seeds are covered, consider placing a humidity dome or a clear plastic wrap over the container to create a mini greenhouse effect. This will help retain moisture and create a stable environment for the seeds to germinate. Place the container in a warm and well-lit location, but avoid direct sunlight, which can overheat the seeds.
Now, all you need to do is wait patiently for the seeds to germinate. Depending on the orchid variety, germination can take anywhere from a few weeks to several months. During this time, be sure to monitor the moisture levels in the container and maintain a humid environment.
Remember, orchid seeds are delicate and sensitive to sudden changes in moisture and temperature. Avoid disturbing the seeds during the germination process and resist the urge to check on them too frequently. Let nature take its course, and you’ll soon witness the magical moment when the orchid seeds begin to sprout.
By sowing the orchid seeds with care and providing them with the optimal conditions, you’re giving them the best chance to germinate and develop into healthy seedlings. This is an exciting stage in the journey of growing orchids from seed, as you’re witnessing the miracle of life unfolding before your eyes.
After sowing orchid seeds, keep the growing medium moist and warm, ideally between 70-85°F. Use a sterile environment to prevent contamination.
Providing Optimal Growing Conditions
Once your orchid seeds have germinated and started to grow, it’s crucial to provide them with the optimal growing conditions to ensure their healthy development. Orchids have specific requirements when it comes to light, temperature, humidity, and air circulation.
Light is essential for orchids to thrive, but they prefer bright, indirect light rather than direct sunlight. Place your growing container near a window with filtered sunlight or use artificial grow lights specifically designed for orchids. Aim for 12-14 hours of light per day, adjusting the distance between the lights and the seedlings to prevent them from getting burnt or stressed.
Temperature plays a significant role in orchid growth. Most orchids prefer temperature ranges between 60-80°F (15-27°C) during the day and a slightly cooler temperature at night. Avoid exposing them to drastic temperature fluctuations, as it can impact their growth and health.
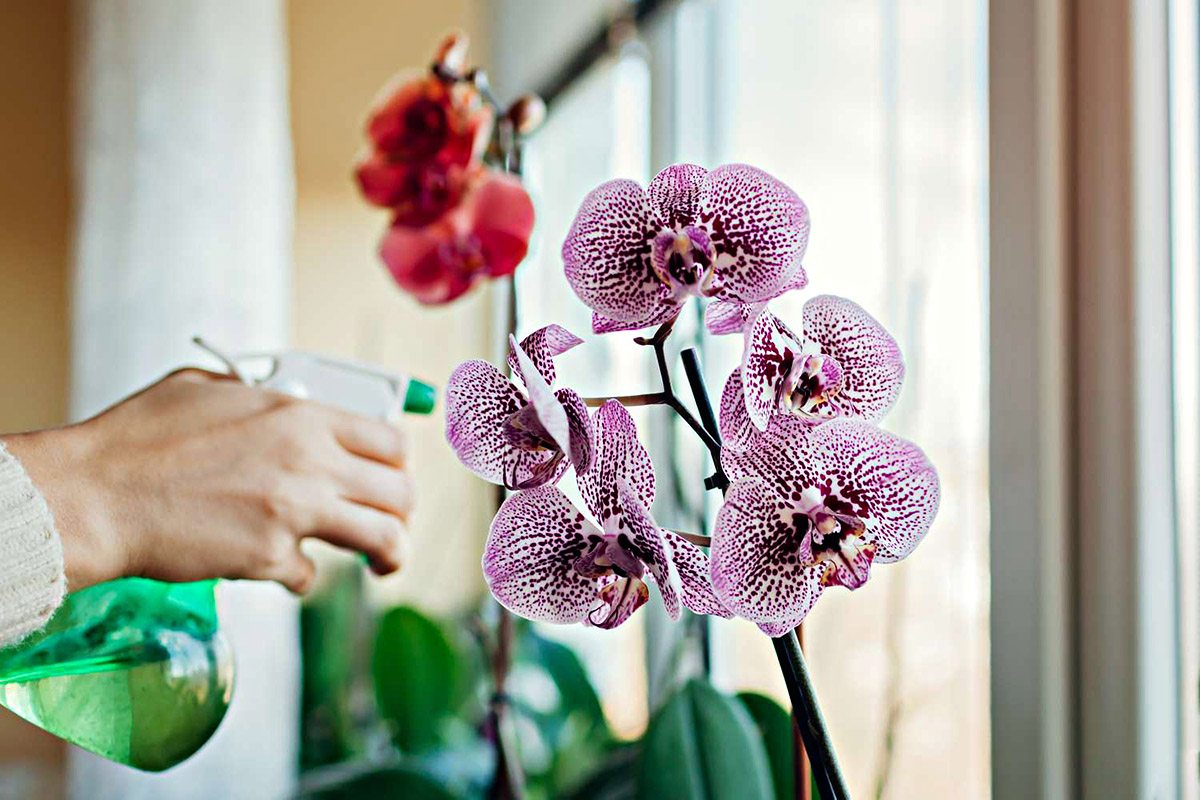
Humidity is key to orchid growth, as they originate from humid tropical regions. Aim for a humidity level of 60-80%. Misting the surrounding air or using a humidifier can help increase humidity levels. Placing the container on a tray filled with water and pebbles can also create a humid microclimate around the orchid seedlings.
Adequate air circulation is important for preventing fungal and bacterial growth on the leaves and roots. Ensure there is a gentle airflow around the plants, but avoid direct drafts that can cause temperature fluctuations. You can use a small fan set on low or open windows periodically to promote air circulation.
Watering orchid seedlings can be tricky as they have delicate root systems that are prone to rot. It’s important to provide consistent moisture without overwatering. Water the seedlings when the top layer of the growing medium feels slightly dry to the touch. Use room-temperature or tepid water to avoid shocking the roots.
Feeding orchid seedlings with a diluted fertilizer is necessary to provide them with essential nutrients. Opt for a balanced orchid fertilizer and apply it at the recommended intervals. Be careful not to over-fertilize, as this can burn the tender roots. Follow the manufacturer’s instructions for the right dosage and frequency.
As the orchid seedlings grow, they may require occasional repotting to allow for proper root development. Choose a suitable potting medium and container size, ensuring that it provides good drainage and aeration.
By providing the optimal growing conditions of light, temperature, humidity, air circulation, and proper watering and fertilization, you’re giving your orchid seedlings the best chance to flourish. With patience and care, you’ll soon witness these tiny seedlings transform into beautiful, blooming orchids.
Read more: How To Grow Orchids From Seed Without Agar
Caring for Young Orchid Seedlings
As your orchid seedlings continue to grow, they will require specific care to ensure their healthy development. Here are some crucial aspects to consider when caring for young orchid seedlings:
Watering: Proper watering is essential to prevent the orchid seedlings from drying out or becoming waterlogged. It’s important to strike a balance and provide consistent moisture. Water the seedlings when the top layer of the growing medium feels slightly dry, but avoid overwatering, as it can lead to root rot.
Fertilizing: Orchid seedlings have delicate roots that can easily get burned by fertilizer. Wait until the seedlings have developed a few sets of leaves before you start feeding them. Use a diluted orchid fertilizer at half the recommended strength and apply it during watering sessions. Follow the product instructions for the proper dosage and frequency.
Lighting: Young orchid seedlings require bright, indirect light to ensure healthy growth. If you’re growing them indoors, place them near a window with filtered sunlight or provide them with artificial grow lights. Ensure they receive 12-14 hours of light per day, adjusting the distance between the lights and the seedlings as they grow.
Air Circulation: Good air circulation is essential to prevent the buildup of moisture and prevent fungal or bacterial infections. Gently move the air around the seedlings using a small fan set on low or by periodically opening windows. Avoid placing them in drafty areas that could cause temperature fluctuations.
Temperature and Humidity: Maintaining the appropriate temperature and humidity levels is important for the health of your orchid seedlings. Most orchids prefer temperatures between 60-80°F (15-27°C) during the day and slightly cooler temperatures at night. Aim for a humidity level of 60-80% by misting the air or using a humidifier.
Monitoring for Pests and Diseases: Regularly inspect the seedlings for any signs of pest infestation or disease. Common orchid pests include aphids, scale insects, and mealybugs. If you notice any issues, take immediate action by using organic insecticides or manually removing the pests. Additionally, ensure good sanitation practices to prevent the spread of diseases.
Support and Staking: As the orchid seedlings grow, they may require support to prevent them from bending or breaking. Gently stake the seedlings using bamboo stakes or other appropriate materials, being careful not to damage the delicate roots or stems.
Remember, each orchid species or hybrid may have specific care requirements, so it’s important to research the particular variety you’re growing to provide the best care possible. By providing proper watering, feeding, lighting, air circulation, temperature, humidity, and monitoring for pests and diseases, you’ll be able to nurture your young orchid seedlings into strong and healthy plants.
Transplanting the Orchid Seedlings
As your orchid seedlings continue to grow, there may come a time when they outgrow their initial containers and need to be transplanted into larger pots. Transplanting orchid seedlings is an important step in their development and ensures that they have enough space for their roots to grow and expand. Here are the steps to successfully transplant your orchid seedlings:
1. Choose the right time: It’s best to transplant orchid seedlings when they are actively growing and have established a strong root system. Avoid transplanting during periods of stress, such as during extreme weather or when the seedlings are blooming.
2. Prepare the new pot: Select a new pot that is slightly larger than the current container. Orchids prefer pots with good drainage, so choose one with drainage holes. Fill the new pot with a well-draining orchid potting mix, such as a mix of orchid bark, perlite, and sphagnum moss. Moisten the potting mix slightly before transplanting.
3. Carefully remove the seedlings: Gently remove the orchid seedlings from their current container, being careful not to damage the roots. If the seedlings are tightly packed, you can carefully separate them, ensuring that each one has enough roots to survive.
4. Inspect and trim the roots: Examine the roots of the seedlings and remove any dead or damaged roots using sterilized scissors or pruners. Trimming the roots helps promote healthy growth and prevents the spread of diseases or rot.
5. Place the seedlings in the new pot: Position the seedlings in the new pot, making sure to spread out their roots gently. Avoid burying the seedlings too deeply—position them at the same level as they were in the previous container. Add additional potting mix around the roots, gently pressing it down to secure the seedlings in place.
6. Water and settle the seedlings: After transplanting, water the seedlings thoroughly to help settle the potting mix and eliminate any air pockets. Avoid overwatering; the goal is to moisten the mix, not saturate it. Allow any excess water to drain out of the pot.
7. Provide the right care: After transplanting, place the orchid seedlings in their ideal growing conditions—appropriate light, temperature, humidity, and air circulation. Continue to monitor their water and fertilizer requirements and provide support if needed.
8. Monitor the seedlings: Keep a close eye on the transplanted seedlings over the coming weeks. Check for signs of stress or any potential issues, such as yellowing leaves, wilting, or fungal growth. Make any necessary adjustments to their care routine to ensure their continued health.
Transplanting orchid seedlings may seem intimidating, but with proper care and attention, you can successfully repot them and promote their ongoing growth. Remember to be gentle with the delicate roots and provide them with a suitable potting mix and adequate growing conditions. Your transplanted orchid seedlings will soon continue to thrive and bring you joy with their beautiful foliage and future blooms.
Conclusion
Congratulations on embarking on the journey of growing orchids from seed! It may require patience and dedication, but the rewards are well worth it. By following the steps outlined in this article, you have learned how to select orchid seeds, prepare the growing containers, sow the seeds, provide optimal growing conditions, care for the young seedlings, and transplant them as they grow.
Remember, growing orchids from seed is a fascinating process that allows you to witness the magic of nature as tiny seeds transform into beautiful and vibrant plants. It’s a journey that teaches you valuable lessons about nurturing and perseverance.
Throughout the process, pay attention to the specific needs of your orchid seedlings. Monitor light levels, temperature, humidity, and airflow to create the perfect environment for their growth. Be vigilant in watering and fertilizing, taking care not to overdo it.
As your orchids continue to develop and mature, remember to enjoy every stage of their growth. From the first sprout to the emergence of delicate leaves and the eventual blossoming of exquisite flowers, each step is a testament to your care and dedication.
Continue to educate yourself about orchids, as this will help you better understand the needs and requirements of different varieties. Explore different orchid species and hybrids, and perhaps even try your hand at cross-pollination to create unique and exclusive orchid hybrids.
Lastly, don’t be disheartened by any challenges or setbacks along the way. Orchid growing is a journey of learning and experimenting, and each experience will provide valuable insights for future success.
Now that you have the knowledge and understanding of how to grow orchids from seed, it’s time to put it into practice. So go ahead, gather your materials, select your favorite orchid seeds, and start this rewarding adventure. Good luck, and may your orchid-growing journey be filled with beauty, joy, and a deep appreciation for these stunning plants.
Frequently Asked Questions about How To Grow Orchids From Seed
Was this page helpful?
At Storables.com, we guarantee accurate and reliable information. Our content, validated by Expert Board Contributors, is crafted following stringent Editorial Policies. We're committed to providing you with well-researched, expert-backed insights for all your informational needs.


0 thoughts on “How To Grow Orchids From Seed”