Home>Garden Essentials>How To Grow Clementines From Seed
Garden Essentials
How To Grow Clementines From Seed
Modified: May 6, 2024
Learn how to grow clementines from seeds in your garden and enjoy fresh, homegrown citrus fruits. Follow our step-by-step guide today!
(Many of the links in this article redirect to a specific reviewed product. Your purchase of these products through affiliate links helps to generate commission for Storables.com, at no extra cost. Learn more)
Introduction
Welcome to the world of gardening, where you can cultivate your own little paradise right in your backyard. If you’re a fan of citrus fruits, specifically clementines, then you’re in for a treat! In this article, we’ll guide you through the process of growing clementines from seed, allowing you to enjoy the sweet and tangy taste of these juicy fruits from your very own tree. Whether you’re an experienced gardener or a beginner with a green thumb, this step-by-step guide will equip you with the knowledge you need to successfully grow clementines from seed.
Before we dive into the nitty-gritty details, let’s take a moment to appreciate the beauty and benefits of growing clementines. Not only do these fruits add a burst of flavor to your meals and snacks, but they also offer a host of health benefits. Clementines are rich in vitamins C and A, which boost your immune system and promote healthy skin. Additionally, they are a great source of dietary fiber and antioxidants, making them a delicious and nutritious choice.
Why start from seed, you may ask? Well, growing clementines from seed allows you to experience the joy of nurturing a plant from its earliest stages. It’s a rewarding journey that allows you to witness the growth and development of your own unique tree. While it does take time and patience, the end result is certainly worth it, as you’ll have a thriving clementine tree that can provide you with fruit for many years to come.
Before we get our hands dirty, let’s go through the essentials you’ll need to get started. First and foremost, gather fresh clementine seeds. These can be obtained by saving seeds from the fruit you consume or by purchasing them from a reputable seed supplier. Additionally, you’ll need potting soil, containers or seed trays, and a warm and sunny location for the seedlings to thrive.
Now that we’re set with the basic requirements, it’s time to embark on our journey to grow clementines from seed. Let’s dig into the first step: selecting and preparing the seeds.
Key Takeaways:
- Grow clementines from seed for a rewarding journey of nurturing your own unique tree and enjoying the sweet, tangy taste of homegrown fruits rich in vitamins and antioxidants.
- Follow the step-by-step guide to select, prepare, germinate, transplant, and care for clementine seeds, leading to a bountiful harvest of delicious, homegrown clementines.
Read more: How To Grow Clementines Without Seeds
Step 1: Selecting and Preparing the Seeds
The first step in growing clementines from seed is to select and prepare the seeds for germination. Here’s what you need to do:
- Selecting the Seeds: Start by choosing ripe and healthy clementines. Look for fruits that are firm, juicy, and free from blemishes or signs of decay. This ensures that the seeds inside are viable and have the potential to germinate successfully.
- Extracting the Seeds: Once you have chosen your clementines, carefully cut them open and gently remove the seeds. Rinse the seeds under cool water to remove any pulp or juice residue. It’s important to note that clementines are typically seedless, so it may take some effort to find viable seeds. You may need to extract seeds from multiple fruits to increase your chances of finding viable ones.
- Drying the Seeds: After rinsing the seeds, place them on a paper towel or a clean cloth in a well-ventilated area. Allow the seeds to air dry for a few days until they are completely dry. This step is crucial as moisture can hinder germination.
- Storage: Once the seeds are dry, transfer them to a clean and dry container. Label the container with the date and variety of clementine to keep track of your seeds. Store the seeds in a cool and dry place until you are ready to start the germination process.
By carefully selecting and preparing your clementine seeds, you are setting the stage for successful germination and healthy seedlings. Now let’s move on to the next step: germinating the seeds.
Step 2: Germinating the Seeds
Now that you have selected and prepared your clementine seeds, it’s time to move on to germinating them. Follow these steps to give your seeds the best chance of sprouting:
- Preparation: Prepare your seed trays or containers by filling them with a good quality potting soil. Make sure the soil is well-draining but retains enough moisture for the seeds to germinate.
- Sowing the Seeds: Create small holes in the soil, about half an inch deep. Place one clementine seed in each hole and gently cover it with soil. If you are using seed trays, space the seeds about two inches apart to allow room for growth.
- Watering: Water the soil gently after sowing the seeds to provide adequate moisture. Avoid overwatering, as it can lead to rotting or fungal diseases. Keep the soil consistently moist but not waterlogged throughout the germination process.
- Warmth and Light: Place the trays or containers in a warm and sunny location, such as a windowsill or a greenhouse. Clementine seeds require temperatures between 70-85°F (21-29°C) to germinate successfully. Providing ample sunlight or using grow lights can aid in the germination process.
- Patience and Monitoring: Germination can take anywhere from two to six weeks, so be patient and keep a close eye on your seeds. Check the soil moisture regularly and adjust watering as needed. Once the seedlings emerge, ensure they receive adequate sunlight and continue to monitor their growth.
With proper care and patience, your clementine seeds will soon sprout into healthy seedlings. Now it’s time to progress to the next step: transplanting the seedlings into larger containers or the garden.
Step 3: Transplanting the Seedlings
As your clementine seedlings grow stronger, it’s time to transplant them into larger containers or directly into your garden. Follow these steps to ensure a successful transition for your young plants:
- Choosing the Right Container: If you decide to use containers, select ones that are large enough to accommodate the growing root system of your clementine tree. Ensure the containers have drainage holes to prevent waterlogging.
- Preparing the Soil: Use well-draining potting soil with added organic matter such as compost or aged manure. This will provide essential nutrients and promote healthy growth.
- Transplanting: Carefully remove the seedlings from the seed trays, taking care not to damage the delicate roots. Gently loosen the soil around each seedling and place it into the prepared container, ensuring the base of the stem is level with the soil surface. If transplanting into the garden, dig a hole twice the size of the seedling’s root ball and backfill with soil.
- Watering: After transplanting, give your seedlings a thorough watering to help them settle into their new environment. Keep the soil moist but not soggy and avoid overwatering.
- Placement: Choose a sunny location in your garden or place the containers in an area that receives at least 6-8 hours of direct sunlight per day. Clementines thrive in full sun and require adequate light to produce abundant fruit.
- Staking: If your young seedlings are tall and slender, consider staking them to provide support and prevent damage from strong winds or heavy rain. Use sturdy stakes and loosely tie the trunk to allow for natural movement and growth.
- Maintenance: Regularly monitor your transplanted seedlings for any signs of pests or diseases. Remove weeds that compete for nutrients and water. Prune any dead or damaged branches to maintain a healthy and well-shaped tree.
Transplanting your clementine seedlings gives them the space and resources they need to thrive and develop into productive trees. Continue to care for your young plants, and soon you will be rewarded with beautiful blooms and, eventually, delicious clementines. Next, we’ll move on to step 4: providing adequate care and maintenance.
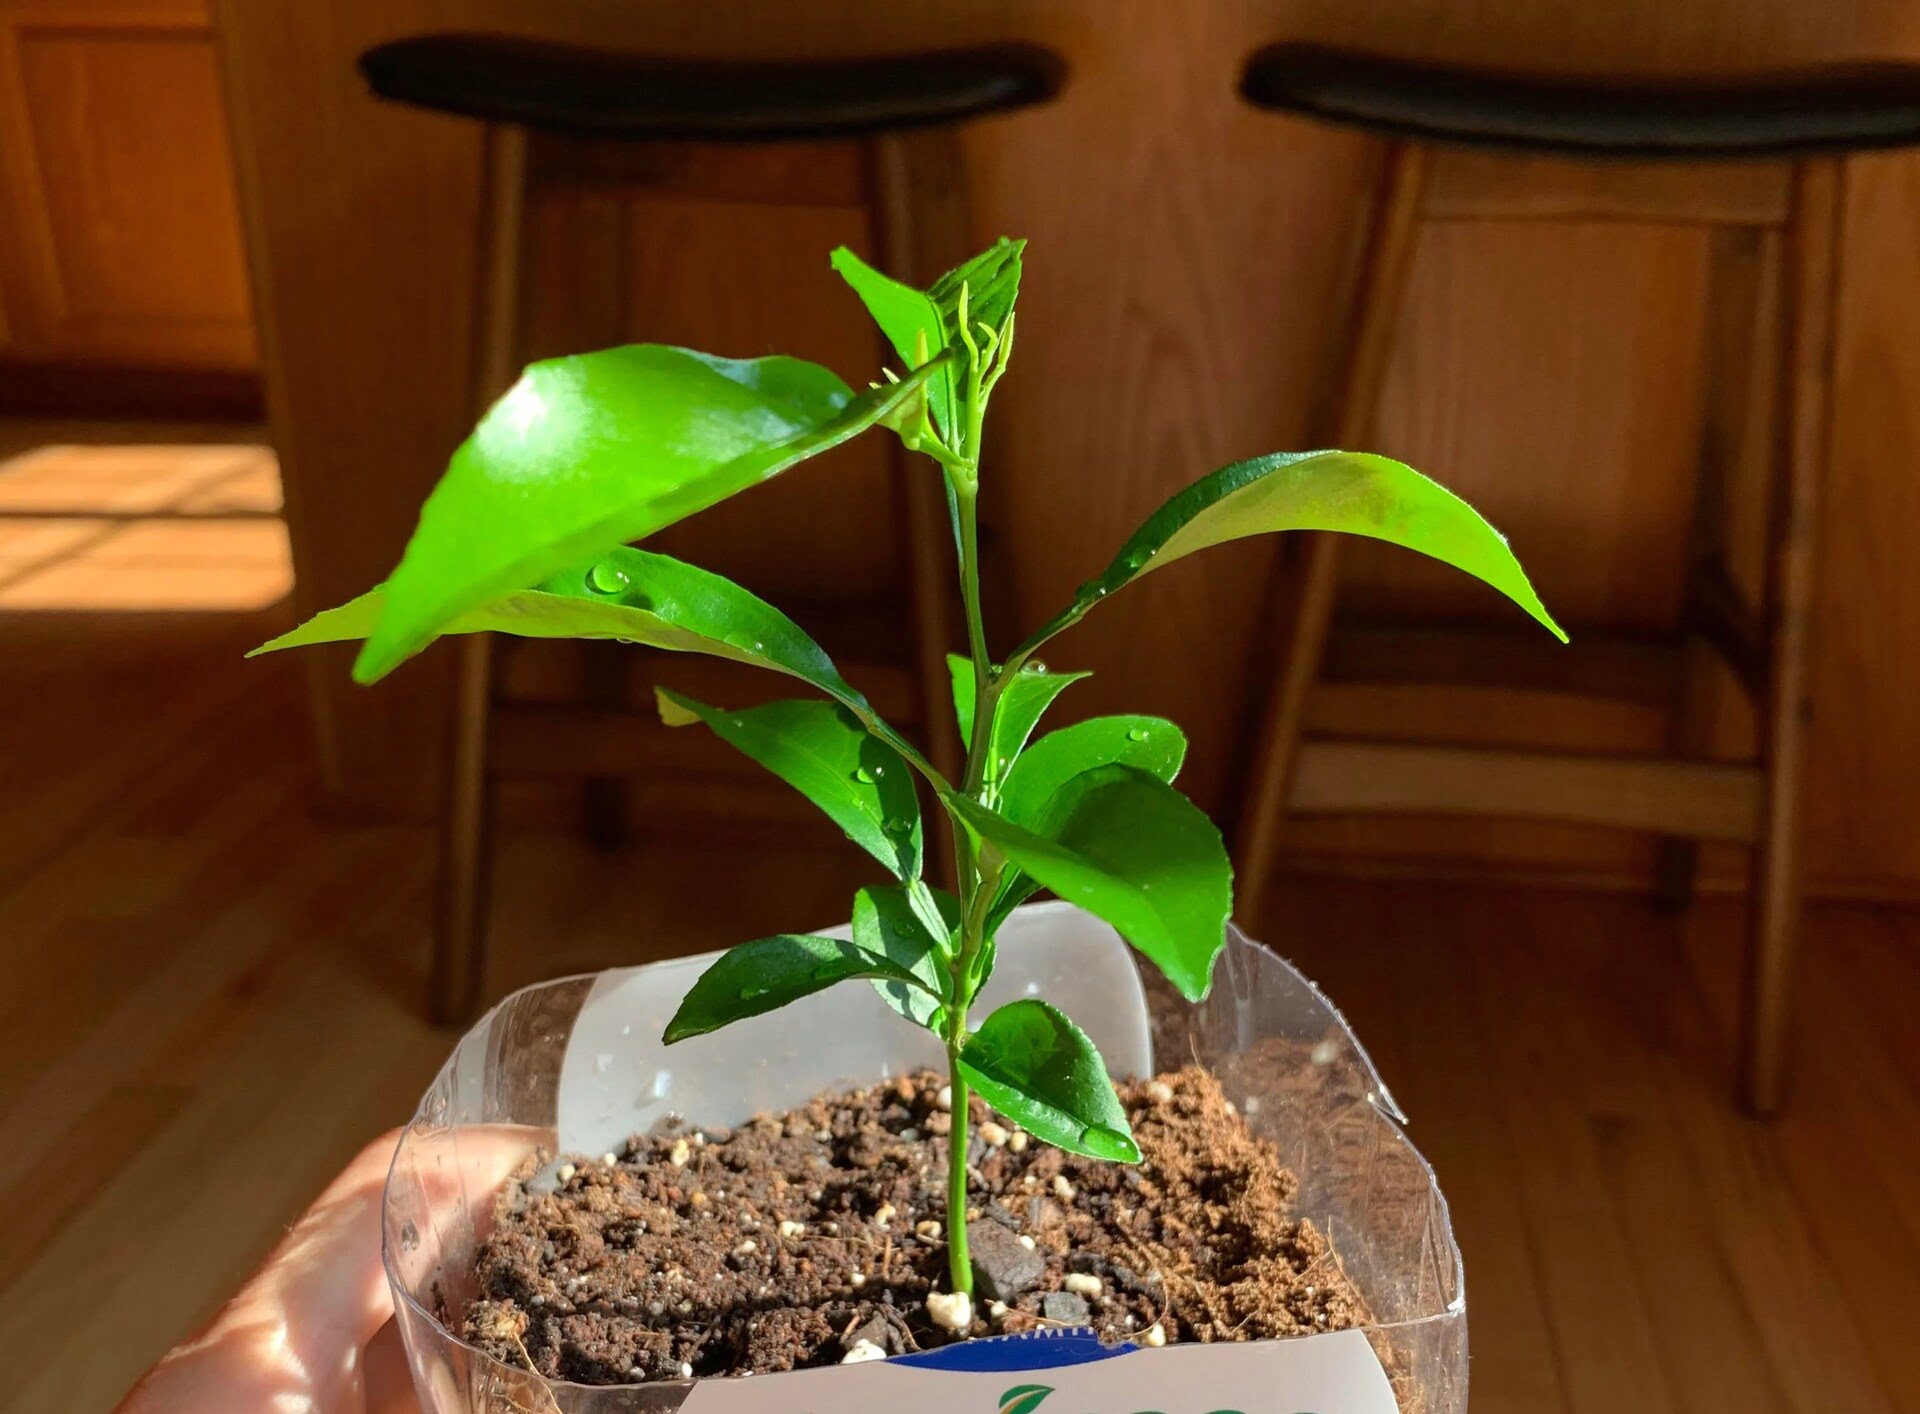
To grow clementines from seed, first remove the seeds from a ripe clementine and let them dry for a few days. Then plant the seeds in a well-draining soil mix, keep the soil consistently moist, and place the pot in a warm, sunny spot. Be patient, as it can take several years for the tree to produce fruit.
Step 4: Providing Adequate Care and Maintenance
Your clementines are now settling into their new homes, but your job as a gardener is far from over. To ensure healthy growth and a bountiful harvest, follow these care and maintenance tips:
- Watering: Keep the soil consistently moist, but be careful not to overwater. Clementines prefer well-draining soil, so allow the top inch of soil to dry out slightly before watering again. Water deeply, providing enough moisture to reach the entire root system.
- Fertilization: Feed your clementine tree with a balanced citrus fertilizer every 6-8 weeks during the growing season. Follow the manufacturer’s instructions regarding dosage and application. Additionally, consider supplementing with compost or organic matter to provide additional nutrients to the soil.
- Pruning: Regular pruning helps maintain the shape and size of your clementine tree, allowing for better air circulation and sunlight penetration. Prune in late winter or early spring, removing dead, damaged, or crossing branches. This promotes new growth and improves fruit production.
- Pest and Disease Control: Keep a watchful eye for common citrus pests, such as aphids, mites, and scale insects. If you notice any infestation, use organic insecticides or insecticidal soaps to control the population. Regularly inspect your tree for signs of diseases like citrus canker or citrus greening, and take appropriate measures to prevent their spread.
- Protecting from Cold: If you live in a region with cold winters, take measures to protect your clementine tree from frost. Cover the tree with a frost blanket or bring potted trees indoors during extreme cold spells to prevent damage.
- Mulching: Apply a layer of organic mulch around the base of your clementine tree, leaving a gap around the trunk to prevent moisture-related issues. Mulching helps retain soil moisture, suppresses weeds, and adds nutrients to the soil as it breaks down.
- Regular Inspection: Inspect your tree regularly for any signs of stress, nutrient deficiencies, or pest/disease issues. Address these problems promptly to maintain the health and vitality of your clementine tree.
By providing your clementine tree with adequate care and maintenance, you are setting the stage for a successful harvest. With time and patience, your efforts will be rewarded with sweet and luscious clementines. Let’s move on to the final step: harvesting the fruits of your labor.
Read more: How To Grow Okra From Seed
Step 5: Harvesting the Clementines
After months of nurturing your clementine tree, the moment of sweet reward has finally arrived. Here’s how to properly harvest your clementines:
- Timing: Clementines are typically ready for harvest in late fall to early winter, depending on the variety and your specific growing region. Look for fruits that have developed their full color and are easily separated from the tree with a gentle twist or cut.
- Gentle Handling: Handle the clementines with care to avoid bruising or damaging the delicate fruits. Use pruning shears or a sharp knife to cut the fruit from the stem, leaving a short stub to prevent damage to the tree.
- Storage: Clementines can be enjoyed fresh or stored for later use. Store them in a cool and well-ventilated area, away from direct sunlight. Alternatively, refrigerate them in a perforated plastic bag to maintain their juiciness. Properly stored clementines can stay fresh for up to several weeks.
- Savoring the Fruits: Peel open a ripe clementine, and enjoy the burst of sweet and tangy flavor. Use them in salads, juices, desserts, or enjoy them as a healthy and refreshing snack straight out of hand. The possibilities are endless!
- Saving Seeds for Future Planting: If you want to continue growing clementines from seed, save some seeds from your harvested fruits. Rinse and dry the seeds thoroughly, and store them in a cool and dry place until you’re ready to start the process again.
Harvesting your very own clementines is an immensely satisfying experience. The taste of freshly picked fruits, nurtured by your own hands, is truly incomparable. Enjoy the fruits of your labor and let them inspire you to continue growing and exploring the wonderful world of gardening.
With step-by-step guidance and a little patience, you have successfully learned how to grow clementines from seed. From selecting and preparing the seeds, to germination, transplanting, care, and finally harvesting, this journey has allowed you to witness the magic of nature firsthand. Now, it’s time to put your newfound knowledge to the test and embark on your own adventure in growing clementines from seed.
Happy gardening!
Conclusion
Congratulations! You have reached the end of this comprehensive guide on how to grow clementines from seed. By following the step-by-step process outlined in this article, you have gained the knowledge and confidence to embark on your own journey of cultivating these delicious citrus fruits in your own backyard.
From selecting and preparing the seeds, to germination, transplanting, providing adequate care and maintenance, and finally harvesting the fruits, each step in the process is essential for the success of your clementine tree. It may require time and patience, but the rewards are plentiful.
Not only will you enjoy the enchanting sight of your clementine tree growing from a tiny seedling to a productive fruit-bearing tree, but you will also relish the experience of savoring its sweet and tangy fruits. The taste of freshly picked clementines, nurtured by your own hands, is truly a testament to the power of nature and your dedication as a gardener.
Remember to provide your clementine tree with the right amount of water, sunlight, proper pruning, and protection from pests and diseases. Stay vigilant and address any issues promptly to ensure the health and vitality of your tree. With proper care, your clementine tree will thrive and provide you with an abundance of delectable fruits for years to come.
As your journey continues, keep in mind that gardening is a beautiful blend of science, art, and patience. Each garden is a unique canvas waiting for you to unleash your creativity and nurture its growth. Don’t be afraid to experiment, learn from your successes and failures, and adapt your gardening practices to suit your specific needs and environment.
So, grab your gardening tools, gather your clementine seeds, and embark on this rewarding adventure of growing clementines from seed. Enjoy the process, connect with nature, and immerse yourself in the joy and beauty of gardening. May your clementine tree flourish and bring you an abundance of delicious fruits!
Happy gardening!
Curious about how quickly clementine seeds turn into sprouting seedlings? Our detailed guide on seed germination breaks down the timing and conditions necessary for seeds to sprout, ensuring your gardening efforts bear fruit sooner. Whether you're a seasoned gardener or just getting your hands dirty, understanding these vital stages can significantly boost your growing success. Don’t miss out on mastering these essential gardening skills—read on to ensure your seedlings get the best start possible!
Frequently Asked Questions about How To Grow Clementines From Seed
Was this page helpful?
At Storables.com, we guarantee accurate and reliable information. Our content, validated by Expert Board Contributors, is crafted following stringent Editorial Policies. We're committed to providing you with well-researched, expert-backed insights for all your informational needs.


0 thoughts on “How To Grow Clementines From Seed”