Home>Garden Essentials>How To Grow Wisteria From Seeds
Garden Essentials
How To Grow Wisteria From Seeds
Modified: September 1, 2024
Learn how to grow wisteria from seeds in your garden with our comprehensive step-by-step guide. Discover expert tips and techniques for successful cultivation.
(Many of the links in this article redirect to a specific reviewed product. Your purchase of these products through affiliate links helps to generate commission for Storables.com, at no extra cost. Learn more)
Introduction
Welcome to the world of wisteria, where cascades of beautiful blossoms bring a touch of elegance and charm to any garden. Growing wisteria from seeds can be a rewarding endeavor that allows you to witness the growth of this majestic vine from its very beginnings. Whether you’re a gardening enthusiast looking for a new project or a nature lover seeking to create a stunning focal point, this article will guide you through the process of growing wisteria from seeds.
Wisteria is a deciduous vine that is native to Asia, particularly China, Japan, and Korea. Its delicate and fragrant flowers hang gracefully in long clusters, filling the air with a sweet aroma. While wisteria is commonly grown and admired for its stunning display of colors in the spring, it also offers beautiful foliage throughout the growing season.
Before embarking on your wisteria-growing journey, it’s important to understand that growing wisteria from seeds can be a bit challenging. Wisteria seeds have a hard outer coat that can be difficult to penetrate, and the germination process can be slow and unpredictable. However, with patience and proper care, you can successfully grow wisteria from seeds and enjoy the beauty of this magnificent vine in your own garden.
In this article, we will explore the steps involved in growing wisteria from seeds, from choosing and collecting seeds to caring for young plants and beyond. We will also address common issues and provide troubleshooting tips to help you overcome any challenges along the way.
So, get ready to dive into the world of wisteria and unlock the secrets of growing this enchanting vine from seeds. Let’s begin our journey towards creating a stunning garden filled with cascades of colorful wisteria blossoms.
Key Takeaways:
- Growing wisteria from seeds requires patience and proper care. From collecting and preparing seeds to nurturing young plants, each step is an opportunity to witness the beauty of this enchanting vine.
- To ensure healthy wisteria plants, provide adequate sunlight, water deeply, and protect from pests and diseases. Regular pruning and training are essential for maintaining the plant’s shape and encouraging abundant blooms.
Read more: How To Propagate Wisteria From Seed
Choosing and Collecting Wisteria Seeds
When it comes to choosing and collecting wisteria seeds, there are a few key factors to consider. Firstly, it’s important to select a reliable source for obtaining wisteria seeds. You can choose to collect seeds from an existing wisteria plant or purchase them from a reputable nursery or online supplier.
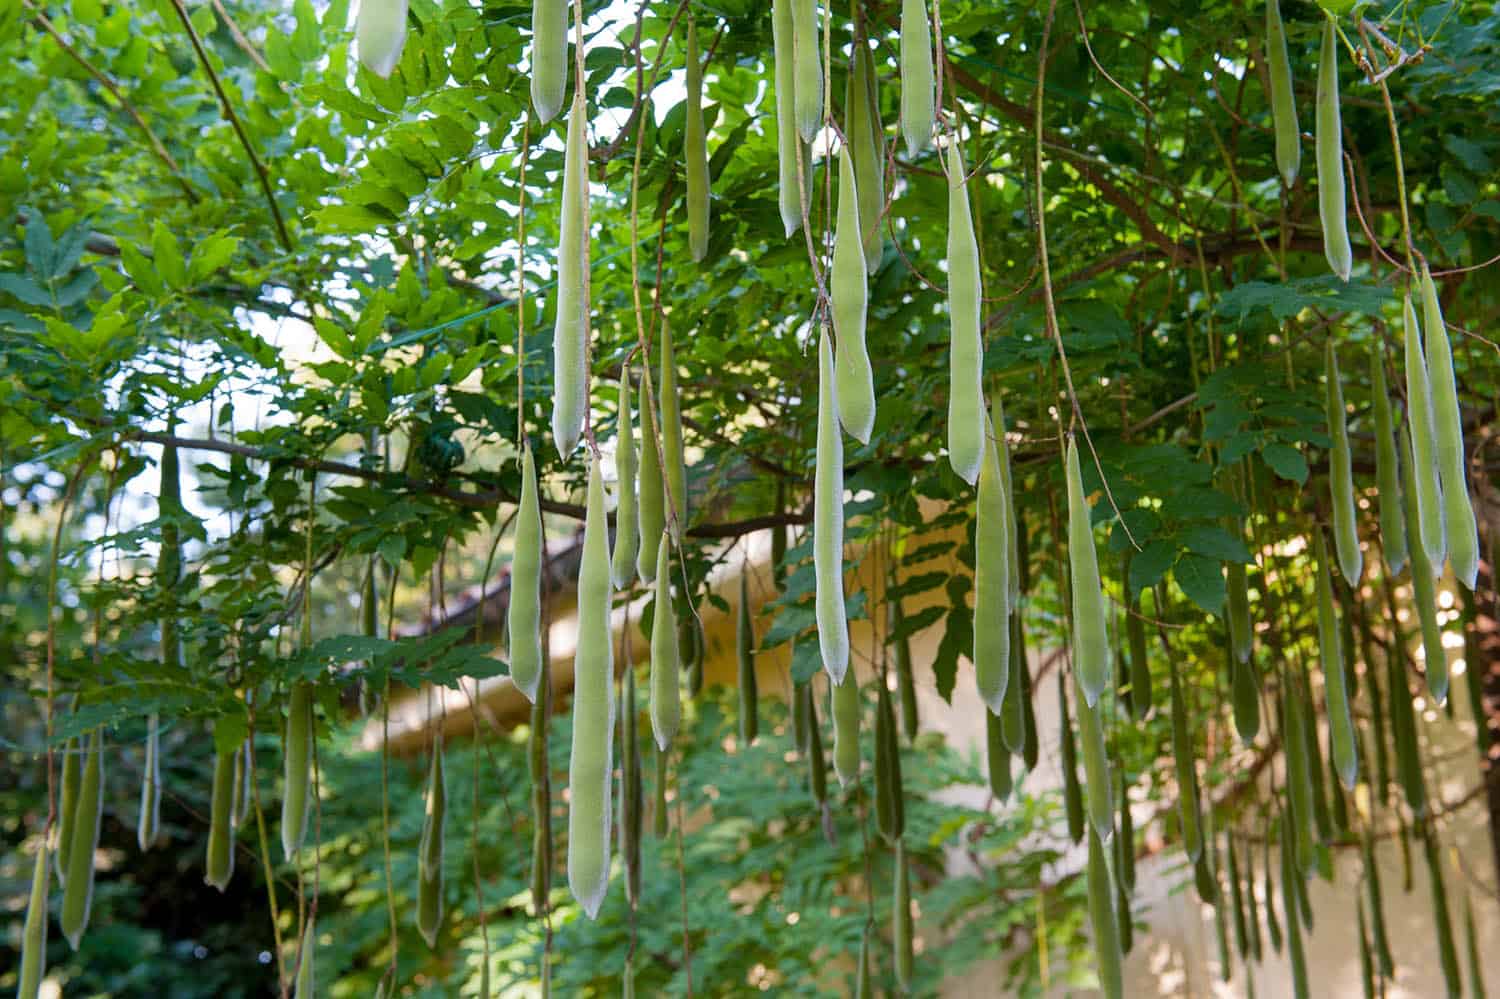
If you decide to collect seeds from an existing wisteria plant, look for mature seed pods that have turned brown and are starting to split open. These pods usually appear after the wisteria has finished flowering. Carefully remove the pods from the plant, making sure not to damage the seeds inside. It’s best to collect multiple pods to increase your chances of successful germination.
Once you have obtained the wisteria pods, it’s time to extract the seeds. Gently pry the pods open using your fingers or a small tool, and you should find several flat, dark brown seeds. Remove any remaining plant material or debris from the seeds and discard any immature or damaged ones.
Properly storing wisteria seeds is essential to maintain their viability. Place the clean and dry seeds in a sealed container, such as a plastic bag or a glass jar with a tight-fitting lid. Label the container with the date and the wisteria variety, if known. Store the seeds in a cool and dry location, such as a refrigerator, until you are ready to plant them.
It’s worth mentioning that wisteria seeds can have a low germination rate, meaning that not all seeds will sprout successfully. To improve your chances of success, consider scarifying or stratifying the seeds.
Scarification involves breaking or weakening the tough outer coat of the seed to stimulate germination. You can scarify wisteria seeds by gently filing or nicking the outer shell with a small file or a sharp knife. Be careful not to damage the embryo inside the seed.
Stratification, on the other hand, mimics the natural winter conditions that seeds experience before germinating in spring. To stratify wisteria seeds, place them in a moist paper towel or peat moss, seal them inside a plastic bag, and refrigerate for 4-12 weeks. This cold treatment will help break seed dormancy and promote germination.
By choosing and collecting wisteria seeds carefully and implementing scarification or stratification techniques if necessary, you can increase the chances of successful germination and enjoy a bountiful wisteria display in your garden.
Preparing the Seeds for Planting
Before planting wisteria seeds, it’s important to prepare them properly to enhance germination. This process involves softening the tough outer coat of the seeds to allow moisture to penetrate and initiate the germination process. Here’s how you can prepare your wisteria seeds for planting:
- Soaking the seeds: Start by soaking the wisteria seeds in warm water for 24-48 hours. This helps to hydrate the seeds and soften the seed coat, making it easier for the seeds to absorb moisture.
- Scarification: After soaking, you can further enhance germination by scarifying the seeds. Use a file or sandpaper to gently rub the outer coat of each seed. This helps to create tiny breaks or scratches in the seed coat, allowing water to penetrate more easily.
- Warm stratification: Some wisteria seeds benefit from a warm stratification period to promote germination. Place the scarified seeds in a sealed plastic bag with a moist paper towel or a small container with damp vermiculite. Keep the bag or container in a warm location, such as on top of a refrigerator or near a heat source, for 2-4 weeks.
- Cold stratification (optional): If you initially scarified the seeds, you can skip this step. However, if you didn’t scarify the seeds, you may want to consider cold stratification. Place the seeds in a sealed plastic bag with a damp paper towel or moist vermiculite and refrigerate them for 6-8 weeks. This mimics the natural winter conditions and helps break the seed dormancy.
Once you have prepared the wisteria seeds, it’s time to move on to the planting stage. Remember to label and keep track of any varieties or specific information about the seeds to ensure proper identification and care.
With the proper preparation, your wisteria seeds will be ready to be planted and given the best chance to germinate. Patience and attention to detail during this preparation process will greatly increase the success of your wisteria seedlings and the beauty they will bring to your garden.
Finding the Ideal Growing Location
Choosing the right location for growing wisteria is crucial for its growth and overall health. Wisteria plants thrive in warm and sunny climates, and they require a sturdy and supportive structure to climb on. Here are some factors to consider when finding the ideal growing location for your wisteria:
- Sunlight: Wisteria loves sunlight and needs at least six hours of direct sun each day to thrive. Look for a location in your garden that receives ample sunlight to ensure the best growth and abundant flowering.
- Soil Quality: Wisteria prefers well-draining soil that is rich in organic matter. The soil pH should be slightly acidic to neutral, ideally between 6.0 and 7.5. Conduct a soil test to determine the pH level and make any necessary amendments to provide the best growing conditions for your wisteria.
- Space: Wisteria is a vigorous vine that can spread and cover a large area over time. It’s important to choose a location that provides enough space for the vine to grow and expand without overcrowding other plants or structures in your garden. Consider the ultimate size of the wisteria variety you are planting and plan accordingly.
- Support Structure: Wisteria requires a strong and sturdy support structure for its vines to climb and twine around. This can be a pergola, trellis, arbor, or any other sturdy framework. Ensure that the support structure is in place before planting your wisteria.
- Protection from Harsh Winds: While wisteria enjoys ample sunlight, it can be susceptible to damage from strong winds. Consider planting your wisteria in a location that offers some protection from harsh winds, such as near a wall or fence.
By paying attention to these factors, you can create an ideal growing environment for your wisteria plants. Remember to choose a location that meets the sunlight, soil, space, support, and wind protection requirements to ensure optimal growth and stunning displays of wisteria blooms.
Planting Wisteria Seeds
Now that you have selected the perfect location for your wisteria and prepared the seeds, it’s time to plant them. Follow these steps to ensure successful planting and germination of wisteria seeds:
- Select the planting containers: Choose containers that have drainage holes to prevent waterlogging. You can use small pots or seed trays filled with a well-draining potting mix.
- Moisten the soil: Before planting the seeds, moisten the potting mix to provide a suitable environment for germination. Make sure the soil is evenly moist but not overly saturated.
- Plant the seeds: Place one or two wisteria seeds about an inch deep into the potting mix. Gently cover them with soil and press it lightly to ensure good seed-to-soil contact.
- Water gently: Use a spray bottle or a gentle watering can to water the soil. Avoid overwatering, as excessive moisture can lead to rotting of the seeds.
- Provide warmth and moisture: Place the containers in a warm location, such as a greenhouse or a sunny windowsill. Cover the containers with plastic wrap or a dome to create a humid environment and retain moisture.
- Monitor and maintain moisture: Check the soil regularly and keep it consistently moist, but not soggy. Mist the soil with water as needed to maintain the desired level of moisture.
- Be patient: Germination of wisteria seeds can be a slow process and may take anywhere from a few weeks to several months. Be patient and continue to provide the necessary care and attention.
Once the seeds have germinated and the seedlings have grown to a suitable size, they can be transplanted into larger pots or directly into the garden. Handle the young plants carefully to avoid damaging the delicate roots.
By following these steps, you can successfully plant wisteria seeds and embark on the journey of nurturing these beautiful vines from their early stages of growth.
Read more: How To Germinate Wisteria Pods
Proper Watering Techniques
Watering is a crucial aspect of caring for wisteria plants, as they have specific water requirements for healthy growth and abundant flowering. Here are some tips to ensure proper watering techniques for your wisteria:
- Establishment phase: During the first year after planting, it’s important to keep the soil consistently moist to encourage deep root development. Water your wisteria regularly, especially during dry spells or hot summer months. Aim to provide about 1-2 inches of water per week, either through rainfall or supplemental watering.
- Water deeply: When watering your wisteria, it’s essential to water deeply to reach the root zone. Apply water directly to the soil rather than overhead watering, as wet foliage can promote fungal diseases. Slowly soak the soil around the base of the plant, allowing the water to penetrate deeply into the root system.
- Avoid waterlogging: While wisteria plants appreciate moist soil, it’s crucial to avoid waterlogging or overly wet conditions. Excessive moisture can lead to root rot and other fungal diseases. Make sure the soil has good drainage and allow the top few inches to dry out slightly before watering again.
- Monitor weather conditions: Adjust your watering schedule based on the weather conditions. If there has been significant rainfall, you may need to reduce or skip supplemental watering. On the other hand, during periods of drought or high temperatures, you may need to increase the frequency and duration of watering.
- Avoid overwatering in winter: While wisteria requires regular watering during the growing season, it’s important to reduce watering in winter. Wisteria plants go dormant during this time, and excess moisture can be detrimental. Water sparingly, only when the soil becomes dry, during the winter months.
- Mulch to retain moisture: Applying a layer of organic mulch around the base of the wisteria plant can help retain soil moisture and reduce weed growth. Mulch also helps regulate soil temperature and prevents moisture evaporation. Use a 2-3 inch layer of organic mulch, such as wood chips or straw, and keep it a few inches away from the plant’s stem.
By following these watering techniques, you can ensure that your wisteria plants receive adequate moisture for healthy growth and vibrant blooms. Remember to strike a balance between providing enough water for the plant’s needs and avoiding overwatering, which can lead to root problems and diseases.
Providing Adequate Sunlight
Sunlight is an essential factor in the growth and blooming of wisteria plants. These vines are known for their abundant and vibrant blossoms, which require adequate sunlight to flourish. Here are some tips for ensuring your wisteria receives the right amount of sunlight:
- Full sun exposure: Wisteria thrives in full sun, which is generally defined as at least six hours of direct sunlight per day. Select a location for your wisteria where it can receive maximum sun exposure. This will help promote healthy growth, vigorous vines, and a profusion of blooms.
- South or west-facing direction: If possible, plant your wisteria in a spot that faces south or west. These directions typically receive the most sunlight throughout the day. This orientation will ensure that your wisteria receives optimal light intensity and duration, which is crucial for photosynthesis and flower production.
- Monitor for shade: Keep an eye on the area surrounding your wisteria and make sure it doesn’t become shaded by nearby trees, buildings, or other structures. Shade can significantly reduce the amount of sunlight reaching the plant and can impact its growth and flowering. If necessary, prune back overhanging branches or consider relocating the wisteria to a sunnier spot.
- Light penetration: Wisteria blooms form on new growth. To encourage optimal blooming, it’s important to ensure that sunlight can penetrate through the entire plant. Prune the wisteria regularly to maintain an open structure, allowing sunlight to reach every part of the vine. This will also help promote good air circulation and reduce the risk of fungal diseases.
- Shade during extreme heat: While wisteria loves full sun, it’s important to protect it from extreme heat during scorching summer days. Excessive heat can stress the plant and reduce flower production. Consider providing some shade during the hottest part of the day, either through temporary structures or by planting companion plants that can provide dappled shade.
By ensuring that your wisteria receives adequate sunlight, you’ll be rewarded with lush foliage and abundant clusters of blossoms. Remember to monitor the sun exposure regularly, adjust as needed, and maintain a balanced and open structure to maximize the benefits of sunlight for your wisteria.
Nurturing and Supporting Seedlings
As your wisteria seedlings begin to emerge and grow, it’s important to provide them with the care and support they need to thrive. The early stages of growth are critical for the development of strong roots and sturdy stems. Here are some tips for nurturing and supporting your wisteria seedlings:
- Proper thinning: If you have multiple seedlings in one container or planting bed, it’s important to thin them out to prevent overcrowding. Choose the strongest and healthiest seedlings and gently remove the weaker ones, being careful not to disturb the roots of the selected seedlings.
- Maintaining moisture: Keep the soil consistently moist but not excessively wet. Check the moisture level regularly and water as needed. Avoid allowing the soil to dry out completely, as this can stress the seedlings. However, overwatering can lead to root rot and other issues, so find a balance in watering frequency.
- Support structures: As the seedlings grow taller, they will need support to climb and twine around. Install a suitable support structure, such as a trellis, stake, or arbor, near the seedlings. Be careful when attaching the seedlings to the support, ensuring that the ties or wires are not too tight to avoid damaging the delicate young stems.
- Training the seedlings: As the seedlings grow, gently guide their stems towards the support structure. You can use plant ties or soft twine to secure the stems to the support, encouraging them to grow in the desired direction. Avoid forcing the seedlings to bend or twist in unnatural ways.
- Fertilizing: After the first few sets of true leaves have developed, you can start feeding your wisteria seedlings with a balanced liquid fertilizer. Follow the manufacturer’s instructions for application rates and frequency. Fertilizing helps promote healthy growth and provides essential nutrients for the young plants.
- Protecting from pests: Monitor your wisteria seedlings for any signs of pests, such as aphids or caterpillars. If you notice any pests, take appropriate action to control them, whether through natural remedies or organic insecticides. Early intervention can prevent pest damage and ensure healthy growth.
By nurturing and supporting your wisteria seedlings during their early stages, you are laying the foundation for strong and vigorous plants. Regular attention and care will help them establish a healthy root system and develop into beautiful, blooming vines that will be the pride of your garden.
To grow wisteria from seeds, scarify the seeds by nicking the hard outer shell with a knife or sandpaper, then soak them in warm water for 24 hours before planting in well-draining soil. Keep the soil consistently moist and provide a trellis for support as the plant grows.
Pest Control and Disease Prevention
To ensure the health and vitality of your wisteria plants, it’s essential to implement effective pest control and disease prevention measures. By staying vigilant and taking proactive steps, you can protect your wisteria from common pests and diseases that can pose a threat to their growth. Here are some tips for pest control and disease prevention:
- Regular inspection: Regularly inspect your wisteria plants for any signs of pests or diseases. Look for insect activity, unusual discoloration or spots on the leaves, wilting, or abnormal growth. Early detection allows for prompt treatment, minimizing potential damage.
- Handpicking: If you notice small infestations of pests, such as aphids or caterpillars, you can physically remove the individuals by hand. Wear gloves and simply pick them off the plant and dispose of them properly. This method can be effective for small-scale infestations.
- Biological control: Introduce beneficial insects, such as ladybugs and lacewings, to your garden. These insects can help control aphids and other plant-eating pests naturally. Additionally, you can use organic insecticides that specifically target the pests affecting your wisteria while minimizing harm to beneficial insects.
- Proper sanitation: Practice good garden hygiene by removing fallen leaves, pruned plant material, and other debris from around your wisteria. This prevents pests and diseases from overwintering and spreading. Dispose of the debris away from the garden or compost it properly.
- Avoid over-fertilization: Excessive fertilization can weaken the plants and make them more vulnerable to pests and diseases. Follow the recommended fertilizer application rates and avoid excessive use of nitrogen-rich fertilizers, as they can promote excessive leaf growth and attract pests.
- Adequate air circulation: Proper airflow around the wisteria plants helps prevent the development and spread of fungal diseases. Avoid overcrowding by providing enough space between plants and regularly thinning out dense foliage. Prune the vines to maintain an open structure and remove any diseased or damaged branches.
- Watering techniques: Proper watering practices can help prevent certain plant diseases. Avoid overhead watering, as wet foliage can create a favorable environment for fungal diseases. Water the base of the plant, keeping the leaves dry whenever possible.
By implementing these pest control and disease prevention strategies, you can keep your wisteria plants healthy and thriving. Remember to stay proactive, regularly monitor your plants, and take appropriate action at the first signs of pests or diseases. With proper care, your wisteria will be able to showcase its stunning blooms without the interference of damaging pests or diseases.
Read more: How To Start Wisteria Seeds
Transplanting Wisteria Seedlings
Transplanting wisteria seedlings is a crucial step in their growth journey, allowing them to establish their roots in a more permanent location. Here are some guidelines to follow when transplanting your wisteria seedlings:
- Choosing the right time: The best time to transplant wisteria seedlings is during early spring or late fall when the temperatures are mild and the plants are dormant. Transplanting during these times minimizes stress on the seedlings and increases their chances of successful establishment.
- Preparing the new location: Before transplanting, prepare the new planting site. Ensure that the soil is well-draining, fertile, and amended with compost or organic matter. Clear any weeds or debris from the area, and ensure it receives adequate sunlight for optimal growth.
- Water the seedlings: Water the seedlings thoroughly before transplanting to ensure that the roots are well-hydrated. This helps reduce transplant shock and allows for easier removal from their current containers or location.
- Digging the new planting hole: Dig a hole in the new location that is wider and slightly deeper than the root ball of the seedling. This will allow room for the roots to spread out. Loosen the soil in the hole to promote root penetration.
- Gently removing the seedlings: Carefully remove the seedlings from their current containers, taking care not to damage the roots. Gently loosen the roots if they are tightly bound. If the seedlings are growing close together, separate them by cutting the root mass apart.
- Planting the seedlings: Place the seedlings in the planting hole, ensuring that the top of the root ball is level with or slightly above the soil’s surface. Backfill the hole with soil, firming it gently around the roots to eliminate air pockets. Avoid compacting the soil too tightly.
- Watering and mulching: After transplanting, water the seedlings thoroughly to settle the soil and provide moisture to the roots. Apply a layer of organic mulch, such as wood chips or straw, around the base of the plants to conserve moisture and suppress weed growth.
- Caring for transplanted seedlings: Keep a close eye on the transplanted seedlings in the following weeks. Water them regularly to keep the soil consistently moist but not waterlogged. Protect them from extreme temperatures, strong winds, and excessive sunlight until they have established their roots.
Transplanting wisteria seedlings can be a delicate process, but by following these steps, you will give your seedlings the best chance of survival and future growth. Remember to provide proper care and monitoring to help them adjust to their new surroundings. With time, your transplanted wisteria seedlings will flourish and become beautiful, blooming vines in your garden.
Caring for Young Wisteria Plants
As your wisteria plants mature from seedlings to young plants, it’s crucial to provide them with proper care to ensure their healthy development and robust growth. Here are some essential tips for caring for young wisteria plants:
- Watering: Young wisteria plants require consistent moisture to establish strong root systems. Water deeply and regularly, especially during dry spells or hot weather. Aim to keep the soil evenly moist but not waterlogged. As the plants grow, adjust watering to their specific needs.
- Fertilizing: Feed your young wisteria plants with a balanced fertilizer that is formulated for flowering vines. Follow the instructions on the fertilizer package for application rates and frequency. Apply the fertilizer in early spring and again after the first flush of blooms to support healthy growth and abundant flowering.
- Weeding: Regularly remove weeds and other competing vegetation from around your young wisteria plants. Weeds can stunt growth, compete for nutrients and water, and provide a host for pests and diseases. Mulching can help suppress weeds and retain moisture around the plants.
- Mulching: Apply a layer of organic mulch, such as wood chips or straw, around the base of the plants. Mulching helps retain soil moisture, moderate soil temperature, and suppress weed growth. Leave a small gap between the mulch and the plant’s stem to prevent rotting.
- Sunlight: Ensure that your young wisteria plants receive ample sunlight. They thrive in full sun, so choose a location that provides at least six hours of direct sunlight each day. Proper sunlight exposure promotes vigorous growth and abundant flowering.
- Pruning: Prune your young wisteria plants regularly to shape and train them. Wisteria plants tend to produce long, vigorous stems, so pruning helps control their size and shape. Pruning should be done in late winter or early spring while the plant is dormant. Remove any dead or weak branches, as well as excessive growth to maintain an open and well-structured framework.
- Support: As your young wisteria plants grow, continue to provide sturdy support for their climbing vines. Regularly check and adjust the ties or wires that secure the plant to the support structure. Ensure that the support can bear the weight of the vines as they mature and become heavier.
- Protection from frost: Young wisteria plants can be sensitive to frost. If you live in an area with late spring frosts, cover your plants with a frost blanket or bring potted plants indoors until the risk of frost has passed. Protecting the plants from frost prevents damage that can hinder their growth.
- Monitor for pests and diseases: Regularly inspect your young wisteria plants for any signs of pests or diseases. Look for insect activity, unusual discoloration, spots on the leaves, or wilting. Early detection allows for prompt treatment and helps prevent the spread of pests and diseases to other parts of the garden.
By providing proper care and attention, your young wisteria plants will establish healthy root systems, develop sturdy structures, and eventually reward you with abundant blooms. Stay consistent in watering, fertilizing, pruning, and monitoring their health, and enjoy the journey of watching your wisteria plants grow and flourish in your garden.
Pruning and Training Wisteria
Pruning and training are essential practices for maintaining the health, shape, and abundant blooming of wisteria plants. Proper pruning and training ensure that the plant stays manageable, encourages the development of a strong framework, and enhances the display of beautiful cascades of blossoms. Here are some important tips for pruning and training wisteria:
- Timing: Pruning wisteria is typically done twice a year. The first pruning should be done during late winter or early spring when the plant is dormant. This is the primary pruning session to control size, remove dead or damaged wood, and shape the plant. The second pruning occurs during the summer after the main flowering period to remove excessive growth.
- Removing suckers: Wisteria has a tendency to produce suckers, which are unwanted shoots that emerge from the base of the plant. Regularly check for suckers and remove them promptly to prevent them from taking valuable resources away from the main plant.
- Framework pruning: When pruning wisteria, aim to establish a strong framework of main branches that will support the plant as it grows. Identify the main stems that will become the permanent framework and prune back any overly long or weak branches. Be strategic in selecting the strongest and most well-positioned branches to form the structure of the plant.
- Encouraging lateral growth: To stimulate lateral growth and promote a fuller, more balanced appearance, prune the main framework branches to a desired length. Make cuts just above a bud or lateral branch to encourage new side shoots. This will increase the number of flowering spurs and promote a more abundant display of blooms.
- Retaining flower buds: Wisteria produces flower buds on the previous season’s growth. To preserve these buds and ensure a profusion of blooms, be careful not to prune excessively during late winter or early spring. Avoid cutting back the previous year’s growth too severely, as this can result in a decrease in flowering.
- Training the vines: As wisteria grows, it will naturally want to twine and climb. Guide the vines in the desired direction by carefully tying them to their support structure. Allow the vines to twine around the support system naturally. Use soft materials like twine or plant ties to avoid damaging the delicate stems.
- Regular maintenance pruning: Throughout the growing season, perform light maintenance pruning to remove any excessive growth or errant shoots. This not only helps maintain the desired shape but also keeps the plant in check and prevents it from becoming too unwieldy or overgrown.
Remember, wisteria plants are very vigorous, so consistent and proper pruning is necessary to maintain their shape and encourage an impressive show of flowers. With regular pruning and training, you can shape your wisteria into a stunning focal point in your garden, showcasing its majestic beauty season after season.
Harvesting and Saving Seeds
Harvesting and saving seeds from your wisteria plants allows you to grow new plants and share the beauty of wisteria with others. Here are the steps to follow for successful seed harvesting and saving:
- Timing: Allow the wisteria flowers to fade and dry on the vine before harvesting the seeds. The best time to harvest the seeds is in late summer or early fall when the seed pods have turned brown and become dry and brittle.
- Seed pod collection: Carefully remove the dry seed pods from the vine. Gently twist or cut the pods from the stems, taking care not to damage them or scatter the seeds.
- Pod preparation: Once you’ve collected the seed pods, place them in a paper bag. Label the bag with the date and wisteria variety, if known. Keep the bag in a cool, dry place for several weeks to allow the pods to fully dry out and split open naturally.
- Seed extraction: Retrieve the dried seed pods from the paper bag and gently pry them open to extract the seeds. The seeds are flat and dark brown in color. Remove any plant material or debris from the seeds, and discard any damaged or immature ones.
- Seed storage: Proper seed storage is important to maintain the viability of the seeds. Place the cleaned and dry seeds in a small, airtight container, such as a glass jar or a sealed plastic bag. Store the container in a cool and dark location, such as a refrigerator, to maintain optimal conditions for seed longevity.
- Labeling: Label the seed container with the date and wisteria variety. This will help you keep track of the seeds’ information and ensure accurate identification when you’re ready to sow or share them.
- Seed viability and testing: Keep in mind that wisteria seeds have varying levels of viability, and not all seeds may germinate successfully. To test the viability of the seeds before planting, you can perform a simple germination test. Place a few seeds between moist paper towels or in a seed tray with a well-draining mix. Keep the seeds warm and moist, and monitor them over several weeks to see how many germinate.
By harvesting and saving seeds from your wisteria plants, you can propagate new plants and share the beauty of wisteria with family and friends. Remember to exercise patience and attention to detail during the seed harvesting and saving process to maximize the chances of successful germination when you’re ready to sow the seeds.
Read more: How To Grow Okra From Seed
Troubleshooting Common Issues
While wisteria plants are generally hardy and resilient, they can occasionally encounter some common issues. Understanding and addressing these issues early on can help ensure the health and vitality of your wisteria. Here are some common problems that you may encounter and how to troubleshoot them:
- Lack of blooms: If your wisteria is not flowering, it could be due to several factors. One common reason is insufficient sunlight. Ensure that your wisteria receives at least six hours of direct sunlight each day. Another possibility is improper pruning. Make sure you’re not removing the flower buds or cutting back the previous year’s growth too severely. Lastly, an excess of nitrogen-rich fertilizer can promote leaf growth at the expense of blooms. Adjust your fertilization routine to include a balanced formula that supports flowering.
- Excessive vegetative growth: If your wisteria is producing excessive foliage but minimal blooms, it may be receiving too much nitrogen in the soil. Reduce the amount of nitrogen-rich fertilizer or use a fertilizer with a lower nitrogen content. Additionally, ensure that the plant is receiving sufficient sunlight and that you’re following recommended pruning techniques to balance growth and flowering.
- Root rot: Wisteria plants are susceptible to root rot if their roots remain consistently wet. Overwatering or poor soil drainage can contribute to this issue. To prevent root rot, ensure that your wisteria is planted in well-draining soil and watering is done only when the top few inches of soil are dry. Avoid overwatering or allowing water to sit around the base of the plant.
- Pest infestation: Wisteria can encounter pests such as aphids, mealybugs, or scale insects. Regularly inspect your plants for signs of infestation, such as clusters of insects, sticky residue, or distorted growth. Use natural remedies like insecticidal soap, neem oil, or introduce beneficial insects to control pest populations. Regularly removing weeds and debris can also help reduce pest habitat.
- Fungal diseases: Wisteria plants can be affected by fungal diseases like powdery mildew or leaf spot. Fungal infections are often favored by high humidity, poor air circulation, and wet foliage. Ensure proper spacing between plants, prune for good airflow, and avoid overhead watering. If necessary, apply organic fungicides to manage fungal infections.
- Invasive growth: Wisteria is known for its vigorous growth and ability to spread aggressively. Keep a close eye on its growth and regularly prune to maintain control over its size and shape. Remove any suckers or unwanted shoots that appear, and consider installing root barriers to prevent unwanted spread.
By proactively addressing these common issues, you can maintain the health and beauty of your wisteria plants. Regular monitoring, proper care, and timely intervention will help ensure that your wisteria thrives and provides you with an exquisite display of cascading blooms.
Conclusion
Growing wisteria from seeds can be a rewarding and fulfilling experience. From the initial selection of seeds to nurturing and caring for the young plants, each step is an opportunity to witness the beauty and resilience of this enchanting vine. By following the guidelines outlined in this article, you can set yourself up for success in growing wisteria from seeds.
Remember, patience is essential when growing wisteria. Germination can be slow, and it may take several years for the plant to establish itself and bloom abundantly. But the wait is well worth it once you see the cascades of colorful blossoms adorning your garden.
Throughout the journey of growing and caring for wisteria, be sure to provide your plants with proper nutrients, water, sunlight, and support. Regularly prune and train the vines to maintain their shape and encourage robust growth. Stay vigilant for any signs of pests, diseases, or other issues. Identifying and addressing problems early on will help ensure the long-term health and vitality of your wisteria plants.
Harvesting and saving seeds from your wisteria offers the opportunity to propagate new plants and share the beauty of this remarkable vine. Following the proper techniques for seed collection, storage, and planting will increase your chances of successful germination and growth.
As you embark on your wisteria-growing journey, enjoy the process and take time to appreciate the beauty of nature unfolding before your eyes. Your efforts will be rewarded with a garden adorned with the graceful and captivating presence of wisteria, a true masterpiece of nature.
So, go ahead and immerse yourself in the world of wisteria. Create an enchanting garden retreat filled with the breathtaking beauty and fragrance of wisteria blooms. Happy gardening!
Frequently Asked Questions about How To Grow Wisteria From Seeds
Was this page helpful?
At Storables.com, we guarantee accurate and reliable information. Our content, validated by Expert Board Contributors, is crafted following stringent Editorial Policies. We're committed to providing you with well-researched, expert-backed insights for all your informational needs.


0 thoughts on “How To Grow Wisteria From Seeds”