Home>Garden Essentials>How To Install Lights In A Water Fountain

Garden Essentials
How To Install Lights In A Water Fountain
Modified: October 22, 2024
Learn how to enhance your garden with a beautiful water fountain. Find out the step-by-step process of installing lights in a water fountain to create a mesmerizing ambiance.
(Many of the links in this article redirect to a specific reviewed product. Your purchase of these products through affiliate links helps to generate commission for Storables.com, at no extra cost. Learn more)
Introduction
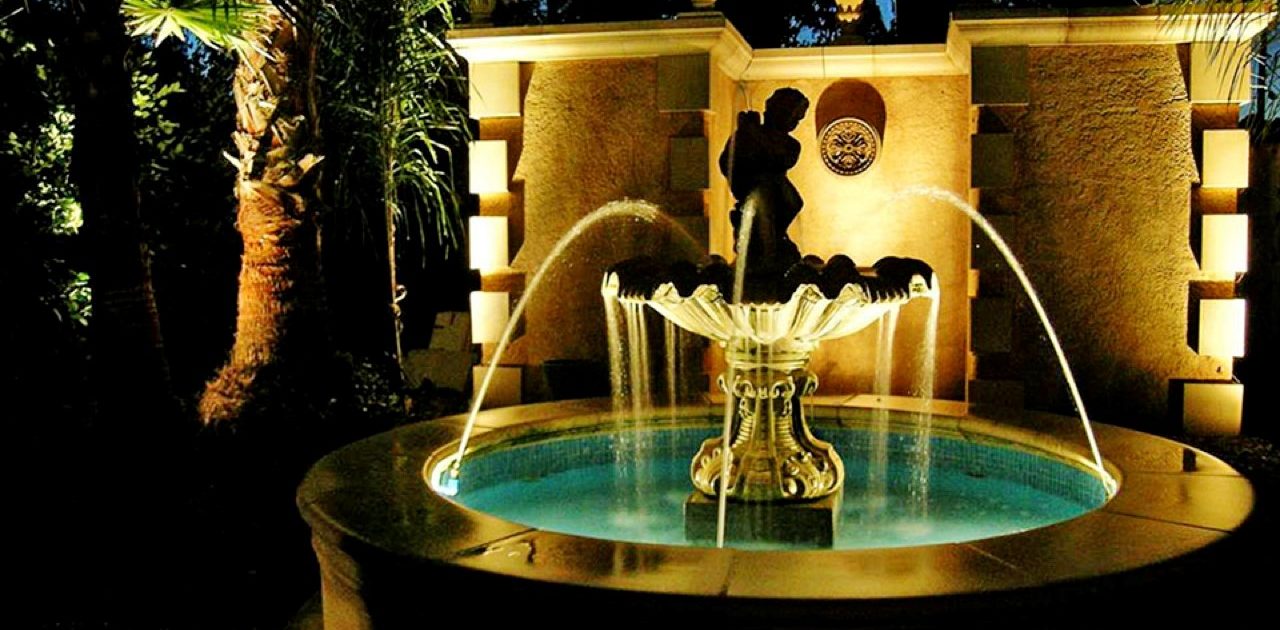
Welcome to our guide on how to install lights in a water fountain. Adding lighting to your fountain can transform it into a breathtaking focal point in your garden or outdoor space, especially in the evening. Not only will it enhance the visual appeal, but it will also create a tranquil ambiance.
In this article, we will walk you through the step-by-step process of installing lights in your water fountain. We will cover everything from gathering the necessary tools and materials to testing the lights and making adjustments. So, let’s get started and bring your water fountain to life at night.
Key Takeaways:
- Transform your water fountain into a mesmerizing focal point by adding underwater lights. Follow our step-by-step guide to illuminate your garden oasis and create a tranquil ambiance at night.
- Prioritize safety, gather necessary tools, determine the power source, and seal connections to successfully install lights in your water fountain. Enjoy the enchanting glow and captivating atmosphere in your outdoor space.
Read more: How To Install A Water Fountain
Step 1: Gather the necessary tools and materials
Before you begin the installation process, it’s crucial to gather all the necessary tools and materials. This will ensure that you have everything you need at hand, saving you time and preventing any delays during the installation. Here’s a list of the items you’ll need:
- Waterproof underwater lights: Opt for LED lights specifically designed for underwater use. These lights are durable, energy-efficient, and provide a bright and vibrant illumination.
- Transformer: You’ll need a low-voltage transformer to convert the standard household voltage to a safe and appropriate level for the lights.
- Electrical wires: Select wires that are suitable for outdoor use and are long enough to reach the power source.
- Wire connectors: These connectors will be used to secure the connections between the wires and the lights.
- Drill with a masonry bit: You’ll need a drill to create holes in the fountain for the lights to be installed.
- Silicone sealant: Choose a waterproof silicone sealant to seal any gaps and ensure the electrical connections are waterproof.
- Pliers and wire strippers: These tools will help you strip the insulation from the wires and make secure connections.
- Electrical tape: Use electrical tape to insulate the wire connections and provide an additional layer of protection.
- Safety goggles and gloves: It’s important to prioritize safety during the installation process. Wear safety goggles to protect your eyes from debris and gloves to keep your hands safe.
Once you have gathered all the necessary tools and materials, you’ll be well-prepared to proceed with the installation process. Remember to read the manufacturer’s instructions for each item and ensure that you have a clear understanding of their proper usage.
Step 2: Determine the power source
Before you can proceed with installing the lights in your water fountain, you need to determine the power source that will supply electricity to the lights. There are a few options to consider:
- Direct connection to an outdoor electrical outlet: If you have an outdoor electrical outlet near your fountain, you can connect the transformer directly to it. Ensure that the outlet has a ground fault circuit interrupter (GFCI) for added safety.
- Extension cord: If the outdoor electrical outlet is not within reach of your fountain, you can use an extension cord to bridge the gap. Make sure to use a heavy-duty outdoor extension cord that is rated for the wattage of your lights.
- Solar-powered lights: For a more environmentally-friendly and convenient option, you can opt for solar-powered lights. These lights have built-in solar panels that charge during the day and automatically illuminate your fountain at night. This option eliminates the need for wiring and a power source.
Consider the location of your fountain and the availability of power sources when deciding on the best option for your setup. If you choose to connect the lights to an electrical outlet, ensure that the power source is adequately protected from water and the elements.
It’s important to note that if you are not comfortable working with electricity or are unsure about the electrical connections, it is always recommended to seek the assistance of a qualified electrician. They can ensure that the installation is done safely and in compliance with local electrical codes.
By determining the power source in advance, you can plan the installation process accordingly and ensure that you have the necessary wiring and connections to power your fountain lights effectively.
Step 3: Prepare the fountain for the lights
Once you have gathered your tools and determined the power source, it’s time to prepare your water fountain for the installation of lights. Follow these steps to ensure a smooth and successful installation:
- Turn off the power: Before you begin any work on the fountain, make sure to turn off the power to prevent any electrical accidents.
- Clean the fountain: Remove any debris, leaves, or algae from the fountain’s surface and basin. Use a non-abrasive cleaner and a soft brush to gently scrub away any dirt or stains.
- Inspect the fountain: Carefully examine the fountain for any cracks or damage. Repair any cracks using a waterproof sealant or adhesive suitable for your fountain material. This will prevent water from seeping into the cracks and damaging the lights or electrical connections.
- Plan the lighting positions: Determine where you want to place the lights in your fountain. Consider the shape and design of the fountain, as well as any decorative elements you want to highlight. Mark the positions with a pencil or masking tape for reference.
- Drill holes for the lights: Use a drill with a masonry bit to create holes in the marked positions. The size of the holes should correspond to the diameter of the lights. Be careful not to apply too much pressure or damage the fountain structure.
- Clear the debris: After drilling the holes, remove any debris or dust from the holes to ensure a clean and secure fit for the lights.
By thoroughly preparing your water fountain, you are setting the stage for a successful installation and ensuring the longevity of your lights. Taking the time to clean, inspect, and plan will help create a seamless integration of the lights into your fountain’s design.
Step 4: Install the underwater lights
Now that you have prepared your fountain, it’s time to install the underwater lights. Follow these steps to ensure a proper installation:
- Place the lights in the holes: Take the underwater lights and carefully insert them into the drilled holes. Make sure they fit securely and are level with the surface of the fountain.
- Adjust the angle: Depending on your fountain’s design and the effect you want to achieve, you may need to adjust the angle of the lights. Use your hands or a pair of pliers to tilt them slightly if necessary.
- Tighten the lights: Once the lights are in the desired position, use the provided screws or fasteners to secure them in place. Be careful not to overtighten, as this can damage the lights or the fountain.
- Check for waterproofing: Before proceeding to the next step, make sure that the lights are properly sealed and waterproof. Inspect the area around the lights for any gaps or openings. If necessary, apply a waterproof silicone sealant around the lights to ensure a watertight seal.
It’s important to position the lights strategically to achieve the desired lighting effect. Experiment with different angles and placements to highlight specific features of your fountain, such as cascading water or ornamental details.
Remember to refer to the manufacturer’s instructions for specific installation guidelines and any additional steps that may be required for your particular brand and model of lights.
Once you have completed the installation of the underwater lights, your water fountain will already start to showcase its new aesthetic appeal. In the next step, we will guide you through connecting the wiring to illuminate the lights.
Make sure to use waterproof lights and secure them in place with waterproof sealant. Place the lights strategically to enhance the beauty of the water fountain.
Read more: How To Install A Water Fountain Pump
Step 5: Connect the wiring
Now that the underwater lights are securely installed in your water fountain, it’s time to connect the wiring and bring them to life. Follow these steps to ensure a proper connection:
- Measure and cut the electrical wires: Measure the distance from each light to the power source and add some extra length for flexibility. Cut the electrical wires to the appropriate length for each connection.
- Strip the wires: Use wire strippers to carefully remove the insulation from the ends of the wires, exposing the bare copper. Take care not to damage the wires during this process.
- Connect the wires to the lights: Attach the stripped ends of the wires to the corresponding terminals on each light. Ensure a secure connection by twisting the wires together and using wire connectors to keep them in place.
- Connect the wires to the transformer: Locate the low-voltage transformer near the power source. Connect the other ends of the wires to the transformer, matching the positive and negative terminals as indicated in the manufacturer’s instructions.
- Insulate the connections: Use electrical tape to insulate and protect the wire connections. Wrap the tape tightly around the exposed wires, covering the connections completely. This will prevent any moisture or water from compromising the electrical integrity.
It’s essential to follow the manufacturer’s instructions for wiring connections and ensure they comply with local electrical codes. If you are unsure about the wiring process or lack experience working with electricity, consult a qualified electrician for assistance and to ensure your safety.
Lastly, tidy up the wiring by gathering any excess length and securing it with zip ties or clips. This will help prevent any tripping hazards and keep the installation neat and organized.
With the wiring properly connected, your water fountain is one step closer to being illuminated. In the next step, we will guide you through sealing the connections and ensuring waterproofing for added durability.
Step 6: Seal the connections and ensure waterproofing
Ensuring that the connections are sealed and waterproofed is a crucial step in successfully installing lights in your water fountain. This will protect the electrical components from moisture and prolong the lifespan of the lights. Follow these steps to properly seal the connections:
- Inspect the connections: Thoroughly examine each connection point, including where the wires are attached to the lights and the transformer. Look for any signs of exposed wiring or gaps that could potentially allow water to enter.
- Apply silicone sealant: Use a waterproof silicone sealant to seal the connections and any gaps or openings in the fountain. Apply a thin layer of sealant around each connection point, ensuring complete coverage.
- Smooth and blend: Use a gloved finger or a tool to carefully smooth out the sealant, ensuring that it blends seamlessly with the surrounding surface. This will maintain the aesthetics of your water fountain while providing reliable waterproofing.
- Allow proper drying time: Follow the manufacturer’s instructions regarding the drying time for the sealant. Avoid disturbing the sealant during this time to allow it to set and create a strong, waterproof barrier.
It’s important to note that the sealant should be applied meticulously for each connection point, including the wiring connections and any openings or gaps in the fountain structure. This will ensure that no water can penetrate and damage the electrical components.
Waterproofing is vital to protect the lights and wiring from water damage, especially in an outdoor environment where the fountain is exposed to natural elements. By properly sealing and waterproofing the connections, you will increase the longevity and reliability of your fountain lighting installation.
Once the sealant has dried, you are ready to move on to the final step: testing the lights and making any necessary adjustments.
Step 7: Test the lights and make adjustments
With the installation process nearing its completion, it’s time to test the lights in your water fountain to ensure they are functioning properly. Follow these steps to test and make any necessary adjustments:
- Turn on the power: Switch on the power to your water fountain lights by plugging in the transformer or activating the solar-powered lights.
- Observe the lights: Take a moment to observe each light and check if it is illuminating as expected. Pay attention to the brightness, color, and overall effect of the lighting.
- Adjust the positioning: If you find that certain areas of your fountain are not adequately illuminated or if the lighting effect is not as desired, you can make adjustments to the positioning of the lights.
- Reposition the lights: Depending on your fountain’s design and the desired lighting effect, you may need to rotate or reposition the lights to achieve the desired illumination. Experiment with different angles and placements until you achieve the desired result.
- Check for any issues: During the testing phase, check for any flickering lights, loose connections, or other issues that may affect the performance of the lights. Ensure that the connections are secure and that there are no exposed wires or potential safety hazards.
By testing the lights and making necessary adjustments, you can fine-tune the illumination of your water fountain to create the desired atmosphere and visual impact. Take the time to experiment with different lighting configurations until you achieve the perfect balance.
Once you are satisfied with the results, make a final inspection of the entire installation to ensure that everything is secure, waterproofed, and in proper working order.
Congratulations! You have successfully installed lights in your water fountain. Enjoy the enchanting ambiance that your illuminated fountain brings to your outdoor space, whether it’s a peaceful retreat or an entertaining area for gatherings.
Remember to regularly inspect and maintain your fountain lights to ensure their longevity and safety. Enjoy the mesmerizing beauty of your water fountain day and night!
Conclusion
Installing lights in your water fountain can elevate its beauty and create a captivating atmosphere in your garden or outdoor space. By following the step-by-step guide we have provided, you can successfully illuminate your fountain and enjoy its enchanting glow during the evening hours.
Throughout the installation process, we covered important steps such as gathering the necessary tools and materials, determining the power source, preparing the fountain, installing the underwater lights, connecting the wiring, sealing the connections, and testing the lights. Each of these steps contributes to a seamless and functional lighting installation.
Remember to prioritize safety by turning off the power before starting any work and seeking professional assistance if you are unsure about electrical connections. Always follow the manufacturer’s instructions and adhere to local electrical codes.
Once your lights are installed and properly adjusted, sit back and enjoy the spectacular transformation of your water fountain. The soft glow and gentle reflections will create a tranquil ambiance, enhancing the charm of your outdoor space.
Regularly inspect and maintain your fountain lights to ensure they continue to shine brightly and remain in good working condition. Clean the lights and the fountain’s surface, check for any signs of damage, and address any issues promptly to prolong their lifespan.
Now, it’s time to immerse yourself in the beauty of your illuminated water fountain. Whether you are relaxing alone or hosting a gathering, the lights will create a magical atmosphere that will be enjoyed by all.
Embrace the captivating power of light and water, and let your water fountain become a captivating centerpiece in your garden. Start the installation process today and bring a touch of enchantment to your outdoor space!
Frequently Asked Questions about How To Install Lights In A Water Fountain
Was this page helpful?
At Storables.com, we guarantee accurate and reliable information. Our content, validated by Expert Board Contributors, is crafted following stringent Editorial Policies. We're committed to providing you with well-researched, expert-backed insights for all your informational needs.












0 thoughts on “How To Install Lights In A Water Fountain”