Articles
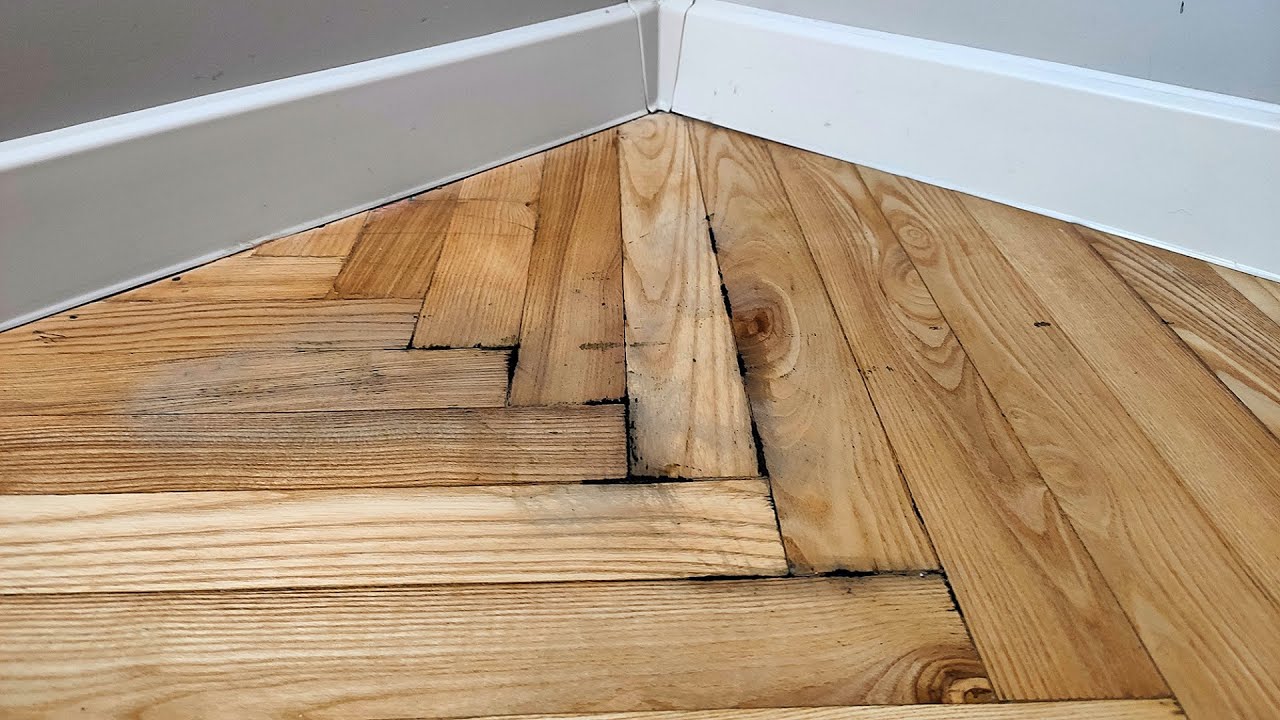
How To Fix A Chip In Wood Floor
Modified: January 8, 2024
Learn the best techniques and methods to fix a chip in your wood floor with our informative articles. Restore your floor's beauty easily and efficiently.
(Many of the links in this article redirect to a specific reviewed product. Your purchase of these products through affiliate links helps to generate commission for Storables.com, at no extra cost. Learn more)
Introduction
Wood floors are a beautiful and timeless addition to any home. However, over time, they can develop chips and imperfections due to heavy foot traffic, furniture rearrangement, or accidental damage. These flaws can detract from the overall aesthetic appeal of the floor and diminish the value of your home. Luckily, fixing a chip in a wood floor is a relatively simple and straightforward process that you can do yourself with the right tools and materials.
In this article, we will guide you through the step-by-step process of fixing a chip in a wood floor. From cleaning the damaged area to applying wood filler and finishing touches, we’ll provide you with all the information you need to restore the beauty of your wood floor.
Before we get started, it’s important to note that the method described here is suitable for minor chips and imperfections in a wood floor. If the damage is extensive or the floor is severely damaged, it may be best to consult a professional for repair or consider replacing the affected boards.
Now, let’s dive into the tools and materials you will need to fix a chip in a wood floor.
Key Takeaways:
- Repairing a chip in a wood floor is a manageable DIY project that involves cleaning, assessing, filling, sanding, staining, and finishing. With the right tools and materials, you can achieve a seamless and professional-looking repair.
- While minor chips in wood floors can be fixed using wood filler and basic steps, extensive damage may require professional repair or board replacement. Regular maintenance and protective measures can help preserve the beauty and longevity of your wood floor.
Read more: How To Fix Chipped Wood On Furniture
Tools and Materials Needed
Before you begin the process of fixing a chip in a wood floor, it’s essential to gather all the necessary tools and materials. Here’s a list of what you’ll need:
- Putty knife: This tool will be used to apply the wood filler.
- Sandpaper: You’ll need both coarse and fine-grit sandpaper for sanding the repaired area.
- Wood filler: Choose a high-quality wood filler that closely matches the color and grain of your wood floor.
- Stain: If needed, select a stain that matches the color of your wood floor to blend the repaired area seamlessly.
- Finish: You will need a clear wood finish to protect the repaired area and give it a polished look.
- Clean cloth: A soft cloth will be required to wipe away excess wood filler, stain, and finish.
- Protective gloves: Wear gloves to keep your hands clean and protected during the repair process.
- Dust mask: It’s important to wear a dust mask while sanding to avoid inhaling dust particles.
- Small paintbrush: This will come in handy when applying the stain and finish.
- Vacuum or broom: You’ll need a vacuum cleaner or broom to clean up any dust and debris before and after the repair.
Having these tools and materials on hand will ensure that you can complete the repair process smoothly and effectively.
Now that you have everything you need, let’s move on to the step-by-step process of fixing a chip in a wood floor.
Step 1: Clean the Area
Before you can begin repairing the chip in your wood floor, it’s important to clean the damaged area thoroughly. This will ensure that the wood filler adheres properly and the repair is seamless.
Start by removing any loose debris or dust from the chip using a vacuum cleaner or a broom. Be thorough in your cleaning to ensure that no dirt or particles remain on the surface.
Next, use a clean, damp cloth to wipe the area. This will remove any remaining dust or dirt and provide a clean surface for the repair. Allow the area to dry completely before proceeding to the next step.
Remember to wear protective gloves and a dust mask to protect yourself from any potential allergens or irritants during the cleaning process.
By starting with a clean and debris-free area, you’ll create an ideal foundation for the repair process and ensure a successful outcome.
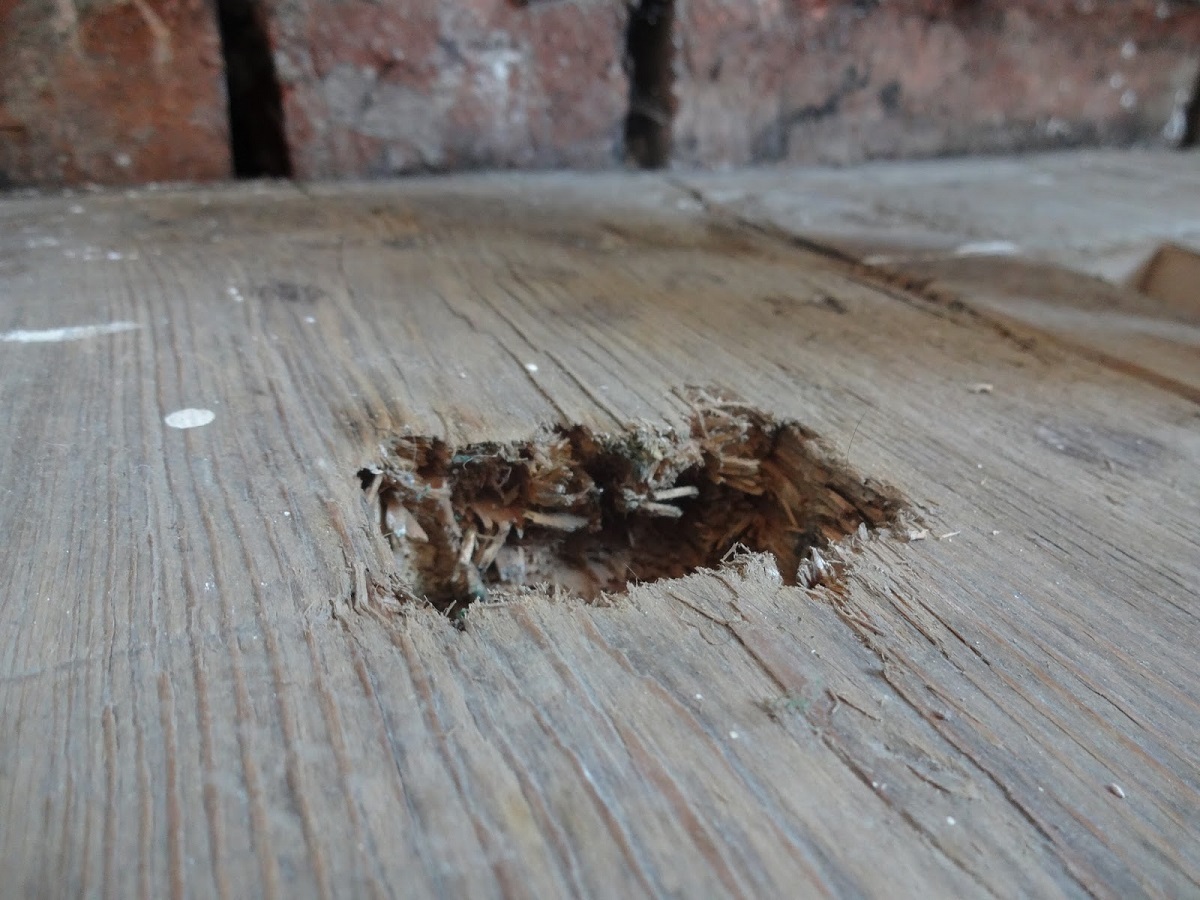
Step 2: Assess the Damage
Once the area is clean, it’s essential to assess the extent of the damage to determine the best course of action for the repair.
Take a closer look at the chip and surrounding area. Note the size and depth of the chip, as well as any splintered or damaged wood fibers.
If the chip is relatively small and shallow, it can typically be repaired using wood filler. However, if the chip is large or extends deep into the wood, it may require more extensive repair or even replacement of the affected board.
If the chip has caused splintered edges or rough portions in the surrounding area, you may need to use sandpaper to smooth them out before proceeding with the repair.
Assessing the damage will help you decide whether you can proceed with a simple wood filler repair or if further steps are necessary. If you’re unsure about the extent of the damage or how to proceed, it’s always advisable to consult a professional for their expertise and guidance.
Once you have assessed the damage, you can move on to the next step, which involves gathering the matching wood filler for the repair.
Step 3: Gather Matching Wood Filler
After assessing the damage, it’s time to gather the appropriate wood filler that closely matches the color and grain of your wood floor.
Visit your local home improvement store or a specialty woodworking store to find a wood filler that blends seamlessly with your floor. Look for a filler that is specifically designed for wood repairs and is compatible with staining and finishing.
When choosing a wood filler, consider the following factors:
- Color: Select a wood filler that closely matches the color of your wood floor. Some fillers come in a range of shades to accommodate different wood species.
- Grain pattern: Look for a wood filler that has a similar grain pattern to your floor. This will help the repair blend in more naturally.
- Drying time: Check the drying time on the packaging to ensure it aligns with your schedule. Some fillers dry quickly, while others may require more time to fully cure.
- Compatibility: Ensure that the wood filler is compatible with staining and finishing products. This will allow you to achieve a cohesive look after the repair.
Once you have chosen the appropriate wood filler, make sure to read the instructions provided by the manufacturer. This will provide you with important information on application techniques and drying times.
With the matching wood filler in hand, you’re now ready to proceed to the next step – applying the wood filler to the damaged area.
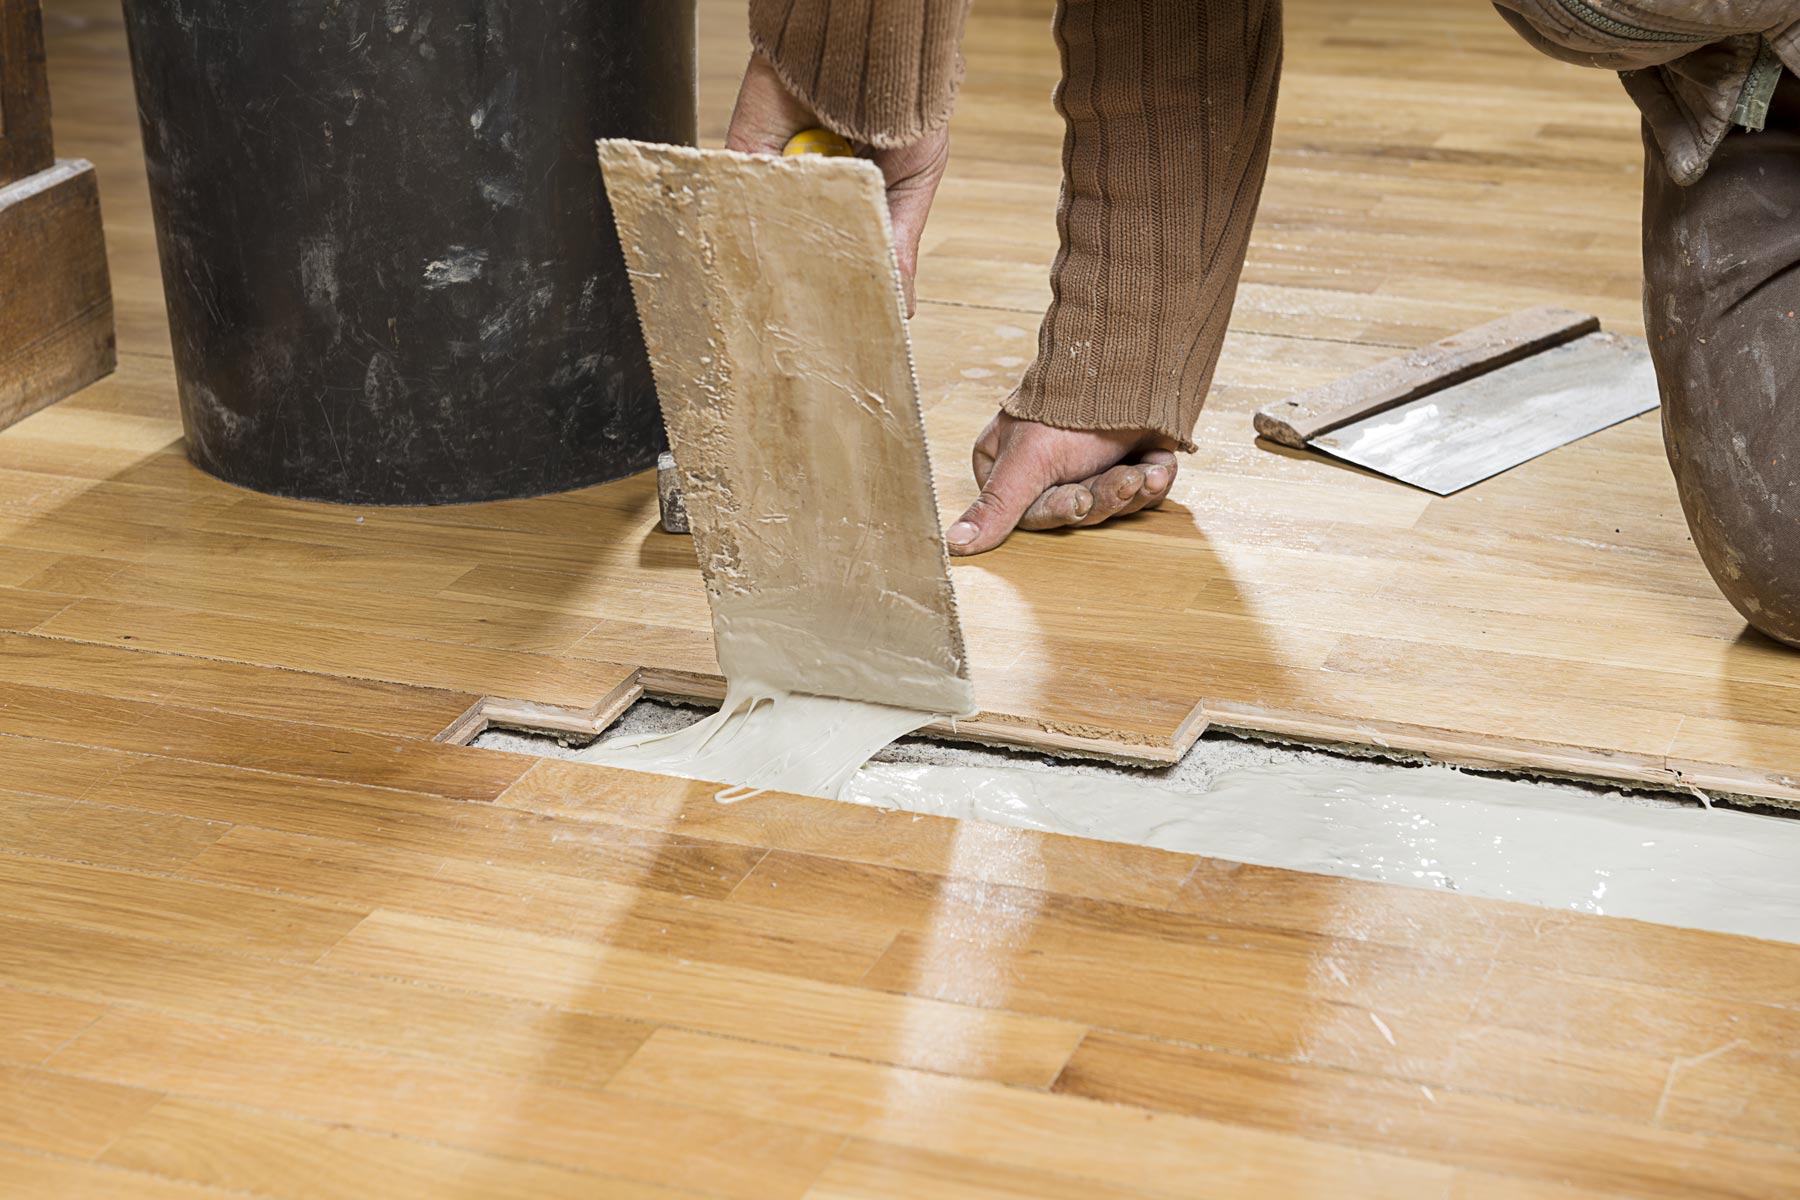
Use wood filler to fill in the chip, then sand and refinish the area to match the rest of the floor. Make sure to clean and dry the area before applying the filler.
Read more: How To Store Wood Chips
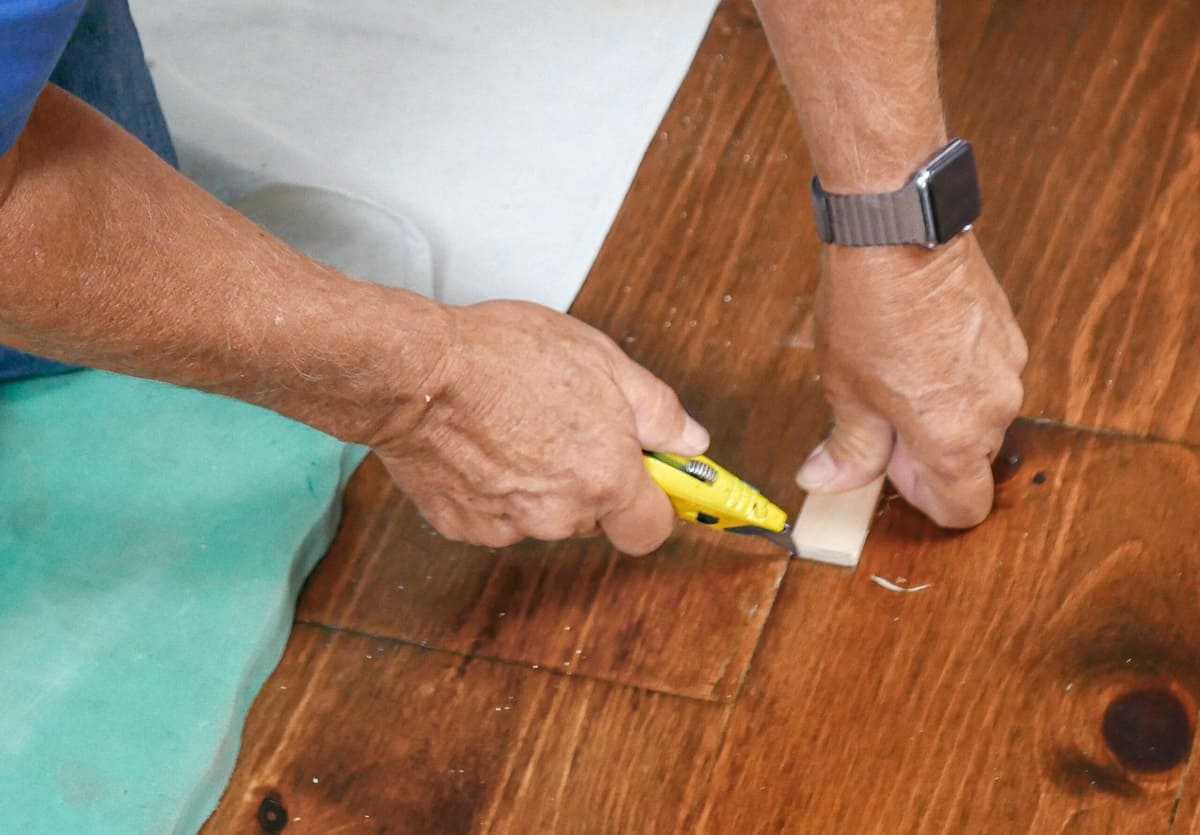
Step 4: Apply Wood Filler
Now it’s time to apply the wood filler to the chip in your wood floor. Follow these steps to ensure a successful repair:
- Using a putty knife, scoop a small amount of wood filler from the container.
- Apply the filler directly into the chip, filling it completely. Be sure to overfill slightly to account for shrinkage during the drying process.
- Smooth out the filler with the putty knife, ensuring it is level with the surrounding floor surface. Remove any excess filler from the surrounding area using the putty knife.
- Continue applying the wood filler to any additional chips or damaged areas as needed.
- Allow the wood filler to dry completely. Follow the manufacturer’s instructions for the recommended drying time.
During the drying process, some wood fillers may shrink slightly. If necessary, apply an additional layer of filler to ensure the repair is flush with the surrounding floor.
Once the wood filler is dry and the damaged area is level, move on to the next step – sanding the filled area.
Step 5: Sand the Filled Area
After the wood filler has dried, it’s time to sand the filled area to achieve a smooth and seamless repair. Follow these steps to properly sand the filled area:
- Start by using coarse-grit sandpaper (around 80-100 grit) to sand the filled area. This will help level the wood filler with the surrounding floor. Sand in a gentle circular motion, being careful not to apply too much pressure.
- As you sand, periodically check the filled area’s smoothness by running your hand over it. If you feel any unevenness, continue sanding until the surface is level.
- Once you are satisfied with the smoothness of the filled area, switch to a finer-grit sandpaper (around 180-220 grit) to refine the surface further. Sand in the direction of the wood grain to achieve a uniform appearance.
While sanding, be cautious not to over-sand the surrounding floor. Focus on the filled area and minimize contact with the adjacent wood to avoid creating unevenness.
After sanding, use a clean, damp cloth to wipe away any sanding dust or debris. Inspect the repaired area to ensure it is level, smooth, and visually matches the rest of the floor. If necessary, you can repeat the sanding process to achieve the desired results.
With the filled area sanded and refined, you’re ready to move on to the next step – staining and finishing.
Step 6: Stain and Finish
Now that the chip in your wood floor has been filled and sanded, it’s time to blend the repaired area with the rest of the floor by applying stain and finish. Follow these steps to achieve a seamless and professional-looking result:
- If the color of the wood filler closely matches the surrounding floor, you may choose to skip the staining step. However, if necessary, select a stain that matches the color of your floor. Apply a small amount of stain to a clean cloth or sponge and rub it onto the filled area in a circular motion.
- Allow the stain to penetrate the wood filler for the recommended time specified on the stain container. Wipe off any excess stain with a clean cloth.
- Once the stain has dried, it’s time to apply a protective finish to the repaired area. Use a clear wood finish or polyurethane that matches the sheen of the rest of your floor (e.g., satin, semi-gloss, or gloss).
- Follow the instructions on the finish container and apply a thin, even coat using a small paintbrush or foam applicator. Apply the finish in the direction of the wood grain, paying extra attention to blend the repaired area with the surrounding floor.
- Allow the finish to dry completely, as specified on the product label. Depending on the type of finish used, you may need to apply multiple coats for optimal protection.
During the staining and finishing process, make sure to work in a well-ventilated area and follow all safety instructions provided by the stain and finish manufacturers.
Lastly, once the finish has fully dried, you’re almost done! All that’s left to do is to buff and polish the repaired area for a final touch of brilliance.
Step 7: Buff and Polish
The final step in repairing a chip in a wood floor is to buff and polish the repaired area to achieve a smooth and glossy finish. Follow these steps to complete the process:
- Start by ensuring the repaired area is free of any dust or debris. Use a clean, dry cloth or a vacuum with a soft brush attachment to carefully remove any particles.
- Next, dampen a clean cloth with a small amount of water or a wood floor cleaner specifically designed for the type of finish you applied. Gently wipe down the repaired area and the surrounding floor to remove any smudges, fingerprints, or residue.
- Once the area is clean and dry, take a soft, lint-free cloth or a polishing pad and apply a small amount of wood floor polish or wax. Begin buffing the repaired area using circular motions, gradually extending to cover the surrounding floor. Continue until the repaired area blends in seamlessly with the rest of the floor.
- Inspect the entire floor to ensure a consistent shine and smoothness. If necessary, repeat the buffing and polishing process on other areas that may require attention.
Remember to follow the instructions provided by the wood floor polish or wax manufacturer and use the appropriate products for your specific type of wood floor finish.
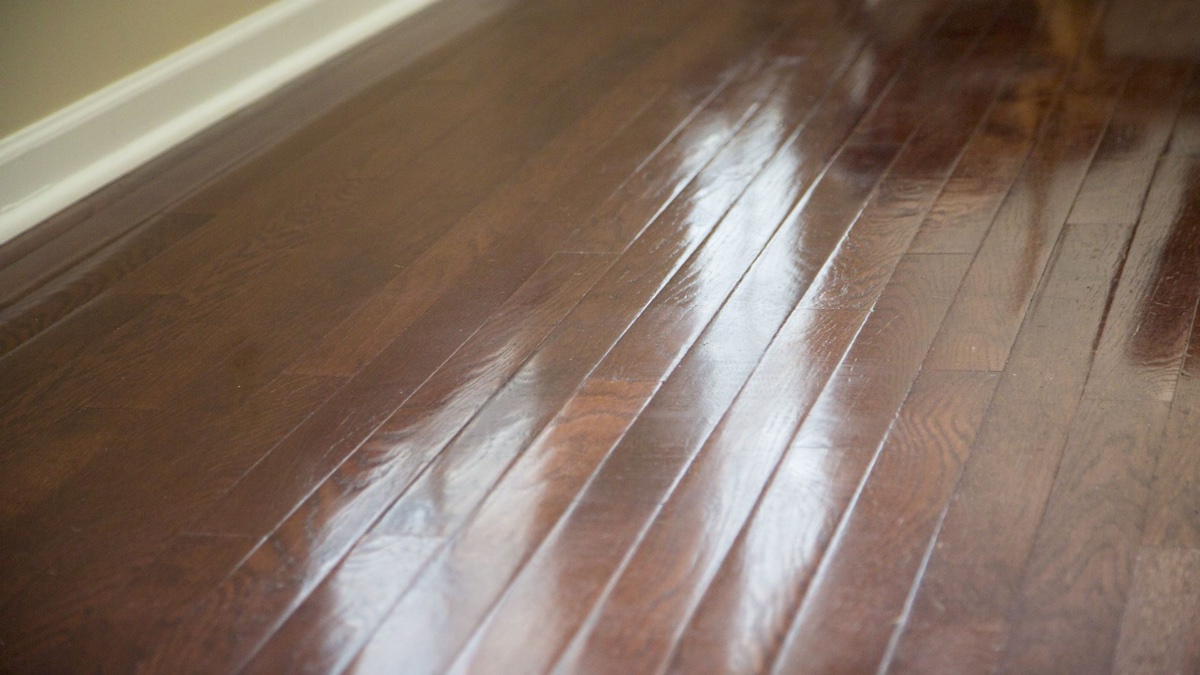
By buffing and polishing the repaired area, you will enhance its appearance and create a cohesive finish that seamlessly integrates with the rest of the floor.
Congratulations! You’ve successfully repaired the chip in your wood floor and restored its beauty. With regular cleaning and maintenance, your floor should continue to impress for years to come.
Remember, if you encounter significant damage or are unsure about the repair process, it’s always advisable to seek professional assistance.
Enjoy your beautifully restored wood floor!
Read more: How To Fix Buckled Wood Floor
Conclusion
Repairing a chip in a wood floor is a rewarding project that can restore the beauty and value of your home. By following the step-by-step process outlined in this article, you can effectively fix minor chips and imperfections in your wood floor.
From cleaning the area and assessing the damage to applying wood filler, sanding, staining, and finishing, each step plays a crucial role in achieving a seamless and professional-looking repair. Taking the time to gather the necessary tools and materials, and following the instructions provided, will ensure a successful outcome.
Remember, while the method described here is suitable for minor chips, extensive damage or severely damaged floors may require professional repair or replacement of affected boards. It’s always a good idea to consult a professional if you’re unsure about the extent of the damage or how to proceed.
With proper care and maintenance, your repaired wood floor will continue to be a stunning feature in your home for years to come. Regular cleaning and protective measures, such as using furniture pads and area rugs, will help preserve the beauty and longevity of your floor.
We hope this article has provided you with the guidance and confidence to tackle the task of fixing a chip in your wood floor. By following the steps outlined here, you can restore the charm and elegance of your wood floor, enhancing the overall aesthetic appeal of your home.
Remember, if you’re ever unsure or uncomfortable with the repair process, it’s wise to seek professional help. But with the right tools, materials, and a little patience, you’ll be well on your way to a beautifully repaired wood floor.
Frequently Asked Questions about How To Fix A Chip In Wood Floor
Was this page helpful?
At Storables.com, we guarantee accurate and reliable information. Our content, validated by Expert Board Contributors, is crafted following stringent Editorial Policies. We're committed to providing you with well-researched, expert-backed insights for all your informational needs.


0 thoughts on “How To Fix A Chip In Wood Floor”