Home>Garden Essentials>How To Shoot Greenery In DSLR Photography
Garden Essentials
How To Shoot Greenery In DSLR Photography
Modified: October 27, 2024
Learn how to capture the vibrant beauty of gardens using your DSLR camera. Enhance your photography skills and bring out the lushness of greenery with our expert tips.
(Many of the links in this article redirect to a specific reviewed product. Your purchase of these products through affiliate links helps to generate commission for Storables.com, at no extra cost. Learn more)
Introduction
Welcome to the world of DSLR photography, where capturing the beauty of nature becomes an art form. When it comes to shooting greenery, whether it’s a lush garden, a dense forest, or a vibrant meadow, there are techniques and considerations unique to this genre of photography that can help you create stunning images. In this article, we will delve into the essentials of shooting greenery using your DSLR camera, from understanding the basics to mastering composition and lighting techniques.
Greenery has always been a popular subject in photography, primarily due to its inherent beauty and calming effect on viewers. It represents vitality, growth, and tranquility, making it a captivating subject to capture through the lens of a camera. Whether you’re an amateur photographer looking to improve your skills or a seasoned professional seeking new ideas, the tips and techniques discussed here will provide you with the knowledge to elevate your greenery photography to new heights.
Before we dive into the specifics, it’s important to have a solid understanding of DSLR photography. DSLR stands for Digital Single-Lens Reflex, which refers to the mechanism by which light enters the camera through a single lens and is reflected onto a digital sensor. This technology allows you to have more control over your camera settings, resulting in high-quality images with exceptional detail and clarity.
When it comes to shooting greenery, there are several reasons why it’s worth exploring. First and foremost, greenery offers a wide range of colors, textures, and patterns, providing endless creative opportunities for photographers. From the vibrant shades of leaves to the intricate details of flowers and plants, greenery can add depth and visual interest to your photographs.
Additionally, greenery photography allows us to connect with nature on a deeper level. It enables us to appreciate the beauty of the natural world and instills a sense of peace and tranquility. Immersing yourself in the green landscapes can have a calming effect on the mind and soul, making it a therapeutic and rejuvenating experience.
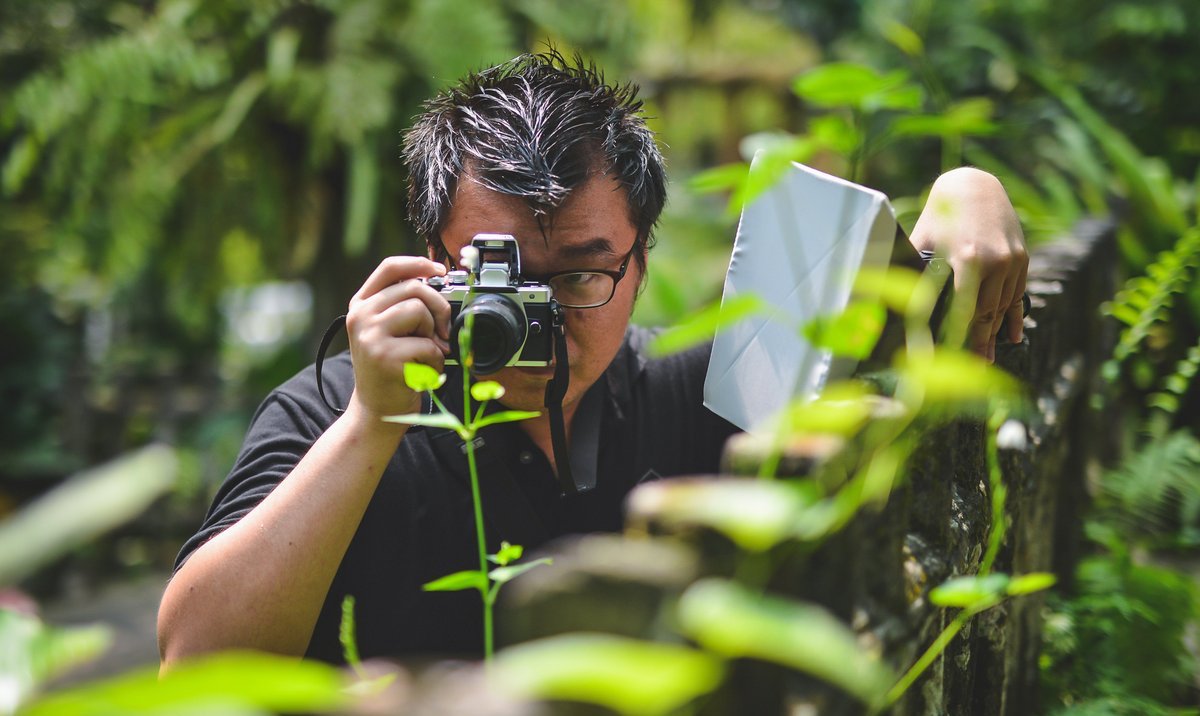
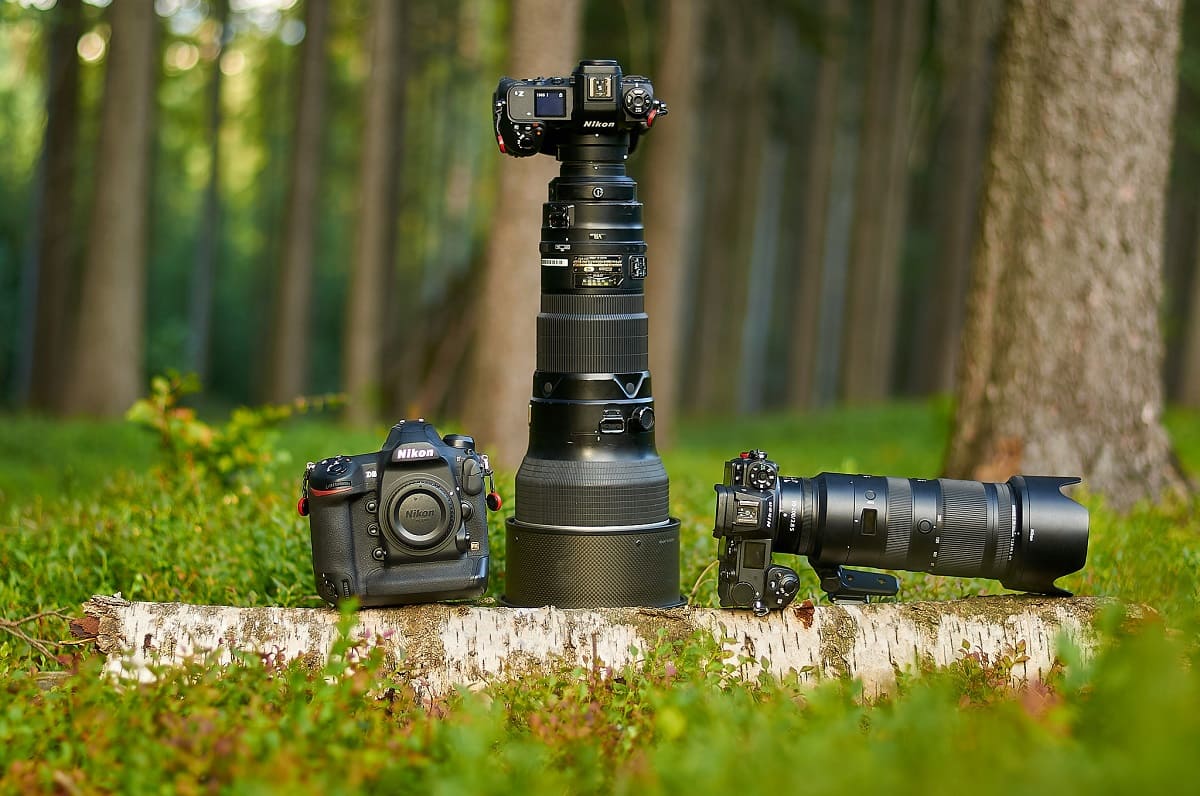
In order to capture the essence of greenery effectively, it is important to have the right equipment. We will discuss the essential gear you’ll need, including the type of DSLR camera, lenses, and accessories that are best suited for capturing greenery in all its glory.
Now that we have set the stage, let’s delve into the world of shooting greenery and uncover the techniques that will help you create captivating and visually stunning images. Whether you’re shooting in your own backyard or exploring new landscapes, these guidelines and tips will assist you in bringing out the best in your greenery photography.
Key Takeaways:
- Embrace the beauty of nature by capturing stunning greenery images with your DSLR camera. Understand camera settings, lighting, and post-processing to bring out the essence of green landscapes.
- Explore the diverse weather conditions and seasons to capture the ever-changing beauty of greenery. Use composition techniques and creative vision to showcase the vibrant colors and textures of nature.
Read more: How To Store Bamboo Shoots
Understanding DSLR Photography
In order to effectively shoot greenery with your DSLR camera, it is important to have a basic understanding of how DSLR photography works. This knowledge will provide you with a solid foundation to explore and experiment with different settings and techniques to capture stunning images of greenery.
DSLR cameras offer a range of manual settings that allow you to have complete control over your photographs. Understanding these settings will help you make informed decisions and adjustments to achieve the desired results.
One of the key settings to be familiar with is the aperture. The aperture determines the depth of field in your photograph, which refers to how much of the image is in focus. When shooting greenery, you may want to create a shallow depth of field to blur the background and bring attention to the main subject, such as a flower or a leaf. On the other hand, you may choose to use a smaller aperture to capture a landscape with everything in sharp focus.
Another important setting is the shutter speed. The shutter speed controls the amount of time the camera’s shutter remains open, determining how much light enters the camera and how motion is captured. When shooting greenery, you may want to use a faster shutter speed to freeze the movement of leaves or flowers swaying in the wind, or a slower shutter speed to create a sense of motion or blur in the image.
ISO is a setting that controls the camera’s sensitivity to light. Lower ISO settings are ideal for shooting in bright conditions, whereas higher ISO settings may be necessary in low light situations. However, keep in mind that higher ISO settings can introduce digital noise into the image, so it’s important to find the right balance to achieve a clean and noise-free result.
Understanding how to control these settings allows you to have full creative control over your photographs. Take the time to explore your camera’s manual mode and experiment with different combinations of aperture, shutter speed, and ISO to see how they affect your images. This hands-on experience will help you gain confidence and expertise in utilizing these settings effectively when shooting greenery.
One aspect of DSLR photography that sets it apart from point-and-shoot cameras and smartphones is the ability to use interchangeable lenses. Different lenses offer varying focal lengths and perspectives, providing versatility and the ability to capture a wide range of compositions.
For shooting greenery, wide-angle lenses are often preferred as they allow you to capture expansive landscapes or include a larger portion of the greenery in the frame. These lenses are also ideal for capturing the grandeur of trees or the vastness of a blooming field.
Macro lenses, on the other hand, are ideal for capturing close-up shots of flowers, leaves, and intricate details within the greenery. They allow you to focus on tiny elements and reveal the often unnoticed beauty that exists within nature.
By understanding the basics of DSLR photography and having the right equipment, you can fully embrace the world of greenery photography. With this knowledge, you are ready to explore the importance of shooting greenery and how to make the most out of your photography experience.
Importance of Shooting Greenery
Shooting greenery holds immense importance in the world of photography, offering numerous benefits and opportunities for photographers of all levels. Here are a few reasons why capturing greenery is a rewarding and valuable endeavor:
1. Connection with Nature: Greenery represents the beauty and essence of the natural world. By immersing yourself in the process of shooting greenery, you can develop a deeper connection with nature. It allows you to appreciate the intricate details, patterns, and colors found in plants, trees, and landscapes. This connection can bring a sense of peace, tranquility, and happiness, both during the photography process and when viewing the final images.
2. Healing and Well-being: Spending time in green environments has been shown to have a positive impact on mental and physical well-being. Greenery photography provides an opportunity to escape the hustle and bustle of daily life and immerse yourself in a calming and rejuvenating natural setting. The act of capturing greenery through the lens can help reduce stress, improve mood, and promote relaxation.
3. Environmental Awareness: Greenery photography can play a role in raising awareness about the importance of environmental conservation. By capturing the beauty of nature and sharing these images with others, you can inspire a sense of awe and appreciation for the natural world. It can serve as a reminder of the importance of preserving green spaces and protecting the planet for future generations.
4. Creativity and Artistic Expression: Greenery offers a vast canvas for photographers to explore their creativity and artistic vision. From the vibrant colors of flowers to the intricate shapes of leaves, there are endless possibilities to capture unique and stunning images. Experimenting with different angles, perspectives, and compositions can help you create artistic and visually captivating photographs that stand out.
5. Educational Value: Greenery photography provides an opportunity to learn about different plant species and ecosystems. As you immerse yourself in the world of greenery, you can deepen your knowledge and appreciation for the natural world. It encourages you to observe and understand the unique characteristics and behaviors of various plants, trees, and flowers.
6. Inspiration for Other Art Forms: Greenery photography can also serve as a source of inspiration for other creative pursuits. The vibrant colors, textures, and patterns found in greenery can spark ideas for painting, drawing, and even writing. By capturing and studying the intricacies of nature, you can expand your artistic horizons and explore new avenues of creative expression.
7. Reflection and Contemplation: Greenery photography provides an opportunity for introspection and contemplation. Through the lens, you can observe the cycles of growth, decay, and renewal that are inherent in nature. It offers a space for reflection, mindfulness, and a deeper understanding of the interconnectedness of all living things.
Shooting greenery allows you to capture the beauty and significance of nature in its various forms. It goes beyond creating visually pleasing images and can have a profound impact on your well-being, creativity, and appreciation for the natural world. So grab your camera, venture out into the green landscapes, and let your photography journey unfold amidst the wonders of greenery.
Equipment Needed for Shooting Greenery
When it comes to shooting greenery, having the right equipment can make a significant difference in the quality and impact of your photographs. Here are the essential tools and gear you’ll need to capture the beauty of greenery:
1. DSLR Camera: A DSLR (Digital Single-Lens Reflex) camera is ideal for shooting greenery due to its versatility and ability to control settings manually. It provides a wide range of options to adjust aperture, shutter speed, ISO, and other key settings to achieve the desired results.
2. Lenses: The choice of lenses is crucial for effectively shooting greenery. Wide-angle lenses are great for capturing expansive landscapes, while macro lenses allow you to capture intricate details of plants and flowers up close. It’s recommended to have a combination of both to fully explore the variety of greenery photography.
3. Tripod: Using a tripod is highly beneficial, especially when capturing greenery in lower light conditions or when you need to set up longer exposures. It provides stability and eliminates any unwanted camera shake, resulting in sharper images.
4. Remote Shutter Release: A remote shutter release allows you to trigger the camera’s shutter without physically touching it. This helps to minimize camera shake and ensures sharp images, particularly when using longer exposures or shooting in challenging conditions.
5. Filters: Filters are valuable accessories that can enhance your greenery photography. A polarizing filter helps reduce glare and reflections, making colors more vibrant and enhancing the overall contrast of the scene. A neutral density (ND) filter is useful for controlling exposure in bright conditions or when you want to create longer exposures to capture movement, such as flowing water or swaying leaves.
6. Lens Cleaning Kit: Shooting outdoors in greenery can expose your lenses to dust, pollen, and other particles. It’s essential to have a lens cleaning kit to keep your lenses clean and free from smudges or debris that can affect image quality.
7. Extra Batteries and Memory Cards: Being out in nature for extended periods means you’ll need to have spare batteries and memory cards. It’s always better to be prepared and avoid missing the perfect shot due to a drained battery or full memory card.
8. Protection from the Elements: When shooting greenery, it’s essential to protect your gear from the elements. Consider carrying a rain cover or waterproof bag to shield your camera and lenses from rain, dew, or spray from nearby waterfalls or fountains.
9. Comfortable Gear: Since shooting greenery often involves spending extended periods outdoors, wearing comfortable clothing, sturdy footwear, and carrying a backpack or camera bag with padded straps can make a significant difference in your overall shooting experience.
Having the right equipment ensures that you are prepared to capture the beauty of greenery in all its forms. Invest in quality gear that suits your needs and allows you to fully explore your creativity while immersing yourself in the wonders of nature.
Setting up the DSLR Camera
Setting up your DSLR camera properly is crucial to ensure that you capture the beauty of greenery in the best possible way. Follow these steps to optimize your camera settings for shooting greenery:
1. Shoot in RAW: Set your camera to shoot in RAW format rather than JPEG. RAW files contain more image data and provide greater flexibility for post-processing, allowing you to recover more details and make adjustments without sacrificing image quality.
2. Choose the Right Shooting Mode: For greater control and flexibility, use the manual (M) mode or aperture priority (A/Av) mode. Manual mode allows you to manually adjust aperture, shutter speed, and ISO, providing complete control over your exposure settings. Aperture priority mode enables you to set the desired aperture while the camera adjusts the shutter speed accordingly.
3. Set the Aperture: Use a wide aperture (small f-number) to create a shallow depth of field and enhance the subject’s separation from the background. This allows you to isolate the greenery and make it the focal point of your image, while the background blends into a pleasing blur.
4. Adjust the ISO: Set your ISO to the lowest possible value to maintain image quality and minimize digital noise. Greenery photography often involves shooting in well-lit environments, so using a low ISO (e.g., ISO 100 or 200) is generally ideal. However, you may need to increase the ISO in low-light conditions or when capturing moving subjects to maintain a fast enough shutter speed.
5. Select the Focus Mode: Depending on the situation, choose between single autofocus (AF-S) or continuous autofocus (AF-C) mode. For still subjects, use AF-S to focus once and recompose if necessary. For moving subjects, such as leaves rustling in the wind, use AF-C to continuously track the subject and maintain focus.
6. Use Manual Focus for Macro Shots: For close-up shots of flowers and intricate details, consider switching to manual focus. Manual focus allows for precise control, as the depth of field can be very shallow in macro photography. Use the focus ring on your lens to achieve crisp and sharp details.
7. Metering Mode: Choose the appropriate metering mode based on the lighting conditions and the scene’s contrast. Evaluative or matrix metering is suitable for most situations, as it considers a wide area of the frame for overall exposure. However, in high contrast scenes, spot metering can be helpful, allowing you to meter for a specific part of the scene and prevent highlights from getting blown out or shadows from becoming too dark.
8. White Balance: White balance ensures accurate color representation in your images. Set the white balance according to the lighting conditions. Auto white balance generally works well, but if you notice a color shift, consider using a specific white balance preset or manually adjust it to match the lighting conditions.
9. Image Stabilization: If your lens or camera has image stabilization (IS) or vibration reduction (VR), keep it enabled to minimize camera shake, especially when shooting handheld or using longer focal lengths.
10. Bracketing: Consider using exposure bracketing if you’re unsure about the correct exposure. This feature takes a series of images at different exposure levels, ensuring that you have multiple options to choose from during post-processing.
11. Gridlines and Level: Enable gridlines in your camera’s viewfinder or LCD screen to aid in composition and ensure that your horizon is level. This helps to create balanced and visually pleasing compositions when capturing greenery landscapes.
By properly setting up your DSLR camera, you can take full advantage of its features and capabilities to capture breathtaking images of greenery. Adjust the settings according to the specific shooting situation and experiment with different combinations to achieve the desired results. Remember to review and adjust your camera settings as needed based on the changing lighting conditions and subjects you encounter during your greenery photography sessions.
Composition Techniques for Shooting Greenery
Composition is a crucial aspect of photography that can make or break the visual impact of your greenery shots. Here are some composition techniques that can help you capture stunning and visually compelling images of greenery:
1. Rule of Thirds: The rule of thirds is a fundamental principle of composition. Imagine dividing your frame into nine equal parts using two horizontal and two vertical lines. Place your main subject or point of interest along these lines or at their intersection points, rather than in the center of the frame. This creates a more dynamic composition and draws the viewer’s attention to the subject while allowing the surrounding greenery to complement the image.
2. Leading Lines: Look for natural lines in the greenery, such as paths, rows of trees, or winding streams. Utilize these lines to draw the viewer’s eye into the image and guide them towards the main subject or focal point. Leading lines can add depth and create a sense of movement, enhancing the overall composition of your photograph.
3. Framing: Use the surrounding greenery to frame your subject and add depth to the image. This could be branches, leaves, or other elements that create a border around the subject. Framing adds a sense of context and draws the viewer’s attention to the main subject while creating a visually pleasing composition.
4. Diagonal Lines: Incorporating diagonal lines within your composition can add a dynamic and energetic feel to your greenery shots. Look for diagonal elements in the scene, such as sloping hills or tree branches, and position them diagonally across the frame to create visual interest and a sense of movement.
5. Negative Space: Experiment with negative space by intentionally leaving empty areas in your composition. By giving the greenery some breathing room, you can emphasize the main subject and create a sense of balance and simplicity. This technique can add a serene and calming atmosphere to your photographs.
6. Patterns and Textures: Greenery often presents captivating patterns and textures that can add visual interest to your images. Look for repetitive shapes, lines, or textures in the leaves, flowers, or foliage and incorporate them into your composition. By highlighting these patterns, you can create visually engaging and aesthetically pleasing photographs.
7. Depth and Layers: Create depth in your greenery shots by including foreground, middle ground, and background elements. This can be achieved by positioning objects or elements at different distances from the camera, adding a sense of depth and dimension to the image. Layering the greenery in this way can create a more immersive and impactful composition.
8. Point of View: Experiment with different angles and perspectives to capture the greenery from unique viewpoints. Get low to the ground to photograph flowers or shoot from a higher vantage point to include expansive landscapes. Changing your point of view can offer fresh perspectives and result in more compelling compositions.
9. Colors and Contrast: Pay attention to the color palette of the greenery you’re shooting. Look for contrasting colors, such as vibrant flowers against lush green leaves, to create visual interest and make your subject stand out. Consider how different colors work together and use them strategically to enhance your composition.
10. Symmetry and Reflections: Look for opportunities to capture symmetrical compositions in greenery. This could be a perfectly mirrored reflection in a still water body or a symmetrical arrangement of plants or trees. Symmetry can create a sense of harmony and balance in your photographs.
Remember, these composition techniques are not rigid rules but rather guidelines to help you create impactful and visually pleasing images of greenery. Don’t be afraid to experiment, think outside the box, and let your creative vision guide you. With practice, you’ll develop your unique style and be able to capture the beauty of greenery in a way that resonates with you and your viewers.
When shooting greenery in DSLR photography, use a polarizing filter to reduce glare and make the colors of the leaves and plants appear more vibrant and saturated in your photos.
Lighting Considerations for Greenery Photography
Lighting plays a crucial role in any form of photography, and greenery photography is no exception. Understanding and utilizing the light effectively can transform your images and bring out the beauty of the greenery. Here are some important lighting considerations to keep in mind when shooting greenery:
1. Golden Hour: The golden hour, which occurs during the first and last hours of sunlight in a day, is often considered the best time for capturing greenery. The soft, warm light during this time adds a golden glow to the foliage, enhancing the colors and creating a magical atmosphere. Take advantage of the gentle sidelight and backlight during this time to add depth and dimension to your images.
2. Diffused Light: Overcast or cloudy days can provide diffused light that is ideal for greenery photography. The clouds act as a natural diffuser, softening the light and reducing harsh shadows. This diffused light is perfect for capturing the intricate details and vibrant colors of leaves, flowers, and plants without any harsh highlights or shadows.
3. Harsh Light: In contrast to diffused light, shooting in harsh sunlight can pose challenges when photographing greenery. Bright overhead sunlight can result in strong contrasts, deep shadows, and washed-out colors. To minimize these effects, look for shaded areas or use a diffuser to soften the light. Experimenting with creative techniques such as backlighting or using the shadows to your advantage can also yield interesting and unique results.
4. Backlighting: Backlighting occurs when the main light source is behind the subject, creating a beautiful glow around the leaves and flowers. Shooting greenery with backlighting can highlight their translucent qualities, creating a sense of depth and luminosity. It can also provide a dreamy and ethereal effect, especially when capturing dainty flowers or foliage.
5. Soft Shadows and Textures: When shooting in direct sunlight, pay attention to the shadows and textures created by the greenery. Soft shadows cast by foliage can add depth and dimension to your compositions, while interesting textures of leaves and bark can become more pronounced in the strong light. Explore different angles and perspectives to capture these unique qualities.
6. Avoiding Harsh Shadows: Harsh shadows can be distracting and take away from the beauty of greenery. To minimize them, choose shooting locations where the greenery is evenly lit, such as under the canopy of trees or in open shade. Alternatively, use a reflector or soft fill-flash to lighten the shadows and balance the overall exposure.
7. Silhouettes: Silhouettes can be a creative way to capture the shapes and forms of greenery. During sunset or sunrise, position the greenery between your camera and the vibrant sky. Expose for the sky to create a silhouette effect, showcasing the interesting outlines and patterns of the foliage.
8. Experiment with Light Direction: Varying the direction of light can create different moods and effects in your greenery photography. Side lighting can emphasize the textures and details, while front lighting can evenly illuminate the subject. Consider how the light direction interacts with the greenery and use it to convey your desired atmosphere or story.
Remember, understanding and utilizing light is a continuous learning process in photography. Take the time to observe and experiment with different lighting conditions and techniques to discover the unique beauty and possibilities of capturing greenery. By harnessing the power of light, you can create captivating and visually stunning images of the natural world around you.
Adjusting Camera Settings for Greenery Photography
Greenery photography offers a vast array of colors, textures, and details that require careful consideration of camera settings to capture the beauty effectively. Here are some essential camera settings to adjust when shooting greenery:
1. Aperture: Selecting the right aperture is crucial in greenery photography. For close-up shots or macro photography, use a wider aperture (smaller f-number) to create a shallow depth of field. This technique will isolate your subject from the background, making it stand out. Alternatively, for landscape shots, choose a smaller aperture (higher f-number) to maximize the depth of field and ensure that the entire scene, from foreground to background, is in focus.
2. Shutter Speed: Depending on the specific greenery scene and your creative intention, adjust the shutter speed accordingly. If you’re capturing still subjects, such as flowers or foliage on a calm day, you can use a slower shutter speed to allow more light to enter the camera. However, when photographing moving subjects, faster shutter speeds will freeze the action and prevent any blurring.
3. ISO: Use the lowest ISO setting possible to maintain optimal image quality. In well-lit conditions, such as during the golden hour, keep the ISO low (e.g., 100-400). If you are shooting in low light or need faster shutter speeds, you may need to increase the ISO. However, be mindful of noise levels and aim to strike a balance between capturing the desired exposure and minimizing digital noise.
4. White Balance: Adjusting the white balance ensures that colors appear natural and accurate in your greenery photographs. Use the appropriate white balance setting based on the lighting conditions. For example, on a sunny day, you can use the “Daylight” or “Auto” white balance. If the greenery appears too cool or warm, consider using a specific white balance preset or manually adjust it to achieve the desired color tones.
5. Metering Mode: Selecting the right metering mode is crucial to achieve accurate exposures. Evaluative or matrix metering is generally reliable for most greenery scenes as it evaluates the entire frame to determine the exposure. However, in high-contrast situations, consider using spot metering to meter for the most important part of the scene, ensuring that your subject is properly exposed.
6. Focus Mode: When shooting greenery, autofocus modes such as single autofocus (AF-S) or continuous autofocus (AF-C) can be useful depending on the subject and shooting conditions. For static subjects, use AF-S to lock the focus once and recompose if necessary. For subjects in motion, like swaying leaves or flying insects, use AF-C to continuously track the subject and maintain focus.
7. Histogram: Pay attention to the histogram on your camera’s display to ensure proper exposure. The histogram represents the distribution of light and dark tones in your image. Aim for a balanced histogram without any significant clipping at the shadows or highlights, ensuring that you capture a wide range of tones in your greenery photographs.
8. RAW Format: Shooting in RAW format provides greater flexibility for post-processing and allows you to make adjustments without sacrificing image quality. RAW files contain more image data compared to JPEG, enabling you to recover details in highlights or shadows and fine-tune the overall image. Shooting in RAW format is particularly beneficial when dealing with challenging lighting conditions in greenery photography.
9. Bracketing: Consider using exposure bracketing to capture a series of images at different exposures. This technique ensures that you have multiple options to choose from during post-processing. Bracketing is especially useful in high-contrast scenes, allowing you to blend multiple images or selectively adjust exposure for different areas of the photograph.
10. Review and Adjust: Continuously review your camera settings and make adjustments as necessary. Lighting conditions can change rapidly outdoors, so adapt your settings to ensure optimal exposure and to capture the desired effects for each greenery scene you encounter.
Remember, mastering camera settings in greenery photography requires practice and experimentation. By understanding how different settings impact your images and adjusting them accordingly, you will be able to capture the breathtaking beauty of greenery with precision and creativity.
Tips for Shooting Greenery in Different Weather Conditions
Greenery photography can be a rewarding experience no matter the weather conditions. Each weather condition offers unique opportunities and challenges to capture the beauty of greenery. Here are some useful tips for shooting greenery in different weather conditions:
1. Sunny Weather: In bright, sunny conditions, greenery can appear vibrant and saturated. To avoid harsh shadows and overexposed highlights, consider shooting during the golden hour—the first and last hour of sunlight for softer, more flattering lighting. If shooting in direct sunlight, look for shade or use a diffuser to soften the light and minimize contrast.
2. Cloudy or Overcast Weather: Cloudy or overcast days provide diffused lighting that is perfect for shooting greenery. The clouds act as natural diffusers, softening the light and reducing harsh shadows. Take advantage of the even lighting to capture the intricate details, colors, and textures of the greenery. Experiment with different angles and compositions to bring out the richness and depth in your images.
3. Rainy Weather: Rain can add an element of drama and freshness to your greenery photography. Use the raindrops on leaves and petals to create interesting and unique compositions. Consider experimenting with close-up shots to capture the details of rain-soaked leaves or the reflections on surfaces. Be sure to protect your camera from water using rain covers or umbrellas, and use a lens hood to shield the front element from raindrops.
4. Foggy or Misty Weather: Shooting greenery in fog or mist can create a magical and ethereal atmosphere. The mist adds a softness and a sense of mystery to the scene. Look for layers of greenery receding into the fog to create depth and atmosphere in your images. Use a longer lens and experiment with composition to capture the layers and the serenity of the misty surroundings.
5. Autumn/Fall Colors: During the autumn season, the greenery transforms into a stunning array of warm and vibrant colors. Embrace the golden, red, and orange hues of the leaves to create striking compositions. Look for contrast between the colorful foliage and the greenery around it. Use wide-angle lenses to capture the grandeur of fall landscapes or macro lenses to focus on the delicate details of individual leaves.
6. Snowy Landscapes: Greenery covered in a blanket of snow offers a unique and serene photographic opportunity. Use the white background to create high-contrast compositions, emphasizing the details and textures of the snow-covered greenery. Pay attention to the exposure and use exposure compensation to prevent the snow from appearing too bright or washing out the details.
7. Windy Weather: Shooting greenery in windy conditions can be challenging, as it can result in blurry images. To minimize camera shake, use a tripod or increase your shutter speed to freeze the motion. Additionally, consider photographing the greenery in sheltered areas or using a fast burst mode to capture multiple images and increase the chances of getting a sharp shot.
8. Changing Seasons: Each season offers its own unique charm and characteristics when shooting greenery. Explore the fresh growth of spring, the lushness of summer, the vibrant colors of fall, and the stark beauty of winter. Pay attention to the elements that define each season and showcase the transitions between them, allowing you to capture the ever-changing beauty of nature throughout the year.
9. Embrace the Weather: Regardless of the conditions, embrace the weather and let it add character to your greenery photographs. Rain, fog, or dramatic skies can create a mood and atmosphere that enhances the visual impact of your images. Don’t be afraid to experiment and let the weather conditions guide your creativity.
Remember, shooting greenery in different weather conditions allows you to capture diverse and captivating images. Adapt your approach, experiment with different techniques, and embrace the unique opportunities that each weather condition presents. By doing so, you’ll be able to create stunning greenery photographs that showcase the beauty of nature under various atmospheric conditions.
Read more: How To Incorporate Photography In Home Decor
Post-processing Techniques for Enhancing Greenery Images
Post-processing is an essential step in bringing out the full potential of your greenery images. It allows you to refine and enhance the colors, tones, and details captured in-camera. Here are some post-processing techniques to consider when editing your greenery images:
1. Adjust Exposure and Contrast: Start by adjusting the overall exposure and contrast of your image. Use tone curves or levels adjustments to fine-tune the brightness and contrast, ensuring that the greenery stands out while maintaining a balanced and pleasing overall tone.
2. Enhance Colors: Use selective color adjustments or saturation/vibrance adjustments to enhance the natural colors of the greenery. Increase the saturation and vibrance to make the greens pop while ensuring they remain realistic. Pay attention to individual color channels to refine the hues and bring out the specific tones of the foliage, flowers, or other elements within the greenery.
3. Fine-tune White Balance: Adjust the white balance if necessary to achieve the desired color temperature and tint. Fine-tuning the white balance ensures that the greens appear natural and pleasing to the eye. Experiment with different white balance settings depending on the lighting conditions and aesthetics you want to convey.
4. Sharpen and Enhance Details: Use selective sharpening masks or tools to enhance the details and textures within the greenery. Be careful not to oversharpen, ensuring that the details appear crisp and natural. Use local adjustment brushes or tools to selectively sharpen specific areas, such as leaves or flowers, to make them stand out.
5. Reduce Noise: Depending on the ISO and the camera used, you may encounter digital noise in your greenery images, especially in low-light situations. Utilize noise reduction tools or plugins to reduce noise while preserving the quality of the image. Be cautious not to over-smooth the image, as it can result in loss of detail.
6. Crop and Straighten: Consider cropping and straightening your image to create a more pleasing composition and eliminate any distractions. Cropping can help remove unnecessary elements and focus the viewer’s attention on the main subject or the most interesting parts of the greenery. Straightening the horizon or aligning vertical lines can also improve the overall balance of the image.
7. Remove Distractions: Use clone stamp or healing tools to remove any distractions or imperfections in the greenery, such as stray branches, debris, or blemishes. Be careful to maintain a natural appearance and be mindful of the image’s integrity while making any adjustments.
8. Experiment with Filters and Presets: Explore various filters or presets available in post-processing software to add different moods and effects to your greenery images. Some presets may enhance the saturation, add a vintage look, or emphasize specific tones. Experiment with different filters and presets to find the style that best complements the mood and atmosphere of your image.
9. Create Beautiful Black and White: Consider converting some of your greenery images to black and white. This can add a timeless and artistic look to the photographs, emphasizing shapes, textures, and patterns within the greenery. Experiment with different black and white conversion techniques and adjust the tones to achieve the desired impact.
10. Maintain a Natural Appearance: While post-processing can enhance and refine your greenery images, it’s crucial to maintain a natural and realistic appearance. Avoid excessive editing that may result in an unnatural look. Balance the adjustments and enhancements to achieve a final image that showcases the beauty of the greenery while retaining the authenticity of the scene.
Remember, post-processing is a creative process that allows you to bring out the full potential of your greenery images. Experiment with different techniques, but always strive to create a final result that stays true to the essence of the greenery and reflects your artistic vision. With practice and experimentation, you’ll develop your unique editing style and enhance your greenery images to their fullest potential.
Conclusion
Shooting greenery with your DSLR camera opens up a world of creativity, beauty, and connection with nature. The techniques and considerations discussed in this article will help you capture stunning images that bring out the true essence of greenery. Whether you’re a beginner or an experienced photographer, these tips will elevate your greenery photography skills and enhance your overall experience.
We started by understanding the basics of DSLR photography and the importance of shooting greenery. The equipment needed for capturing greenery, including the right camera, lenses, and accessories, was outlined to ensure you have the necessary tools to create exceptional images.
Setting up your DSLR camera correctly is vital, from adjusting camera settings to composition techniques. By utilizing the rule of thirds, leading lines, and framing, you can create visually compelling compositions that draw the viewer’s attention to the beauty of greenery. Proper lighting considerations help you make the most of different lighting conditions, such as golden hour, diffused light, or even challenging weather conditions, adding mood and atmosphere to your imagery.
Understanding how to adjust camera settings, such as aperture, shutter speed, ISO, and white balance, allows you to have control and achieve the desired effects in greenery photography. Additionally, post-processing techniques further enhance the beauty of your greenery images. Adjusting exposure and contrast, enhancing colors and details, and fine-tuning white balance bring out the best in your photographs.
Don’t forget to consider the weather conditions and their impact on your greenery photography. From sunny to rainy, foggy to snowy, each weather condition offers unique opportunities to capture stunning greenery images. Embrace the changes in seasons and adapt your approach to showcase the ever-changing beauty of nature.
Ultimately, greenery photography is a blend of technical expertise, compositional knowledge, and artistic vision. It’s a way to connect with nature, find inspiration, and create images that evoke emotions and appreciation for the natural world.
So, grab your DSLR camera, venture into the green landscapes, and let your creativity unfold. Explore the vibrant colors, intricate details, and diverse textures that greenery offers. Remember to experiment, practice, and embrace the beauty of nature through the lens of your camera. With dedication and passion, your greenery photography skills will continue to flourish, and your images will leave a lasting impression on viewers.
Frequently Asked Questions about How To Shoot Greenery In DSLR Photography
Was this page helpful?
At Storables.com, we guarantee accurate and reliable information. Our content, validated by Expert Board Contributors, is crafted following stringent Editorial Policies. We're committed to providing you with well-researched, expert-backed insights for all your informational needs.


0 thoughts on “How To Shoot Greenery In DSLR Photography”