Articles
How To Make A Shooting Board Woodworking
Modified: October 18, 2024
Discover the best articles on how to make a shooting board for woodworking and enhance your woodworking skills with expert tips and techniques.
(Many of the links in this article redirect to a specific reviewed product. Your purchase of these products through affiliate links helps to generate commission for Storables.com, at no extra cost. Learn more)
Introduction
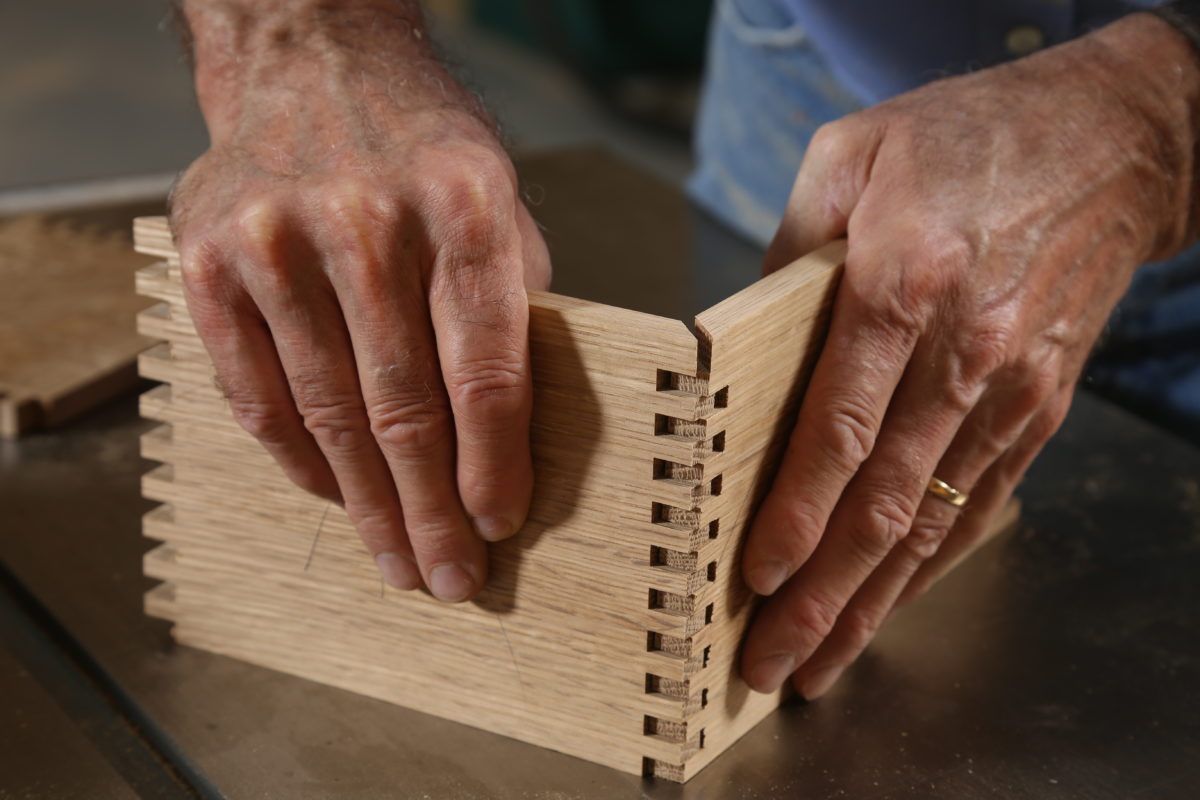
Welcome to the world of woodworking! If you’re a woodworking enthusiast looking to improve the accuracy and precision of your cuts, then a shooting board is a must-have tool in your arsenal. A shooting board is a versatile woodworking jig that allows you to trim and square the ends of boards, creating clean, straight edges for seamless joinery.
In this article, we will guide you step-by-step on how to make a shooting board for woodworking. Whether you are a beginner or a seasoned woodworker, building your own shooting board can be a rewarding and cost-effective project. With just a few materials and tools, you’ll be able to enhance the quality of your woodworking projects and achieve professional-level results.
Before we dive into the step-by-step process, let’s first gather the materials and tools you’ll need.
Key Takeaways:
- Elevate the precision of your woodworking cuts by crafting a shooting board with just a few materials and tools. Achieve clean, straight edges for seamless joinery and unleash your creativity with improved accuracy.
- Building your own shooting board is a rewarding endeavor that enhances the quality of your woodworking projects. With proper care, this versatile tool will serve you well for many projects to come, allowing for consistent and repeatable cuts.
Read more: How To Make A Chess Board With Hand Tools
Materials and Tools Needed
Before you begin building your shooting board, gather the following materials and tools:
Materials:
- 3/4 inch thick plywood or hardwood for the base
- 1/4 inch thick plywood or hardwood for the fence
- Wood glue
- Screws
- Sanding paper (various grits)
- Finish (varnish, lacquer, or wax)
Tools:
- Table saw
- Miter saw or hand saw
- Drill
- Screwdriver
- Sanding block or power sander
- Measuring tape
- Pencil
- Ruler or straightedge
- Clamps
Once you have gathered all the necessary materials and tools, you’re ready to move on to the next step: selecting the wood for your shooting board base.
Step 1: Selecting the Wood
The first step in making a shooting board is selecting the right wood for your base. The base serves as the foundation of the shooting board, providing stability and support for your workpiece.
When choosing the wood for the base, it’s important to select a sturdy and flat material. Plywood or hardwood that is at least 3/4 inch thick is recommended for the base. Plywood is a popular choice because it is usually more affordable and readily available.
Make sure the plywood or hardwood you select is free from bowing, warping, or any visible defects. This will ensure that your shooting board remains stable and accurate throughout its use.
Remember that the size of your shooting board depends on the size of the workpieces you will be working with. Consider the maximum width and length of the boards you typically work with and choose a base material that will accommodate those sizes.
Once you have selected the wood for your base, mark the dimensions on the wood using a pencil and a straightedge. Use a table saw or a miter saw to cut the base to its final dimensions.
Now that you have your base, let’s move on to preparing it for assembly in the next step.
Read more: How To Make A Cutting Board Using Hand Tools
Step 2: Preparing the Base
With the wood for your shooting board base cut to the desired dimensions, it’s time to prepare it for assembly. This step involves creating a flat and smooth surface on the base to ensure accurate and precise cuts.
Start by sanding the top surface of the base using sandpaper. Begin with a rough grit (around 80 or 100) to remove any roughness or imperfections. Gradually move to a finer grit (such as 120 or 150) to achieve a smooth finish.
Make sure to sand in the direction of the wood grain to prevent scratches or tear-out. Use a sanding block or a power sander for even and consistent sanding. Be thorough in your sanding process, paying attention to all edges and corners of the base.
Once you have achieved a smooth surface, wipe away any dust or debris from the sanding. You can use a clean cloth or a tack cloth for this purpose.
Next, apply a finish to the base to protect and enhance the wood. There are various options for finishes such as varnish, lacquer, or wax. Choose a finish that suits your preference and provides durability.
Apply the finish according to the manufacturer’s instructions, usually using a brush or a cloth. Allow the finish to dry completely before moving on to the next step.
Now that your shooting board base is prepared, it’s time to move on to the next step and create the fence.
Step 3: Cutting the Fence
The fence is an essential component of the shooting board as it provides a reference surface for the workpiece and ensures consistent and accurate cuts. In this step, we will guide you on how to cut and shape the fence.
Start by selecting a piece of 1/4 inch thick plywood or hardwood for the fence. Ensure that the width of the fence matches the height of the base. This will allow the fence to provide adequate support and stability during use.
Using a measuring tape and a pencil, mark the length of the fence on the selected wood. Make sure to consider any overhang you desire for added support. Use a table saw or a miter saw to cut the fence to its final length.
Once the fence is cut to length, you may want to round over the top edge for added comfort and to prevent damage to your workpiece. This can be achieved using a router with a round-over bit or by sanding the edge with sandpaper until it is smooth.
After rounding over the top edge, sand the entire fence to achieve a smooth and clean finish. Start with a rough grit sandpaper and gradually move to finer grits for a polished look.
Ensure that the fence is flat and free from any noticeable imperfections or defects. This will help maintain accuracy and precision in your cuts.
Once the fence is sanded and smoothed, wipe away any dust or debris. You can use a clean cloth or a tack cloth for this purpose.
Now that you have a well-prepared fence, it’s time to move on to the next step and attach the fence to the base.
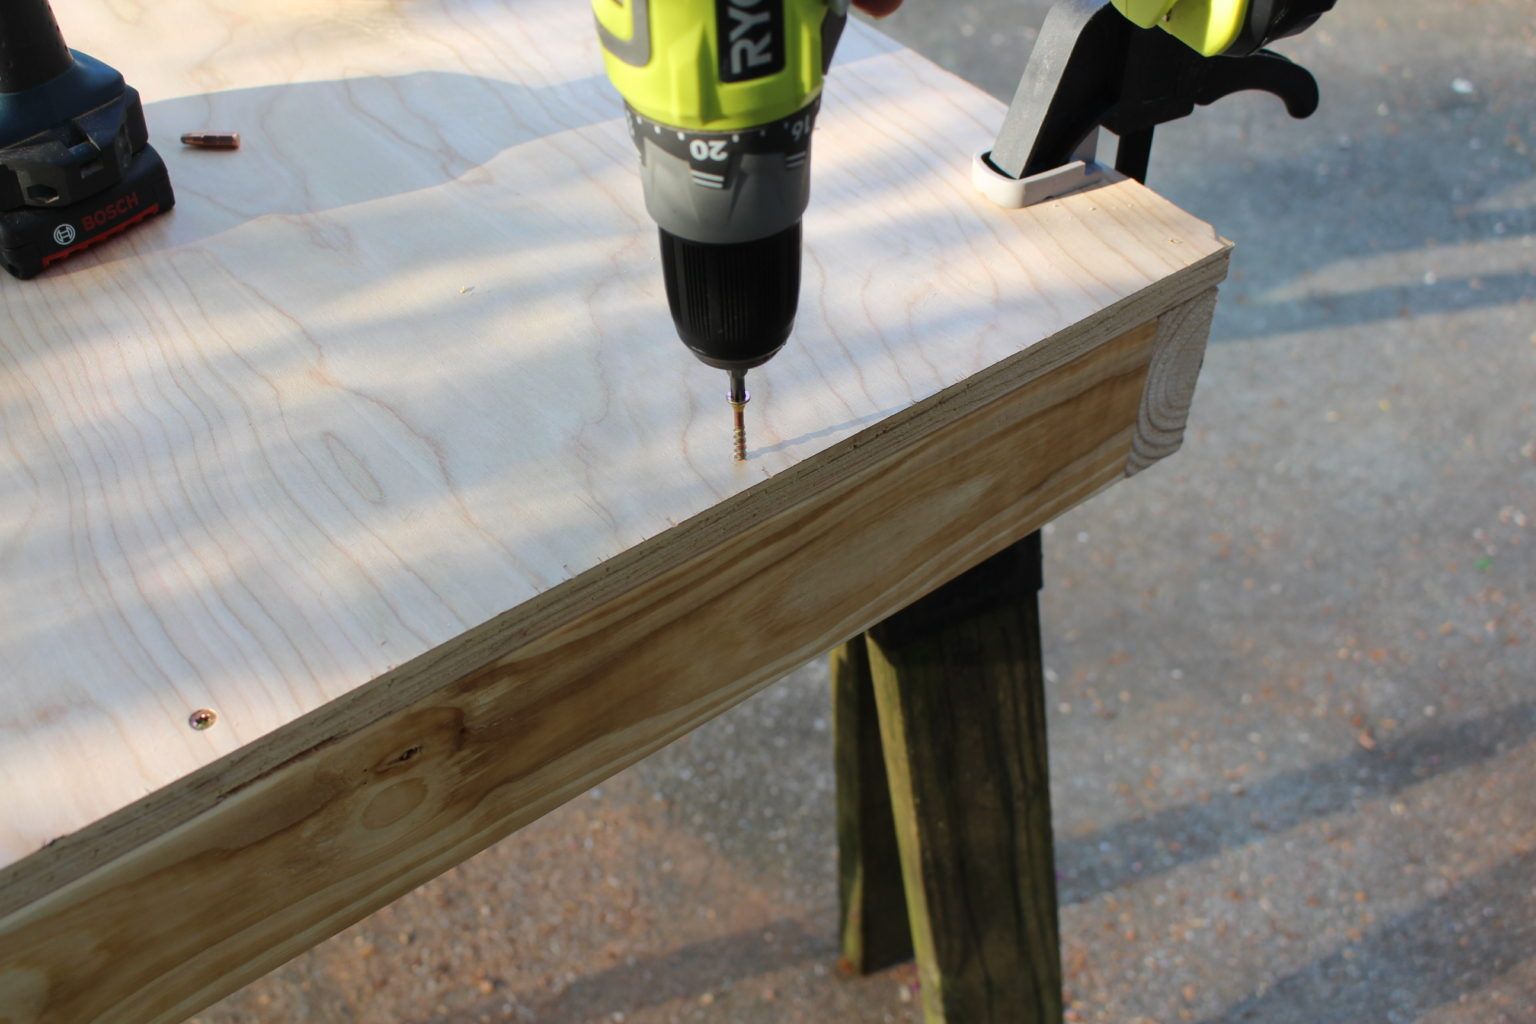
Step 4: Attaching the Fence to the Base
Now that you have your shooting board base and fence prepared, it’s time to attach the fence to the base. This step is crucial as it ensures stability and alignment during use.
Start by positioning the fence on the top surface of the shooting board base. Align the edges of the fence with one of the sides of the base. Make sure the top edge of the fence is flush with the top surface of the base.
Once the fence is in the desired position, use a pencil to mark the location of screw holes on the base. This will guide you in placing the screws for a secure attachment.
Using a drill and an appropriate sized drill bit, create pilot holes on the marked locations. This will prevent the wood from splitting when you drive the screws in.
Apply a thin layer of wood glue along the mating surfaces of the fence and the base. This will provide extra strength and stability to the joint.
Position the fence back onto the base, aligning the screw holes with the pilot holes. Drive the screws into the pilot holes using a screwdriver or a drill with a screwdriver bit. Ensure that the screws are flush with or slightly below the surface of the wood to avoid interference during use.
Once the screws are securely fastened, wipe away any excess glue that may have squeezed out during the attachment process.
Allow the glue to dry completely according to the manufacturer’s instructions before moving on to the next step.
Now that the fence is firmly attached to the shooting board base, it’s time to proceed to the next step and create a shooting plane.
When making a shooting board for woodworking, ensure that the fence is perfectly square to the base to achieve accurate and clean cuts. Use a reliable square to check and adjust the alignment as needed.
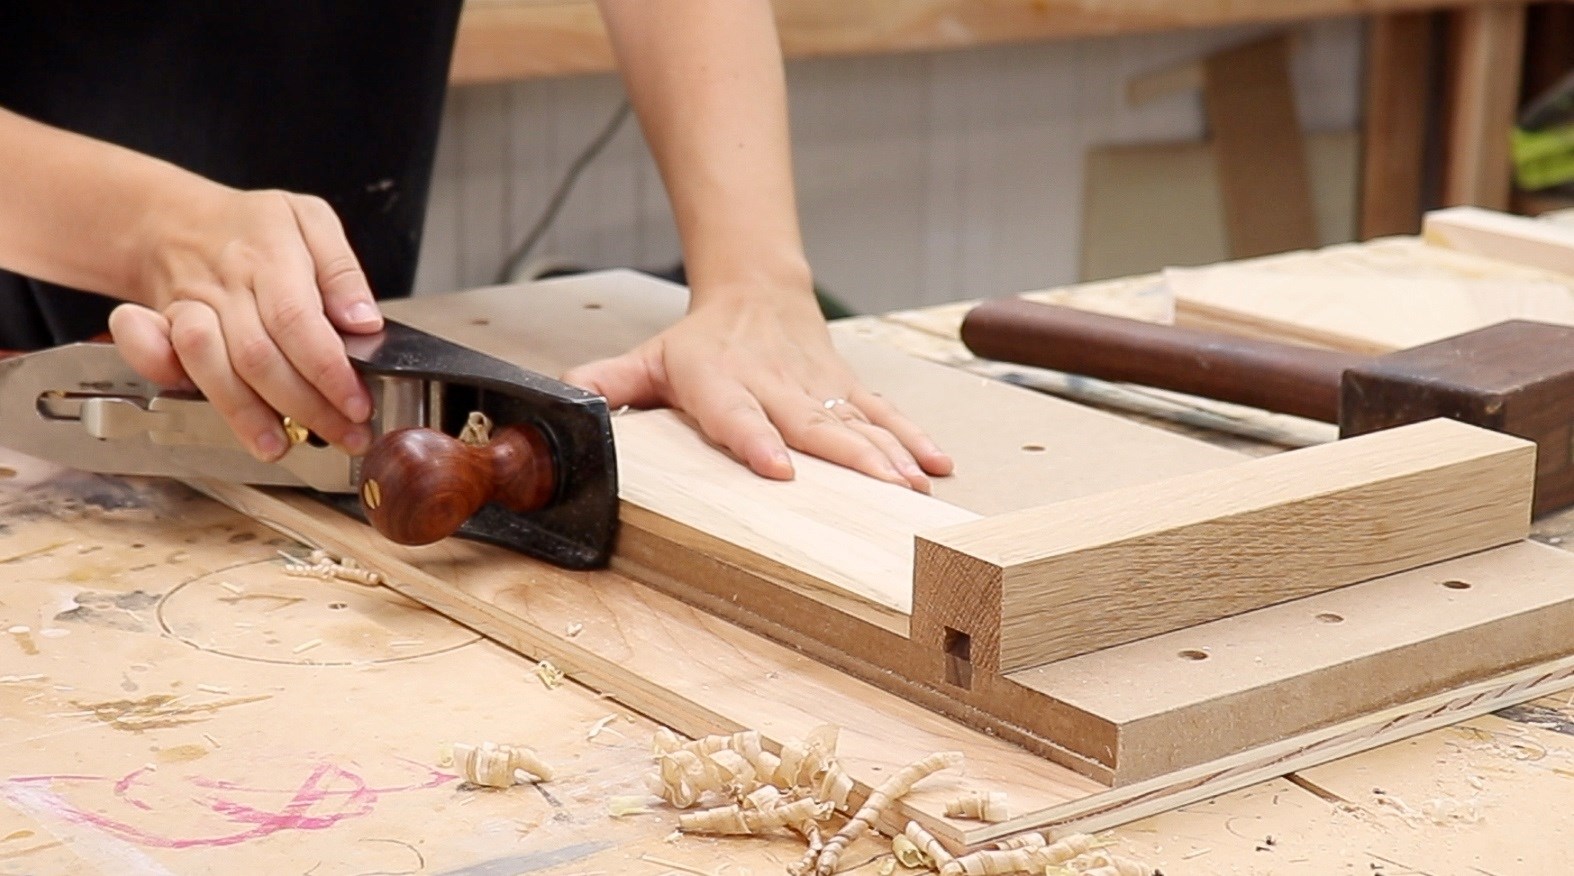
Step 5: Creating a Shooting Plane
Creating a shooting plane is a crucial step in the construction of a shooting board. The shooting plane acts as a guide for your hand when making accurate and precise cuts. In this step, we will guide you on how to create a shooting plane for your shooting board.
Start by selecting a piece of hardwood that is flat and straight. The shooting plane should be slightly wider and longer than the workpieces you plan to trim. This will provide ample support and stability during the cutting process.
Using a table saw or a miter saw, cut the shooting plane to the desired dimensions. Aim for a thickness that is comfortable to grip and maneuver while maintaining stability.
Once the shooting plane is cut to size, sand the top surface and the edges to achieve a smooth and flat finish. Start with a rough grit sandpaper and gradually work your way up to finer grits for a polished look.
Ensure that the shooting plane is free from any imperfections or rough spots that may interfere with the cutting process. A smooth and flat surface is crucial for achieving accurate and clean cuts.
After sanding, wipe away any dust or debris from the shooting plane using a clean cloth or a tack cloth.
Now, with the shooting plane ready, you can proceed to the next step and add a stop block to enhance the functionality of your shooting board.
Read more: How To Flatten Board With Hand Tools
Step 6: Adding a Stop Block
Adding a stop block to your shooting board enhances its versatility and allows for consistent and repeatable cuts. A stop block provides a reference point to ensure that multiple workpieces are cut to the same length consistently. In this step, we will guide you on how to add a stop block to your shooting board.
Start by selecting a piece of hardwood for the stop block. The size of the stop block will depend on the desired length of the workpieces you plan to cut. Make sure the thickness of the stop block matches the height of the fence on your shooting board.
Position the stop block against the fence on your shooting board, aligning it with the desired length for your workpieces. Mark the location of the stop block on the shooting board base using a pencil.
Using a drill and an appropriate sized drill bit, create pilot holes on the marked location for the stop block screws.
Apply a thin layer of wood glue on the mating surfaces of the stop block and the shooting board base. This will ensure a secure and stable attachment.
Position the stop block back onto the shooting board base, aligning it with the previously marked location. Drive screws into the pilot holes to securely attach the stop block to the shooting board base.
Once the stop block is securely in place, check its alignment and adjust if necessary. The stop block should be perpendicular to the fence, ensuring that your cuts are square and accurate.
Allow the wood glue to dry completely according to the manufacturer’s instructions before moving on to the next step.
Now that your shooting board has a stop block, you are almost ready to start using it. But first, let’s move on to the final step and make sure your shooting board is properly sanded and finished for optimum performance.
Step 7: Sanding and FinishingAfter assembling the components of your shooting board, it’s important to perform some final touches to ensure optimal performance and durability. In this step, we will guide you through the process of sanding and finishing your shooting board.
Start by sanding the entire shooting board, including the base, fence, shooting plane, and stop block. Begin with a rough grit sandpaper to remove any rough edges or imperfections. Gradually move to a finer grit sandpaper, such as 120 or 150, to achieve a smooth and polished finish.
Sand all surfaces in the direction of the wood grain to avoid scratches or tear-out. Use a sanding block or power sander for even and consistent sanding. Pay attention to all edges and corners to ensure a uniform finish.
Once you have finished sanding, wipe away any dust or debris from the shooting board using a clean cloth or a tack cloth. Ensure that the surface is clean and smooth before proceeding to the next step.
Now, it’s time to apply a finish to your shooting board. The finish not only enhances the appearance of the wood but also protects it from moisture and wear.
There are various options for finishes, such as varnish, lacquer, or wax. Choose a finish that suits your preferences and provides the desired level of protection and durability.
Apply the finish according to the manufacturer’s instructions. This may involve brushing or spraying the finish onto the wood surfaces. Ensure even coverage and allow the finish to dry completely between coats.
Once the finish has dried, lightly sand the shooting board with a fine grit sandpaper to smooth out any imperfections or roughness. Wipe away any sanding residue and apply additional coats of finish if desired.
Finally, let the shooting board dry and cure according to the finish manufacturer’s instructions.
Congratulations! You have successfully created a shooting board for woodworking. It’s now ready to be used for making precise and accurate cuts in your woodworking projects.
Remember to maintain and periodically inspect your shooting board for any signs of wear or damage. With proper care, your shooting board will continue to serve you well for many woodworking projects to come.
Now that you’re equipped with a well-crafted shooting board, go ahead and explore the possibilities it offers in elevating the quality and precision of your woodworking skills!
Conclusion
Building your own shooting board for woodworking is a rewarding endeavor that can greatly enhance the accuracy and precision of your cuts. With just a few materials and tools, you can create a versatile tool that will elevate the quality of your woodworking projects.
We have covered the step-by-step process of making a shooting board, starting from selecting the wood and preparing the base, to cutting the fence, attaching the fence to the base, creating a shooting plane, adding a stop block, and finally, sanding and finishing the shooting board.
Throughout the process, it’s important to pay attention to detail, ensuring that all components are flat, smooth, and securely attached. The use of proper materials and tools, along with precision in the assembly, will guarantee optimal performance of your shooting board.
Once your shooting board is complete, you’ll have a versatile tool at your disposal. It will allow you to trim and square the ends of boards, creating clean, straight edges for seamless joinery. The added stop block will enable you to make consistent and repeatable cuts.
Remember to maintain your shooting board by periodically inspecting for wear or damage and making any necessary repairs. With proper care, your shooting board will serve you well for a long time.
Now, armed with your newly created shooting board, you can confidently tackle woodworking projects with improved accuracy and precision. It’s time to unleash your creativity and take your woodworking skills to new heights!
Happy woodworking!
Frequently Asked Questions about How To Make A Shooting Board Woodworking
Was this page helpful?
At Storables.com, we guarantee accurate and reliable information. Our content, validated by Expert Board Contributors, is crafted following stringent Editorial Policies. We're committed to providing you with well-researched, expert-backed insights for all your informational needs.

0 thoughts on “How To Make A Shooting Board Woodworking”