Home>Garden Essentials>What Veggies Have Seeds
Garden Essentials
What Veggies Have Seeds
Modified: August 25, 2024
Discover which garden vegetables have seeds and learn how to save them for future crops and sustainability. Planting and harvesting tips included.
(Many of the links in this article redirect to a specific reviewed product. Your purchase of these products through affiliate links helps to generate commission for Storables.com, at no extra cost. Learn more)
Introduction
Welcome to the fascinating world of vegetable seeds! In the bountiful realm of gardening, there is a diverse array of plant varieties to explore, each with its unique characteristics. While some vegetables are grown from bulbs or cuttings, many are cultivated from seeds. In this article, we will delve into the realm of vegetable seeds and discuss some of the popular veggies that contain seeds.
Seeds are essential for the growth and propagation of plants. They contain the genetic information necessary for a plant to develop and produce fruits or vegetables. They serve as the building blocks of life, and understanding them is vital for any aspiring gardener.
By identifying which vegetables have seeds, gardeners can make informed choices about what to grow, how to care for their plants, and even save seeds for future seasons. Additionally, knowing which vegetables require seed-saving techniques can help contribute to sustainability and self-sufficiency in gardening practices.
Without further ado, let’s dive into the world of vegetable seeds and explore some of the veggies that are known for their abundant seeds.
Key Takeaways:
- 1. Veggies like tomatoes, cucumbers, and peas are not just tasty, they’re also full of seeds that can be saved and replanted for a bountiful garden. Embrace the wonder of seeds and enjoy the process of growing your own veggies!
- 2. By saving seeds from your favorite veggies, like zucchini and corn, you can continue the cycle of growth, maintain unique flavors, and contribute to sustainable gardening. Embrace the joy of nurturing plants from seed to harvest!
Read more: What Fruit Does Not Have Seeds
Understanding Vegetable Seeds
Before we explore the vegetables that have seeds, let’s take a moment to understand the different aspects of vegetable seeds and how they contribute to the growth and development of plants.
Seeds are the reproductive structures of plants. They contain the embryo of the plant, along with the necessary nutrients to support its growth until it can establish itself and start producing its own food through photosynthesis. Essentially, seeds are tiny powerhouses of life.
There are two main types of seeds: monocotyledonous (monocots) and dicotyledonous (dicots). Monocots, as the name suggests, have one cotyledon or seed leaf, while dicots have two. This distinction is important as it affects the way the plant grows and develops.
In addition to the cotyledons, seeds consist of various other parts, including the seed coat, endosperm, and embryo. The seed coat provides protection for the embryo, while the endosperm acts as a source of nutrients for the developing seedling.
When it comes to planting vegetable seeds, factors such as soil temperature, moisture, and sunlight play crucial roles in the germination process. Each type of vegetable seed has specific requirements for optimal germination. Some seeds need to be soaked, while others need to be planted directly in the soil. Understanding these requirements will help ensure successful seed germination.
It’s important to note that not all vegetables produce seeds that are suitable for saving and replanting. Some vegetables are hybrids, which means they are the result of cross-pollination between different parent plants. Seeds from hybrid plants often do not produce plants with the same characteristics as the parent plant. Therefore, it’s recommended to purchase seeds or seedlings from reputable sources to ensure desired traits in your vegetable garden.
Now that we have a basic understanding of vegetable seeds, let’s move on to explore some of the popular veggies that contain seeds.
Vegetables with Seeds
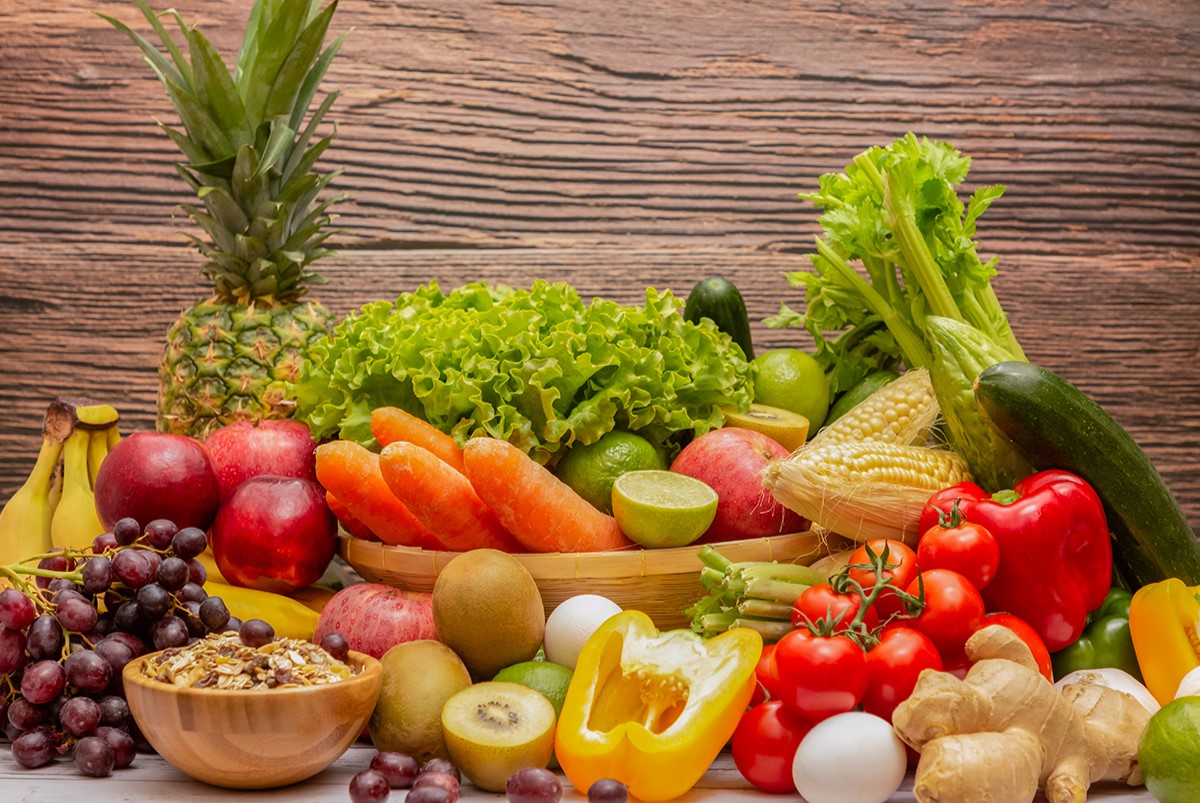
When it comes to vegetables, there are plenty of tasty options that contain an abundance of seeds. Let’s take a closer look at some of these flavorful and nutritious veggies:
- Tomatoes: Tomatoes are not only a staple in many dishes, but they are also a fantastic source of seeds. Whether you prefer the juicy and tangy cherry tomatoes or the large and meaty beefsteak tomatoes, slicing them open reveals a cluster of seeds nestled inside the fruit.
- Cucumbers: Cool and refreshing, cucumbers are a popular vegetable in salads and sandwiches. Slicing into a cucumber will expose a cavity filled with numerous seeds. These seeds can be harvested and dried for future planting.
- Peppers: Whether it’s bell peppers or spicy chili peppers, these vibrant and versatile vegetables are packed with seeds. Cut open a pepper, and you’ll find a host of seeds connected to the placenta on the inside. These seeds can be dried and saved for planting in your garden.
- Eggplant: Known for its glossy purple skin and creamy flesh, eggplants are not only delicious but also contain numerous small seeds. These seeds are found in the soft, central portion of the eggplant and can be saved for growing your own eggplants in the future.
- Squash: Varieties of squash, including zucchini and butternut squash, have seeds embedded in their flesh. When you cut open a squash, you’ll find a cavity filled with large, flat seeds. These seeds can be saved and planted to enjoy a fresh batch of squash in your garden.
- Zucchini: Zucchini, a type of summer squash, deserves a separate mention due to its prolific seed production. This vegetable is known for its quick growth and abundant seeds. Its seeds can be collected and dried for replanting or even enjoyed as a nutritious snack when roasted.
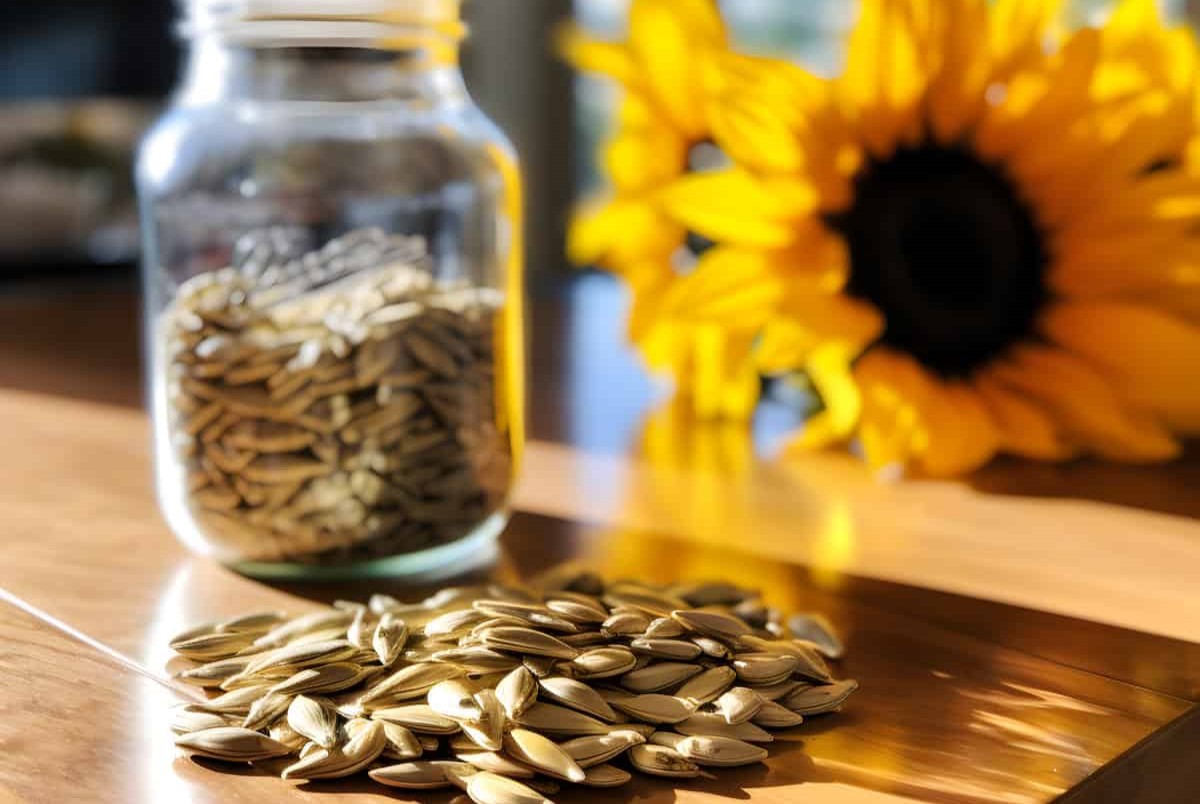
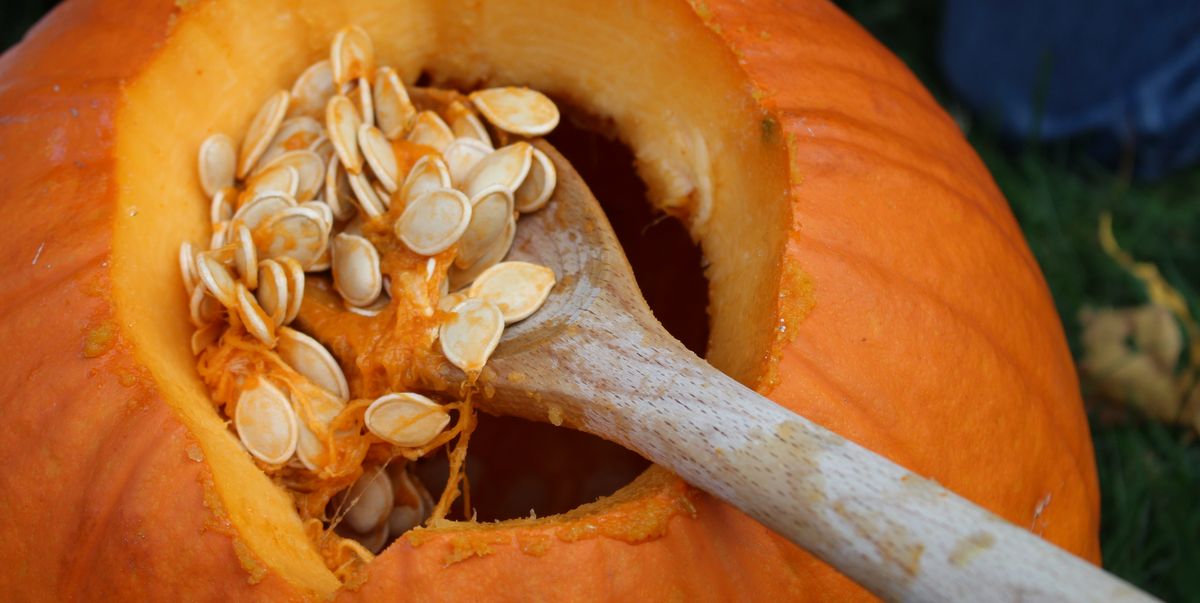
- Pumpkins: The beloved pumpkin, often associated with autumn and Halloween, produces large and nutritious seeds. These seeds, also known as pepitas, can be harvested from a ripe pumpkin and either roasted and enjoyed as a snack or saved for planting the following year.
- Peas: Peas are not only tasty but are also a fantastic source of protein and fiber. Inside the pod, you’ll find multiple peas, each containing its own set of seeds. These seeds can be saved and planted to grow your own pea plants.
- Beans: Whether it’s green beans, kidney beans, or any other variety of legumes, beans are a great source of seeds. The seeds are typically found inside the bean pods and can be dried and saved for future planting.
- Corn: Corn is a staple crop that produces an abundance of seeds. Each cob is filled with rows of plump kernels, each of which is a seed. Corn seeds can be saved for replanting or enjoyed as a delicious snack when roasted or popped.
These are just a few examples of vegetables that contain seeds. Exploring the world of vegetable seeds opens up a whole new realm of possibilities for gardening, seed-saving, and enjoying fresh produce straight from your garden.
Now that we’ve explored some vegetables with seeds, let’s wrap up the article with some final thoughts.
Tomatoes
Tomatoes are undoubtedly one of the most popular and versatile vegetables in the garden. Whether eaten fresh, cooked into sauces, or used in salads, tomatoes are a delicious and nutritious addition to any meal. But did you know that tomatoes are also packed with seeds?
When you slice open a tomato, you’ll discover a beautiful array of seeds encased in a pulpy matrix. Each tomato can contain dozens, or even hundreds, of seeds depending on its size. These seeds are usually oval-shaped and vary in color from white to yellow to dark brown.
Tomato seeds are relatively easy to save for future planting. Simply scoop out the seeds along with their surrounding gel-like substance and transfer them to a container. Add water to the container and allow the mixture to ferment for a few days. This fermentation process helps to remove any chemicals that may inhibit germination. After fermentation, rinse the seeds thoroughly and lay them out to dry on a paper towel. Once completely dry, store them in a cool and dry place until you’re ready to plant them.
When it comes to planting tomato seeds, you have two options: starting them indoors or directly sowing them in the garden. Starting seeds indoors allows for an earlier planting and gives you greater control over environmental conditions. However, if you live in an area with a long growing season, you can also sow tomato seeds directly into the garden after the danger of frost has passed.
Tomatoes are warm-season plants that thrive in full sun and well-drained soil. They require regular watering to keep the soil evenly moist but not waterlogged. As the plants grow, you may need to provide support by staking or using cages to keep the vines upright.
Once the tomatoes mature and ripen, you can enjoy them in a multitude of ways. Add them to salads, slice them for sandwiches, or use them as the base for homemade sauces and salsas.
By saving tomato seeds from the fruits you grow, you can continue the cycle of growth and enjoy a never-ending supply of fresh tomatoes year after year. So, whether you’re a fan of cherry tomatoes, beefsteak tomatoes, or any other variety, don’t forget to appreciate the incredible abundance of seeds that tomatoes have to offer.
Now that we’ve explored tomatoes, let’s move on to another seed-filled vegetable – cucumbers.
Cucumbers
When it comes to refreshing and hydrating vegetables, cucumbers are at the top of the list. These versatile veggies are not only low in calories but also contain a considerable number of seeds.
Cucumbers have a unique anatomy that showcases their plentiful seeds. When you slice open a cucumber, you’ll notice a hollow center filled with gelatinous material and seeds. These seeds are small and have a slightly oblong shape.
Harvesting cucumber seeds is relatively straightforward. Simply scrape them out of the cucumber using a spoon or your fingers, ensuring you collect as many seeds as possible. It’s important to note that cucumbers from grocery stores are often waxed, so it’s best to choose fresh cucumbers from your own garden or a local farmer’s market to ensure the seeds are viable for planting.
Before storing cucumber seeds, it’s essential to remove the gel-like substance surrounding them. This can be done by placing the seeds in a strainer and gently rinsing them under running water. The water will wash away the gel, leaving you with clean and viable seeds. Afterward, pat the seeds dry with a paper towel and lay them out to air dry completely. Once dry, store them in a cool and dry place until you’re ready to plant.
When it comes to planting cucumber seeds, there are a few key factors to consider. Cucumbers thrive in warm weather, so it’s best to sow the seeds when the soil temperature reaches around 70°F (21°C) or higher. Additionally, cucumbers prefer well-drained soil and full sun exposure for optimal growth.
Cucumber seeds can be directly sown into the garden or started indoors. If starting indoors, plant the seeds in peat or compostable pots about three weeks before the last expected frost. This will give the seedlings a head start and allow you to transplant them into the garden once the weather warms up.
Whether you’re growing cucumbers for pickling or slicing, they require consistent moisture to thrive. Water them regularly, ensuring the soil remains evenly moist. Providing support for the vines, such as trellises or stakes, can also help maximize space and improve airflow, reducing the risk of diseases.
When cucumbers reach maturity, the abundance of seeds becomes more apparent. These seeds can either be saved for future planting or removed if desired. To save seeds, allow the cucumbers to fully ripen on the vine until they turn yellow and the skin becomes slightly tough. Cut open the cucumber, collect the seeds, and dry them thoroughly before storing them in a cool and dry place.
Whether enjoyed fresh in salads, transformed into refreshing chilled soups, or pickled for a tangy crunch, cucumbers are a delicious and nutritious addition to any recipe. So, next time you bite into a crisp cucumber, take a moment to appreciate the tiny seeds that hold the potential for even more cucumber goodness in the future.
Now, let’s move on to another seed-packed vegetable – peppers.
Read more: What Fruits Have Seeds In Them
Peppers
Peppers are not just known for their vibrant colors and varying levels of heat; they are also packed with numerous seeds. Whether you enjoy the mild sweetness of bell peppers or the spicy kick of chili peppers, these delicious vegetables offer a delightful array of seeds.
When you slice open a pepper, you’ll discover a cavity filled with seeds attached to the placenta, the white membrane that runs along the inside. The size and shape of pepper seeds can vary depending on the variety, ranging from small and round to larger and plumper.
To save pepper seeds, start by removing them from the pepper. You can simply scoop them out with a spoon or gently squeeze the pepper to release the seeds. Separate the seeds from the placenta, rinsing them under cool water to remove any clingy pulp or residues. After rinsing, spread the seeds out on a paper towel or screen to dry. Make sure they are completely dry before storing them in a cool and dry place for future planting.
Peppers are warm-season vegetables that thrive in full sun and well-drained soil. They require a longer growing season, so depending on your climate, it may be necessary to start pepper seeds indoors several weeks before the last expected frost. This gives them a head start and increases the chances of a successful harvest.
When starting pepper seeds indoors, sow them in seed trays or small pots filled with a well-draining seed starting mix. Keep the soil consistently moist and maintain a temperature of around 70-80°F (21-27°C) for optimal germination. Once the seedlings have developed a few sets of true leaves, they can be transplanted into larger containers or the garden.
Peppers are generally self-pollinating, which means they don’t heavily rely on pollinators like bees or wind for successful fertilization. However, if you want to ensure thorough pollination, gently shaking the plants or using a small brush to transfer pollen between flowers can be beneficial.
Throughout the growing season, it’s important to provide regular watering to keep the soil consistently moist. However, be cautious not to overwater, as peppers prefer well-drained soil and can be susceptible to root rot if they sit in soggy conditions.
As peppers mature, you can harvest them at different stages of ripeness. Green peppers are typically harvested early, while red, yellow, or orange peppers are left to fully mature on the plant. Depending on the variety, you may notice that the peppers become sweeter and develop more complex flavors as they ripen.
In addition to enjoying the peppers themselves, saving seeds from your favorite pepper varieties allows you to perpetuate their unique characteristics. By selecting and saving seeds from the most vibrant, flavorful, or productive peppers, you’ll be able to cultivate a customized pepper garden year after year.
Now that we’ve explored the abundance of seeds in peppers, let’s move on to another veggie with seed-filled potential – eggplants.
Eggplant
Eggplants, with their glossy purple skin and creamy flesh, are not only delicious additions to various dishes but also contain a generous number of seeds. When you cut open an eggplant, you’ll find a soft and succulent interior with a central portion that houses numerous small seeds.
Harvesting and saving eggplant seeds is a simple process. Begin by slicing the eggplant lengthwise, revealing the seed-filled core. Use a spoon or your fingers to scoop out the seeds, making sure to gather as many as possible. The seeds of eggplants are relatively small and ovular in shape, with a color that ranges from light tan to dark brown.
Once you’ve collected the seeds, rinse them in a fine-mesh strainer under cool water to separate them from any residual pulp or fibers. Then, spread the seeds in a single layer on a paper towel or screen to dry. Make sure to allow them to dry completely before storing. This can take up to two weeks, depending on the humidity levels in your environment.
Eggplants thrive in warm climates and require full sun exposure to grow and produce an abundant harvest. They prefer well-drained soil with a pH level between 5.5 and 7.0. Before planting, it’s recommended to amend the soil with organic matter like compost to improve its fertility and drainage.
Eggplant seeds can be started indoors or directly sown into the garden, depending on your growing zone and the length of your growing season. If you choose to start seeds indoors, sow them in biodegradable pots or seed trays about eight to ten weeks before the last expected frost. Maintain a warm temperature of around 75-85°F (24-29°C) for optimal germination.
Transplant the seedlings into the garden once all danger of frost has passed and the soil has warmed up. Space the plants at least 24 inches (60 cm) apart to provide adequate room for growth. As eggplants grow, they may require staking or support to prevent their stems from bending or breaking under the weight of the fruits.
Throughout the growing season, water eggplants regularly, aiming to keep the soil evenly moist. Be cautious not to overwater as excessive moisture can lead to root rot. During periods of hot weather, a layer of mulch around the plants can help retain soil moisture and regulate soil temperature.
As the eggplant fruits develop, you can harvest them at various stages of ripeness. Some prefer to harvest the fruits when they are young and firm, while others allow them to fully mature and reach their peak size and flavor. Regardless of your preference, remember to save some of the ripest fruits to collect seeds for future planting.
By saving and planting your own eggplant seeds, you have the opportunity to continue growing your favorite eggplant varieties, ensuring a consistent supply of these flavorful and versatile vegetables in your garden year after year.
As we continue our exploration of vegetables with seeds, let’s move on to another member of the squash family – squash.
Some common veggies that have seeds include tomatoes, cucumbers, bell peppers, and zucchini. When choosing these veggies, look for ones that are firm and have a good weight to them, as this indicates they have mature seeds inside.
Squash
Squash, with its wide range of varieties, shapes, and flavors, is a beloved vegetable in many kitchens. From the versatile and mild zucchini to the rich and sweet butternut squash, these vegetables not only provide delicious culinary options but also contain a plethora of seeds.
When you cut open a squash, you’ll find a central cavity filled with seeds. The size, shape, and color of the seeds vary depending on the type of squash. For instance, zucchini seeds are relatively small and oval-shaped, while butternut squash seeds are larger and flat.
Harvesting and saving squash seeds is a straightforward process. Begin by cutting open the squash and scooping out the seeds using a spoon. Place the seeds in a colander or fine-mesh strainer and rinse them under running water to remove any pulp or debris.
After rinsing, transfer the seeds to a bowl and soak them in water for a few minutes. This will help separate the seeds from any clinging fibers. Swirl the seeds around in the water, and the viable seeds will sink to the bottom while the debris will float to the top.
Once the seeds have been separated from unwanted material, lay them out on a paper towel or screen to dry. It’s crucial to dry them thoroughly to prevent mold and ensure their long-term viability. After drying, store the seeds in a cool and dry place until you’re ready to plant them.
Squash plants thrive in warm weather and require full sun exposure for optimal growth. They prefer well-drained soil rich in organic matter. Before planting, prepare the soil by incorporating compost or aged manure to enhance fertility and improve soil structure.
Squash seeds can be directly sown into the garden once all risk of frost has passed and the soil has warmed up. Plant the seeds in groups or hills, spacing them according to the specific variety’s recommended guidelines. The hills provide better drainage and promote air circulation around the plants.
Water the squash plants consistently to keep the soil evenly moist, especially during dry periods. Applying a layer of organic mulch around the plants can help retain soil moisture, suppress weed growth, and maintain a more stable soil temperature.
Squash plants are known for their vigorous growth and spread. As they develop, they may require proper support or trellising to keep them off the ground and prevent damage to the fruits. Additionally, regular pruning and maintenance can help control the plant’s growth and promote better airflow, reducing the risk of diseases.
Depending on the variety, squash can be harvested at different stages. Some varieties, like zucchini, are best harvested when young and tender, while others, like butternut squash, should be allowed to fully mature and develop their characteristic sweetness.
By saving seeds from your harvested squash, you can continue the cycle of growth and enjoy a consistent supply of squash in your garden. So don’t forget to explore the amazing array of squash varieties out there and savor the flavors and abundance of seeds they have to offer.
Now, let’s move on to another seed-filled vegetable that often grows alongside squash — zucchini!
Zucchini
Zucchini, a member of the squash family, has a reputation for its rapid growth and an abundance of seeds. This versatile vegetable is not only a culinary favorite but also provides gardeners with an opportunity to collect and save seeds for future planting.
When you slice open a zucchini, you’ll discover a soft and succulent flesh surrounding a central cavity filled with seeds. The seeds of zucchini are relatively small and oval-shaped, resembling pumpkin seeds. Their color can range from pale white to light tan.
Harvesting zucchini seeds is a simple process. Begin by cutting the zucchini lengthwise and exposing the seed-filled core. Use a spoon or your fingers to gently scoop out the seeds, collecting as many as possible. It’s best to choose mature zucchinis for seed harvesting, as they will have fully developed and viable seeds.
Once you’ve collected the seeds, rinse them in a colander under cool water to remove any residual pulp or fibers. Gently rub the seeds between your fingers to ensure a thorough cleaning. After rinsing, transfer the seeds to a paper towel or screen to dry. Proper drying is crucial to prevent mold and maintain the viability of the seeds.
Store the dried zucchini seeds in a cool, dry place until you’re ready to plant them. Like other squash seeds, zucchini seeds can be stored for several years, as long as they are kept in suitable conditions.
Zucchini plants are warm-season vegetables that thrive in full sun and well-drained soil. They require a minimum of 6-8 hours of direct sunlight per day to produce a bountiful harvest. Prepare the soil by adding organic matter, such as compost or well-rotted manure, to enhance fertility and improve moisture retention.
Zucchini seeds can be directly sown into the garden once all risk of frost has passed and the soil has warmed up. Plant the seeds about 1 inch deep and 12-18 inches apart. You can also choose to start the seeds indoors a few weeks before the last frost date and transplant the seedlings into the garden when they have developed a few sets of true leaves.
Consistent watering is essential for healthy zucchini plants. Aim to keep the soil evenly moist but not waterlogged. Mulching around the plants can help retain soil moisture, prevent weed growth, and reduce temperature fluctuations.
As zucchini plants mature, they will produce an abundance of flowers, both male and female. The female flowers, usually identified by a swollen base resembling a tiny zucchini, will develop into fruit if successfully pollinated. Bees and other pollinators play a vital role in the pollination process, so encourage their presence in your garden by providing a variety of flowering plants.
Zucchini can be harvested when the fruits are young and tender, typically 6-8 inches long. Regular harvesting encourages continued production and prevents the fruits from becoming excessively large and tough. As you enjoy the flesh of the zucchini, don’t forget to appreciate the multitude of seeds that hold the potential for future plantings.
By saving and planting zucchini seeds from your homegrown fruits, you can continue the cycle of growth and enjoy a continuous supply of this versatile vegetable year after year. So, embrace the abundance of zucchini seeds and relish the countless culinary possibilities they offer in your garden and kitchen.
Next, let’s move on to a vegetable that is closely related to zucchini – pumpkins!
Read more: What Fruit Doesn’t Have Seeds
Pumpkins
Pumpkins, with their vibrant orange hues and festive associations with Halloween and autumn, are not only decorative but also hold a treasure trove of seeds. These large and delicious fruits are a delight to carve, cook, and, of course, save seeds from for future planting.
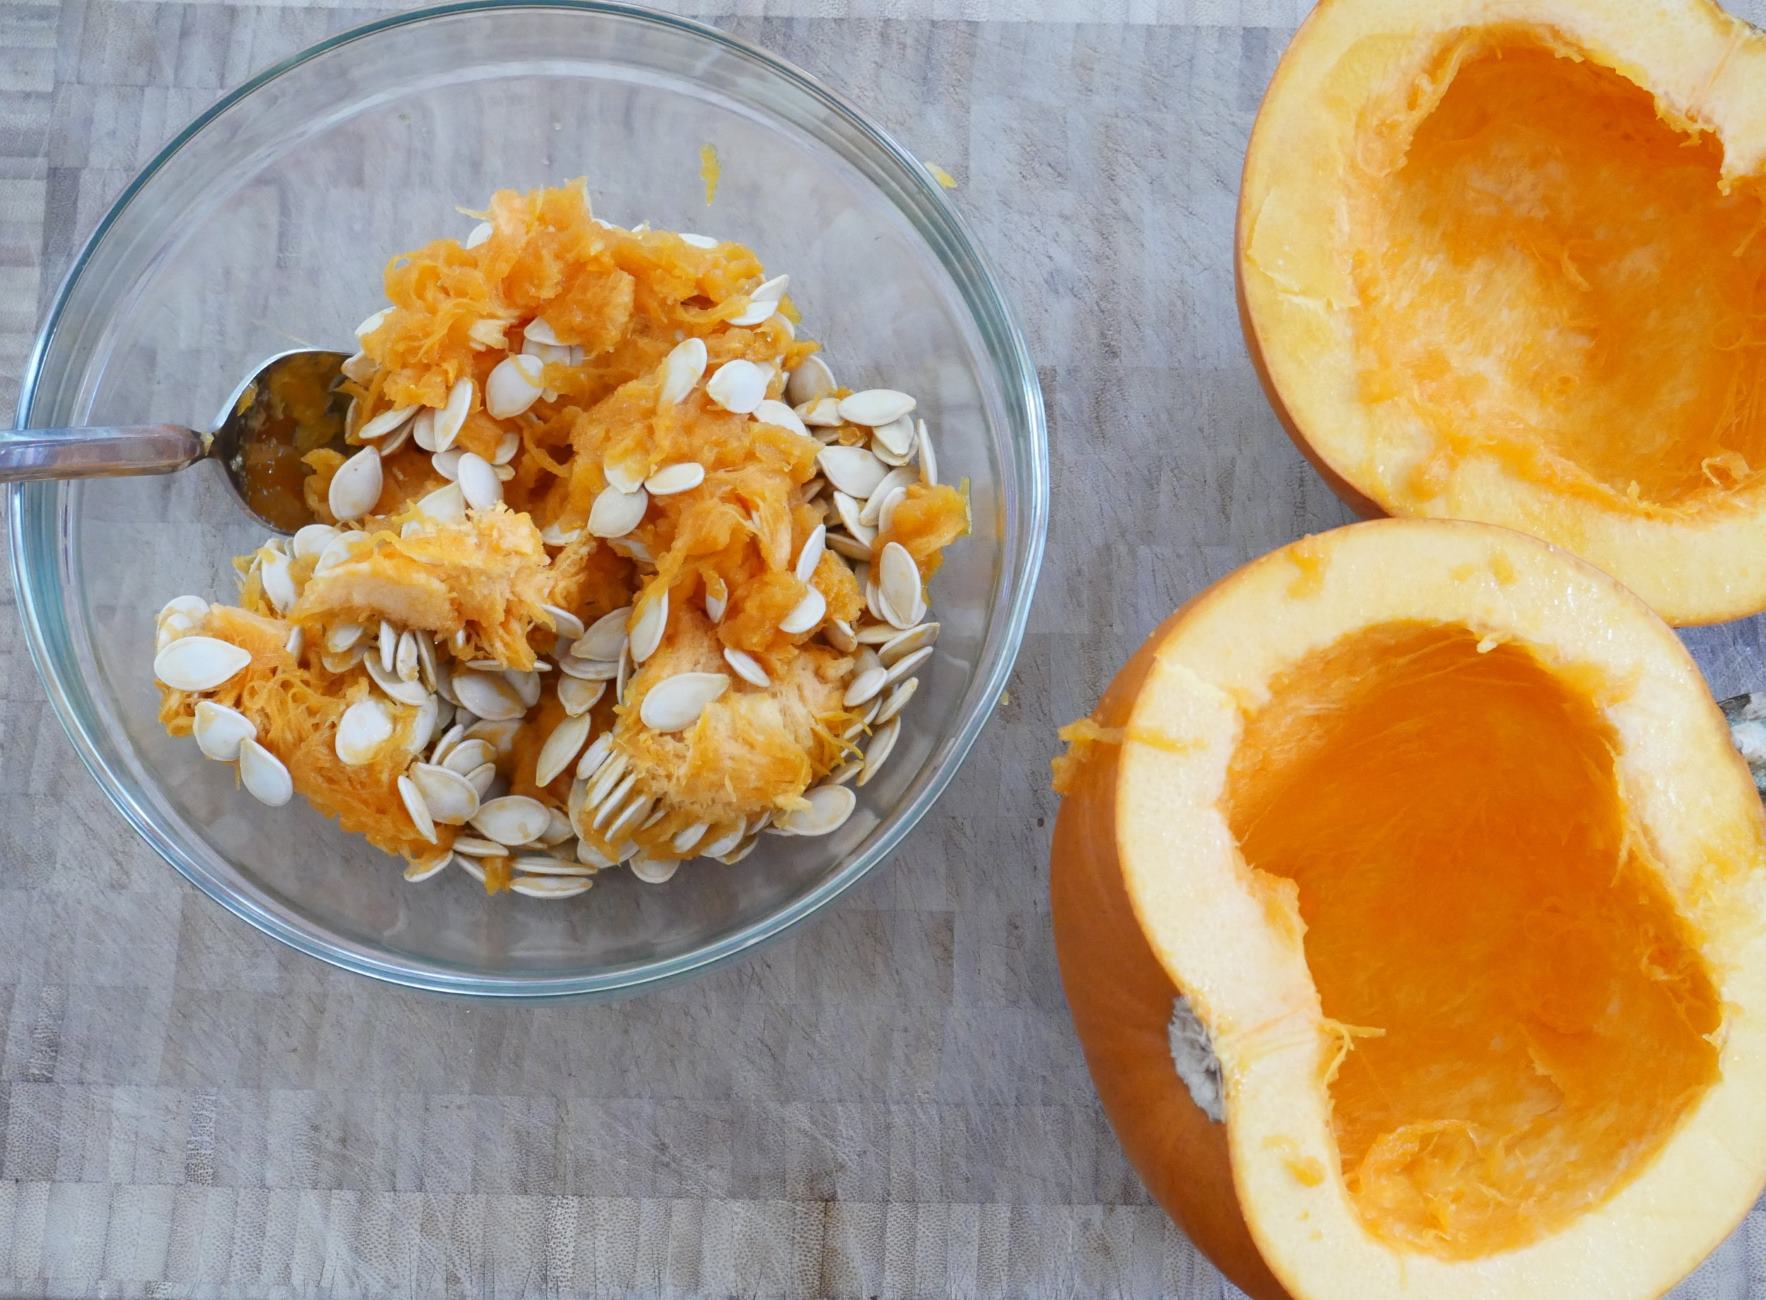
When you cut open a pumpkin, you’ll be greeted with a rich and fleshy interior, housing a cavalcade of seeds. These seeds, also known as pepitas, are flat and oval-shaped, with a beige or light brown color. The size and number of seeds will vary depending on the size of the pumpkin.
Harvesting and saving pumpkin seeds is a fun and rewarding endeavor. Start by scooping out the seeds with a spoon, ensuring that they are separated from the pulp as much as possible. It’s helpful to place the seeds in a colander or strainer and rinse them under cool water to remove excess pulp.
After rinsing, transfer the seeds to a bowl and soak them in water for a few minutes. This soaking process can help clean the seeds further and make the separation of any remaining pulp easier. Swirl the seeds in the water to separate any clinging debris, and then strain them.
Spread the cleaned pumpkin seeds on a paper towel or screen and leave them to dry completely. It’s crucial to dry the seeds thoroughly to prevent molding. This can take anywhere from a few days to a couple of weeks depending on environmental conditions. Once dry, store the seeds in a cool and dry place for future planting.
Pumpkins are warm-season plants that require full sun exposure and fertile, well-drained soil to thrive. They are typically planted directly into the garden, as their large size and sprawling vines make transplanting challenging. Wait until any danger of frost has passed and the soil has warmed up before planting pumpkin seeds.
When sowing pumpkin seeds, create mounds or shallow depressions in the soil. Plant several seeds in each mound or depression, spacing them according to the specific variety’s recommendations. The extra seeds can serve as backups in case some fail to germinate.
Water the pumpkin seeds thoroughly after planting to ensure good soil-to-seed contact. Throughout the growing season, keep the soil consistently moist, avoiding both underwatering and overwatering. Mulching around the plants can help retain moisture in the soil and suppress weed growth.
As pumpkin vines develop, they will send out sprawling tendrils and produce large, bright yellow flowers. Pumpkins are typically pollinated by bees and other insects, so it’s important to encourage their presence by planting pollinator-friendly flowers nearby. If necessary, you can hand-pollinate the flowers using a small paintbrush or cotton swab to transfer pollen between male and female flowers.
Pumpkins take time to mature, with harvesting usually occurring in the late summer or fall. The skin of a pumpkin should be firm and fully colored, indicating its readiness for harvest. Cut the pumpkin from the vine, leaving a few inches of stem attached for better storage and preservation.
After enjoying the delicious flesh of the pumpkin, don’t forget to save some seeds for planting. With the plethora of seeds found within pumpkins, you can embark on a new growing season, sowing the seeds and watching them develop into beautiful and fruitful pumpkin plants.
Now that we’ve explored the seed-filled world of pumpkins, let’s move on to another legume with a reputation for its tasty seeds – peas!
Peas
Peas, with their delicate and sweet flavor, are a delightful addition to any vegetable garden. Not only are they a favorite among gardeners and chefs alike, but they also offer an abundance of seeds that can be saved and replanted for future harvests.
Peas belong to the legume family and have a unique seed structure. Each pea pod contains several pea seeds, also known as peas, nestled together in a row. Their size, shape, and color vary depending on the variety, ranging from small and round to larger and wrinkled.
To harvest pea seeds, wait until the pods have fully ripened and turned a vibrant green or yellow hue. Gently twist or snap the mature pods from the vines, being careful not to damage the seeds inside. It’s important to note that garden peas, also known as shelling peas, are typically grown for the seeds inside the pods, while edible-podded peas, like sugar snap peas, are enjoyed whole.
To save pea seeds, open the pods and remove the seeds. Place the seeds on a paper towel or flat surface and allow them to air dry for a few weeks. Make sure they are completely dry before storing them in a cool and dry place. They can be stored in envelopes or airtight containers for several years, maintaining their viability if kept in suitable conditions.
Peas are cool-season crops, often grown in early spring or fall when temperatures are mild. They prefer well-drained soil and full sun exposure, although some varieties can tolerate partial shade. Before planting, prepare the soil by incorporating organic matter to improve fertility and drainage.
There are different types of peas, including garden peas, snow peas, and snap peas. Garden peas are typically shelled and enjoyed fresh or used in a variety of dishes. Snow peas have flatter pods that are edible and tender when harvested at a young stage. Snap peas have a crisp, juicy texture and can be enjoyed both in their pod or as shelled peas.
Peas can be directly sown into the garden or started indoors in seed trays before transplanting. Sow the seeds about 1-2 inches apart and 1-2 inches deep, depending on the variety and instructions on the seed packet. Provide support for the vines by installing trellises, stakes, or fences to keep them upright as they grow.
Water peas regularly to keep the soil evenly moist, especially during dry spells. However, be careful not to overwater, as excessive moisture can lead to fungal diseases. Mulching around the plants can aid in moisture retention and weed suppression.
Harvesting time depends on the specific pea variety and desired stage of consumption. Garden peas are typically harvested when the pods are plump but still tender. Snow peas are best when the pods are flat and the peas inside are small and undeveloped. Snap peas are harvested when the pods are crisp and the peas have reached a desirable size.
Peas are not only delightful to enjoy fresh from the garden but also offer the opportunity to save seeds for future planting. By saving and replanting pea seeds, you can continue to experience the joy of growing your own peas year after year, ensuring a sustainable and delicious supply of this versatile legume.
Now, let’s move on to another legume known for its bountiful and nutritious seeds – beans!
Beans
Beans, with their versatility, nutritional value, and satisfying taste, are a staple in many kitchens. These leguminous plants not only provide a delicious addition to various recipes but also offer an abundance of seeds that can be saved and replanted for future harvests.
When it comes to beans, the seeds are the prized gem within their pods. Each bean pod contains multiple seeds, neatly nestled together. These seeds, also known as beans, come in different shapes, sizes, and colors, depending on the variety.
To harvest bean seeds, wait until the pods have matured and begun to dry. This is typically indicated by a change in color, from green to yellow or brown, and a papery texture. Gently snap or twist the pods off the plants, ensuring not to damage the seeds inside.
Once you have harvested the pods, it’s time to extract the seeds. Open the pods and remove the beans, discarding any damaged or discolored ones. Some beans may require additional processing, such as shelling or removing a protective outer layer.
After the beans have been extracted, remove any residual plant material and spread them out on a flat surface to dry. Allow the beans to air dry completely, which may take a few weeks, before storing them in a cool and dry place. Store the beans in envelopes or airtight containers, ensuring they are labeled with the variety and date of collection.
Beans are warm-season crops, thriving in full sun and well-drained soil. Before planting, prepare the soil by incorporating organic matter to improve fertility and moisture retention. The timing of planting depends on the specific bean variety and local climate, but beans are typically sown in spring or early summer when the soil has warmed up.
Sow the bean seeds directly into the garden, about 1-2 inches deep and spaced according to the variety’s recommendations. Beans can be planted in rows or in raised beds, providing support such as stakes or trellises if necessary. Some bean varieties, like pole beans, require vertical support due to their climbing nature.
Water the beans regularly, ensuring the soil remains consistently moist but not waterlogged. Avoid overhead watering methods, as wet foliage can increase the risk of fungal diseases. Mulching around the plants can help conserve moisture in the soil and suppress weed growth.
As the bean plants grow, you’ll witness their development and the gradual maturation of new pods. Some bean varieties are meant to be harvested as fresh, tender beans, while others are left to dry in order to harvest the mature, fully developed seeds. Pay attention to the specific variety and harvest the beans accordingly.
Bean seeds are not only delicious when cooked and consumed, but they also provide an opportunity to continue the cycle of growth. By saving and replanting bean seeds, you can save money, maintain desirable traits, and enjoy a sustainable garden for years to come.
Now that we’ve explored the world of bean seeds, let’s transition to another seed-filled vegetable that is loved around the world – corn!
Corn
Corn, with its tall stalks and golden kernels, is a staple crop that not only plays a significant role in agriculture but also offers a multitude of seeds for harvesting and replanting. This versatile vegetable has been a dietary staple for centuries and continues to provide nourishment, flavor, and an abundance of seeds.
When it comes to corn, the seeds are contained within the familiar cylindrical shape of an ear. Each ear of corn is covered in rows of plump and juicy kernels, which are the seeds themselves. These seeds come in a variety of colors, including white, yellow, and shades of blue and red.
Harvesting corn seeds, also known as maize, requires allowing the ears to fully mature on the stalk. This is usually indicated by a change in color to a deep and vibrant hue and the appearance of dried silk at the top of the ear. Gently twist or snap the ears off the stalks, taking care not to damage the kernels.
Once harvested, it’s essential to remove any remaining husks or silk from the corn ears. This can be done by carefully peeling away the outer layers, revealing the rows of beautifully formed kernels. It’s important to note that corn seeds can be quite tender, so handle them with care to prevent damage or cracking.
After cleaning the ears, it’s recommended to air dry them before removing the kernels for storage. This can be done by hanging the ears in a well-ventilated area with low humidity. Once the ears are fully dried, the kernels can be removed by running a sharp knife down each row, separating them from the husk.
If you plan to save the seeds for replanting, ensure they are completely dry before storing them. Place the seeds in airtight containers or envelopes, making sure to label them with the variety and date of collection. Store the containers in a cool and dry place, away from moisture and pests.
Corn is a warm-season crop, needing full sun exposure and fertile, well-drained soil for optimal growth. It’s best to plant corn in blocks or multiple rows to assist with pollination, as corn relies on the transfer of pollen from the tassels (male flowers) to the silks (female flowers) for successful kernel development.
Start corn seeds directly in the garden once the soil has warmed up and all risks of frost have passed. Plant the seeds about 1-2 inches deep and 9-12 inches apart within their respective rows. Space the rows about 2-3 feet apart, allowing adequate room for the corn plants to grow and develop.
Water the corn plants regularly, aiming for consistent soil moisture, particularly during dry spells. Mulching around the base of the plants can help retain soil moisture and suppress weed growth. As the plants grow taller, they may require additional support to prevent lodging or damage caused by strong winds.
Harvesting corn for consumption usually occurs when the kernels are plump and filled out, and a gentle squeeze produces a milky juice. However, if you desire to save seeds for planting, allow the corn to fully mature on the stalk until the kernels become fully hardened and dry. At this stage, the kernels are suitable for seed harvesting.
Corn seeds offer not only the potential for a delicious meal but also the opportunity to perpetuate the corn’s heritage and flavor in your garden. By saving and replanting corn seeds, you can continue the legacy of this versatile crop and experience the joy of cultivating your own corn harvest year after year.
With the exploration of corn as the final entry on our list, we’ve covered a range of vegetables that contain an abundance of seeds. From tomatoes to cucumbers, peppers to squash, zucchini to pumpkins, peas to beans, and finally corn, these vegetables offer not only delicious flavors but also the possibility of a bountiful garden through seed saving. So embrace the world of seeds, enjoy the process of growing, and savor the rewards of a garden teeming with life and abundance!
Happy gardening!
Conclusion
As we come to the end of this exploration into the world of vegetables with seeds, we have uncovered a multitude of plant varieties that offer not only delicious flavors but also a wealth of seeds to harvest and save. From tomatoes to cucumbers, peppers to eggplants, squash to zucchini, pumpkins to peas, beans to corn, these vegetables have provided us with an understanding of the diverse seeds found within their structures.
Seeds are more than just tiny entities; they contain the potential for growth, life, and the continuation of plant species. Understanding how to save and replant vegetable seeds allows us to establish self-sufficiency in our gardens, savor the flavors of our favorite varieties, and contribute to sustainable gardening practices.
By exploring the process of saving seeds, we have learned about the importance of proper cleaning, drying, and storage techniques. Taking the time to carefully harvest, clean, and dry seeds ensures their viability and longevity, allowing us to enjoy the benefits of these seeds for years to come.
Moreover, by engaging in seed-saving practices, we can maintain the desirable traits of our favorite vegetable varieties and develop a deeper connection with our gardens. By saving seeds from plants that have thrived in our own unique growing conditions, we can create a localized seed bank that reflects our specific climate, soil, and preferences.
While some vegetables, such as hybrids, may not produce seeds that are true to the parent plant, saving seeds from heirloom or open-pollinated varieties allows us to preserve their unique characteristics and flavors. It also empowers us to contribute to the preservation of plant biodiversity and the richness of our food heritage.
As we embark on our gardening journey, let us embrace the world of seeds with wonder and enthusiasm. Let’s savor the process of nurturing plants, from seed to harvest, and delight in the abundance that seeds provide. Let’s appreciate their role in sustaining us with nutritious food and the endless possibilities they present for new growth in our gardens.
Whether you’re a seasoned gardener or just starting out, saving seeds and developing your own seed collection is a worthwhile endeavor. It offers a deeper connection to the natural world, fosters self-reliance, and encourages a sense of stewardship for the land and its resources.
So, as you plant your next vegetable garden, take a moment to appreciate the seeds within each plant. Recognize the potential they hold, not only for the growth and abundance of your garden but also for the joy and satisfaction they bring to your table.
Happy gardening and seed saving!
Excited about garden veggies with seeds? Keep that enthusiasm growing—jump right into our guide on creative garden fence ideas. Fencing not only secures your leafy pals but also spruces up the yard's decor. Whether you're a seasoned gardener or just starting, these fencing tips are perfect for anyone eager to enhance their green space.
Frequently Asked Questions about What Veggies Have Seeds
Was this page helpful?
At Storables.com, we guarantee accurate and reliable information. Our content, validated by Expert Board Contributors, is crafted following stringent Editorial Policies. We're committed to providing you with well-researched, expert-backed insights for all your informational needs.


0 thoughts on “What Veggies Have Seeds”