Home>Garden Essentials>How To Start Pepper Seeds Indoors
Garden Essentials
How To Start Pepper Seeds Indoors
Modified: August 17, 2024
Learn how to start pepper seeds indoors and set up your own garden. Find tips and step-by-step instructions to ensure successful seed germination and healthy plants.
(Many of the links in this article redirect to a specific reviewed product. Your purchase of these products through affiliate links helps to generate commission for Storables.com, at no extra cost. Learn more)
Introduction
Starting pepper seeds indoors is a fantastic way to get a head start on the growing season and ensure a bountiful harvest of flavorful peppers. It is especially beneficial for gardeners in regions with shorter growing seasons or cooler climates. By giving your pepper seeds a warm and controlled environment to germinate and grow, you can extend the growing season and have healthy seedlings ready for transplanting when the weather is ideal.
There are numerous benefits to starting pepper seeds indoors. Firstly, it allows you to choose from a wider variety of pepper plants than what might be available at your local nursery. You can experiment with unique and exotic pepper varieties that may not be readily accessible. Secondly, by starting your seeds indoors, you have more control over the growing conditions, ensuring optimal temperature, light, and moisture levels that promote vigorous growth. Additionally, starting pepper seeds indoors gives you the opportunity to nurture and care for the plants from the very beginning, fostering a deeper connection to your garden and the joy of watching your plants thrive.
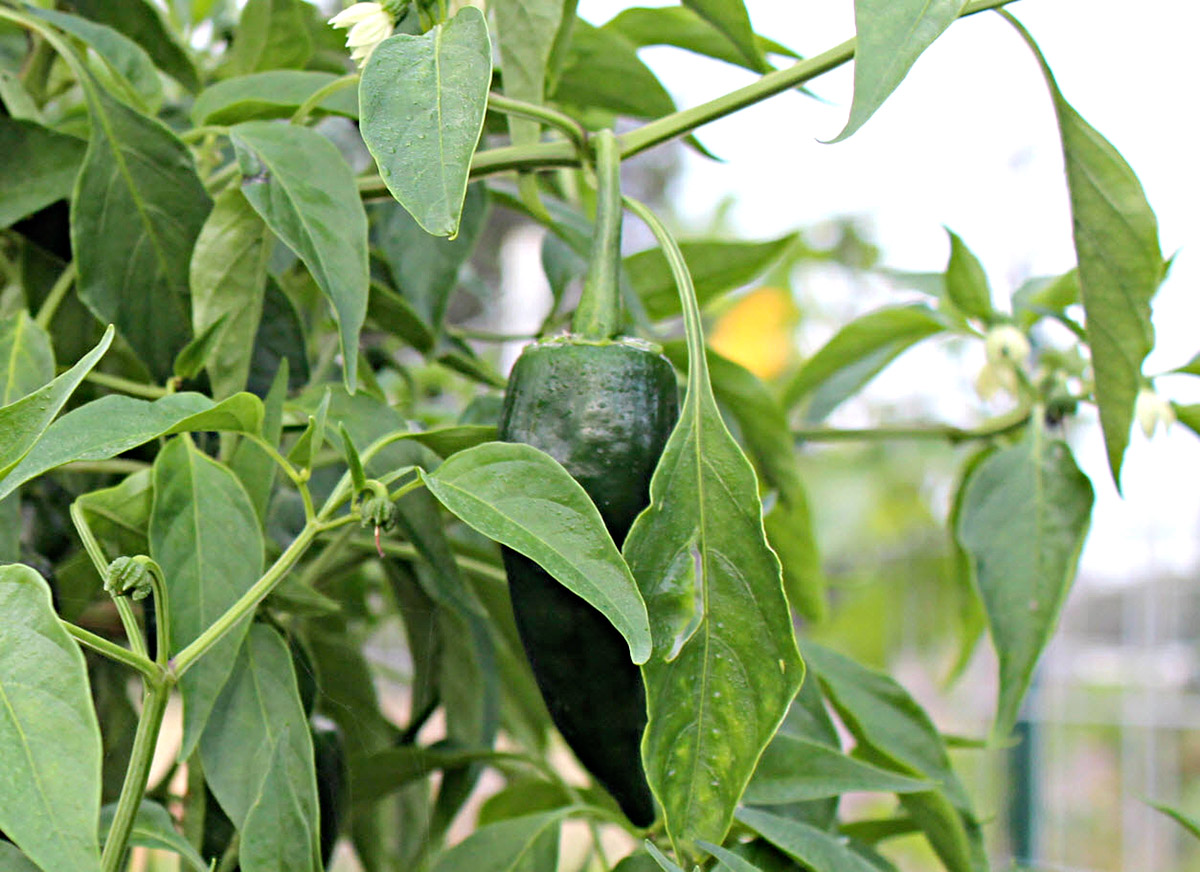
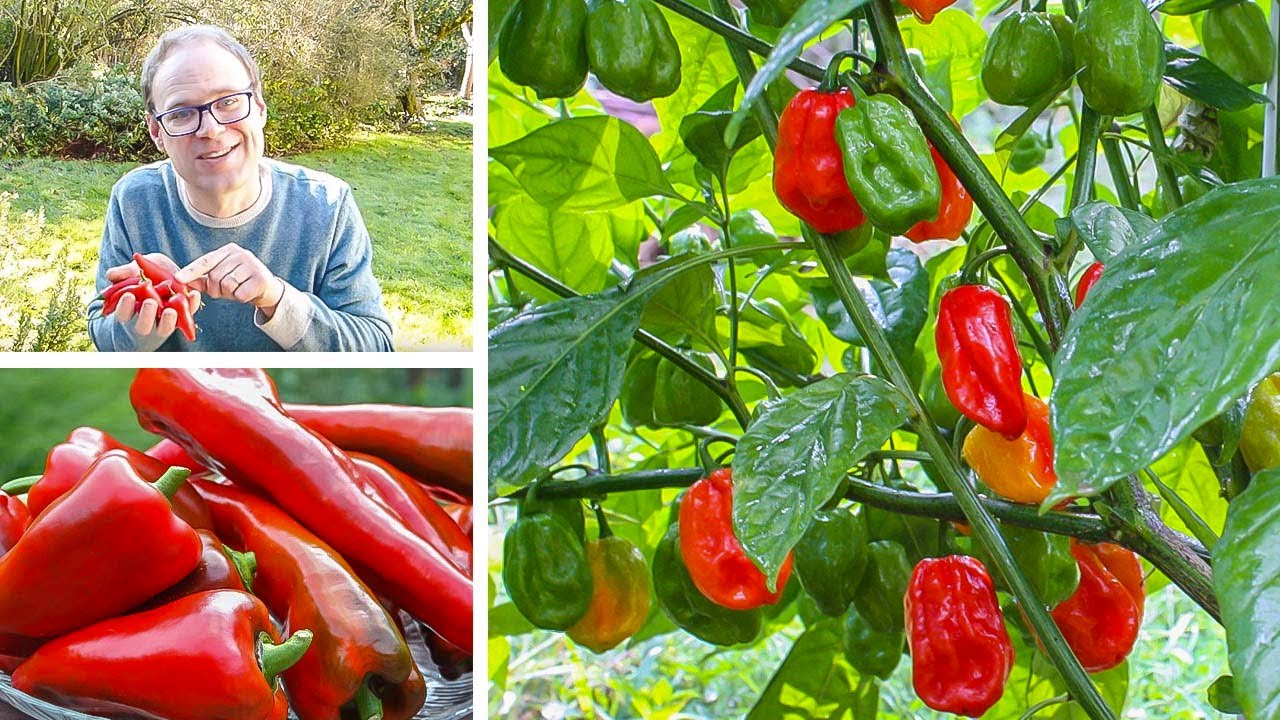
Choosing the right pepper varieties is an important first step in the seed starting process. Consider factors such as your growing zone, available space, and desired flavor profiles. Whether you prefer sweet bell peppers or fiery chili peppers, there is a wide range of pepper varieties to choose from. Some popular choices include Bell Peppers, Jalapenos, Habaneros, Poblano, and Cayenne peppers. It’s a good idea to select a mix of mild, medium, and hot peppers to add variety to your garden and culinary creations.
Before you begin sowing your pepper seeds, you will need to gather the necessary supplies. These include seed trays or pots with drainage holes, a quality seed starting mix, labels or markers for identification, a spray bottle for watering, and a light source such as a grow light or a sunny windowsill. It is also beneficial to have a thermometer to monitor the temperature and a small fan to encourage air circulation around the seedlings.
Next, you’ll need to prepare the seed starting mix. A well-draining mix is essential for healthy seed germination. You can either purchase a pre-made seed starting mix or create your own by combining equal parts of sterile seed-starting soil, perlite, and vermiculite. This mix provides optimal aeration and moisture retention, ensuring your pepper seeds have a favorable environment to sprout.
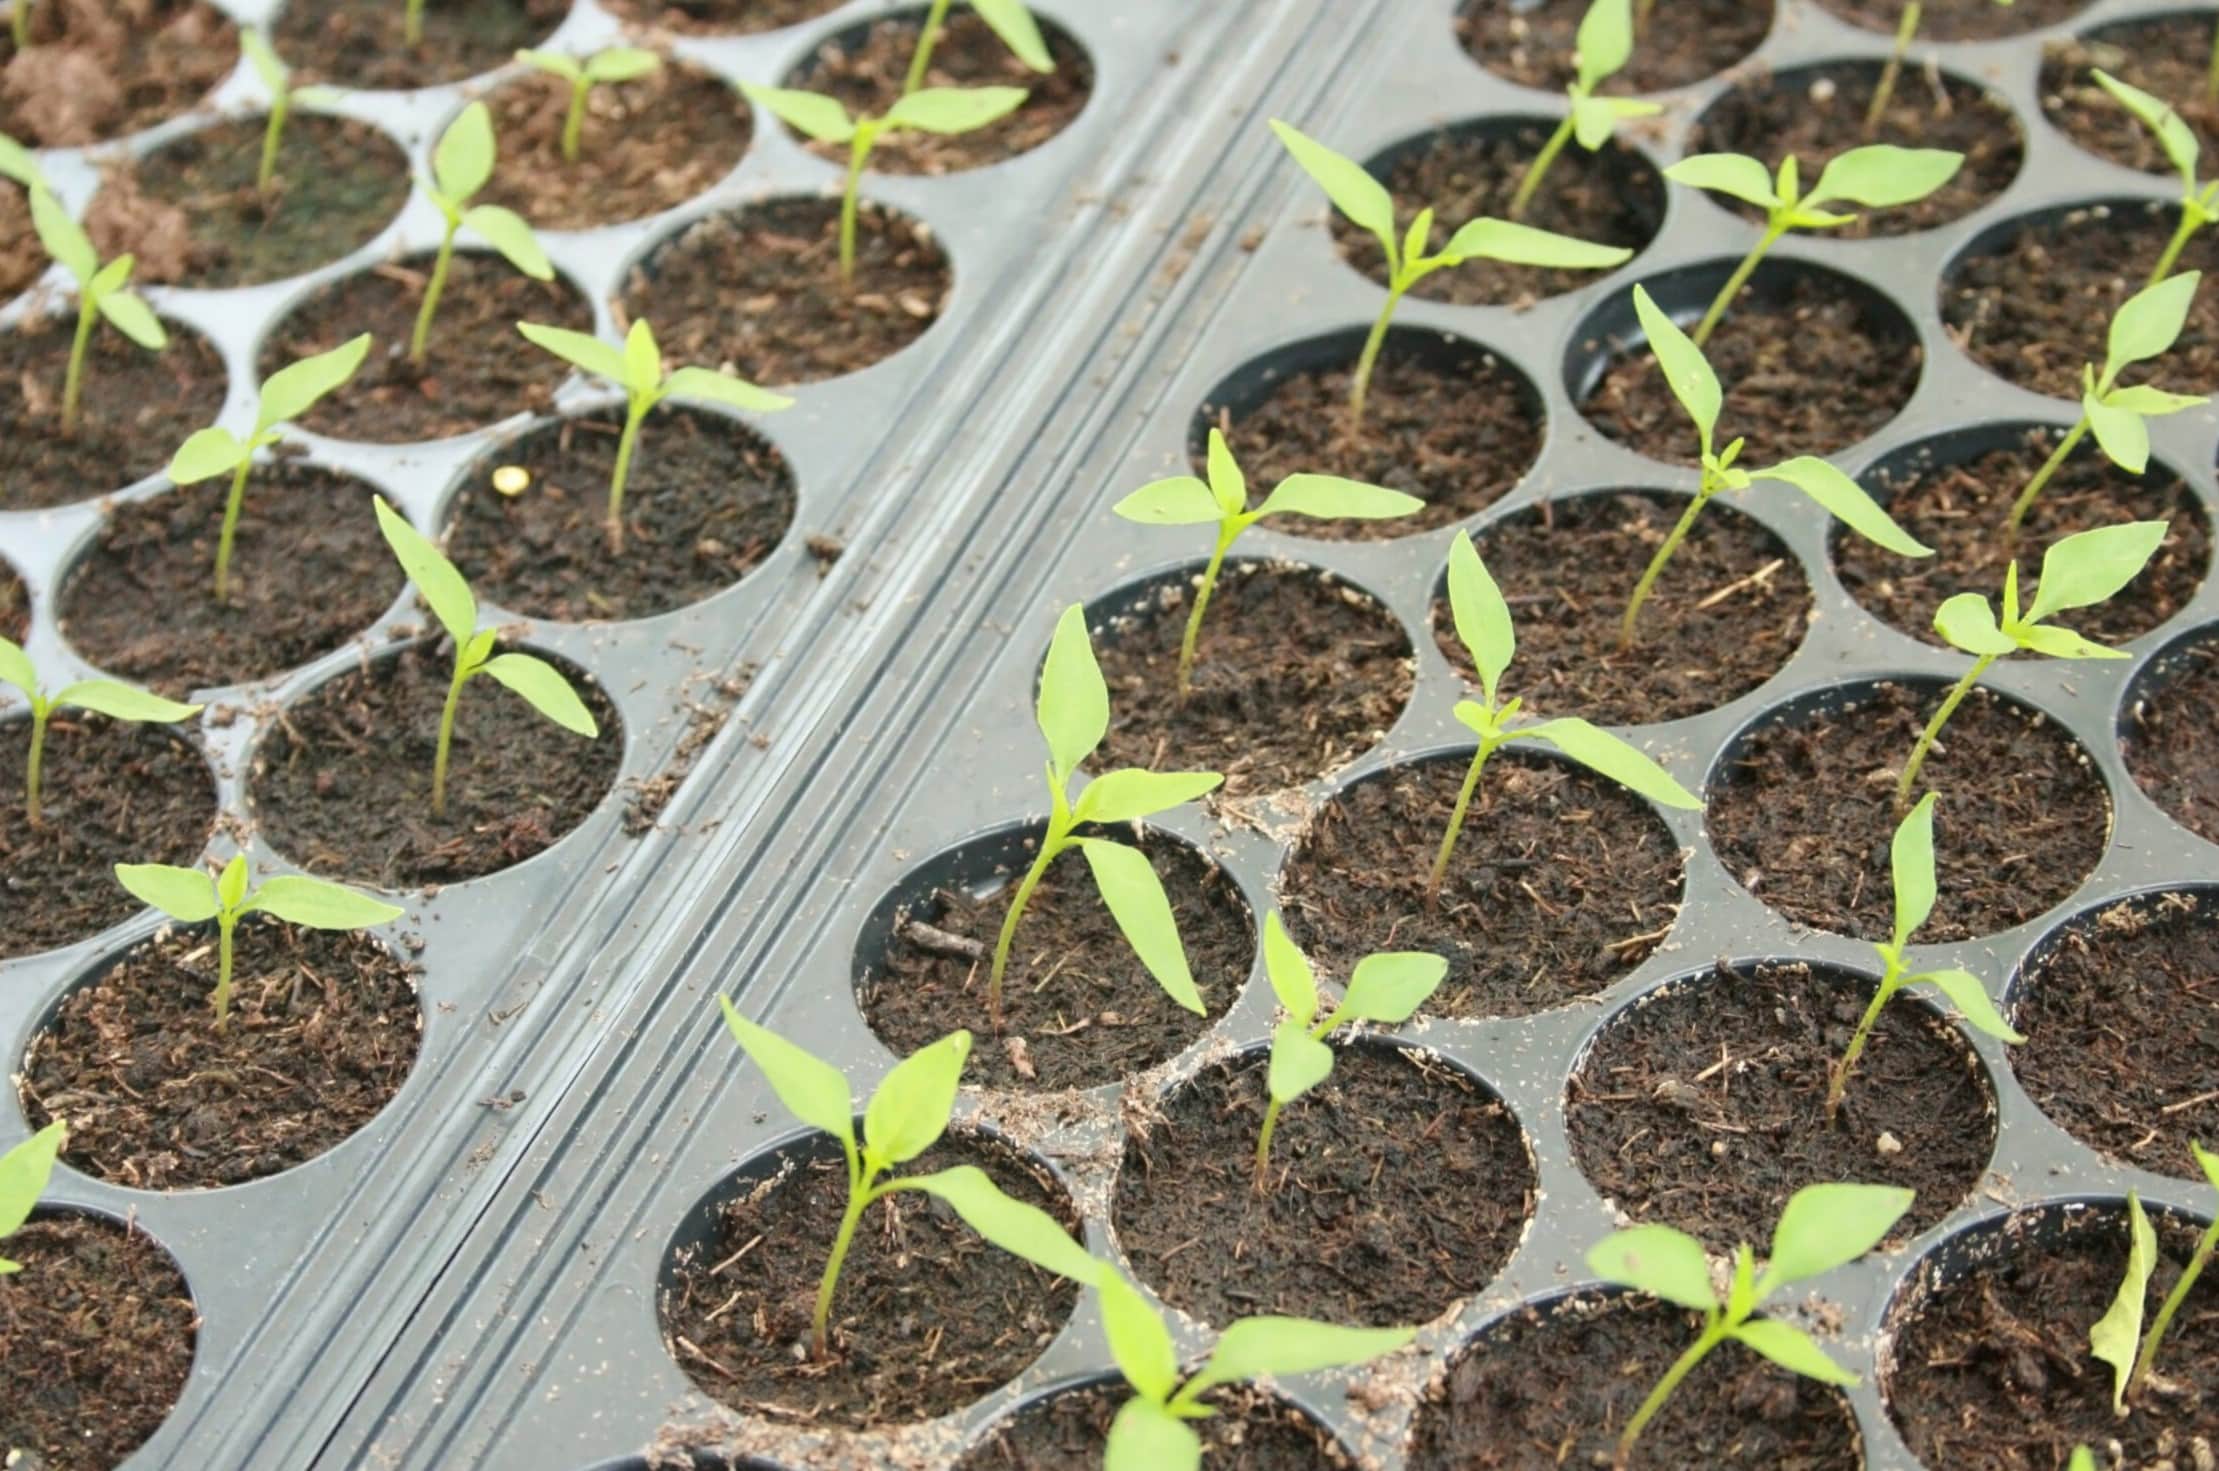
Once your supplies and seed starting mix are ready, it’s time to sow your pepper seeds. Create small depressions in the moistened seed starting mix, about a quarter inch deep, and space the seeds according to the recommended spacing listed on the seed packet. Cover the seeds with a thin layer of seed starting mix and gently press it down.
To provide the optimal growing conditions for your pepper seedlings, place the trays or pots in a warm area with temperatures between 70-80°F (21-27°C). Moisture is crucial at this stage, so keep the soil consistently moist but not soggy. Using a spray bottle to water from the bottom can help prevent overwatering.
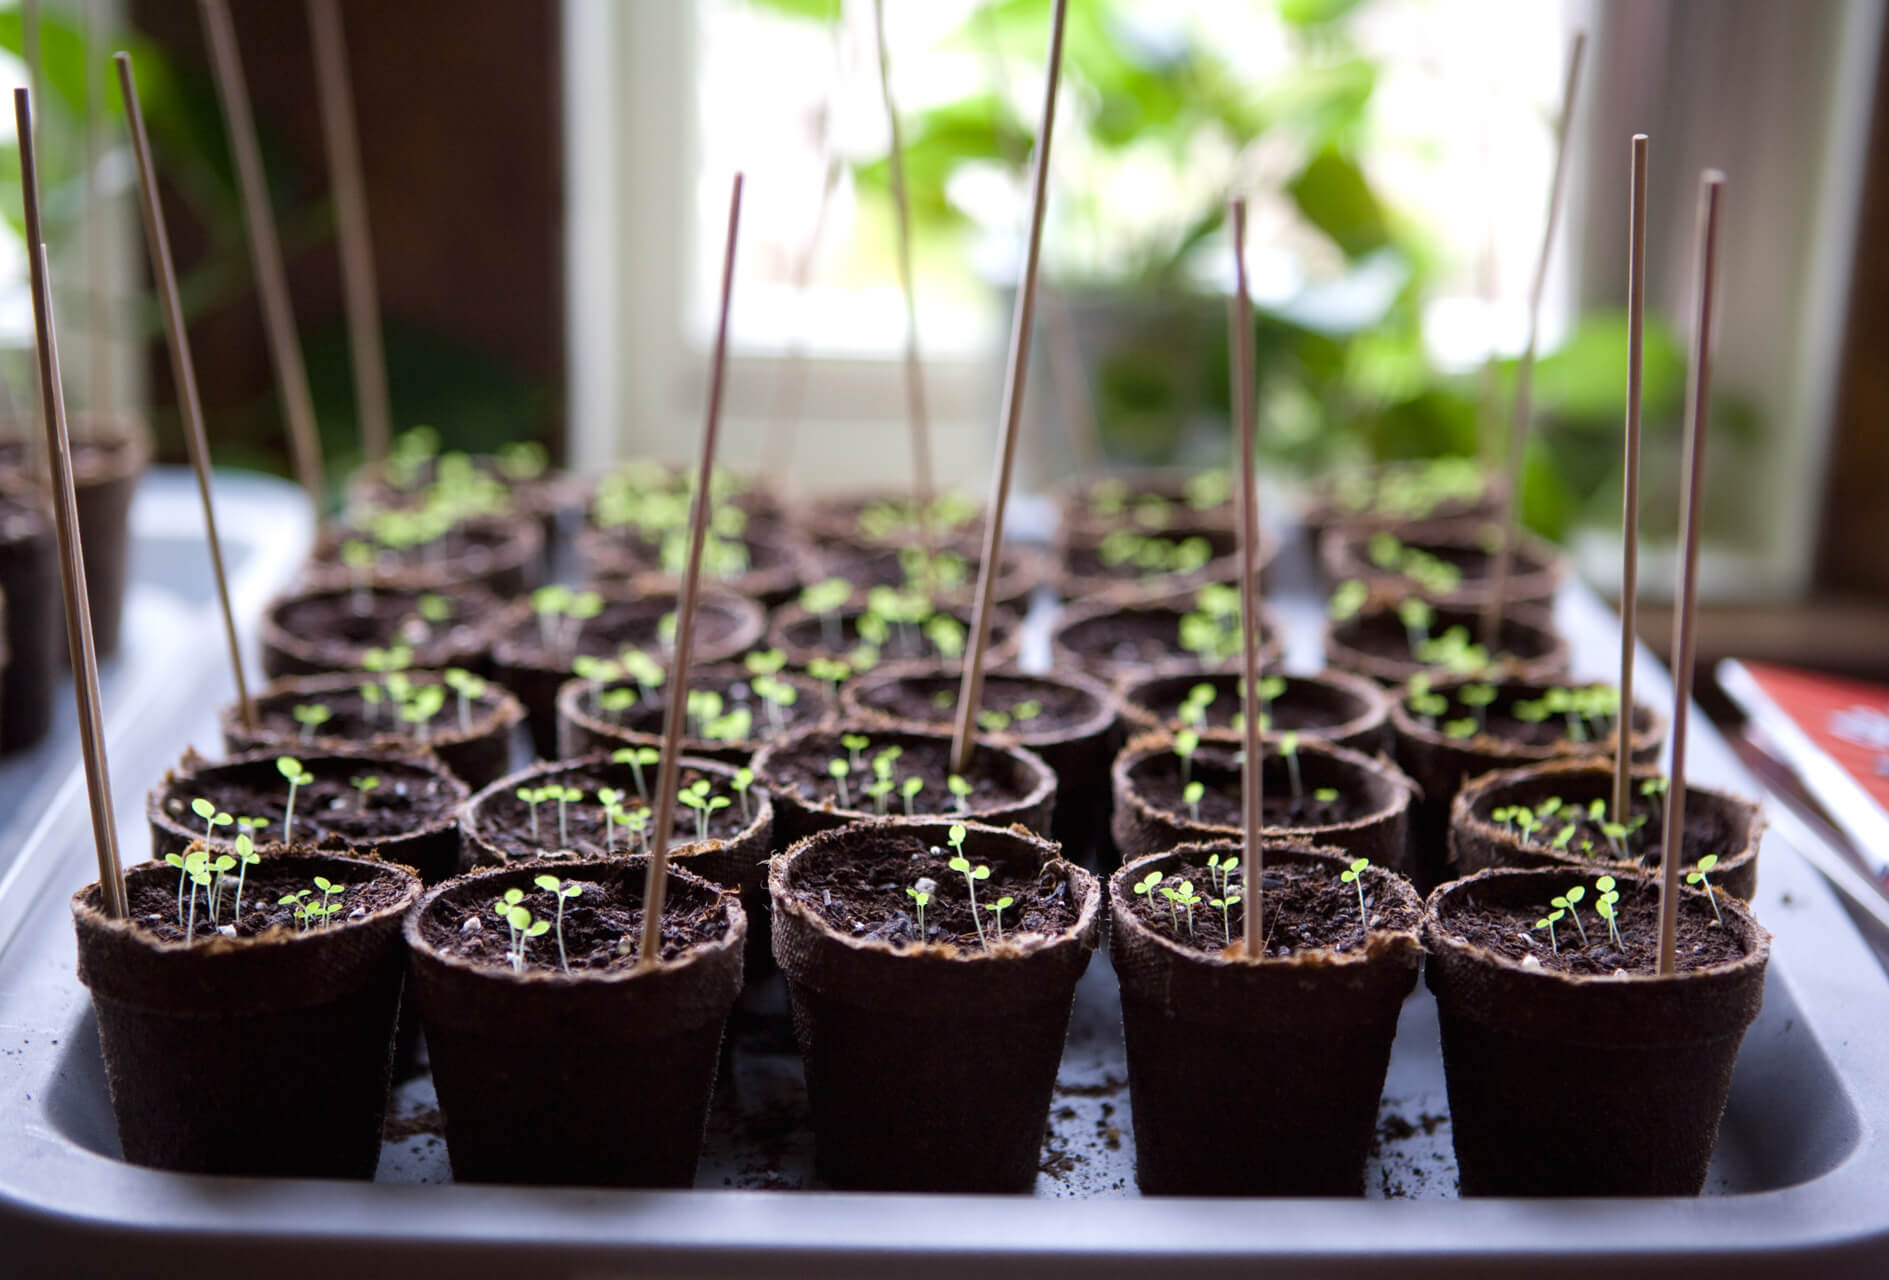
As the seeds germinate and the seedlings start to grow, it’s essential to provide them with adequate light. Place the trays under a grow light or near a sunny window where they can receive at least 12-14 hours of bright, indirect light per day. If using natural light, rotate the trays regularly to ensure even growth.
Continued in the next section…
Key Takeaways:
- Starting pepper seeds indoors extends the growing season, offers a wider variety of peppers, and fosters a deeper connection to gardening, leading to a bountiful harvest and flavorful culinary creations.
- Providing optimal conditions, proper watering, and troubleshooting common seedling issues are essential for nurturing healthy pepper seedlings and ensuring a successful gardening journey.
Read more: How To Start Lettuce Seeds Indoors
Benefits of Starting Pepper Seeds Indoors
Starting pepper seeds indoors offers a range of benefits that can greatly enhance your gardening experience and increase the success of your pepper plants. Here are some of the key advantages:
1. Extended Growing Season: By starting pepper seeds indoors, you can begin the growing process earlier than if you were to wait for the weather to warm up. This allows you to extend the growing season and maximize the time your plants have to produce peppers.
2. Greater Variety: When starting pepper seeds indoors, you have access to a wider range of pepper varieties than what is typically available at local nurseries. This opens up a world of exciting options, including heirloom, rare, or exotic pepper varieties that may be difficult to find elsewhere. Experimenting with different peppers can add a delightful variety of flavors and spice levels to your dishes.
3. Control Over Growing Conditions: Indoor seed starting provides you with more control over the growing conditions, ensuring optimal temperature, light, and moisture levels. This control allows you to create an ideal environment that promotes strong and healthy seedling growth.
4. Early Harvest: When you start pepper seeds indoors, you give your plants a head start. As a result, they have more time to establish themselves and develop robust root systems. This ultimately leads to earlier and more abundant harvests, allowing you to enjoy fresh homegrown peppers sooner.
5. Disease and Pest Management: By starting seeds indoors, you reduce the risk of diseases and pests that can often hinder outdoor seed germination and young plant growth. Indoor environments offer cleaner and more controlled conditions, minimizing the chances of seedling loss due to infections or pest damage.
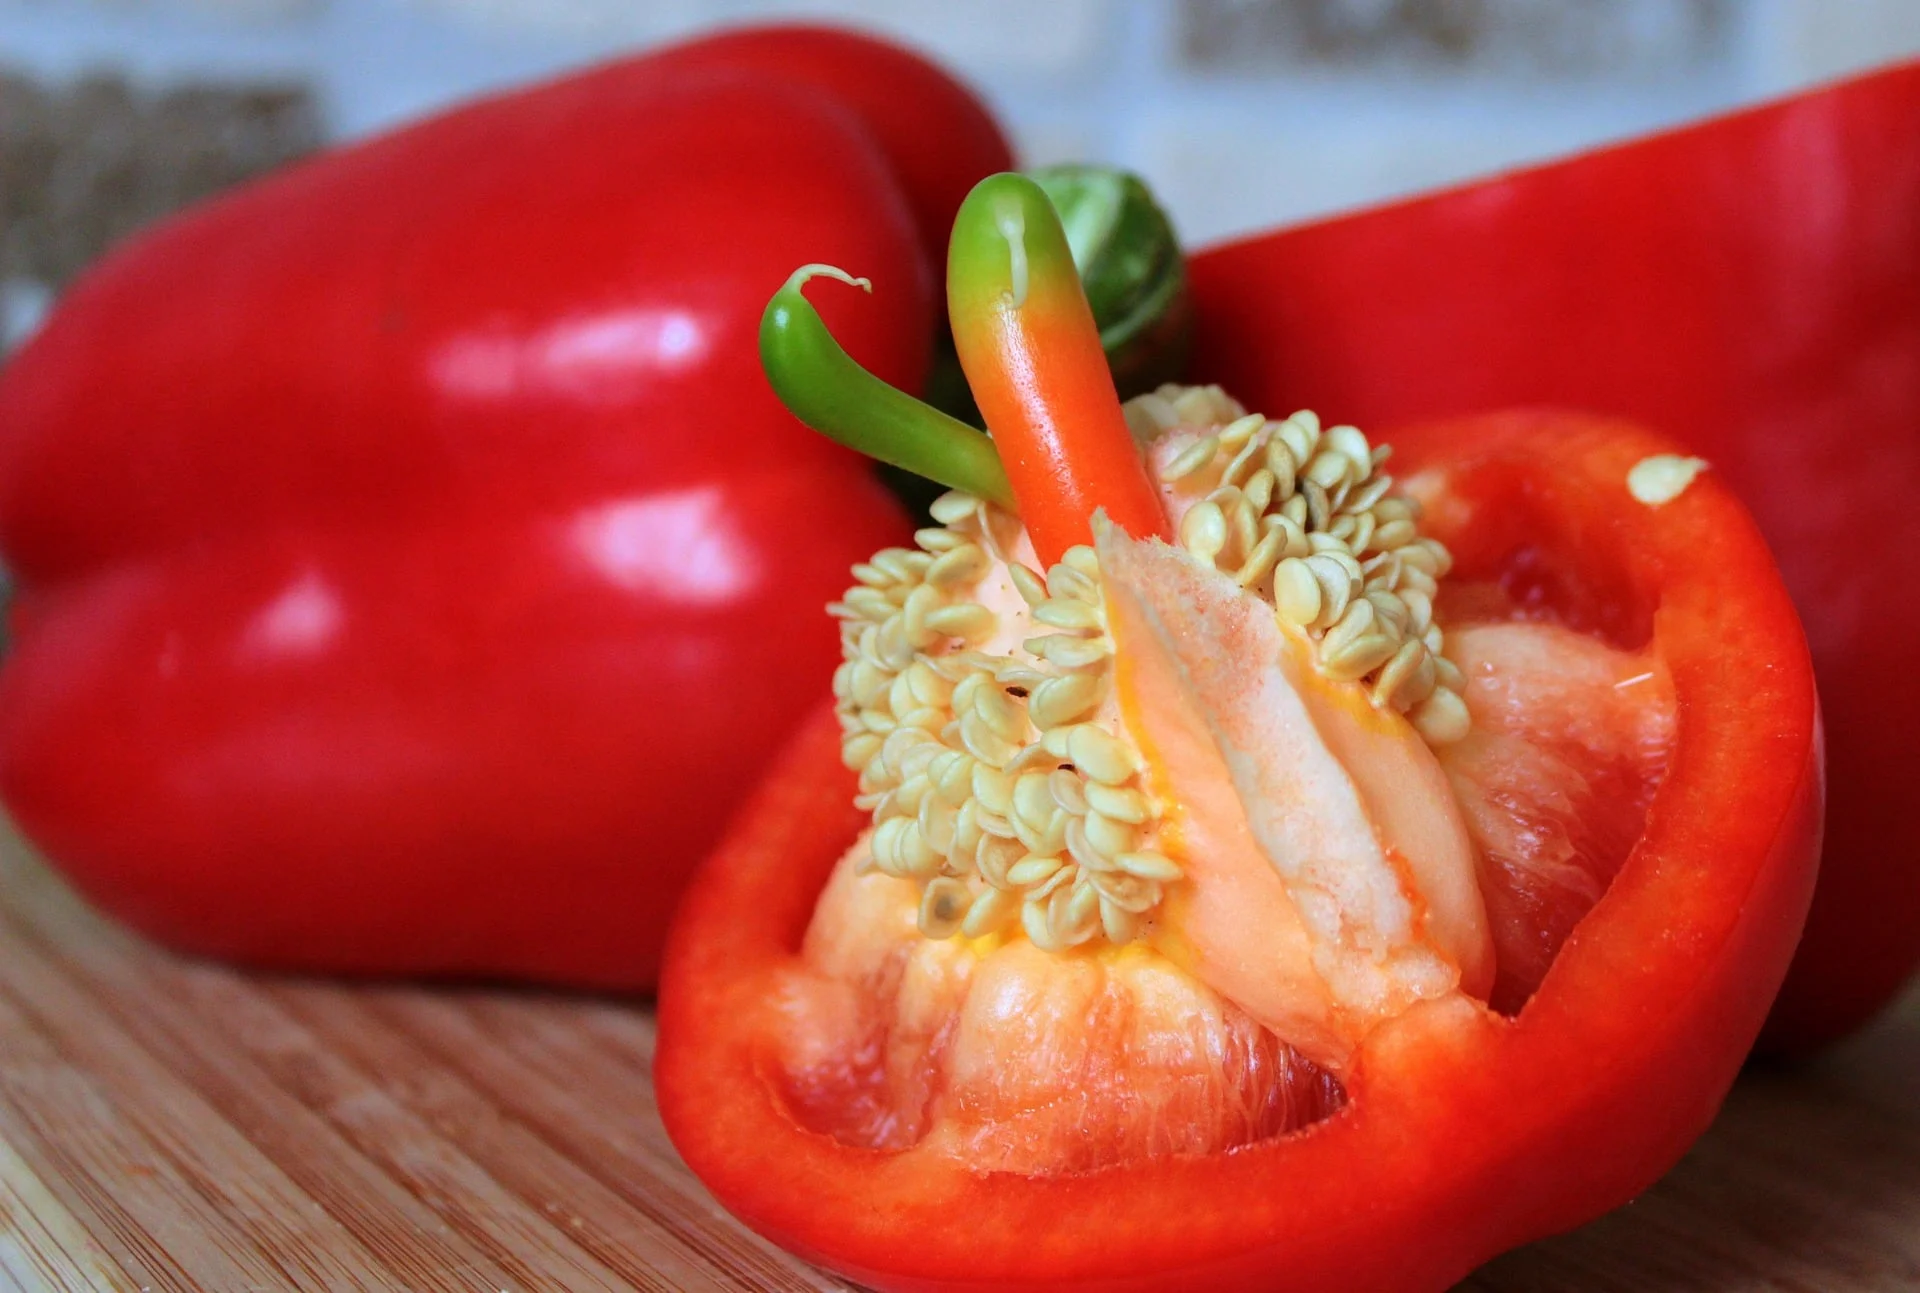
6. Cost-Effective: Starting seeds indoors is a cost-effective way to grow peppers. The initial investment in seed trays, pots, and seed starting mix is relatively low compared to purchasing established pepper plants. Moreover, you can save seeds from your own homegrown peppers for future planting, reducing the need to purchase seeds each year.
7. Learning Experience: Starting pepper seeds indoors provides an excellent opportunity for both beginners and experienced gardeners to learn and refine their plant nurturing skills. Observing the entire germination process, from seed to seedling, allows you to better understand the needs and growth patterns of pepper plants. This knowledge can be applied to future gardening endeavors.
8. Personal Satisfaction: There’s a unique sense of satisfaction in growing your own plants from seed. Witnessing the transformation from a tiny seed to a thriving pepper plant is incredibly rewarding and fosters a deeper connection with nature and the food you consume. Harvesting homegrown peppers that you started from seed brings a sense of pride and joy to your gardening efforts.
Starting pepper seeds indoors is a practical and fulfilling way to kickstart your gardening season. From greater variety and extended harvests to control over growing conditions and cost-effective gardening, the benefits of starting pepper seeds indoors are numerous. So grab your seeds, prepare your indoor growing space, and embark on a journey filled with flavorful peppers and gardening satisfaction.
Choosing the Right Pepper Varieties
When it comes to choosing pepper varieties for your indoor garden, there are a few factors to consider. The right selection will depend on your personal preferences, available space, and growing conditions. Here are some key points to keep in mind when choosing pepper varieties:
1. Heat Level: Peppers come in a wide range of heat levels, ranging from mild to extremely hot. Consider your tolerance for spice and the culinary dishes you plan to use the peppers in. If you’re new to growing peppers or prefer milder flavors, start with varieties like bell peppers or sweet banana peppers. For those who love a bit of heat, jalapenos, serranos, and cayenne peppers are great options. If you’re a spice enthusiast, consider growing ghost peppers, habaneros, or Carolina reapers.
2. Flavor Profile: Beyond the heat level, each pepper variety has its own unique flavor profile. Some peppers have a sweet and fruity taste, while others have a smoky or earthy flavor. Consider the flavors that appeal to you and align with your culinary preferences. Popular flavorful peppers include Poblano, Anaheim, Hungarian Wax, and Cubanelle peppers.
3. Size and Shape: Peppers come in various sizes and shapes, from small and round to long and slender. Consider the space you have available for growing and the desired appearance of your pepper plants. If you have limited space, compact varieties like mini bell peppers or ornamental peppers are excellent choices. On the other hand, if you want larger peppers for stuffing or grilling, look for varieties like bell peppers or banana peppers.
4. Growth Habit: Pepper plants can have different growth habits, which can impact the space needed for indoor cultivation. Some varieties are compact and bushy, making them suitable for smaller pots or container gardens. Others are more sprawling and require larger containers or trellises for support. Determinate varieties tend to have a more compact growth habit, while indeterminate varieties can grow larger and continue producing peppers throughout the season.
5. Days to Maturity: Consider the average time it takes for the pepper plants to reach maturity and produce ripe peppers. This information is typically provided on the seed packet or plant label. If you have a short growing season or want to have an early harvest, look for varieties that have a shorter days to maturity. Conversely, if you have a long growing season and want a prolonged harvest, choose varieties with longer maturation times.
6. Disease Resistance: Some pepper varieties have been bred to be more resistant to common diseases, such as bacterial spot or powdery mildew. Consider the disease resistance traits of the pepper varieties you’re interested in, especially if you’ve had issues with specific diseases in the past. Disease-resistant varieties can provide added protection and help ensure a successful harvest.
Remember to read seed catalogs, consult local gardening experts, and research online resources to gather information about specific pepper varieties. By carefully selecting pepper varieties that align with your preferences and growing conditions, you can create an indoor garden that yields a variety of delicious and flavorful peppers to enjoy. Happy pepper variety hunting!
Gathering the Necessary Supplies
Before you begin the exciting process of starting pepper seeds indoors, it’s essential to gather all the necessary supplies. Having the right equipment and materials at hand will ensure a smooth and successful seed starting experience. Here’s a checklist of the supplies you’ll need:
1. Seed Trays or Pots: Choose seed trays or individual pots that have drainage holes to prevent waterlogging. Opt for trays or pots that are at least 2-3 inches deep to allow room for root development. Starter kits with divided cells are also available and can help with organization.
2. Seed Starting Mix: Use a high-quality seed starting mix that is light and well-draining. Avoid using regular garden soil, as it can be too heavy and may contain pathogens that could harm delicate seedlings. Pre-mixed seed starting mix can be purchased from gardening centers or online, or you can create your own mix using a combination of peat moss, perlite, and vermiculite.
3. Labels or Markers: It’s crucial to label your seed trays or pots with the varieties of peppers you’re planting. Use waterproof labels or markers to prevent them from fading or getting damaged when watering your seedlings. This will help you stay organized and identify each variety as they grow.
4. Spray Bottle: A spray bottle with a fine mist setting is an excellent tool for watering your pepper seeds and seedlings. It allows you to provide moisture without disturbing the delicate seeds or dislodging the soil. Mist the soil surface gently to keep it evenly moist during the germination process.
5. Grow Lights or Sunny Windowsill: Pepper seeds need ample light to grow into healthy seedlings. If you don’t have access to a sunny south-facing windowsill, consider investing in a grow light system. LED or fluorescent lights with adjustable height options work best for indoor seed starting. Place the lights a few inches above the seedlings and adjust their height as the plants grow.
6. Thermometer: A thermometer is handy for monitoring the temperature in your seed starting area. Most pepper seeds require a consistent temperature of around 70-80°F (21-27°C) for successful germination. Keep track of the temperature to ensure optimal growing conditions for your seeds.
7. Small Fan: Air circulation is important to prevent mold growth and strengthen the seedlings. A small fan set on low or a breeze from an open window can simulate gentle airflow. This can help strengthen the stems of the seedlings and discourage fungal diseases.
8. Watering Can: While a spray bottle is useful for misting, a watering can with a narrow spout can be helpful for bottom watering and providing a more substantial amount of water to the seedlings as they grow.
In addition to these essential supplies, you may also want to consider items such as a seedling heat mat to provide bottom heat for faster germination, a humidity dome to create a mini greenhouse effect, and a plant grow tent or shelf to create a dedicated space for your indoor gardening venture.
Take the time to gather all the necessary supplies before starting your pepper seeds indoors. Having everything readily available will make the process more efficient and enjoyable. With the right equipment and materials at hand, you’ll be well-equipped to embark on a successful pepper-growing adventure.
Preparing the Seed Starting Mix
Preparing the seed starting mix is a crucial step in the process of starting pepper seeds indoors. The right mix provides optimal aeration, moisture retention, and nutrient availability for the seeds to germinate and seedlings to thrive. Here’s a step-by-step guide to preparing the seed starting mix:
1. Choose the Right Ingredients: To create a suitable seed starting mix, you’ll need a combination of three main ingredients: sterile seed-starting soil, perlite, and vermiculite.
2. Sterile Seed-Starting Soil: The base of the seed starting mix is sterile seed-starting soil. This type of soil is specially formulated to be lightweight and well-draining. It is free from disease-causing organisms and provides a good balance of organic matter and nutrients.
3. Perlite: Perlite is a lightweight volcanic mineral that helps improve drainage in the seed starting mix. It prevents the soil from becoming compacted, allowing air to reach the roots and preventing waterlogged conditions that can lead to root rot.
4. Vermiculite: Vermiculite is another mineral that helps retain moisture in the seed starting mix. It has excellent water-holding properties, ensuring that the seeds stay consistently moist during the germination process.
5. Mixing the Ingredients: Start by measuring equal parts of sterile seed-starting soil, perlite, and vermiculite in a clean container or bucket. Use a trowel or scoop to combine the ingredients thoroughly, breaking up any clumps and ensuring a uniform mixture.
6. Optional Additions: Depending on personal preference and availability, you may choose to add additional ingredients to enhance the seed starting mix. Some gardeners like to include compost or well-rotted manure for added nutrients and microbial activity. However, be cautious not to use fresh compost or manure, as they can introduce harmful pathogens to the mix.
7. Moistening the Mix: Once the ingredients are well mixed, it’s time to moisten the seed starting mix. Gradually add water while stirring until the mixture is moist but not waterlogged. The goal is to achieve a consistency similar to a damp sponge – where the mix holds its shape when squeezed but does not release excessive water.
8. Allowing the Mix to Settle: After moistening the mix, let it sit for a while to allow the components to settle. This resting period helps the mix absorb the moisture evenly and ensures consistent moisture distribution when used for seeding.
By following these steps, you can create a well-balanced and nutrient-rich seed starting mix that offers the ideal conditions for successful germination and healthy seedling development. Remember to keep the prepared mix in a clean and covered container until you’re ready to use it. Providing your pepper seeds with this optimal starting medium sets them on the path to thriving and flourishing as they transition from seeds to robust and productive plants.
Read more: When To Start Foxglove Seeds Indoors
Sowing Pepper Seeds
Sowing pepper seeds is an exciting and essential step in the process of starting peppers indoors. Proper sowing techniques provide the seeds with the right conditions to germinate and ensure strong, healthy seedlings. Here’s a step-by-step guide to sowing pepper seeds:
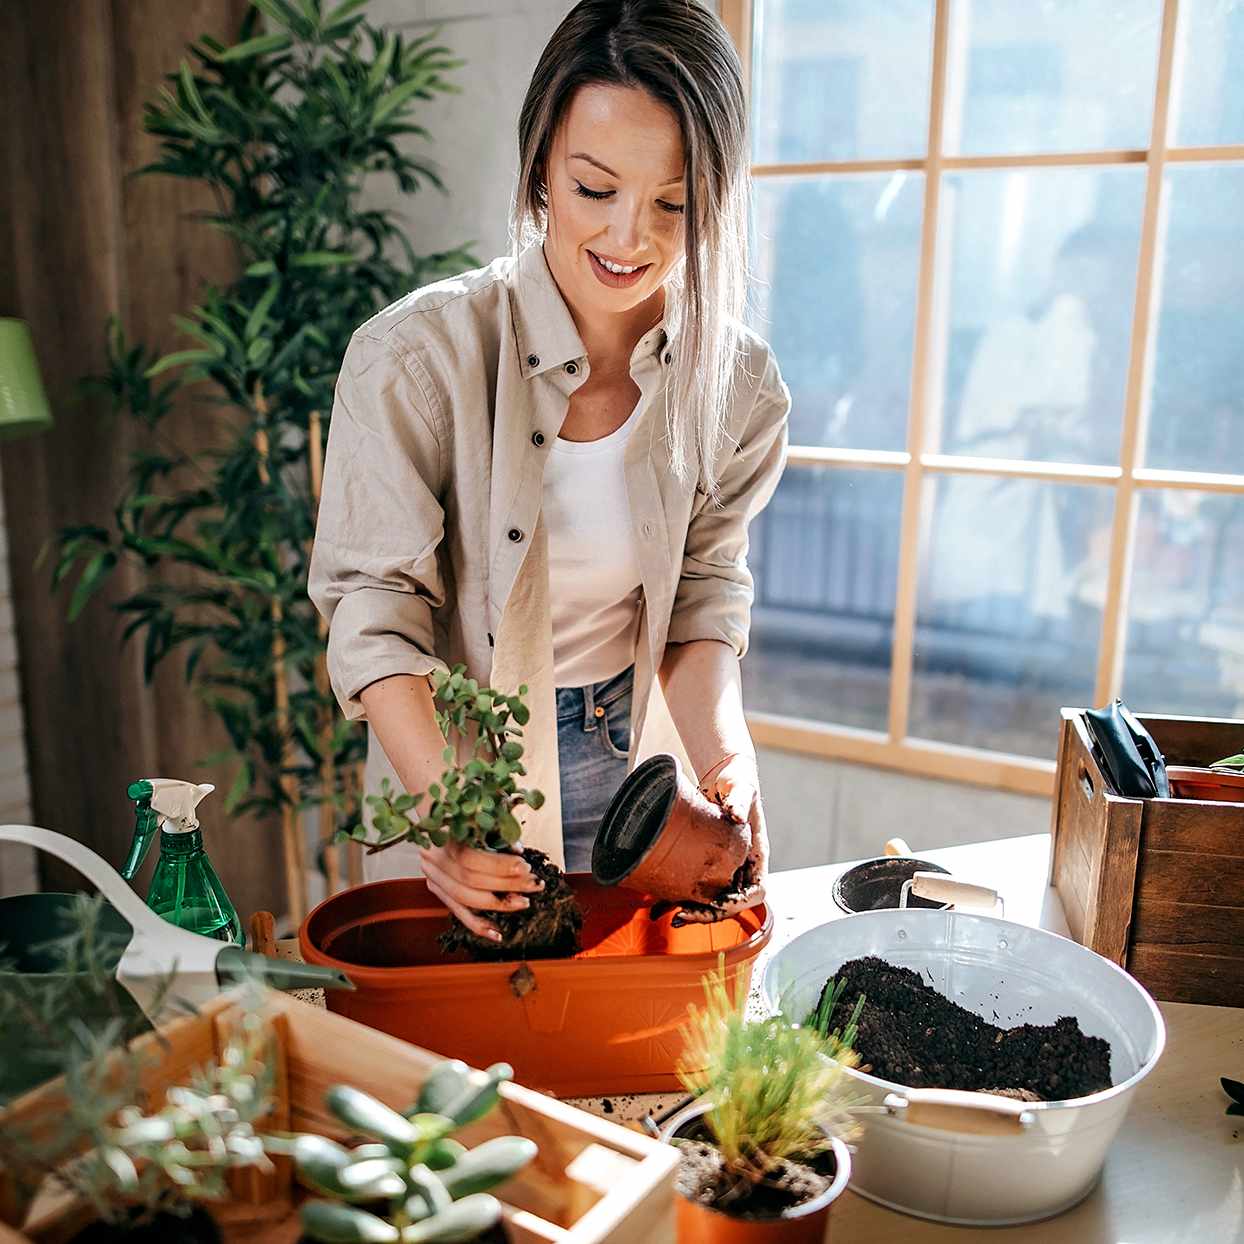
1. Prepare the Seed Trays or Pots: Fill your seed trays or individual pots with the prepared seed starting mix. Ensure that the containers have drainage holes to prevent waterlogging. Gently pat down the soil to create a level surface for sowing the seeds.
2. Make Indentations: Using your finger or a small tool, create small indentations or holes in the soil. The depth of the holes depends on the size of the pepper seeds. As a general rule, plant the seeds about 1/4 to 1/2 inch deep. Space the holes according to the recommended spacing for the variety you are planting.
3. Sow the Seeds: Carefully place one or two pepper seeds in each hole, ensuring they are evenly spaced. If sowing multiple seeds in a single container, position them a few inches apart to allow for proper growth. If you are sowing a variety mix, make sure to label the trays or pots to identify each variety.
4. Cover the Seeds: Once the seeds are in place, cover them with a thin layer of the prepared seed starting mix. Gently press down on the soil to ensure good seed-to-soil contact.
5. Mist the Soil: Using a spray bottle set to a fine mist setting, gently spray the soil surface with water. You want to keep the soil moist but not waterlogged. Misting helps avoid displacing the seeds or compacting the soil.
6. Label and Date: To avoid confusion later on, label each seed tray or pot with the variety of pepper seeds you’ve sown. It’s also helpful to include the date of sowing. This information will come in handy when monitoring germination and growth.
7. Provide Adequate Light: Place the seed trays or pots in a warm area with access to bright, indirect light. Pepper seeds require warmth for germination, so maintaining a consistent temperature between 70-80°F (21-27°C) is crucial. If natural light is limited, consider using a grow light to supplement the light requirements.
8. Maintain Moisture: As the seeds germinate and the seedlings begin to grow, it’s crucial to keep the soil consistently moist. Use the spray bottle to mist the soil surface when it starts to dry out. Watering from the bottom is also an option. Simply fill a tray or saucer with water, and place the seed tray or pot on top, allowing the soil to absorb the water through the drainage holes.
9. Patience and Observation: Be patient during the germination process, as pepper seeds can take anywhere from 7 to 14 days to sprout. Check the trays or pots regularly and observe the progress. Once the seedlings emerge, adjust the light source to maintain a distance of a few inches above the plants.
By following these steps and providing the optimal conditions, you are well on your way to successfully growing pepper seedlings. Remember that each seed has the potential to develop into a thriving pepper plant, contributing to a bountiful harvest of delicious and flavorsome peppers.
When starting pepper seeds indoors, use a seed starting mix, provide warmth and light, and keep the soil consistently moist but not waterlogged. Transplant seedlings into larger pots once they have developed a few sets of true leaves.
Providing Optimal Growing Conditions
To ensure the healthy growth and development of your pepper seedlings, it’s essential to provide them with optimal growing conditions. Creating a favorable environment for your plants will promote vigorous growth, strong root development, and ultimately lead to a successful harvest. Here are some key factors to consider in providing optimal growing conditions for your pepper seedlings:
1. Temperature: Pepper plants thrive in warm temperatures. In the early stages, maintain a temperature between 70-80°F (21-27°C) for optimal germination and growth. Use a thermometer to monitor the temperature in your growing area and make any necessary adjustments to keep it within the desired range. Avoid exposing seedlings to cold drafts or extreme temperature fluctuations.
2. Light: Adequate light is crucial for the growth of healthy pepper seedlings. Place the trays or pots in a location that receives bright, indirect light for at least 12-14 hours each day. If natural light is limited, consider using artificial grow lights. Position the lights a few inches above the seedlings, adjusting the height as the plants grow to maintain an appropriate distance.
3. Air Circulation: Good air circulation helps strengthen the seedlings’ stems, minimize disease risks, and promote overall plant health. Place a small fan on low setting near the seedlings to provide gentle airflow or open a nearby window periodically. Avoid placing the fan too close to the seedlings to prevent excessive drying of the soil.
4. Humidity: Pepper seedlings prefer moderate humidity levels to prevent drying out. While it’s essential to maintain a slightly moist soil, avoid excessive humidity, as it can lead to fungal diseases. If the air in your growing area is dry, consider using a humidity dome or placing a tray filled with water near the seedlings to create a slightly more humid environment.
5. Watering: Proper watering is crucial for the health of your pepper seedlings. Keep the soil consistently moist but not overly saturated. Use a spray bottle or a watering can with a narrow spout to water the seedlings gently from the bottom, or mist the soil surface when it starts to dry out. Avoid overwatering, as it can lead to root rot and other moisture-related issues.
6. Nutrients: While the seed starting mix provides some initial nutrients, additional fertilization is necessary as the seedlings grow. About two weeks after germination, begin feeding the seedlings with a balanced liquid fertilizer diluted to half the recommended strength. Gradually increase the frequency and strength of the fertilizer as the plants develop, following the manufacturer’s instructions.
7. Transplanting: As the seedlings grow, they will outgrow their initial containers. Transplant them into larger pots or trays when they have developed a few sets of true leaves and are around 2-3 inches tall. Use the same seed starting mix or a well-draining potting mix. Handle the seedlings carefully to avoid damaging the delicate roots.
8. Hardening Off: Before transplanting the hardened-off seedlings into the outdoor garden, gradually expose them to outdoor conditions. This process, known as hardening off, helps acclimate the seedlings to the sun, wind, and temperature changes. Start by placing the seedlings outdoors in a sheltered area for a few hours a day, gradually increasing their exposure over the course of a week.
By providing optimal growing conditions, you are giving your pepper seedlings the best chance to thrive and produce a bountiful harvest. With attention to temperature, light, air circulation, humidity, watering, nutrient availability, and proper transplanting practices, you will support strong and healthy plants that will bring you joy and a plentiful harvest of flavorful peppers.
Watering and Fertilizing Pepper Seedlings
Watering and fertilizing are essential aspects of caring for pepper seedlings. Proper attention to these practices ensures that your seedlings receive the necessary moisture and nutrients for healthy growth and development. Here’s a guide to watering and fertilizing your pepper seedlings:
Watering:
1. Monitor Moisture Levels: Check the moisture level of the seed starting mix regularly by inserting your finger into the soil. If the soil feels dry up to your first knuckle, it’s time to water. Avoid overwatering, as it can lead to root rot and other moisture-related problems. Aim for consistently moist soil, but not soggy or waterlogged.
2. Bottom Watering: To provide water directly to the roots and avoid disturbing the fragile seedlings, use the bottom watering method. Place the seed tray or pot in a tray or saucer filled with water and allow the soil to absorb moisture through the drainage holes. Leave the container in the water until the surface of the soil appears moist, then remove it to prevent excessive saturation.
3. Mist the Soil: Alternatively, you can mist the soil surface with a spray bottle set to a fine mist. Mist the soil whenever it starts to dry out, ensuring that the top layer remains consistently moist. Be gentle to avoid dislodging the seeds or compacting the soil.
4. Regular Watering Schedule: The frequency of watering depends on various factors, including the environmental conditions, size of the containers, and the age of the seedlings. As a general guideline, water the seedlings every 1-3 days, adjusting the frequency based on soil moisture levels. Avoid letting the soil dry out completely or remain excessively damp for extended periods.
Fertilizing:
1. Timing of Fertilization: Pepper seedlings typically require fertilization after around two weeks of growth. At this point, they have used up the initial nutrients provided by the seed starting mix and need a boost for continued development.
2. Use Balanced Fertilizer: Choose a balanced liquid fertilizer with equal amounts of nitrogen, phosphorus, and potassium (NPK). Dilute the fertilizer to half the recommended strength to avoid over-fertilizing the seedlings.
3. Fertilization Frequency: Begin by fertilizing the seedlings once a week, gradually increasing the frequency to every 2-3 days as they grow. Carefully follow the fertilizer manufacturer’s instructions for mixing ratios and application rates.
4. Apply Fertilizer Carefully: When applying the fertilizer, pour it directly onto the soil, avoiding contact with the leaves or stems. Take care not to over-fertilize, as excessive nutrient levels can lead to burns or stunted growth.
5. Organic Fertilizer Options: If you prefer to use organic fertilizers, options such as compost tea or diluted fish emulsion can be effective for providing nutrients to your pepper seedlings. Follow the manufacturer’s instructions or consult a trusted gardening resource for proper application rates.
6. Observation and Adjustment: Monitor the growth and overall health of your pepper seedlings after fertilization. If you notice any signs of nutrient deficiencies (such as yellowing leaves), adjust your fertilization schedule or switch to a fertilizer specifically formulated for peppers.
Remember, maintaining a balance in watering and fertilizing practices is crucial. Overwatering or over-fertilizing can be just as harmful to the seedlings as neglecting their needs. By providing consistent moisture and appropriate nutrients, you’ll nurture robust pepper seedlings that will go on to produce an abundant harvest of flavorful peppers.
Transplanting Pepper Seedlings
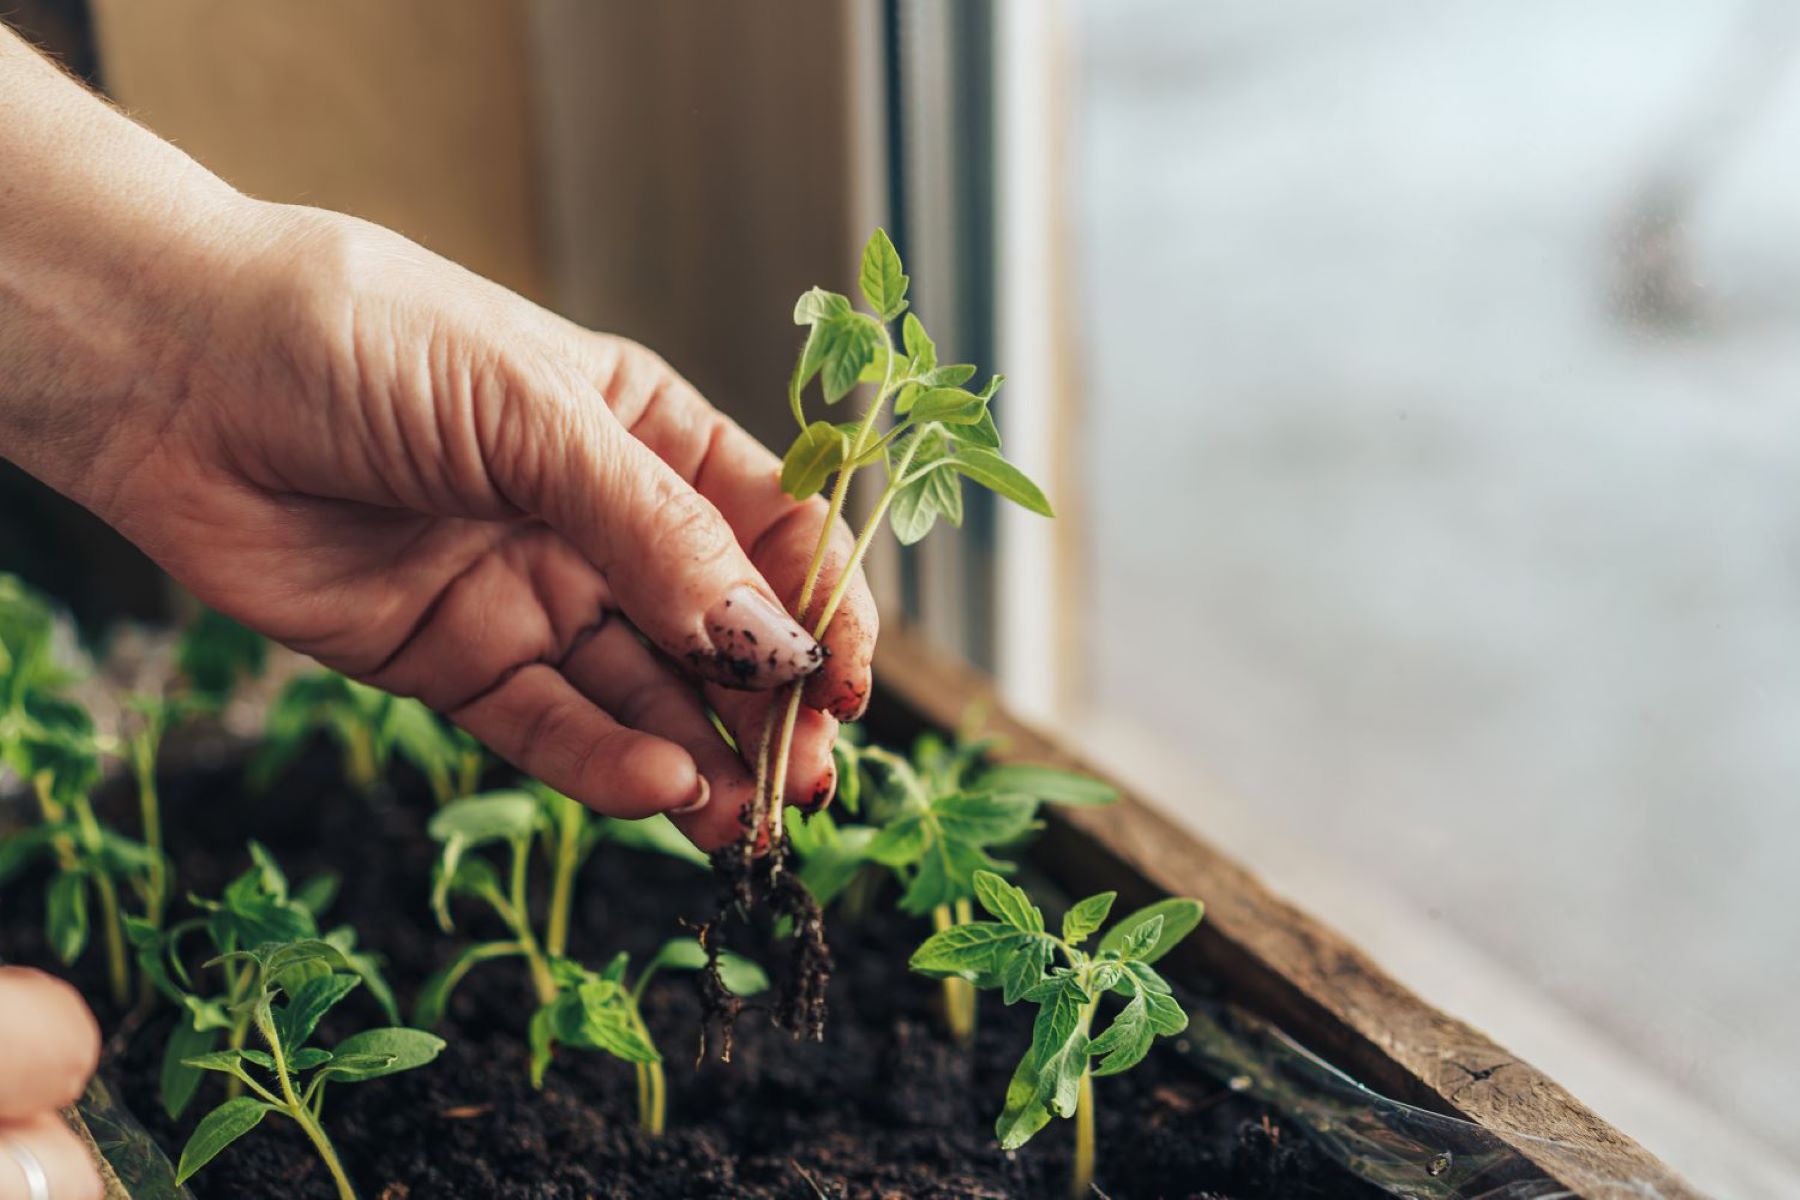
Transplanting is a critical step in the journey of pepper seedlings, allowing them to transition from their small containers to larger pots or directly into the garden. To ensure a successful transition and healthy growth, it’s important to follow proper transplanting techniques. Here’s a guide to transplanting your pepper seedlings:
1. Timing: Transplant your pepper seedlings after they have developed a few sets of true leaves and are around 2-3 inches tall. Usually, this occurs 6-8 weeks after sowing the seeds indoors. Make sure the threat of frost has passed and the outdoor temperatures are consistently warmer, as peppers are sensitive to cold.
2. Prepare the New Containers: Choose containers or pots that have drainage holes and are large enough to accommodate the growing roots of the pepper plants. Fill the new containers with a well-draining potting mix, leaving some space at the top for watering.
3. Water the Seedlings: Before transplanting, thoroughly water the seedlings in their current containers. This moisture will help hold the soil together during the transplanting process and minimize stress on the plants.
4. Loosen the Soil: Gently loosen the soil around the base of each seedling with your fingers or a small trowel. Be careful not to damage the delicate roots. This step helps ease the removal of the seedling from its current container.
5. Carefully Remove Seedlings: Hold the seedling by its leaves, never by the stem, as the stem is fragile and can be easily damaged. Gently lift the seedling from its current container, ensuring you retain as much of the root system and soil surrounding the roots as possible.
6. Place in New Containers: Make a hole in the soil of the new container that is deep enough to accommodate the roots, and carefully place the seedling in the hole. If the seedling is too tall for the hole, you can gently pinch off the bottom leaves to ensure that only the upper leaves are above the soil.
7. Firm Soil and Water: Gently firm the soil around the seedling, ensuring that it is secure and upright. Water the newly transplanted seedling thoroughly to settle the soil and eliminate any air pockets around the roots.
8. Maintain Care: After transplanting, place the newly transplanted pepper seedlings in a warm and protected location, away from direct sunlight for a couple of days. This will help them adjust to their new environment. Gradually introduce them to more sunlight by moving them to a sunny spot for a couple of hours each day, increasing the duration gradually over a week.
9. Outdoor Transplanting: If transplanting the seedlings directly into the garden, space them according to the recommended spacing for the specific pepper variety. Ensure they are planted at the same depth as they were in the containers. Apply a layer of organic mulch around the base of the plants to conserve moisture and suppress weeds.
10. Water and Monitor: Keep the newly transplanted seedlings well-watered but be cautious not to overwater. Monitor the plants closely for any signs of stress or damage, and make adjustments as needed in terms of supporting stakes, pest control, or nutrient requirements.
Remember, transplanting can cause temporary stress to the seedlings, but with proper care and attention, they will quickly recover and continue growing vigorously. By following these guidelines, you’ll ensure a smooth transition for your pepper seedlings and set them on the path to a productive and flourishing pepper garden.
Troubleshooting Common Seedling Issues
Growing pepper seedlings indoors can sometimes come with challenges. However, with proper care and attention, it’s possible to overcome common seedling issues and set your plants up for success. Here are some troubleshooting tips for common seedling issues:
1. Seedling Legginess: Leggy seedlings are characterized by long, weak stems and sparse foliage. This is often the result of inadequate light. To prevent leggy seedlings, ensure your seedlings are receiving sufficient light. Position them near a sunny window or use artificial grow lights placed a few inches above the seedlings. Rotate the trays regularly to promote even growth.
2. Damping-Off: Damping-off is a fungal disease that causes seedlings to become weak and collapse at the base. To prevent damping-off, make sure to use sterilized seed starting mix and clean containers. Avoid overwatering, provide adequate air circulation, and discard any infected seedlings promptly. A solution of chamomile tea or hydrogen peroxide can be used as a preventative treatment for damping-off.
3. Soil Diseases: Soil-borne diseases such as fungal wilts or root rot can affect pepper seedlings. To minimize the risk of soil diseases, ensure that you’re using clean containers and properly sterilized seed starting mix. Practice good sanitation by not reusing soil or containers from previous seasons. Avoid overwatering or keeping the seedlings in excessively wet conditions.
4. Nutrient Deficiencies: Seedlings can exhibit nutrient deficiencies if they are not receiving adequate nutrition. Common nutrient deficiencies in seedlings include nitrogen, phosphorus, and iron. Use a balanced fertilizer specifically formulated for seedlings to provide essential nutrients. If noticing specific deficiency symptoms, such as yellowing leaves or stunted growth, adjust your fertilization routine accordingly.
5. Overwatering or Underwatering: Overwatering or underwatering can lead to stress and damage to seedlings. Ensure that you maintain proper moisture levels in the soil by checking the soil moisture regularly. Water the seedlings when the soil feels dry up to your first knuckle, ensuring the water reaches the root zone. Avoid letting the soil dry out completely or keeping it overly saturated for prolonged periods.
6. Insufficient Air Circulation: Poor air circulation can lead to issues such as mold growth, weak stems, and increased risk of disease. Ensure proper ventilation in your growing area by using a small fan set on low or opening a nearby window periodically. This will promote air circulation and strengthen the seedlings’ stems.
7. Pests: Seedlings can be susceptible to pests like aphids, mealybugs, or spider mites. Inspect your seedlings regularly and take immediate action if you notice any pest activity. Use organic pest control methods such as spraying plants with neem oil or using insecticidal soap. Remove any heavily infested seedlings to prevent the spread of pests.
8. Transplant Shock: Transplanting can cause temporary stress to the seedlings, resulting in wilting or slowed growth. Minimize transplant shock by carefully handling the seedlings during the transplanting process and providing them with a protective environment for a few days after transplanting. Gradually introduce them to outdoor conditions if transplanting to the garden.
By being observant, taking proactive measures, and providing the necessary care, you can troubleshoot and overcome common seedling issues. Remember, prevention is key, so establish good practices from the beginning and address any problems promptly. With patience and dedicated attention, your pepper seedlings will overcome these challenges and grow into strong, productive plants.
Conclusion
Starting pepper seeds indoors is a rewarding and practical way to get a head start on the growing season, expand your variety selection, and ensure a successful harvest of flavorful peppers. By following the steps outlined in this guide, you can embark on a journey of growing healthy and thriving pepper seedlings.
Choosing the right pepper varieties, gathering the necessary supplies, preparing the seed starting mix, sowing the seeds, and providing optimal growing conditions are all integral parts of the process. From monitoring temperature and light levels to proper watering and fertilizing, caring for your pepper seedlings requires attention to detail and a nurturing touch.
Transplanting your seedlings into larger containers or the garden marks an important milestone in their growth, enabling them to continue flourishing and eventually bear fruit. Throughout the journey, troubleshooting common seedling issues, such as legginess, diseases, nutrient deficiencies, or pests, ensures that you address any concerns promptly for the best chance of success.
By dedicating time and effort to starting pepper seeds indoors, you gain a deeper connection with your garden and the food you grow. The satisfaction of nurturing your plants from tiny seeds to robust plants is unparalleled. Your harvest of fresh, homegrown peppers will elevate your culinary creations and bring a sense of accomplishment and pride.
Remember to enjoy the process and be patient. Gardening is both an art and a science, and it’s through trial and error that we learn and improve. Don’t be discouraged by setbacks or challenges along the way. Instead, view them as opportunities for growth and learning.
Embrace the joy of starting pepper seeds indoors, experimenting with different varieties, and relishing in the beauty of watching your seedlings transform into productive plants. With the knowledge and guidance provided in this guide, you are well-equipped to embark on a successful pepper-growing journey.
So, gather your supplies, prepare your seed starting mix, sow those seeds with care, and provide the optimal growing conditions for your pepper seedlings. Before you know it, you’ll be enjoying the fruits of your labor, adding homegrown peppers to your favorite dishes, and delighting in the satisfaction of a thriving garden. Happy growing!
Frequently Asked Questions about How To Start Pepper Seeds Indoors
Was this page helpful?
At Storables.com, we guarantee accurate and reliable information. Our content, validated by Expert Board Contributors, is crafted following stringent Editorial Policies. We're committed to providing you with well-researched, expert-backed insights for all your informational needs.


0 thoughts on “How To Start Pepper Seeds Indoors”