Home>Gardening & Outdoor>Outdoor Entertaining>How To Build A Gazebo Over A Fire Pit
Outdoor Entertaining
How To Build A Gazebo Over A Fire Pit
Modified: August 20, 2024
Learn how to create the perfect outdoor entertaining space with our step-by-step guide on building a gazebo over a fire pit. Ideal for cozy gatherings and summer nights.
(Many of the links in this article redirect to a specific reviewed product. Your purchase of these products through affiliate links helps to generate commission for Storables.com, at no extra cost. Learn more)
Introduction
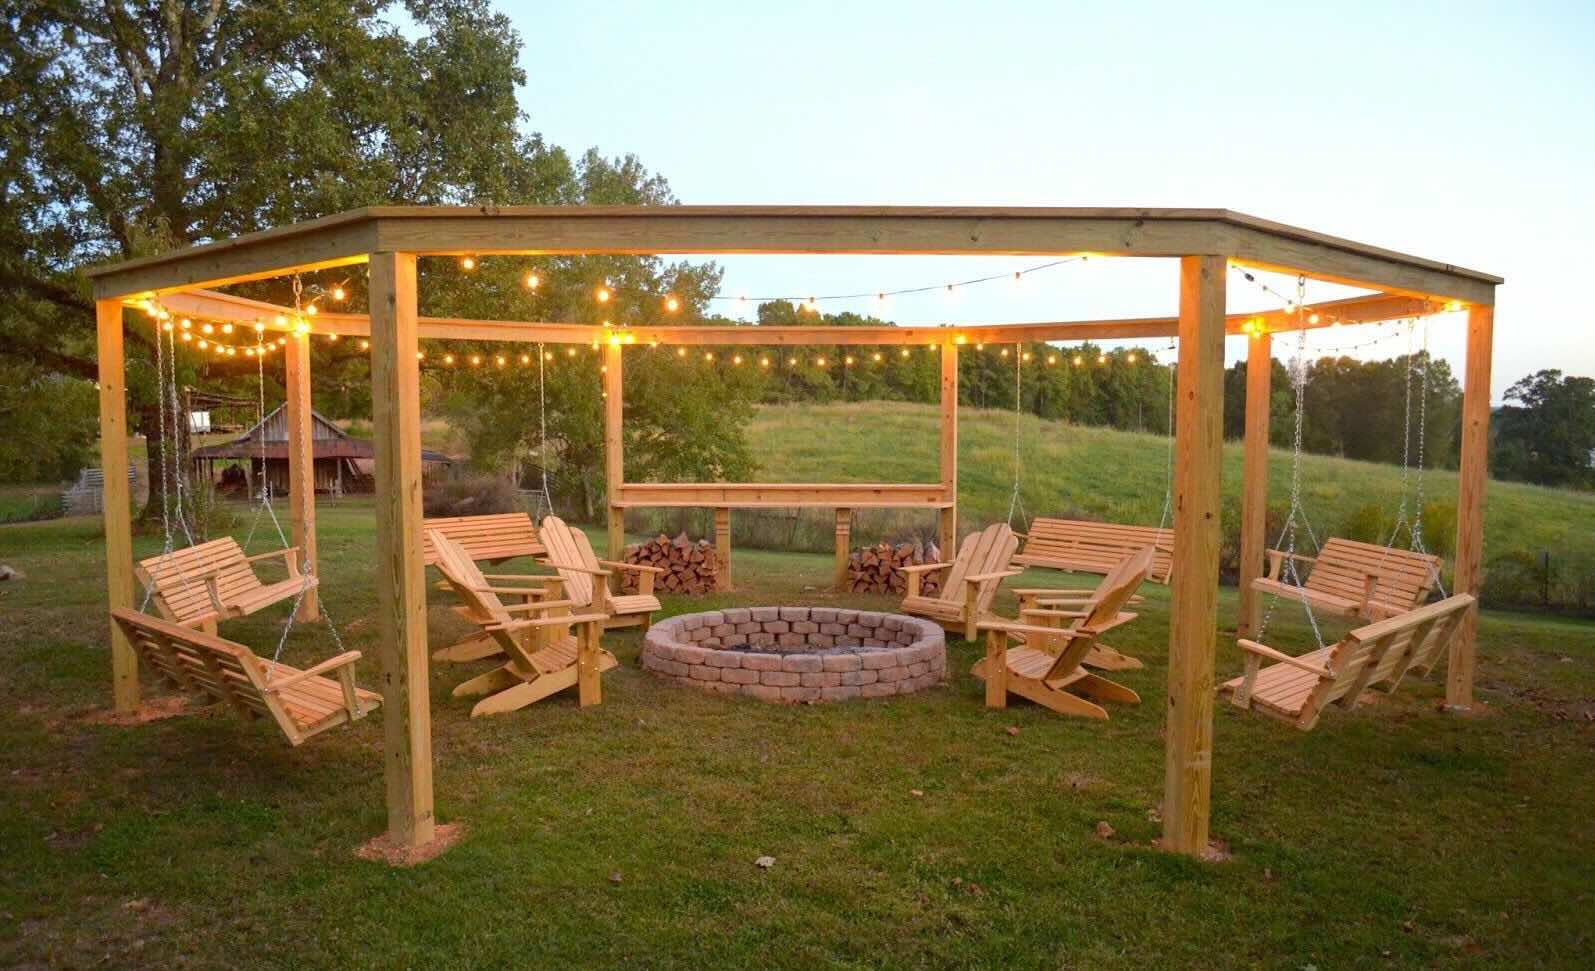
Welcome to the ultimate guide on how to build a gazebo over a fire pit! Creating a cozy outdoor space where you can gather with friends and family around a crackling fire is a dream for many homeowners. A gazebo not only adds charm and character to your backyard but also provides a sheltered area for relaxation and entertainment. By incorporating a fire pit into your gazebo design, you can extend the functionality of your outdoor living space, making it a focal point for year-round enjoyment.
In this comprehensive guide, we will walk you through each step of the process, from planning and preparation to the finishing touches. Whether you're a seasoned DIY enthusiast or a novice looking to embark on your first outdoor construction project, we've got you covered. With detailed instructions and expert tips, you'll gain the confidence and know-how to bring your vision to life.
So, roll up your sleeves, gather your tools, and get ready to embark on an exciting journey of creating a stunning gazebo over a fire pit. Let's dive in and explore the essential steps to turn your outdoor space into a captivating retreat that beckons you to relax and unwind amidst the mesmerizing glow of a crackling fire.
Key Takeaways:
- Planning and preparation are essential for building a gazebo over a fire pit. Consider design, local regulations, materials, budget, and utility connections to ensure a successful and safe construction project.
- Adding finishing touches like seating, lighting, and safety measures enhances the functionality and ambiance of your outdoor retreat. Personalize the space to create a welcoming and memorable environment for gatherings.
Read more: How To Build An Outdoor Fire Pit
Step 1: Planning and Preparation
Before diving into the construction process, meticulous planning and thorough preparation are crucial for the successful execution of your gazebo and fire pit project. Here are the key aspects to consider:
- Design and Layout: Start by envisioning the size, shape, and style of your gazebo, taking into account the space needed for the fire pit. Consider factors such as the number of seating areas, the desired ambiance, and any additional features you may want to incorporate, such as built-in benches or a serving counter.
- Local Regulations and Permits: Check with your local building authorities to understand any zoning restrictions, building codes, or permit requirements for constructing a gazebo and fire pit. Compliance with regulations is essential to ensure safety and avoid potential legal issues.
- Material Selection: Research and select suitable materials for your project, considering durability, weather resistance, and aesthetic appeal. Common options include pressure-treated wood, cedar, or composite materials for the gazebo, and fire-resistant materials for the fire pit area.
- Budget and Timeline: Establish a realistic budget for the entire project, factoring in material costs, tools, and any professional assistance you may require. Create a timeline that outlines the various stages of construction, allowing for potential setbacks and unexpected delays.
- Utility Considerations: Take into account the proximity to utilities such as gas, electricity, and water. If you plan to incorporate features like outdoor lighting, a gas-fueled fire pit, or a built-in grill, ensure that the necessary connections or provisions are in place.
By investing time and effort in the planning phase, you can lay a solid foundation for the construction process and minimize the likelihood of unforeseen challenges along the way. With a well-defined plan in place, you’ll be ready to move on to the next exciting stage: choosing the perfect location for your gazebo and fire pit.
Step 2: Choosing the Right Location
When it comes to selecting the ideal spot for your gazebo and fire pit, several factors come into play. The location not only influences the visual impact of your outdoor space but also affects practical considerations such as accessibility and safety. Here’s what to keep in mind as you scout for the perfect location:
- Scenic Views and Natural Elements: Consider the surrounding landscape and any natural focal points, such as a lush garden, a serene pond, or a breathtaking mountain vista. Orienting your gazebo to take advantage of scenic views can enhance the overall ambiance and create a captivating setting for gatherings.
- Proximity to the Home: Evaluate the proximity of the chosen location to your house, ensuring convenient access from indoor living areas. A well-placed gazebo can serve as a seamless extension of your home, encouraging frequent use and easy transition between indoor and outdoor spaces.
- Sun and Shade: Take note of the sun’s path throughout the day to determine the desired level of sun exposure and shade. Positioning the gazebo to provide a comfortable mix of sunlight and shade can optimize comfort and usability, especially during hot summer days.
- Wind and Ventilation: Assess the prevailing wind direction and airflow patterns in your yard. By strategically placing the gazebo, you can create a sheltered and breezy environment, minimizing wind exposure while promoting natural ventilation.
- Safety and Regulations: Ensure compliance with safety guidelines and local regulations regarding setback distances from property lines, existing structures, and utility easements. Prioritize safety by choosing a location that minimizes fire hazards and allows for adequate clearance around the fire pit.
By carefully considering these factors, you can pinpoint a location that maximizes the beauty, functionality, and comfort of your gazebo and fire pit ensemble. Once you’ve identified the perfect spot, you’ll be ready to embark on the next phase: gathering the essential materials and tools for your construction project.
Step 3: Gathering Materials and Tools
As you prepare to bring your gazebo and fire pit vision to life, assembling the necessary materials and tools is a pivotal step. By ensuring that you have everything required for the construction process, you can streamline the project and minimize interruptions. Here’s a comprehensive list of the essential materials and tools you’ll need:
Materials:
- Gazebo Components: Depending on your chosen design, acquire the necessary lumber, posts, beams, and hardware for the gazebo frame. Opt for high-quality, weather-resistant materials that align with your aesthetic preferences and long-term durability goals.
- Roofing Materials: Select roofing materials such as shingles, metal panels, or thatch, along with the associated underlayment and fasteners. Consider the climate in your area and choose materials that offer adequate protection from the elements.
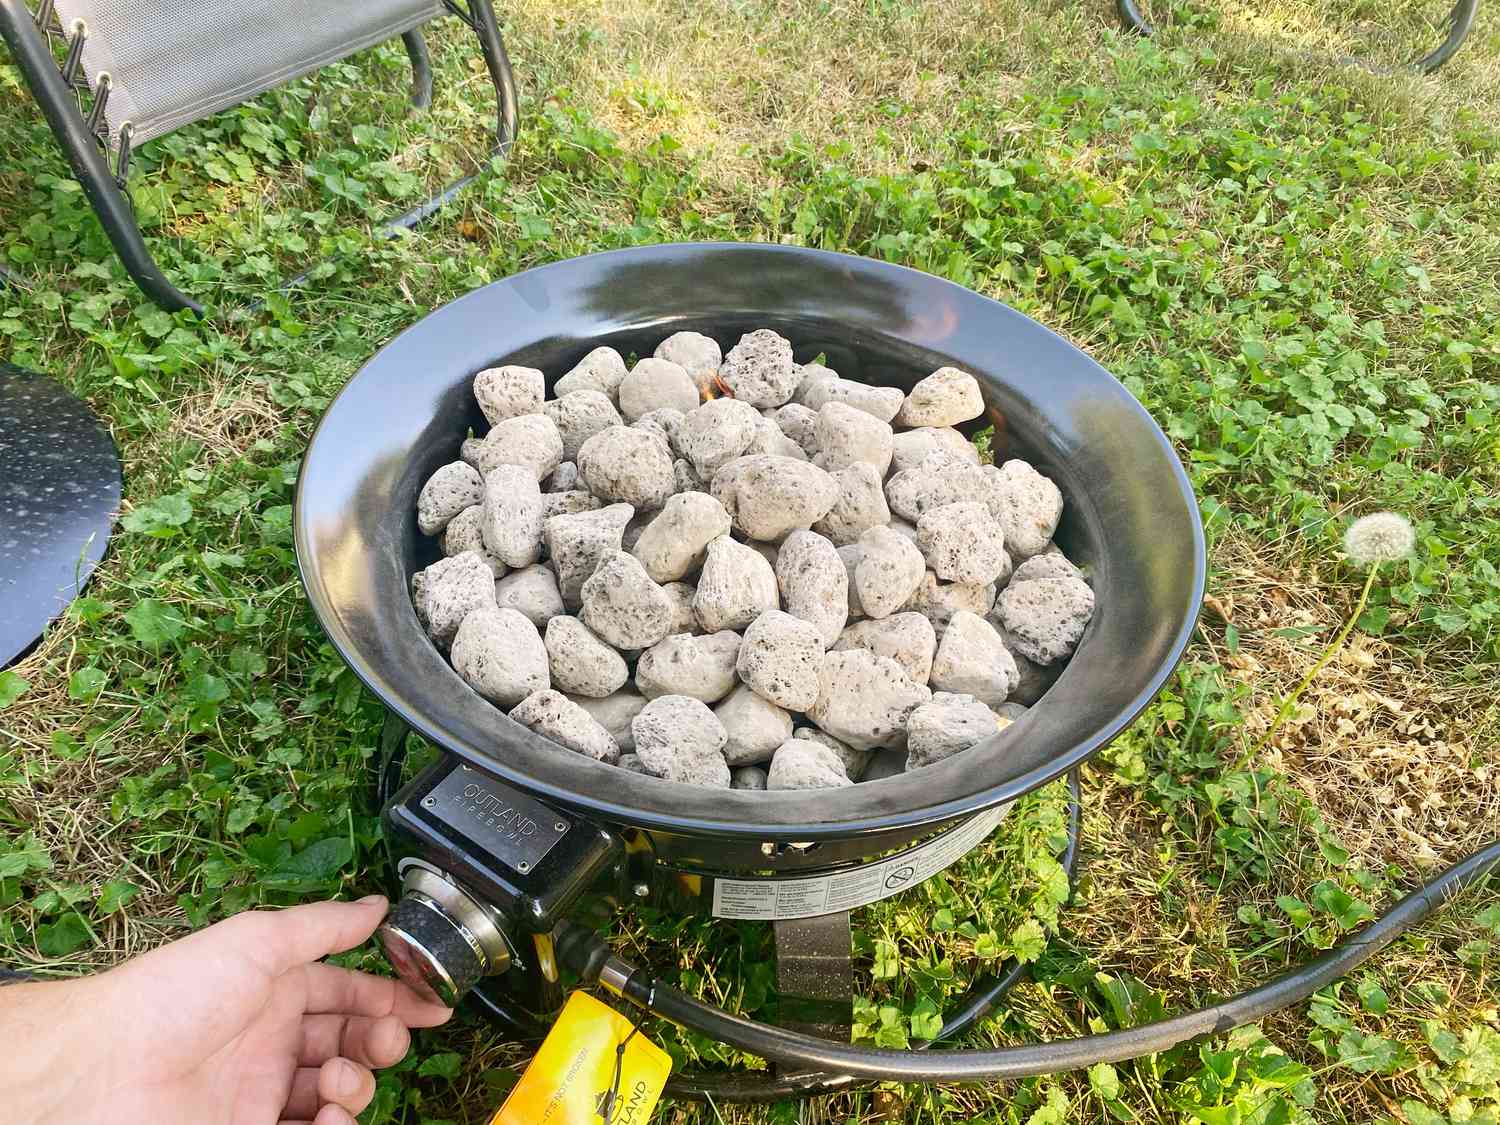
- Fire Pit Kit or Materials: If you’re installing a pre-fabricated fire pit kit, ensure that you have all components, including the fire ring, retaining wall blocks, and capstones. For a custom fire pit, gather fire-resistant bricks, concrete blocks, or stone materials as per your design.
- Concrete and Gravel: Procure concrete mix for footings and post anchors, as well as gravel for drainage and leveling purposes. Properly preparing the foundation is essential for the stability and longevity of your gazebo and fire pit structure.
- Finishing and Decorative Elements: Consider any finishing touches such as paint or stain for the gazebo, decorative trim, lighting fixtures, and seating options for the fire pit area.
Read more: How To Build A Good Fire In A Fire Pit
Tools:
- Basic Hand Tools: Ensure you have a comprehensive set of hand tools, including a hammer, screwdrivers, wrenches, levels, and tape measures for general construction tasks.
- Power Tools: Depending on the complexity of your gazebo design, gather power tools such as a circular saw, drill/driver, and a miter saw for precision cuts and assembly.
- Concrete Mixing and Finishing Tools: If working with concrete, have the necessary tools on hand, such as a mixing trough, trowels, and a float for finishing the concrete footings.
- Safety Gear: Prioritize safety by obtaining personal protective equipment, including gloves, safety glasses, and hearing protection, especially when operating power tools or handling construction materials.
By compiling a comprehensive inventory of materials and ensuring that your tool arsenal is well-equipped, you’ll set the stage for a smooth and efficient construction process. With the groundwork laid and the resources at your disposal, you’re ready to move on to the exciting phase of building the foundation for your gazebo and fire pit.
Step 4: Building the Foundation
As you embark on the construction journey, laying a solid foundation is paramount to the structural integrity and longevity of your gazebo and fire pit ensemble. The foundation serves as the anchor that supports the entire structure, providing stability and resistance to the elements. Here’s a step-by-step guide to building a robust foundation for your outdoor haven:
1. Site Preparation:
Begin by marking the layout of the gazebo and fire pit area, ensuring precise measurements and alignment. Clear the site of any debris, vegetation, or obstacles that may impede construction. Use a string line and stakes to outline the perimeters and establish the exact placement of the footings.
2. Excavation and Footings:
Excavate the marked areas to the specified depth for the footings, accounting for local building codes and soil conditions. Pour a layer of gravel into the excavated holes to facilitate drainage and provide a stable base for the footings. Prepare and pour concrete into the footings, embedding post anchors or brackets as per your gazebo design’s requirements.
Read more: How To Build A Brick Fire Pit
3. Post Installation:
Once the concrete footings have cured, proceed to install the vertical support posts for the gazebo. Use a level to ensure that the posts are plumb and securely anchored in the footings. Depending on your design, attach beams or braces to the posts, forming the framework for the gazebo structure.
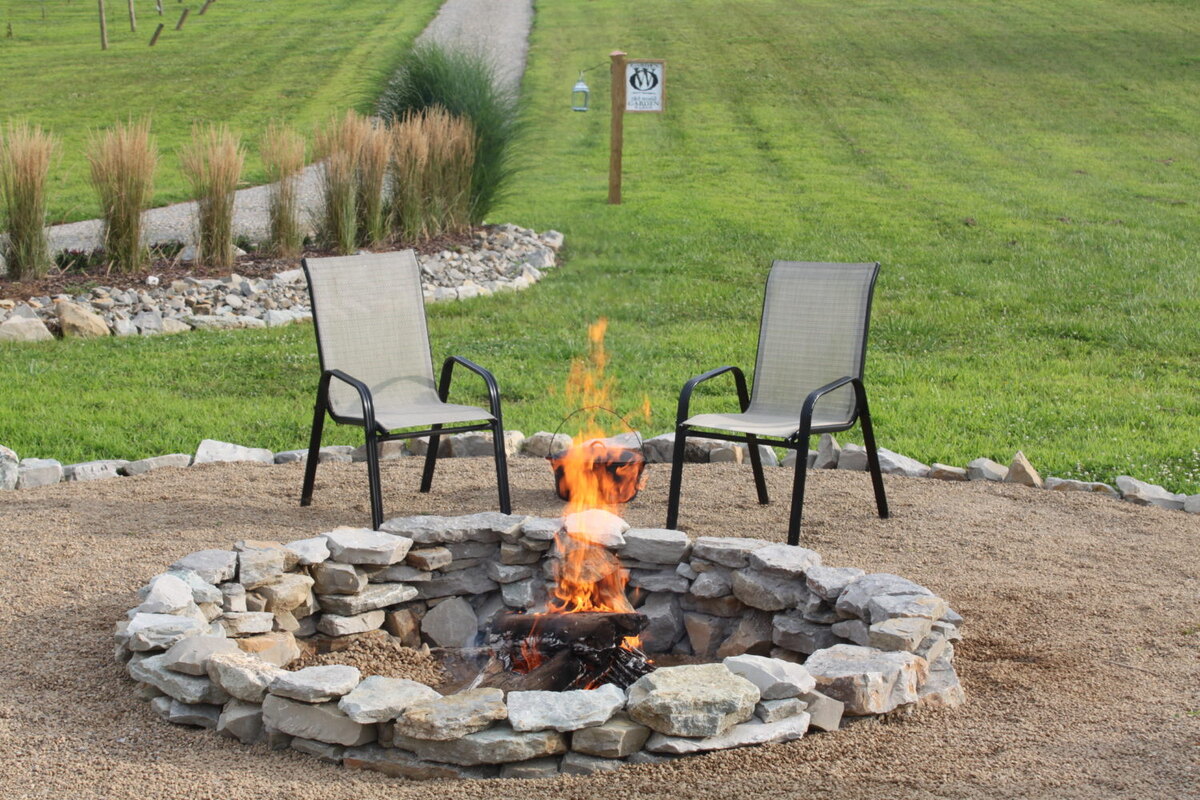
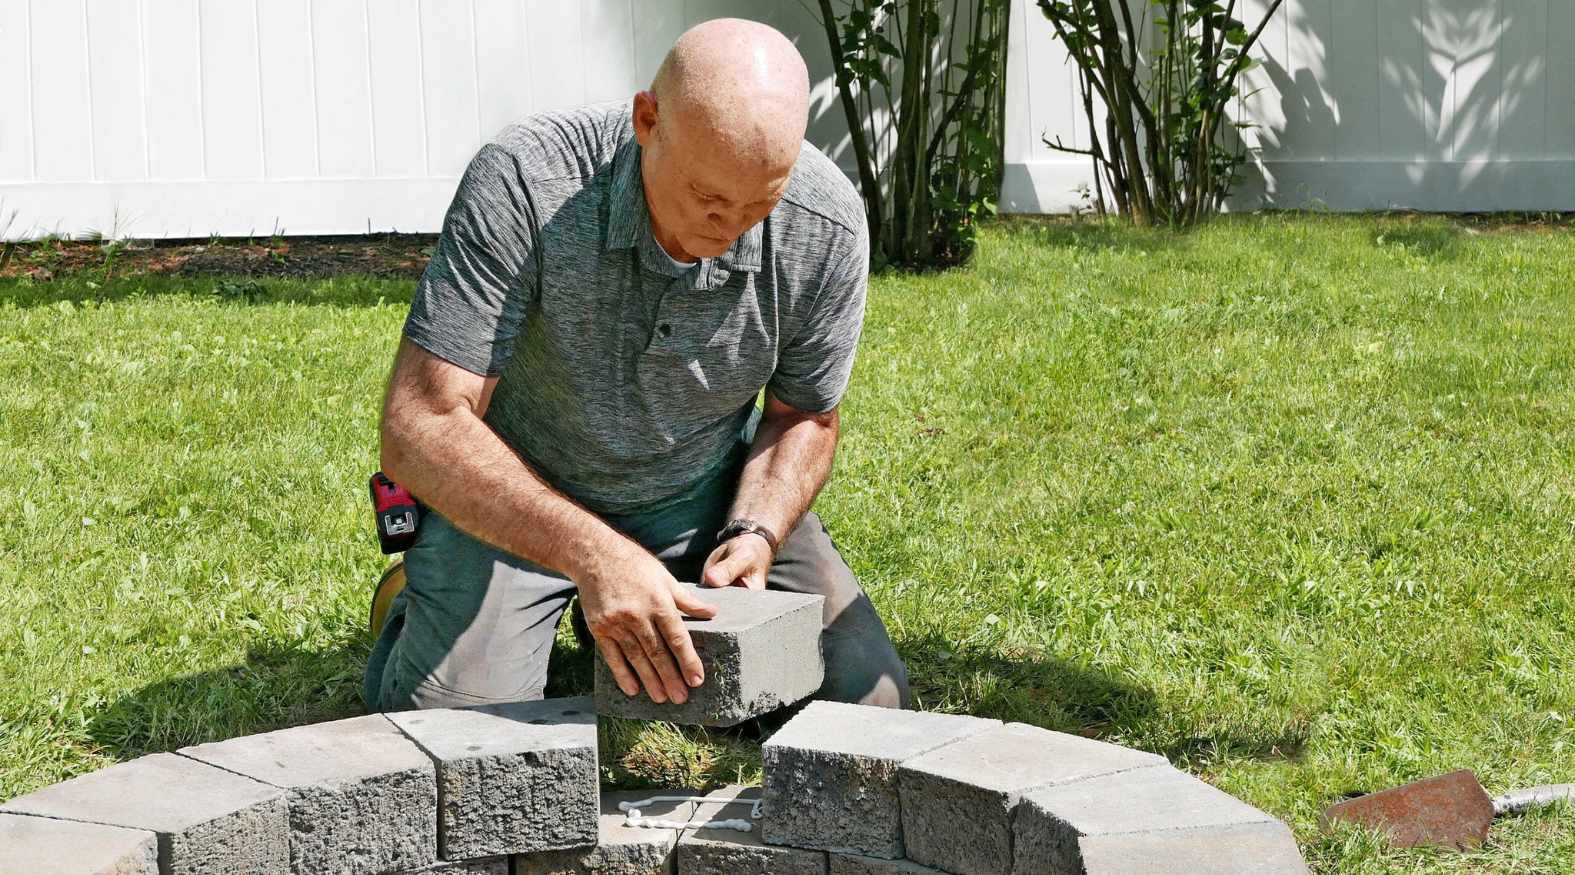
4. Fire Pit Base:
If incorporating a fire pit, construct the base using fire-resistant materials such as concrete blocks or pavers. Create a level and stable foundation for the fire pit, ensuring proper alignment and dimensions based on your chosen design. Consider adding a layer of fireproof sand or gravel within the fire pit area for enhanced safety and heat distribution.
5. Inspection and Adjustment:
Thoroughly inspect the completed foundation, verifying the alignment, levelness, and structural integrity of the footings, posts, and fire pit base. Make any necessary adjustments to ensure that the foundation serves as a reliable and durable base for the upcoming phases of construction.
By meticulously executing the foundation-building process, you’ll establish a robust groundwork that sets the stage for the erection of the gazebo frame and the integration of the fire pit. With the foundation in place, you’re ready to transition to the exhilarating phase of constructing the gazebo frame, bringing your vision one step closer to reality.
Step 5: Constructing the Gazebo Frame
With the foundation set, it’s time to shift your focus to the construction of the gazebo frame, a pivotal stage that shapes the visual appeal and structural integrity of your outdoor retreat. The gazebo frame serves as the framework for the roof and provides the defining structure for the entire ensemble. Here’s a comprehensive guide to constructing the gazebo frame with precision and craftsmanship:
Read more: How To Build A Fire Pit With Stone
1. Post and Beam Assembly:
Begin by assembling the horizontal beams and rafters that form the framework of the gazebo. Secure the beams to the vertical posts using appropriate hardware, ensuring that they are level, aligned, and securely fastened. Take care to maintain consistent spacing and symmetry to achieve a balanced and aesthetically pleasing frame.
2. Roof Support Structure:
Depending on your chosen gazebo design, install additional support elements such as braces, trusses, or joists to reinforce the roof structure. These components provide essential support for the roofing materials and contribute to the overall stability of the gazebo frame.
3. Roofing Material Installation:
Once the frame is in place, proceed to install the selected roofing materials, whether it’s shingles, metal panels, thatch, or another roofing option. Follow manufacturer guidelines and best practices for secure and weather-resistant installation, ensuring proper flashing and sealing to safeguard against moisture infiltration.
4. Fire Pit Integration (Optional):
If your design includes a fire pit within the gazebo structure, ensure that the necessary safety measures and fireproofing considerations are addressed during the framing process. Create a designated area for the fire pit, incorporating fire-resistant materials and adequate ventilation to maintain a safe and enjoyable fire feature within the gazebo.
Read more: How To Build A Fire Pit In The Ground
5. Quality Checks and Adjustments:
Thoroughly inspect the completed gazebo frame, assessing the structural stability, alignment, and overall craftsmanship. Make any necessary adjustments to ensure that the frame is solid, level, and capable of supporting the roof and any additional features integrated into the structure.
By meticulously executing the construction of the gazebo frame, you’ll bring your vision to life with a visually striking and structurally sound centerpiece for your outdoor sanctuary. With the frame in place, you’re ready to progress to the next phase: adding the roof to provide shelter and character to your gazebo and fire pit ensemble.
Step 6: Adding the Roof
As you approach the culmination of your gazebo and fire pit construction project, the addition of the roof marks a significant milestone, transforming the framework into a sheltered and inviting space. The roof not only provides protection from the elements but also contributes to the aesthetic appeal and character of your outdoor retreat. Here’s a comprehensive guide to adding the roof to your gazebo:
1. Roofing Material Preparation:
Prior to installing the roof, ensure that the selected roofing materials are prepared and organized for efficient and precise installation. Lay out the materials, including shingles, metal panels, or thatch, and verify that all necessary components and fasteners are readily accessible.
2. Roof Installation Process:
Commence the roof installation by following the manufacturer’s guidelines and best practices for the chosen roofing material. Whether it involves laying shingles, securing metal panels, or thatching, pay meticulous attention to detail to ensure proper alignment, weatherproofing, and secure fastening.
Read more: How To Build A Fire Pit For Burning Leaves
3. Roof Ventilation and Drainage:
Integrate ventilation and drainage features as applicable to your gazebo design, promoting airflow and moisture management within the roof structure. Adequate ventilation helps regulate temperature and reduce humidity, while proper drainage safeguards against water accumulation and potential damage to the roof and underlying framework.
4. Fire Pit Safety Considerations:
If the gazebo encompasses a fire pit, incorporate fire-resistant materials into the roofing around the fire pit area. Ensure that the roof design allows for safe dispersal of smoke and heat, minimizing the risk of fire hazards and maintaining a comfortable environment for gathering around the fire pit.
5. Quality Assurance and Final Touches:
Conduct a thorough inspection of the completed roof, verifying the integrity of the installation, weatherproofing, and overall aesthetic appeal. Address any final adjustments or finishing touches to ensure that the roof enhances the functionality and visual allure of your gazebo and fire pit ensemble.
With the roof in place, your gazebo and fire pit project will take on a new dimension, offering a welcoming and sheltered space for relaxation and entertainment. The addition of the roof sets the stage for the final phase: incorporating finishing touches that elevate the ambiance and comfort of your outdoor retreat.
Step 7: Finishing Touches
As you near the completion of your gazebo and fire pit construction, the final touches play a pivotal role in enhancing the functionality, comfort, and visual appeal of your outdoor sanctuary. These details add personality and charm, transforming the space into an inviting haven for leisure and social gatherings. Here’s a comprehensive guide to adding the finishing touches to your gazebo and fire pit ensemble:
Read more: How To Build A Fire Pit On A Concrete Patio
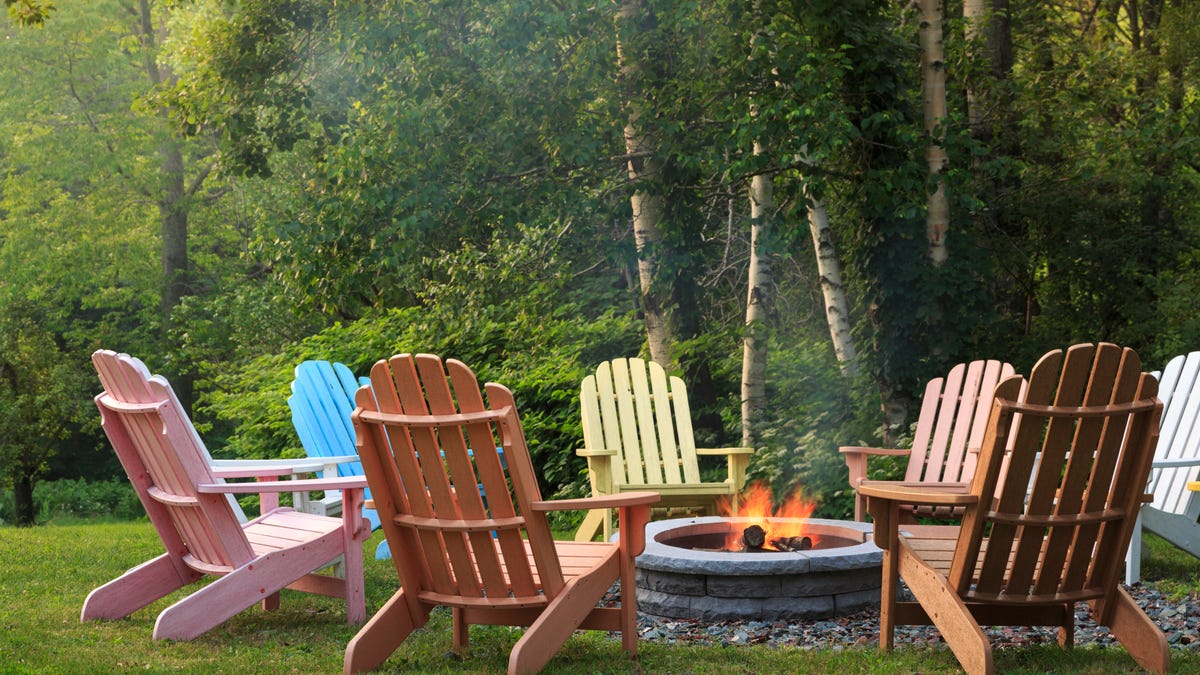
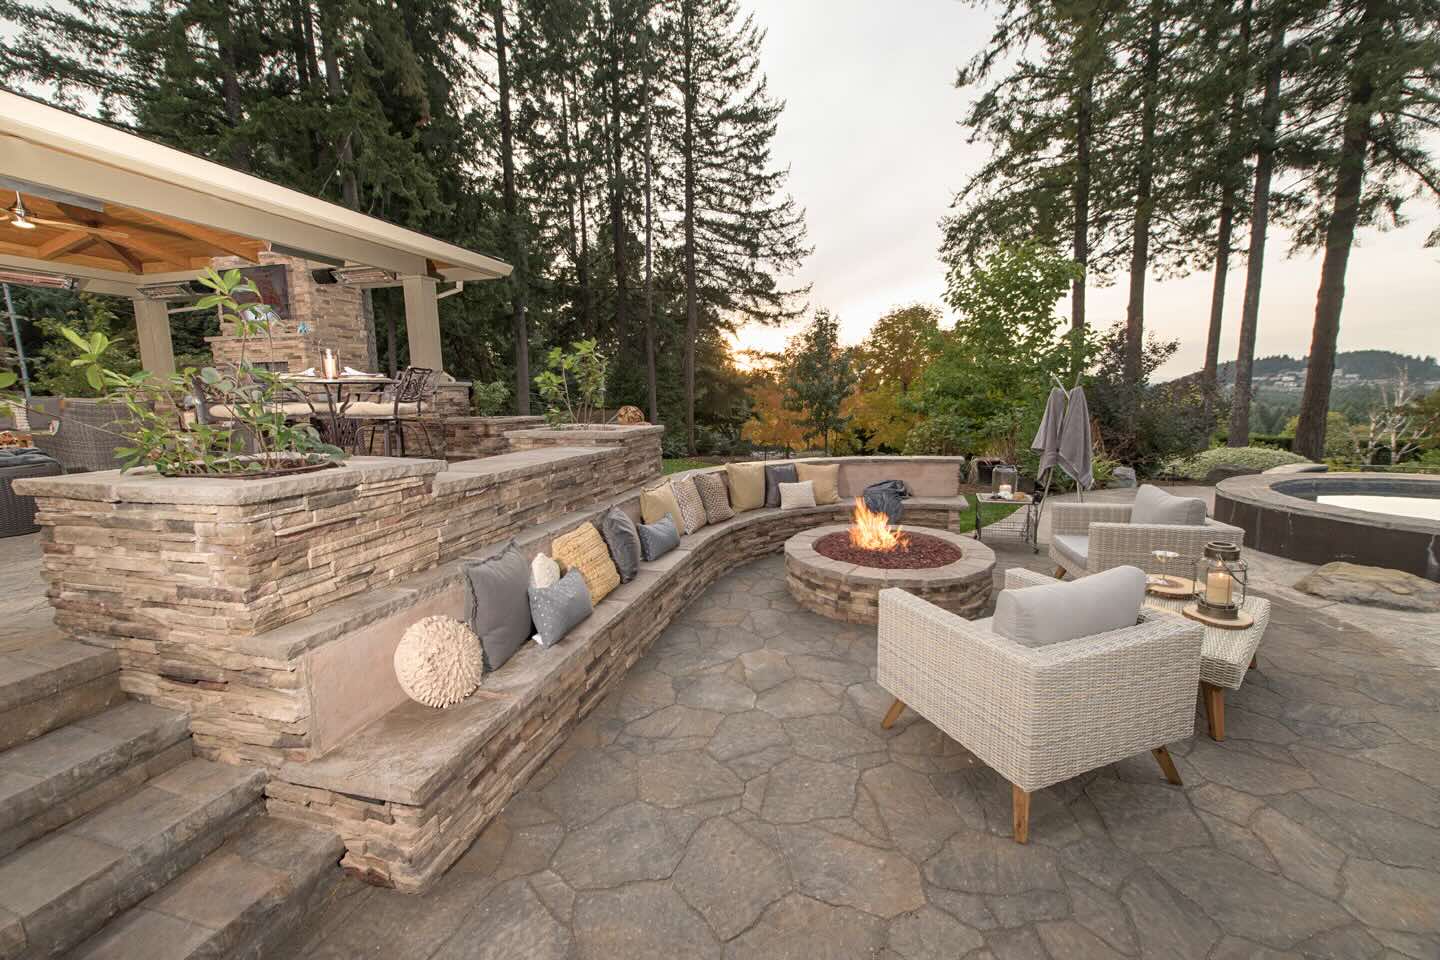
1. Seating and Furnishings:
Introduce comfortable seating options within the gazebo, such as benches, chairs, or built-in seating, providing ample space for relaxation and conversation around the fire pit. Consider the placement of furnishings to optimize comfort and foster a convivial atmosphere within the outdoor space.
2. Lighting and Ambiance:
Incorporate lighting elements to extend the usability of the gazebo and fire pit area into the evening hours. Options include string lights, lanterns, or low-voltage landscape lighting, creating a warm and inviting ambiance while enhancing safety and visibility after dark.
3. Decorative Accents:
Add decorative elements such as potted plants, outdoor artwork, or ornamental features to infuse character and style into the outdoor retreat. These accents contribute to the overall aesthetic and create a personalized touch that reflects your taste and creativity.
4. Comfort and Convenience Features:
Consider integrating amenities that elevate comfort and convenience, such as a serving counter, storage benches, or a designated area for grilling and outdoor cooking. These features enhance the functionality of the space, making it well-equipped for entertaining and relaxation.
Read more: How To Build A Square Fire Pit
5. Safety Considerations:
Ensure that safety measures are in place, including fire extinguishers, first aid kits, and clear pathways around the fire pit and gazebo. Prioritize the well-being of your guests by addressing potential hazards and promoting a secure environment for enjoyment.
6. Personalization and Customization:
Add personal touches that reflect your unique style and preferences, whether it’s through custom signage, decorative accents, or thematic elements that resonate with your outdoor vision. Infuse the space with elements that make it distinctly yours, creating a welcoming and memorable environment for gatherings.
With the finishing touches in place, your gazebo and fire pit ensemble will exude warmth, character, and functionality, beckoning you and your guests to savor moments of relaxation and connection amidst the natural beauty of your outdoor retreat. By attending to these details, you’ll bring your vision to fruition and create a captivating haven that enriches your outdoor living experience.
Conclusion
Congratulations on completing the journey of building a gazebo over a fire pit, transforming your outdoor space into a captivating retreat that beckons you to unwind and connect with nature and loved ones. Through meticulous planning, skilled craftsmanship, and attention to detail, you’ve created a harmonious fusion of shelter, warmth, and ambiance—a space that invites relaxation and conviviality throughout the seasons.
By embarking on this endeavor, you’ve not only expanded your outdoor living options but also cultivated a space for cherished moments and cherished memories. The gazebo and fire pit ensemble stands as a testament to your creativity and dedication, offering a sanctuary for gatherings, contemplation, and the simple joy of basking in the glow of a crackling fire.
As you revel in the fruits of your labor, remember that the journey doesn’t end here. Your outdoor sanctuary will evolve as you infuse it with your personal touch, hosting gatherings, and creating lasting experiences that enrich your life and the lives of those who share in the warmth of your outdoor haven.
Whether it’s the laughter of friends gathered around the fire pit, the tranquil moments of solitude within the sheltering gazebo, or the countless memories yet to be made, your outdoor retreat will continue to inspire and nurture, offering a respite from the hustle and bustle of daily life.
As you savor the fruits of your labor, take pride in the transformation you’ve brought to your outdoor space, and relish the boundless possibilities that your gazebo and fire pit ensemble offers. From tranquil evenings under the stars to lively gatherings filled with laughter, your outdoor haven is poised to become a cherished backdrop for life’s most precious moments.
So, as the flames dance in the fire pit and the gazebo stands as a symbol of your creativity and vision, may your outdoor sanctuary be a source of joy, connection, and rejuvenation for years to come.
Excited about enhancing your outdoor space further? Dive into vibrant tips for outdoor living that will transform any deck into a lively gathering spot. Or maybe you're ready to tackle new challenges? Our insights on why DIY projects are so rewarding could spark your next big creation. And for those who love curating their garden's charm, don't miss our compilation of landscaping ideas that are perfect for any home.
Frequently Asked Questions about How To Build A Gazebo Over A Fire Pit
Was this page helpful?
At Storables.com, we guarantee accurate and reliable information. Our content, validated by Expert Board Contributors, is crafted following stringent Editorial Policies. We're committed to providing you with well-researched, expert-backed insights for all your informational needs.

0 thoughts on “How To Build A Gazebo Over A Fire Pit”