Home>Construction & Tools>Building Materials>How To Make A Brick Fire Pit
Building Materials
How To Make A Brick Fire Pit
Modified: October 20, 2024
Learn how to make a brick fire pit using building materials. Follow our step-by-step guide for a beautiful and functional addition to your outdoor space.
(Many of the links in this article redirect to a specific reviewed product. Your purchase of these products through affiliate links helps to generate commission for Storables.com, at no extra cost. Learn more)
Introduction
Creating a cozy outdoor space where friends and family can gather around a crackling fire is a timeless way to enjoy the great outdoors. A brick fire pit not only adds warmth and ambiance to your backyard but also serves as a focal point for social gatherings. Building your own brick fire pit can be a rewarding and cost-effective project that enhances the aesthetic appeal of your outdoor living area.
In this comprehensive guide, we will walk you through the step-by-step process of constructing a brick fire pit. From selecting the ideal location to adding the finishing touches, we will provide you with the knowledge and confidence to embark on this engaging DIY endeavor. Whether you are a seasoned DIY enthusiast or a novice looking to explore the world of outdoor construction, this guide will equip you with the essential know-how to create a stunning brick fire pit that will be the envy of your neighborhood.
So, roll up your sleeves, gather your materials, and let's dive into the exciting journey of bringing a charming and functional brick fire pit to life in your outdoor space.
Key Takeaways:
- Building a brick fire pit requires careful planning, sturdy materials, and attention to detail. From selecting the right location to adding finishing touches, creating a cozy outdoor space is an engaging and rewarding DIY project.
- The construction process involves preparing the area, building a solid base, laying the bricks, adding a fire pit ring, and finishing with personal touches. The result is a charming and functional fire pit that enhances outdoor living.
Read more: How To Make A Fire Pit With Bricks
Materials Needed
Before diving into the construction process, it’s essential to gather all the necessary materials and tools to ensure a smooth and efficient building experience. Here’s a comprehensive list of the materials and tools you’ll need:
Materials:
- Bricks: Choose durable, heat-resistant bricks that can withstand high temperatures. Common options include fire bricks or clay bricks.
- Concrete mix: Opt for a high-quality concrete mix to create a sturdy base for the fire pit.
- Gravel: Use gravel to create a stable and well-draining foundation for the fire pit.
- Fire pit ring or insert: Select a fire pit ring or insert that suits your desired size and design preferences.
- Masonry adhesive: Invest in a reliable masonry adhesive to securely bond the bricks together.
- Steel rebar: Rebar will provide structural reinforcement for the concrete base, enhancing its strength and stability.
- Leveling sand: This will be used to create a smooth and level surface for the base of the fire pit.
- Safety equipment: Ensure you have gloves, safety goggles, and a dust mask to protect yourself during the construction process.
Tools:
- Shovel: Essential for digging and moving gravel and soil during site preparation.
- Tape measure: Use a tape measure to ensure accurate dimensions and alignment during construction.
- Mason’s string and stakes: These will help you establish straight and level guidelines for laying the bricks.
- Trowel: A trowel is indispensable for applying masonry adhesive and leveling the concrete mix.
- Rubber mallet: Use a rubber mallet to gently tap the bricks into place, ensuring a snug fit.
- Wheelbarrow: Ideal for mixing concrete and transporting materials around the construction site.
- Broom: You’ll need a broom to sweep and clean the work area as you progress through the project.
By ensuring you have all the required materials and tools on hand, you’ll be well-prepared to commence the construction of your brick fire pit with confidence and efficiency.
Step 1: Selecting a Location
Choosing the right location for your brick fire pit is a crucial first step that sets the foundation for a safe and enjoyable outdoor space. Consider the following factors when selecting the ideal spot:
Read more: How To Build A Brick Fire Pit
1. Safety and Legal Considerations:
Prioritize safety by ensuring that the chosen location complies with local fire codes and regulations. Some areas may have restrictions on open fires, so it’s essential to check with your local authorities before proceeding with the construction. Additionally, keep the fire pit a safe distance away from any flammable structures, overhanging branches, or combustible materials.
2. Accessibility and Convenience:
Opt for a location that is easily accessible and convenient for gatherings. Consider the proximity to seating areas, outdoor furniture, and the overall flow of foot traffic in your outdoor space. Creating a welcoming and easily accessible fire pit area will encourage frequent use and social interaction.
3. Wind Direction and Ventilation:
Take note of the prevailing wind direction in your outdoor space. Position the fire pit so that the smoke is less likely to blow toward seating areas or gathering spots. Adequate ventilation will ensure that the smoke dissipates efficiently, enhancing the comfort of those around the fire.
4. Aesthetic Appeal:
Consider the visual impact of the fire pit within your outdoor landscape. Choose a location that complements the overall aesthetics of your backyard while creating a focal point that adds charm and warmth to the environment.
Read more: How To Make A Portable Fire Pit
5. Ground Stability:
Ensure that the chosen location has a stable and level ground surface. Avoid areas prone to water accumulation or uneven terrain, as these factors can impact the stability and longevity of the fire pit structure.
By carefully evaluating these considerations, you can confidently select a location that not only meets practical and safety requirements but also enhances the overall ambiance and functionality of your outdoor living space.
Step 2: Preparing the Area
Before commencing the construction of the brick fire pit, thorough preparation of the designated area is essential to ensure a stable and long-lasting foundation. Follow these steps to prepare the site for the fire pit installation:
1. Clear the Area:
Begin by clearing the chosen location of any debris, vegetation, or obstacles that may impede the construction process. This includes removing rocks, roots, and any other obstructions that could affect the stability of the fire pit.
2. Mark the Perimeter:
Use marking paint or stakes and string to outline the perimeter of the fire pit. This will provide a clear visual guide for the excavation and construction process, ensuring that the dimensions and placement align with your design intentions.
Read more: What Kind Of Bricks For Fire Pit
3. Excavate the Site:
With the perimeter marked, proceed to excavate the area to a depth that accommodates the base and first layer of bricks. Typically, a depth of 6 to 8 inches is sufficient for the base and initial layer of gravel and sand. Use a shovel to carefully remove the soil, creating a level and uniform excavation site.
4. Add Gravel and Sand:
Once the site is excavated, add a layer of gravel to the bottom of the pit to facilitate drainage and provide a stable base. Follow this with a layer of leveling sand, ensuring that it is evenly distributed and compacted to create a smooth and level surface for the fire pit base.
5. Compact the Base:
Use a hand tamper or a rented plate compactor to compact the gravel and sand base thoroughly. This step is crucial for establishing a solid and stable foundation that will support the weight of the fire pit and withstand the heat generated by the fire.
6. Verify Levelness:
Utilize a carpenter’s level to confirm that the prepared base is level in all directions. Making necessary adjustments at this stage will contribute to the overall stability and symmetry of the fire pit structure.
By diligently preparing the area according to these steps, you will establish a solid and well-draining foundation that forms the groundwork for the construction of your brick fire pit.
Read more: How Many Bricks Needed For Fire Pit
Step 3: Building the Base
With the site prepared, it’s time to construct the base of the brick fire pit. This foundational element provides stability and support for the structure, ensuring its durability and longevity. Follow these steps to build a solid base for your fire pit:
1. Create the Concrete Mix:
Prepare the concrete mix according to the manufacturer’s instructions. It’s essential to use a high-quality concrete mix that will provide strength and resilience to the base of the fire pit.
2. Pour and Level the Concrete:
Carefully pour the concrete mix into the prepared excavation, ensuring an even distribution across the entire base area. Use a trowel to level the concrete, smoothing it out to achieve a uniform surface. The thickness of the concrete base should typically be around 3 to 4 inches, providing ample support for the subsequent layers of the fire pit.
3. Insert Steel Rebar:
To reinforce the concrete base, insert steel rebar into the freshly poured concrete at regular intervals. This reinforcement enhances the structural integrity of the base, especially in areas prone to temperature variations and ground movement.
Read more: How To Make A Fire Pit Screen
4. Allow for Curing:
Allow the concrete base to cure for the recommended time as per the manufacturer’s instructions. This curing process is vital for the concrete to achieve its maximum strength and durability, ensuring a solid foundation for the fire pit.
5. Verify Stability and Levelness:
After the concrete has cured, verify that the base is stable and level. Use a level to confirm that the surface is even and adjust as needed to achieve optimal stability and uniformity.
6. Apply Masonry Adhesive:
Once the concrete base is prepared, apply a layer of high-quality masonry adhesive on top of the cured concrete. This adhesive will facilitate the secure placement and bonding of the first layer of bricks, ensuring a robust and stable construction.
By following these steps, you will establish a sturdy and well-reinforced base for your brick fire pit, laying the groundwork for the subsequent stages of the construction process.
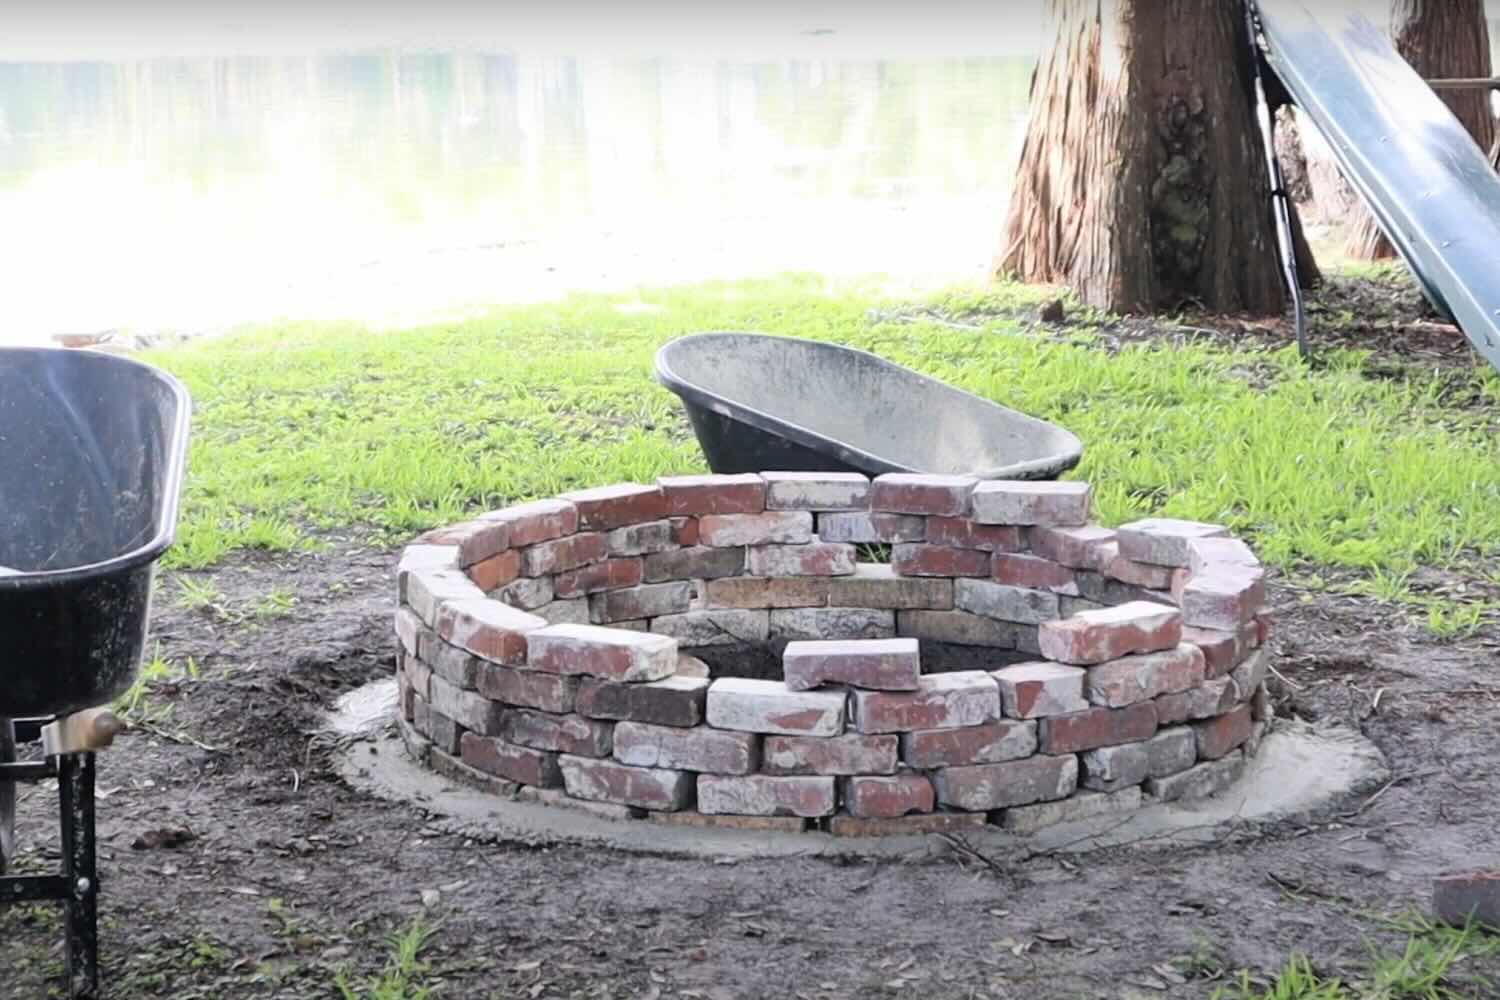
Step 4: Laying the Bricks
As you progress with the construction of your brick fire pit, the process of laying the bricks forms a pivotal stage in bringing the structure to life. The careful arrangement of the bricks not only contributes to the fire pit’s visual appeal but also ensures its structural integrity. Here’s a detailed guide on how to effectively lay the bricks for your fire pit:
Read more: How To Make A Simple Fire Pit
1. Arrange the First Course:
Begin by arranging the first course of bricks on top of the prepared base, following the circumference outlined by the fire pit’s design. Ensure that the bricks are positioned snugly against each other, leaving minimal gaps between them.
2. Apply Masonry Adhesive:
Apply a generous amount of masonry adhesive to the top surface of the concrete base, creating a secure bonding surface for the first layer of bricks. This adhesive will enhance the stability and longevity of the fire pit structure.
3. Check for Levelness:
Use a level to confirm that the first course of bricks is level in all directions. Adjust the positioning of the bricks as necessary to maintain a consistent level throughout the circumference of the fire pit.
4. Build Upward:
Continue stacking the bricks to create subsequent courses, ensuring that each layer is offset from the one below it. This staggered placement provides structural stability and visual appeal, contributing to the overall strength and aesthetics of the fire pit.
Read more: How To Make A Dakota Fire Pit
5. Utilize a Rubber Mallet:
Gently tap the bricks into place using a rubber mallet, ensuring that they are firmly seated and aligned with the desired layout. This step helps to achieve a uniform and secure arrangement of the bricks.
6. Maintain Consistent Joints:
As you lay the bricks, pay attention to maintaining consistent joint widths between them. This attention to detail contributes to the professional finish and structural integrity of the fire pit.
7. Verify Alignment:
Periodically step back and assess the alignment and visual appeal of the brick arrangement. Making adjustments as needed will ensure that the fire pit maintains a symmetrical and aesthetically pleasing profile.
By meticulously following these steps, you will skillfully lay the bricks to create a robust and visually striking structure, bringing your brick fire pit one step closer to completion.
Step 5: Adding the Fire Pit Ring
Integrating the fire pit ring into the construction process marks a pivotal stage in bringing functionality and safety to your brick fire pit. The fire pit ring not only contains the fire within a designated area but also adds a decorative and practical element to the overall design. Here’s a comprehensive guide on how to add the fire pit ring to your construction:
Read more: How To Make A Fake Fire Pit For Halloween
1. Select the Appropriate Fire Pit Ring:
Choose a fire pit ring that aligns with the dimensions and design of your brick fire pit. Consider factors such as material, size, and heat resistance to ensure that the selected ring meets both aesthetic and functional requirements.
2. Position the Fire Pit Ring:
Place the fire pit ring securely within the center of the brick structure, ensuring that it rests evenly on the topmost layer of bricks. The ring should fit snugly and align with the inner circumference of the brick fire pit.
3. Verify Levelness and Alignment:
Use a level to confirm that the fire pit ring is positioned evenly and aligned with the surrounding bricks. Adjust the placement as needed to achieve a consistent and level orientation throughout the circumference of the fire pit.
4. Secure the Fire Pit Ring:
Apply a bead of high-temperature masonry adhesive around the base of the fire pit ring, creating a secure bond between the ring and the top layer of bricks. This adhesive ensures that the ring remains firmly in place during use and enhances the overall stability of the fire pit structure.
Read more: How To Make A Fire Pit With Pavers
5. Test Fit and Functionality:
Prior to proceeding with further construction, conduct a test fit of the fire pit ring to ensure that it sits securely and functions as intended. This step allows you to make any necessary adjustments before finalizing the installation.
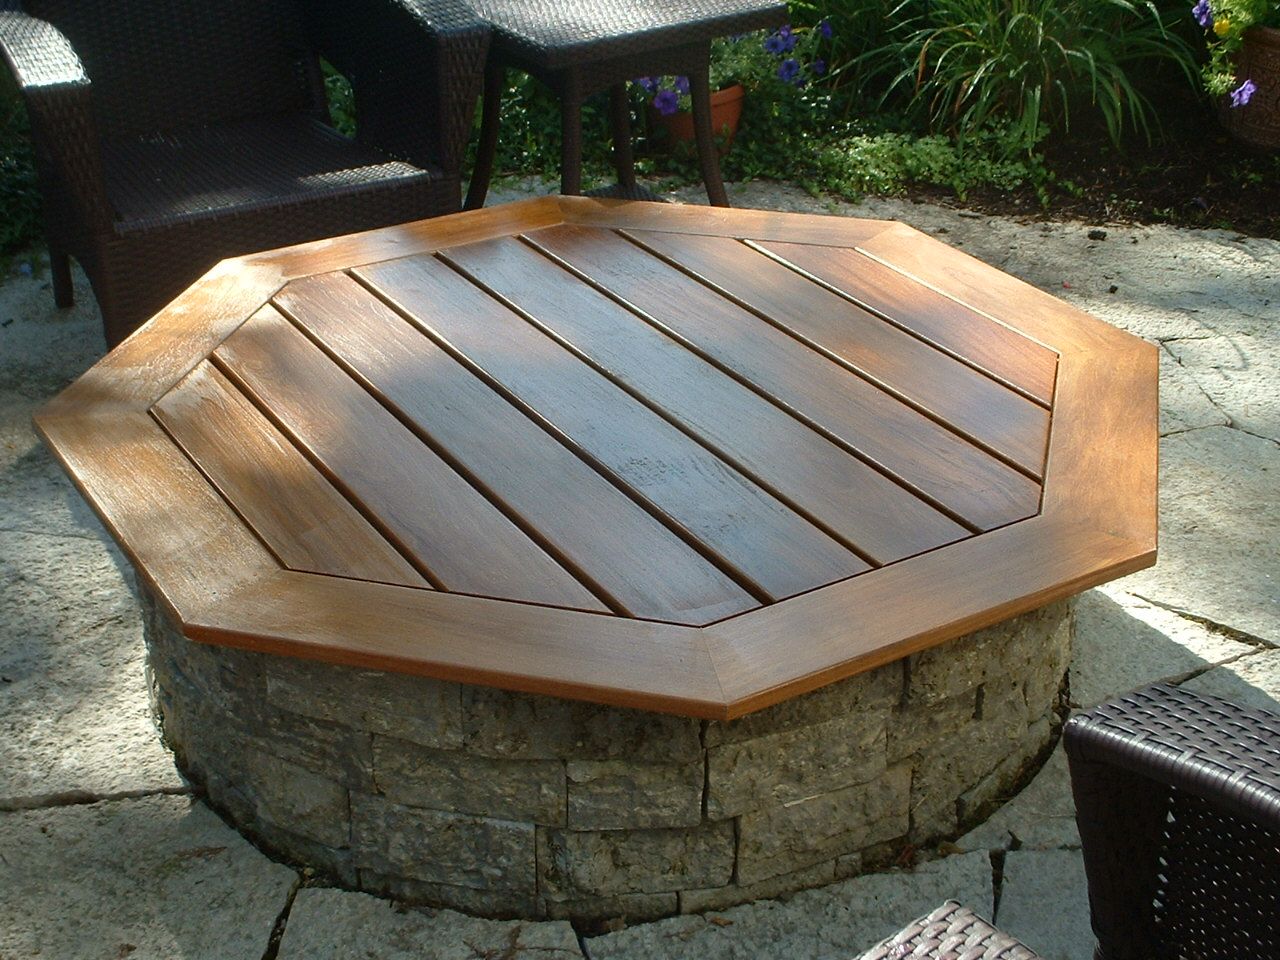
6. Consider Additional Features:
If desired, consider incorporating additional features such as a spark screen, cooking grate, or fire pit cover to enhance the versatility and functionality of your fire pit. These accessories can further elevate the usability and enjoyment of your outdoor space.
By following these steps, you will seamlessly integrate the fire pit ring into your brick fire pit, bringing both aesthetic appeal and practical functionality to the heart of your outdoor gathering space.
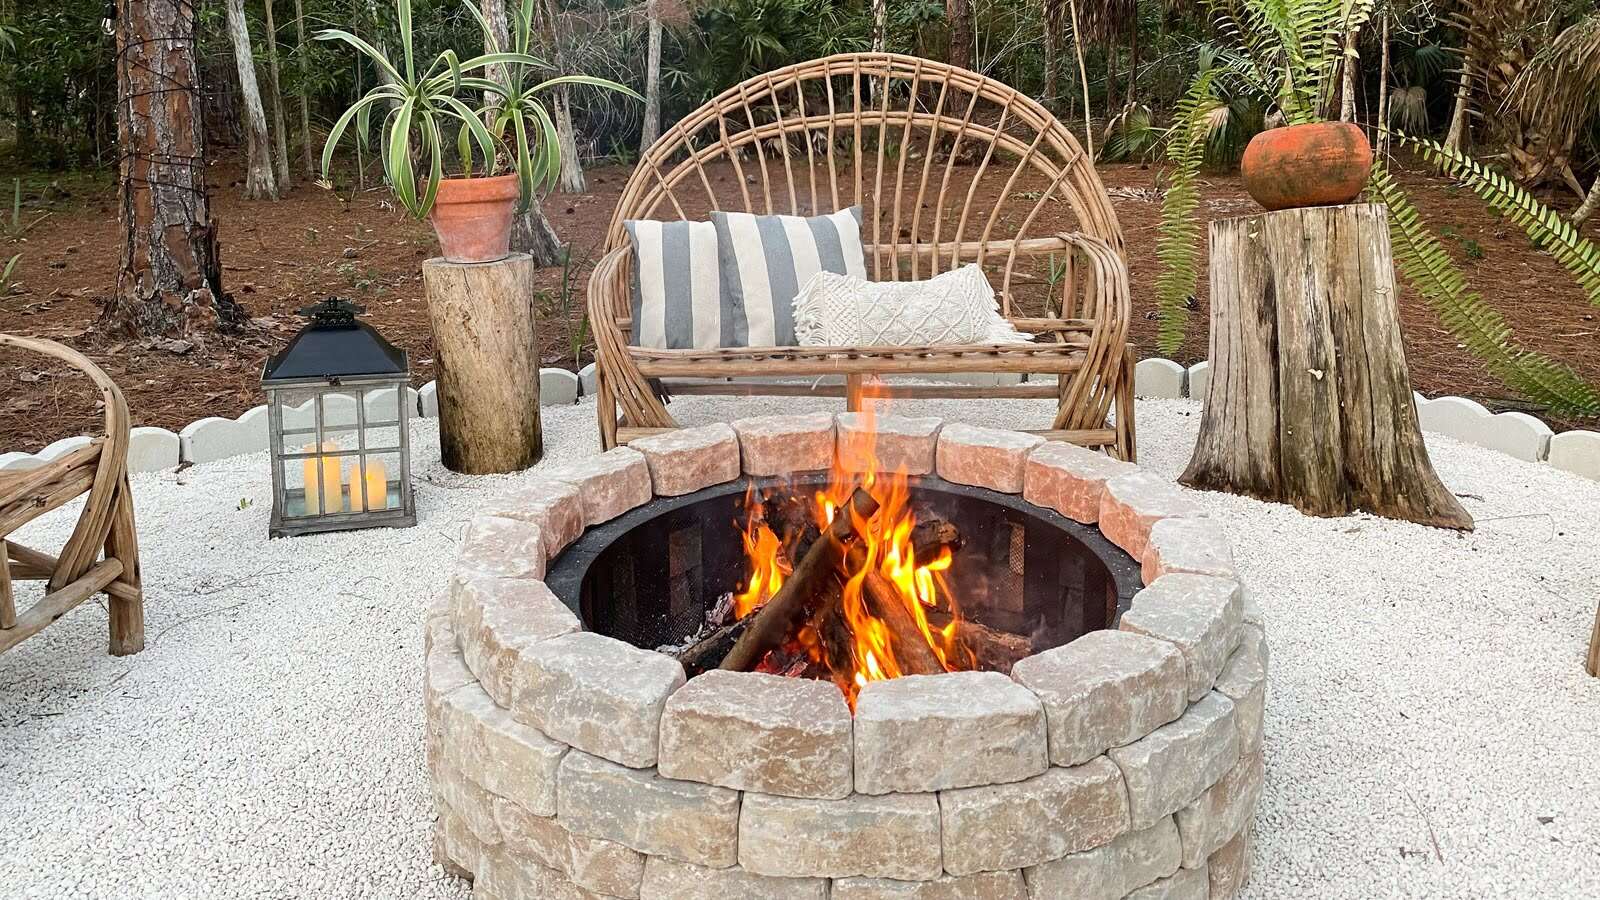
Step 6: Finishing Touches
As you near the completion of your brick fire pit construction, attending to the finishing touches will elevate the overall aesthetic appeal and functionality of the structure. These final steps add polish and character to your fire pit, transforming it into a captivating centerpiece for outdoor gatherings. Here’s a detailed guide on how to add the finishing touches to your brick fire pit:
1. Apply a Protective Sealant:
Consider applying a high-temperature sealant to the exterior surface of the bricks. This protective sealant not only enhances the visual richness of the bricks but also provides a layer of defense against the elements, ensuring the longevity and resilience of the fire pit’s exterior.
Read more: How To Make A Tabletop Fire Pit
2. Enhance the Surrounding Area:
Complement the fire pit with thoughtful landscaping and seating arrangements. Incorporate comfortable outdoor furniture, decorative lighting, and greenery to create a welcoming and inviting space around the fire pit, encouraging relaxation and social interaction.
3. Personalize with Decorative Elements:
Add personal touches to the fire pit area with decorative elements such as fire pit glass, lava rocks, or decorative stones. These embellishments not only enhance the visual allure of the fire pit but also contribute to the dispersion of heat and the overall ambiance of the space.
4. Incorporate Safety Features:
Prioritize safety by ensuring that the fire pit area is equipped with essential safety features, including a fire extinguisher, a designated area for storing firewood, and clear signage outlining fire safety guidelines. These measures promote a secure and responsible approach to enjoying the fire pit.
5. Illuminate the Surroundings:
Integrate outdoor lighting to accentuate the fire pit area, creating an enchanting ambiance during evening gatherings. Consider incorporating solar-powered pathway lights, string lights, or strategically positioned lanterns to enhance both safety and visual appeal.
Read more: How To Make A Brick Barbecue Pit
6. Celebrate with an Inaugural Fire:
Mark the completion of your brick fire pit by celebrating with an inaugural fire. Gather friends and family to enjoy the warmth and camaraderie around the fire pit, creating cherished memories that reflect the heart of your outdoor living space.
By attending to these finishing touches, you will infuse your brick fire pit with charm, functionality, and personal flair, culminating in a captivating outdoor feature that enriches your leisure time and fosters meaningful connections with loved ones.
Conclusion
Congratulations on successfully completing the construction of your brick fire pit! Through meticulous planning, dedicated effort, and a touch of creativity, you have transformed your outdoor space into a welcoming haven for warmth, relaxation, and social gatherings. As the focal point of your backyard, your brick fire pit stands as a testament to your craftsmanship and vision, offering a multitude of opportunities for enjoyment and connection.
By embarking on this DIY journey, you have not only enhanced the aesthetic appeal of your outdoor living area but have also cultivated a space that beckons friends and family to gather, share stories, and create enduring memories. The crackling flames and inviting glow of your fire pit will serve as a magnet for cherished moments and meaningful conversations, fostering a sense of community and togetherness.
As you bask in the warmth and ambiance of your newly constructed fire pit, take pride in the knowledge that you have created a space that transcends mere functionality. Your fire pit embodies the spirit of craftsmanship, creativity, and the joy of bringing people together, infusing your outdoor oasis with a touch of magic and warmth.
As you continue to enjoy the fruits of your labor, may your brick fire pit serve as a constant reminder of the power of DIY ingenuity, the beauty of outdoor living, and the enduring value of shared experiences. Whether it’s roasting marshmallows, sharing laughter, or simply unwinding in the glow of the fire, your fire pit stands as a beacon of comfort and conviviality, enriching the tapestry of your outdoor lifestyle.
With your brick fire pit as the centerpiece of your outdoor sanctuary, may it kindle countless moments of joy, connection, and tranquility, creating a cherished backdrop for the stories and celebrations that unfold within its radiant embrace.
Frequently Asked Questions about How To Make A Brick Fire Pit
Was this page helpful?
At Storables.com, we guarantee accurate and reliable information. Our content, validated by Expert Board Contributors, is crafted following stringent Editorial Policies. We're committed to providing you with well-researched, expert-backed insights for all your informational needs.
0 thoughts on “How To Make A Brick Fire Pit”