Home>Gardening & Outdoor>Outdoor Recreation & Activities>How To Patch A Concrete Swimming Pool
Outdoor Recreation & Activities
How To Patch A Concrete Swimming Pool
Modified: November 2, 2024
Learn how to patch a concrete swimming pool with our expert guide. Keep your outdoor recreation and activities area in top shape with our easy-to-follow tips.
(Many of the links in this article redirect to a specific reviewed product. Your purchase of these products through affiliate links helps to generate commission for Storables.com, at no extra cost. Learn more)
Introduction
Repairing a concrete swimming pool is a crucial task to maintain its structural integrity and ensure a safe and enjoyable swimming experience. Over time, concrete pools may develop cracks, chips, or other forms of damage due to various factors such as weathering, ground movement, or wear and tear from regular use. Fortunately, with the right tools, materials, and techniques, patching up these imperfections can be a manageable and rewarding endeavor.
In this comprehensive guide, we will walk you through the step-by-step process of patching a concrete swimming pool, providing valuable insights and practical tips to help you achieve professional-quality results. Whether you're a seasoned DIY enthusiast or a first-time pool owner looking to tackle this project, this guide will equip you with the knowledge and confidence to restore your pool to its former glory.
From draining the pool and preparing the surface to applying the patching material and ensuring a smooth, durable finish, each step is essential in the pool repair process. By following these instructions diligently, you can address minor damages and prevent them from escalating into more extensive and costly issues down the line.
As we delve into the intricacies of pool patching, it's important to approach this task with patience and attention to detail. While the process may seem daunting at first, the satisfaction of revitalizing your pool and extending its lifespan makes the effort worthwhile. So, roll up your sleeves, gather your supplies, and let's embark on this rewarding journey to restore your concrete swimming pool to its pristine condition.
Key Takeaways:
- Repairing a concrete swimming pool involves draining the pool, preparing the surface, applying the patching material, and allowing it to cure. Each step is crucial for a successful and long-lasting pool repair.
- By following the step-by-step guide, pool owners can restore their concrete pools to their former glory. Patience, precision, and attention to detail are key to achieving professional-quality results.
Read more: How To Waterproof A Concrete Swimming Pool
Step 1: Drain the Pool
Draining the pool is the crucial first step in the process of patching a concrete swimming pool. Before beginning any repair work, it's essential to ensure that the pool is completely drained to provide clear access to the damaged areas and create a safe working environment. Here's a detailed breakdown of the pool-draining process:
-
Turn off the Equipment: Start by switching off all the pool's equipment, including the pump, filter, and heater. This prevents any potential damage to the system and ensures a smooth drainage process.
-
Locate the Drainage Point: Identify the drainage point of the pool, typically located at the lowest part of the pool's structure. This may be a dedicated drainage valve or a submersible pump used to remove the water.
-
Connect the Pump: If a submersible pump is required, connect it to a power source and position it in the pool to begin pumping out the water. Ensure that the pump's discharge hose is directed to an appropriate drainage area, such as a storm drain or an area where the water can flow away from the pool without causing any damage.
-
Monitor the Water Level: As the water is being drained, monitor the water level to ensure that it decreases steadily and uniformly. This helps prevent any strain on the pool's structure and facilitates a more efficient and controlled drainage process.
-
Inspect the Drained Area: Once the pool is drained, take the opportunity to inspect the exposed surface for any additional signs of damage, such as cracks, chips, or areas in need of repair. This thorough assessment will guide the subsequent steps in the patching process.
By meticulously following these steps to drain the pool, you set the stage for the subsequent repair work, laying the foundation for a successful and effective pool patching endeavor. With the pool drained and the damaged areas clearly visible, you're now ready to move on to the next phase of the repair process: preparing the surface for patching.
Step 2: Prepare the Surface
Preparing the surface of the concrete swimming pool is a critical phase in the patching process, as it sets the stage for the successful application of the patching material. This step involves thorough cleaning, removal of debris, and addressing any existing damage to ensure a smooth and stable foundation for the patch. Here's a detailed breakdown of the surface preparation process:
-
Clean the Surface: Begin by thoroughly cleaning the exposed concrete surface using a high-pressure washer or a stiff-bristled brush. Remove any dirt, algae, or other contaminants that may have accumulated on the surface. Pay close attention to areas around the damaged spots, ensuring that they are free from any debris that could interfere with the adhesion of the patching material.
-
Remove Loose Material: Inspect the damaged areas for any loose concrete, debris, or old patching material that may be present. Use a chisel, wire brush, or a suitable tool to carefully remove any loose material, creating a clean and well-defined area for the patching process.
-
Repair Cracks and Cavities: If there are visible cracks or cavities in the concrete surface, it's essential to address them before proceeding with the patching. Use a concrete repair compound or a suitable filler to fill in the cracks and level out any uneven surfaces. Smooth out the repaired areas to ensure a seamless transition between the existing concrete and the patched sections.
-
Etch the Surface: To promote optimal adhesion, etch the cleaned and repaired surface using a concrete etching solution. This process helps create a slightly rough texture on the concrete, enhancing the bond between the existing surface and the patching material.
-
Apply Bonding Agent: Once the surface is thoroughly cleaned, repaired, and etched, apply a high-quality bonding agent to the prepared areas. The bonding agent facilitates a strong bond between the existing concrete and the patching material, ensuring long-lasting and durable repairs.
By diligently following these steps to prepare the surface of the concrete swimming pool, you establish a solid foundation for the subsequent application of the patching material. This meticulous preparation is instrumental in ensuring the effectiveness and longevity of the pool repair, setting the stage for a seamless and professional-quality restoration of the pool's structural integrity.
Step 3: Apply the Patching Material
Applying the patching material is a pivotal stage in the process of restoring a concrete swimming pool. This step involves carefully filling in the damaged areas with a high-quality patching compound, ensuring a seamless integration with the existing concrete surface. Here's a detailed breakdown of the application process:
-
Mix the Patching Compound: Begin by preparing the patching compound according to the manufacturer's instructions. This typically involves mixing the compound with water to achieve the desired consistency. Use a clean bucket and a mixing paddle to create a smooth and uniform mixture, free from lumps or dry patches.
-
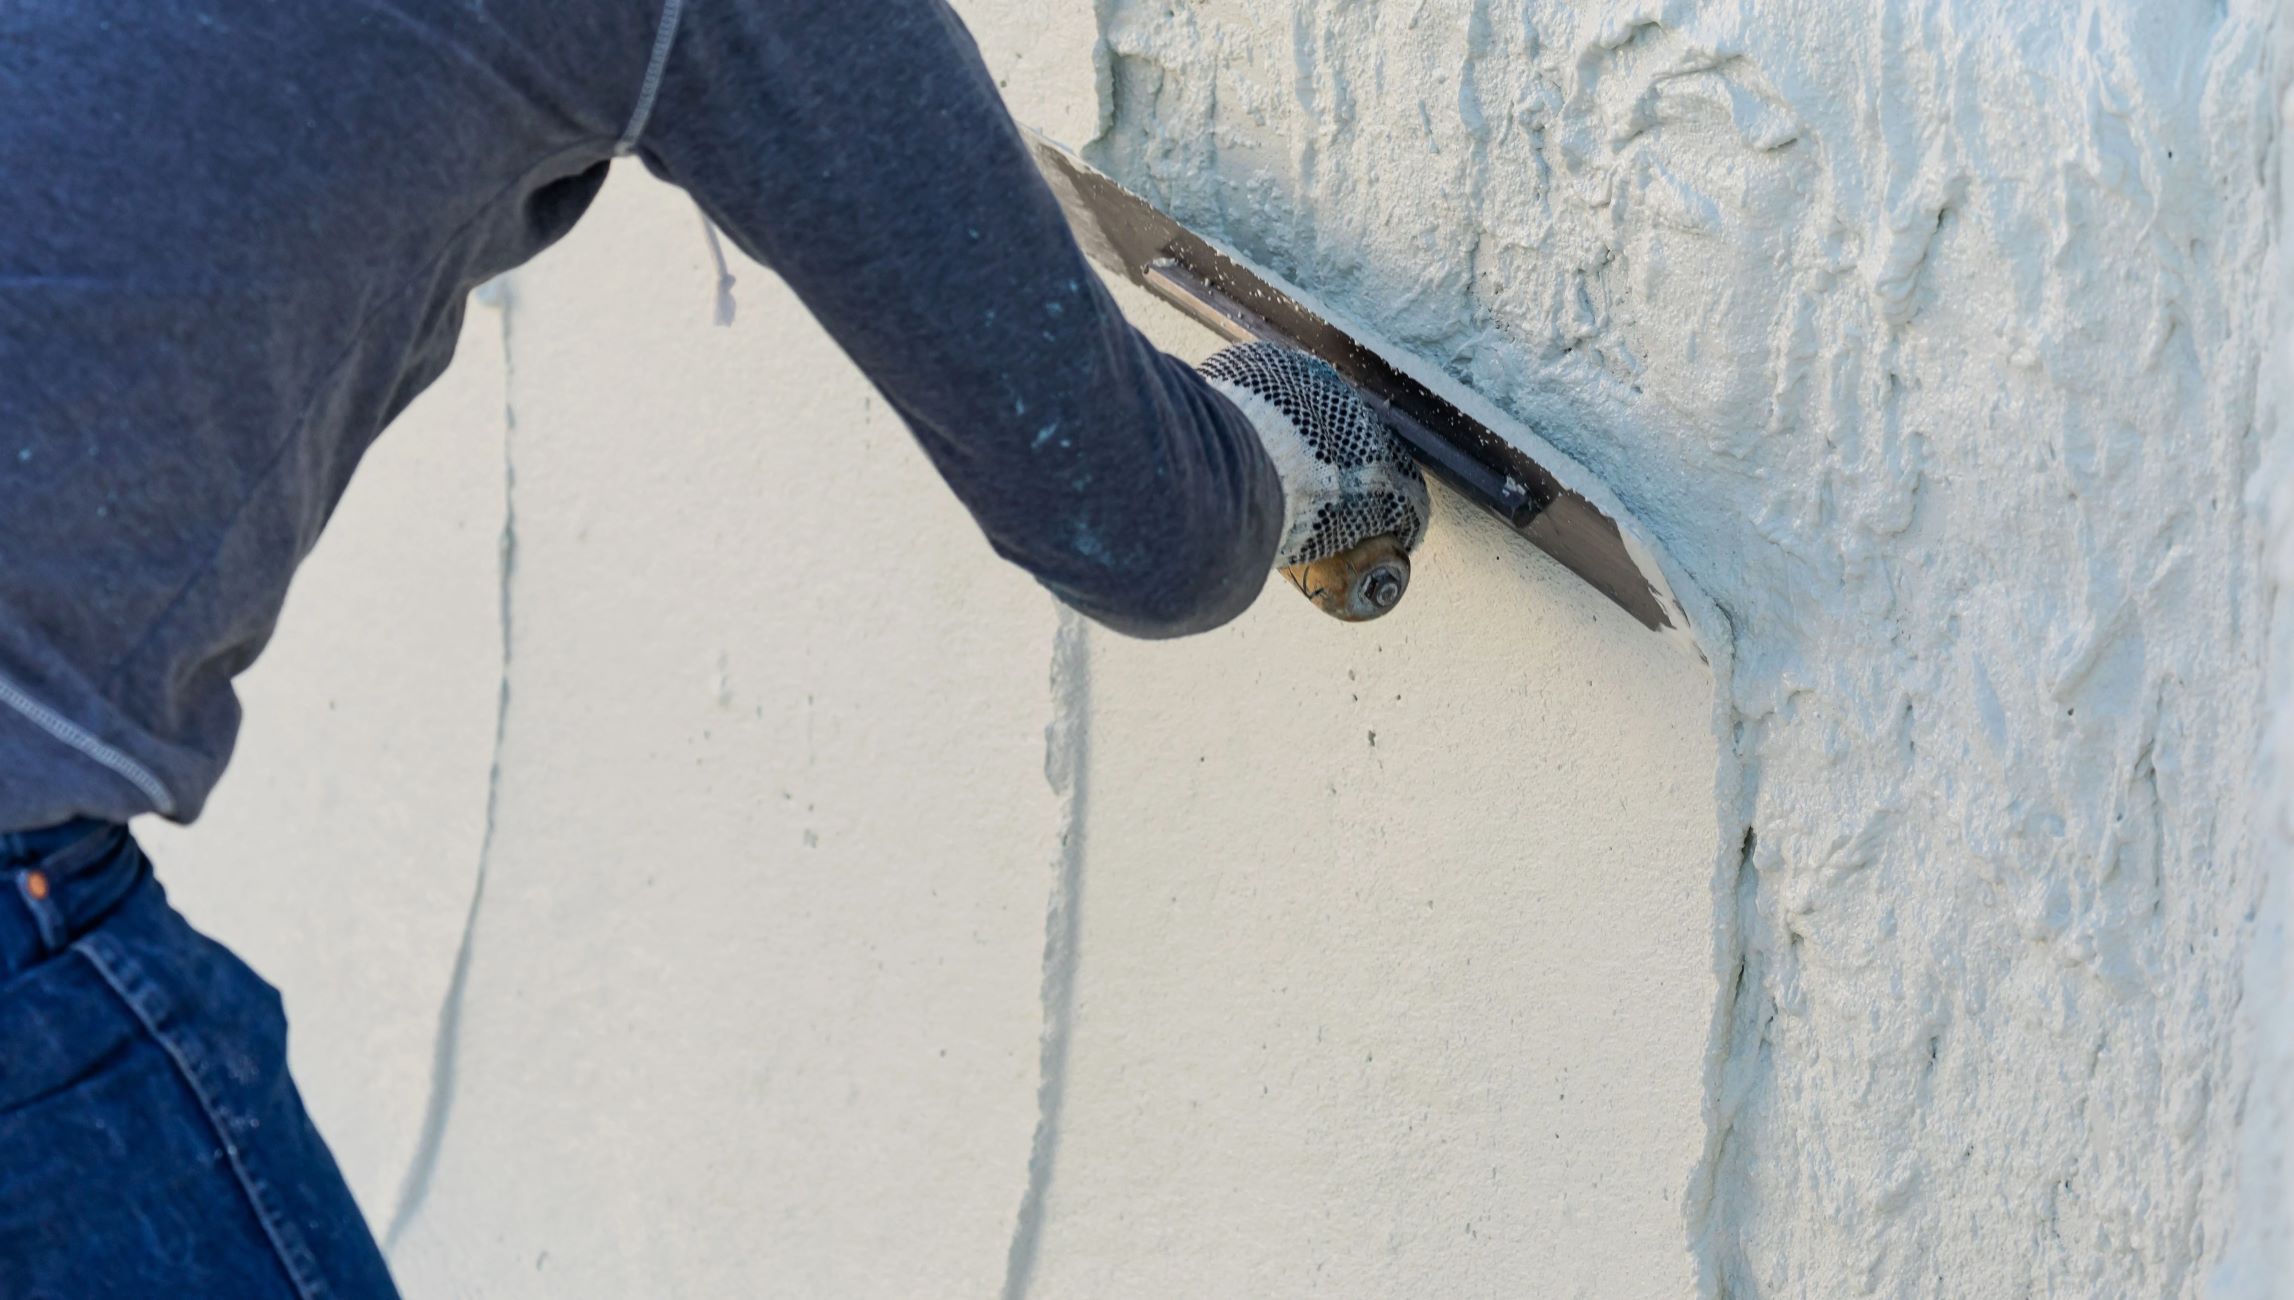
Fill the Damaged Areas: Using a trowel or a suitable application tool, carefully fill the damaged areas with the prepared patching compound. Ensure that the compound is evenly distributed and firmly pressed into the damaged areas, effectively filling in any cracks, chips, or imperfections in the concrete surface.
-
Smooth and Level the Patch: Once the damaged areas are filled, use the trowel to smooth and level the patching compound, creating a seamless transition between the patched sections and the surrounding concrete. Pay close attention to achieving a uniform and even surface, eliminating any excess compound and refining the contours to match the existing pool structure.
-
Address Larger Damages: For larger areas of damage or deeper cracks, consider applying the patching compound in layers to achieve a more robust and durable repair. Allow each layer to partially set before applying the next, ensuring a thorough and comprehensive restoration of the damaged sections.
-
Blend with Surrounding Surface: As you work on applying the patching material, strive to blend the repaired areas with the surrounding surface, maintaining a consistent texture and appearance throughout the pool. This cohesive integration creates a visually appealing and structurally sound result, seamlessly concealing the previous damage.
By meticulously following these steps to apply the patching material, you contribute to the effective restoration of the concrete swimming pool, addressing and rectifying the damages with precision and expertise. This meticulous application process sets the stage for the subsequent phase of the repair, allowing the patching compound to cure and solidify, ultimately ensuring a resilient and enduring repair that enhances the overall integrity of the pool.
Before patching a concrete swimming pool, make sure to clean the area thoroughly and remove any loose debris or old patching material. This will ensure a strong bond for the new patching material.
Step 4: Smooth and Level the Patch
After applying the patching compound to the damaged areas of the concrete swimming pool, the crucial task of smoothing and leveling the patch comes into play. This step is essential for achieving a seamless integration of the patching material with the existing concrete surface, ensuring a uniform and visually appealing result. Here's a detailed exploration of the process:
-
Trowel Technique: Utilize a high-quality trowel to carefully smooth and level the applied patching compound. Employing precise and deliberate movements, work the trowel over the patched areas, ensuring that the compound is evenly distributed and conforms to the contours of the pool surface.
-
Feathering Edges: Pay particular attention to feathering the edges of the patching material. This technique involves gently tapering the edges of the patch to blend seamlessly with the surrounding concrete, creating a gradual transition that eliminates any abrupt or noticeable differences in elevation.
-
Eliminating Imperfections: While smoothing and leveling the patch, be vigilant in identifying and addressing any imperfections or irregularities in the surface. This may involve refining the texture, evening out minor undulations, and meticulously refining the appearance of the patched areas to achieve a consistent and polished finish.
-
Consistency in Texture: Strive to maintain a consistent texture throughout the patched sections and the surrounding concrete surface. This uniformity contributes to a visually cohesive result, effectively concealing the previous damage and creating a harmonious integration of the patching material with the pool structure.
-
Precision and Patience: Approach the smoothing and leveling process with precision and patience, taking the time to refine the appearance of the patched areas with meticulous attention to detail. By exercising care and diligence, you can achieve a professional-quality finish that enhances the overall aesthetic appeal of the pool.
-
Visual Assessment: Periodically step back and visually assess the patched areas from different angles to ensure a uniform and seamless result. This visual inspection allows you to identify any areas that may require further attention, enabling you to refine the patching compound with precision and accuracy.
By diligently executing the process of smoothing and leveling the patch, you contribute to the creation of a visually appealing and structurally sound repair. This meticulous attention to detail ensures that the patched areas seamlessly integrate with the existing pool surface, culminating in a professional-quality restoration that enhances the overall integrity and aesthetic appeal of the concrete swimming pool.
Read more: How To Resurface A Concrete Swimming Pool
Step 5: Allow the Patch to Cure
After meticulously applying and smoothing the patching compound, the crucial final step in the pool repair process is allowing the patch to cure. This phase is essential for ensuring the durability, strength, and long-term effectiveness of the repair. Here's a detailed exploration of the process:
-
Curing Time: The patching compound requires adequate time to cure and solidify, forming a resilient and robust bond with the existing concrete surface. Refer to the manufacturer's guidelines to determine the recommended curing time for the specific patching material used. Typically, the curing process may range from several hours to a few days, depending on the compound's composition and environmental conditions.
-
Protective Measures: During the curing period, it's imperative to protect the repaired areas from any potential damage or disturbances. Implement measures to prevent foot traffic, equipment, or debris from coming into contact with the freshly patched sections. Erecting temporary barriers or cautionary signage can help communicate the need to avoid the cured areas, ensuring that the repair process remains undisturbed.
-
Environmental Considerations: Take into account the environmental factors that can influence the curing process. Temperature, humidity, and air circulation play a significant role in determining the duration and effectiveness of the curing phase. Ensure that the cured areas are shielded from extreme temperatures, direct sunlight, precipitation, and other environmental elements that may impede the curing process.
-
Observation and Monitoring: Throughout the curing period, periodically observe and monitor the patched areas to assess the progress of the curing process. Look for any signs of cracking, shrinking, or other irregularities that may indicate potential issues with the curing compound. Address any concerns promptly to maintain the integrity of the repair.
-
Optimal Conditions: Create an environment conducive to optimal curing conditions. This may involve maintaining moderate temperatures, controlling humidity levels, and providing adequate ventilation to facilitate the curing process. By ensuring that the cured areas are subjected to favorable conditions, you contribute to the development of a strong and resilient bond between the patching compound and the existing concrete surface.
-
Post-Curing Inspection: Once the patching compound has completed the curing process, conduct a thorough inspection of the repaired areas. Verify that the cured sections exhibit the desired strength, texture, and appearance, confirming that the repair has achieved the intended results. This post-curing assessment provides assurance of the repair's effectiveness and longevity.
By allowing the patching compound to cure under optimal conditions and exercising vigilance throughout the process, you contribute to the creation of a durable and enduring repair. This meticulous approach ensures that the patched areas seamlessly integrate with the existing pool surface, culminating in a professional-quality restoration that enhances the overall integrity and aesthetic appeal of the concrete swimming pool.
Conclusion
In conclusion, the process of patching a concrete swimming pool is a multifaceted endeavor that demands meticulous attention to detail, precision, and a commitment to achieving professional-quality results. By following the step-by-step guide outlined in this comprehensive resource, pool owners and DIY enthusiasts can effectively address minor damages and restore the structural integrity of their concrete pools.
From the initial phase of draining the pool to the final step of allowing the patching compound to cure, each stage plays a pivotal role in the overall success of the repair process. The thorough preparation of the pool surface, the precise application of the patching material, and the careful smoothing and leveling of the patch are essential components that contribute to the creation of a seamless and durable repair.
Furthermore, the emphasis on allowing the patching compound to cure under optimal conditions underscores the significance of patience and vigilance in ensuring the long-term effectiveness of the repair. By adhering to the recommended curing time and implementing protective measures, pool owners can safeguard the integrity of the freshly patched areas, setting the stage for a resilient and enduring restoration of their concrete swimming pools.
Ultimately, the satisfaction derived from revitalizing a concrete swimming pool through meticulous patching efforts is a testament to the rewarding nature of this undertaking. Whether it's addressing minor cracks, chips, or imperfections, or undertaking a comprehensive restoration of the pool surface, the commitment to preserving and enhancing the pool's structural integrity is a worthwhile investment of time and effort.
As pool owners embark on the journey of patching their concrete swimming pools, they are empowered with the knowledge and insights to navigate each phase of the repair process with confidence and expertise. By embracing the principles of thorough preparation, precision in application, and patience in allowing the patch to cure, individuals can achieve professional-quality results that not only restore the pool's functionality but also elevate its aesthetic appeal.
In essence, the process of patching a concrete swimming pool transcends mere repair; it embodies a commitment to preserving a cherished recreational space and ensuring its longevity for years to come. With the guidance provided in this comprehensive guide, pool owners are equipped to embark on this fulfilling endeavor, knowing that they have the tools and understanding to restore their concrete swimming pools to their former glory.
Frequently Asked Questions about How To Patch A Concrete Swimming Pool
Was this page helpful?
At Storables.com, we guarantee accurate and reliable information. Our content, validated by Expert Board Contributors, is crafted following stringent Editorial Policies. We're committed to providing you with well-researched, expert-backed insights for all your informational needs.


0 thoughts on “How To Patch A Concrete Swimming Pool”