Home>Gardening & Outdoor>Outdoor Recreation & Activities>How To Resurface A Concrete Swimming Pool
Outdoor Recreation & Activities
How To Resurface A Concrete Swimming Pool
Modified: February 18, 2024
Learn how to resurface a concrete swimming pool and restore it to its former glory with our outdoor recreation and activities guide. Discover the best techniques and products for a successful pool resurfacing project.
(Many of the links in this article redirect to a specific reviewed product. Your purchase of these products through affiliate links helps to generate commission for Storables.com, at no extra cost. Learn more)
Introduction
Resurfacing a concrete swimming pool is a crucial aspect of pool maintenance and can significantly enhance the pool's aesthetics, durability, and overall functionality. Over time, concrete pool surfaces can deteriorate due to exposure to harsh weather conditions, chemical imbalances, and general wear and tear. As a pool owner, understanding the process of resurfacing a concrete pool is essential for preserving its longevity and ensuring a safe and enjoyable swimming environment for years to come.
When it comes to resurfacing a concrete swimming pool, several key steps must be followed to achieve a successful and long-lasting result. From draining the pool to applying a new pool surface and allowing it to cure, each phase of the resurfacing process plays a vital role in restoring the pool to its former glory.
In this comprehensive guide, we will delve into the step-by-step process of resurfacing a concrete swimming pool, providing valuable insights and expert tips to help you navigate this essential maintenance task with confidence. Whether you're a seasoned pool owner or a first-time pool enthusiast, understanding the intricacies of pool resurfacing will empower you to make informed decisions and ensure the optimal condition of your pool.
By following the detailed instructions outlined in this guide, you will gain a deeper understanding of the resurfacing process and the necessary precautions to take along the way. From draining the pool and cleaning the surface to repairing any cracks or damage and applying a new pool surface, each step is crucial in revitalizing the pool's appearance and structural integrity.
Embarking on the journey of resurfacing a concrete swimming pool is a proactive investment in the long-term maintenance of your pool, ultimately contributing to a safer and more enjoyable swimming experience for you, your family, and your guests. So, let's dive into the step-by-step process of pool resurfacing and equip ourselves with the knowledge and expertise needed to embark on this rewarding endeavor.
Key Takeaways:
- Revitalizing a concrete swimming pool involves draining, cleaning, repairing, applying a bonding agent, installing a new surface, and curing it. Each step ensures a durable, visually appealing, and long-lasting pool for enjoyment.
- By following the meticulous process of pool resurfacing, pool owners can proactively invest in the enduring beauty and functionality of their pool, creating a safe, inviting, and cherished aquatic oasis for relaxation and recreation.
Read more: How To Patch A Concrete Swimming Pool
Step 1: Drain the Pool
Draining the pool is the initial and crucial step in the pool resurfacing process. Before beginning the draining process, it's essential to ensure that all necessary safety precautions are in place. This includes securing the area to prevent unauthorized access and taking measures to divert the drained water away from any sensitive areas, such as gardens or stormwater drains.
Once the safety measures are in place, the pool's water level should be lowered to facilitate the subsequent steps of the resurfacing process. This can be achieved by using a submersible pump to gradually drain the water, taking care to avoid causing any damage to the pool's structure or surrounding landscape.
As the water level decreases, it's important to monitor and manage the drainage to prevent any potential issues, such as soil erosion or water accumulation in unwanted areas. Additionally, the drained water should be directed to an appropriate drainage point, ensuring that it does not cause any disruption or damage to the surrounding environment.
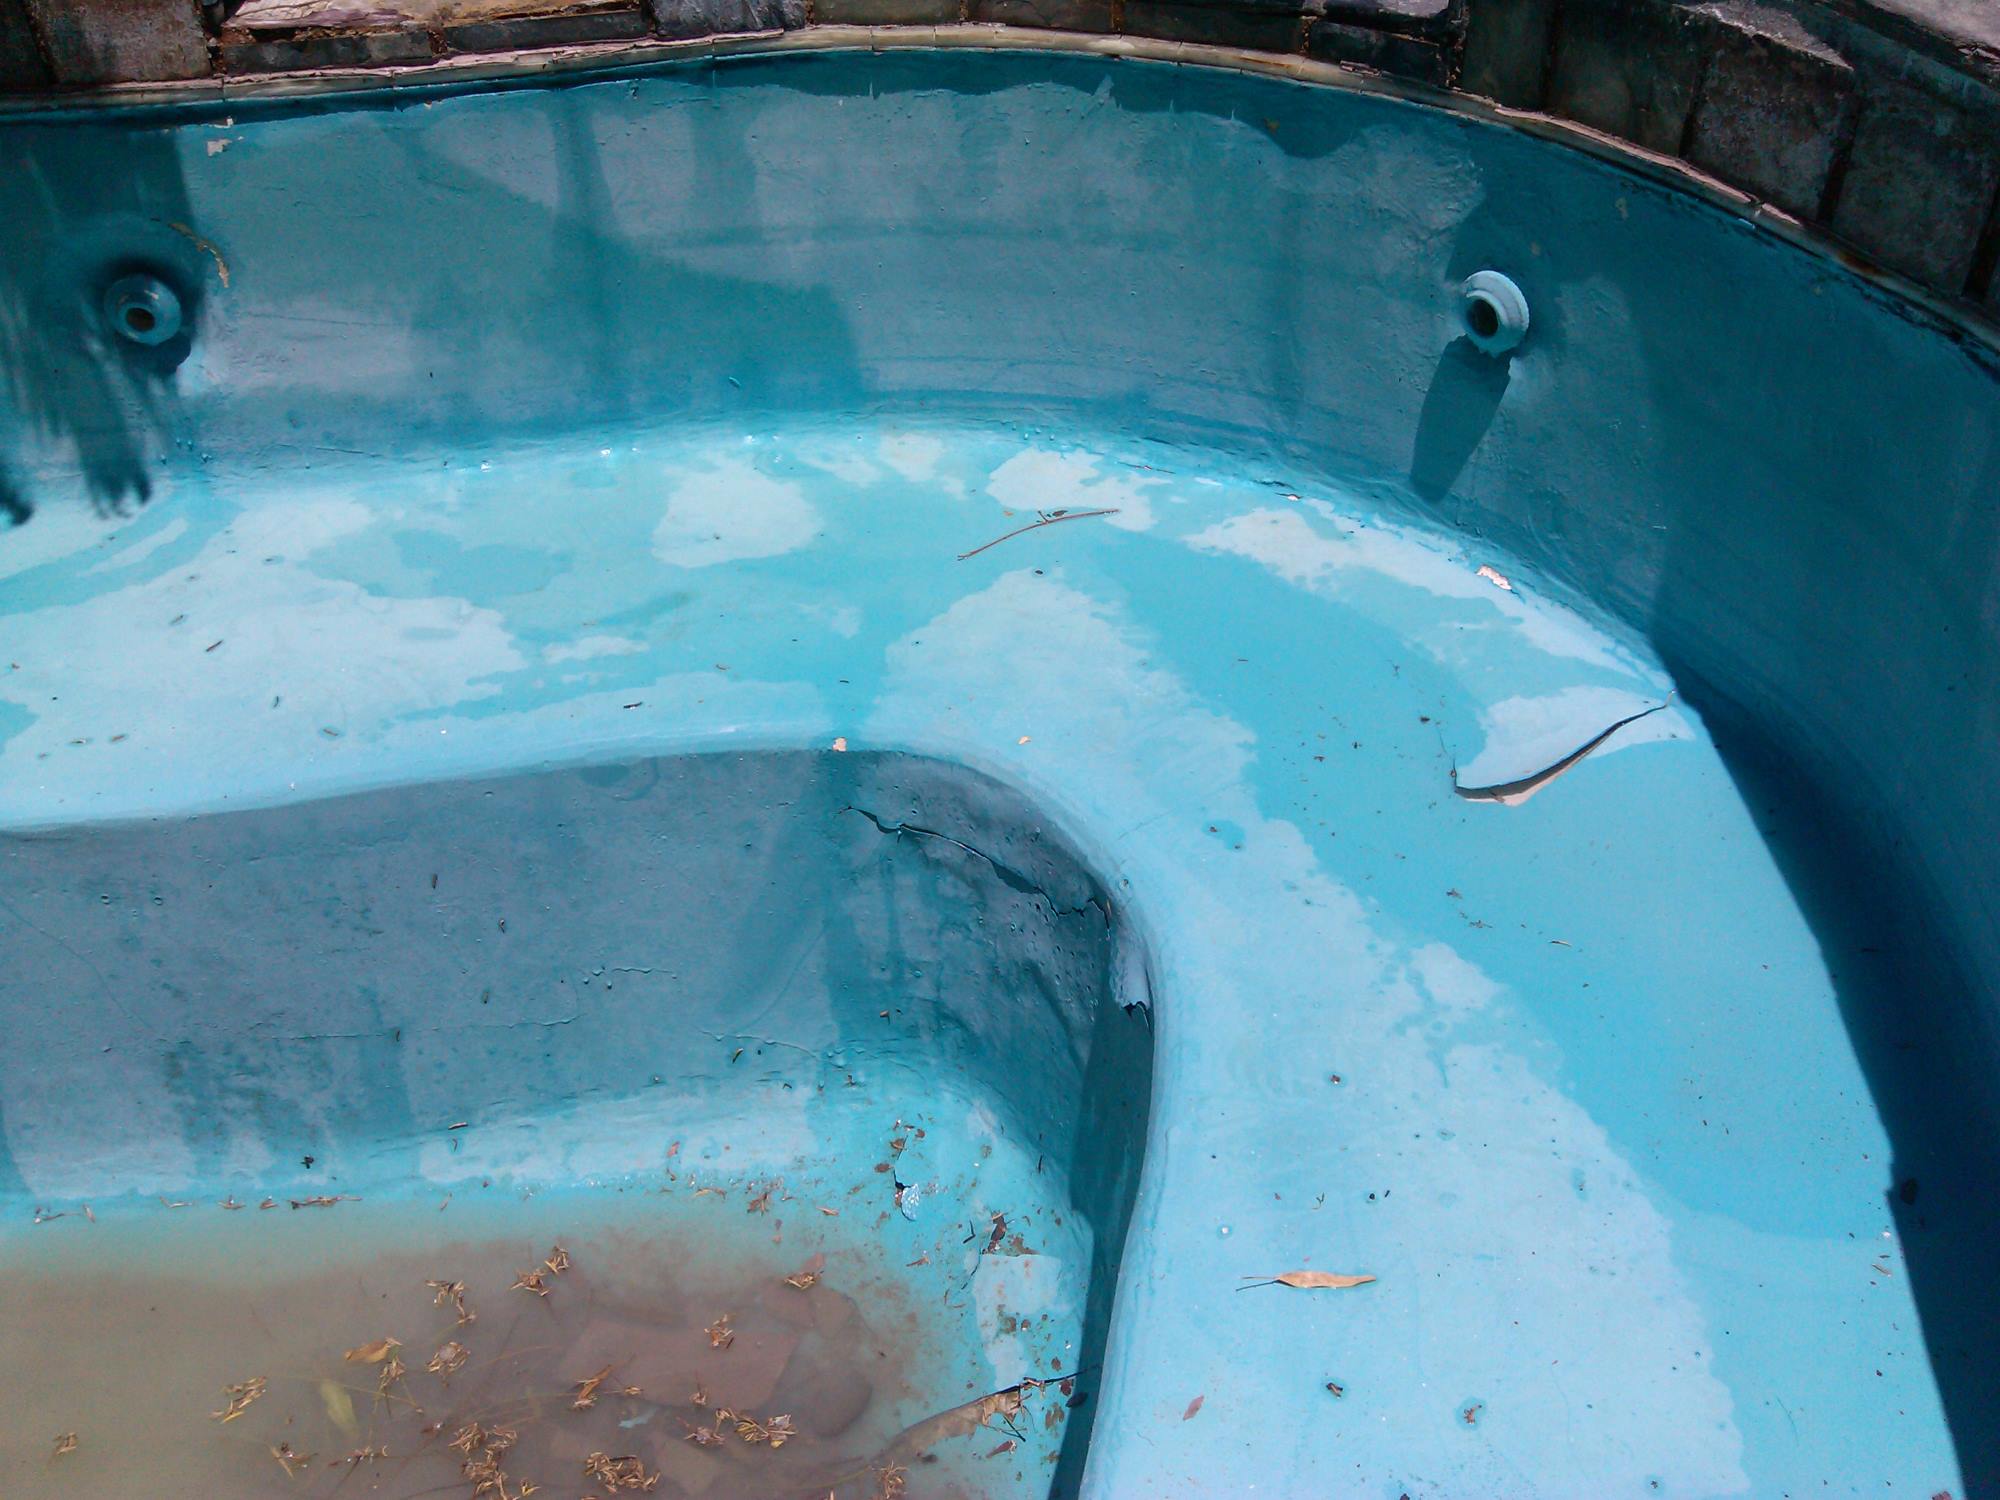
During the draining process, it's also a good opportunity to inspect the pool's interior for any visible signs of damage, such as cracks, stains, or deterioration. This visual assessment can provide valuable insights into the condition of the pool surface and help in planning the subsequent steps of the resurfacing process.
Once the pool is completely drained, it's essential to remove any remaining water and debris from the pool floor, ensuring a clean and clear surface for the subsequent cleaning and preparation steps. This may involve using a wet vacuum or other suitable equipment to eliminate any residual water and debris, setting the stage for the next phase of the resurfacing process.
Draining the pool sets the foundation for the subsequent steps of the resurfacing process, allowing for thorough cleaning, inspection, and preparation of the pool surface. By approaching this initial step with care and attention to detail, pool owners can ensure a smooth transition into the subsequent phases of pool resurfacing, ultimately contributing to a successful and long-lasting outcome.
Step 2: Clean the Pool Surface
Cleaning the pool surface is a critical phase in the resurfacing process, as it sets the stage for the application of the new pool surface. The goal of this step is to remove any contaminants, debris, and residues that may compromise the adhesion and integrity of the new pool surface. By thoroughly cleaning the pool surface, pool owners can ensure a smooth and durable foundation for the subsequent resurfacing activities.
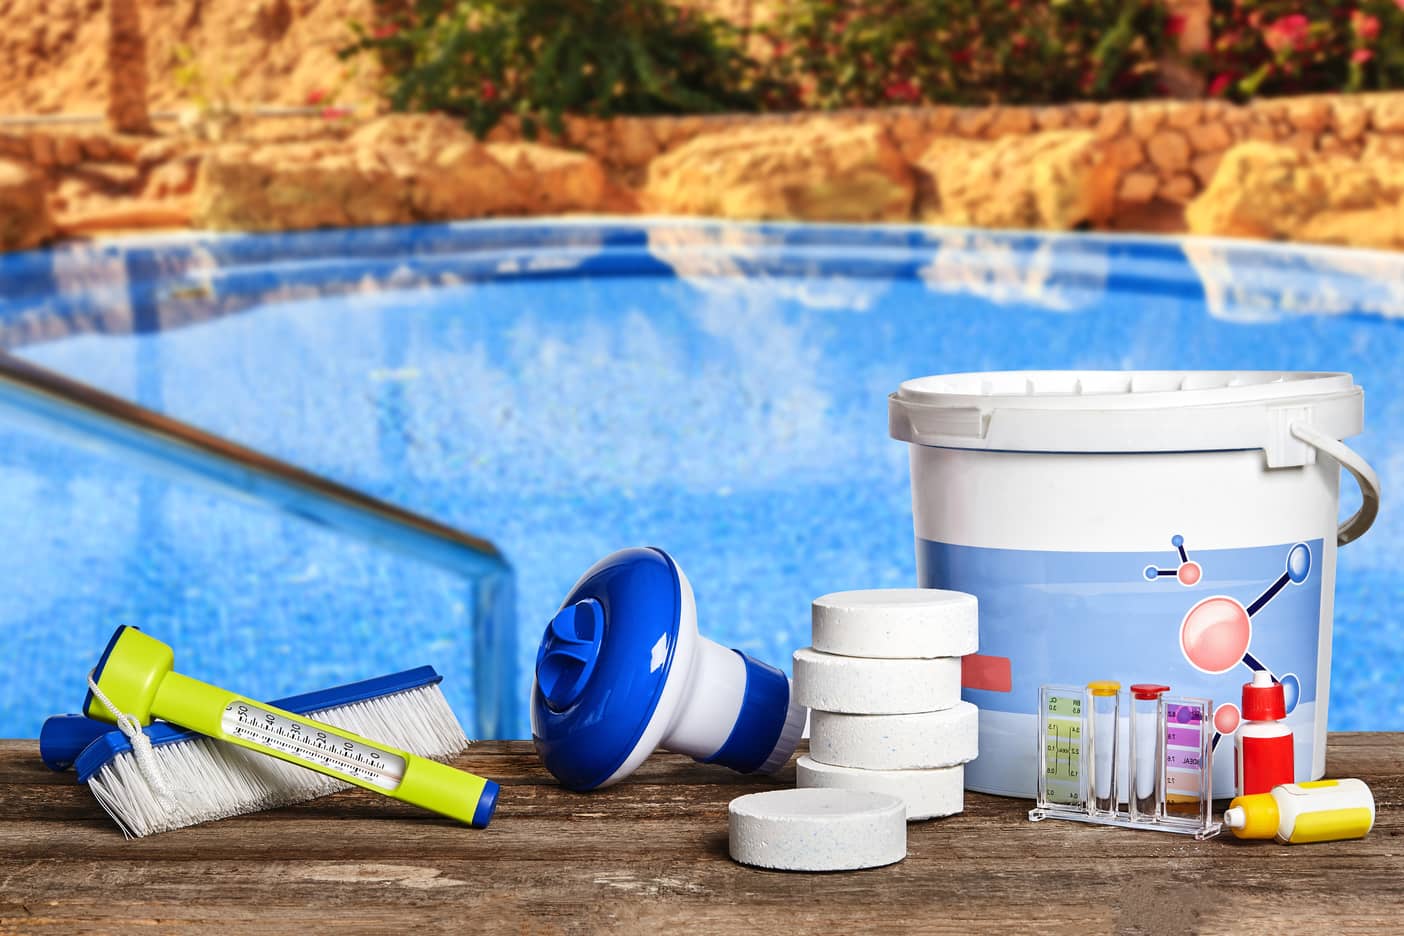
The cleaning process typically begins with the removal of any remaining water and debris from the pool floor, which may include leaves, dirt, and other foreign particles. This can be accomplished using a combination of manual cleaning tools, such as nets and brushes, as well as mechanical equipment, such as pool vacuums and automatic cleaners. By eliminating these impurities, the pool surface is prepared for more intensive cleaning and treatment.
Once the initial debris is removed, the pool surface is thoroughly scrubbed and cleaned to eliminate any embedded dirt, algae, or other organic matter. This may involve using specialized pool cleaning solutions and equipment to effectively dislodge and remove stubborn contaminants. Additionally, the pool walls and waterline are given particular attention to ensure a comprehensive cleaning of the entire pool interior.
In cases where the pool surface exhibits stubborn stains or discoloration, targeted cleaning methods, such as acid washing or pressure washing, may be employed to restore the surface to a uniform and pristine condition. These techniques are carefully executed to avoid damage to the underlying concrete while effectively addressing specific areas of concern.
Following the cleaning process, the pool surface is rinsed thoroughly to remove any cleaning residues and ensure a clean and neutral substrate for the subsequent resurfacing materials. Proper rinsing is essential to prevent any chemical interactions between the cleaning agents and the new pool surface, which could compromise the adhesion and longevity of the resurfacing materials.
By dedicating meticulous attention to cleaning the pool surface, pool owners can lay the groundwork for a successful and enduring pool resurfacing project. This phase not only enhances the visual appeal of the pool but also contributes to the overall quality and longevity of the new pool surface, ensuring a revitalized and inviting swimming environment for years to come.
Step 3: Repair Any Cracks or Damage
Repairing any cracks or damage on the pool surface is a crucial step in the resurfacing process, as it addresses structural integrity and prevents potential issues from compromising the new pool surface. Concrete pool surfaces are susceptible to developing cracks over time due to various factors, including ground movement, temperature fluctuations, and the natural aging of the material. Additionally, damage from impact, wear, or improper maintenance can further contribute to the deterioration of the pool surface. Therefore, identifying and addressing any existing cracks or damage is essential to ensure a durable and long-lasting resurfacing outcome.
The repair process begins with a thorough inspection of the pool surface to identify any visible cracks, chips, spalls, or other forms of damage. This visual assessment is complemented by tactile examination to detect any subtle irregularities or weaknesses in the concrete. By systematically evaluating the entire pool surface, including the walls, floor, and waterline, pool owners can pinpoint areas that require repair and develop a comprehensive plan to address the identified issues.
Once the damaged areas are identified, the next step involves preparing the surfaces for repair. This may include cleaning the damaged areas to remove any loose debris, contaminants, or previous repair materials. Proper surface preparation is essential to ensure the adhesion and effectiveness of the repair materials, allowing for a seamless integration with the existing pool structure.
Depending on the nature and extent of the damage, various repair techniques and materials may be employed. For minor cracks and surface imperfections, specialized concrete patching compounds or epoxy-based fillers are utilized to fill and seal the damaged areas. These materials are carefully applied to the affected areas, ensuring a smooth and level surface that seamlessly blends with the surrounding concrete.
In cases where more significant damage, such as structural cracks or spalling, is present, professional repair methods, including structural crack injection or reinforcement, may be necessary. These advanced techniques involve the use of specialized materials and equipment to stabilize and restore the structural integrity of the affected areas, effectively mitigating the risk of further deterioration.
By addressing any existing cracks or damage before applying the new pool surface, pool owners can safeguard the structural stability and longevity of the pool, ultimately contributing to a successful and enduring resurfacing outcome. This proactive approach to repair not only enhances the visual appeal of the pool but also ensures a safe and functional swimming environment for years to come.
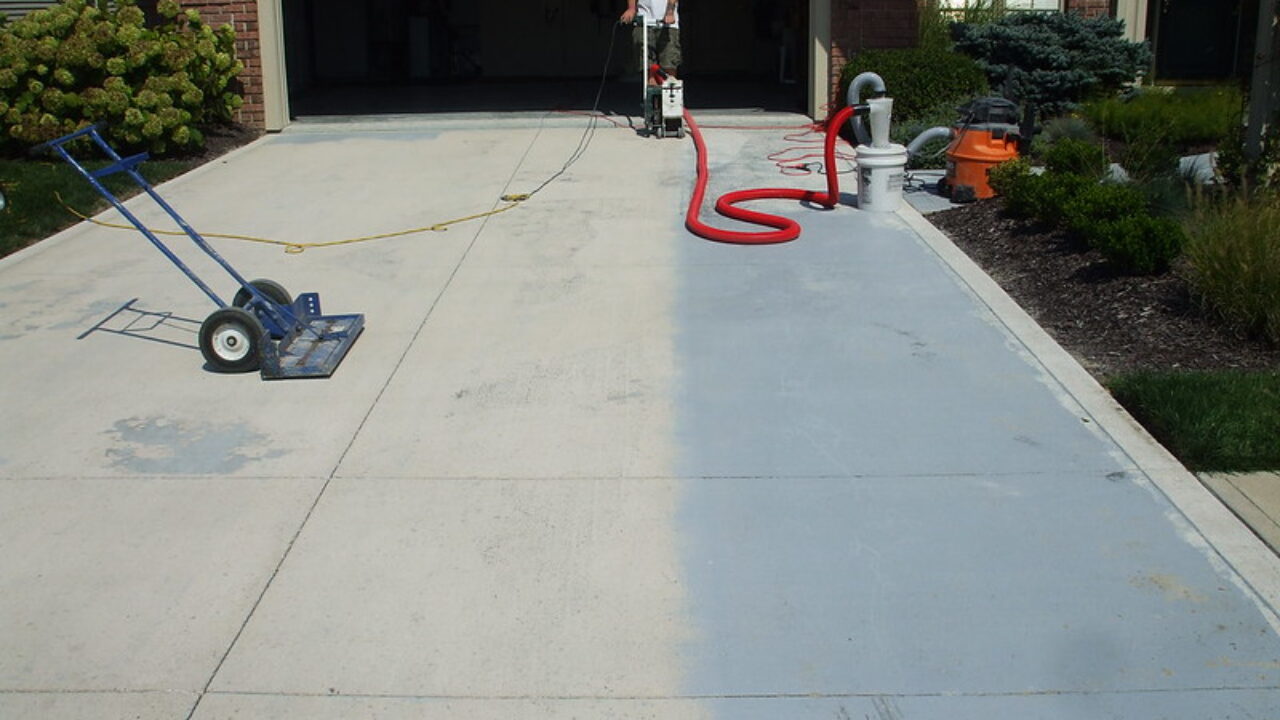
Before resurfacing a concrete swimming pool, make sure to thoroughly clean the surface and repair any cracks or damage. This will ensure a smooth and long-lasting finish.
Step 4: Apply Bonding Agent
Applying a bonding agent is a critical step in the pool resurfacing process, as it establishes a strong and durable bond between the existing pool surface and the new pool finish. The bonding agent, also known as a pool primer, serves as a crucial intermediary layer that enhances the adhesion and cohesion of the subsequent resurfacing materials, ensuring a seamless and long-lasting integration with the pool structure.
The application of the bonding agent begins with meticulous surface preparation to create an optimal substrate for the bonding material. This involves thoroughly cleaning the pool surface to remove any residual contaminants, debris, or previous coatings that may hinder the bonding process. Additionally, any areas of repair or patching are inspected to ensure that they are fully cured and prepared for the application of the bonding agent.
Once the pool surface is properly prepared, the bonding agent is carefully applied in accordance with the manufacturer's guidelines. The selection of the bonding agent is crucial, as it should be compatible with both the existing pool surface and the new resurfacing materials. Common types of bonding agents include epoxy-based primers, acrylic bonding agents, and specialized adhesion promoters designed specifically for concrete pool surfaces.
The application of the bonding agent is typically carried out using a roller, brush, or sprayer, ensuring even coverage and penetration into the concrete substrate. It is essential to apply the bonding agent at the recommended thickness and coverage rate, taking care to avoid excessive buildup or pooling, which could compromise the bonding performance.
After the bonding agent is applied, it is allowed to cure to the appropriate tackiness or dryness as specified by the manufacturer. This curing period is essential to ensure that the bonding agent achieves the necessary adhesion and bonding strength, creating an ideal foundation for the subsequent application of the new pool surface.
By applying a high-quality bonding agent, pool owners can enhance the overall integrity and longevity of the pool resurfacing project. The bonding agent serves as a vital link between the existing pool structure and the new pool finish, ensuring a robust and enduring bond that withstands the rigors of pool usage and environmental exposure. This meticulous attention to the bonding process sets the stage for a successful and long-lasting pool resurfacing outcome, ultimately contributing to the revitalization and preservation of the pool for years to come.
Read more: How To Waterproof A Concrete Swimming Pool
Step 5: Apply New Pool Surface
Applying the new pool surface marks a pivotal phase in the pool resurfacing process, where the transformation of the pool's appearance and functionality takes shape. This step involves the meticulous application of the chosen pool finish, whether it's plaster, aggregate, or tile, to rejuvenate the pool's aesthetic appeal and reinforce its structural integrity.
The selection of the new pool surface material is a critical decision, as it directly influences the pool's visual appeal, durability, and maintenance requirements. Plaster, known for its smooth and classic finish, is a popular choice for pool surfaces, offering a timeless elegance and versatility. On the other hand, aggregate finishes, comprising a blend of pebbles, glass beads, or quartz, present a textured and durable option that adds depth and character to the pool surface. Additionally, tile surfaces, featuring ceramic, porcelain, or glass tiles, offer a customizable and resilient solution that enhances the pool's visual impact.
The application of the new pool surface demands precision and expertise to ensure a flawless and enduring result. The process typically begins with the preparation of the chosen material, which may involve mixing plaster, preparing aggregate blends, or arranging tile patterns. Each material requires specific handling and application techniques to achieve the desired finish and performance.
Once the material is prepared, it is skillfully applied to the pool surface, starting from the walls and progressing to the floor in a systematic and methodical manner. For plaster and aggregate finishes, trowels and application tools are used to spread and compact the material evenly, creating a uniform and seamless surface. In the case of tile finishes, meticulous placement and grouting of individual tiles are carried out to achieve a precise and visually striking result.
Throughout the application process, attention is given to detail, ensuring that the new pool surface is free from imperfections, irregularities, and air pockets. This meticulous approach not only enhances the visual appeal of the pool but also contributes to the overall durability and longevity of the new surface.
By applying the new pool surface with care and precision, pool owners can elevate the pool's aesthetic charm and reinforce its structural resilience, ultimately creating an inviting and enduring swimming environment. The successful execution of this step sets the stage for the final phase of the resurfacing process, bringing the vision of a revitalized and captivating pool one step closer to reality.
Step 6: Cure the Surface
Curing the newly applied pool surface is a critical and final step in the pool resurfacing process, essential for ensuring the optimal strength, durability, and longevity of the newly installed material. Proper curing allows the pool surface to develop the necessary resilience and resistance to environmental factors, ultimately contributing to a robust and enduring finish that withstands the rigors of pool usage and exposure.
The curing process typically begins immediately after the new pool surface is applied, as the material is still in its initial state and requires careful treatment to achieve its full potential. The specific curing requirements vary depending on the type of pool surface material used, such as plaster, aggregate, or tile, as each material may have distinct curing methods and timelines.
For plaster and aggregate finishes, the curing process often involves maintaining a consistent and optimal moisture level on the surface to facilitate the hydration and hardening of the material. This may include techniques such as misting the surface with water, covering it with wet burlap or plastic sheeting, or utilizing specialized curing compounds to retain moisture and promote proper curing.
In the case of tile finishes, the curing process encompasses ensuring the proper adhesion and setting of the tiles and grout, allowing them to bond securely and achieve the desired strength and integrity. This may involve protecting the newly installed tiles from excessive moisture or environmental stress during the initial curing period, ensuring that they set and adhere effectively.
Throughout the curing period, it is essential to adhere to the manufacturer's guidelines and recommendations for the specific pool surface material, including the duration of the curing process and any specific maintenance or treatment requirements. This meticulous approach ensures that the new pool surface achieves its full potential in terms of strength, durability, and visual appeal.
Properly cured pool surfaces exhibit enhanced resistance to chemical imbalances, abrasion, and environmental factors, ultimately contributing to a long-lasting and visually appealing pool finish. By dedicating attention to the curing process, pool owners can ensure that the newly resurfaced pool surface achieves its maximum potential, providing a durable and inviting swimming environment for years to come.
The successful completion of the curing process marks the culmination of the pool resurfacing journey, where the vision of a revitalized and enduring pool becomes a reality. With the pool surface fully cured and ready for use, pool owners can revel in the transformation of their pool, enjoying a renewed and captivating aquatic oasis that embodies both beauty and resilience.
Conclusion
In conclusion, the process of resurfacing a concrete swimming pool is a comprehensive and meticulous endeavor that encompasses a series of essential steps, each contributing to the revitalization and preservation of the pool's appearance and functionality. From draining the pool and cleaning the surface to repairing any cracks or damage, applying a bonding agent, and installing a new pool surface, every phase of the resurfacing process plays a crucial role in achieving a successful and enduring outcome.
By embarking on the journey of pool resurfacing with a thorough understanding of the intricacies involved, pool owners can proactively invest in the long-term maintenance and enjoyment of their pool. The careful execution of each step, coupled with attention to detail and adherence to best practices, ensures that the pool surface is revitalized with durability, visual appeal, and structural integrity in mind.
The culmination of the resurfacing process lies in the meticulous curing of the newly installed pool surface, where the material achieves its full potential in terms of strength, resilience, and resistance to environmental factors. Proper curing sets the stage for a durable and visually captivating pool finish, ultimately providing a safe and inviting swimming environment for years to come.
As pool owners witness the transformation of their pool through the resurfacing process, they can take pride in knowing that they have proactively preserved and enhanced a vital aspect of their property. The revitalized pool not only embodies aesthetic charm but also reflects a commitment to quality and longevity, offering a space for relaxation, recreation, and cherished moments with family and friends.
In essence, the journey of resurfacing a concrete swimming pool is a proactive investment in the enduring beauty and functionality of a cherished aquatic oasis. By embracing the process with knowledge, care, and attention to detail, pool owners can ensure that their pool remains a source of joy, relaxation, and rejuvenation for years to come.
Frequently Asked Questions about How To Resurface A Concrete Swimming Pool
Was this page helpful?
At Storables.com, we guarantee accurate and reliable information. Our content, validated by Expert Board Contributors, is crafted following stringent Editorial Policies. We're committed to providing you with well-researched, expert-backed insights for all your informational needs.


0 thoughts on “How To Resurface A Concrete Swimming Pool”