Articles
How To Resurface A Concrete Driveway
Modified: October 22, 2024
Learn the step-by-step process of resurfacing a concrete driveway with our informative articles. Improve the appearance and durability of your driveway.
(Many of the links in this article redirect to a specific reviewed product. Your purchase of these products through affiliate links helps to generate commission for Storables.com, at no extra cost. Learn more)
Introduction
Welcome to the world of concrete driveways! If you own a home or property with a concrete driveway, chances are you’ve noticed that over time, it can become worn, cracked, or just plain unsightly. While replacing the entire driveway may be an option, it can be costly and time-consuming.
Fortunately, there’s another solution: resurfacing your concrete driveway. Resurfacing allows you to restore the look and functionality of your driveway without the need for a complete overhaul. It’s a cost-effective and efficient way to breathe new life into your driveway and enhance your home’s curb appeal.
In this article, we’ll guide you through the process of resurfacing a concrete driveway, step by step. Whether you’re a DIY enthusiast or simply looking to learn more about the process, we’ve got you covered.
Before we dive into the nitty-gritty details, it’s important to understand that resurfacing a concrete driveway is a project that requires careful planning and preparation. It’s not a task that can be completed in a single day, but with the right approach and the right materials, you can achieve professional-looking results.
Throughout the article, we’ll provide tips, techniques, and recommendations to help you along the way. From assessing the condition of your driveway to sealing the surface for added protection, we’ll cover all the essential steps.
So, if you’re ready to take on the challenge of resurfacing your concrete driveway and transform it into a smooth, durable, and visually appealing feature, let’s get started with the first step: assessing the condition of the concrete driveway.
Key Takeaways:
- Resurfacing a concrete driveway involves assessing, repairing, and applying a new surface to restore functionality and enhance curb appeal. Proper preparation, application, and maintenance are crucial for long-lasting results.
- The resurfacing process includes cleaning, repairing cracks, preparing the resurfacing mixture, applying the resurfacer, and sealing the driveway. Attention to detail, patience, and adherence to manufacturer’s instructions are essential for a successful outcome.
Read more: How To Resurface An Asphalt Driveway
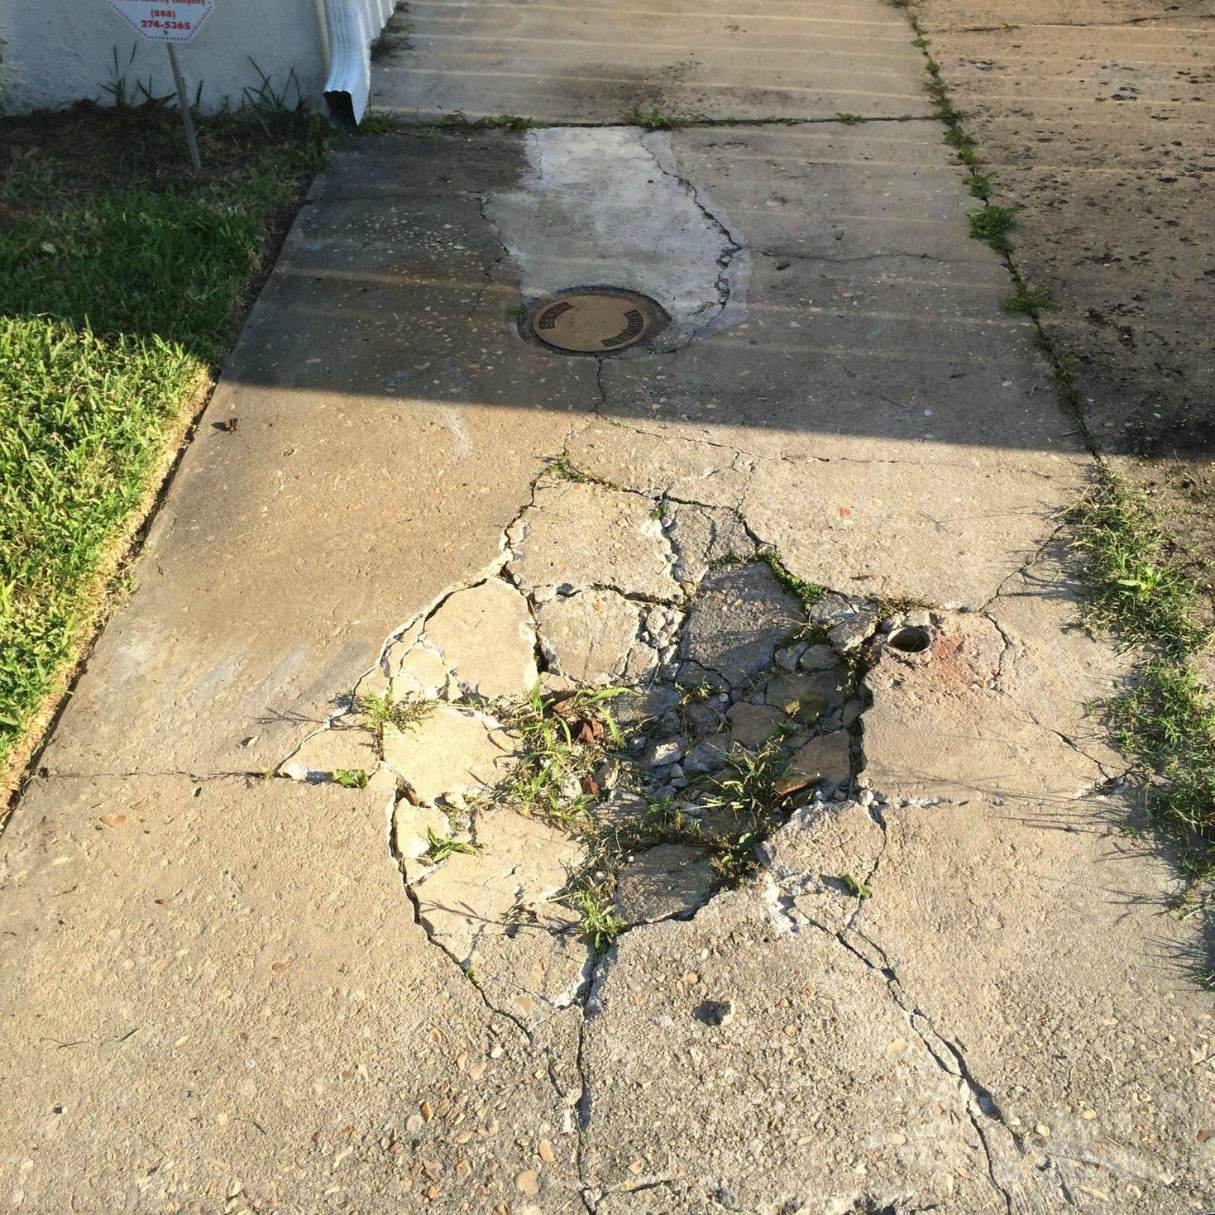
Step 1: Assess the condition of the concrete driveway
Before you begin the process of resurfacing your concrete driveway, it’s crucial to assess its current condition. This step will help you determine the extent of repairs needed and plan accordingly. Here are a few key factors to consider:
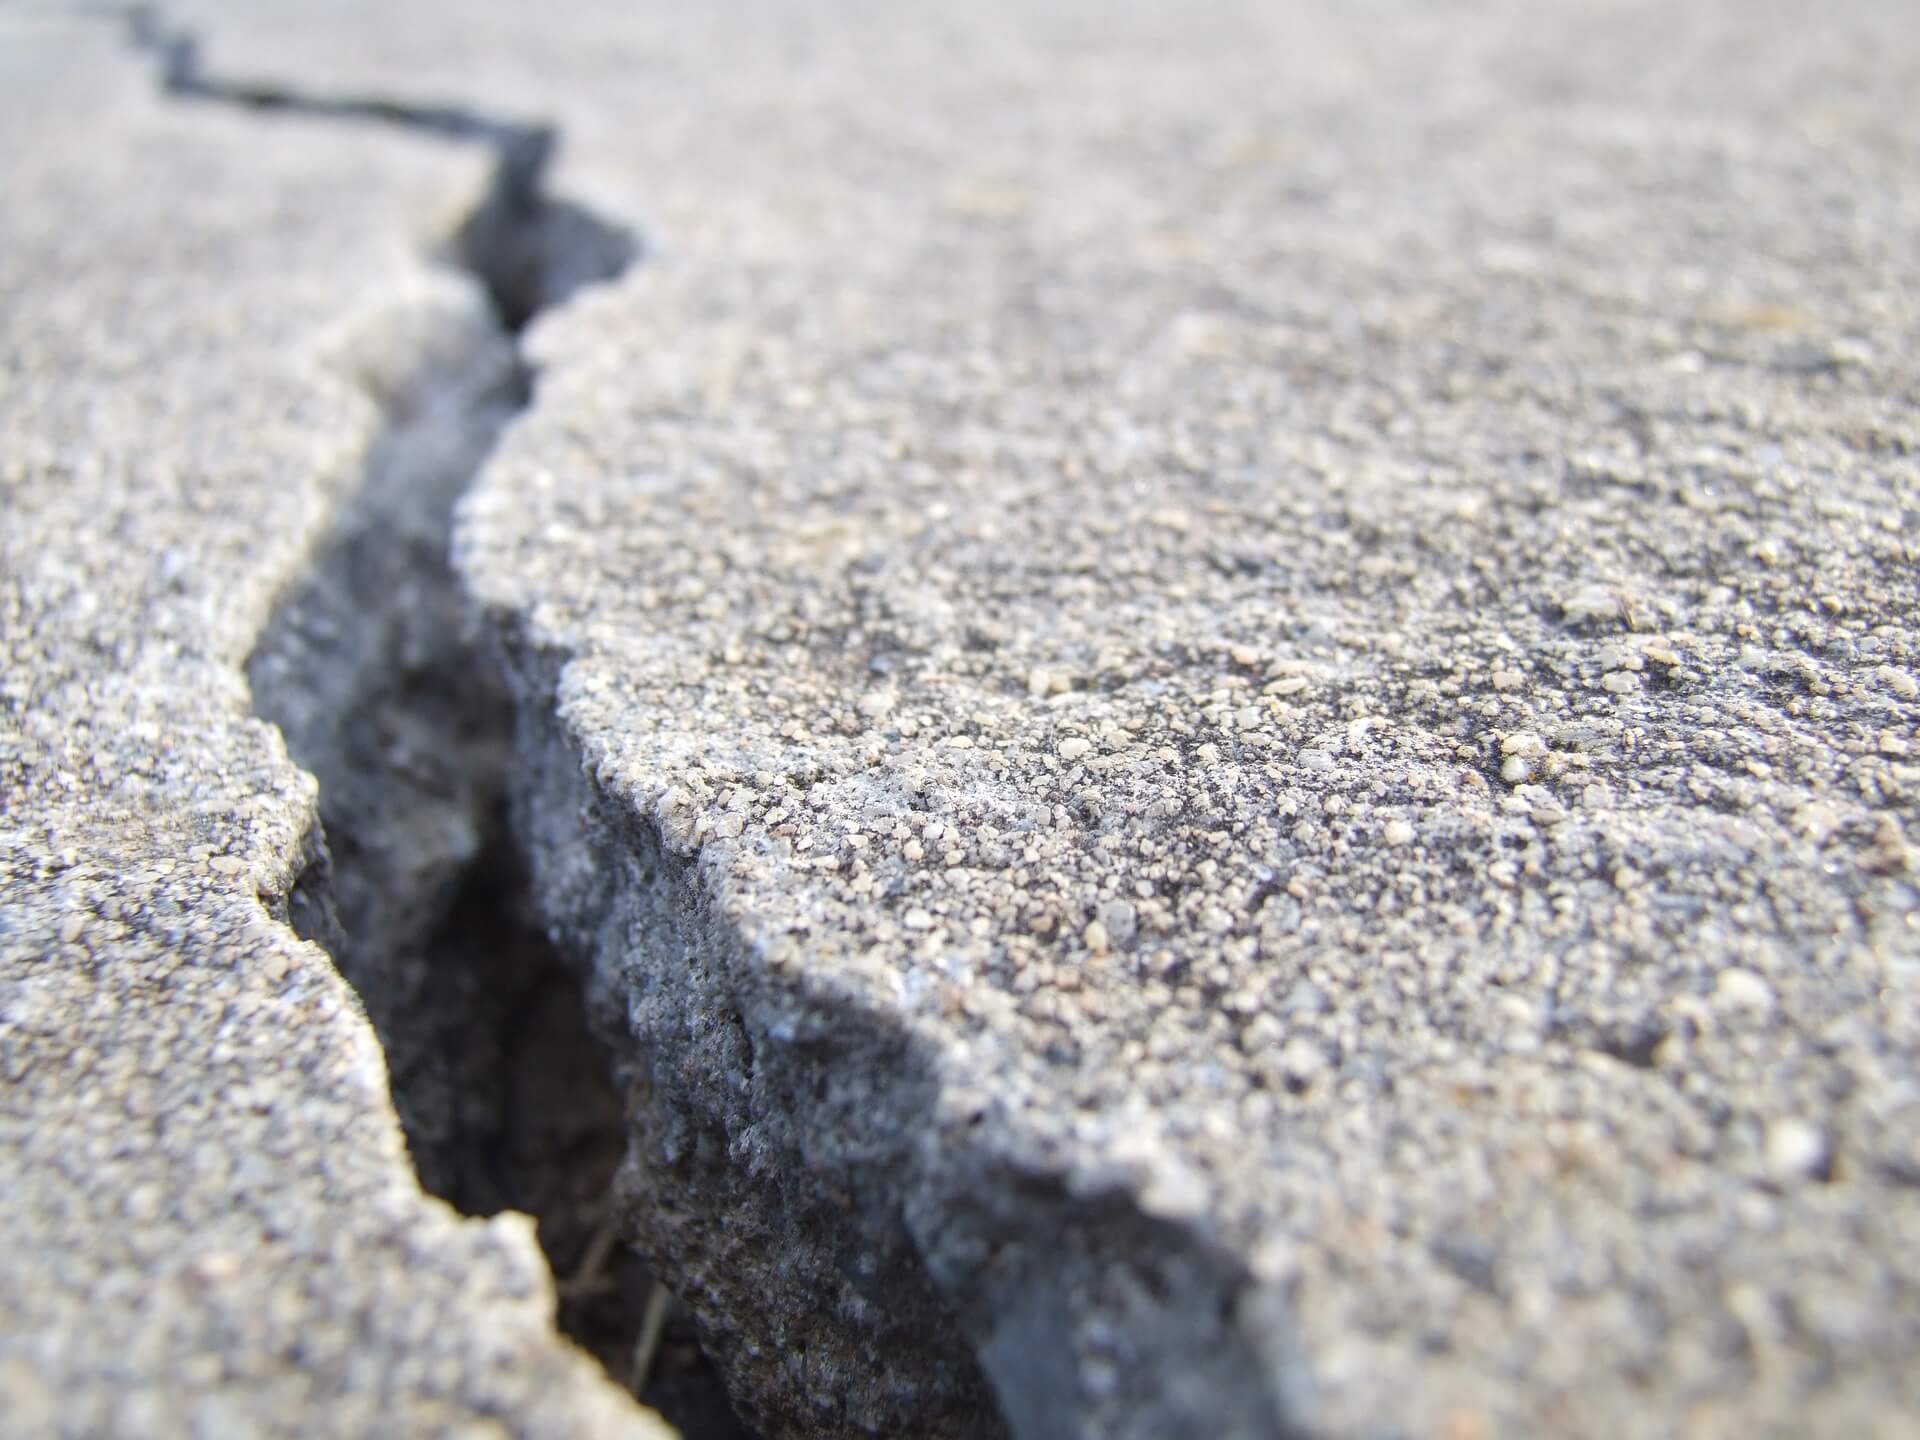
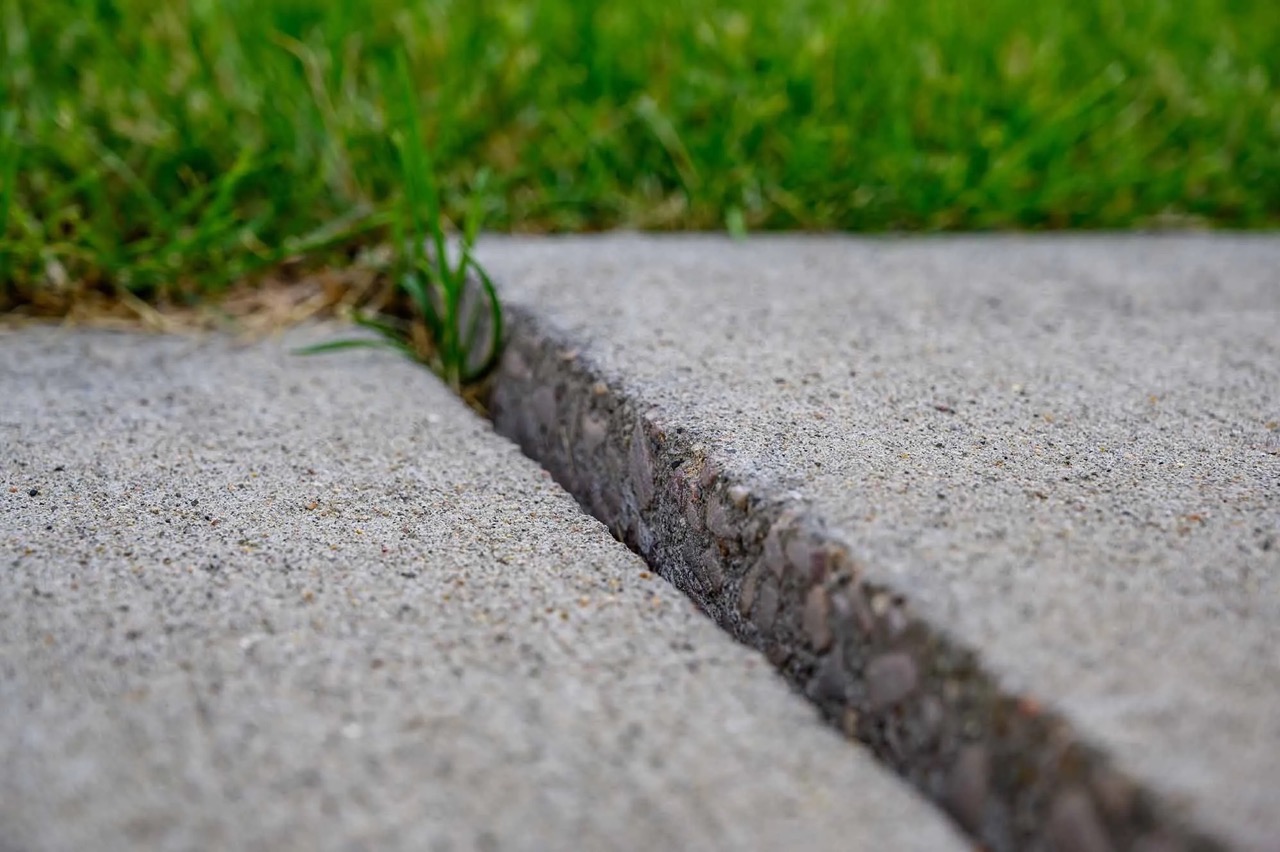
- Cracks and damage: Inspect the driveway for any visible cracks, potholes, or other signs of damage. It’s important to address these issues before proceeding with the resurfacing process.
- Surface wear: Look for any areas of the driveway where the surface has become worn, rough, or discolored. These areas may need extra attention during the resurfacing process.
- Drainage issues: Check for any areas where water tends to accumulate on the driveway, as this can indicate drainage problems. Resurfacing can help improve the slope and alleviate drainage issues.
- Stability: Assess the overall stability of the driveway. Look for any signs of sinking, shifting, or heaving, which can indicate underlying issues that should be addressed before resurfacing.
- Compatibility: Consider the compatibility of the resurfacing materials you plan to use. Some products may be better suited for certain conditions or climates, so it’s important to choose the right option for your specific situation.
By thoroughly assessing the condition of your concrete driveway, you’ll be able to make informed decisions regarding the resurfacing process. If you’re unsure about any aspect of the assessment, it may be helpful to consult with a professional contractor or concrete specialist.
Once you have a clear understanding of the condition of your driveway, you can move on to the next step: gathering the necessary materials and tools.
Step 2: Gather the necessary materials and tools
Now that you’ve assessed the condition of your concrete driveway, it’s time to gather all the materials and tools you’ll need for the resurfacing process. Having everything ready before you start will help ensure a smoother and more efficient workflow. Here’s a list of the essential items:
- Cleaning supplies: You’ll need a pressure washer or a stiff-bristle brush and a degreasing cleaner to thoroughly clean the surface of the driveway.
- Crack repair materials: Depending on the severity of the cracks in your driveway, you may need a crack filler or a concrete patching compound to fix them.
- Resurfacing product: Choose a high-quality concrete resurfacer that is suitable for your specific driveway conditions. Consider factors such as durability, weather resistance, and color options when selecting the product.
- Mixing tools: You’ll need a mixing container, such as a wheelbarrow or a large bucket, as well as a mixing paddle or a drill with a mixing attachment to blend the resurfacing material.
- Application tools: Depending on the size of your driveway, you may need a long-handled squeegee, a concrete trowel, or a concrete float to apply the resurfacer evenly.
- Protective gear: Ensure you have safety goggles, gloves, a face mask, and appropriate clothing to protect yourself during the resurfacing process.
- Sealer: Consider purchasing a concrete sealer to provide added protection and enhance the longevity of your resurfaced driveway. Check the sealer’s compatibility with the resurfacer you’re using.
Once you have gathered all the necessary materials and tools, make sure to read the instructions provided by the manufacturers of the resurfacer and crack repair products. Familiarize yourself with the recommended application techniques and safety precautions.
With your materials and tools in hand, you’re ready to move on to the next step: cleaning the driveway surface.
Step 3: Clean the driveway surface
Before you can begin the resurfacing process, it’s essential to thoroughly clean the surface of your concrete driveway. This step ensures proper adhesion of the resurfacer and helps remove any dirt, grease, or debris that could interfere with the final results. Follow these steps to effectively clean your driveway:
- Remove loose dirt: Use a broom, leaf blower, or a stiff-bristle brush to sweep away any loose dirt, leaves, or debris from the surface of the driveway. Pay close attention to corners, edges, and joints.
- Pressure wash: If you have access to a pressure washer, it’s the most effective way to clean your driveway. Start by removing any large stains or oil spots, directing the nozzle at a 45-degree angle and maintaining a distance of around 12 inches from the surface. Work in overlapping passes to ensure even cleaning. Be cautious not to use excessive pressure, as it can damage the concrete.
- Degrease and scrub: If you encounter stubborn grease or oil stains, apply a degreasing cleaner to the affected areas. Follow the instructions on the cleaner and use a stiff-bristle brush to scrub the stains gently. Rinse the driveway thoroughly with water afterward.
- Address any mold or mildew: If you notice any mold or mildew on your driveway surface, it’s important to treat it before proceeding. Use a mixture of water and bleach or a commercial concrete cleaner specifically designed to combat mold and mildew. Apply the solution, let it sit for a few minutes, then scrub the area with a brush. Rinse the driveway thoroughly afterward.
- Allow the surface to dry: After cleaning, give your driveway ample time to dry completely. This is crucial for the resurfacing material to adhere properly. Depending on the weather conditions and humidity levels, it may take anywhere from a few hours to a full day for the surface to dry.
By diligently cleaning your driveway surface, you’ll create a clean and smooth canvas for the resurfacer. This step is vital to achieve a long-lasting and professional-looking result.
Now that your driveway is clean and dry, you’re ready to move on to the next step: repairing any cracks or damage.
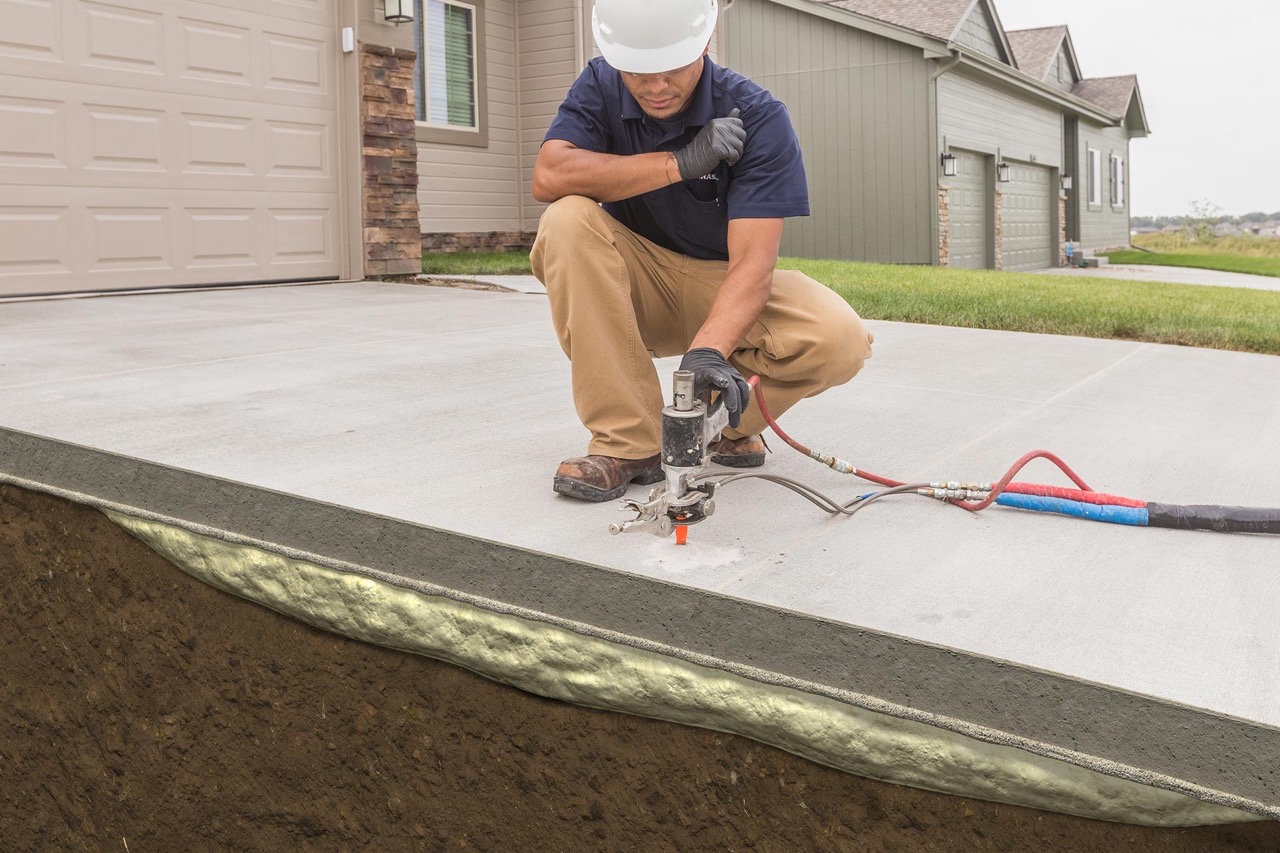
Step 4: Repair any cracks or damage
Before you proceed with the resurfacing process, it’s crucial to address any cracks or damage on your concrete driveway. Repairing these issues will ensure a smooth and even surface and prevent them from worsening over time. Follow these steps to effectively repair cracks and damage:
- Inspect the cracks: Carefully examine the cracks on your driveway and assess their size and severity. Note any wider cracks or areas where the concrete has crumbled.
- Clean the cracks: Use a wire brush or a crack cleaning tool to remove any loose debris, dirt, or vegetation from the cracks. This will ensure proper adhesion of the crack filler or patching compound.
- Choose the right repair method: Depending on the size and depth of the cracks, you can choose between using a crack filler or a concrete patching compound. Fillers are suitable for hairline cracks or cracks up to a quarter-inch wide, while larger cracks may require patching.
- Apply the crack filler: Squeeze the crack filler into the crack, filling it slightly above the surface. Use a putty knife or a trowel to smooth and level the filler, ensuring it blends seamlessly with the surrounding concrete. Follow the manufacturer’s instructions for drying time.
- Apply the patching compound: For larger cracks or areas with crumbled concrete, mix the patching compound according to the manufacturer’s instructions. Apply the compound to the damaged area, slightly overfilling it to allow for shrinkage. Smooth and level the patch using a trowel or a float.
- Allow the repairs to cure: Give the crack filler or patching compound sufficient time to dry and cure. This can vary depending on the product and weather conditions, so refer to the manufacturer’s guidelines. Avoid placing any weight or heavy traffic on the repaired areas until they are fully cured.
Properly repairing cracks and damage on your driveway ensures a solid foundation for the resurfacing process. It helps maintain the structural integrity of the driveway and prevents future issues.
With your cracks and damage repaired, you’re ready to move on to the next step: preparing the resurfacing mixture.
Read more: How To Resurface A Concrete Patio
Step 5: Prepare the resurfacing mixture
Now that you’ve assessed and repaired any cracks or damage on your concrete driveway, it’s time to prepare the resurfacing mixture. This mixture will serve as the top layer of your driveway, providing a fresh and durable surface. Follow these steps to prepare the resurfacing mixture:
- Read the instructions: Before you begin mixing the resurfacing product, carefully read and follow the instructions provided by the manufacturer. Different products may have specific guidelines for mixing ratios and application techniques.
- Gather the materials: Ensure you have all the necessary materials for mixing the resurfacing product. This typically includes the resurfacer itself, water, and a mixing container such as a wheelbarrow or a large bucket.
- Measure the amount of resurfacer: Calculate the amount of resurfacing product needed based on the square footage of your driveway and the manufacturer’s instructions. It’s better to mix smaller batches at a time to ensure proper consistency and workability.
- Add water gradually: Slowly pour the recommended amount of water into the mixing container. Then, gradually add the resurfacing product while stirring continuously. Use a mixing paddle attachment on a drill or a mixing tool to blend the materials together.
- Achieve the right consistency: Aim for a smooth and creamy consistency with the resurfacing mixture. It should be thick enough to spread easily but not too runny. Adjust the amount of water or resurfacer as needed to achieve the desired consistency.
- Mix thoroughly: Continue mixing the resurfacing mixture until all lumps or clumps are fully blended. Ensure that there are no dry pockets of material in the mixture.
Remember to work efficiently when mixing the resurfacing product, as some products may have specific working times or drying times. If the mixture starts to stiffen or dry out, avoid adding more water as this can affect the integrity of the resurfaced surface.
With your resurfacing mixture prepared, you’re now ready to move on to the exciting part: applying the resurfacer to your driveway to restore its beauty and functionality.
Before resurfacing a concrete driveway, make sure to thoroughly clean the surface and repair any cracks or damage. This will ensure a smooth and long-lasting finish.
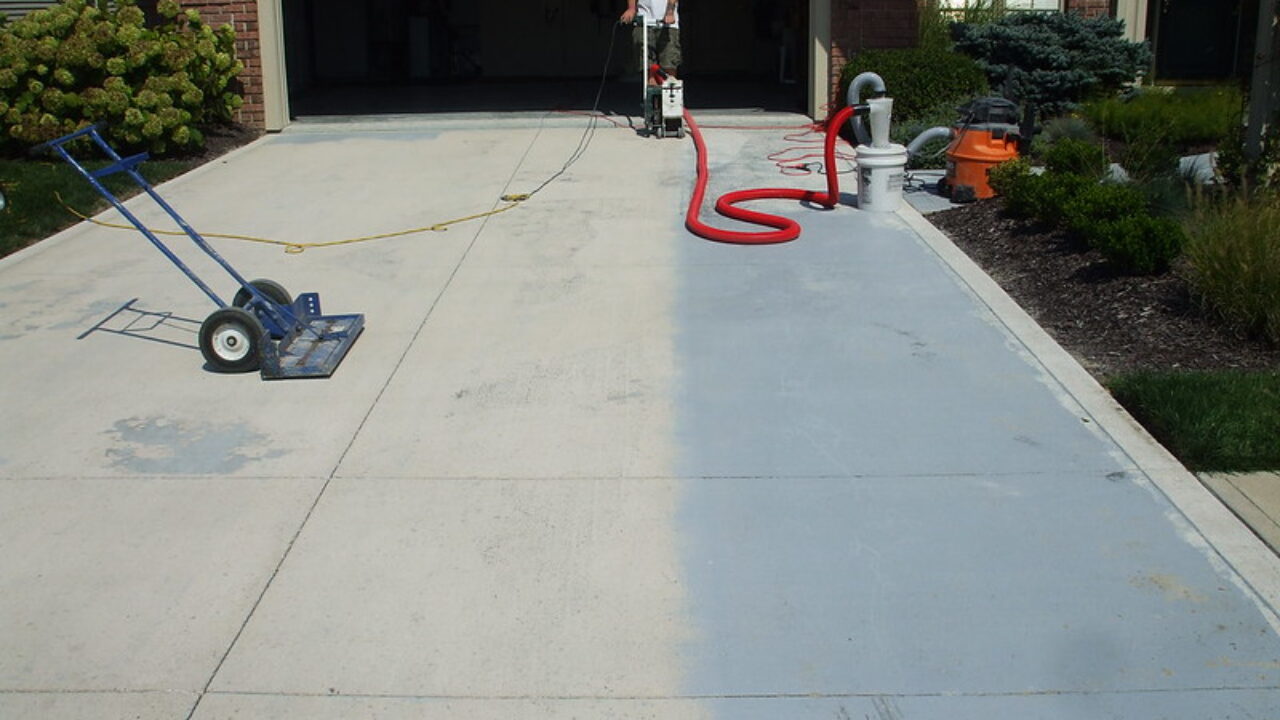
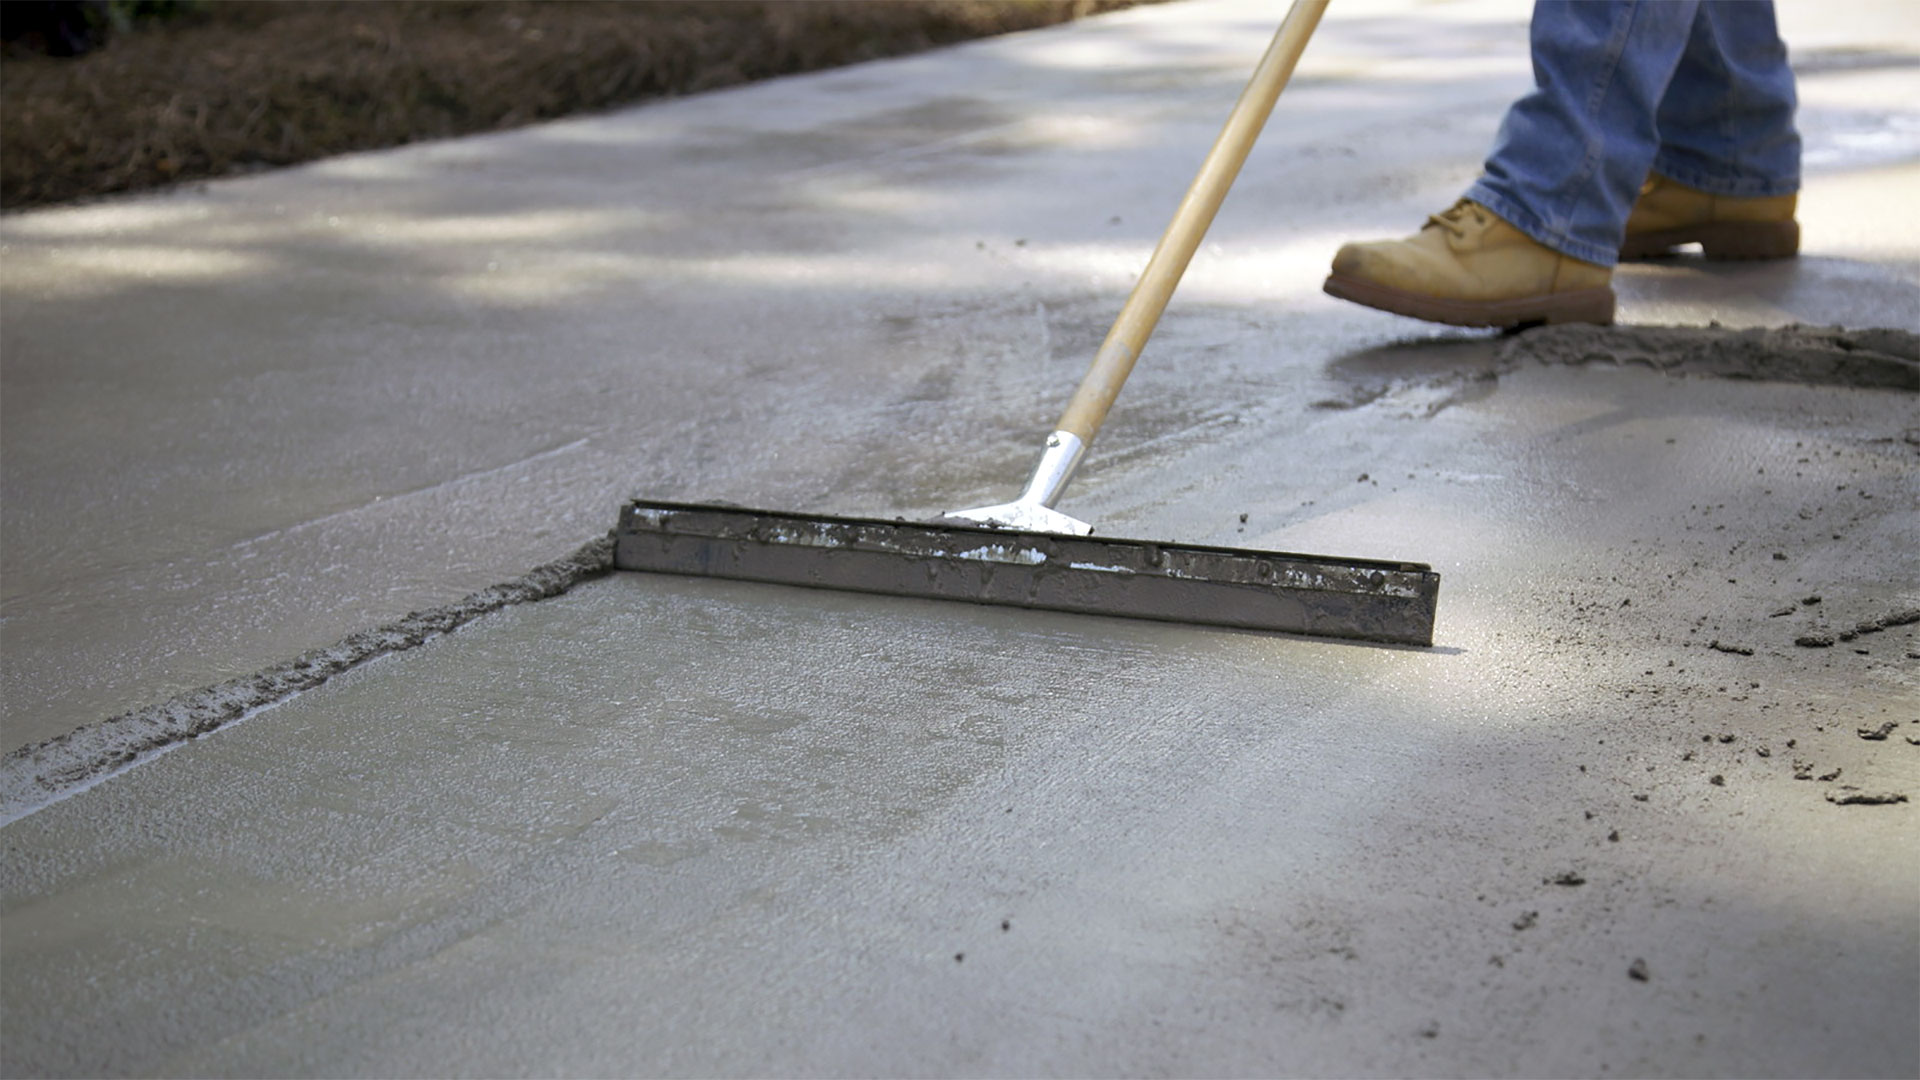
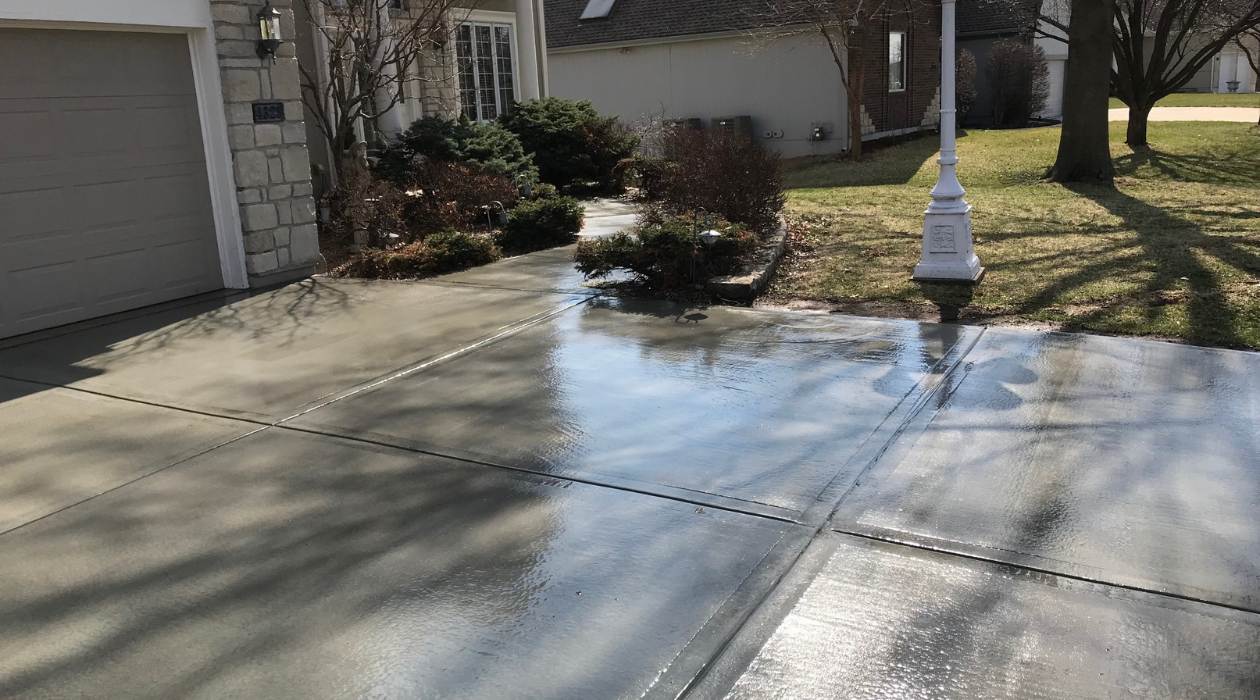
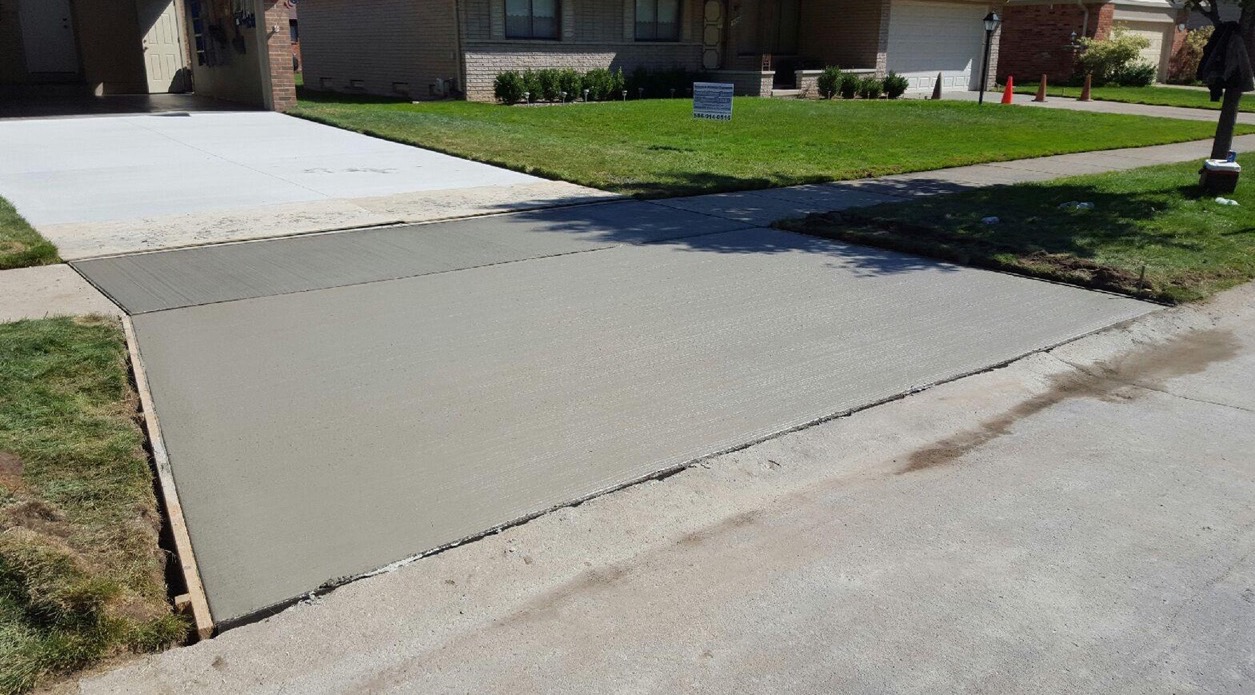
Step 6: Apply the resurfacer to the driveway
With the resurfacing mixture prepared, it’s time to apply the resurfacer to your concrete driveway. This step will bring your driveway back to life and give it a fresh, uniform appearance. Follow these steps to properly apply the resurfacer:
- Preparation: Before you begin, make sure your driveway surface is clean and dry. Remove any loose debris or dirt that may have accumulated since the cleaning process.
- Start at the edges: Begin by applying the resurfacer along the edges of your driveway using a brush or a small trowel. This will ensure that the edges are properly coated and blended with the rest of the resurfacer.
- Work in sections: Divide your driveway into manageable sections, depending on its size and your comfort level. It’s best to work on one section at a time to ensure even application and avoid the resurfacer drying out before you’re finished.
- Apply the resurfacer: Use a squeegee or a long-handled trowel to spread the resurfacer evenly over the section you’re working on. Apply a thin layer of resurfacer initially and distribute it in a back and forth motion. Then, apply a second thicker coat to achieve the desired thickness, usually around 1/8 to 1/4 inch.
- Smooth and level the surface: Once the resurfacer is applied, use a concrete float or a trowel to smooth and level the surface. Work the float or trowel in broad, sweeping motions to remove any excess material and create a uniform finish.
- Feather and blend: To ensure a seamless transition between sections, feather the edges of each freshly applied section into the previously coated area. This will create a smooth and continuous surface without noticeable lines or edges.
- Repeat the process: Continue applying and smoothing the resurfacer section by section until the entire driveway is covered. Take breaks as needed to prevent the resurfacer from drying out and becoming difficult to work with.
It’s important to work efficiently and avoid walking or driving on the freshly applied resurfacer until it has dried and cured completely. Refer to the manufacturer’s instructions for the recommended drying time.
Now that you’ve successfully applied the resurfacer, you’re one step closer to enjoying your beautifully restored driveway. However, there are a few more steps to complete before your resurfaced driveway is fully finished.
Step 7: Smooth and level the resurfaced area
After applying the resurfacer to your driveway, it’s essential to smooth and level the surface to achieve a professional-looking result. This step will ensure that your driveway is even, free from imperfections, and visually appealing. Follow these steps to smooth and level the resurfaced area:
- Inspect the surface: Take a close look at the resurfaced area of your driveway. Identify any uneven spots, ridges, or excess material that needs to be addressed.
- Use a concrete float: Begin by using a concrete float to smooth out any rough or uneven areas. Hold the float at a slight angle and push it across the resurfaced surface in long, sweeping motions. This will help blend the resurfacer and create a consistent texture.
- Work in small sections: It’s best to work in small sections to ensure that you have enough time to smooth and level the resurfacer before it starts to dry. Take your time and pay attention to detail, making sure the surface is as even as possible.
- Level bumps and ridges: If you encounter any bumps or ridges in the resurfaced area, use a trowel or a putty knife to level them out. Gently press down on the elevated areas and remove any excess material to create a smooth and flat surface.
- Feather the edges: Pay special attention to feathering the edges of the resurfaced area to create a seamless transition between the resurfacer and the existing driveway. Blend the edges by lightly running the float or trowel along the perimeter.
- Smooth out imperfections: If you notice any imperfections, such as air bubbles or small irregularities, use the float or trowel to smooth them out. Work carefully and methodically, making sure the surface is as uniform as possible.
- Allow the resurfacer to dry: Once you’re satisfied with the smoothness and levelness of the resurfaced area, allow it to dry according to the manufacturer’s instructions. This drying period is crucial for the resurfacer to fully bond and harden.
By taking the time to smooth and level the resurfaced area, you’ll achieve a visually appealing driveway that is both functional and aesthetically pleasing. Once the resurfacer has dried and cured, you’re almost ready to enjoy your newly transformed driveway.
However, there’s one more important step to complete before you can fully protect your resurfaced driveway: allowing the resurfacer to dry and cure.
Step 8: Allow the resurfacer to dry and cure
After smoothing and leveling the resurfaced area of your driveway, it’s crucial to allow the resurfacer to properly dry and cure. This will ensure that it bonds securely to the existing concrete and achieves its maximum strength and durability. Follow these steps to allow the resurfacer to dry and cure effectively:
- Refer to the manufacturer’s instructions: Different resurfacer products may have varying drying and curing times. It’s important to carefully read and follow the guidelines provided by the manufacturer for the specific product you used.
- Minimize foot and vehicle traffic: During the drying and curing process, it’s crucial to minimize foot and vehicle traffic on the resurfaced area. Avoid walking or driving on the driveway until the resurfacer has fully dried and cured to prevent any damage or premature wear.
- Protect the resurfaced area: While the resurfacer is drying and curing, take precautions to protect it from the elements. If there is a chance of rain, cover the resurfaced area with plastic or a tarp to prevent water from interfering with the drying process.
- Allow sufficient drying time: The drying time can vary depending on factors such as weather conditions, humidity levels, and the specific resurfacer product used. Typically, it can take anywhere from 24 to 48 hours for the resurfacer to dry completely. Refer to the manufacturer’s instructions for a more accurate drying time estimate.
- Provide ample curing time: While the resurfacer may appear dry after the initial drying period, it’s important to allow it to cure fully before subjecting it to heavy use. Curing time can range from a few days to a week or more, depending on the product. During this time, avoid placing heavy objects or parking vehicles on the resurfaced area to allow the resurfacer to achieve its maximum strength and durability.
- Monitor the curing process: Keep an eye on the resurfaced area during the curing period. If you notice any cracks or damage, consult the manufacturer’s guidelines for appropriate remedial actions.
By allowing the resurfacer to properly dry and cure, you’ll ensure that your driveway’s new surface is strong, durable, and able to withstand the rigors of everyday use. Once the resurfacer has fully dried and cured, you can move on to the final step: sealing the driveway for added protection.
Read more: How To Resurface A Concrete Swimming Pool
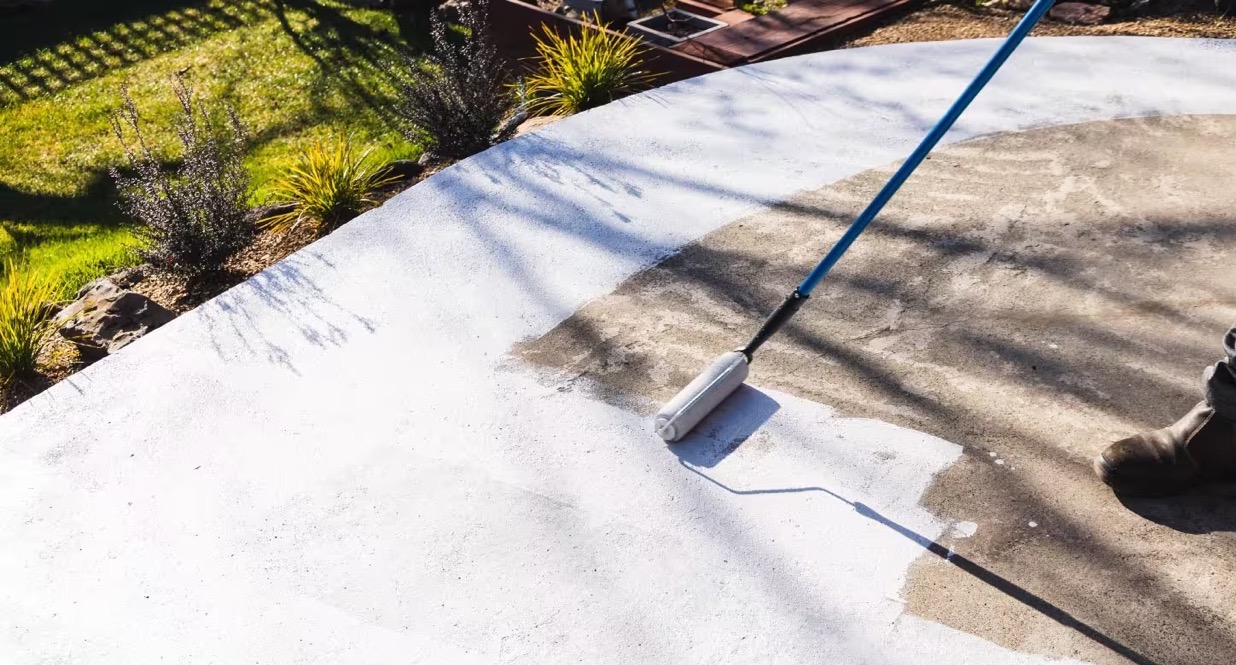
Step 9: Seal the driveway for added protection
After the resurfacer has dried and cured, it’s important to take the extra step of sealing your driveway to provide added protection and longevity. Sealing helps to protect the resurfaced surface from moisture, UV rays, oil stains, and other potential damage. Follow these steps to effectively seal your driveway:
- Clean the surface: Before applying the sealant, ensure that the resurfaced area is clean and free from any dust, debris, or loose particles. Sweep or use a leaf blower to remove any surface contaminants.
- Choose the right sealer: There are different types of driveway sealers available, such as acrylic sealers, epoxy sealers, or penetrating sealers. Consider the specific needs of your driveway and choose a sealer that is suitable for your climate and conditions.
- Read the manufacturer’s instructions: Carefully read and follow the instructions provided by the manufacturer of the sealant. Different sealers may have specific application methods, drying times, and coverage rates.
- Prepare the sealant: Mix or shake the sealant as per the manufacturer’s instructions. Some sealers may require dilution with water, while others are ready to use straight from the container.
- Apply the sealant: Use a long-handled roller or a sprayer to apply the sealer evenly over the resurfaced surface. Work in small sections, making sure to overlap each pass to ensure consistent coverage. Avoid excessive application that could lead to pooling or drips.
- Allow proper drying time: After applying the sealant, allow it to dry according to the manufacturer’s instructions. This can typically take anywhere from a few hours to a full day. Keep foot and vehicle traffic off the sealed driveway until it is fully cured.
- Maintain the sealant: Periodically check the condition of the sealant on your driveway. If you notice any areas of wear or damage, touch up those spots as needed. Regularly reapply the sealer according to the manufacturer’s recommendations to maintain protection and extend the life of your driveway.
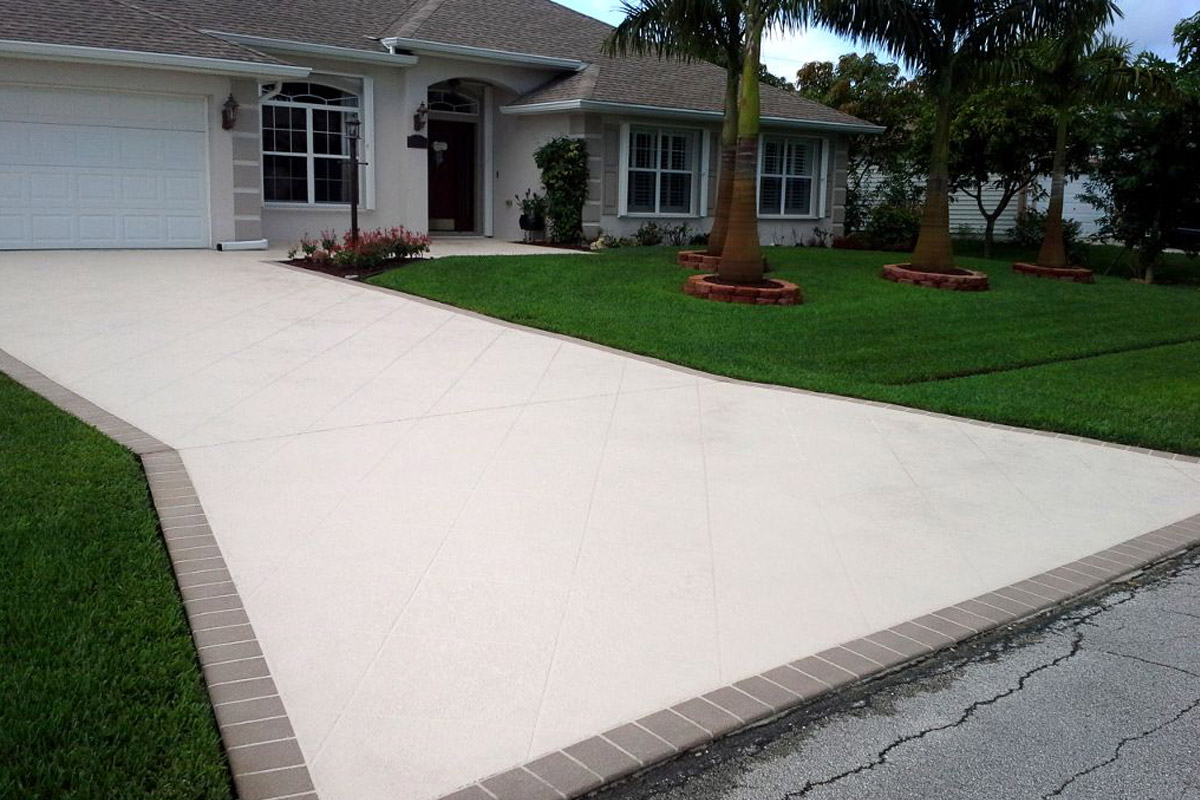
By sealing your resurfaced driveway, you’re providing an extra layer of protection that will help prolong its appearance and performance. It’s a proactive step that will help maintain the integrity of your investment.
Once the sealer has fully dried and cured, you can proudly enjoy your newly resurfaced and protected concrete driveway. The process may require some time and effort, but the results are well worth it.
Congratulations on successfully resurfacing and sealing your concrete driveway! You’ve not only improved the functionality and durability of your driveway but also enhanced the curb appeal of your home.
Remember to follow all safety precautions, read and follow the manufacturer’s instructions, and seek professional assistance if needed. With proper care and maintenance, your resurfaced driveway can continue to provide years of beauty and functionality.
Conclusion
Resurfacing a concrete driveway is a cost-effective and efficient way to restore its functionality and enhance its appearance. By following the step-by-step process outlined in this article, you can successfully transform your worn-out or damaged driveway into a smooth and visually appealing feature.
Assessing the condition of your driveway, gathering the necessary materials and tools, cleaning the surface, repairing any cracks or damage, preparing the resurfacing mixture, applying the resurfacer, smoothing and leveling the surface, allowing the resurfacer to dry and cure, and sealing the driveway are the key steps involved in the resurfacing process.
Throughout each step, it’s important to pay attention to detail, follow the manufacturer’s instructions, and be patient. While the process may require time and effort, the results will be well worth it. Your resurfaced driveway will not only improve the overall aesthetics of your property but also provide a more durable and functional surface for your vehicles.
Remember to take the necessary safety precautions, wear protective gear, and work in favorable weather conditions. If you’re unsure about any aspect of the resurfacing process, consider consulting with a professional contractor or concrete specialist.
Maintaining your resurfaced driveway is key to ensuring its longevity. Regular cleaning, periodic resealing, and addressing any issues promptly will help prolong its appearance and performance. By investing time and effort into proper maintenance, you can enjoy the benefits of a beautiful and functional driveway for many years to come.
Resurfacing a concrete driveway is a project that allows you to breathe new life into your outdoor space, enhance your property’s value, and improve your curb appeal. With the knowledge and guidance provided in this article, you are now equipped to embark on the journey of resurfacing your concrete driveway.
Frequently Asked Questions about How To Resurface A Concrete Driveway
Was this page helpful?
At Storables.com, we guarantee accurate and reliable information. Our content, validated by Expert Board Contributors, is crafted following stringent Editorial Policies. We're committed to providing you with well-researched, expert-backed insights for all your informational needs.


0 thoughts on “How To Resurface A Concrete Driveway”