
Articles
How To Resurface A Concrete Porch Floor
Modified: August 20, 2024
Learn step-by-step articles on how to resurface a concrete porch floor and transform it into a beautiful and durable outdoor space.
(Many of the links in this article redirect to a specific reviewed product. Your purchase of these products through affiliate links helps to generate commission for Storables.com, at no extra cost. Learn more)
Introduction
Welcome to the world of concrete porch floor resurfacing! If you have a worn-out or unsightly porch floor that needs a fresh new look, this comprehensive guide is here to help. Resurfacing your concrete porch floor can improve its appearance, increase its durability, and extend its lifespan. Whether you are looking to revitalize your porch for personal enjoyment or to boost your home’s curb appeal, the process is easier than you might think.
Understanding the basics of concrete porch floors is crucial before diving into the resurfacing process. Concrete is a durable material commonly used for porch floors due to its strength and longevity. However, over time, concrete can develop cracks, spalling, discoloration, or other signs of wear and tear.
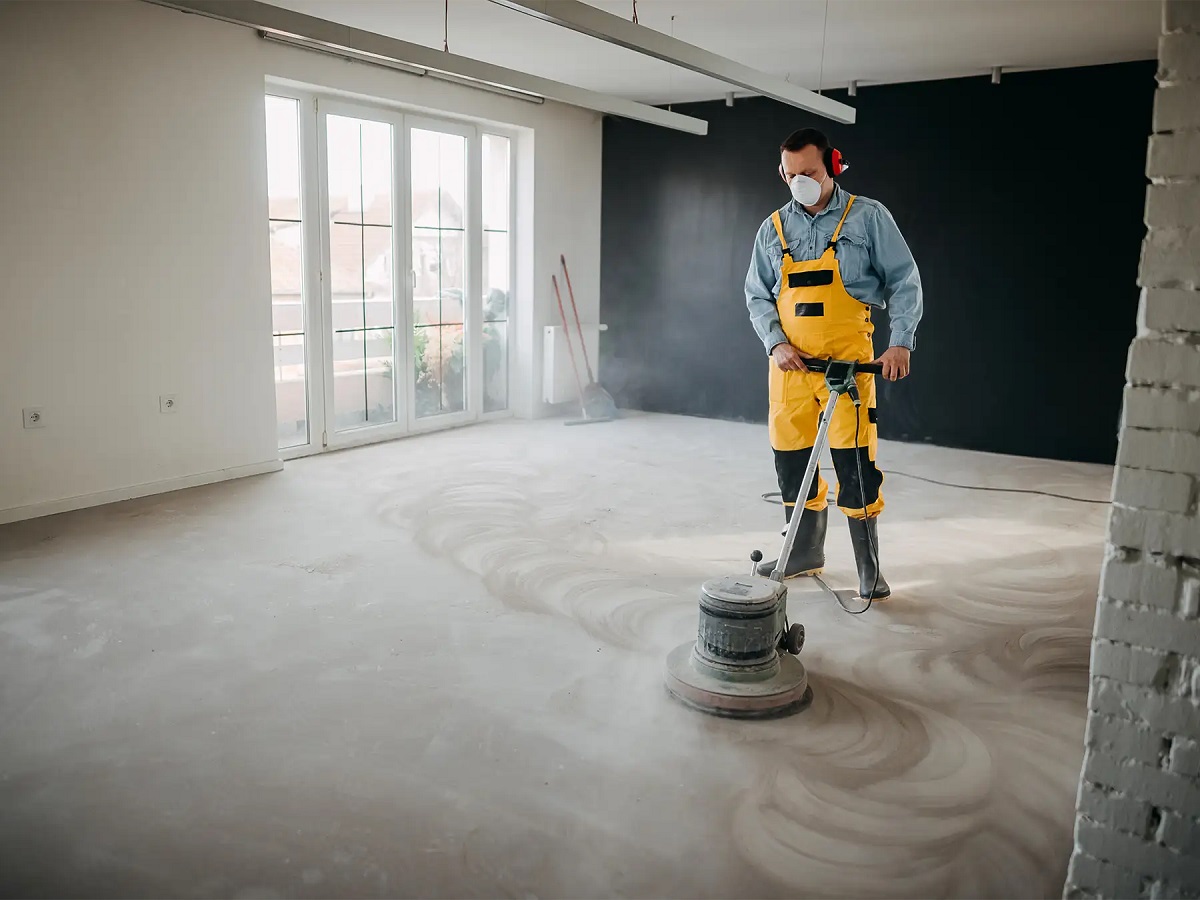
Preparation is key when it comes to resurfacing a concrete porch floor. Before applying any resurfacing material, you’ll need to thoroughly clean the floor to remove dirt, debris, and any loose or damaged concrete. Repairing any damaged areas is also essential to ensure a smooth and even surface for the resurfacing product.
The next step involves mixing and applying the resurfacer. A concrete resurfacer is a specially formulated product designed to bond to the existing concrete surface and create a new, durable layer. It can be applied in various thicknesses to achieve the desired result.
Once the resurfacer is applied, there are a few finishing touches you can add to enhance the overall appearance and functionality of your porch floor. This may include applying a decorative finish, adding texture, or sealing the surface to provide extra protection against stains, moisture, and UV damage.
By following the step-by-step instructions in this guide, you’ll be able to successfully resurface your concrete porch floor and enjoy a beautiful, renewed space that will stand the test of time. So, gather your tools and let’s begin the journey to transform your porch floor into a stunning showcase of craftsmanship and style.
Key Takeaways:
- Transform your worn-out concrete porch floor into a stunning, durable space by following the step-by-step resurfacing guide. From preparation to finishing touches, create a beautiful outdoor area that stands the test of time.
- Elevate the aesthetics and functionality of your porch floor with decorative finishes, texture, and protective sealers. Enjoy a revitalized outdoor space and prolong its lifespan with regular maintenance.
Read more: How To Resurface A Concrete Driveway
Understanding Concrete Porch Floors
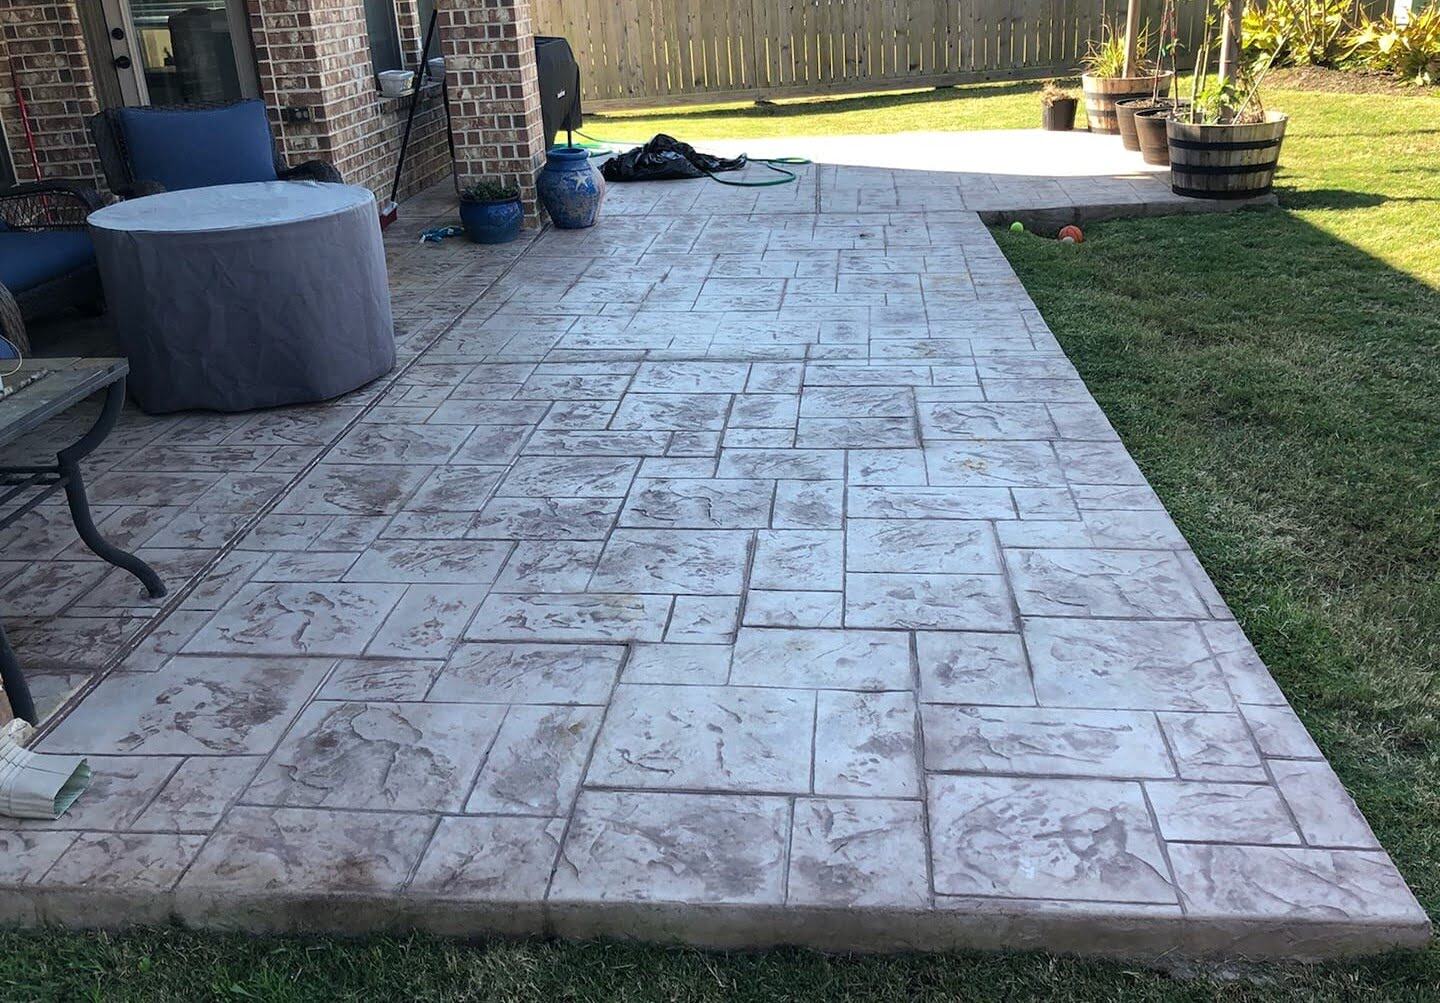
Concrete porch floors are a popular choice due to their durability, versatility, and aesthetic appeal. They provide a solid foundation for outdoor living spaces and can withstand heavy foot traffic, weather fluctuations, and other external factors. Understanding the characteristics of concrete porch floors can help you better assess their condition and determine the best course of action for resurfacing.
Concrete is a composite material made from a mixture of cement, sand, gravel or crushed stone, and water. When these ingredients are combined, a chemical reaction called hydration occurs, resulting in the hardening of the mixture and the formation of a solid mass.
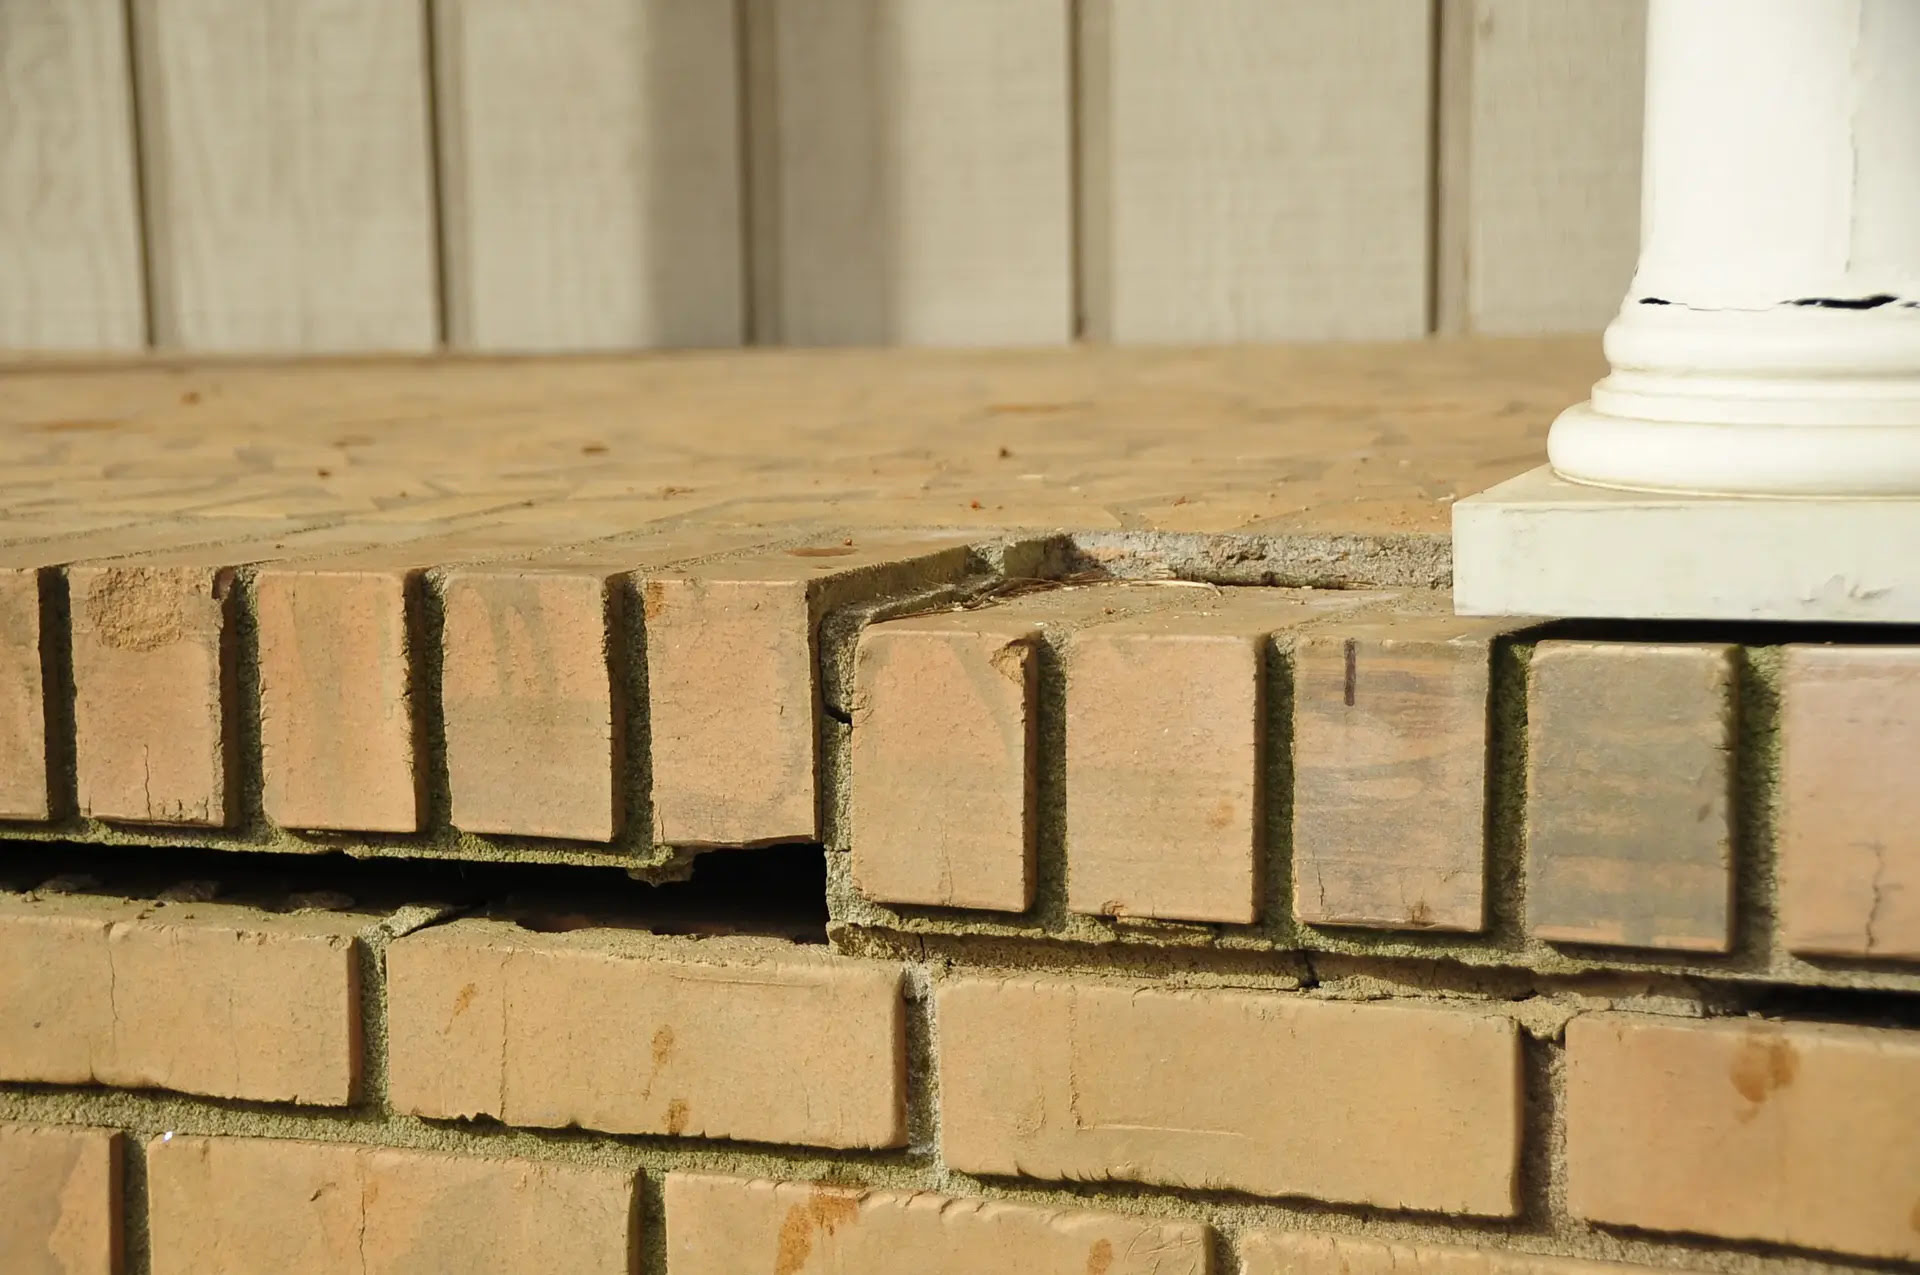
Porches often have concrete floors because of their strength and ability to withstand various weather conditions. Concrete is resistant to moisture, which makes it ideal for outdoor use. However, over time, concrete can develop issues such as cracks, spalling (flaking of the surface layer), and discoloration due to wear and tear, weathering, or improper installation.
Cracks in concrete porch floors can occur for several reasons, including shrinkage during the curing process, settlement of the underlying soil, or heavy loads being placed on the surface. These cracks not only detract from the appearance of the porch but can also lead to further damage if left unaddressed.
Spalling is another common issue with concrete porch floors. It usually happens when the surface layer of the concrete deteriorates and starts to break off in flakes or chunks. This can be caused by freeze-thaw cycles, water seepage, or the use of improper materials during construction.
Discoloration is another concern for concrete porch floors. Over time, exposure to sunlight, moisture, and external elements can cause the color of the concrete to fade or become uneven. This can significantly impact the overall appearance of the porch and may require resurfacing to restore its original beauty.
By understanding these common issues and the properties of concrete, you can assess the condition of your porch floor and determine if resurfacing is necessary. Resurfacing can not only address these problems but also provide a fresh, new surface that enhances the aesthetics of your porch and improves its longevity.
Preparation
Before you embark on the process of resurfacing your concrete porch floor, thorough preparation is essential to ensure a successful and long-lasting result. Proper preparation will help to remove any dirt, debris, or loose material from the existing surface, create a clean and stable base, and allow the resurfacing material to bond effectively. Here are the steps involved in preparing your porch floor for resurfacing:
- Clean the Porch Floor: Start by sweeping the entire porch floor to remove any loose dirt or debris. Use a stiff-bristle broom or a leaf blower to get rid of stubborn dirt. Next, wash the surface with a mild detergent or concrete cleaner and scrub it using a stiff brush. This will help remove any stains or ingrained dirt. Rinse the porch floor thoroughly with water and let it dry completely before proceeding to the next step.
- Repair Damaged Areas: Inspect the porch floor for any cracks, spalling, or other signs of damage. Use a chisel and hammer to remove any loose or deteriorating concrete. Fill smaller cracks and holes with a concrete patching compound, following the manufacturer’s instructions. For larger areas of spalling or significant damage, it may be necessary to consult a professional for repairs. Allow the repairs to cure completely before continuing.
- Etch the Surface: Etching the surface of the porch floor is an important step to ensure proper adhesion of the resurfacing material. Use a concrete etching solution or acid wash, following the manufacturer’s instructions. Apply the solution evenly to the entire surface using a sprayer or brush. Allow it to sit for the recommended time, typically around 20 minutes, and then rinse the porch floor thoroughly with water.
- Check for Moisture: Moisture can affect the adhesion of the resurfacing material. Perform a moisture test on the porch floor by taping down a plastic sheet and leaving it for 24-48 hours. If moisture accumulates beneath the plastic or the floor feels damp, you may need to address any underlying moisture issues before proceeding.
- Protect Adjacent Areas: Take the necessary precautions to protect any adjacent surfaces or landscaping near the porch. Cover plants, furniture, and any other items that may be exposed to the resurfacing materials or cleaning agents. Use plastic sheets or drop cloths to create a barrier, ensuring that only the porch floor is being worked on.
By thoroughly preparing the porch floor before resurfacing, you are setting the stage for a successful project. Proper cleaning, repairing of damaged areas, etching the surface, checking for moisture, and protecting adjacent areas will help ensure that the resurfacing material adheres well and provides a durable, attractive finish to your porch floor.
Cleaning the Porch Floor
Cleaning the porch floor is a crucial step in the resurfacing process as it helps to remove dirt, stains, and any contaminants that may prevent the resurfacing material from adhering properly. By thoroughly cleaning the surface, you’re creating a clean and stable base for the new layer of material. Follow these steps to effectively clean your porch floor:
- Remove Loose Debris: Start by sweeping the porch floor with a stiff-bristle broom or using a leaf blower to get rid of loose dirt, leaves, and other debris. Pay special attention to corners and edges where debris tends to accumulate. This step will help you have a clearer view of the surface as you proceed.
- Choose a Cleaning Solution: Select an appropriate cleaning solution for your porch floor based on the type and severity of stains. For general cleaning, a mild detergent mixed with water usually suffices. However, for tougher stains such as oil or grease, you may need to use a specialized concrete cleaner or a degreaser. Consult the manufacturer’s instructions for the recommended dilution ratio.
- Apply the Cleaning Solution: Use a pump sprayer or a watering can to apply the cleaning solution evenly onto the porch floor. Start from one end and work your way towards the other, ensuring complete coverage. For tough stains, you may need to scrub the area using a stiff brush to help loosen the dirt and grime.
- Allow Dwell Time: After applying the cleaning solution, allow it to sit on the surface for the recommended dwell time. This will allow the cleaning agent to penetrate the stains and break down the dirt and contaminants. The dwell time typically ranges from 5 to 15 minutes, but refer to the instructions provided by the manufacturer of the cleaning solution for the specific duration.
- Scrub the Surface: Once the dwell time is complete, use a stiff brush or a scrub brush to agitate the cleaning solution on the porch floor. Scrub the entire surface in a circular motion, paying extra attention to any stubborn stains or heavily soiled areas. This process helps to dislodge the dirt and grime and ensures a thorough cleaning.
- Rinse the Porch Floor: After scrubbing, rinse the porch floor thoroughly with clean water. You can use a garden hose or a pressure washer set at a low pressure to remove the cleaning solution residue and any remaining dirt. Make sure to rinse all areas, including corners and cracks, to ensure no cleaning agents are left behind.
- Drying: Allow the porch floor to dry completely before proceeding to the next step. Depending on weather conditions, this may take several hours or even overnight. Ensure that the surface is completely dry to the touch before moving on to the next stage of the resurfacing process.
Cleaning the porch floor is an important step to create a clean and suitable surface for the application of the resurfacing material. By removing dirt, stains, and contaminants, you are ensuring better adhesion and a longer-lasting result. So take the time to clean your porch floor thoroughly before moving forward with the resurfacing process.
Repairing Damaged Areas
Before you can resurface your concrete porch floor, it is crucial to address any existing damage. Repairing damaged areas will help create a smooth and even surface for the resurfacing material and prevent further deterioration. Here are the steps to follow when repairing damaged areas on your porch floor:
- Inspect the Porch Floor: Begin by closely examining the porch floor for any cracks, chips, spalling, or other signs of damage. Pay attention to both the surface and the edges, as well as any areas where the concrete may have deteriorated. Take note of the size and severity of each damaged area.
- Prepare the Damaged Areas: Use a hammer and chisel to remove any loose or deteriorated concrete around the damaged areas. Carefully chip away the damaged material until you reach solid and stable concrete. Be sure to remove all loose debris and clean the area thoroughly to ensure a proper bond with the repair material.
- Choose the Right Repair Product: Select an appropriate repair product based on the type and extent of the damage. For small cracks and chips, a patching compound or a concrete repair caulk can be used. These products are often available in pre-mixed tubes, making application quick and easy. For larger damaged areas or spalling, a polymer-modified concrete repair mortar may be more suitable. Consult the manufacturer’s instructions for the recommended type and quantity of repair material.
- Apply the Repair Product: Follow the manufacturer’s instructions to mix the repair material to the desired consistency. Using a trowel, apply the repair product to the damaged areas, ensuring that it fills the cracks, chips, or spalled areas completely. Smooth the surface of the repair material with the trowel, blending it seamlessly with the surrounding concrete. For larger repairs, you may need to build up the material in layers, allowing each layer to cure before applying the next.
- Cure and Finish: Once the repair material is applied, follow the recommended curing time provided by the manufacturer. This typically involves keeping the repaired areas moist and protected from extreme temperatures until they fully harden. After the curing period, you can further smooth the surface with sandpaper or a concrete rubbing stone to achieve a more uniform appearance.
- Inspect and Test: Once the repairs are complete and fully cured, inspect the repaired areas for any irregularities or rough edges. Sand, shape, or smooth the repaired sections as needed to achieve a seamless transition between the repaired areas and the rest of the porch floor. Perform a final touch-up to ensure that the repaired areas blend in with the surrounding concrete.
Repairing damaged areas on your porch floor is a critical step in the resurfacing process. By addressing cracks, chips, and spalling, you are creating a stable and even surface for the resurfacing material. Take the time to properly repair and prepare your porch floor to ensure a successful and long-lasting resurfacing project.
Before resurfacing a concrete porch floor, make sure to thoroughly clean and etch the surface to ensure proper adhesion of the new concrete overlay.
Read more: How To Resurface A Concrete Patio
Mixing the Resurfacer
Now that you have prepared and repaired your concrete porch floor, it’s time to mix the resurfacer. The resurfacer is a specially formulated product designed to bond to the existing concrete surface and create a new, durable layer. Mixing the resurfacer correctly is essential to ensure its effectiveness and proper application. Follow these steps to mix the resurfacer for your porch floor:
- Gather the Materials: Start by gathering all the necessary materials for mixing the resurfacer. This includes the resurfacing product itself, a clean bucket or mixing container, a mixing paddle or drill attachment, a measuring tool, and clean water. Make sure to read and follow the manufacturer’s instructions on the resurfacer packaging for specific mixing ratios and guidance.
- Measure the Resurfacer: Carefully measure the appropriate amount of resurfacer powder according to the manufacturer’s instructions. The recommended mixing ratio will depend on the thickness and coverage desired for your porch floor. Use a measuring tool, such as a scoop or measuring cup, to ensure accuracy.
- Add Water Gradually: Slowly add water to the clean bucket or mixing container while continuously mixing with a drill-mounted paddle or a mixing paddle. Follow the manufacturer’s instructions regarding the water-to-resurfacer ratio. It is important to add the water incrementally to avoid creating a mixture that is too runny or too thick.
- Mix Thoroughly: Continue mixing the resurfacer and water until you achieve a smooth, lump-free consistency. It’s essential to mix thoroughly to ensure that all the resurfacing powder is properly hydrated and mixed evenly. Be mindful not to overmix, as this can introduce air bubbles into the mixture and affect the integrity of the resurfacer.
- Check the Consistency: Once mixed, check the consistency of the resurfacer. It should have the consistency of a thick pancake batter or a trowelable paste. The resurfacer should be workable and spreadable without being too watery or overly thick. Adjust the mixture by adding small amounts of water or resurfacer powder as needed to achieve the desired consistency.
- Let the Mixture Rest: After mixing, let the resurfacer mixture rest for a few minutes as recommended by the manufacturer. This resting period allows the ingredients to fully combine and ensures a more stable and workable mixture.
By properly mixing the resurfacer for your porch floor, you are ensuring that the product is at the right consistency for easy application and optimal bonding with the existing concrete surface. Remember to follow the manufacturer’s instructions regarding the mixing ratios and recommendations for a successful resurfacing project.
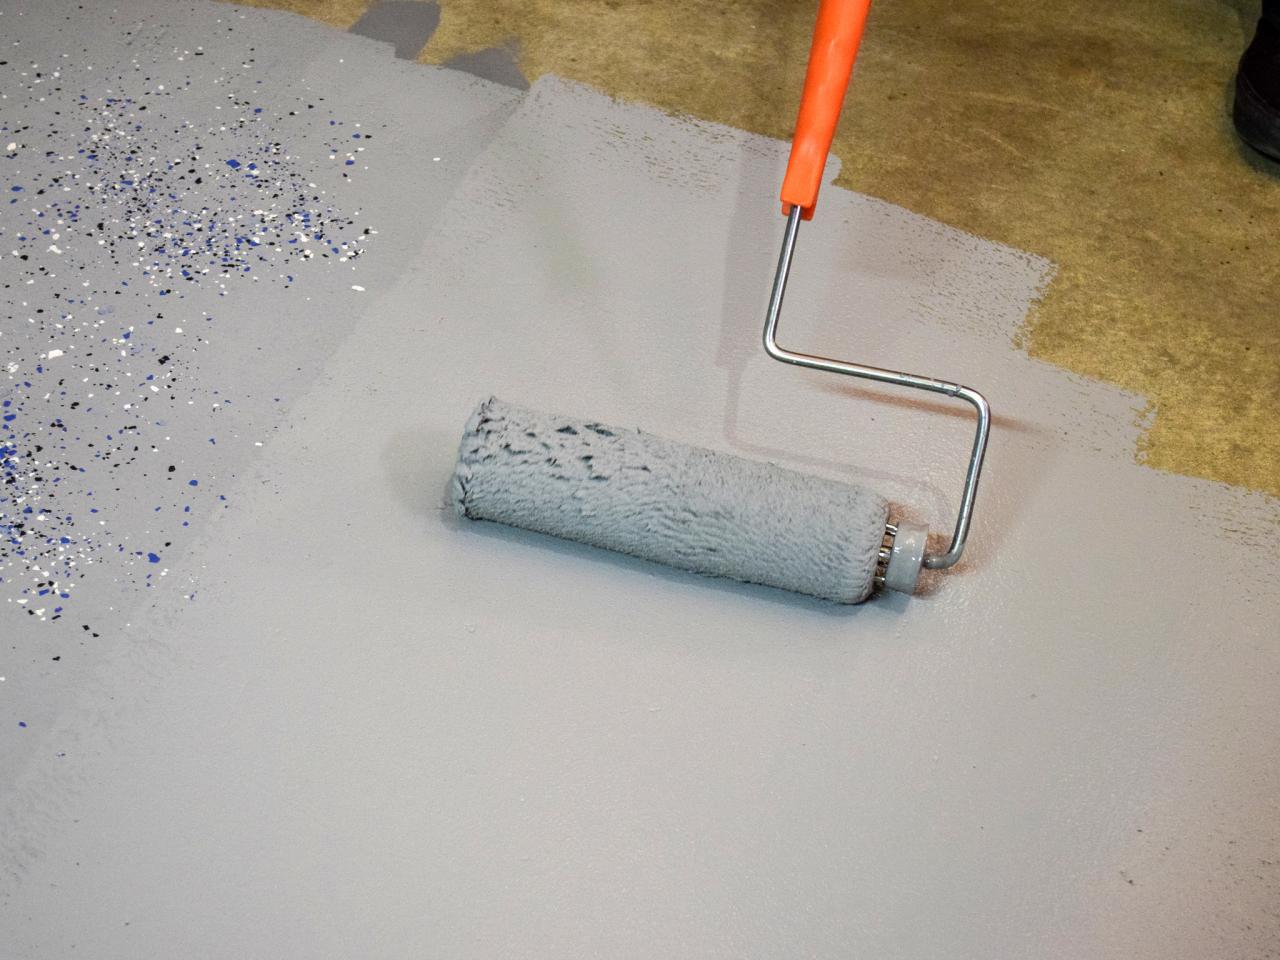
Applying the Resurfacer
Now that you have prepared the resurfacer mixture, it’s time to apply it to your concrete porch floor. Applying the resurfacer requires attention to detail and proper technique to achieve a smooth, even, and professional-looking finish. Follow these steps to apply the resurfacer to your porch floor:
- Prepare the Porch Floor: Before applying the resurfacer, dampen the porch floor with clean water. This will help the resurfacer bond better with the existing concrete surface. Make sure the porch floor is slightly damp, but not overly wet, before proceeding.
- Start from the Far End: Begin applying the resurfacer mixture from the farthest corner of the porch floor. This will ensure that you don’t accidentally step on the freshly applied material as you work your way back towards the exit.
- Spread the Resurfacer: Use a trowel or a long-handled squeegee to spread the resurfacer mixture evenly over the porch floor. Start with a thin layer and work in small sections, about 2 to 3 feet wide, at a time. Apply the resurfacer in a sweeping motion, moving the trowel or squeegee back and forth to distribute the material evenly.
- Smooth and Level: After spreading the resurfacer, use a concrete float or a steel trowel to smooth and level the surface. This is an important step to ensure that the resurfacer is evenly distributed and the porch floor is flat and uniform. Work the float or trowel in circular or figure-eight motions to achieve a smooth finish.
- Continue Working in Sections: Once you have finished smoothing one section, continue to the next section and repeat the process until the entire porch floor is covered. Make sure to blend each section with the previous one while the resurfacer is still wet to achieve a seamless transition.
- Fill Low Areas: If there are any low areas or uneven spots on the porch floor, you can use additional resurfacer mixture to fill them in. Simply add a small amount of resurfacer to the low area and use the trowel or float to level it out with the rest of the surface. Blend the edges smoothly to create a seamless appearance.
- Allow Proper Drying Time: After applying the resurfacer, allow it to dry according to the manufacturer’s instructions. The drying time may vary depending on factors such as temperature and humidity. Avoid walking or placing any furniture or heavy objects on the porch floor until the resurfacer is fully cured.
- Cure and Protect: Once the resurfacer has dried, follow any additional instructions provided by the manufacturer for curing and protecting the surface. This may include applying a curing compound or a sealer to enhance the durability and longevity of the resurfaced porch floor.
By following these steps and paying attention to detail, you can achieve a beautifully resurfaced porch floor. Remember to take your time, work in sections, and ensure a smooth and even application of the resurfacer for a professional-looking finish.
Finishing Touches
Once the resurfacer has dried and cured on your concrete porch floor, there are a few finishing touches you can add to enhance its overall appearance and longevity. These finishing touches not only improve the functionality of your porch but also add a touch of style. Consider the following options to complete your porch floor resurfacing project:
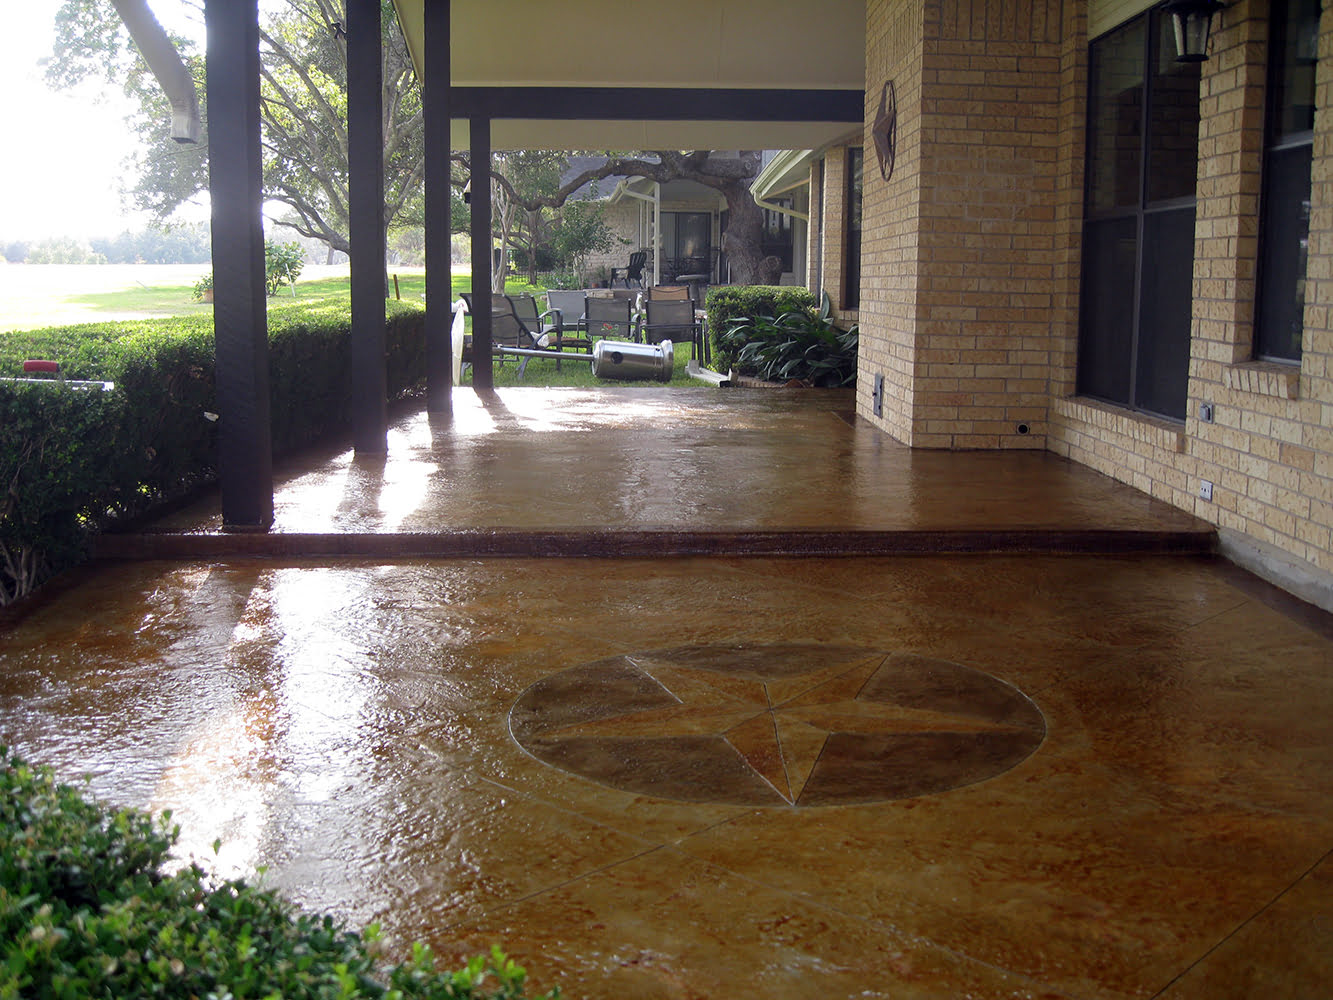
- Decorative Finishes: To add a decorative touch to your porch floor, consider using a decorative concrete stain or a concrete dye. These products come in a variety of colors and can be applied to the resurfaced surface to create a unique and personalized look. You can also use stencils or templates to create intricate patterns or designs on the porch floor.
- Texture: If you’re looking to add texture to your porch floor, consider using a textured resurfacer or adding an anti-slip additive to the final coat. Textured resurfacers provide a slightly rough surface, which can be beneficial for outdoor areas prone to wet conditions. The added texture not only improves traction but also adds visual interest to the porch floor.
- Seal the Surface: Applying a concrete sealer is highly recommended to protect your resurfaced porch floor from stains, moisture, and UV damage. Sealers come in various finishes, such as matte, semi-gloss, and high-gloss, allowing you to choose the desired level of sheen. Follow the manufacturer’s instructions for applying the sealer, and make sure the porch floor is clean and dry beforehand.
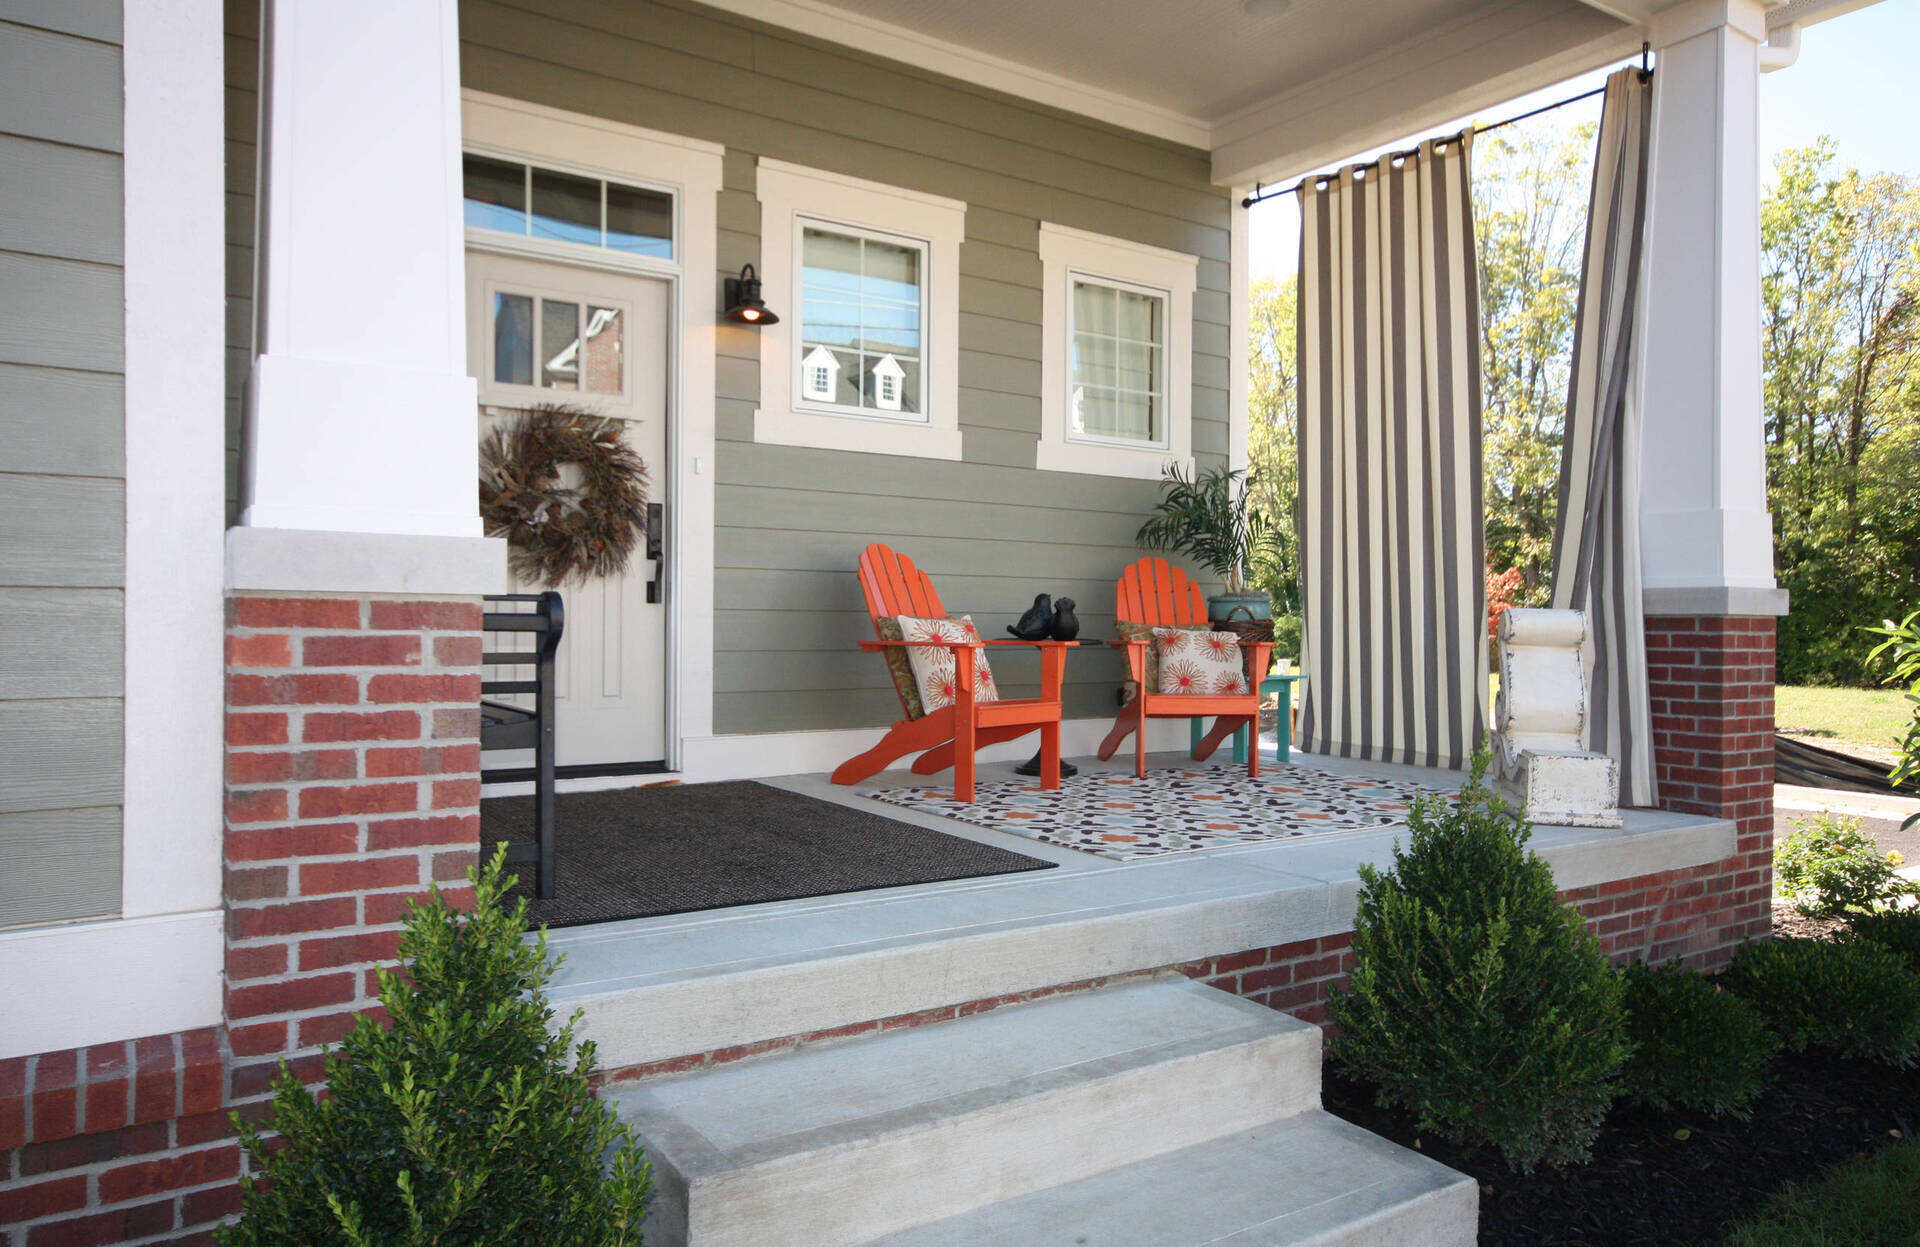
- Add Rugs or Mats: Placing rugs or mats on your resurfaced porch floor can add both comfort and style. Outdoor rugs or mats can provide a cozy feeling and protect the porch floor from excessive wear and tear. Choose rugs or mats that complement your outdoor décor and ensure they have a non-slip backing for safety.
- Regular Maintenance: To prolong the life of your resurfaced porch floor, it’s important to perform regular maintenance. Sweep or rinse the porch floor regularly to remove dirt, debris, and stains. Avoid using harsh chemicals or abrasive cleaners that can damage the surface. If any stains occur, address them promptly using appropriate cleaning methods recommended for your particular resurfacing product.
By adding these finishing touches, you can transform your newly resurfaced porch floor into a stunning and functional space. Whether you choose to enhance its appearance with decorative finishes, add texture for improved safety, or protect it with sealers and rugs, these small details can make a significant difference in the overall look and longevity of your porch floor.
Remember to follow the manufacturer’s recommendations for each finishing touch and enjoy the beauty and durability of your freshly resurfaced porch floor for years to come.
Conclusion
Congratulations! You have successfully resurfaced your concrete porch floor, bringing new life and functionality to your outdoor space. By following the step-by-step instructions in this guide, you have learned essential techniques to prepare, repair, and resurface your porch floor like a pro.
Understanding the characteristics of concrete porch floors and addressing any existing damage were key steps in ensuring a successful resurfacing project. By thoroughly cleaning the porch floor, repairing damaged areas, and mixing and applying the resurfacer correctly, you have created a beautiful and durable new surface.
Remember to consider the finishing touches to truly elevate the aesthetics and functionality of your porch floor. Whether it’s adding decorative elements, creating texture, or applying a protective sealer, these extra steps will enhance the overall appearance and longevity of the surface.
Regular maintenance is essential to keep your resurfaced porch floor in its best condition. Sweeping or rinsing off dirt and debris, promptly addressing stains, and protecting the surface from excessive wear and tear will help prolong its lifespan and maintain its beauty.
Now that your porch floor is transformed, take the time to enjoy it! Furnish your porch with comfortable seating, add potted plants or hanging baskets for a touch of greenery, and spend time relaxing in your revitalized outdoor space.
Thank you for following this comprehensive guide to resurfacing your concrete porch floor. We hope that it has provided you with the knowledge and inspiration to create a porch floor that you can be proud of for years to come. Happy resurfacing!
Frequently Asked Questions about How To Resurface A Concrete Porch Floor
Was this page helpful?
At Storables.com, we guarantee accurate and reliable information. Our content, validated by Expert Board Contributors, is crafted following stringent Editorial Policies. We're committed to providing you with well-researched, expert-backed insights for all your informational needs.


0 thoughts on “How To Resurface A Concrete Porch Floor”