Home>Gardening & Outdoor>Outdoor Structures>How To Jack Up A Shed
Outdoor Structures
How To Jack Up A Shed
Published: January 20, 2024
Learn how to safely jack up your outdoor structures with our step-by-step guide. Get expert tips for lifting sheds and other outdoor buildings.
(Many of the links in this article redirect to a specific reviewed product. Your purchase of these products through affiliate links helps to generate commission for Storables.com, at no extra cost. Learn more)
Introduction
Welcome to the comprehensive guide on how to jack up a shed! Whether you're looking to level the foundation, replace rotted skids, or improve ventilation, this step-by-step tutorial will equip you with the knowledge and confidence to tackle this project.
Jacking up a shed may seem like a daunting task, but with the right tools, preparation, and technique, it can be a manageable and rewarding endeavor. By following the guidelines outlined in this article, you'll be able to elevate your shed safely and effectively, ensuring its longevity and structural integrity.
So, roll up your sleeves, gather your tools, and let's embark on this journey to elevate your shed to new heights!
Key Takeaways:
- Elevating a shed requires careful preparation, precise lifting, and strategic support placement to ensure safety and stability.
- By mastering the skill of jacking up a shed, you can prolong its lifespan, enhance its structural integrity, and maintain a reliable outdoor space.
Read more: How To Jack Up A Porch
Tools and Materials Needed
Before you begin jacking up your shed, it’s essential to gather the necessary tools and materials to ensure a smooth and safe lifting process. Here’s what you’ll need:
Tools:
- Hydraulic jack or bottle jack
- Pressure-treated lumber or steel beams (depending on the shed's weight)
- Shovel
- Level
- Tape measure
- Work gloves
- Safety goggles
- Hammer
- Adjustable wrench
- Chains or straps
- Blocks or wedges
- Safety stands or blocks
- Crowbar or pry bar
- Drill and screws (if additional support is needed)
Materials:
- Pressure-treated wooden blocks or concrete blocks
- Gravel or crushed stone for leveling
- Replacement skids (if necessary)
- Anchor bolts or lag screws (if securing the shed to the foundation)
- Wood shims
- Galvanized nails or screws
- Concrete mix (if adding new footings)
- Metal brackets or straps (if reinforcing the shed)
Having these tools and materials on hand will streamline the process and ensure that you’re well-prepared for any scenario that may arise during the shed jacking process. Safety should always be a priority, so be sure to use appropriate safety gear and exercise caution when working with heavy equipment and materials.
Preparing the Shed
Before you commence the process of jacking up your shed, it’s crucial to prepare the structure and its surroundings to ensure a safe and efficient lifting operation. Here are the key steps to prepare the shed:
Read more: How To Jack Up Floor Joists
Clear the Area:
Remove any items stored in or around the shed to create a clear workspace. This includes garden tools, equipment, and any debris that may obstruct the lifting process.
Inspect the Shed:
Conduct a thorough inspection of the shed’s exterior and interior. Look for signs of damage, rot, or structural weaknesses that may need to be addressed during the lifting process. Pay close attention to the condition of the skids, floor joists, and support posts.
Secure Loose Items:
If there are any loose or protruding components on the shed, such as nails, screws, or splintered wood, secure or remove them to prevent potential hazards during the lifting operation.
Level the Ground:
Ensure that the ground beneath the shed is relatively level. If the shed is situated on uneven terrain, use a shovel to remove excess soil or add gravel to create a more stable and uniform surface.
Read more: How To Set Up Solar Power For A Shed
Stabilize the Shed:
To prevent any unintended movement during the lifting process, secure the shed by bracing it against lateral shifts. This can be achieved by installing temporary supports or braces on the shed’s walls, particularly if the shed is free-standing and not anchored to a foundation.
By meticulously preparing the shed and its surroundings, you’ll set the stage for a successful and secure jacking process. Taking the time to address these preparatory steps will contribute to a smoother and more controlled lifting experience, minimizing the risk of damage to the shed and ensuring the safety of everyone involved in the project.
Lifting the Shed
With the shed prepared and the necessary tools at hand, it’s time to commence the lifting process. This phase requires precision, coordination, and a keen focus on safety. Follow these steps to lift the shed effectively:
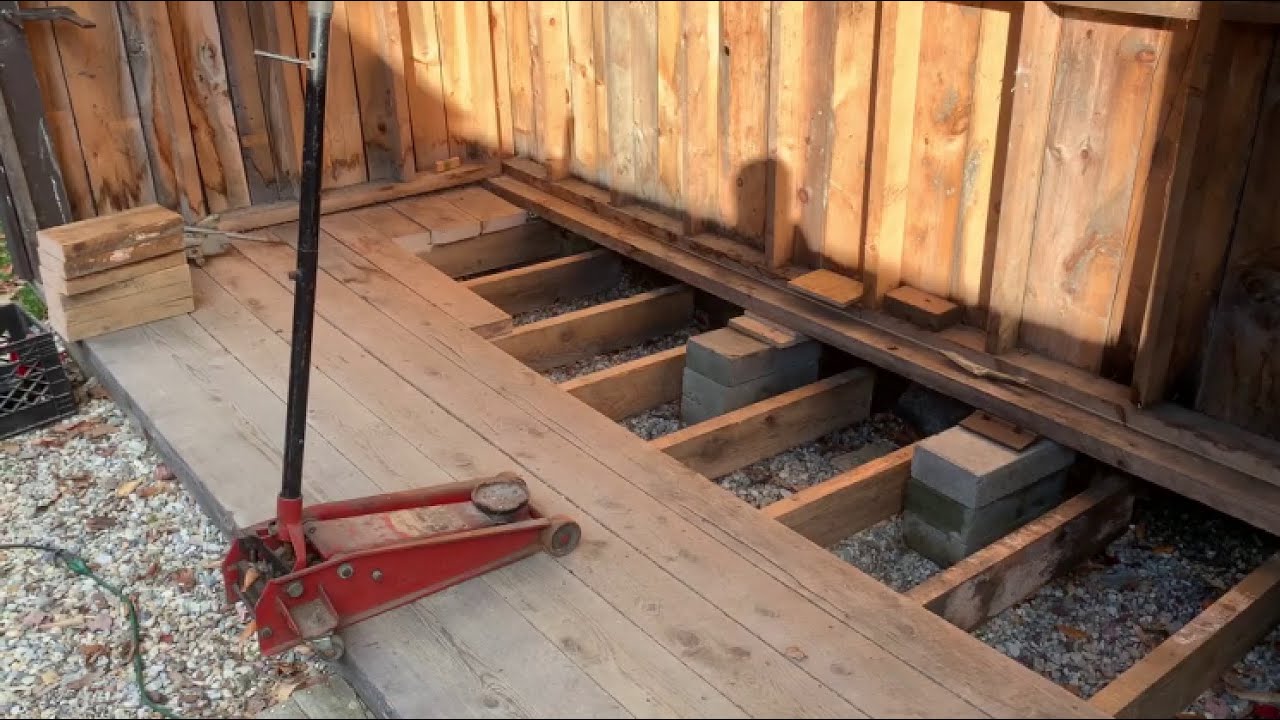
Position the Jack:
Place the hydraulic or bottle jack at a strategic point along the shed’s skids or floor joists. Ensure that the jack is positioned centrally and can provide even support during the lifting process.
Apply Pressure:
Gradually pump the jack to apply upward pressure on the shed. As the shed begins to elevate, monitor its movement and make any necessary adjustments to maintain a level lift. It’s crucial to proceed slowly and methodically to prevent any sudden shifts or instability.
Read more: How To Store Jack Daniels
Check for Alignment:
Periodically assess the shed’s alignment and levelness as it is being lifted. Use a level to ensure that the structure is rising uniformly and that no excessive stress is being exerted on specific areas of the shed.
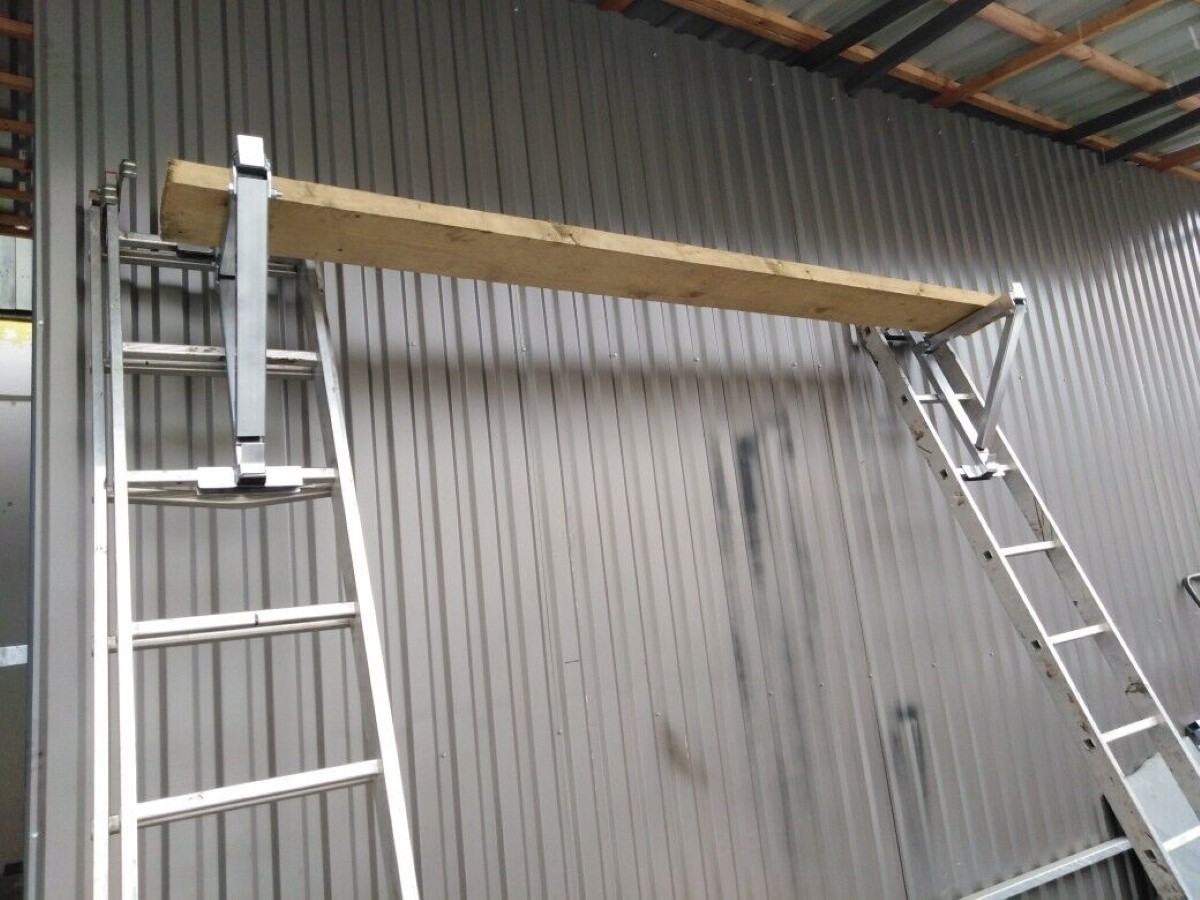
Utilize Support Beams:
As the shed is lifted, slide pressure-treated lumber or steel beams beneath it to provide temporary support. These beams will bear the weight of the shed once it reaches the desired height, allowing you to make necessary adjustments and repairs to the foundation or skids.
Monitor Stability:
Throughout the lifting process, keep a close eye on the shed’s stability and the integrity of the lifting equipment. Be prepared to pause the lifting operation if any irregularities or safety concerns arise.
By meticulously following these steps and maintaining a vigilant approach, you’ll be able to safely and effectively elevate the shed to the desired height, setting the stage for the subsequent phases of the jacking process.
Placing Supports
Once the shed has been successfully lifted to the desired height, the next critical step is to secure it with appropriate supports to ensure stability and safety during the maintenance or repair activities. Here’s how to effectively place supports under the elevated shed:
Read more: How Much Is A Floor Jack
Select Sturdy Supports:
Choose pressure-treated lumber or steel beams that are capable of bearing the weight of the shed without flexing or buckling. The supports should be of sufficient length to span the width of the shed and provide uniform support across the structure.
Position the Supports:
Carefully slide the supports into place beneath the shed, ensuring that they align with the floor joists or skids. It’s essential to position the supports evenly and securely to distribute the weight of the shed and prevent any uneven stress on the structure.
Adjust for Levelness:
Use a level to verify that the supports are positioned horizontally and that they maintain the shed’s lifted position without any tilting or imbalance. Make any necessary adjustments to the supports to achieve a stable and level foundation for the shed.
Add Temporary Bracing:
To further reinforce the stability of the shed, consider installing temporary bracing between the supports and the shed’s walls. This additional measure can prevent lateral movement and enhance the overall rigidity of the elevated structure.
Read more: How To Clean A Jack Lalanne Juicer
Double-Check Stability:
Before proceeding with any work beneath the shed, thoroughly inspect the placement of the supports and the overall stability of the elevated shed. Confirm that the supports are securely positioned and that the shed is level and stationary.
By methodically placing sturdy supports under the elevated shed and ensuring their proper alignment and stability, you’ll create a secure and reliable foundation for conducting any necessary maintenance, repairs, or modifications to the shed’s structure or foundation.
Lowering the Shed
Once the necessary maintenance or repairs have been completed beneath the elevated shed, it’s time to carefully lower the structure back onto its newly reinforced foundation. This phase requires precision and attentiveness to ensure a controlled and safe descent. Follow these steps to lower the shed:
Remove Temporary Bracing:
If temporary bracing was installed during the lifting phase, carefully remove it to allow for unobstructed lowering of the shed. Ensure that all tools and materials are clear from the area beneath the shed to prevent any interference during the descent.
Release Pressure from the Jack:
Slowly release the pressure on the hydraulic or bottle jack to initiate the downward movement of the shed. Exercise caution and monitor the shed’s descent closely to prevent any sudden drops or shifts.
Read more: How To Use Floor Jack
Coordinate Lowering:
If multiple jacks were used to lift the shed, coordinate the simultaneous release of pressure on each jack to ensure a uniform and controlled descent. This will help maintain the shed’s stability and prevent any tilting or uneven lowering.
Monitor Alignment:
As the shed descends, use a level to verify that it is returning to a level position on the foundation. If any misalignment is observed, make gradual adjustments to the lowering process to correct the shed’s orientation.
Ensure Even Contact:
As the shed nears the ground, confirm that it makes even contact with the newly reinforced foundation or supports. This will help prevent any undue stress on specific areas of the shed and ensure a stable reconnection with the ground.
By carefully following these steps and maintaining a cautious approach, you’ll be able to safely and methodically lower the shed back onto its foundation, setting the stage for the final adjustments to secure the structure in its newly improved position.
Final Adjustments
With the shed securely lowered onto its foundation, it’s time to make the final adjustments to ensure its stability, levelness, and structural integrity. These critical steps will help solidify the shed’s position and prepare it for continued use. Here’s how to carry out the final adjustments:
Read more: How To Turn A Shed Into A She Shed
Verify Levelness:
Use a level to confirm that the shed is resting evenly on its foundation. Make any necessary adjustments to the supports or shims to achieve a perfectly level position, which is essential for the shed’s long-term stability.
Tighten Fasteners:
Inspect the shed’s structural components, including floor joists, skids, and wall connections, and tighten any fasteners that may have loosened during the lifting and lowering process. This will help reinforce the shed’s framework and prevent potential shifting or movement.
Secure Anchoring:
If the shed is intended to be anchored to the foundation, ensure that anchor bolts or lag screws are securely fastened to prevent any lateral movement. This step is crucial for enhancing the shed’s resistance to external forces and maintaining its position over time.
Inspect for Damage:
Conduct a thorough inspection of the shed’s exterior and interior to identify any new damage or weaknesses that may have emerged during the lifting and lowering process. Address any issues promptly to prevent them from escalating into more significant problems.
Read also: 13 Amazing Dryer Jack For 2025
Reinforce Supportive Elements:
Consider adding additional bracing, cross supports, or reinforcement to key structural elements of the shed, especially if weaknesses or vulnerabilities were identified during the initial inspection. This proactive measure can bolster the shed’s resilience and longevity.
By meticulously carrying out these final adjustments, you’ll fortify the shed’s position and structural soundness, ensuring that it is well-prepared to withstand the elements and serve its intended purpose for years to come.
Conclusion
Congratulations on successfully jacking up your shed and completing the necessary maintenance or repairs! By following the comprehensive steps outlined in this guide, you’ve not only elevated your shed to new heights but also fortified its foundation and structural integrity. As you reflect on the journey from preparation to final adjustments, it’s essential to recognize the significance of this undertaking and the positive impact it will have on the shed’s longevity and functionality.
Through meticulous preparation, precise lifting, strategic support placement, and careful lowering, you’ve demonstrated a commitment to ensuring the stability and safety of your shed. The attention to detail and the conscientious approach taken throughout this process are testaments to your dedication to maintaining a reliable outdoor structure.
As you admire the shed in its newly improved state, take pride in the knowledge and skills you’ve acquired throughout this endeavor. The ability to jack up a shed is a valuable skill that empowers you to address foundational issues, enhance structural stability, and prolong the lifespan of your outdoor storage or workspace.
Remember that periodic inspections and proactive maintenance will further contribute to the shed’s resilience and durability. By staying attuned to any signs of wear, settling, or damage, you can address potential concerns before they escalate, preserving the integrity of your shed for years to come.
Thank you for embarking on this transformative journey with your shed. Your commitment to its well-being and your willingness to tackle this project head-on exemplify the spirit of conscientious shed ownership. May your newly elevated shed continue to serve as a reliable and functional space, providing shelter, storage, and a sense of accomplishment for years to come.
Frequently Asked Questions about How To Jack Up A Shed
Was this page helpful?
At Storables.com, we guarantee accurate and reliable information. Our content, validated by Expert Board Contributors, is crafted following stringent Editorial Policies. We're committed to providing you with well-researched, expert-backed insights for all your informational needs.


0 thoughts on “How To Jack Up A Shed”