Articles
How To Jack Up Floor Joists
Modified: January 20, 2024
Learn how to jack up floor joists with our informative articles. Improve the stability and safety of your home with our step-by-step guides and expert advice.
(Many of the links in this article redirect to a specific reviewed product. Your purchase of these products through affiliate links helps to generate commission for Storables.com, at no extra cost. Learn more)
Introduction
Welcome to our comprehensive guide on how to jack up floor joists. If you’ve noticed sagging floors, uneven surfaces, or cracks in your walls, it might be time to consider jacking up your floor joists. This process can help correct structural issues, improve stability, and ensure the longevity of your home.
Jacking up floor joists involves lifting and supporting them to restore their original position and level. This can help eliminate unevenness, improve the overall stability of your floors, and prevent further damage to your home. While it may sound like a daunting task, with the right tools, materials, and safety precautions, you can successfully undertake this project and restore the integrity of your flooring system.
In this guide, we will walk you through each step of the process, from inspection and preparation to the actual jacking up of the floor joists. We will also provide you with important safety considerations and tips to ensure a successful and safe project.
Before we dive into the details, it’s essential to note that jacking up floor joists can be a complex task, and if you don’t feel comfortable or have limited experience, it’s always best to consult with a professional contractor who specializes in structural repairs. They will have the knowledge and expertise to assess and address any underlying issues that may have caused the sagging and recommend the most appropriate course of action.
Now, let’s get started on the essential information you need to know before jacking up your floor joists!
Key Takeaways:
- Jacking up floor joists is a complex but rewarding process that can correct sagging floors, level surfaces, and ensure the stability of your home’s flooring system. Prioritize safety, take your time, and enjoy the benefits of a leveled and stable floor.
- Proper preparation, careful inspection, and systematic lifting are essential for successfully jacking up floor joists. By following the step-by-step process and taking necessary safety precautions, you can achieve a structurally sound and even floor.
Read more: What Is A Floor Joist
What is Jacking Up Floor Joists?
Before we delve into the process of jacking up floor joists, let’s first understand what floor joists are and why they may require lifting.
Floor joists are horizontal beams that provide structural support to the flooring system of a building. They typically run parallel to each other and are spaced apart to create a stable platform for the floor above. Over time, due to factors such as settling, moisture exposure, or inadequate support, floor joists can sag or become uneven, causing a variety of issues.
Jacking up floor joists is the process of lifting and supporting them to restore their original position and level. By doing so, you can eliminate sagging floors, reduce uneven surfaces, and correct any structural issues that may have developed over time.
There are several reasons why floor joists may require jacking up. One common cause is settling. As a building ages, the soil underneath it can settle, causing the foundation to shift. This can lead to the downward movement of the floor joists, resulting in sagging floors and uneven surfaces.
Moisture can also play a significant role in the deterioration of floor joists. Excessive moisture from leaks or inadequate drainage can weaken the wood, causing it to warp or rot. This can lead to a loss of structural integrity and the need for jacking up the floor joists to level the floor.
Inadequate support is another factor that can contribute to the need for jacking up floor joists. If the original construction did not provide sufficient support or if modifications were made without considering the load-bearing capacity, the floor joists may not be able to adequately support the weight of the floor above, leading to sagging and unevenness.
Jacking up floor joists is a proactive measure to address these issues and prevent further damage to the structure of your home. By restoring the floor joists to their proper position and level, you can improve the stability and durability of your flooring system.
Now that we understand what jacking up floor joists entails, let’s explore the tools and materials you’ll need for this project.
Reasons for Jacking Up Floor Joists
There are several reasons why you may need to jack up your floor joists. Identifying the underlying causes of sagging or uneven floors is crucial in determining whether jacking up the floor joists is the appropriate solution. Here are some common reasons for jacking up floor joists:
- Settling: Over time, the soil underneath a building can settle, causing the foundation to shift. This can lead to the downward movement of the floor joists, resulting in sagging floors and uneven surfaces. Jacking up the floor joists can help bring them back to their original position, leveling the floors in the process.
- Moisture Damage: Excessive moisture from leaks, plumbing issues, or inadequate drainage can wreak havoc on floor joists. The wood may warp, rot, or become weak, leading to sagging floors. By jacking up the floor joists, you can repair the damage and restore the structural integrity of the flooring system.
- Inadequate Support: If the floor joists were not adequately supported during construction or modifications were made without considering load-bearing capacity, the floors may start to sag. Insufficient support over time can cause the floor joists to weaken and sink. Jacking up the floor joists provides an opportunity to reinforce the support system and level the floors.
- Age and Wear: As a building ages, the materials used in construction can deteriorate. Floor joists may weaken or start to sag due to years of use and exposure to various elements. Jacking up the floor joists can help rejuvenate the structural integrity of the flooring system and extend its lifespan.
- Structural Repairs: If you’re undertaking structural repairs in your home, such as repairing or replacing damaged beams or columns, jacking up the floor joists may be necessary. This allows for better access to the areas that require repair and helps ensure that the entire flooring system is properly supported.
It’s important to remember that jacking up floor joists is not a solution for all types of flooring problems. In some cases, the underlying issues may be more severe and require more extensive repairs or even the expertise of a professional contractor. If you’re unsure about the cause of your flooring problems or the appropriate course of action, it’s always best to consult with a structural engineer or contractor who specializes in floor repairs.
Now that we understand the reasons why jacking up floor joists may be necessary, let’s move on to the tools and materials you’ll need for the project.
Tools and Materials Required
Before you begin jacking up your floor joists, it’s important to gather the necessary tools and materials to ensure a smooth and successful project. Here’s a list of the essential items you’ll need:
Tools:
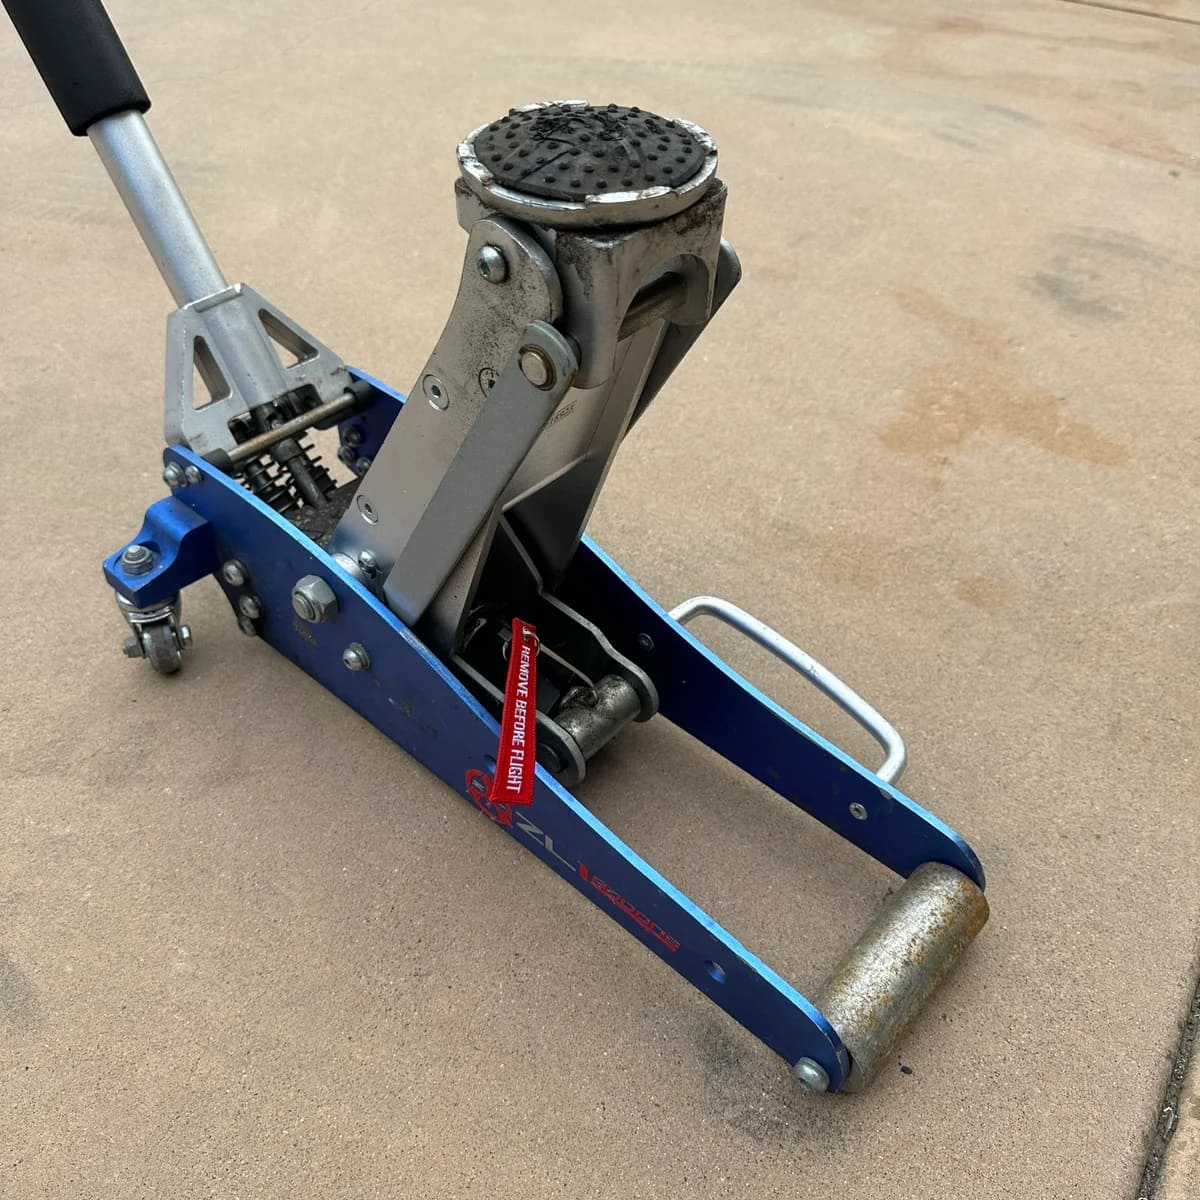
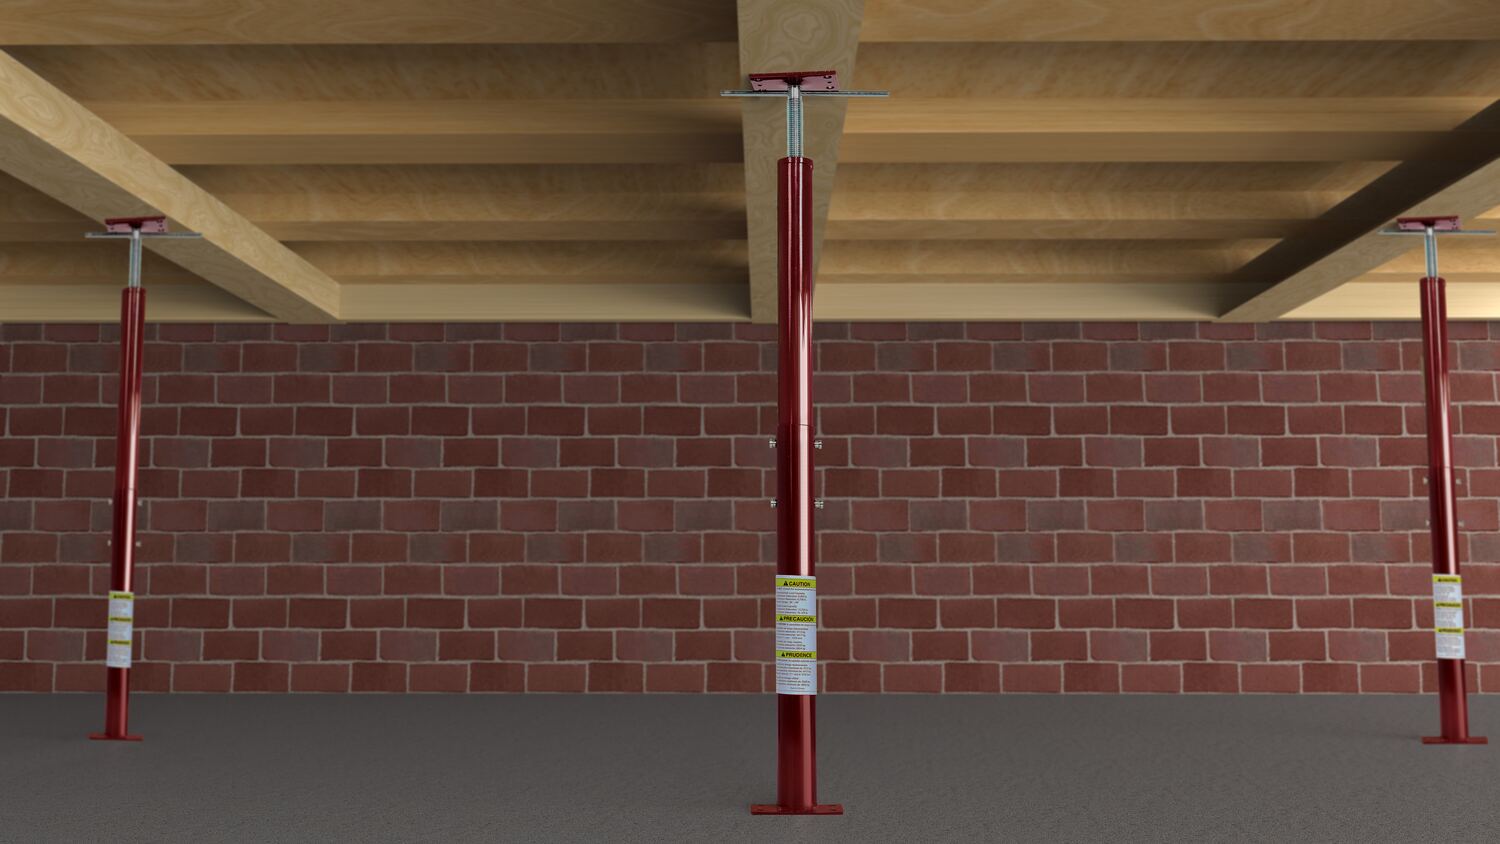
- Jack or hydraulic lift: This is the primary tool you’ll need to lift the floor joists. A bottle jack or hydraulic lift with sufficient weight capacity is recommended.
- Support beams: These beams will provide temporary support to the floor joists as you lift them. Adjustable steel or wooden beams are commonly used.
- Measuring tape: Use a measuring tape to determine the level and height of the floor joists.
- Level: This tool is essential for ensuring that the floor joists are properly aligned and level after lifting.
- Hammers and nails: These basic tools will be useful for securing temporary supports and making minor adjustments.
- Safety equipment: Always prioritize your safety by wearing gloves, safety glasses, and sturdy footwear during the project.
Read more: How To Strengthen Floor Joists
Materials:
- Blocking material: You may need wooden blocks or shims to provide additional support or adjust the level of the floor joists.
- Screws or nails: These will be used to secure temporary supports and make any necessary adjustments to the floor joists.
- Hardware and brackets: Depending on your specific case, you may need additional hardware or brackets to reinforce the connections between the floor joists and supports.
- Safety barriers: If you’re working in a raised area or off the ground, consider using safety barriers or barriers to prevent accidents or falls.
Having the proper tools and materials ready before you start jacking up your floor joists will help streamline the process and ensure that you have everything you need. It’s also a good idea to have extra supplies on hand in case you encounter any unexpected issues or need to make adjustments during the project.
Next, let’s discuss important safety considerations to keep in mind throughout the jacking up process.
Safety Considerations
Jacking up floor joists can be a challenging and potentially hazardous task if not approached with caution. To ensure a safe working environment and minimize the risk of accidents, it’s important to follow these safety considerations:
- Personal Protective Equipment (PPE): Always wear appropriate safety gear, including gloves, safety glasses, and sturdy footwear, to protect yourself from potential hazards, such as falling debris or sharp objects.
- Stability: Before starting the jacking process, ensure that the area is clear of any obstacles or loose objects that could interfere with your work. This includes removing furniture, rugs, and any other items that may be in the way.
- Secure Footing: When working on elevated surfaces, such as crawl spaces or basements, make sure to have stable footing. Use proper ladders or scaffolding and secure them to prevent accidents caused by slips or falls.
- Weight Capacity: Before using a jack or hydraulic lift, carefully check its weight capacity to ensure it can handle the load of the floor joists. Exceeding the weight limit can lead to equipment failure and potential injuries.
- Proper Lifting Techniques: Familiarize yourself with the proper techniques for using the jack or hydraulic lift. Follow the manufacturer’s instructions and guidelines to ensure safe operation. Avoid sudden or jerky movements while lifting to maintain stability.
- Support Beams: When installing temporary supports, ensure they are properly secured and positioned directly beneath the floor joists. Use a level to ensure they are plumb and level to provide stable support.
- Inspecting the Structure: Before initiating any jacking or lifting, carefully inspect the floor joists, support beams, and surrounding areas for signs of damage, rot, or structural issues. If any concerns are identified, consult with a professional before proceeding.
- Communication: If you are working with a team or have assistance, establish clear communication and have a plan in place to ensure everyone’s safety. Use verbal cues, hand signals, or walkie-talkies to stay connected and coordinate movements.
- Project Complexity: Recognize when a project is beyond your skill level or requires professional expertise. If you’re unsure about any aspect of the process, it’s always recommended to consult with a structural engineer or contractor who specializes in floor repairs.
Remember, safety should be the top priority throughout the entire jacking up process. Taking the necessary precautions and following established safety guidelines will help mitigate risks and ensure a successful and accident-free project.
Now that we’ve covered the safety considerations, let’s move on to the step-by-step process of jacking up floor joists.
Step 1: Inspect the Area
Before you begin jacking up floor joists, it’s crucial to thoroughly inspect the area to assess the condition of the floor joists, identify any underlying issues, and determine the extent of the problem. Here’s how to conduct a comprehensive inspection:
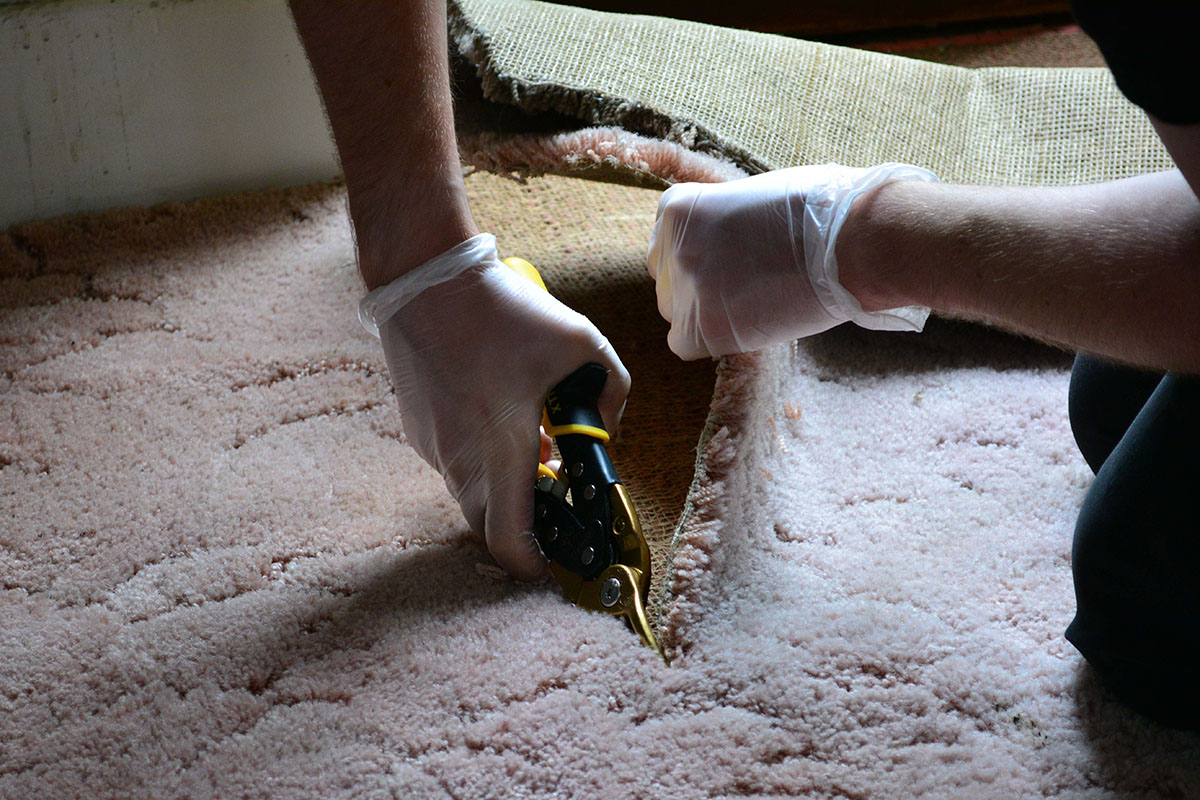
- Clear the area: Remove any furniture, rugs, or objects that may obstruct your view or impede your movement during the inspection process.
- Check for signs of damage: Examine the floor joists for visible signs of damage, such as cracks, splits, rot, or insect infestation. Pay close attention to areas near plumbing fixtures, as leaks can cause moisture damage to the wood.
- Check for sagging or uneven floors: Walk around the room and observe any noticeable sagging or unevenness in the flooring. Use a level to determine if the floors are indeed uneven or if there are areas that dip or slope in an abnormal way.
- Inspect the foundation: Look for any signs of foundation issues, such as cracks, settling, or unevenness. Foundation problems can directly impact the condition of the floor joists and contribute to sagging or uneven floors.
- Identify the cause: Try to identify the root cause of the problem, such as settling, moisture damage, inadequate support, or structural issues. Understanding the cause will help determine the appropriate course of action to fix the floor joists.
- Take measurements: Measure the height differences in the floors using a tape measure or laser level. This will provide valuable information about the amount of lifting required to level the floors.
- Document your findings: Take photos and notes of all the issues you observe during the inspection. This documentation will serve as a reference as you progress through the repair process.
By conducting a thorough inspection, you can gather essential information about the condition of your floor joists and identify any underlying problems that may require attention. This will help you plan the necessary repairs and ensure a successful jacking up process.
Once you have completed the inspection, it’s time to prepare the work area for the jacking up process. In the next step, we’ll guide you through the necessary preparations to ensure a safe and efficient project.
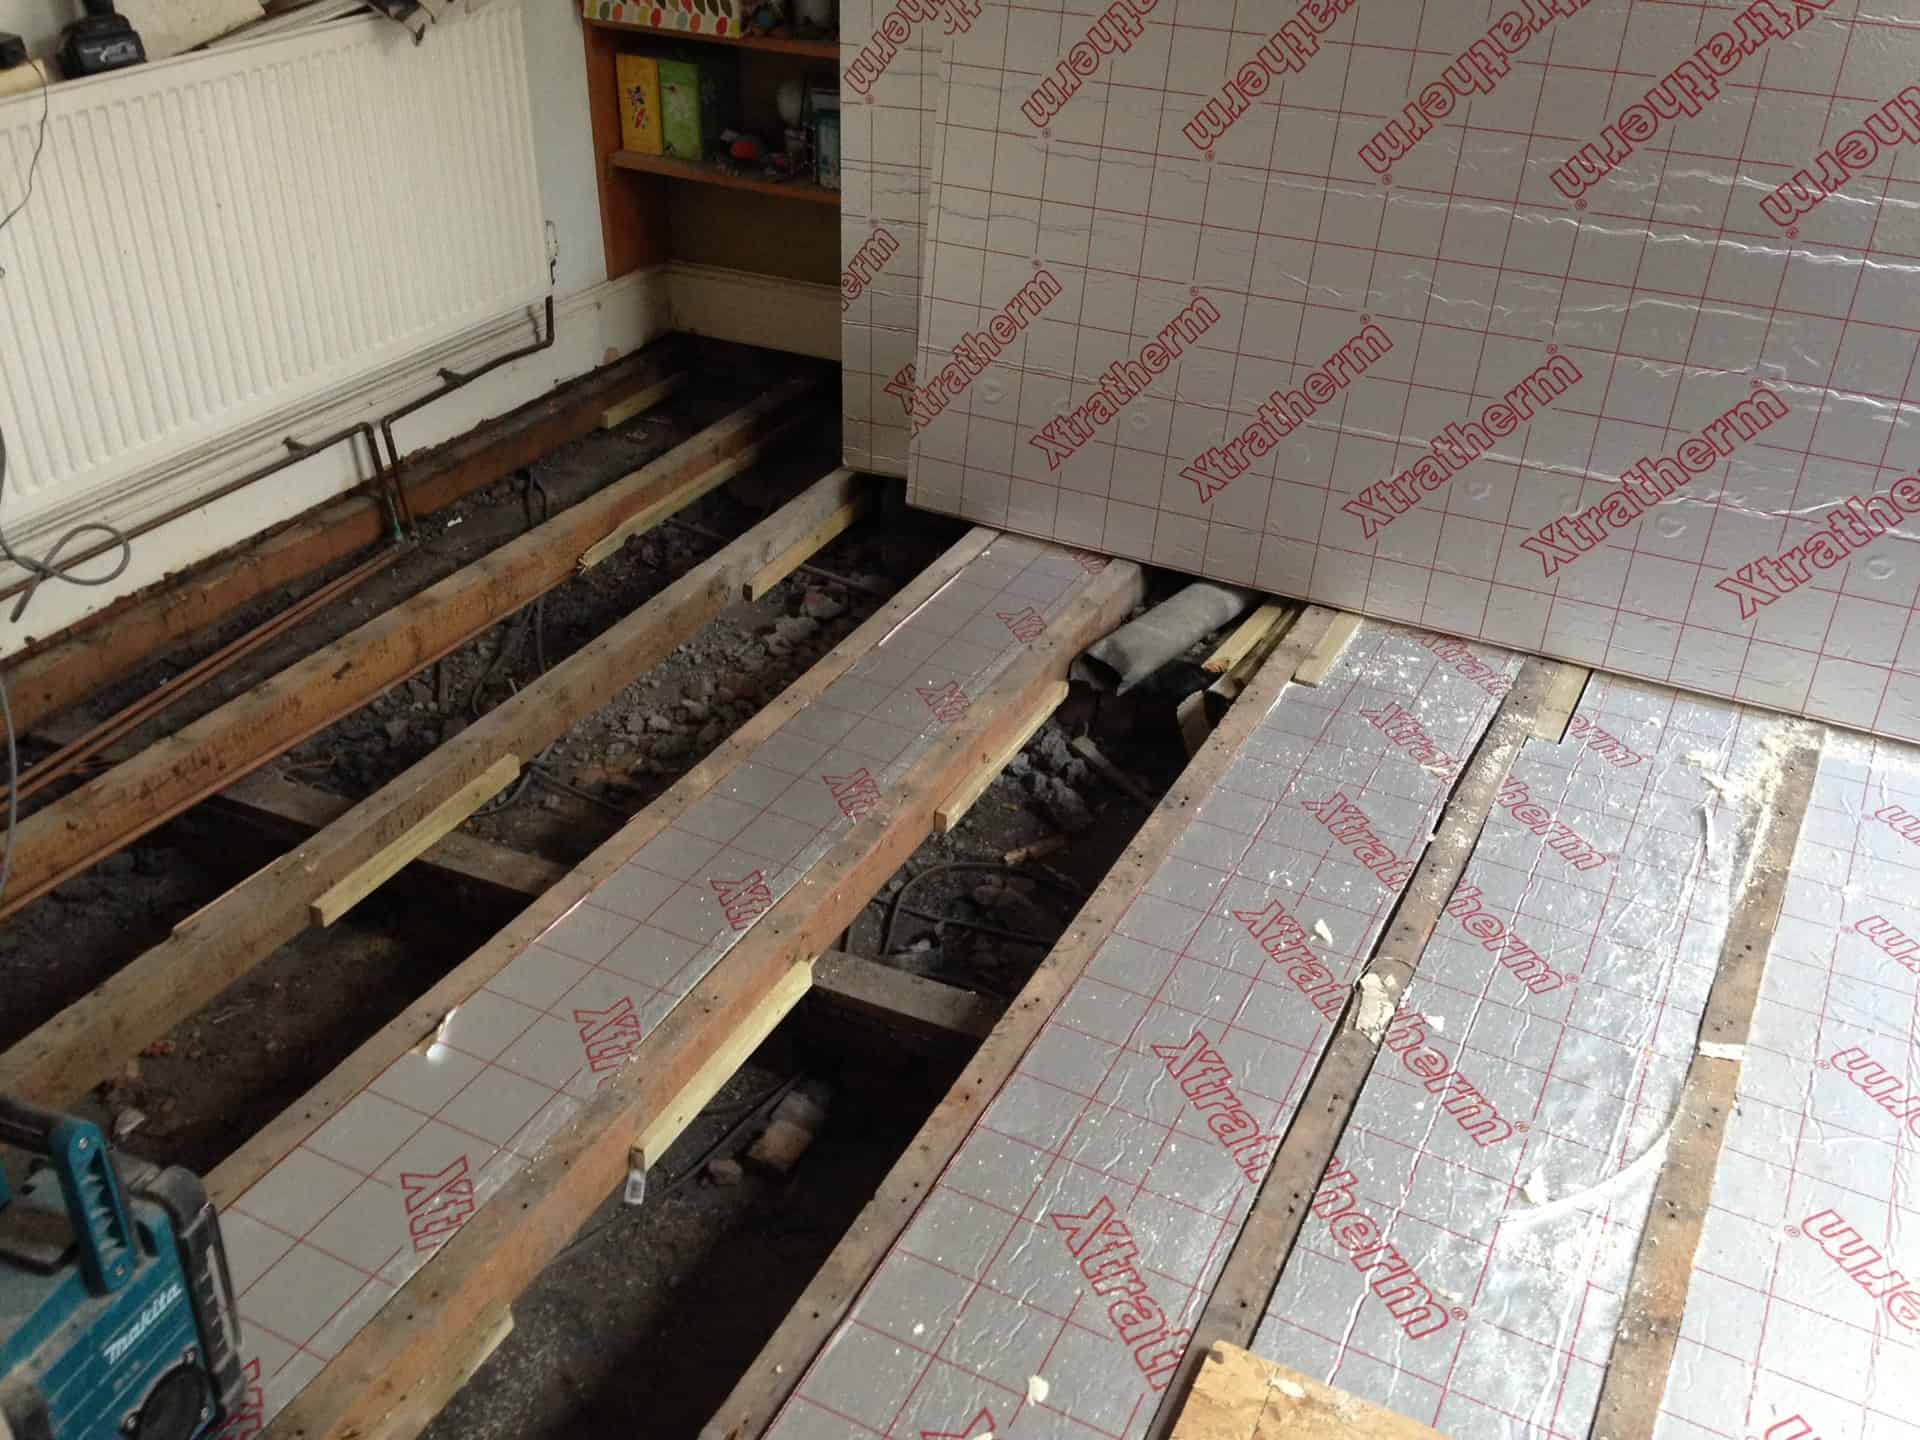
Step 2: Prepare the Work Area
After inspecting the area and documenting any issues, it’s time to prepare the work area before you begin jacking up the floor joists. Proper preparation is crucial to ensure a safe and efficient project. Here’s what you need to do:
- Clear the space: Remove any furniture, appliances, or objects that may obstruct your movement or pose a safety hazard during the jacking up process. Clear the area to create a clean and organized workspace.
- Secure loose items: If there are any loose or hanging items, such as light fixtures or ceiling fans, secure them properly or remove them entirely to prevent any accidents or damage during the project.
- Identify utility lines: Before drilling or working with tools, be aware of the location of utility lines such as electrical wiring, plumbing pipes, or gas lines. Contact the appropriate professionals if you need assistance in identifying and marking these lines.
- Establish safety barriers: If you’re working in an elevated area or near open edges, set up safety barriers, such as caution tape or temporary fencing, to prevent accidental falls or injuries. Clearly mark hazardous areas to ensure everyone’s safety.
- Ensure proper ventilation and lighting: Adequate ventilation and lighting are essential for a safe work environment. Open windows or use fans to improve ventilation, and provide sufficient lighting to ensure clear visibility during the project.
- Organize your tools and materials: Arrange your tools, equipment, and materials in a neat and accessible manner. This will help save time and eliminate unnecessary searching or trips to retrieve supplies during the project.
- Communicate safety protocols: If you’re working with a team or have assistance, ensure that everyone is aware of the safety protocols and guidelines. Make sure they understand the potential hazards and know how to communicate effectively during the project.
Taking the time to prepare the work area will help create a safe and efficient workspace for jacking up the floor joists. By removing potential hazards and organizing your tools, you can focus on the task at hand and minimize the risk of accidents or injuries.
With the work area properly prepared, you’re ready to move on to the next step: installing temporary supports to provide stability during the jacking up process.
Read more: How To Replace A Floor Joist
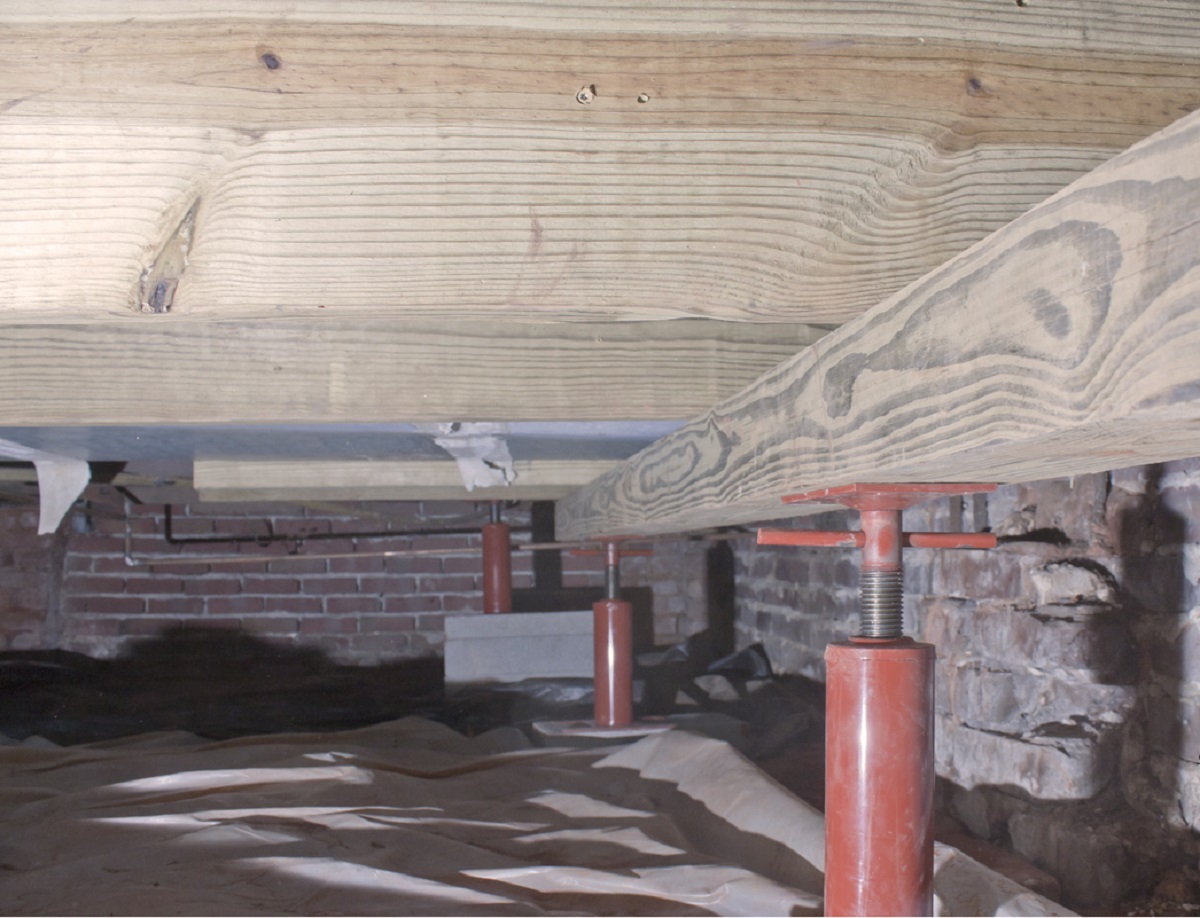
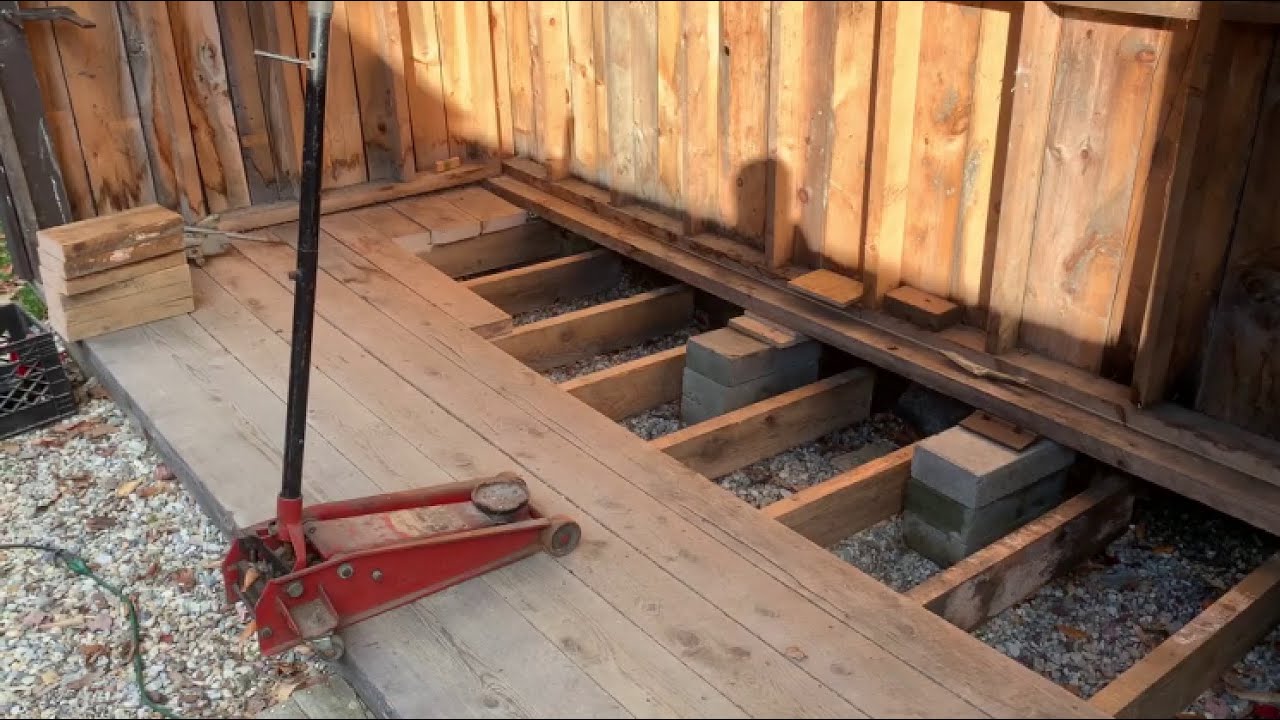
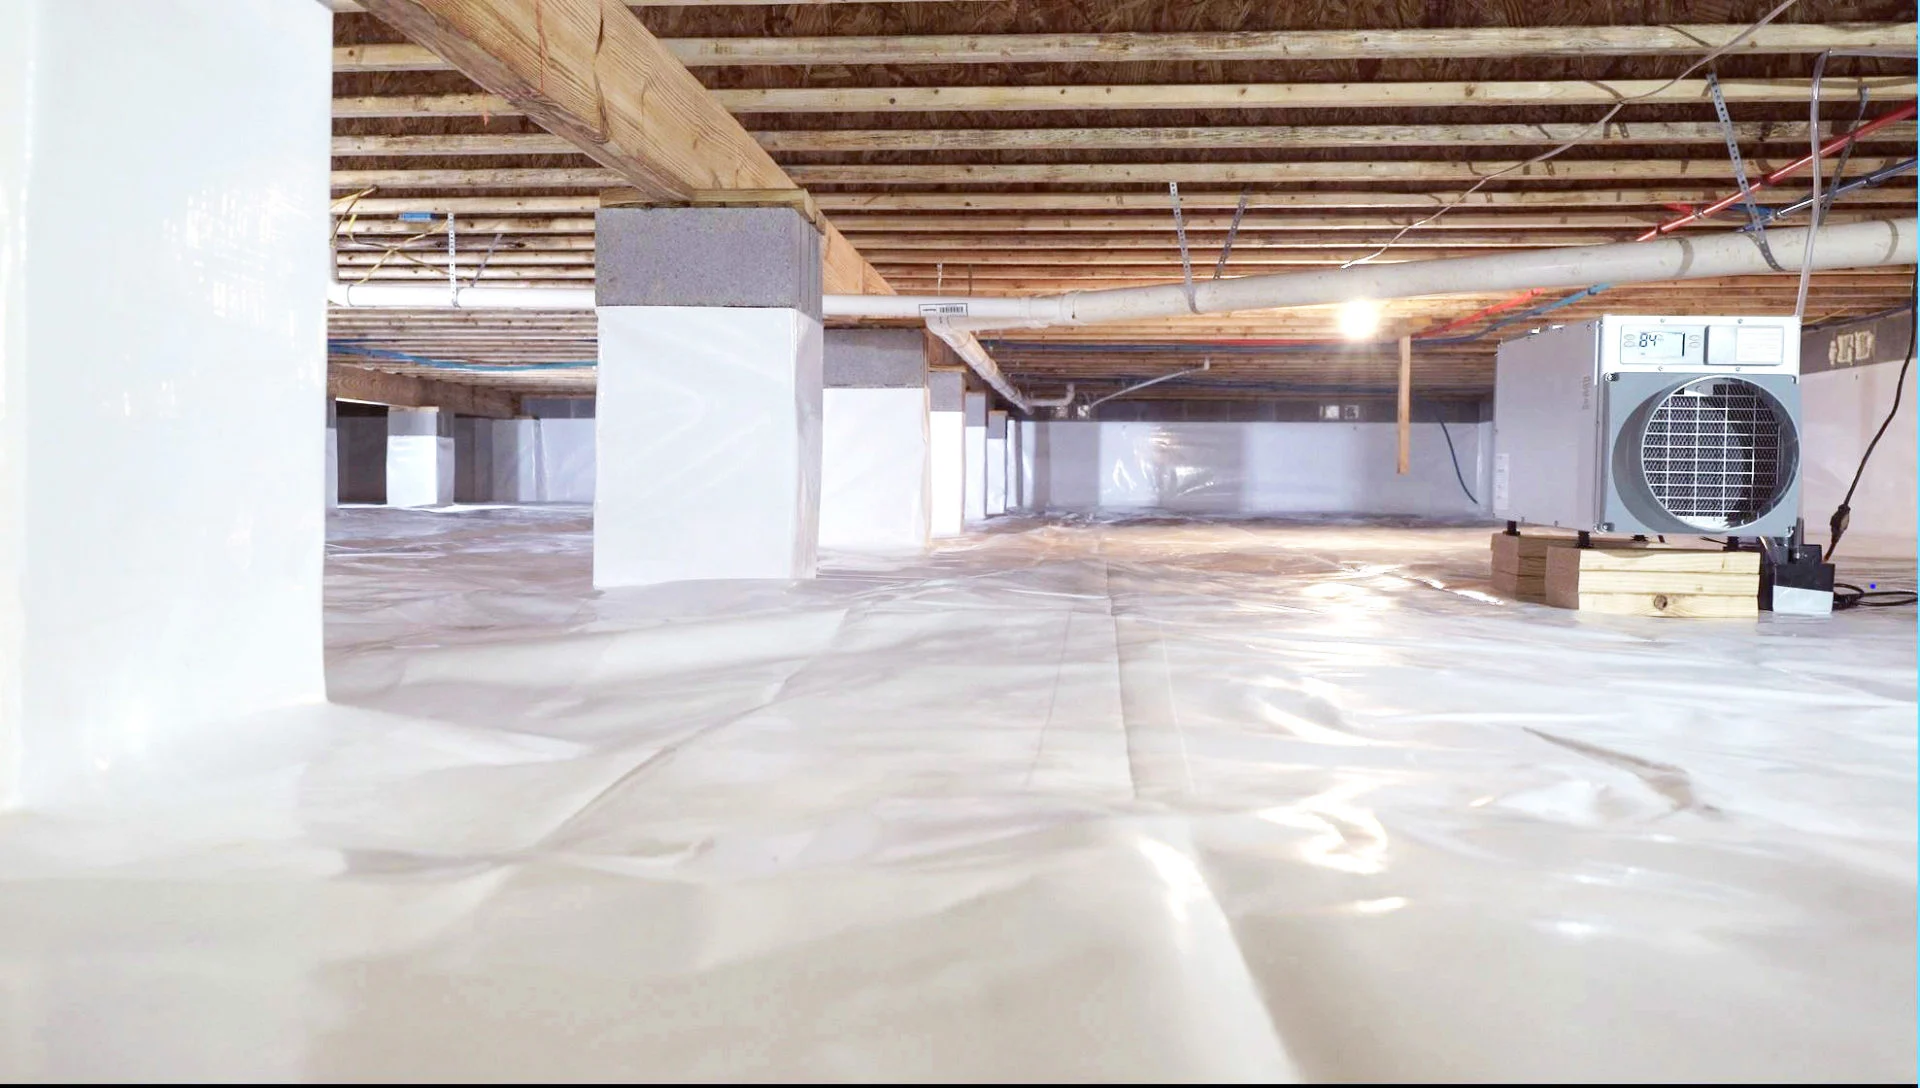
Step 3: Install Temporary Supports
Installing temporary supports is a crucial step in the process of jacking up floor joists. These supports will provide stability and prevent further sagging or movement while you lift the floor joists. Follow these steps to install the temporary supports:
- Measure and cut your support beams: Measure the distance between the floor joists and cut your support beams to match the required length. Ensure that the support beams are long enough to span between the foundation or load-bearing wall and the floor joists.
- Position the support beams: Position the support beams directly beneath the floor joists at even intervals. Remember to place the beams on solid ground or secure them to the foundation or load-bearing walls. Use a level to ensure the support beams are plumb and level.
- Attach the support beams: Secure the support beams in place using nails, screws, or brackets. Make sure the beams are tightly fastened and provide stable support to the floor joists. Use multiple supports if needed to distribute the weight evenly.
- Make height adjustments: If you encounter any significant height discrepancies between the support beams and the floor joists, use shims or wooden blocks to adjust the height and level the temporary supports. Double-check the level to ensure the supports are secure and aligned properly.
- Test the stability: Once the supports are in place, test their stability by applying gentle pressure or adding weight to ensure they can withstand the load. If there is any wobbling or instability, reassess the positioning and tighten the supports as needed.
- Document the support placement: Take photos or make notes to document the placement and positioning of the temporary supports. This will be helpful when it’s time to remove them after the jacking up process is complete.
Installing temporary supports is crucial to provide stability and prevent further damage while you lift the floor joists. Ensure the supports are secure and level before proceeding to the next step.
Now that the temporary supports are in place, it’s time to move on to Step 4: determining the jack points to begin lifting the floor joists.
When jacking up floor joists, make sure to use a hydraulic jack and place it on a sturdy base. Always work with a partner for safety and use shims to provide additional support as needed.
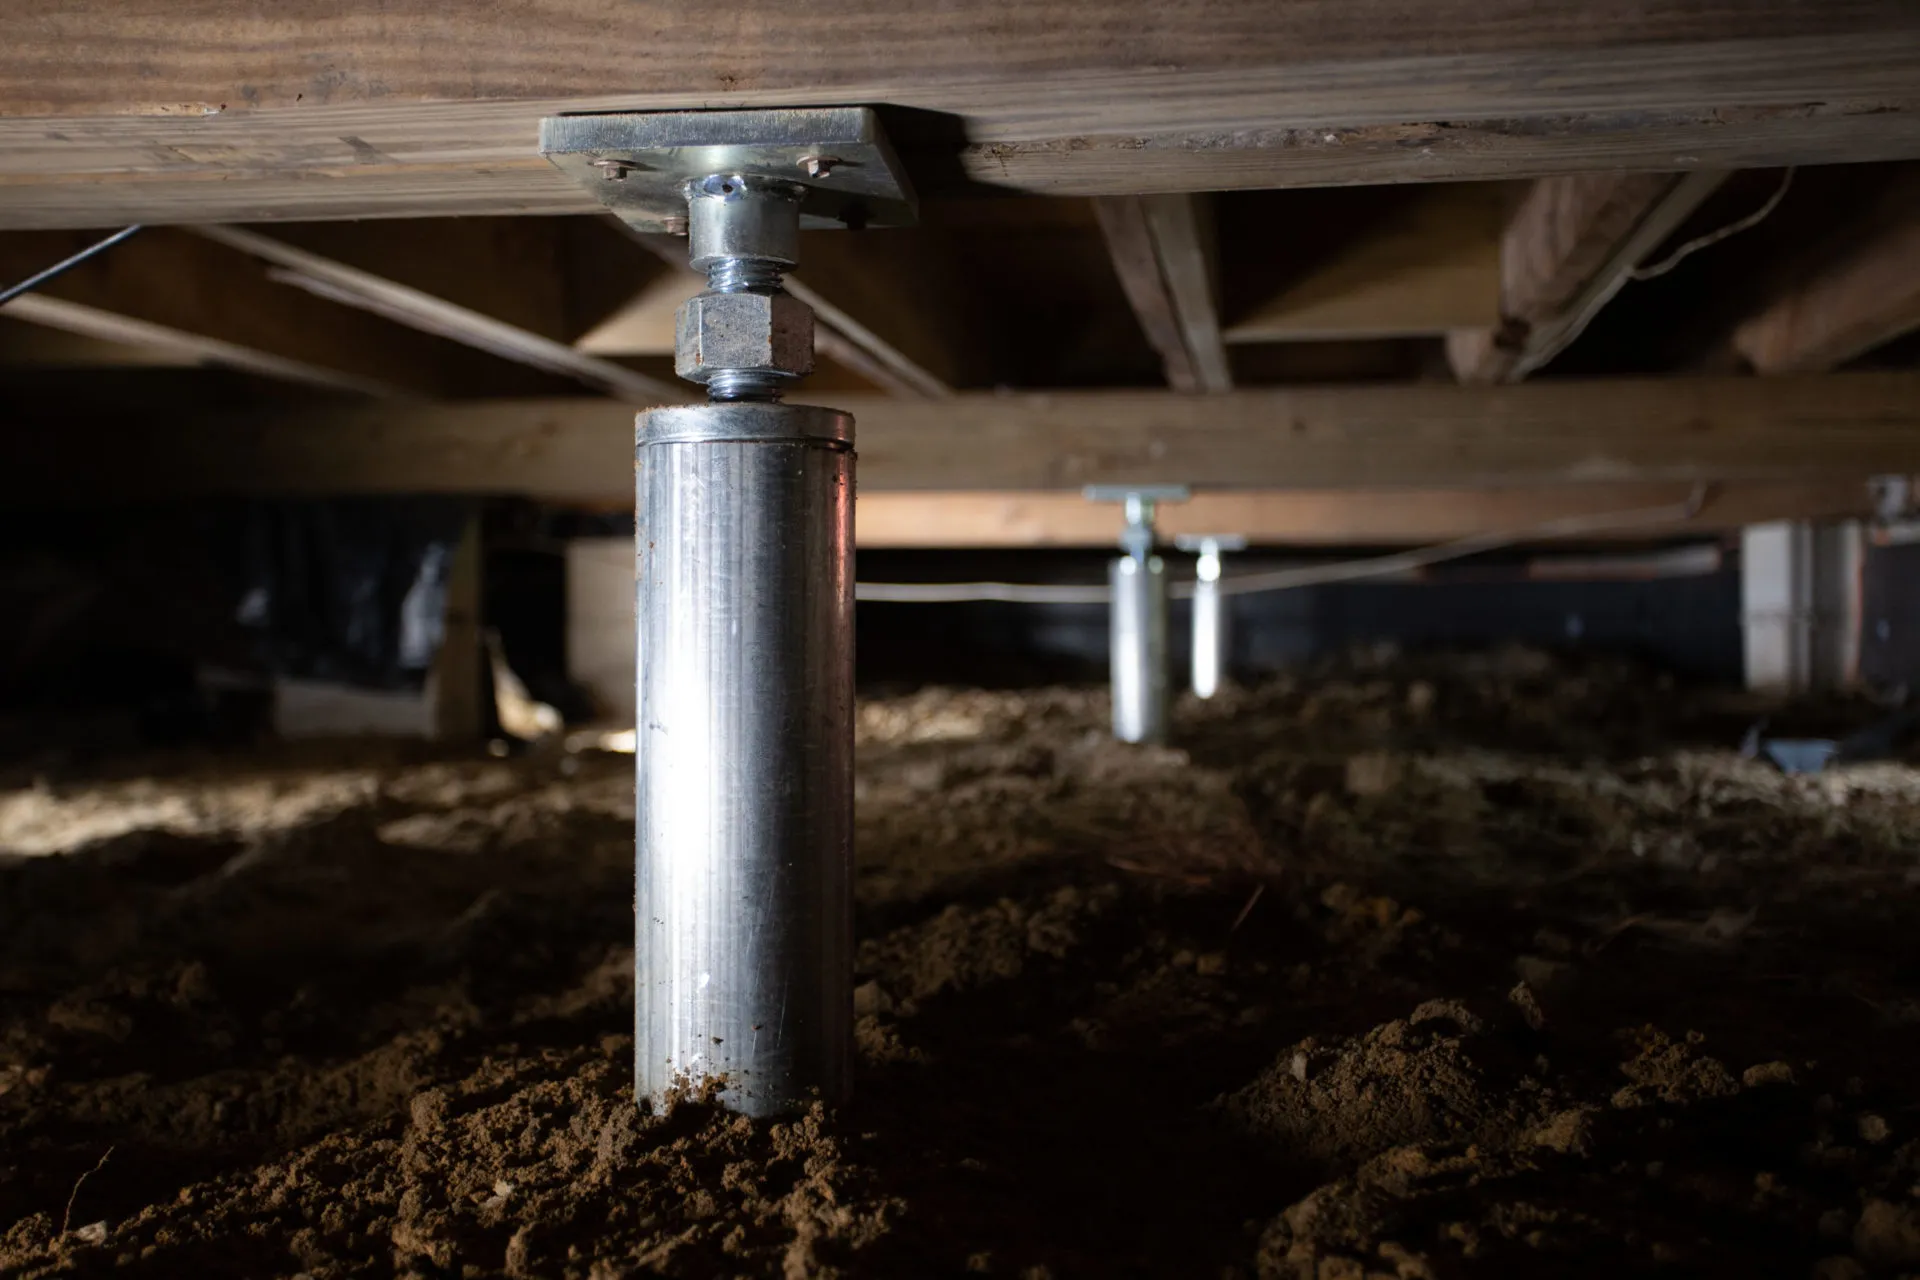
Step 4: Determine the Jack Points
Before you can start jacking up the floor joists, it’s important to determine the appropriate jack points. These are the locations where the jack or hydraulic lift will be positioned to lift the floor joists. Here’s how to determine the jack points:
- Identify the sagging areas: Take note of the areas where the floor joists are sagging or uneven. These will typically be the primary areas where you’ll need to lift the joists.
- Choose the distance between jack points: Determine the spacing between the jack points based on the length of your support beams and the distribution of the load. Ensure that the load is evenly distributed and that the support beams will provide stable support when lifting the floor joists.
- Mark the jack points: Use a pencil or chalk to mark the locations on the support beams where the jack or hydraulic lift will be placed. Make sure the marks are clearly visible and aligned with the areas of sagging or unevenness.
- Position the jacks: Carefully position the jacks or hydraulic lifts beneath the marked jack points. Ensure that the jacks are stable and properly aligned with the support beams and floor joists.
- Secure the jacks: Once the jacks are in position, ensure they are securely in place. If needed, use shims or wooden blocks to stabilize and level the jacks. Double-check that the jacks are firmly supporting the support beams and floor joists.
- Test the stability: Before proceeding to lift the floor joists, test the stability of the jacks by applying gentle pressure to ensure they can withstand the load. If any instability is noticed, reassess the positioning of the jacks and make necessary adjustments.
By determining the appropriate jack points, you can ensure that the load is evenly distributed and that the floor joists will be lifted in the correct areas. This step is essential for the successful jacking up of the floor joists.
Now that you have determined the jack points, let’s move on to the next step: beginning the actual process of jacking up the floor joists.
Step 5: Begin Jacking Up the Floor Joists
Now that you have prepared the work area, installed temporary supports, and determined the jack points, it’s time to begin the process of jacking up the floor joists. Follow these steps to safely and effectively lift the floor joists:
- Double-check stability and safety: Before you start lifting, ensure that the temporary supports and jacks are stable and secure. Verify that the support beams and jack points are aligned, and there is no wobbling or instability.
- Start lifting slowly: Begin lifting the floor joists gradually using the jacks or hydraulic lifts. Apply even pressure to all the jacks, raising them simultaneously to maintain balance and prevent uneven lifting.
- Monitor the height: Continuously monitor the height of the floor joists as you lift them. Compare the height of the sagging area to the surrounding level areas to ensure that you are achieving a consistent level across the floor.
- Make adjustments if necessary: If you notice any unevenness or resistance during the lifting process, pause and investigate the cause. Check the stability of the temporary supports, the placement of the jacks, and make any necessary adjustments before continuing.
- Lift to the desired height: Raise the floor joists to the desired height, aiming to level them with the surrounding floor areas. Take your time to ensure a gradual and controlled lifting process.
- Check for alignment: As you lift the floor joists, periodically check for alignment using a level. Adjust the height of the jacks if needed to achieve a level surface.
- Document the lifted position: Take photos or make notes of the lifted position of the floor joists. This will be helpful when it’s time to secure the joists and remove the temporary supports.
Remember to proceed with caution when jacking up the floor joists. Take your time, monitor the lifting process closely, and make adjustments as needed to ensure a level and stable flooring system.
Now that you’ve successfully lifted the floor joists, it’s time to move on to the next step: checking for leveling and making any necessary adjustments.
Step 6: Check for Leveling
After jacking up the floor joists, it’s essential to check for leveling to ensure that the flooring system is properly aligned and stable. Follow these steps to check for leveling and make any necessary adjustments:
- Use a level: Place a level on various areas of the floor to determine if it is level and evenly supported. Check both the lifted areas of the floor joists and the surrounding floor areas to ensure that there are no noticeable discrepancies.
- Identify uneven spots: Look for any areas that appear to be still sagging or uneven. It’s normal to have some variation due to the natural contours of the building, but significant discrepancies may indicate the need for further adjustments.
- Adjust the jacks: If you notice any areas that are not level, make adjustments to the jacks or hydraulic lifts accordingly. Raise or lower specific jacks to help level out the floor joists and create a more even surface.
- Shim or wedge as necessary: If there are specific spots that require additional support, you may need to use shims or wedges to fill gaps and provide extra stability. Place them strategically beneath the floor joists to level out any unevenness.
- Recheck for leveling: Once you’ve made adjustments, recheck the floor using a level to ensure that it is now level and properly supported. Continue to adjust as needed until the entire floor is consistently level.
- Take notes of adjustments: Document the adjustments you’ve made, including the locations and any specific techniques used. This will be helpful for future reference or if further adjustments are needed down the line.
Checking for leveling is crucial to ensure the stability and functionality of the flooring system. Taking the time to assess and make necessary adjustments will help create a level and even floor that is safe and structurally sound.
Once you’re satisfied with the leveling, it’s time to move on to the next step: securing the floor joists to maintain their position.
Read more: How To Jack Up A Porch
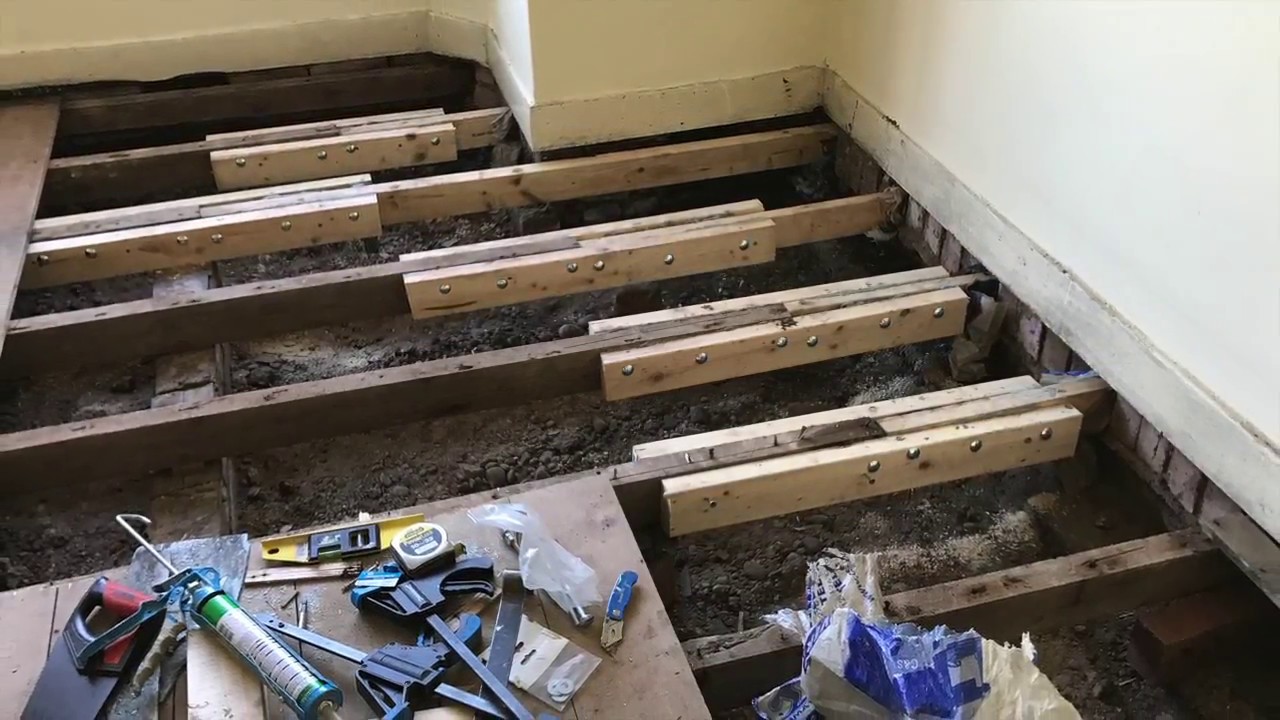
Step 7: Secure the Floor Joists
Securing the floor joists is an important step to ensure that they remain in their lifted position and maintain stability over time. Follow these steps to properly secure the floor joists:
- Use blocking material: Install wooden blocks or shims between the floor joists and the supporting beams or the foundation. These blocks will help prevent the floor joists from sinking back down and provide additional support.
- Secure with screws or nails: Attach the blocking material to the floor joists and the supporting beams using screws or nails. This will help secure the blocks in place and reinforce the connection between the floor joists and the support system.
- Ensure proper spacing: Make sure the blocking material is evenly spaced along the length of the floor joists. This will distribute the weight and support the joists effectively.
- Check for stability: Verify that the floor joists are stable and securely attached to the blocking material. Test the stability by applying gentle pressure or adding weight to ensure the floor joists can withstand the load.
- Inspect for any remaining issues: Take the opportunity to thoroughly inspect the floor joists and the surrounding areas. Look for any signs of remaining damage, rot, or structural issues. Address any concerns before proceeding.
- Document the final position: Take photos or make notes of the secured position of the floor joists. Documenting the final position will provide a reference and help with any future inspections or repairs.
Securing the floor joists is crucial in maintaining the stability and structural integrity of your flooring system. By properly attaching the blocking material and reinforcing the connection between the joists and the support system, you can ensure that the lifted position is maintained over time.
Now that you have secured the floor joists, it’s time to move on to the final step: removing the temporary supports and completing the jacking up process.
Step 8: Remove Temporary Supports
With the floor joists secured and the leveling complete, it’s time to remove the temporary supports that were installed during the jacking up process. Follow these steps to safely remove the temporary supports:
- Ensure stability: Before removing any supports, double-check that the floor joists are stable and properly secured. Confirm that there is no movement or shifting when applying gentle pressure to the floor.
- Start from one end: Begin by removing the temporary supports from one end of the floor joist system. Gradually work your way to the other end, removing each support one at a time.
- Monitor for any changes: As you remove each support, observe for any changes in the position or stability of the floor joists. If any noticeable shifts or unevenness occur, stop and reassess the situation before proceeding.
- Replace with permanent support if needed: In some cases, you may need to replace the temporary supports with permanent ones. If this is necessary, make sure to carefully install the permanent supports following the appropriate guidelines and building codes.
- Check for any remaining issues: Once all the temporary supports have been removed, carefully inspect the area for any signs of remaining problems or damage. Address any concerns promptly to ensure the long-term stability and safety of the flooring system.
- Document the completion: Take photos or make notes to document the completion of the process, including the removal of the temporary supports. This documentation can serve as a reference for future inspections or repairs.
Removing the temporary supports is the final step in the jacking up process. By carefully and systematically removing the supports, you can ensure a smooth transition to the completed project.
Congratulations! You have successfully jacked up the floor joists, leveled the floors, and secured the structural integrity of your flooring system.
Remember, if you have any doubts or concerns during the process, it’s always best to consult with a professional contractor or structural engineer for expert advice and assistance.
We hope this guide has been helpful in guiding you through the process of jacking up floor joists. Enjoy your leveled and stable floors!
Conclusion
Jacking up floor joists can be a challenging but rewarding process that allows you to correct sagging floors, level surfaces, and ensure the stability of your home’s flooring system. By following the steps outlined in this guide and taking the necessary safety precautions, you can successfully undertake this project and achieve a structurally sound and even floor.
Throughout this guide, we’ve covered the importance of inspecting the area, preparing the work area, installing temporary supports, determining jack points, lifting the floor joists, checking for leveling, securing the floor joists, and removing temporary supports. Each step plays a crucial role in achieving the desired outcome and maintaining the structural integrity of your home.
It’s essential to remember that jacking up floor joists can be a complex task that requires careful planning, attention to detail, and a thorough understanding of the underlying issues. If you’re unsure about any aspect of the process or encounter significant structural issues, it’s always best to consult with a professional contractor or structural engineer for expert guidance.
By following the guidelines in this guide, you can improve the stability, safety, and longevity of your home’s flooring system. Remember to prioritize safety throughout the entire process, wear appropriate protective gear, and take your time to ensure a job well done.
We hope this comprehensive guide has provided you with the knowledge and confidence to take on the project of jacking up floor joists. Enjoy the benefits of a leveled and stable floor in your home!
Frequently Asked Questions about How To Jack Up Floor Joists
Was this page helpful?
At Storables.com, we guarantee accurate and reliable information. Our content, validated by Expert Board Contributors, is crafted following stringent Editorial Policies. We're committed to providing you with well-researched, expert-backed insights for all your informational needs.


0 thoughts on “How To Jack Up Floor Joists”