Home>Gardening & Outdoor>Outdoor Structures>How To Repair A Shed
Outdoor Structures
How To Repair A Shed
Modified: February 18, 2024
Learn how to repair outdoor structures like sheds with our comprehensive guide. Discover expert tips and techniques for fixing and maintaining your outdoor space.
(Many of the links in this article redirect to a specific reviewed product. Your purchase of these products through affiliate links helps to generate commission for Storables.com, at no extra cost. Learn more)
Introduction
So, your trusty shed has seen better days. Maybe it weathered a storm, or perhaps it's just showing the wear and tear of time. But fear not! With a little know-how and some elbow grease, you can restore your shed to its former glory. Whether it's a small cosmetic touch-up or a more substantial repair job, this guide will walk you through the process step by step.
A well-maintained shed not only enhances the aesthetic appeal of your outdoor space but also provides valuable storage and utility. By addressing any damage promptly, you can prolong the life of your shed and save money on costly replacements.
In this comprehensive guide, we'll cover everything you need to know to repair your shed effectively. From assessing the extent of the damage to gathering the necessary materials and tools, we'll guide you through each phase of the repair process. Whether it's patching up a leaky roof, fixing damaged siding, or repairing doors and windows, we've got you covered.
By the end of this guide, you'll not only have the knowledge and skills to tackle shed repairs with confidence but also understand how to maintain and prevent future damage. So, roll up your sleeves and let's get started on restoring your beloved shed to its former glory!
Key Takeaways:
- Assess the damage and gather the right materials and tools before starting shed repairs. Thoroughly inspect the roof, walls, doors, and windows to prioritize and plan the repairs effectively.
- Regular maintenance and preventive measures are essential for extending the lifespan of your shed. Implement routine inspections, keep the exterior clean, and address potential issues early to minimize future damage.
Read more: How To Build A Shed Floor
Assessing the Damage
Before diving into the repair process, it’s crucial to assess the extent of the damage to your shed. Start by conducting a thorough inspection of the entire structure, paying close attention to the roof, walls, siding, doors, and windows. Look for signs of water damage, rot, mold, pest infestations, and structural issues. Take note of any areas that require immediate attention and prioritize the repairs based on the severity of the damage.
When inspecting the roof, check for missing or damaged shingles, signs of water leakage, and sagging areas. Examine the walls and siding for cracks, rot, or warping, which may indicate moisture-related issues. Inspect the doors and windows for any gaps, cracks, or damaged frames that could compromise the shed’s security and insulation.
Additionally, assess the foundation and support structure for any signs of deterioration, such as wood rot, insect damage, or structural instability. Identifying these issues early on can prevent further damage and ensure the safety and longevity of your shed.
It’s also essential to consider the environmental factors that may have contributed to the damage. Harsh weather conditions, such as heavy rain, snow, or intense sunlight, can take a toll on the structural integrity of the shed. Similarly, nearby trees or foliage can pose a risk of falling branches or debris, potentially causing damage to the shed.
By thoroughly assessing the damage, you’ll gain a clear understanding of the scope of the repairs required and can plan accordingly. Whether it’s a minor cosmetic fix or a more extensive restoration project, a comprehensive assessment sets the stage for an effective and targeted repair process.
Gathering Materials and Tools
Once you’ve assessed the damage to your shed, the next step is to gather the necessary materials and tools for the repair process. Having the right supplies on hand will streamline the repairs and ensure that you can address the issues efficiently.
Start by making a detailed list of the materials needed for each specific repair task. For example, if you’re repairing the roof, you may require roofing shingles, underlayment, roofing nails, and sealant. If the walls or siding need attention, you might need exterior-grade paint, wood filler, replacement siding panels, or insulation materials.
When it comes to tools, ensure that you have a well-equipped toolbox that includes essential items such as a hammer, screwdrivers, tape measure, utility knife, pry bar, and a power drill. Depending on the nature of the repairs, you may also need specialized tools such as a caulking gun, roofing nail gun, circular saw, or a level.
Consider the quality of the materials you’ll be using. Opt for durable, weather-resistant products that are designed for outdoor use, as they will provide long-lasting results and better protection against the elements. Additionally, ensure that the tools you use are in good working condition, as they will significantly impact the efficiency and quality of the repairs.
If you’re unsure about the specific materials and tools required for the job, don’t hesitate to seek advice from professionals at your local hardware store or consult online resources for comprehensive repair guides and product recommendations.
By gathering the right materials and tools before starting the repairs, you’ll minimize delays and ensure that the process runs smoothly. Being well-prepared sets the stage for a successful and efficient shed restoration project.
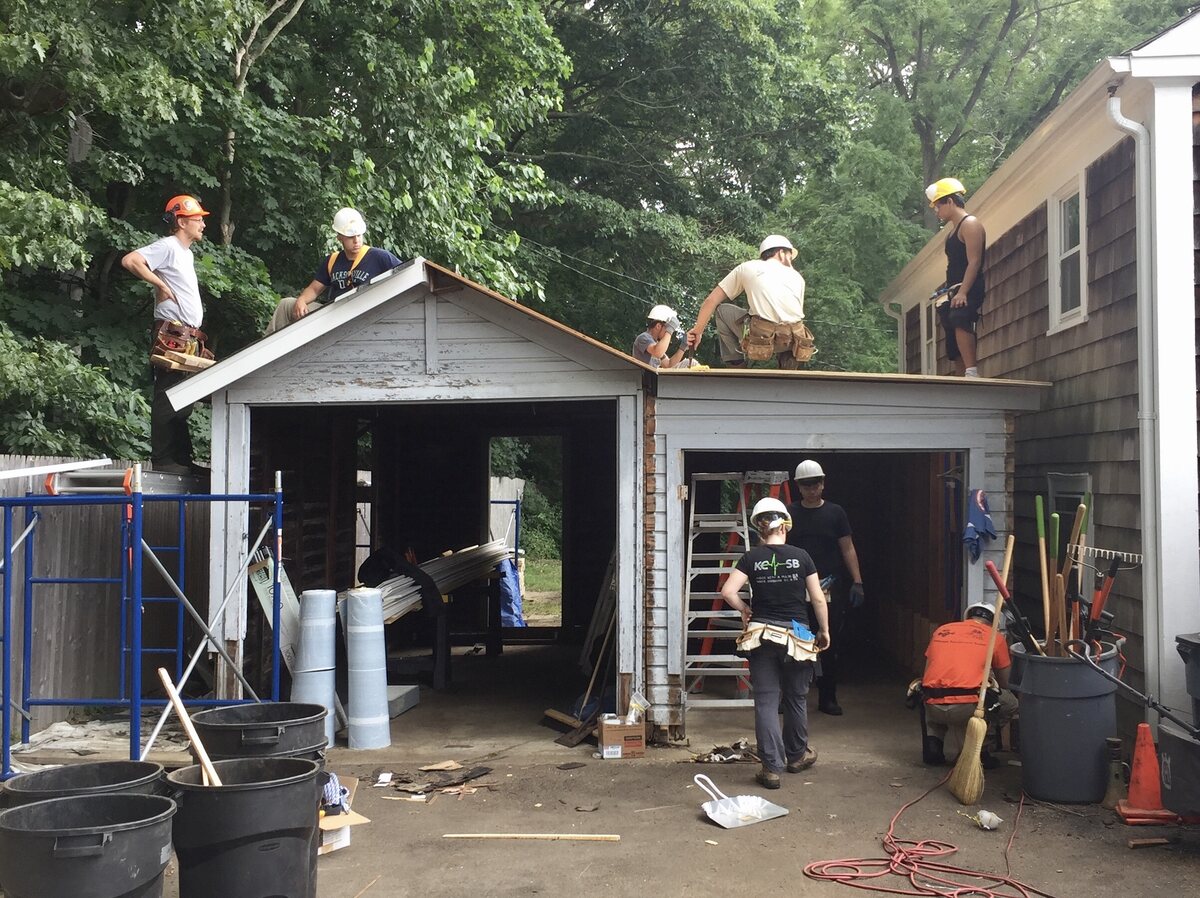
Repairing the Roof
The roof is a critical component of your shed, providing protection against the elements. If you’ve identified issues such as missing or damaged shingles, leaks, or sagging areas during your assessment, it’s essential to address these issues promptly to prevent further damage to the structure and its contents.
Start by clearing any debris or vegetation that may have accumulated on the roof. This will allow you to inspect the surface more effectively and prepare it for repairs. If there are missing or damaged shingles, carefully remove the old ones and replace them with new ones of the same style and color. Ensure that the replacement shingles are securely fastened and properly aligned to provide a seamless and watertight barrier.
If there are signs of water leakage or damage to the underlying roof structure, it’s crucial to address these issues as well. Apply a high-quality roofing sealant to any areas where water infiltration is suspected, paying close attention to seams, flashing, and areas around vents and chimneys. Additionally, inspect the roof’s underlayment for any tears or deterioration and replace it if necessary to reinforce the waterproofing of the roof.
In cases where the roof’s support structure shows signs of damage or sagging, it may be necessary to reinforce or replace the affected components. This may involve replacing damaged rafters, trusses, or sheathing to ensure the structural integrity of the roof.
Throughout the repair process, prioritize safety by using appropriate fall protection equipment when working at heights and exercising caution when handling tools and materials on the roof. If the repairs involve complex structural issues or if you’re uncomfortable working at heights, consider seeking professional assistance to ensure the safety and quality of the repairs.
By addressing roof-related issues promptly and effectively, you’ll safeguard your shed from water damage and structural compromise, extending its lifespan and maintaining a secure and functional outdoor storage space.
Regularly inspect your shed for any signs of damage such as rot, cracks, or loose shingles. Repair any issues promptly to prevent further damage and maintain the structural integrity of the shed.
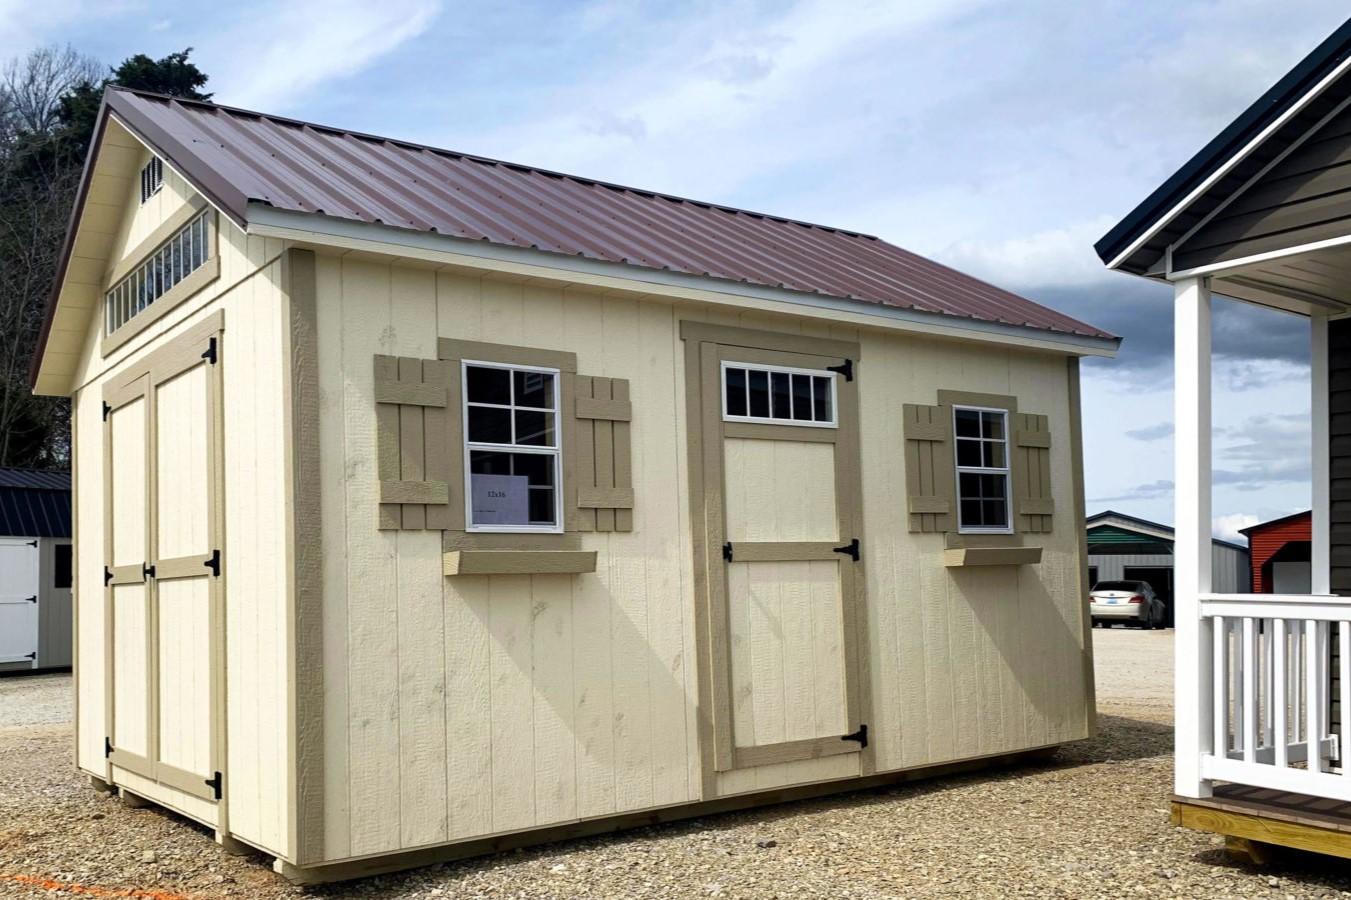
Fixing Walls and Siding
The walls and siding of your shed play a crucial role in protecting its interior and enhancing its visual appeal. If you’ve noticed cracks, rot, or damage to the siding during your assessment, addressing these issues is essential to maintain the structural integrity and aesthetics of the shed.
Begin by thoroughly cleaning the affected areas to remove dirt, debris, and any loose paint or siding material. This will provide a clean surface for repairs and ensure proper adhesion of new materials. If the damage is limited to small cracks or holes, use a high-quality exterior caulk or wood filler to seal and repair these areas, creating a smooth and uniform surface.
For more extensive damage, such as rotted or warped siding panels, carefully remove the affected sections and replace them with new siding material. Ensure that the replacement siding matches the existing style and color to maintain a cohesive appearance. Additionally, inspect the underlying wall structure for any signs of water damage or deterioration and address these issues to prevent further damage to the siding and interior of the shed.
If the walls themselves are compromised due to structural issues or damage, it may be necessary to reinforce or replace the affected sections. This could involve repairing or replacing damaged studs, sheathing, or insulation to ensure the stability and longevity of the shed’s walls.
When working with siding materials, prioritize weather resistance and durability to protect the shed from the elements. Opt for high-quality exterior paint and siding products designed to withstand outdoor conditions, providing long-lasting protection and visual appeal.
Throughout the repair process, pay attention to detail and ensure that the repaired areas blend seamlessly with the surrounding surfaces. Properly executed wall and siding repairs not only enhance the structural integrity of the shed but also contribute to its overall aesthetic and functional value.
Read more: How To Turn A Shed Into A She Shed
Repairing Doors and Windows
The doors and windows of your shed are essential for both functionality and security. If you’ve identified issues such as gaps, damage, or operational problems during your assessment, addressing these issues will enhance the usability and protection of your outdoor storage space.
Start by inspecting the doors and windows for any signs of damage, such as warped frames, cracked glass, or malfunctioning hardware. Address any immediate security concerns by reinforcing or repairing damaged locks, hinges, or latches to ensure that the shed is secure and accessible.
If the doors or windows show signs of water infiltration or air leaks, apply weatherstripping or caulking to seal these areas and improve insulation. This will enhance the shed’s energy efficiency and protect its contents from the elements.
For damaged or deteriorated door and window frames, carefully remove the affected sections and replace them with new, weather-resistant materials. Ensure that the replacement components are properly sealed and aligned to provide a secure and weathertight fit.
If the windows feature glass panels, inspect them for cracks or damage and replace any compromised panes with new, properly sized glass. Additionally, consider adding protective coatings or films to the windows to enhance their durability and resistance to impact and weather-related damage.
When addressing door-related issues, pay attention to proper alignment and functionality to ensure smooth operation and a secure closure. Adjust or replace hinges, tracks, or rollers as needed to restore the doors to their optimal working condition.
By addressing door and window repairs promptly and effectively, you’ll enhance the security, functionality, and visual appeal of your shed, creating a more comfortable and inviting space for storage and activities.
Maintaining and Preventing Future Damage
After successfully repairing your shed, it’s essential to implement a maintenance plan to preserve the structural integrity and functionality of the structure. By incorporating regular maintenance tasks and preventive measures, you can extend the lifespan of your shed and minimize the likelihood of future damage.
Start by establishing a routine inspection schedule to assess the condition of the shed’s roof, walls, doors, windows, and foundation. Regular inspections allow you to identify and address potential issues early, preventing minor problems from escalating into significant damage.
Keep the exterior of the shed clean and free of debris, vegetation, and other obstructions. This helps prevent moisture buildup, pest infestations, and damage caused by environmental factors. Additionally, consider applying a protective sealant or paint to the exterior surfaces to enhance their resistance to water, UV radiation, and other damaging elements.
Check and maintain the integrity of the roof regularly, especially after severe weather events. Clear debris, inspect for loose or damaged shingles, and address any signs of water infiltration promptly to prevent water damage and structural compromise.
Inspect the doors and windows for proper sealing, functionality, and security. Lubricate hinges, tracks, and hardware as needed to ensure smooth operation and longevity. Replace worn weatherstripping and caulking to maintain a weathertight seal and enhance energy efficiency.
Consider implementing pest control measures to prevent infestations that can cause damage to the shed’s structure and contents. Seal potential entry points, such as gaps around doors and windows, and consider using pest-resistant materials in the construction and maintenance of the shed.
Lastly, consider the surrounding landscape and vegetation when planning preventive measures. Trim overhanging branches, remove dead foliage, and maintain a clear perimeter around the shed to reduce the risk of falling debris and minimize the impact of environmental factors on the structure.
By incorporating these maintenance and preventive measures into your shed care routine, you’ll ensure that your outdoor structure remains in optimal condition, providing reliable storage and utility for years to come.
Conclusion
Repairing and maintaining your shed is not only a practical endeavor but also a rewarding one. By investing time and effort into the restoration and care of your outdoor structure, you’re preserving a valuable asset and creating a functional and aesthetically pleasing space in your outdoor environment.
Throughout this guide, we’ve explored the essential steps involved in repairing a shed, from assessing the damage to gathering materials and tools, addressing roof, wall, door, and window repairs, and implementing preventive maintenance measures. By following these guidelines, you’ve taken proactive steps to restore the integrity of your shed and prevent future damage.
Remember that regular maintenance and timely repairs are key to preserving the longevity and functionality of your shed. By incorporating routine inspections, cleaning, and maintenance tasks into your shed care routine, you can minimize the likelihood of costly repairs and ensure that your shed remains a reliable storage and utility space for years to come.
As you embark on your shed repair journey, don’t hesitate to seek guidance from professionals or resources specific to your shed’s construction and materials. Additionally, consider enlisting the help of friends or family members to make the repair process more efficient and enjoyable.
Ultimately, the effort you put into repairing and maintaining your shed will pay off in the form of a sturdy, secure, and visually appealing outdoor structure. Whether it’s storing gardening tools, outdoor equipment, or creating a workshop space, your shed will continue to serve as a valuable asset in your outdoor living environment.
So, roll up your sleeves, gather your tools, and take pride in the restoration and care of your shed. With the knowledge and skills you’ve gained from this guide, you’re well-equipped to tackle shed repairs with confidence and ensure that your outdoor structure remains a functional and enduring feature of your property.
Frequently Asked Questions about How To Repair A Shed
Was this page helpful?
At Storables.com, we guarantee accurate and reliable information. Our content, validated by Expert Board Contributors, is crafted following stringent Editorial Policies. We're committed to providing you with well-researched, expert-backed insights for all your informational needs.


0 thoughts on “How To Repair A Shed”