Home>Gardening & Outdoor>Outdoor Structures>How To Mount An Awning To A Roof Rack
Outdoor Structures
How To Mount An Awning To A Roof Rack
Modified: November 2, 2024
Learn how to properly mount an awning to a roof rack for your outdoor structures. Follow our step-by-step guide for a secure and hassle-free installation.
(Many of the links in this article redirect to a specific reviewed product. Your purchase of these products through affiliate links helps to generate commission for Storables.com, at no extra cost. Learn more)
Introduction
When it comes to enhancing your outdoor adventures, having a reliable and versatile awning mounted to your roof rack can make a world of difference. Whether you"re a seasoned outdoor enthusiast or a novice camper, a well-installed awning can provide shelter from the elements, create a comfortable outdoor living space, and add a touch of convenience to your travels. In this comprehensive guide, we"ll walk you through the process of mounting an awning to a roof rack, offering expert tips and insights to ensure a successful and secure installation.
Picture this: You"re out on a thrilling off-road expedition, traversing rugged terrain and immersing yourself in the breathtaking beauty of nature. Suddenly, the weather takes a turn, and dark clouds loom ominously overhead. This is where a sturdy and well-positioned awning comes into play, offering a haven of protection from rain, harsh sunlight, or even the occasional unexpected drizzle. Furthermore, a thoughtfully mounted awning can serve as a cozy spot for al fresco dining, a shaded area for relaxation, or a practical shelter for impromptu gatherings with fellow adventurers.
In this article, we"ll delve into the essential tools and materials required for the installation, guide you through the process of selecting the ideal awning for your specific needs, and provide detailed steps for preparing your roof rack for the mounting process. From securely attaching the awning to the roof rack to conducting thorough testing and adjustments, we"ll cover every aspect to ensure that your awning is firmly and safely mounted, ready to accompany you on countless memorable escapades.
So, whether you"re gearing up for a weekend camping trip, a cross-country road adventure, or a day of off-grid exploration, mastering the art of mounting an awning to your roof rack will undoubtedly elevate your outdoor experiences. Let"s embark on this enlightening journey together, as we unlock the secrets to seamlessly integrating this invaluable outdoor accessory into your travels.
Key Takeaways:
- Mounting an awning to your roof rack enhances outdoor adventures by providing shelter, comfort, and convenience, making it a valuable addition for all types of outdoor enthusiasts.
- Careful preparation, precise attachment, and thorough testing are essential for securely integrating an awning into your roof rack setup, ensuring optimal performance and reliability during outdoor excursions.
Read more: What Are Roof Racks For
Tools and Materials Needed
Before embarking on the process of mounting an awning to your roof rack, it is crucial to gather the essential tools and materials to ensure a smooth and efficient installation. Here’s a comprehensive list of what you’ll need:
Tools:
- Power drill with appropriate bits
- Socket and ratchet set
- Adjustable wrench
- Tape measure
- Marker or chalk for marking
- Screwdrivers (flathead and Phillips head)
- Level
- Step ladder or sturdy platform
- Caulking gun (if sealant is required)
Materials:
- Quality awning specifically designed for roof rack mounting
- Mounting brackets and hardware provided with the awning
- Sealant (if recommended by the awning manufacturer)
- Protective gloves
- Safety goggles
- Clear and concise installation instructions provided by the awning manufacturer
Ensuring that you have the appropriate tools and materials on hand will streamline the installation process and minimize potential delays or complications. Additionally, it’s important to prioritize safety by wearing protective gloves and goggles when handling tools and working at elevated heights. With these tools and materials at your disposal, you’ll be well-prepared to embark on the next steps of mounting your awning to the roof rack with confidence and precision.
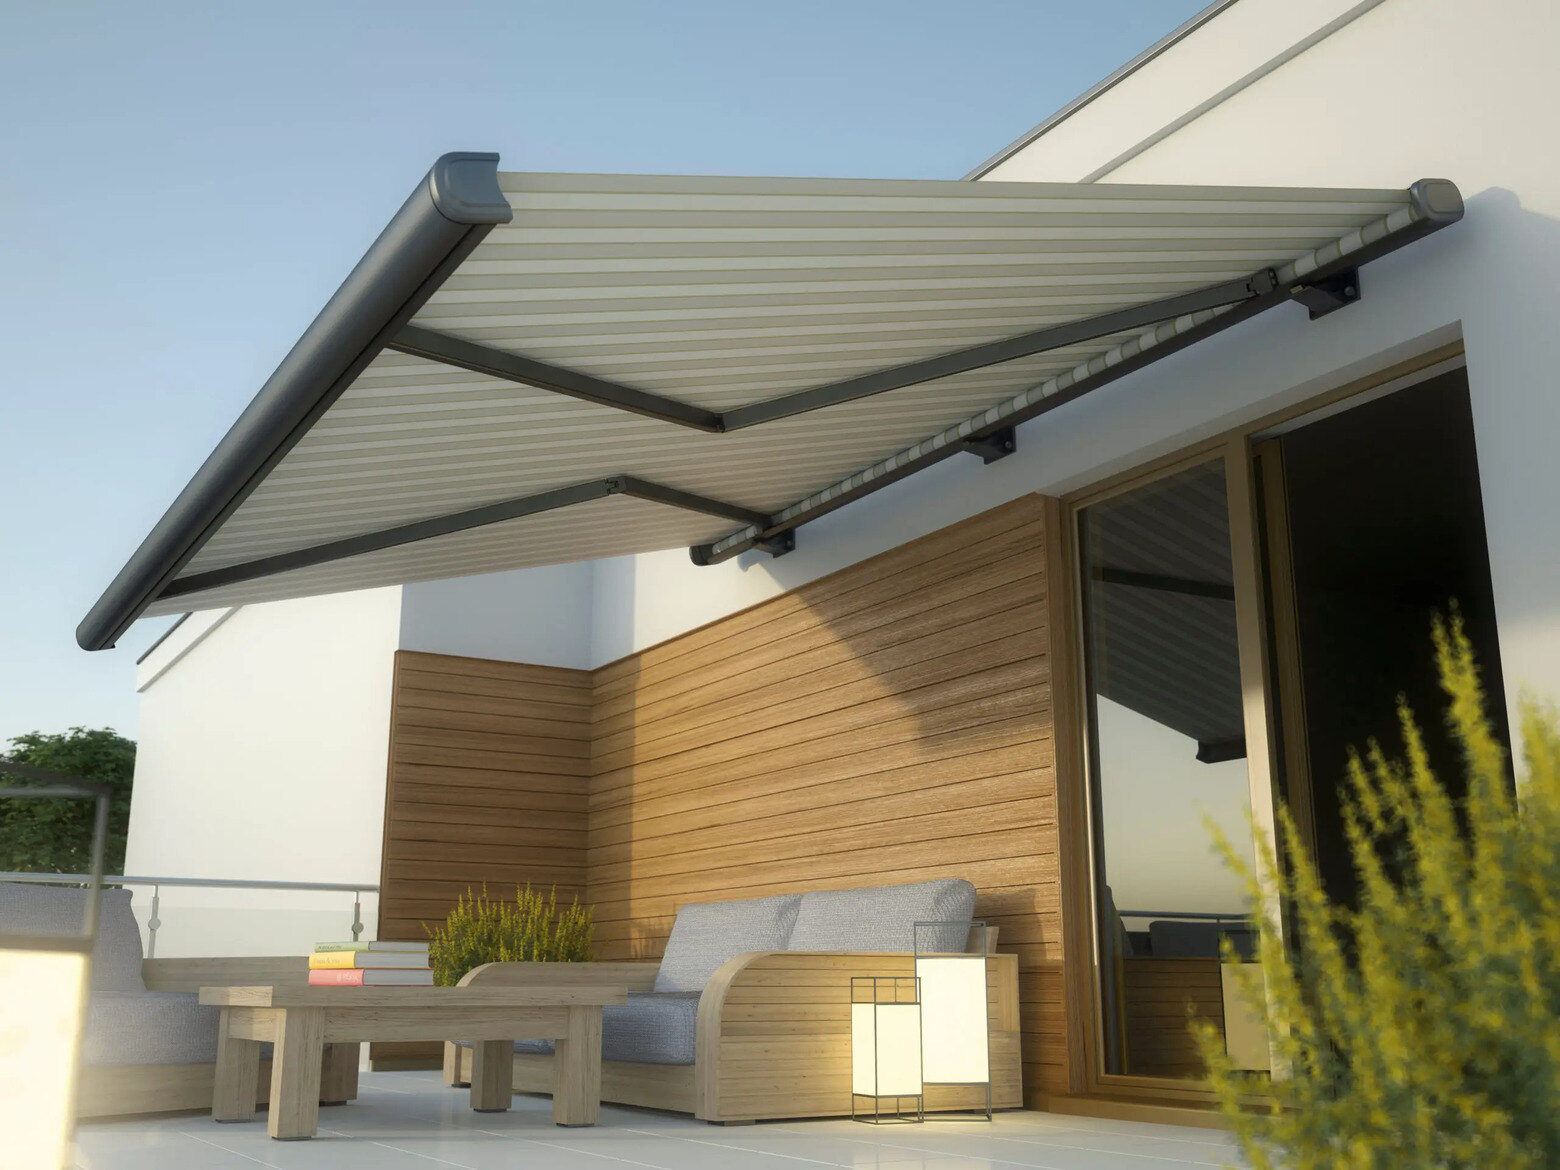
Choosing the Right Awning for Your Roof Rack
When it comes to selecting an awning for your roof rack, it’s essential to consider various factors to ensure that you choose a model that aligns with your specific needs and preferences. Here are key considerations to keep in mind when choosing the right awning:
Read more: How To Mount Solar Panels To Roof
Size and Coverage:
The size of the awning should be determined by the amount of coverage you require. Consider the dimensions of your roof rack and the space available for mounting the awning. Additionally, think about the number of people the awning will need to accommodate and the activities you plan to engage in beneath it. Whether you need a compact awning for solo adventures or a larger one for group outings, selecting the appropriate size is crucial.
Material and Durability:
Opt for an awning constructed from high-quality, durable materials that can withstand various weather conditions. Look for UV-resistant, waterproof, and mold-resistant fabrics that offer long-term reliability. Additionally, consider the robustness of the awning’s frame and components, ensuring that they can endure the rigors of outdoor use without compromising stability.
Mounting Compatibility:
Ensure that the awning is specifically designed for roof rack mounting, with compatible mounting brackets and hardware included. This compatibility is crucial for a secure and stable installation, preventing any potential issues related to fit or stability.
Ease of Use and Versatility:
Consider the awning’s deployment and retraction mechanisms, aiming for user-friendly operation. Look for features such as telescopic legs, adjustable poles, and simple locking mechanisms for effortless setup. Additionally, versatile design elements, such as the ability to add walls, mosquito nets, or extension panels, can enhance the awning’s functionality and adaptability to diverse environments.
Read more: How To Tie Ladder To Roof Rack
Brand Reputation and Reviews:
Research reputable brands known for manufacturing high-quality awnings. Explore customer reviews and testimonials to gain insights into the performance, durability, and overall satisfaction of users. A brand with a strong reputation for producing reliable outdoor equipment can instill confidence in your awning selection.
By carefully evaluating these factors and conducting thorough research, you can confidently choose an awning that seamlessly integrates with your roof rack, enhances your outdoor experiences, and provides enduring value. Whether it’s for camping, overland expeditions, or leisurely outdoor gatherings, the right awning will undoubtedly become an indispensable companion on your adventures.
Preparing the Roof Rack for Mounting
Before embarking on the process of mounting the awning to your roof rack, it’s essential to prepare the rack to ensure a secure and stable foundation for the installation. Here’s a step-by-step guide to preparing your roof rack for mounting the awning:
Assess the Roof Rack:
Begin by thoroughly inspecting your roof rack to identify the most suitable location for mounting the awning. Consider factors such as clearance from obstructions, ease of access, and the awning’s compatibility with the rack’s dimensions and weight capacity. Ensure that the chosen mounting area allows for unobstructed deployment and retraction of the awning.
Clean and Clear the Mounting Area:
Clear the chosen mounting area of any debris, dirt, or grime that may affect the installation or cause damage to the awning. Use a mild detergent and water to clean the surface, and allow it to dry completely before proceeding.
Read more: How To Mount A Wine Rack To The Wall
Positioning and Marking:
With the mounting area clean and dry, position the awning mounting brackets on the roof rack according to the manufacturer’s specifications. Use a marker or chalk to clearly outline the placement of the brackets, ensuring precise alignment and spacing. This step is crucial for accurately positioning the brackets and ensuring a secure attachment.
Drilling Pilot Holes:
If the awning mounting brackets require drilling for installation, use a power drill with the appropriate bit to create pilot holes at the marked positions. Exercise caution and precision during this step to prevent damage to the roof rack and ensure that the pilot holes are aligned correctly for the subsequent attachment of the brackets.
Secure the Mounting Brackets:
With the pilot holes in place, proceed to attach the awning mounting brackets to the roof rack using the provided hardware. Use a socket and ratchet set or the appropriate tools to securely fasten the brackets, ensuring that they are level and tightly affixed to the roof rack.
Apply Sealant (If Required):
Depending on the awning manufacturer’s recommendations, apply a suitable sealant to the mounting points to prevent water intrusion and enhance the overall weatherproofing of the installation. Follow the manufacturer’s instructions for the proper application of sealant, if necessary.
By meticulously preparing your roof rack for the mounting process, you establish a solid foundation for securely attaching the awning, ensuring that it remains steadfast and reliable during your outdoor escapades. With the roof rack primed and ready, you’re now poised to seamlessly integrate the awning into your outdoor adventures, ready to embrace the countless benefits it brings to your explorations.
Read more: How To Build A Wall-Mounted Coat Rack
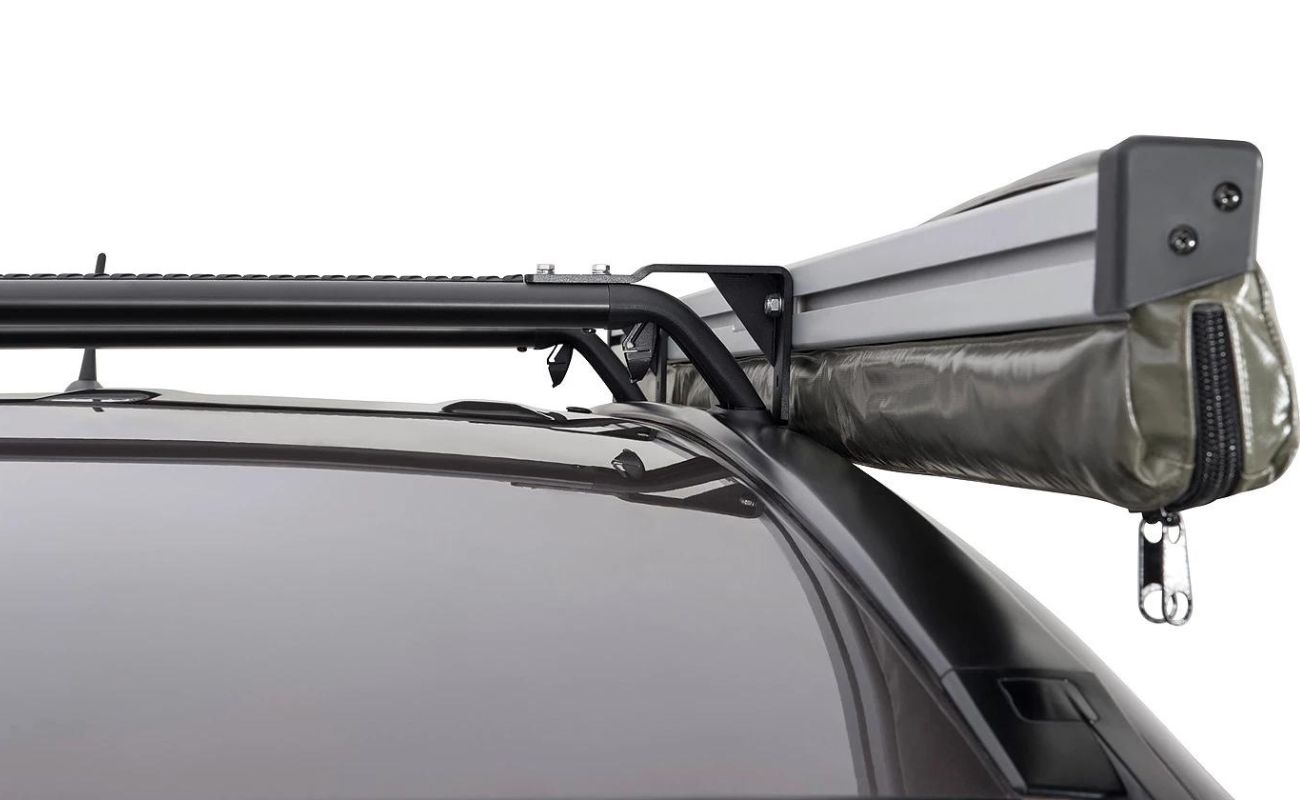
Attaching the Awning to the Roof Rack
With the roof rack meticulously prepared, it’s time to proceed with the pivotal step of attaching the awning to the roof rack. This process demands precision, attention to detail, and adherence to the manufacturer’s instructions to ensure a secure and stable mounting. Here’s a comprehensive guide to attaching the awning to the roof rack:
Positioning the Awning:
Carefully lift the awning and position it adjacent to the mounted brackets on the roof rack. Ensure that the awning aligns with the brackets and that the mounting points correspond accurately to facilitate a seamless attachment process. Enlist the assistance of a second person if needed to position the awning securely.
Aligning and Securing the Awning:
With the awning properly positioned, align the mounting holes on the awning with the corresponding brackets on the roof rack. Use the provided hardware, such as bolts and nuts, to secure the awning to the brackets. Exercise caution and precision during this step to avoid overtightening or misalignment, ensuring a balanced and secure attachment.
Tightening and Leveling:
Utilize an adjustable wrench or the appropriate tools to tighten the fasteners, securing the awning to the roof rack. Ensure that the awning is level and uniformly positioned, making any necessary adjustments to achieve optimal alignment and stability. This step is crucial for guaranteeing a secure and balanced attachment that minimizes the risk of shifting or instability during use.
Read more: How To Mount A Towel Rack On A Hollow Door
Verifying Stability and Fit:
Once the awning is securely attached, conduct a thorough assessment of its stability and fit on the roof rack. Gently apply pressure to various points of the awning to gauge its resistance and stability. Verify that the awning is firmly affixed to the roof rack and that there are no signs of movement or instability.
Testing Deployment and Retraction:
Before finalizing the attachment, test the awning’s deployment and retraction mechanisms to ensure smooth operation. Verify that the awning extends and retracts without obstruction, and that the locking mechanisms function as intended. This step allows you to confirm that the awning is fully operational and ready for use.
By meticulously following these steps and exercising diligence during the attachment process, you can ensure that the awning is securely and seamlessly affixed to the roof rack, poised to accompany you on countless outdoor adventures. With the awning now firmly integrated into your setup, you’re one step closer to experiencing the unparalleled comfort, convenience, and shelter it provides during your outdoor pursuits.
Testing and Adjusting the Mounted Awning
With the awning securely attached to the roof rack, the next crucial phase involves thorough testing and meticulous adjustments to guarantee optimal functionality and performance. This comprehensive process ensures that the mounted awning is primed for seamless deployment, reliable operation, and enduring stability. Here’s a detailed guide to testing and adjusting the mounted awning:
Deployment Test:
Begin by initiating a deployment test to assess the awning’s extension mechanism. Unfurl the awning fully, observing its smoothness of operation, stability, and the integrity of its support structure. Verify that the telescopic legs, if applicable, are securely engaged and provide adequate support.
Read more: How To Mount Ceramic Towel Rack In Drywall
Retraction Test:
Following the deployment test, retract the awning fully to evaluate the efficiency and ease of the retraction mechanism. Confirm that the awning retracts smoothly without encountering any obstructions or irregularities. Pay close attention to the locking mechanisms to ensure that the awning remains securely stowed when not in use.
Stability Assessment:
Apply gentle pressure to various points of the awning to assess its stability and resistance to movement. Verify that the awning remains steadfast and secure, with no indication of shifting or instability. This step is crucial for ensuring that the awning can withstand outdoor conditions and provide reliable shelter when deployed.
Alignment and Leveling:
Evaluate the alignment and leveling of the awning to ensure that it is uniformly positioned and balanced. Make any necessary adjustments to the mounting brackets or fasteners to achieve optimal alignment, preventing any potential strain on the awning’s structure or the roof rack.
Functionality Check:
Test any additional features or accessories, such as sidewalls, extension panels, or integrated lighting, to verify their functionality and integration with the awning. Ensure that these elements operate smoothly and complement the overall functionality of the awning, enhancing its versatility and adaptability to diverse outdoor settings.
Read also: 13 Best Universal Roof Rack For 2025
Weather Resistance Test:
If feasible, conduct a simulated weather resistance test by exposing the awning to light water spray or gentle wind to gauge its resilience and protective capabilities. This step allows you to assess the awning’s ability to withstand mild environmental elements and provides valuable insights into its overall weatherproofing.
By meticulously conducting these tests and adjustments, you can fine-tune the mounted awning to deliver optimal performance, stability, and versatility. This thorough process ensures that the awning is fully primed to accompany you on your outdoor excursions, providing reliable shelter, comfort, and convenience while seamlessly integrating with your roof rack setup.
Conclusion
Congratulations! By delving into the intricacies of mounting an awning to your roof rack, you’ve embarked on a transformative journey toward enhancing your outdoor experiences. The process of seamlessly integrating this invaluable accessory into your setup is a testament to your commitment to comfort, convenience, and preparedness during your adventures. As you conclude this enlightening endeavor, it’s essential to reflect on the invaluable insights gained and the remarkable benefits that await you.
Through meticulous preparation, precise attachment, and thorough testing, you’ve empowered yourself with the knowledge and proficiency to seamlessly incorporate an awning into your outdoor escapades. The shelter it provides from the elements, the versatile living space it creates, and the convenience it adds to your travels are poised to elevate every aspect of your outdoor lifestyle.
As you envision your future excursions, picture the seamless deployment of your awning, transforming any outdoor setting into a welcoming oasis of comfort and protection. Whether it’s a spontaneous roadside stop, a serene lakeside retreat, or a rugged off-road expedition, your mounted awning stands ready to enrich your experiences and provide a reliable sanctuary amidst nature’s diverse elements.
Furthermore, the skills and knowledge you’ve acquired through this process extend beyond the installation itself. Your newfound proficiency in mounting an awning to your roof rack signifies a deeper connection to your outdoor pursuits, a commitment to preparedness, and a dedication to optimizing every facet of your adventures.
As you embark on your next outdoor endeavor, whether it’s a weekend camping excursion, a cross-country road trip, or an off-grid exploration, your mounted awning will stand as a testament to your dedication to comfort, adaptability, and the relentless pursuit of memorable experiences.
So, as you set your sights on the horizon, envision the countless possibilities that await with your expertly mounted awning by your side. Embrace the comfort, convenience, and shelter it provides, and relish in the seamless integration of this invaluable outdoor accessory into your travels. Your outdoor adventures will undoubtedly be transformed, enriched, and elevated, all thanks to the art of mounting an awning to your roof rack.
Frequently Asked Questions about How To Mount An Awning To A Roof Rack
Was this page helpful?
At Storables.com, we guarantee accurate and reliable information. Our content, validated by Expert Board Contributors, is crafted following stringent Editorial Policies. We're committed to providing you with well-researched, expert-backed insights for all your informational needs.


0 thoughts on “How To Mount An Awning To A Roof Rack”