Home>Storage & Organization>Living Room Organization>How To Build A Wall-Mounted Coat Rack
Living Room Organization
How To Build A Wall-Mounted Coat Rack
Modified: February 18, 2024
Discover how to declutter your living room with our step-by-step guide on building a stylish wall-mounted coat rack. Maximize space and organization effortlessly.
(Many of the links in this article redirect to a specific reviewed product. Your purchase of these products through affiliate links helps to generate commission for Storables.com, at no extra cost. Learn more)
Introduction
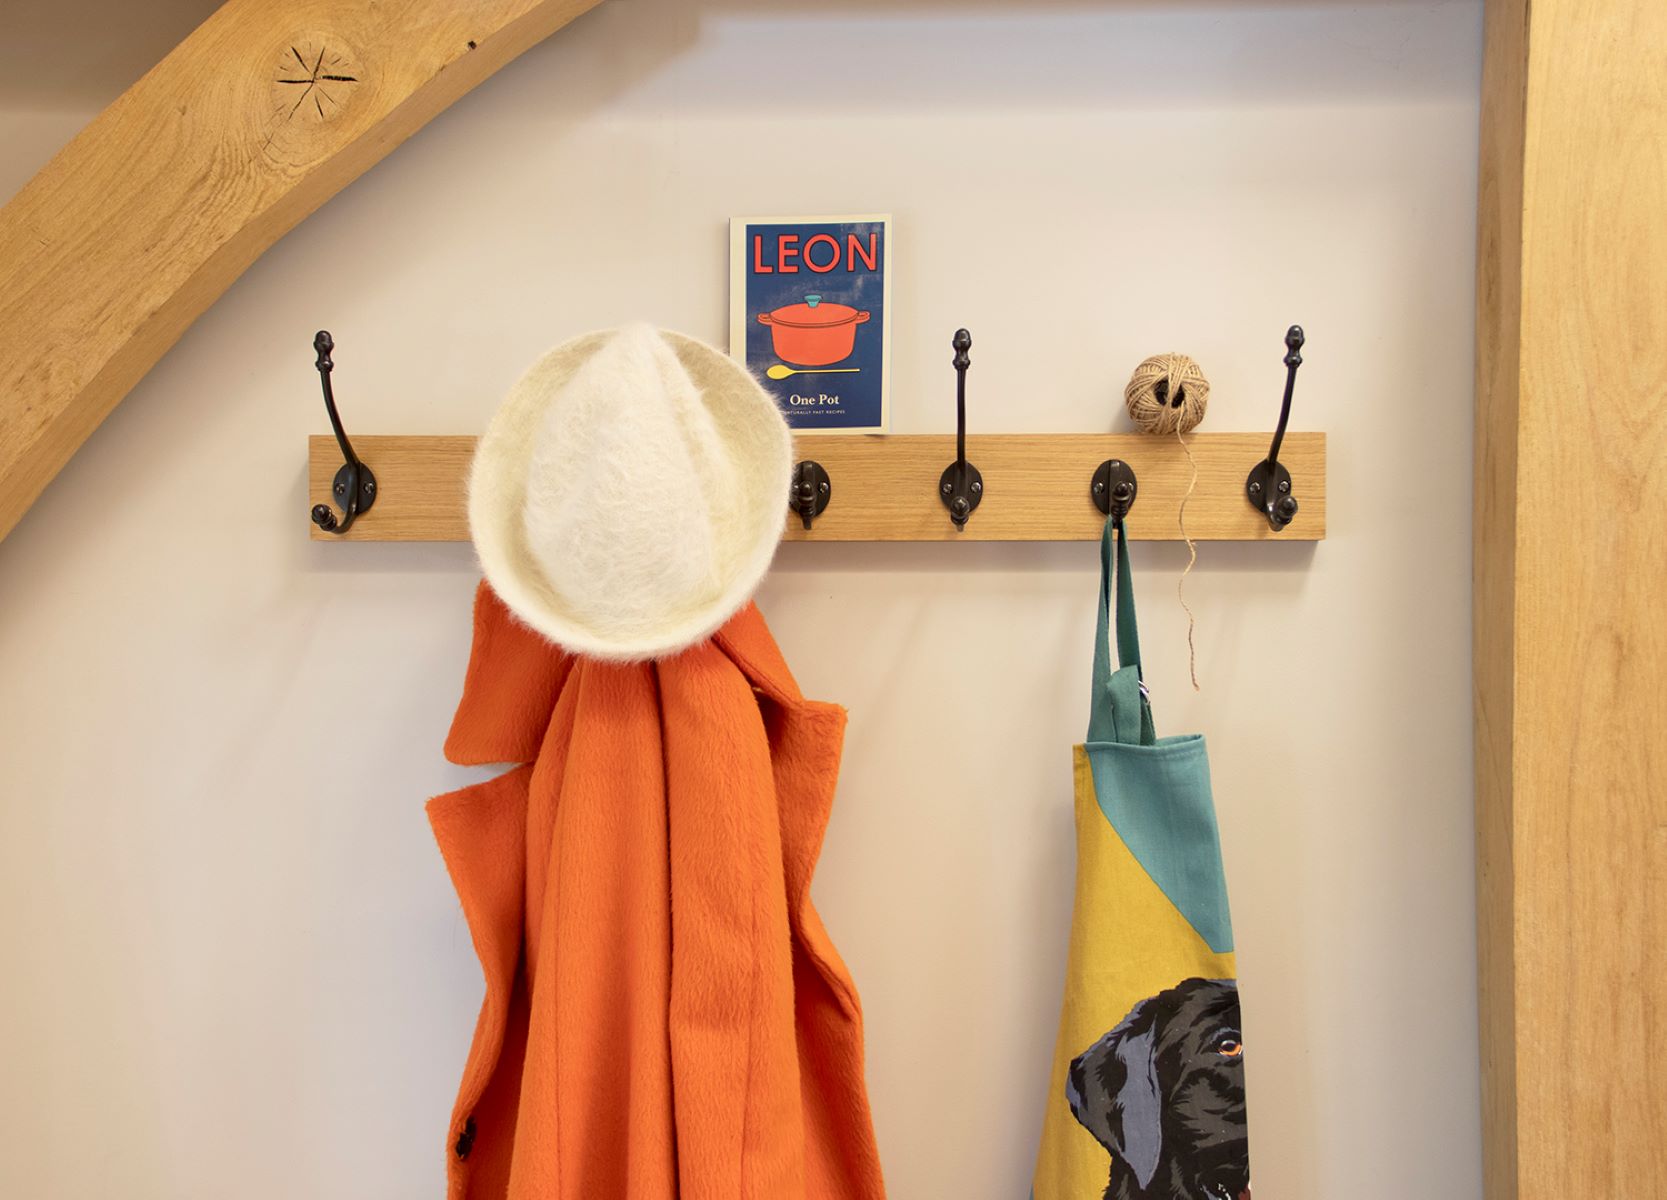
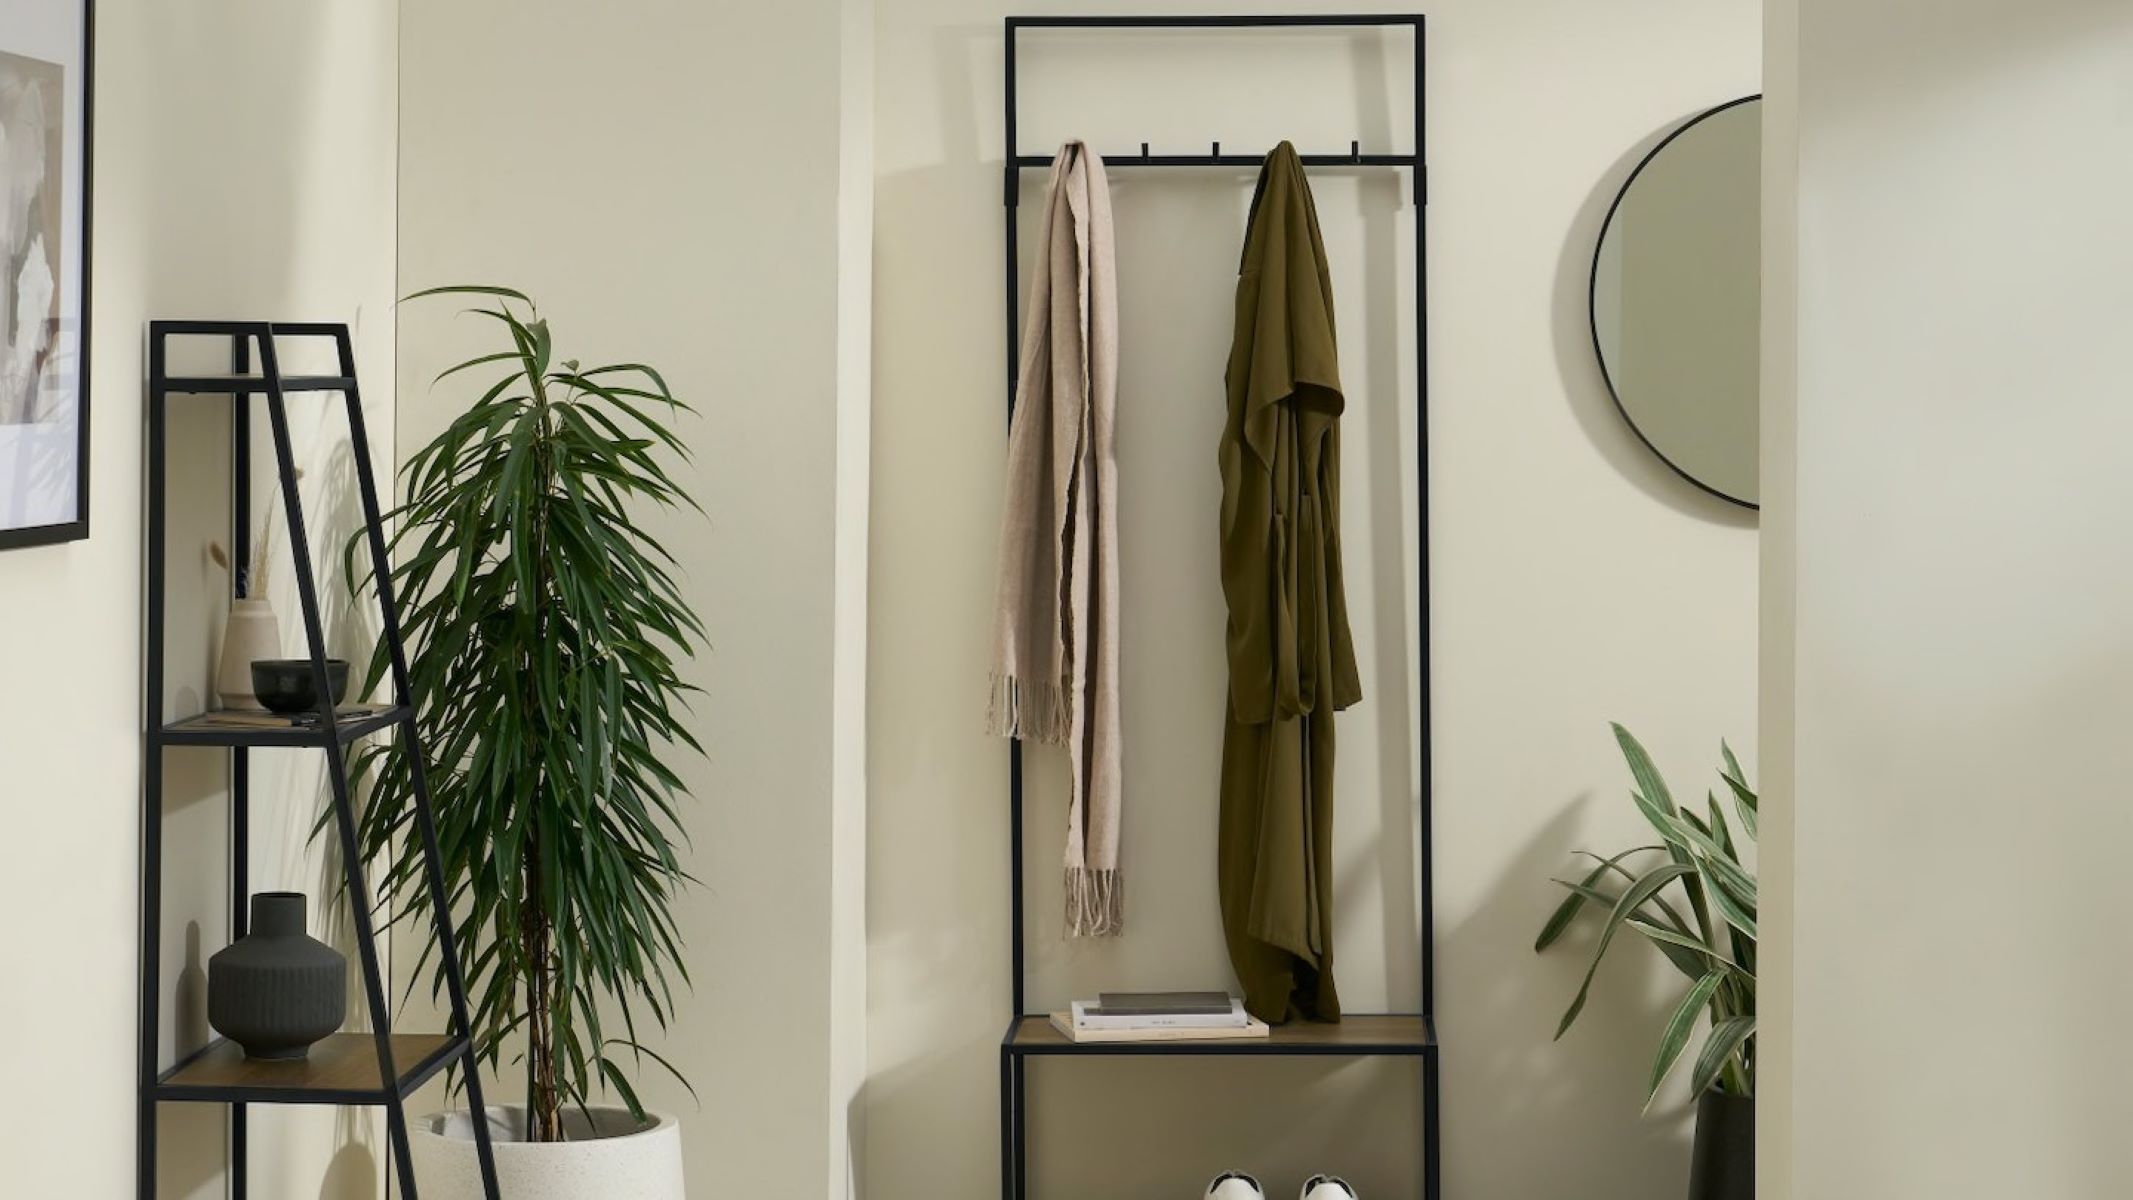
A wall-mounted coat rack is a practical and stylish addition to any living room, providing a designated space to hang coats, hats, scarves, and other accessories. Not only does it help keep the living room tidy and organized, but it also adds a touch of charm and functionality to the space. Building a wall-mounted coat rack is a rewarding DIY project that allows you to customize the design and size to suit your specific needs and aesthetic preferences.
Whether you're a seasoned DIY enthusiast or a novice looking to embark on your first home improvement project, constructing a wall-mounted coat rack is a manageable and gratifying endeavor. By following a few simple steps and using basic tools and materials, you can create a practical storage solution that enhances the functionality of your living room while showcasing your craftsmanship.
In this comprehensive guide, we will walk you through the process of building a wall-mounted coat rack, from gathering the necessary materials and tools to the final installation. By the end of this tutorial, you will have a beautifully crafted coat rack that not only serves a practical purpose but also adds a personal touch to your living room decor.
So, roll up your sleeves, gather your tools, and let's dive into the rewarding journey of creating a custom wall-mounted coat rack that will elevate the organization and aesthetic appeal of your living room.
Key Takeaways:
- Building a wall-mounted coat rack is a fun and rewarding DIY project that adds charm and functionality to your living room. With basic tools and materials, you can create a personalized storage solution that showcases your craftsmanship.
- The construction process involves precise measurements, drilling, attaching hooks, and mounting the rack to the wall. By adding final touches like protective finishes and personal embellishments, you can create a stylish and practical addition to your living space.
Read more: How To Build A Coat Rack Bench
Materials Needed
To embark on the exciting project of building a wall-mounted coat rack, you will need a selection of materials that are readily available at hardware stores and online retailers. Gathering the following items will set the stage for a successful and fulfilling DIY endeavor:
-
Wooden Plank: Select a sturdy and visually appealing wooden plank that will serve as the foundation of your coat rack. The dimensions of the plank will depend on your desired rack size, but a common recommendation is a 1-inch thick plank with a width of 4 to 6 inches, providing ample space for hanging coats and accessories.
-
Coat Hooks: Choose a set of high-quality coat hooks that align with your preferred style and complement the aesthetics of your living room. Whether you opt for classic metal hooks, rustic wooden hooks, or modern minimalist designs, ensure that they are durable and capable of supporting the weight of heavy coats.
-
Screws: Acquire screws that are suitable for attaching the coat hooks securely to the wooden plank. The length of the screws should accommodate the thickness of the plank while providing a firm and stable connection.
-
Wall Anchors and Screws: Depending on the type of wall you will be mounting the coat rack on, it may be necessary to use wall anchors to ensure a secure installation. Select wall anchors and screws that are appropriate for your wall type, whether it's drywall, plaster, or a stud.
-
Sandpaper: Prepare the wooden plank for a smooth and polished finish by having sandpaper on hand. This will allow you to sand down any rough edges or imperfections, ensuring a professional and refined look for your coat rack.
-
Wood Stain or Paint (Optional): If you desire a personalized touch, consider acquiring wood stain or paint to add color and character to the wooden plank. This optional step allows you to customize the coat rack to complement your living room decor or express your unique style.
-
Protective Finish (Optional): To safeguard the wooden plank from wear and tear, consider obtaining a protective finish such as polyurethane or varnish. This will not only enhance the durability of the coat rack but also preserve its aesthetic appeal over time.
By gathering these essential materials, you will be well-equipped to commence the construction of your wall-mounted coat rack, setting the stage for a rewarding and functional addition to your living room.
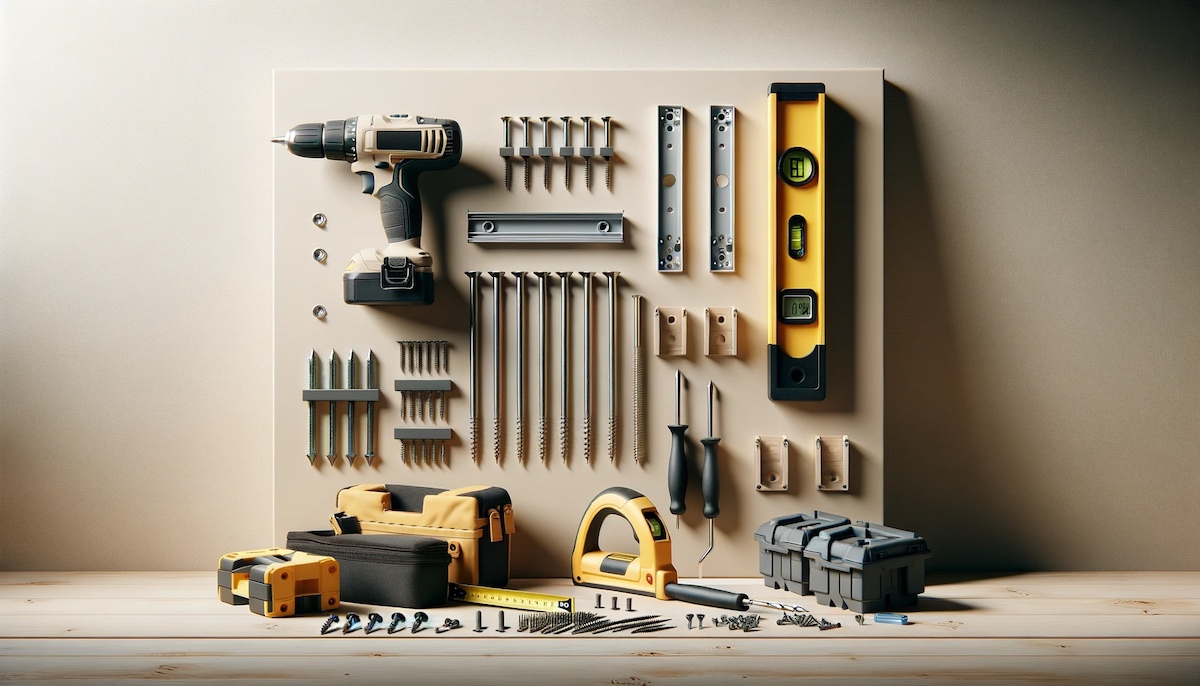
Tools Required
Embarking on the construction of a wall-mounted coat rack requires the use of essential tools to ensure precision, efficiency, and a professional finish. By having the following tools at your disposal, you will be well-prepared to tackle each step of the project with confidence and ease.
Measuring Tape
Accurate measurements are crucial for the successful assembly and installation of a wall-mounted coat rack. A reliable measuring tape will enable you to determine the precise dimensions for the wooden plank and the strategic placement of the coat hooks. This tool serves as the foundation for a well-proportioned and visually appealing coat rack.
Pencil or Marker
Marking the wooden plank for hole placements and hook positioning is a fundamental aspect of the construction process. A pencil or marker allows you to make clear and easily visible markings, ensuring that the drill holes and coat hooks are aligned and evenly spaced. This simple yet indispensable tool facilitates precision and consistency throughout the project.
Read more: How To Build A Coat Rack With A Shelf
Drill and Drill Bits
A power drill equipped with the appropriate drill bits is essential for creating the necessary holes in the wooden plank to accommodate the screws for attaching the coat hooks. The drill provides efficiency and accuracy, allowing you to achieve clean and precise holes without exerting excessive manual effort.
Screwdriver
A reliable screwdriver, whether manual or electric, is indispensable for securing the screws that attach the coat hooks to the wooden plank. This tool ensures a firm and secure connection, contributing to the overall stability and functionality of the coat rack. Additionally, a screwdriver may be needed for mounting the coat rack to the wall, depending on the chosen installation method.
Sanding Block or Sandpaper
Achieving a smooth and refined surface on the wooden plank is made possible with a sanding block or sandpaper. This tool allows you to eliminate rough edges, uneven surfaces, and imperfections, resulting in a polished and professional appearance for your coat rack. By meticulously sanding the wooden plank, you can enhance its visual appeal and tactile quality.
Level
Ensuring that the coat rack is mounted perfectly straight and level on the wall is essential for both aesthetic and functional reasons. A level enables you to confirm that the rack is aligned correctly, preventing it from appearing crooked or uneven once installed. This tool is instrumental in achieving a visually pleasing and structurally sound final result.
By having these essential tools at your disposal, you will be well-equipped to undertake the construction of a wall-mounted coat rack with confidence and precision. Each tool plays a crucial role in facilitating the various stages of the project, ultimately contributing to the creation of a functional and visually appealing addition to your living room.
Read more: How To Mount A Wine Rack To The Wall
Step 1: Measure and Mark
The initial step in constructing a wall-mounted coat rack involves precise measurements and strategic markings to ensure the proper placement of the coat hooks on the wooden plank. This pivotal stage sets the foundation for a well-proportioned and visually appealing coat rack that seamlessly integrates into your living room decor.
Begin by selecting a suitable location for the coat rack in your living room. Consider factors such as convenience, available wall space, and aesthetic harmony with the surrounding environment. Once the ideal placement is determined, use a measuring tape to carefully assess the dimensions of the chosen area. Take note of the available width and height, as this will guide the size of the wooden plank and the positioning of the coat hooks.
With the measurements in hand, transfer the dimensions to the wooden plank using a pencil or marker. Mark the locations where the coat hooks will be attached, ensuring that they are evenly spaced and aligned for a balanced and visually pleasing arrangement. The precision of these markings is crucial, as it will dictate the uniformity and functionality of the coat rack.
Using the measuring tape and level, confirm that the marked positions are symmetrical and appropriately spaced. This step is essential for achieving a harmonious and balanced appearance once the coat rack is installed. Adjust the markings as needed to guarantee an aesthetically pleasing and structurally sound layout.
Additionally, consider the desired distance between each coat hook to accommodate various sizes of coats, hats, and accessories. By strategically marking these intervals on the wooden plank, you can customize the coat rack to meet your specific organizational needs while maintaining a visually appealing design.
By meticulously measuring and marking the wooden plank, you establish a solid framework for the subsequent steps of drilling holes and attaching the coat hooks. This attention to detail ensures that the coat rack will not only serve its practical purpose but also contribute to the overall aesthetic appeal of your living room. With the measurements and markings in place, you are ready to proceed to the next phase of the construction process, bringing you one step closer to the completion of your custom wall-mounted coat rack.
Step 2: Drill Holes
With the wooden plank marked and the positions for the coat hooks clearly designated, the next crucial step in constructing a wall-mounted coat rack is to drill the necessary holes to accommodate the attachment of the hooks. This phase requires precision and attention to detail to ensure that the holes are aligned, evenly spaced, and of the appropriate size to facilitate a secure and seamless installation of the coat hooks.
Begin by selecting the appropriate drill bit size based on the specifications of the screws that will be used to attach the coat hooks. It is essential to choose a drill bit that matches the diameter of the screws, allowing for a snug and secure fit. Additionally, consider the depth of the holes to ensure that the screws will be fully embedded in the wooden plank, contributing to the stability and durability of the coat rack.
Position the drill bit at the first marked location on the wooden plank, aligning it carefully with the designated spot for the coat hook. With a steady hand and controlled pressure, proceed to drill a clean and straight hole at the marked position. It is important to maintain a consistent angle and depth throughout the drilling process to achieve uniformity and precision across all the holes.
Once the first hole is drilled, repeat the process for each marked position on the wooden plank, ensuring that the holes are evenly spaced and aligned according to the initial markings. Exercise patience and attentiveness during this stage, as the accuracy of the drilled holes will directly impact the final appearance and functionality of the coat rack.
After all the holes are drilled, use a sanding block or sandpaper to smooth any rough edges around the drilled holes, ensuring a polished and professional finish. This step contributes to the overall aesthetic appeal of the coat rack while also preventing any potential snags or damage to the coats and accessories that will be hung on the rack.
By meticulously drilling the necessary holes in the wooden plank, you have laid the groundwork for the seamless attachment of the coat hooks, bringing you one step closer to the completion of your custom wall-mounted coat rack. The precision and care invested in this phase will yield a visually appealing and structurally sound coat rack that enhances the organization and charm of your living room.
Step 3: Attach Hooks
With the holes drilled into the wooden plank, the next pivotal step in the construction of a wall-mounted coat rack is the attachment of the coat hooks. This phase requires precision, attention to detail, and a focus on achieving a balanced and visually appealing arrangement of the hooks. By following the steps outlined below, you will seamlessly integrate the hooks into the wooden plank, bringing your custom coat rack one step closer to completion.
Begin by selecting the coat hooks and positioning them at the designated holes on the wooden plank. Ensure that the hooks are aligned with the drilled holes and that they are evenly spaced to create a harmonious and functional layout. By taking the time to arrange the hooks in a visually pleasing manner, you can achieve a balanced and proportional design that enhances the overall aesthetic of the coat rack.
Once the hooks are positioned, secure them to the wooden plank using screws that are appropriate for the size and weight-bearing capacity of the hooks. With a screwdriver, carefully drive the screws through the pre-drilled holes in the hooks, ensuring a firm and stable attachment to the wooden plank. Exercise caution to avoid over-tightening the screws, as this may compromise the integrity of the wooden plank.
As each hook is attached, verify that it is securely fastened and capable of supporting the weight of coats, hats, and accessories. This attention to detail ensures that the coat rack will not only serve its practical purpose but also withstand the demands of daily use, providing a reliable and durable storage solution for your living room.
Throughout the attachment process, periodically step back and assess the visual balance and symmetry of the coat hooks on the wooden plank. Adjust the positioning as needed to achieve a cohesive and visually appealing arrangement that complements the overall design of your living room. By fine-tuning the placement of the hooks, you can create a coat rack that not only organizes your space but also adds a touch of charm and personality to your living room decor.
With the coat hooks securely attached to the wooden plank, you have successfully completed a pivotal phase in the construction of your wall-mounted coat rack. The meticulous attention to detail and the focus on achieving a balanced and visually appealing arrangement have brought you one step closer to the realization of a functional and stylish addition to your living room.
Step 4: Mount to Wall
The process of mounting the wall-mounted coat rack is a crucial step that brings the project to its completion, transforming the meticulously crafted wooden plank with attached coat hooks into a functional and visually appealing fixture in your living room. By following the steps outlined below, you will seamlessly integrate the coat rack into your living space, providing a practical and stylish solution for organizing coats, hats, and accessories.
Begin by selecting the ideal location on the wall for mounting the coat rack. Use a measuring tape to ensure that the chosen spot aligns with the dimensions and layout of the wooden plank, allowing for sufficient clearance and a visually balanced placement. Consider factors such as convenience, accessibility, and aesthetic harmony with the surrounding decor to determine the optimal position for the coat rack.
Once the mounting location is determined, use a pencil or marker to make clear and level markings on the wall that correspond to the pre-drilled holes in the wooden plank. This step is essential for ensuring precise alignment and a seamless installation process. Use a level to confirm that the markings are straight and evenly spaced, contributing to the overall symmetry and visual appeal of the mounted coat rack.
Depending on the type of wall surface, such as drywall, plaster, or a stud, it may be necessary to use appropriate wall anchors to ensure a secure and stable installation. Select anchors and screws that are suitable for the specific wall type, providing the necessary support for the weight of the coat rack and the items it will hold. Carefully follow the manufacturer's guidelines for installing the wall anchors, ensuring that they are firmly embedded in the wall and capable of withstanding the load of the coat rack.
With the wall anchors in place, align the pre-drilled holes in the wooden plank with the marked positions on the wall. Using a screwdriver, carefully drive the screws through the wooden plank and into the wall anchors, securing the coat rack firmly to the wall. Exercise caution to avoid over-tightening the screws, as this may compromise the integrity of the wall anchors or the wooden plank.
Once the coat rack is securely mounted to the wall, verify its stability and alignment, ensuring that it is level and capable of supporting the intended weight of coats and accessories. Periodically check the mounted rack from different angles to confirm that it is visually balanced and seamlessly integrated into your living room decor.
By meticulously mounting the coat rack to the wall, you have brought the project to its culmination, creating a functional and visually appealing addition to your living room. The attention to detail and precision invested in this phase have resulted in a custom coat rack that not only enhances the organization of your space but also adds a touch of charm and personality to your living room decor.
Read more: How To Decorate A Coat Rack
Step 5: Final Touches
With the wall-mounted coat rack securely installed in your living room, the final touches serve as the finishing flourish, elevating the overall aesthetic and functionality of the project. This phase allows you to refine the coat rack, ensuring that it not only serves its practical purpose but also harmonizes with the surrounding decor, adding a personalized and polished touch to your living space.
One of the key final touches involves a thorough inspection of the coat rack to ensure that all components are securely fastened and aligned. Take a moment to verify that the coat hooks are firmly attached to the wooden plank, capable of accommodating the weight of coats and accessories without any signs of instability. Additionally, confirm that the mounted rack is level and visually balanced, contributing to a seamless integration with your living room decor.
If you have opted for a natural wood finish, consider applying a protective finish such as polyurethane or varnish to safeguard the wooden plank from wear and tear. This protective layer not only enhances the durability of the coat rack but also enriches the natural beauty of the wood, adding a lustrous sheen that accentuates the grain and texture.
For those who prefer a touch of color, the application of wood stain or paint presents an opportunity to customize the coat rack to complement your living room decor. Whether you choose a rich stain to accentuate the natural warmth of the wood or a vibrant paint color to make a bold statement, this final touch allows you to infuse your personal style into the coat rack, transforming it into a captivating focal point in your living room.
As a thoughtful final touch, consider adding decorative elements to the coat rack that reflect your personal taste and enhance its visual appeal. Whether it's a small potted plant placed atop the rack, a string of fairy lights draped along its length, or a charming wall decal positioned above, these embellishments impart a touch of personality and warmth to the coat rack, elevating it from a functional fixture to a captivating design feature in your living room.
By attending to these final touches, you bring the wall-mounted coat rack to its full potential, creating a bespoke and inviting addition to your living room. The meticulous attention to detail and the infusion of personal style culminate in a coat rack that not only organizes your space but also reflects your unique aesthetic sensibilities, contributing to a warm and welcoming ambiance in your home.
When building a wall-mounted coat rack, make sure to use sturdy materials and secure it to the wall studs for maximum support. This will ensure that the coat rack can hold the weight of multiple coats without falling.
Conclusion
In conclusion, the construction of a wall-mounted coat rack is a gratifying and rewarding DIY project that not only enhances the organization of your living room but also allows you to showcase your creativity and craftsmanship. By following the step-by-step process outlined in this guide, you have embarked on a journey that culminates in the creation of a functional and visually appealing addition to your living space.
Throughout the construction process, meticulous attention to detail and precision have been instrumental in ensuring the seamless integration of the coat rack into your living room decor. From the initial measurements and markings on the wooden plank to the final touches that infuse the coat rack with personal style, each step has contributed to the realization of a custom storage solution that reflects your unique preferences and organizational needs.
The completion of the wall-mounted coat rack signifies more than just the assembly of a practical fixture. It represents the transformation of raw materials into a personalized and functional element that adds character and charm to your living room. The careful selection of materials, the use of essential tools, and the infusion of final touches have collectively resulted in a coat rack that not only serves its intended purpose but also elevates the visual appeal of your living space.
As you admire the finished coat rack mounted on your living room wall, take pride in the craftsmanship and dedication that have brought this project to fruition. The coat rack stands as a testament to your ability to transform a vision into a tangible and impactful creation, enhancing the functionality and aesthetic allure of your home.
Moving forward, the wall-mounted coat rack will serve as a practical and stylish solution for organizing coats, hats, and accessories, contributing to a tidy and inviting living room environment. Its presence will not only streamline daily routines but also serve as a focal point that reflects your individual style and attention to detail.
In essence, the construction of a wall-mounted coat rack transcends the realm of DIY projects, embodying the fusion of practicality and creativity. It represents a personalized and functional expression of your dedication to enhancing your living space, infusing it with warmth, organization, and a touch of your unique personality.
Frequently Asked Questions about How To Build A Wall-Mounted Coat Rack
Was this page helpful?
At Storables.com, we guarantee accurate and reliable information. Our content, validated by Expert Board Contributors, is crafted following stringent Editorial Policies. We're committed to providing you with well-researched, expert-backed insights for all your informational needs.


0 thoughts on “How To Build A Wall-Mounted Coat Rack”