Home>Gardening & Outdoor>Outdoor Structures>How To Repair A Canvas Awning
Outdoor Structures
How To Repair A Canvas Awning
Modified: March 2, 2024
Learn how to repair your outdoor canvas awning with our step-by-step guide. Keep your outdoor structures in top condition with our expert tips.
(Many of the links in this article redirect to a specific reviewed product. Your purchase of these products through affiliate links helps to generate commission for Storables.com, at no extra cost. Learn more)
Introduction
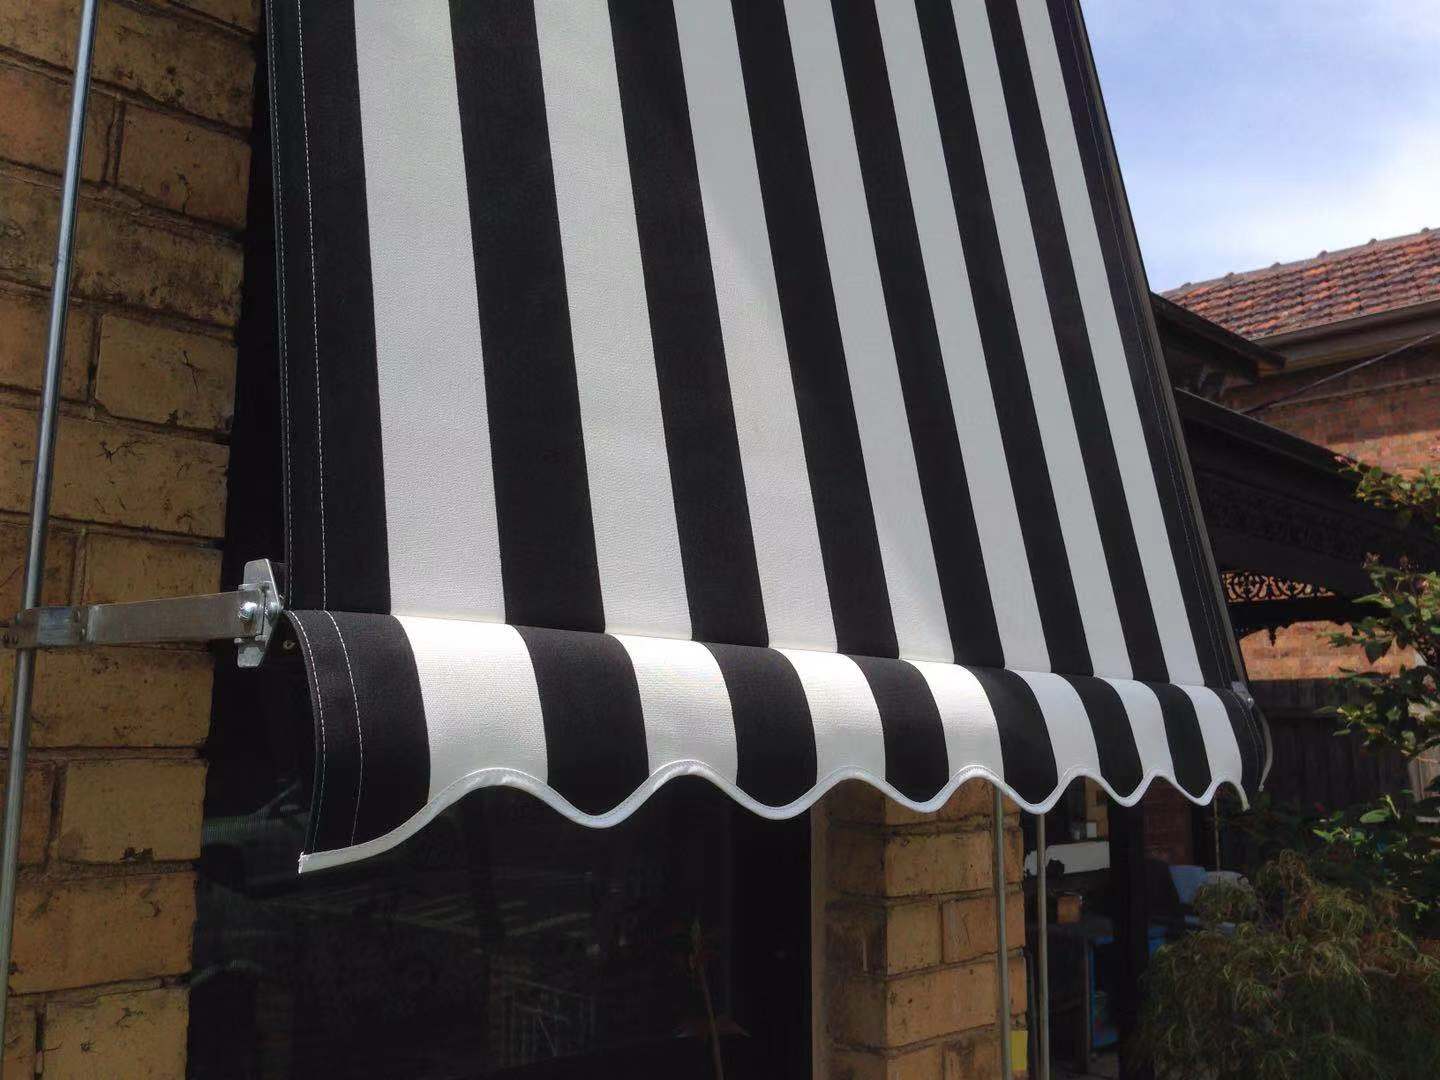
Repairing a canvas awning is a valuable skill that can extend the lifespan of this outdoor structure, saving you money and preserving its functionality and aesthetic appeal. Over time, canvas awnings can sustain damage from various sources, including harsh weather conditions, accidental tears, or general wear and tear. However, with the right knowledge and tools, you can effectively restore your canvas awning to its former glory.
Whether your canvas awning is part of a residential or commercial property, maintaining its integrity is essential for both practical and visual reasons. A well-maintained canvas awning not only provides shade and protection from the elements but also contributes to the overall curb appeal of your property. By learning how to repair a canvas awning, you can take proactive steps to ensure that it remains a functional and attractive feature for years to come.
In this comprehensive guide, we will walk you through the step-by-step process of assessing the damage, gathering the necessary tools and materials, cleaning the canvas, and executing various repair techniques. From addressing small holes and tears to patching larger areas of damage and replacing hardware and fasteners, you will gain the expertise needed to tackle a range of issues that may arise with your canvas awning. Additionally, we will explore the crucial step of waterproofing the canvas to enhance its durability and weather resistance.
By following the instructions provided in this guide, you will be equipped with the knowledge and skills to effectively repair your canvas awning, ensuring that it continues to serve its purpose and enhance the visual appeal of your outdoor space. Let's embark on this journey to restore and revitalize your canvas awning, preserving its functionality and beauty for the long term.
Key Takeaways:
- Repairing a canvas awning involves assessing damage, gathering tools, cleaning the canvas, and executing repair techniques. This proactive approach ensures the awning remains functional and visually appealing for years to come.
- By waterproofing the canvas and replacing worn hardware, you can prolong the awning’s durability and resilience against the elements. This proactive maintenance ensures the awning continues to provide shade and protection.
Read more: How To Repair Canvas Awning
Assessing the Damage
Before embarking on the repair process, it is crucial to thoroughly assess the extent of damage to your canvas awning. This initial step sets the foundation for a targeted and effective repair strategy, ensuring that all issues are identified and addressed appropriately.
Start by visually inspecting the entire surface of the canvas awning. Look for signs of wear and tear, such as fraying edges, discoloration, or areas of significant damage. Pay close attention to seams, corners, and areas where the canvas is most exposed to the elements, as these are common trouble spots.
Next, carefully examine the awning for any small holes, punctures, or tears. These may be the result of sharp objects, animal damage, or general deterioration over time. Even minor damage can worsen if left unattended, so it is essential to identify and address these issues promptly.
In addition to visible damage, assess the overall structural integrity of the awning. Check for any loose or damaged hardware, such as fasteners, grommets, or support brackets. These components play a critical role in the stability and functionality of the awning and may require repair or replacement.
Consider the impact of environmental factors on the canvas material. Exposure to sunlight, moisture, and fluctuating temperatures can lead to fading, mold growth, or degradation of the fabric. Take note of any areas where the canvas shows signs of weather-related damage.
Furthermore, evaluate the existing waterproofing and protective coatings on the canvas. Over time, these coatings may wear off, compromising the awning's ability to repel water and withstand the elements. Look for areas where water absorption or leakage is evident, as this indicates a need for reapplication of waterproofing treatments.
By conducting a thorough assessment of the damage, you will gain a comprehensive understanding of the issues affecting your canvas awning. This knowledge will guide your subsequent actions, allowing you to prioritize repairs based on the severity of the damage and develop a tailored plan to restore the awning to optimal condition.
Gathering the Necessary Tools and Materials
Before commencing the repair process for your canvas awning, it is essential to gather the appropriate tools and materials to ensure a smooth and efficient workflow. Having the right supplies at hand will enable you to address various types of damage and execute the necessary repairs with precision and effectiveness.
Tools:
- Scissors or Fabric Shears: These will be used to trim frayed edges and cut patching materials to size.
- Sewing Awl or Needle and Thread: Essential for stitching small tears and reinforcing seams.
- Patching Material: Select a durable and weather-resistant fabric that closely matches the color and texture of your canvas awning.
- Adhesive Canvas Patch (Optional): A convenient alternative for quick and temporary repairs, especially for small punctures and tears.
- Canvas Repair Tape: Ideal for sealing seams and small punctures, providing a temporary fix until more extensive repairs can be made.
- Waterproofing Spray or Solution: To restore the water-repellent properties of the canvas and protect it from moisture and mildew.
Materials:
- Cleaning Solution: Choose a mild detergent or specialized canvas cleaner to remove dirt, stains, and mildew from the awning.
- Soft Bristle Brush or Sponge: For gentle scrubbing during the cleaning process, ensuring thorough removal of debris and stains.
- Rubbing Alcohol: Useful for cleaning and preparing the surface before applying adhesive patches or tape.
- Replacement Hardware: Inspect the awning for any damaged grommets, fasteners, or support components that may need to be replaced.
- Protective Gloves: To protect your hands during cleaning and repair tasks, especially when working with cleaning solutions and adhesives.
- Ladder or Step Stool: Depending on the height of your awning, a stable platform will be necessary for safe and convenient access during the repair process.
By assembling these tools and materials, you will be well-equipped to address a wide range of issues that may affect your canvas awning. This proactive approach ensures that you can proceed with the repair process efficiently, minimizing interruptions and achieving optimal results. With the necessary supplies on hand, you are ready to embark on the journey of restoring and revitalizing your canvas awning, preserving its functionality and visual appeal for years to come.
Read more: How To Clean A Canvas Awning
Cleaning the Canvas
Cleaning the canvas of your awning is a crucial step in the repair process, as it not only enhances the overall appearance but also prepares the surface for subsequent repair and maintenance tasks. Over time, outdoor elements such as dust, dirt, pollen, bird droppings, and environmental pollutants can accumulate on the canvas, leading to discoloration, stains, and potential degradation of the fabric. Additionally, exposure to moisture can create an environment conducive to the growth of mildew and mold, further compromising the aesthetic and structural integrity of the awning.
To begin the cleaning process, prepare a gentle yet effective cleaning solution. A mild detergent or specialized canvas cleaner diluted in water is suitable for this purpose. Avoid using harsh chemicals or abrasive cleaners, as they can damage the fabric and its protective coatings. Using a soft bristle brush or sponge, gently apply the cleaning solution to the entire surface of the canvas, working in small sections to ensure thorough coverage.
Focus on areas with visible stains, discoloration, or mildew growth, applying slightly more pressure to lift and remove stubborn debris. Take care not to scrub too vigorously, as this can damage the fabric or alter its texture. For particularly stubborn stains, consider using a diluted solution of rubbing alcohol, applied with a soft cloth to target specific areas.
After applying the cleaning solution, allow it to penetrate the fabric for a few minutes to loosen dirt and grime. Then, using clean water and a hose or bucket, rinse the entire surface of the awning thoroughly. Ensure that all traces of the cleaning solution are completely removed, as any residue left behind can affect the appearance and integrity of the canvas.
Once the canvas is rinsed, allow it to air dry completely before proceeding with any repairs or maintenance tasks. Avoid using artificial heat sources to expedite the drying process, as excessive heat can cause the fabric to shrink or become distorted. Additionally, direct sunlight can lead to premature drying and potential damage to the fabric, so it is advisable to choose a shaded or well-ventilated area for drying the awning.
By thoroughly cleaning the canvas of your awning, you not only improve its visual appeal but also create a clean and receptive surface for subsequent repair and maintenance activities. This proactive approach sets the stage for effective repairs and ensures that the canvas remains in optimal condition for years to come.
Repairing Small Holes and Tears
Repairing small holes and tears in the canvas of your awning is a critical step in restoring its functionality and visual appeal. Even minor damage can compromise the integrity of the fabric and lead to further deterioration if left unaddressed. By promptly repairing small holes and tears, you can prevent the damage from spreading and ensure that your awning remains resilient against the elements.
To begin the repair process, start by trimming any frayed edges around the damaged area using scissors or fabric shears. This helps create a clean and manageable surface for the subsequent repair steps. Next, assess the size and nature of the damage to determine the most suitable repair method.
For small punctures and tears, adhesive canvas patches offer a convenient and effective solution. These patches are designed to adhere securely to the canvas, providing a quick and reliable fix for minor damage. Ensure that the patch is slightly larger than the damaged area, allowing for adequate coverage and adhesion. Clean the surrounding area with rubbing alcohol to remove any debris or residue that may hinder the patch's adhesion.
Carefully apply the adhesive patch over the damaged area, pressing firmly to ensure a strong bond. Smooth out any air bubbles or wrinkles to create a seamless and secure repair. Once the patch is in place, allow sufficient time for it to bond with the canvas, following the manufacturer's recommended curing period.
For small holes and tears that require stitching, a sewing awl or needle and thread can be used to reinforce the damaged area. Select a durable and weather-resistant thread that matches the color of the canvas to ensure a discreet and effective repair. Begin by stitching along the edges of the tear, using a strong and consistent technique to create a secure seam. Knot the thread at the end to prevent unraveling and trim any excess for a neat finish.
After completing the repair, inspect the patched or stitched area to ensure that the damage has been effectively addressed. Test the integrity of the repair by gently tugging on the surrounding fabric to check for secure adhesion or stitching. Additionally, consider applying a waterproofing spray or solution to the repaired area to enhance its resistance to moisture and prolong the longevity of the repair.
By diligently repairing small holes and tears in the canvas of your awning, you can safeguard its structural integrity and maintain its visual appeal. This proactive approach ensures that your awning remains a durable and attractive feature in your outdoor space, ready to withstand the elements and provide reliable protection for years to come.
Patching Larger Areas of Damage
When faced with larger areas of damage on the canvas of your awning, a strategic and thorough approach to patching is essential to restore the fabric's integrity and visual appeal. Whether the damage is the result of extensive tearing, abrasion, or weather-related wear, addressing larger areas of damage requires careful consideration and precise execution to achieve a seamless and durable repair.
To begin the process of patching larger areas of damage, start by assessing the extent and nature of the damage. Identify the boundaries of the affected area and evaluate the surrounding fabric for any signs of weakness or stress. This comprehensive assessment will guide the selection of appropriate patching materials and techniques to effectively restore the damaged section.
When selecting a patching material for larger areas of damage, opt for a durable and weather-resistant fabric that closely matches the color and texture of the existing canvas. This ensures a cohesive and visually appealing repair that seamlessly integrates with the original awning. Cut the patching material to size, allowing for a slight overlap beyond the damaged area to ensure comprehensive coverage and secure adhesion.
Before applying the patch, thoroughly clean the damaged area and its immediate surroundings to remove any dirt, debris, or residual cleaning agents. This preparatory step is crucial for promoting strong adhesion and ensuring a clean and receptive surface for the patching material.
Once the surface is clean and dry, carefully position the patch over the damaged area, ensuring that it aligns seamlessly with the surrounding fabric. Secure the patch in place using a suitable adhesive designed for outdoor fabric repairs. Apply the adhesive evenly and liberally to the back of the patch and the corresponding area of the canvas, ensuring complete coverage and a strong bond.
After affixing the patch, apply gentle pressure to ensure uniform adhesion and the absence of air pockets or wrinkles. Allow the adhesive to cure according to the manufacturer's instructions, ensuring that the patch forms a secure and integrated bond with the canvas.
Once the patch is firmly in place, inspect the repaired area to confirm the effectiveness of the patching process. Test the adhesion and integrity of the patch by gently tugging on the surrounding fabric, ensuring that the repair is secure and seamless. Additionally, consider applying a waterproofing spray or solution to the patched area to enhance its resistance to moisture and further fortify the repair against the elements.
By meticulously patching larger areas of damage on the canvas of your awning, you can effectively restore its structural integrity and aesthetic appeal. This proactive approach ensures that your awning remains a resilient and visually pleasing feature in your outdoor space, ready to withstand the rigors of weather and time.
To repair a canvas awning, clean the area with mild soap and water, then patch any holes or tears with a canvas repair kit. Apply a waterproof sealant to protect the awning from future damage.
Replacing Hardware and Fasteners
Ensuring that the hardware and fasteners of your canvas awning are in optimal condition is essential for maintaining its stability, functionality, and overall integrity. Over time, exposure to outdoor elements and regular use can lead to wear, corrosion, or damage to the hardware components, compromising their ability to securely support the awning. By proactively inspecting and replacing worn or damaged hardware, you can enhance the structural reliability of the awning and prolong its service life.
Begin the process by conducting a thorough inspection of the existing hardware, including grommets, support brackets, screws, and any other fasteners securing the awning to its frame or structure. Look for signs of rust, corrosion, bending, or loosening, as these indicate potential issues that require attention. Pay particular attention to areas where the hardware interfaces with the canvas, as these points are susceptible to stress and may exhibit signs of wear.
For hardware that shows visible signs of wear or corrosion, it is advisable to replace these components with new, high-quality counterparts. Select hardware and fasteners specifically designed for outdoor use, constructed from durable and weather-resistant materials such as stainless steel or corrosion-resistant alloys. This ensures that the replacement components can withstand exposure to moisture, sunlight, and fluctuating temperatures without compromising their structural integrity.
When removing and replacing hardware, exercise caution to avoid damaging the surrounding fabric or structure of the awning. Use appropriate tools, such as screwdrivers, pliers, or wrenches, to safely remove the old hardware without causing unnecessary strain or damage. Take note of the specific dimensions and configurations of the hardware to ensure that the replacements are compatible and provide a secure fit.
Carefully install the new hardware, following the manufacturer's guidelines and recommendations for proper fastening and alignment. Ensure that the hardware is tightened securely, providing stable and reliable support for the awning. Pay attention to the distribution of fasteners across the awning, ensuring that the load is evenly distributed to prevent undue stress on specific areas.
After replacing the hardware and fasteners, conduct a comprehensive inspection to confirm the effectiveness of the replacements. Test the stability and integrity of the newly installed components, ensuring that they provide secure anchoring and support for the awning. Additionally, consider applying a protective coating or lubricant to the hardware to further enhance its resistance to corrosion and environmental degradation.
By diligently replacing worn or damaged hardware and fasteners, you can fortify the structural stability of your canvas awning, ensuring that it remains a reliable and enduring feature in your outdoor space. This proactive approach safeguards the functionality and longevity of the awning, allowing it to withstand the challenges of outdoor exposure and continue providing valuable shade and protection for years to come.
Waterproofing the Canvas
Waterproofing the canvas of your awning is a crucial step in preserving its longevity and enhancing its ability to withstand the elements. Over time, exposure to rain, snow, and moisture can compromise the water-repellent properties of the fabric, leading to potential leaks, mold growth, and accelerated wear. By proactively waterproofing the canvas, you can fortify its resistance to water penetration and prolong its overall durability.
To initiate the waterproofing process, ensure that the canvas is thoroughly clean and dry. Any residual dirt, debris, or cleaning agents can hinder the effectiveness of the waterproofing treatment, so it is essential to start with a clean and receptive surface. If necessary, allow the canvas to air dry in a shaded and well-ventilated area to ensure complete moisture evaporation.
Select a high-quality waterproofing spray or solution specifically formulated for outdoor fabrics such as canvas. These products are designed to create a protective barrier that repels water while allowing the fabric to breathe, preventing moisture buildup and mold formation. When applying the waterproofing treatment, follow the manufacturer's instructions regarding application methods, coverage, and drying times.
Using a gentle and even spraying motion, apply the waterproofing solution to the entire surface of the canvas, ensuring comprehensive coverage. Pay particular attention to seams, stitching, and areas prone to water accumulation, as these are common points of vulnerability. Allow the waterproofing treatment to penetrate the fabric and form a protective barrier, effectively enhancing its resistance to moisture and weather-related damage.
After applying the waterproofing solution, allow the canvas to dry completely according to the manufacturer's recommendations. This curing period is essential for the treatment to bond with the fabric and achieve its maximum effectiveness. Avoid exposing the treated canvas to moisture or inclement weather during the drying process to ensure optimal results.
Once the waterproofing treatment has fully cured, conduct a visual inspection of the canvas to confirm the effectiveness of the treatment. Test the water-repellent properties by gently sprinkling water onto the surface of the awning. If the water beads up and rolls off the fabric without being absorbed, the waterproofing treatment has been successful in restoring the fabric's resistance to moisture.
By diligently waterproofing the canvas of your awning, you can bolster its ability to repel water and endure the challenges of outdoor exposure. This proactive measure not only safeguards the fabric against water damage but also contributes to the overall resilience and longevity of your canvas awning, ensuring that it remains a reliable and enduring feature in your outdoor space.
Conclusion
In conclusion, the process of repairing a canvas awning encompasses a series of essential steps that collectively contribute to the restoration and preservation of this outdoor structure. By embarking on this journey to revitalize your canvas awning, you have gained valuable insights into assessing damage, gathering necessary tools and materials, cleaning the canvas, and executing various repair techniques. From addressing small holes and tears to patching larger areas of damage, replacing hardware and fasteners, and waterproofing the canvas, you have acquired the knowledge and skills to ensure the continued functionality and visual appeal of your awning.
The thorough assessment of damage sets the stage for targeted and effective repairs, allowing you to prioritize issues based on severity and develop a tailored plan to restore the awning to optimal condition. By carefully inspecting the entire surface of the canvas awning, identifying small holes, tears, and structural weaknesses, you have laid the groundwork for a comprehensive and proactive approach to repair.
Gathering the necessary tools and materials ensures that you are well-equipped to address a wide range of issues that may affect your canvas awning. This proactive step minimizes interruptions and ensures that you can proceed with the repair process efficiently, achieving optimal results and preserving the functionality and visual appeal of the awning.
Cleaning the canvas is a critical step that not only enhances the overall appearance but also prepares the surface for subsequent repair and maintenance tasks. By diligently removing dirt, stains, and mildew, you have created a clean and receptive canvas, setting the stage for effective repairs and ensuring that the fabric remains in optimal condition for years to come.
Repairing small holes and tears, as well as patching larger areas of damage, is essential for safeguarding the structural integrity and visual appeal of the canvas awning. By promptly addressing damage and reinforcing the fabric, you have taken proactive measures to prevent further deterioration and ensure that your awning remains resilient against the elements.
Replacing worn or damaged hardware and fasteners fortifies the structural stability of the awning, ensuring that it remains a reliable and enduring feature in your outdoor space. This proactive approach safeguards the functionality and longevity of the awning, allowing it to withstand the challenges of outdoor exposure and continue providing valuable shade and protection for years to come.
Waterproofing the canvas is a crucial step in preserving its longevity and enhancing its ability to withstand the elements. By fortifying its resistance to water penetration, you have prolonged its overall durability and ensured that it remains a reliable and enduring feature in your outdoor space.
In essence, the comprehensive repair process outlined in this guide empowers you to take proactive steps in maintaining and revitalizing your canvas awning. By following the instructions provided, you have acquired the knowledge and skills to effectively restore your canvas awning, ensuring that it continues to serve its purpose and enhance the visual appeal of your outdoor space for years to come.
Frequently Asked Questions about How To Repair A Canvas Awning
Was this page helpful?
At Storables.com, we guarantee accurate and reliable information. Our content, validated by Expert Board Contributors, is crafted following stringent Editorial Policies. We're committed to providing you with well-researched, expert-backed insights for all your informational needs.


0 thoughts on “How To Repair A Canvas Awning”