Home>Gardening & Outdoor>Outdoor Structures>How To Paint A Tin Shed
Outdoor Structures
How To Paint A Tin Shed
Modified: August 28, 2024
Learn how to paint a tin shed and protect your outdoor structures with our step-by-step guide. Enhance durability and curb appeal.
(Many of the links in this article redirect to a specific reviewed product. Your purchase of these products through affiliate links helps to generate commission for Storables.com, at no extra cost. Learn more)
Introduction
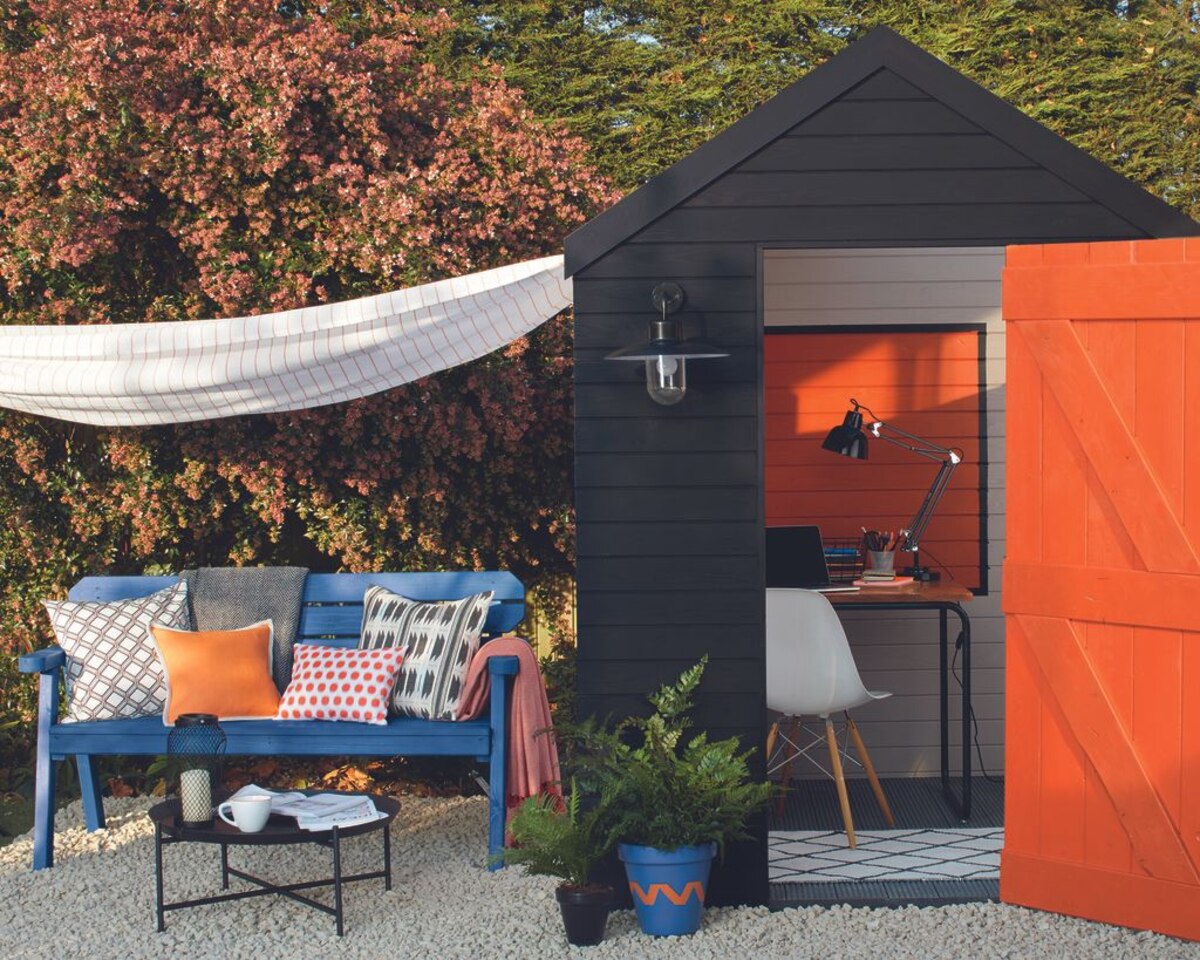
Welcome to the world of outdoor DIY projects! If you have a tin shed that's seen better days, a fresh coat of paint can work wonders in reviving its appearance and protecting it from the elements. Whether you're a seasoned DIY enthusiast or a novice looking to embark on your first outdoor painting project, this guide will walk you through the process of transforming your weathered tin shed into a vibrant and durable structure that enhances your outdoor space.
A tin shed can serve as a valuable storage space, a cozy workshop, or even a charming backyard retreat. However, over time, exposure to sunlight, rain, and fluctuating temperatures can cause the paint to fade, peel, or chip, leaving the shed looking worn and uninspiring. By applying a fresh coat of paint, you can not only breathe new life into the shed but also fortify it against rust and corrosion, prolonging its lifespan.
In this comprehensive guide, we'll explore the essential materials needed for the project, the preparatory steps to ensure a smooth painting process, the importance of selecting the right paint for outdoor use, the application of primer for optimal adhesion, the actual painting process, and the finishing touches to add a touch of finesse to your newly painted tin shed.
Whether you're aiming for a rustic, weathered look or a sleek, modern finish, this guide will equip you with the knowledge and confidence to tackle the task at hand. So, roll up your sleeves, grab your paintbrush, and let's embark on this transformative journey to breathe new life into your tin shed!
Key Takeaways:
- Revive and Protect: Transforming your tin shed with a fresh coat of paint not only revitalizes its appearance but also fortifies it against rust and corrosion, ensuring long-lasting resilience against the elements.
- Personalized Charm: Adding final touches like decorative trim and landscaping elements infuses your shed with unique style, enhancing its visual appeal and reflecting your individual creativity.
Read more: How To Insulate A Tin Shed
Materials Needed
Before delving into the painting process, it’s crucial to gather all the necessary materials to ensure a smooth and efficient DIY experience. Here’s a comprehensive list of the items you’ll need:
- Paint: Select a high-quality exterior paint specifically formulated for metal surfaces. Look for a paint that offers excellent durability, weather resistance, and UV protection to safeguard your shed from the elements.
- Primer: Invest in a rust-inhibiting metal primer designed to promote adhesion and prevent corrosion. The primer will create a stable base for the paint, ensuring long-lasting results.
- Paintbrushes or Rollers: Depending on your preference and the size of the shed, acquire high-quality paintbrushes or rollers suitable for applying paint to metal surfaces.
- Painter’s Tape: Use painter’s tape to protect areas you don’t want to be painted, such as windows, trim, and door frames.
- Drop Cloths or Tarps: Cover the surrounding ground and any nearby objects with drop cloths or tarps to prevent accidental paint splatters and spills.
- Sandpaper or Wire Brush: Prepare the shed’s surface by sanding away any loose paint, rust, or debris. A wire brush can be particularly effective for tackling stubborn rust spots.
- Cleaner/Degreaser: Prior to painting, thoroughly clean the shed’s exterior using a suitable cleaner or degreaser to remove dirt, grime, and any oily residues that could hinder paint adhesion.
- Protective Gear: Ensure your safety by wearing protective gear, including gloves, safety goggles, and a mask to shield against fumes and airborne particles.
- Ladder or Scaffolding: Depending on the shed’s height, secure a stable ladder or scaffolding to access all areas requiring painting.
- Ventilation: If the shed lacks adequate ventilation, consider using fans or keeping doors and windows open to facilitate air circulation and expedite the drying process.
By assembling these essential materials, you’ll be well-prepared to embark on the painting journey, ensuring professional-looking results and long-term protection for your tin shed.
Preparing the Shed
Proper preparation is the key to a successful and long-lasting paint job. Before diving into the painting process, it’s essential to thoroughly prepare the surface of the tin shed to ensure optimal adhesion and a smooth, professional finish. Here’s a step-by-step guide to preparing the shed for painting:
- Clear the Surrounding Area: Begin by removing any obstacles, debris, or items near the shed to create a clear and spacious working environment. This will prevent accidental damage or obstructions during the painting process.
- Clean the Exterior: Using a suitable cleaner or degreaser, thoroughly wash the exterior of the shed to remove dirt, grime, and any residues that could hinder paint adhesion. Pay special attention to areas prone to accumulation, such as corners, seams, and joints.
- Inspect for Damage: Carefully examine the shed for signs of rust, corrosion, or structural damage. Address any rust spots by sanding or using a wire brush to remove the rust down to the bare metal. For larger areas of corrosion, consider using a rust converter to stabilize the metal before proceeding with priming and painting.
- Repair and Replace: If the shed exhibits dents, dings, or damaged panels, take the time to repair and replace any compromised sections. Use metal filler or appropriate patching materials to smooth out imperfections and ensure a uniform surface for painting.
- Sand and Smooth: After addressing any damage, use sandpaper or a sanding block to smooth out rough areas, remove any remaining loose paint, and create a clean, even surface for the primer and paint to adhere to.
- Protect Surrounding Features: Cover any areas you don’t want to be painted, such as windows, trim, and door frames, with painter’s tape and drop cloths to prevent accidental paint splatters and maintain clean, defined edges.
- Ensure Adequate Ventilation: If the shed is not well-ventilated, consider opening doors and windows or using fans to promote airflow and facilitate the drying process, ensuring efficient paint curing and durability.
By meticulously preparing the shed for painting, you’ll create an ideal canvas for the application of primer and paint, setting the stage for a stunning transformation and long-term protection against the elements. With the surface meticulously prepped, you’re now ready to move on to selecting the right paint for your tin shed.
Choosing the Right Paint
When it comes to painting a tin shed, selecting the right paint is crucial for achieving a durable, weather-resistant finish that withstands the test of time. With a myriad of paint options available, it’s essential to choose a high-quality exterior paint specifically formulated for metal surfaces. Here are key factors to consider when selecting the ideal paint for your tin shed:
- Durability and Weather Resistance: Opt for a paint designed to endure outdoor conditions, including sunlight, rain, snow, and fluctuating temperatures. Look for formulations that offer exceptional durability, resistance to fading, and protection against rust and corrosion.
- UV Protection: Given the shed’s exposure to sunlight, UV-resistant paint is essential to prevent premature fading and degradation. UV protection helps maintain the paint’s color integrity and ensures long-term aesthetic appeal.
- Adhesion to Metal: Choose a paint specifically engineered for metal surfaces to ensure strong adhesion and minimize the risk of peeling or flaking over time. Rust-inhibiting properties are particularly beneficial for safeguarding the shed against corrosion.
- Color Selection: Consider the desired aesthetic and the shed’s surroundings when selecting a paint color. Whether you prefer a classic neutral tone, a bold accent color, or a custom hue to complement your outdoor landscape, ensure the paint color enhances the shed’s visual appeal.
- Finish Options: Exterior paints are available in various finishes, including matte, satin, semi-gloss, and high-gloss. Each finish offers distinct attributes in terms of sheen, ease of cleaning, and resistance to moisture, allowing you to choose a finish that aligns with your aesthetic and maintenance preferences.
- Eco-Friendly Formulations: For environmentally conscious consumers, there are eco-friendly paint options that prioritize low VOC (volatile organic compound) emissions and sustainable manufacturing practices, promoting a healthier environment and reduced air pollution.
Before making a final decision, consult with a knowledgeable paint professional or review product specifications to ensure the selected paint meets the specific requirements for painting a metal shed. By choosing a high-quality, weather-resistant paint tailored to metal surfaces, you’ll set the stage for a successful and enduring paint job that elevates the appearance and longevity of your tin shed.
Before painting a tin shed, make sure to clean the surface thoroughly to remove any dirt, rust, or old paint. Use a wire brush and sandpaper to smooth out any rough spots. Apply a rust-inhibiting primer before painting to ensure the paint adheres properly and lasts longer.
Applying the Primer
Before applying the topcoat of paint, it’s essential to lay a solid foundation by priming the tin shed. A high-quality metal primer serves as a critical intermediary layer, promoting adhesion, preventing corrosion, and enhancing the longevity of the paint job. Here’s a detailed overview of the steps involved in applying the primer to your shed:
- Clean and Prepare: Ensure the shed’s exterior is clean and free of dust, dirt, and residues before applying the primer. Thoroughly remove any remaining loose paint, rust, or debris using a wire brush, sandpaper, or a power sander.
- Choose the Right Primer: Select a rust-inhibiting metal primer specifically formulated for exterior use. Consider primers with corrosion-resistant properties and excellent adhesion to metal surfaces, providing a stable base for the subsequent coat of paint.
- Protective Gear and Ventilation: Prior to priming, don appropriate protective gear, including gloves, safety goggles, and a mask to shield against fumes and airborne particles. Ensure adequate ventilation by working in a well-ventilated area or employing fans to promote airflow.
- Application Method: Utilize a high-quality paintbrush or roller suitable for applying primer to metal surfaces. Begin by carefully cutting in around edges and corners with a brush before using a roller to cover larger areas, ensuring even and thorough coverage.
- Even Application: Apply the primer in smooth, even strokes, working in manageable sections to maintain a wet edge and prevent lap marks. Aim for complete coverage while avoiding excessive buildup or drips, which can compromise the final finish.
- Drying Time and Additional Coats: Allow the primer to dry completely according to the manufacturer’s recommendations. Depending on the primer’s formulation and the shed’s condition, a second coat of primer may be necessary to achieve optimal adhesion and corrosion protection.
- Inspect for Uniformity: Once the primer is dry, inspect the shed’s surface to ensure uniform coverage and a smooth, well-prepped canvas for the application of the topcoat. Address any uneven areas or missed spots before proceeding with the painting phase.
By conscientiously applying a high-quality metal primer, you’ll fortify the shed’s surface, mitigate the risk of corrosion, and establish an ideal substrate for the subsequent coat of paint. With the primer in place, you’re now ready to embark on the transformative process of painting your tin shed.
Read more: How To Paint A Shed Exterior
Painting the Shed
With the shed meticulously prepared and the primer providing a solid foundation, it’s time to embark on the transformative process of applying the topcoat of paint. Whether you’re aiming for a classic, understated finish or a bold burst of color, the painting phase is where the shed’s new aesthetic identity comes to life. Here’s a comprehensive guide to painting your tin shed:
- Choose Ideal Weather Conditions: Select a day with mild temperatures and low humidity to ensure optimal paint application and drying. Avoid painting in direct sunlight or on windy days to prevent rapid drying and potential dust or debris interference.
- Stir and Strain the Paint: Thoroughly stir the paint to achieve a uniform consistency, and consider straining it to remove any impurities or lumps that could affect the finish. Use a clean, sturdy stirring stick and a paint strainer for this purpose.
- Protective Gear: Prior to painting, don appropriate protective gear, including gloves, safety goggles, and a mask to shield against fumes and airborne particles, ensuring a safe and comfortable painting experience.
- Application Method: Depending on your preference and the shed’s size, use high-quality paintbrushes or rollers suitable for applying paint to metal surfaces. Begin by cutting in around edges and corners with a brush before using a roller to cover larger areas, ensuring even and thorough coverage.
- Even Application: Apply the paint in smooth, even strokes, working in manageable sections to maintain a wet edge and prevent lap marks. Strive for consistent coverage while avoiding excessive buildup or drips, which can compromise the final finish.
- Multiple Coats: Depending on the paint’s formulation and the desired depth of color, you may need to apply multiple coats, allowing each coat to dry completely before adding the next. Follow the manufacturer’s recommendations for the optimal number of coats to achieve the desired finish and durability.
- Inspect and Touch-Ups: Once the paint has dried, inspect the shed’s surface for uniformity and any areas that may require touch-ups. Address any missed spots or uneven areas with additional paint to ensure a seamless and professional-looking finish.
- Clean-Up and Disposal: After completing the painting process, carefully clean your paintbrushes, rollers, and any other equipment according to the manufacturer’s instructions. Dispose of paint waste and materials responsibly, adhering to local regulations and environmental guidelines.
By methodically painting your tin shed with precision and care, you’ll elevate its visual appeal, fortify its resilience against the elements, and infuse your outdoor space with renewed charm and character. With the shed now adorned in its fresh coat of paint, it’s time to add the final embellishments that will enhance its overall allure and longevity.
Adding Final Touches
As you near the completion of the painting process, adding final touches to your freshly painted tin shed can elevate its aesthetic appeal and ensure long-term durability. These finishing touches not only enhance the shed’s visual impact but also contribute to its resilience against environmental elements. Here’s a guide to adding the essential final touches to your painted tin shed:
- Inspect and Address Imperfections: After the paint has fully cured, carefully inspect the shed’s surface for any imperfections, such as missed spots, uneven coverage, or minor blemishes. Touch up these areas with additional paint to achieve a seamless and professional finish.
- Seal Joints and Seams: Use a high-quality exterior caulk to seal any gaps, joints, or seams on the shed, providing an added layer of protection against moisture infiltration and enhancing the shed’s weather resistance.
- Apply a Protective Topcoat (Optional): For added durability and sheen, consider applying a clear protective topcoat specifically formulated for metal surfaces. This additional layer can safeguard the paint from abrasion, UV exposure, and moisture, prolonging the shed’s vibrant appearance.
- Enhance with Trim and Accents: Consider adding decorative trim, accents, or architectural details to further enhance the shed’s visual appeal. Whether it’s charming window shutters, a decorative door frame, or custom accents, these embellishments can infuse personality and style into the shed’s exterior.
- Landscaping and Lighting: Complement the shed’s new look by enhancing its surroundings with landscaping elements and outdoor lighting. Planting vibrant flowers, installing pathway lighting, or incorporating garden features can create a cohesive and inviting outdoor space.
- Maintenance and Care: Establish a routine maintenance plan to preserve the shed’s newly painted finish. Regularly inspect the paint for signs of wear, clean the exterior as needed, and promptly address any damage or corrosion to uphold the shed’s appearance and structural integrity.
- Personalization and Customization: Infuse your creativity and personal style into the shed’s exterior by adding custom touches, such as painted designs, stenciled motifs, or personalized signage. These unique elements can make the shed a reflection of your individuality and enhance its visual impact.
By attending to these final touches, you’ll not only enhance the aesthetic allure of your painted tin shed but also fortify its resilience and longevity. Embracing these thoughtful details will ensure that your shed stands as a durable and captivating outdoor feature for years to come, enriching your outdoor space and reflecting your personal style.
Conclusion
Congratulations on successfully transforming your tin shed into a revitalized and resilient outdoor structure! By embarking on this painting journey, you’ve not only enhanced the shed’s visual appeal but also fortified it against the rigors of outdoor exposure. As you reflect on the accomplishment of this DIY project, consider the enduring benefits and the pride of revitalizing a key element of your outdoor space.
Through meticulous preparation, the careful selection of high-quality materials, and the application of expert techniques, you’ve breathed new life into your tin shed, ensuring its durability and aesthetic allure for years to come. As you bask in the satisfaction of a job well done, take a moment to appreciate the following key takeaways from this transformative process:
- Resilience and Protection: The application of a durable, weather-resistant paint and primer has fortified your shed against the elements, safeguarding it from corrosion, UV exposure, and moisture infiltration.
- Enhanced Aesthetic Appeal: The fresh coat of paint has revitalized the shed’s appearance, infusing it with renewed vibrancy and charm, and elevating the overall aesthetic of your outdoor space.
- Personalized Expression: Through the addition of final touches and thoughtful details, you’ve personalized the shed’s exterior, making it a reflection of your individual style and enhancing its visual impact.
- Long-Term Maintenance: By establishing a maintenance plan and attending to the shed’s care, you’ve ensured the longevity of the paint job and the shed’s structural integrity, preserving its beauty for the future.
As you admire the newly painted shed gracing your outdoor landscape, take pride in the knowledge that your efforts have not only revitalized a functional structure but also contributed to the overall ambiance of your outdoor environment. The transformation of your tin shed stands as a testament to your dedication, creativity, and commitment to enhancing your living space.
As you revel in the satisfaction of a job well done, consider the potential for future outdoor projects and the opportunity to continue infusing your outdoor space with creativity and personal expression. Whether it’s a garden feature, a patio renovation, or a custom outdoor structure, your newfound expertise and passion for outdoor DIY projects can continue to enrich and elevate your outdoor living experience.
With your tin shed now radiating with renewed allure and resilience, may this project inspire further creative endeavors and serve as a lasting source of pride and enjoyment in your outdoor oasis.
Frequently Asked Questions about How To Paint A Tin Shed
Was this page helpful?
At Storables.com, we guarantee accurate and reliable information. Our content, validated by Expert Board Contributors, is crafted following stringent Editorial Policies. We're committed to providing you with well-researched, expert-backed insights for all your informational needs.


0 thoughts on “How To Paint A Tin Shed”