Home>Home Maintenance>Who Can Fix A Dryer Vent

Home Maintenance
Who Can Fix A Dryer Vent
Modified: October 20, 2024
In need of home maintenance? Find experienced professionals who can fix your dryer vent and ensure it's working efficiently.
(Many of the links in this article redirect to a specific reviewed product. Your purchase of these products through affiliate links helps to generate commission for Storables.com, at no extra cost. Learn more)
Introduction
Welcome to our comprehensive guide on fixing a dryer vent. A properly functioning dryer vent is crucial for efficient and safe operation of your dryer. A clogged or damaged dryer vent can cause various issues, ranging from reduced drying performance to potential fire hazards. Understanding how to fix common problems with your dryer vent can save you time, money, and ensure the longevity of your appliance.
In this article, we will take an in-depth look at the role of a dryer vent, when to seek professional help, DIY solutions for fixing common issues, necessary tools and materials, a step-by-step guide for repairing a dryer vent, and important safety precautions to follow. Additionally, we will address some common issues and provide troubleshooting tips to help you diagnose and resolve any problems you may encounter.
Whether you’re a seasoned DIY enthusiast or a homeowner looking to save on maintenance costs, this article will equip you with the knowledge and practical steps to fix your dryer vent. So let’s dive in and learn how to keep your dryer vent in optimal condition.
Key Takeaways:
- Regularly cleaning and maintaining your dryer vent is crucial for efficient drying, preventing fire hazards, and extending the lifespan of your appliance.
- When in doubt, seek professional help for issues like excessive lint accumulation, clogged vents, or gas dryer problems to ensure thorough and safe resolution.
Read more: Who Can Install A Dryer Vent
Understanding the Role of a Dryer Vent
A dryer vent plays a critical role in the functioning of your clothes dryer. Its main purpose is to expel hot air and moisture generated during the drying process, allowing your clothes to dry efficiently. This vent carries the humid air from the dryer drum to the outside of your home, preventing it from accumulating inside and causing potential problems.
Proper ventilation is essential for several reasons. Firstly, it helps to prevent the buildup of heat and humidity, which can be damaging to both your clothes and the dryer itself. Excessive heat and moisture can lead to wrinkling, shrinking, or even scorching of your clothes, and it can also cause malfunctions and damage to the dryer’s internal components.
Furthermore, a well-functioning dryer vent helps to prevent the accumulation of lint. As your clothes tumble and dry, fibers and lint particles are released and can accumulate in the vent over time. A clogged vent restricts airflow, causing the dryer to work harder and become less efficient. This not only prolongs drying times but also increases energy consumption and can lead to unnecessary wear and tear on the machine.
Importantly, a blocked or malfunctioning dryer vent can pose significant safety risks. Lint is highly flammable, and if it becomes trapped in the vent, it creates a potential fire hazard. It is estimated that thousands of fires per year are caused by dryer vents that have not been properly cleaned or maintained.
Regular maintenance and cleaning of your dryer vent are essential to ensure proper airflow and reduce the risk of fire. By understanding the vital role of a dryer vent and being proactive in its care, you can protect your clothes, extend the lifespan of your dryer, and maintain a safe and efficient laundry routine.
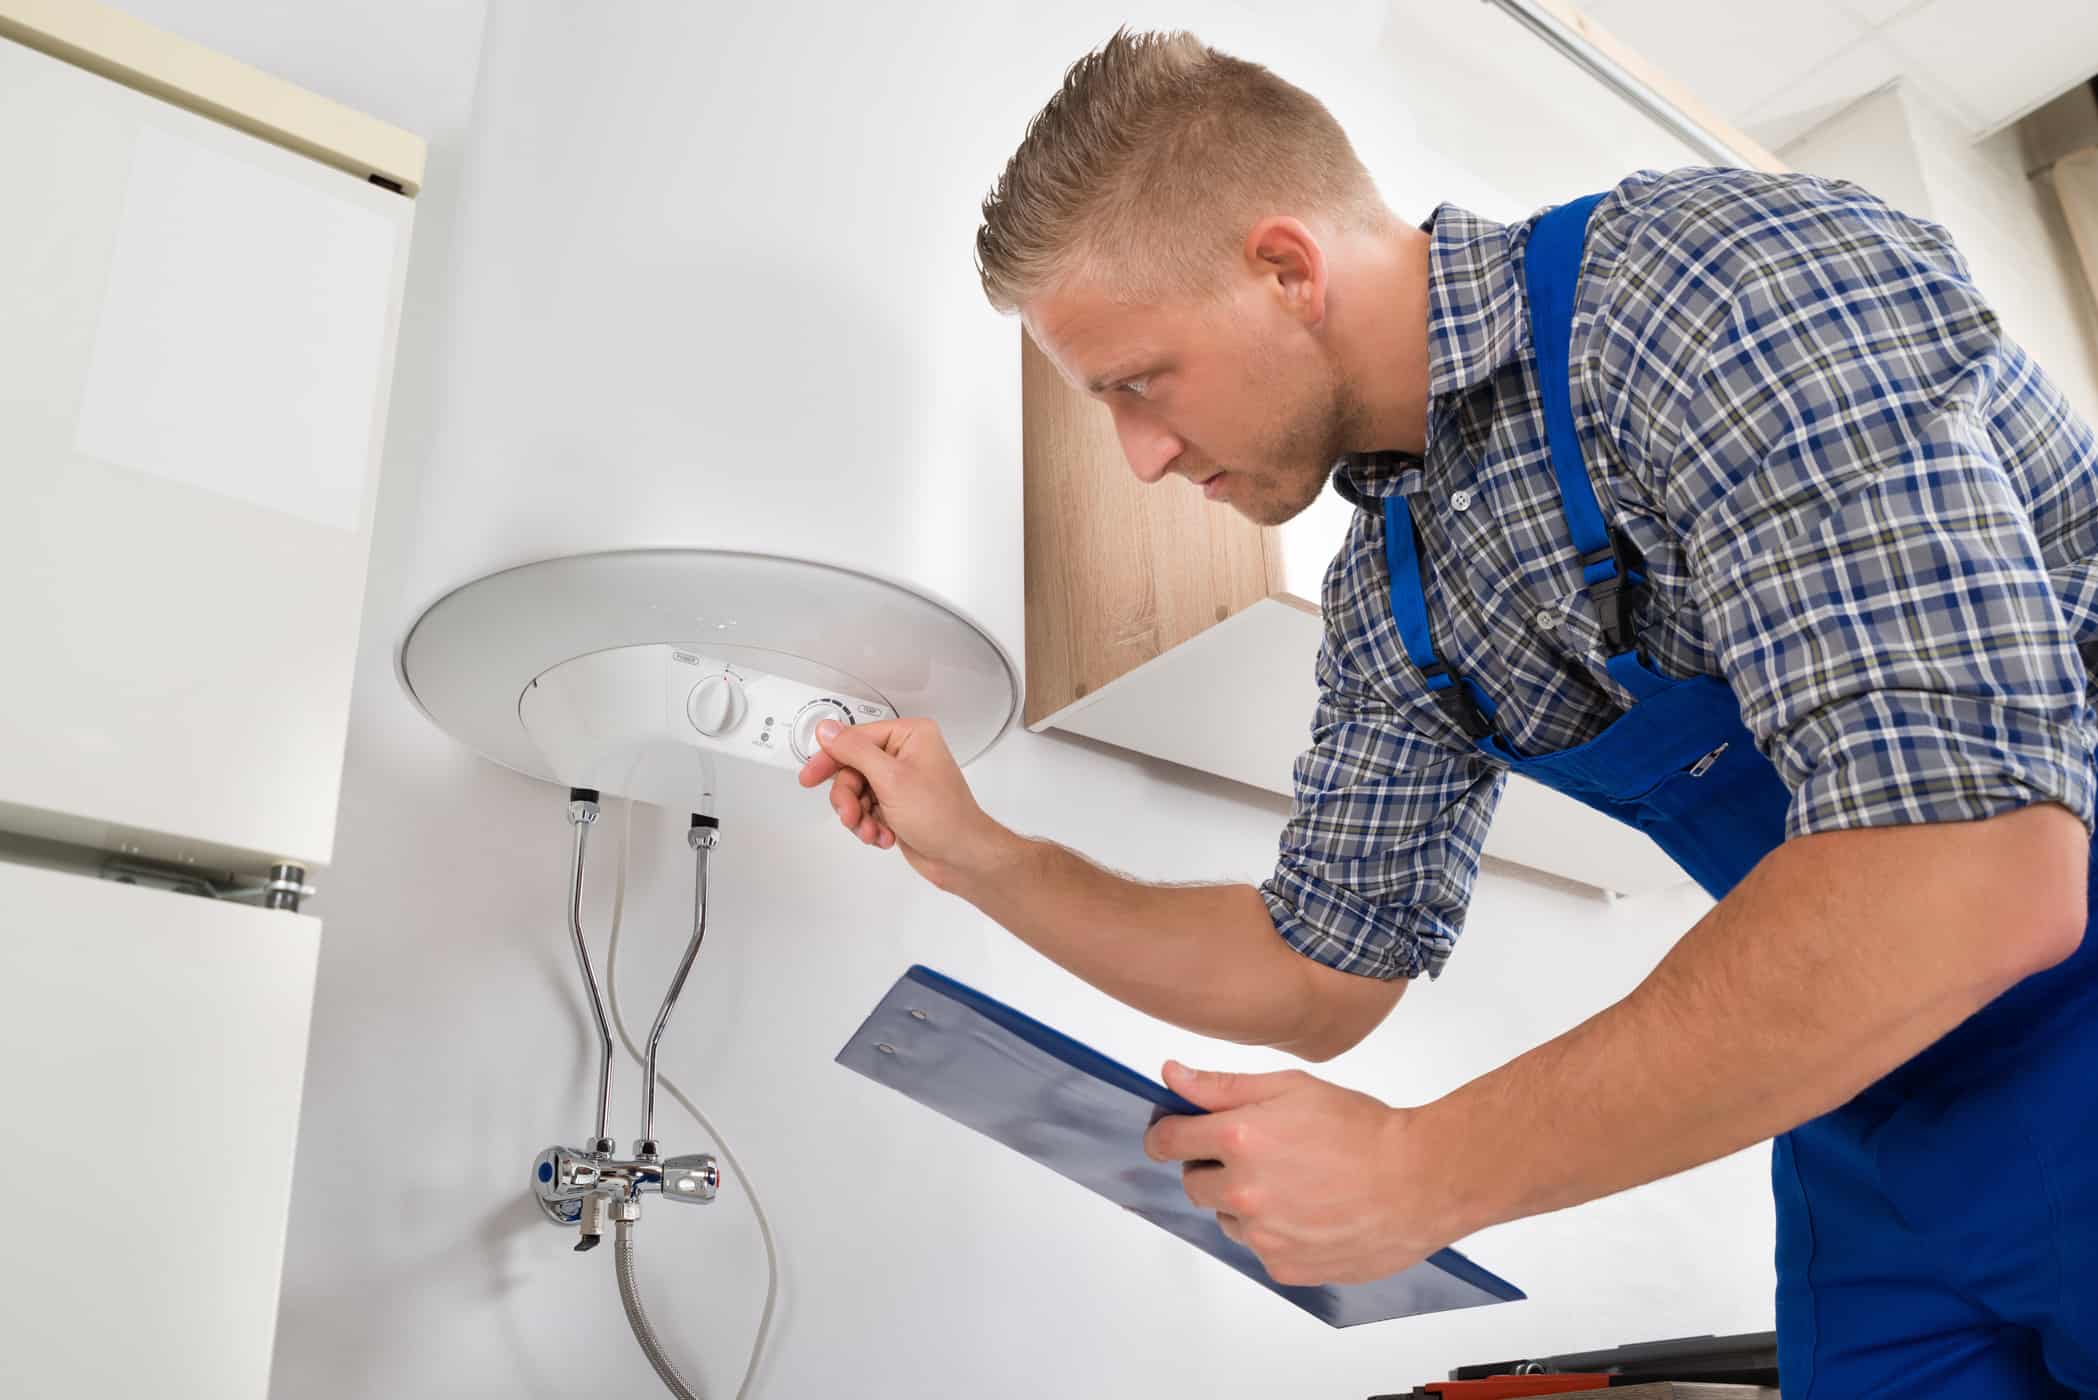
When to Seek Professional Help
While some minor issues with your dryer vent can be fixed through simple DIY solutions, there are certain situations where it is best to seek professional help. Understanding when to call in a professional can save you time, prevent further damage, and ensure that the job is done correctly and safely.
Here are some scenarios where it’s advisable to enlist the expertise of a professional:
- Excessive lint accumulation: If you notice a significant buildup of lint in your dryer vent, it may indicate a more severe problem. A professional can assess the situation and thoroughly clean the vent, reducing the risk of fire and improving the dryer’s performance.
- Clogged or blocked vent: If your dryer is not drying clothes effectively or taking longer than usual, it could be an indication of a clogged or blocked vent. Professionals have the necessary tools and expertise to diagnose and resolve such issues efficiently.
- Damaged vent pipe: If you observe visible damage to the vent pipe, such as cracks, breaks, or deterioration, it’s best to consult a professional. They can inspect the extent of the damage and replace the vent pipe, ensuring proper airflow and preventing safety hazards.
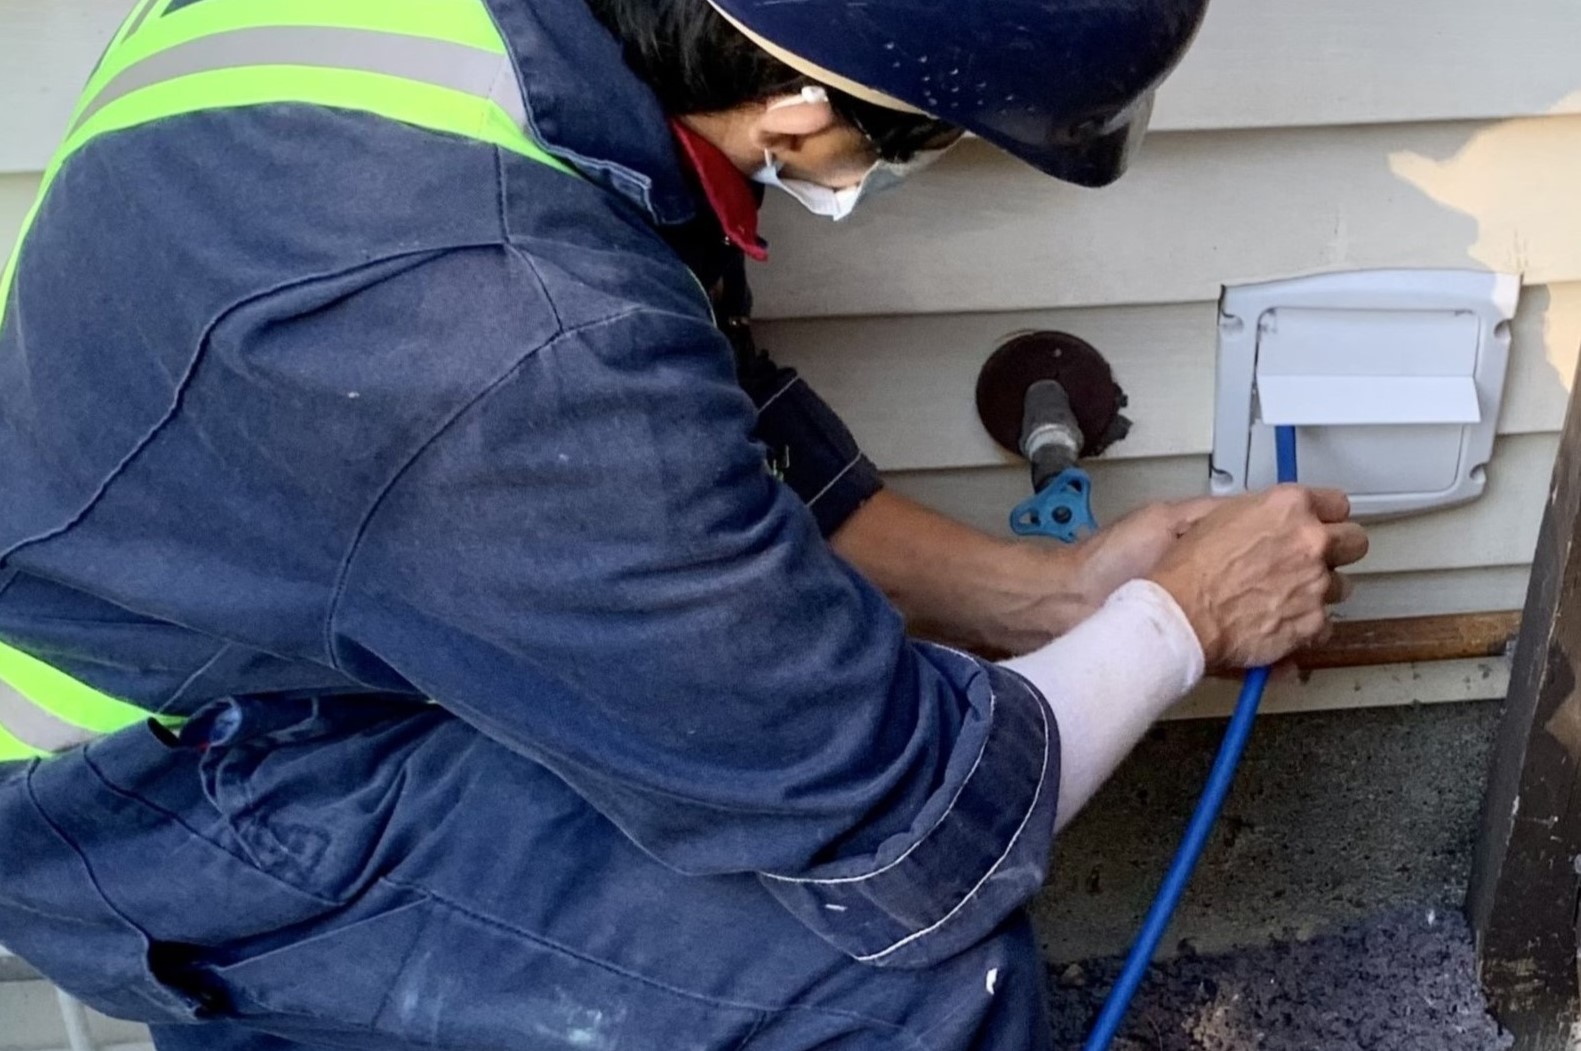
- Difficult access: In some cases, dryer vents may be located in hard-to-reach areas, such as crawl spaces or attics. Working in confined spaces can be challenging and potentially dangerous. Professionals are skilled in handling these situations and can safely navigate and repair the vent system.
- Gas dryer issues: If you have a gas dryer, any repairs or modifications to the vent system should be handled by a professional. Gas appliances require specific expertise to ensure proper venting and prevent the risk of gas leaks or carbon monoxide poisoning.
Remember, the safety and efficiency of your dryer vent system should not be compromised. If you encounter any of these scenarios or feel unsure about tackling the repair yourself, reach out to a qualified professional who can assess, diagnose, and resolve the issue promptly and effectively.
DIY Solutions for Fixing a Dryer Vent
While some dryer vent issues require professional assistance, there are several common problems that you can tackle yourself with some basic DIY solutions. These DIY fixes can save you money and help maintain the integrity and efficiency of your dryer vent system. Here are some simple steps you can take to address common dryer vent issues:
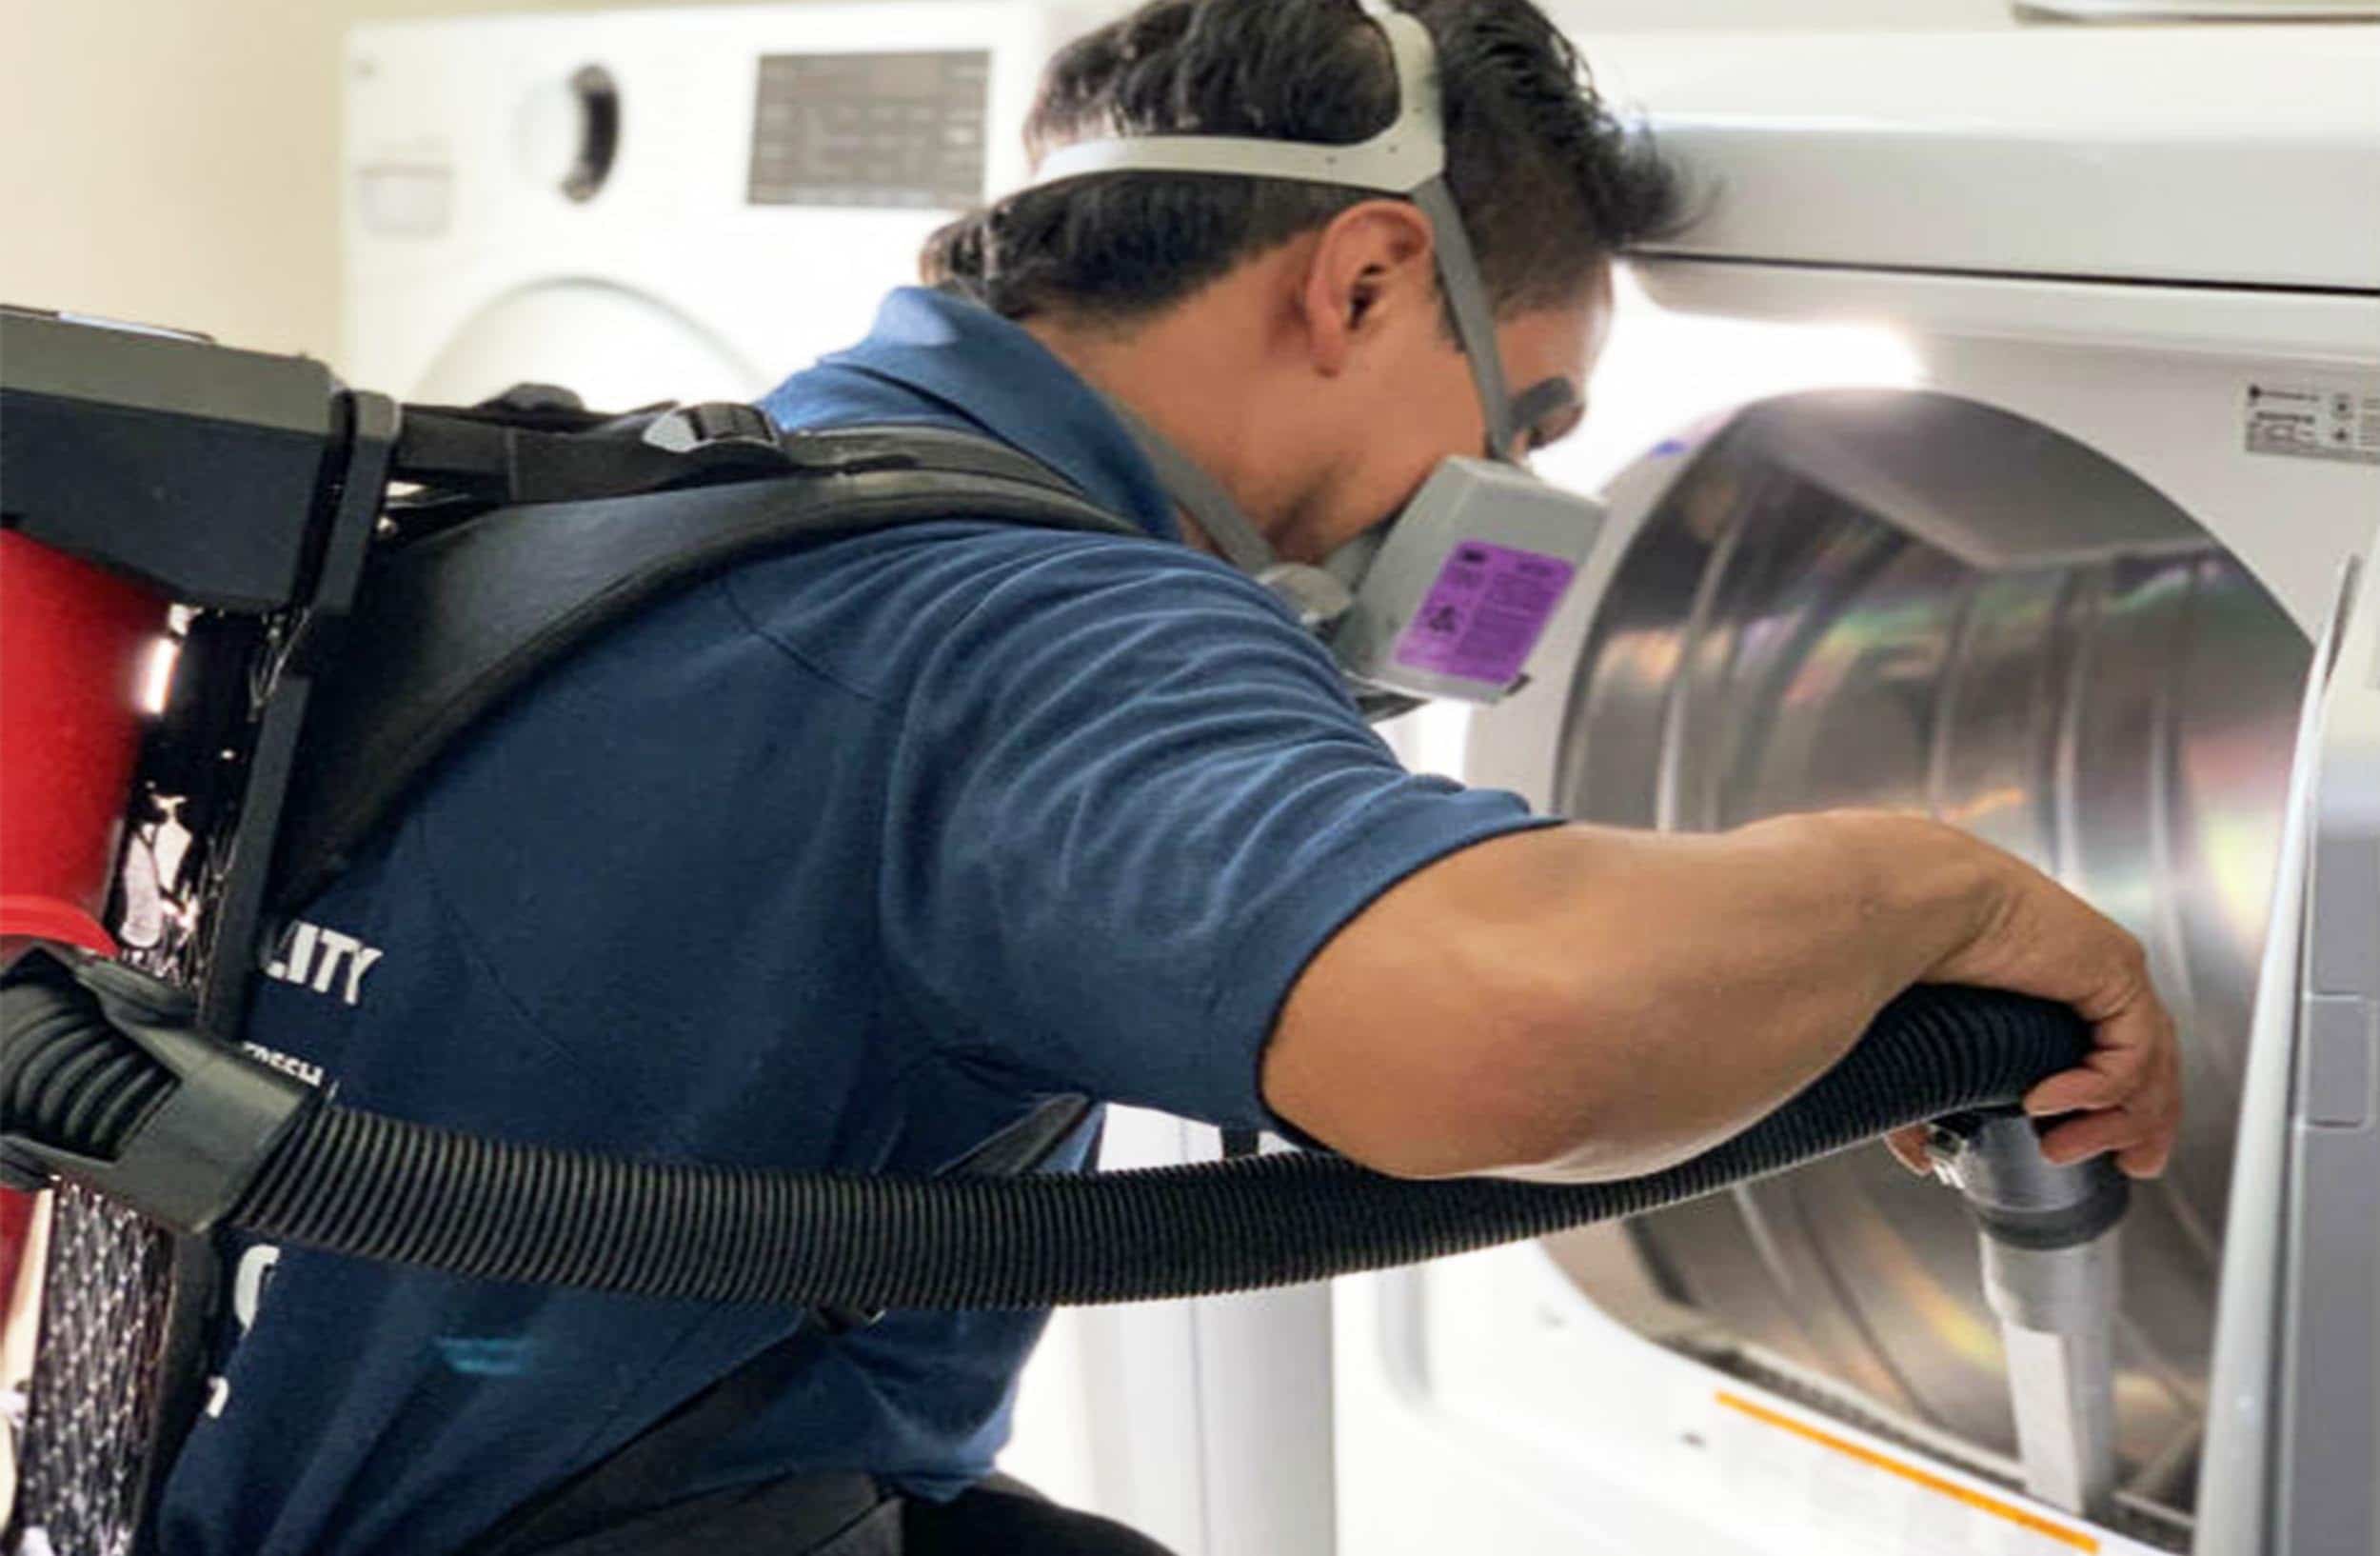
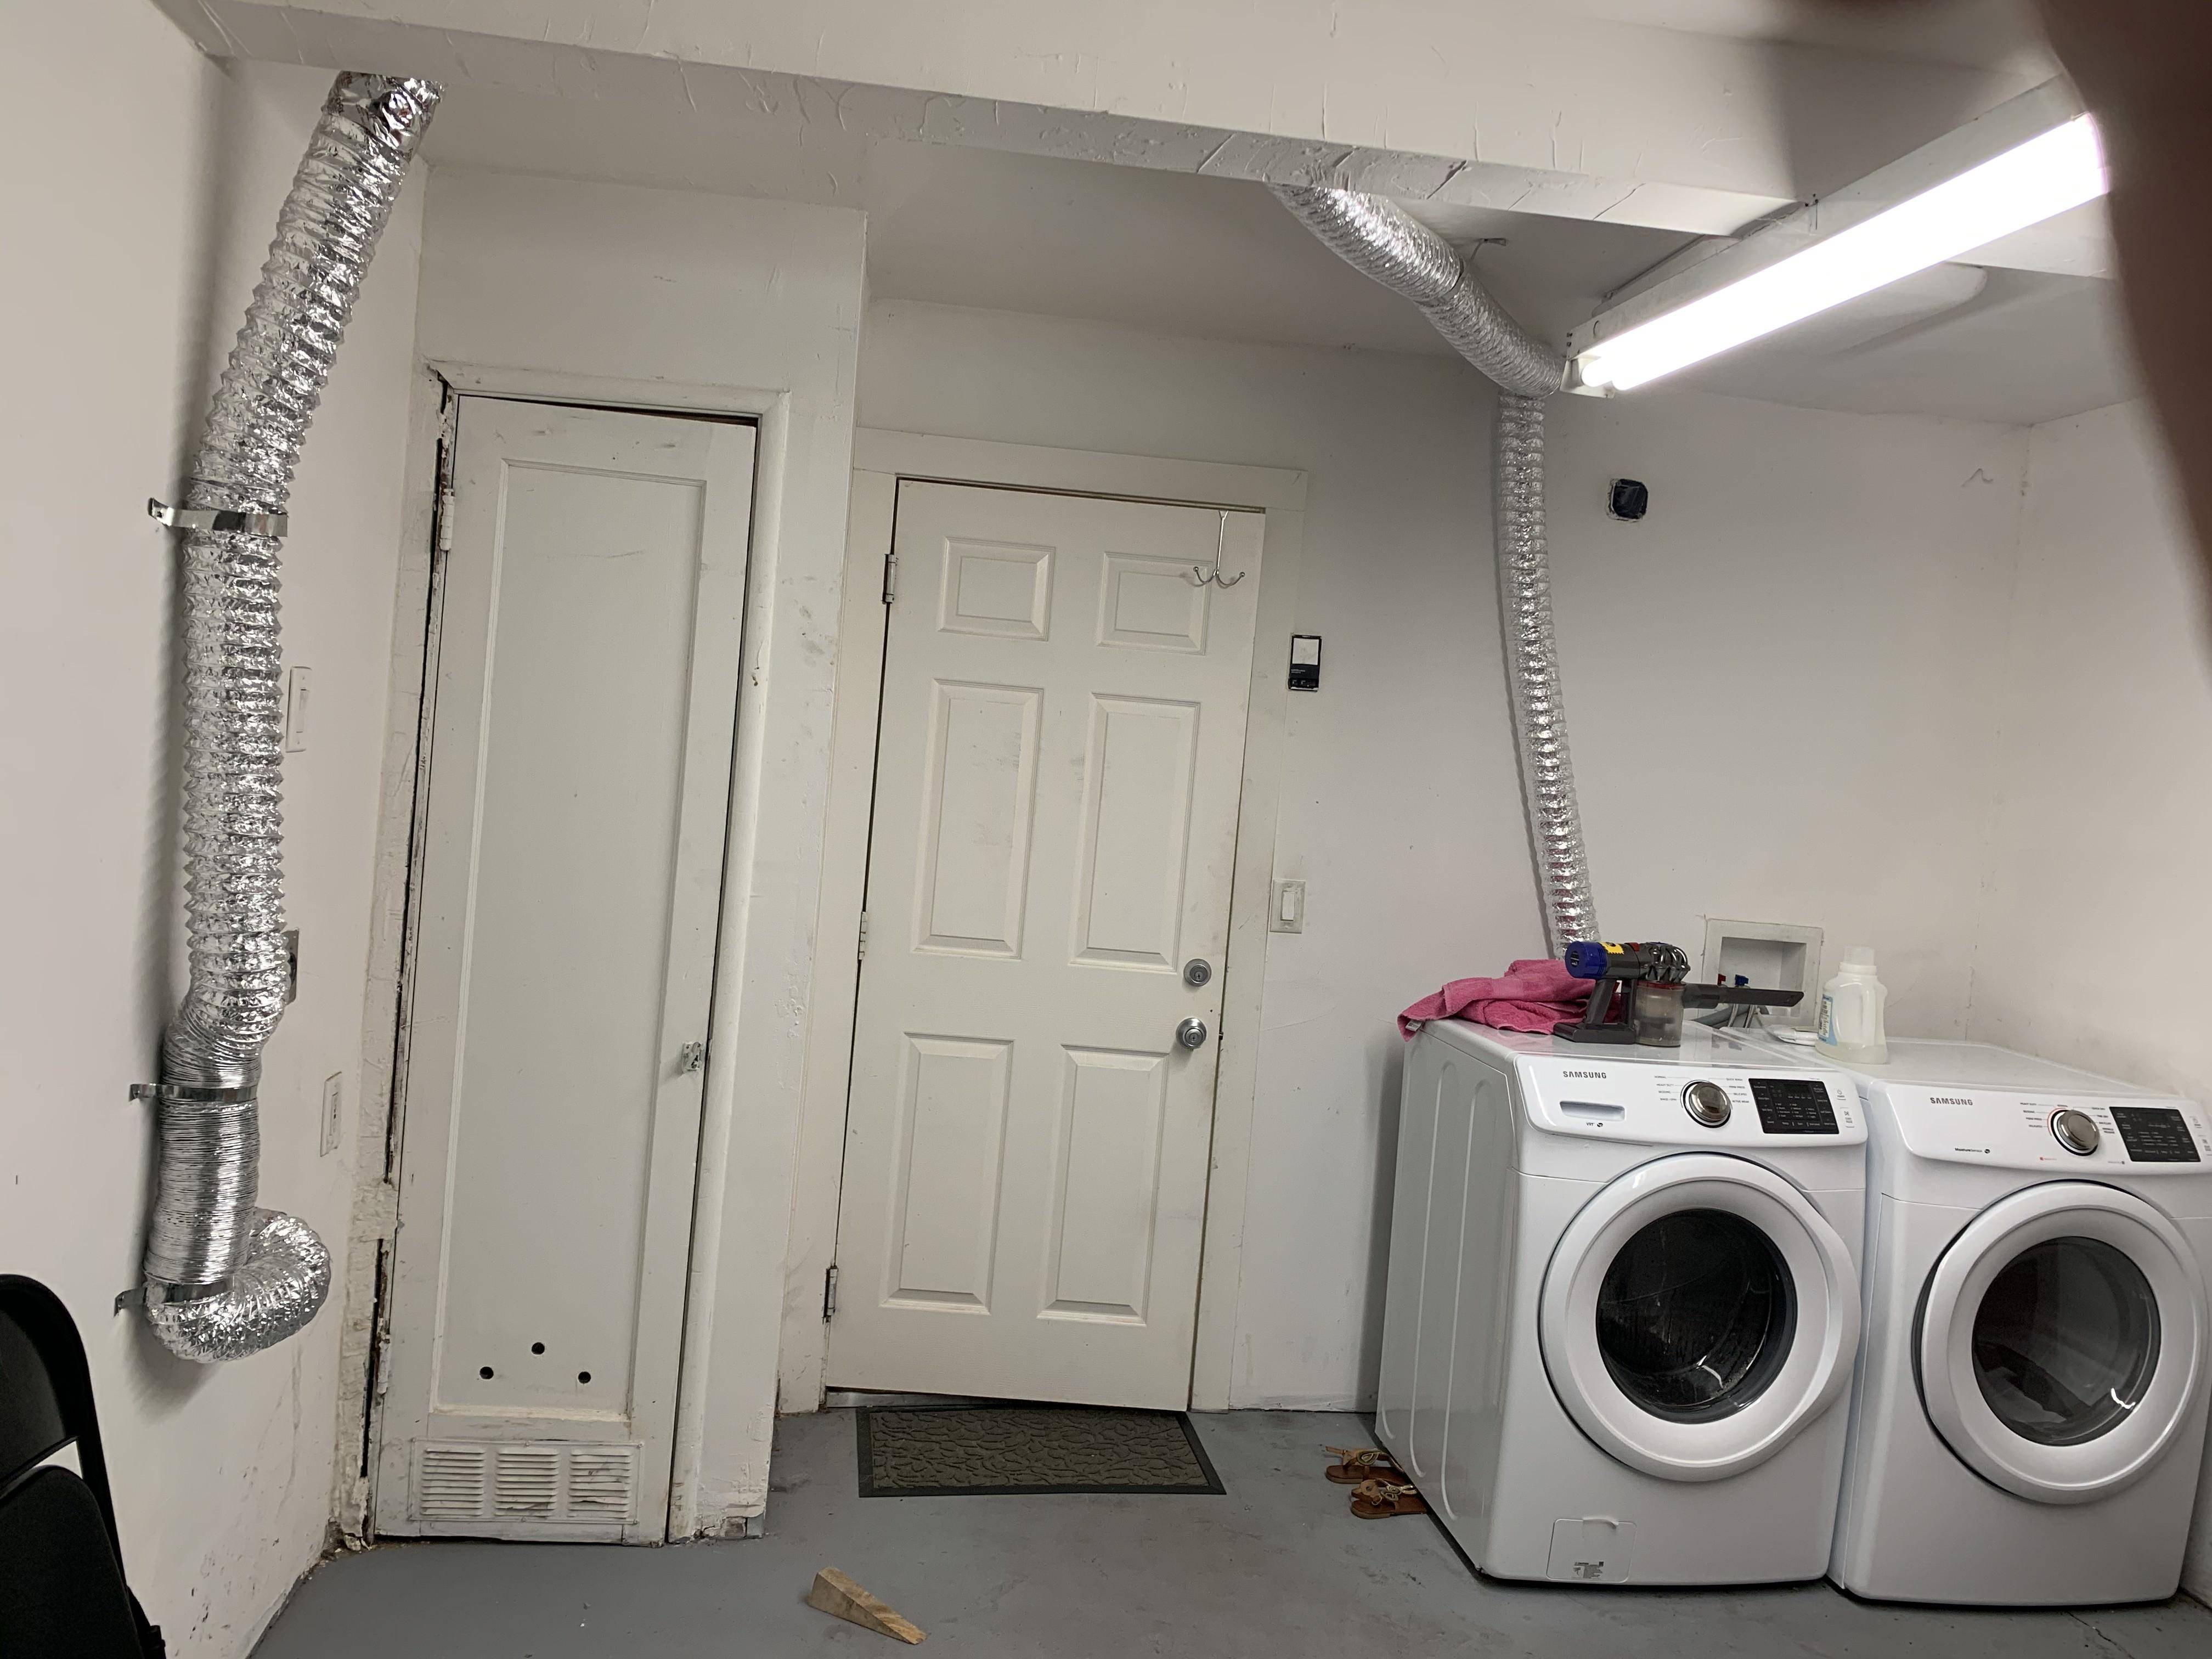
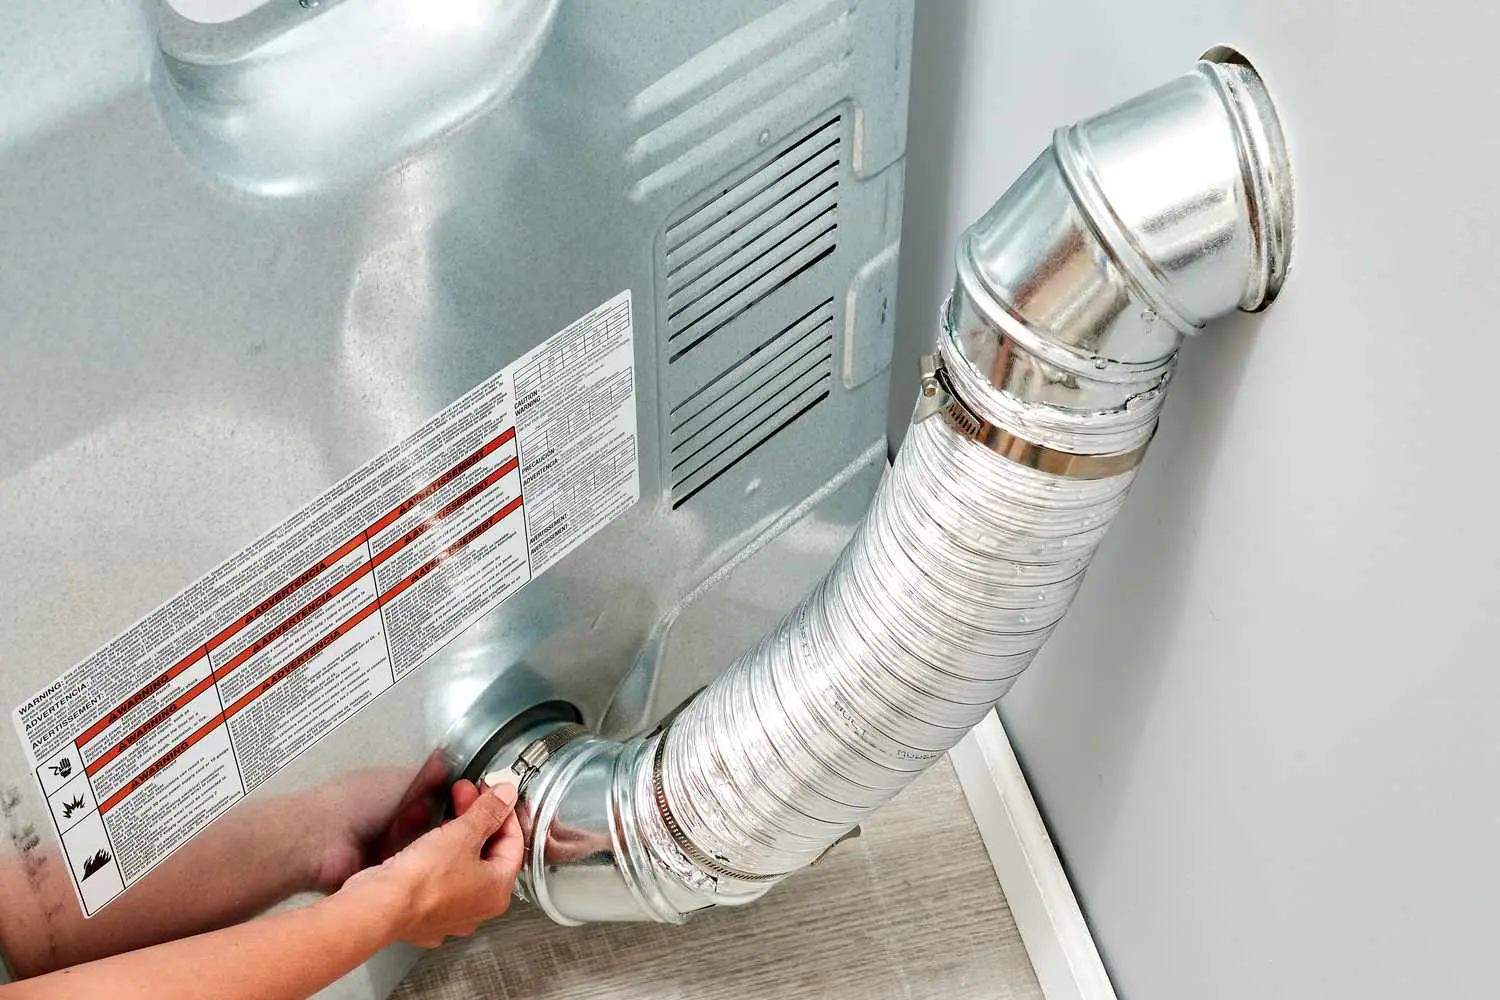
- Cleaning the vent: Regularly cleaning your dryer vent is crucial for optimal airflow and preventing lint buildup. Start by disconnecting the dryer from the power source and removing the vent cover or lint trap. Use a vacuum cleaner or lint brush to remove any lint or debris from the vent pipe. You can also purchase a dryer vent cleaning kit with flexible rods to reach deeper into the vent. Be sure to clean both the dryer end and the vent outlet on the exterior of your home.
- Checking for obstructions: Inspect the vent pipe for any obstructions or blockages that may impede airflow. Common culprits include bird nests, leaves, or debris. If you find any obstructions, use a brush or your vacuum cleaner to clear them out gently.
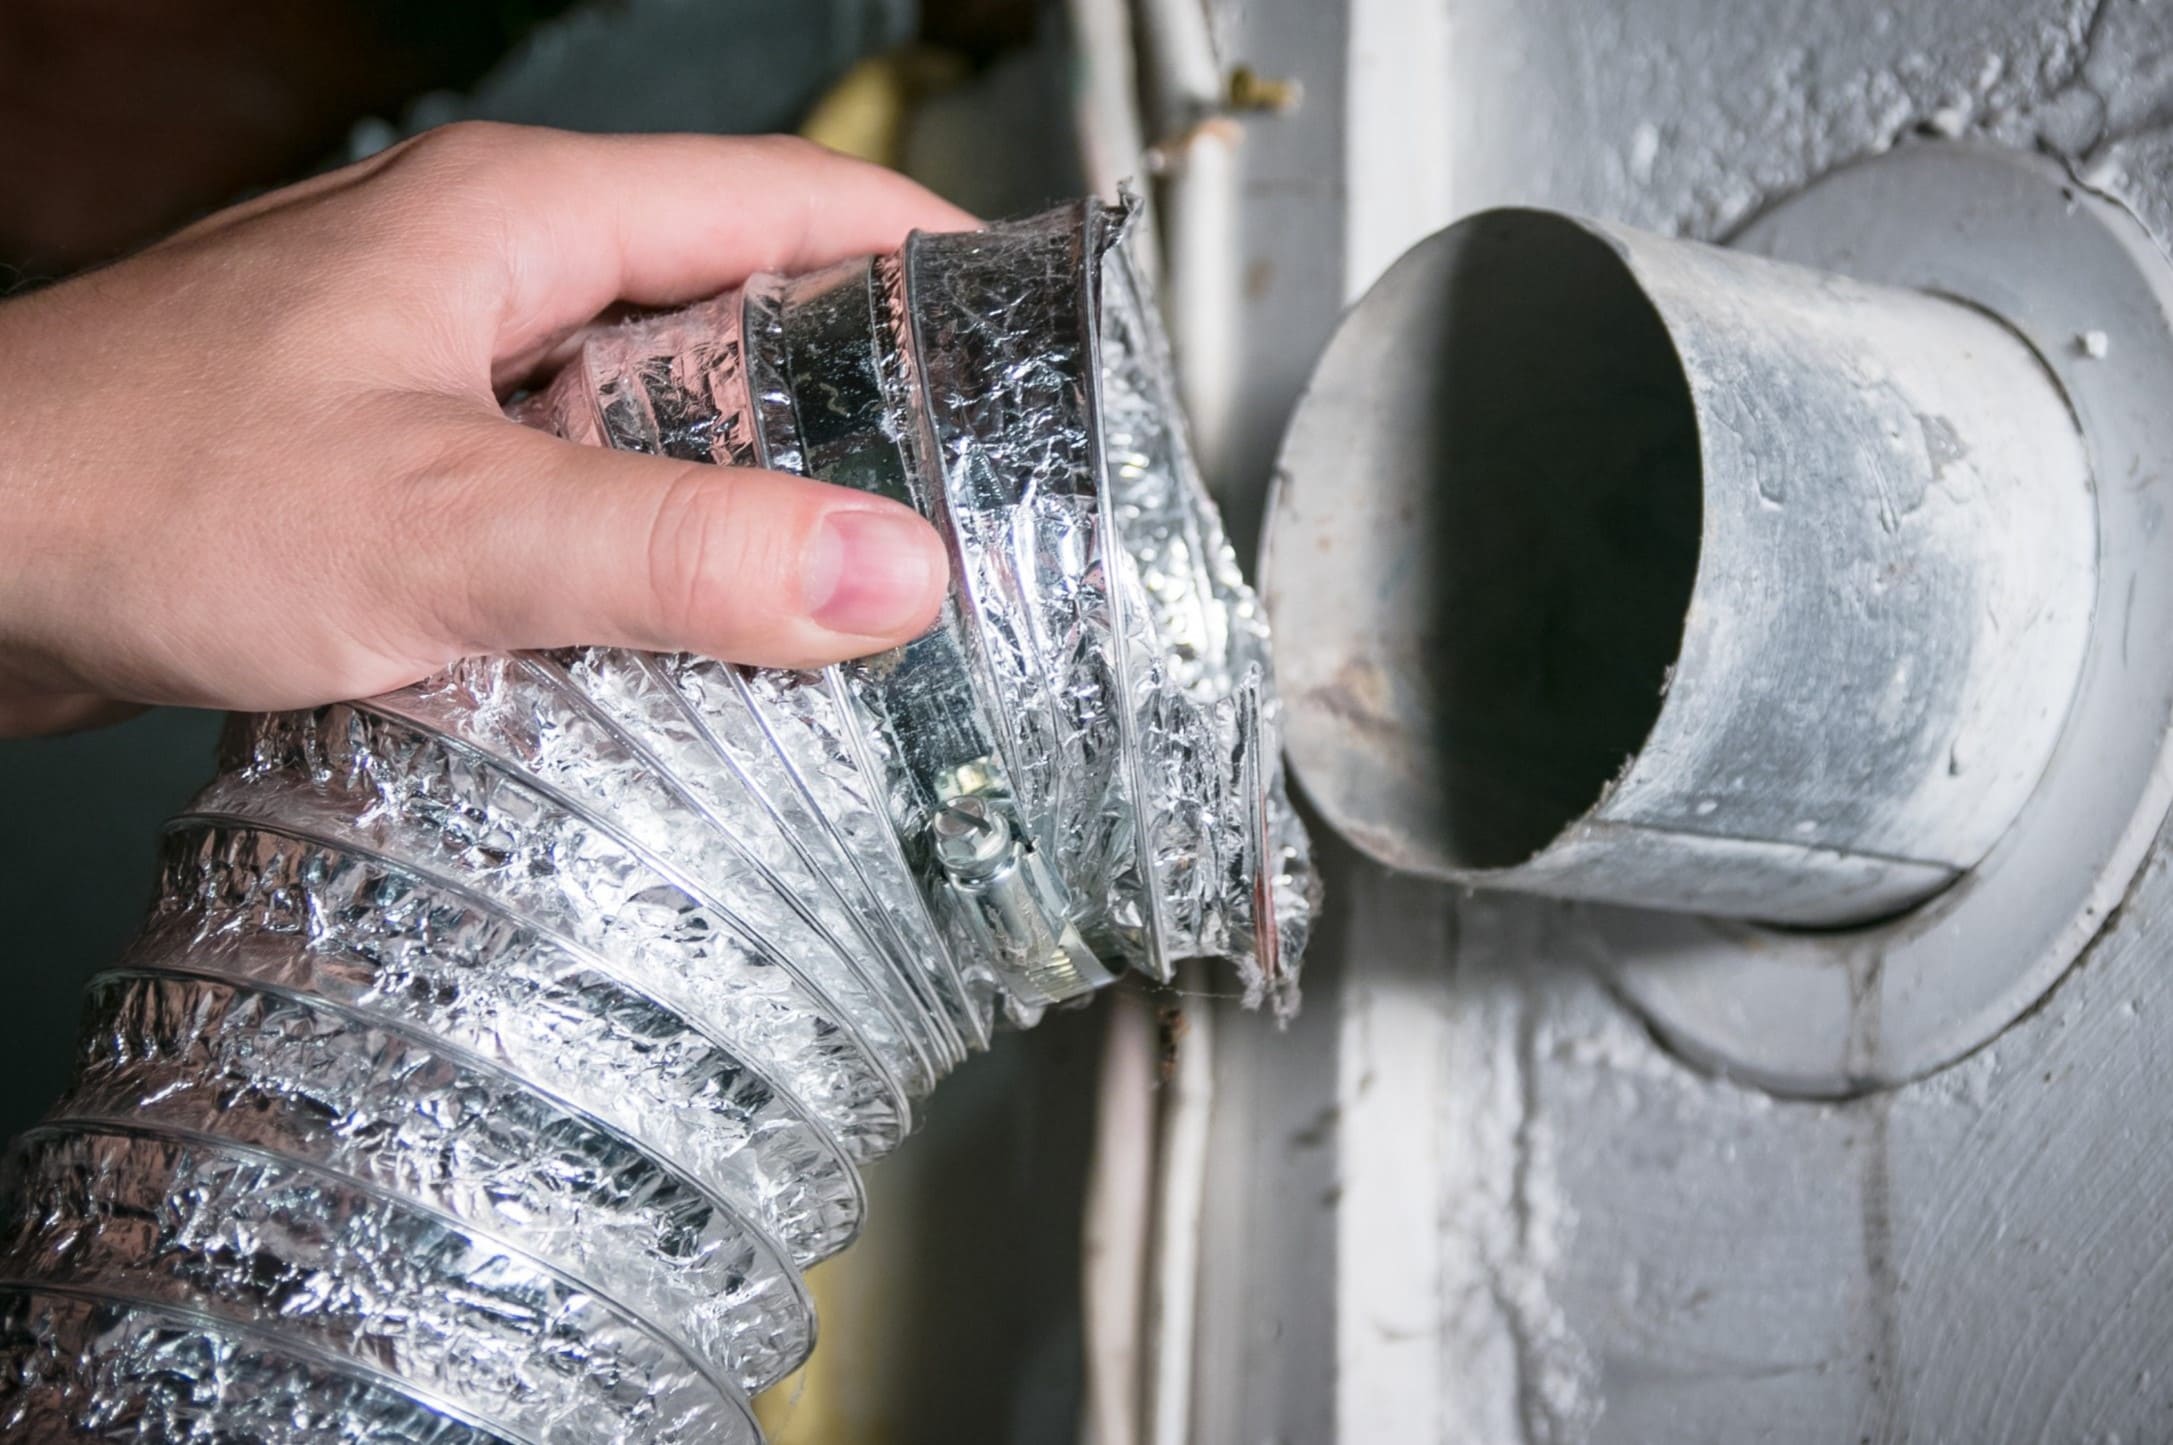
- Repairing damaged vent pipe: If you notice any cracks or breaks in the vent pipe, you can use aluminum foil tape or duct tape to seal them temporarily. However, it’s best to replace the damaged section of the vent pipe with a new one for a more permanent solution.
- Ensuring proper vent installation: Check that the vent pipe is properly connected and secured to both the dryer and the exterior vent outlet. Make sure there are no loose connections or gaps that could leak air or lint. Use metal clamps or foil tape to secure the connections if needed.
- Clearing the lint trap: Clean the lint trap before or after every load of laundry. A clogged lint trap can restrict airflow and lead to lint buildup in the vent pipe. Remove the lint by hand or use a soft brush to dislodge any stubborn debris.
It’s important to note that while these DIY solutions can address common issues, regular maintenance and professional inspections are still essential to ensure the safety and efficiency of your dryer vent system. If you encounter a more complex problem or if DIY efforts do not resolve the issue, it’s best to seek the assistance of a qualified professional.
By being proactive in maintaining your dryer vent system and addressing minor issues promptly, you can prolong the life of your dryer, improve drying performance, and reduce the risk of fire hazards.
Tools and Materials Needed
When it comes to fixing and maintaining your dryer vent, having the right tools and materials on hand can make the process much easier and more efficient. Here is a list of essential items you may need for DIY repairs:
- Screwdriver: A screwdriver is useful for removing the vent cover or lint trap to access the vent pipe.
- Vacuum cleaner or lint brush: These tools are essential for cleaning lint and debris from the vent pipe. A vacuum cleaner with a long, narrow attachment or a specialized lint brush can help you reach deep into the vent.
- Aluminum foil tape or duct tape: These tapes are helpful for temporarily sealing small cracks or breaks in the vent pipe. However, it is recommended to replace the damaged section of the pipe for a more permanent solution.
- Metal clamps: Metal clamps are used to secure the connections between the vent pipe, the dryer, and the exterior vent outlet.
- Dryer vent cleaning kit: A dryer vent cleaning kit consists of flexible rods or brushes that attach to a drill. This kit is helpful for thorough cleaning of the vent pipe, especially for reaching hard-to-access areas.
- New vent pipe: If you encounter significant damage to the vent pipe, it is advisable to replace the affected section with a new vent pipe. Measure the diameter and length needed to ensure a proper fit.
In addition to these tools, it’s important to consider safety equipment, such as gloves and safety glasses, to protect yourself during the repair process. It’s also helpful to have a flashlight readily available for inspecting the vent pipe and identifying any obstructions or damage.
Before starting any repair work, ensure that you have all the necessary tools and materials on hand. Proper preparation will streamline the process and allow you to address the issue efficiently.
Remember, if you’re unsure about any aspect of the repair or if the problem is more complex, consult a professional for guidance and assistance. They will have the expertise and specialized tools to ensure a safe and effective repair.
Make sure to regularly clean the lint trap and vent to prevent clogs and potential fire hazards. If you notice your dryer taking longer to dry clothes, it may be time to clean the vent or seek professional help.
Read more: Who Cleans Dryer Vent
Step-by-Step Guide for Fixing a Dryer Vent
Fixing a dryer vent can be a straightforward process if you follow the proper steps. Here is a step-by-step guide to help you tackle common issues with your dryer vent:
- Disconnect the dryer: Start by unplugging the dryer from the power source or shutting off the gas supply if you have a gas dryer. Safety should always be a top priority.
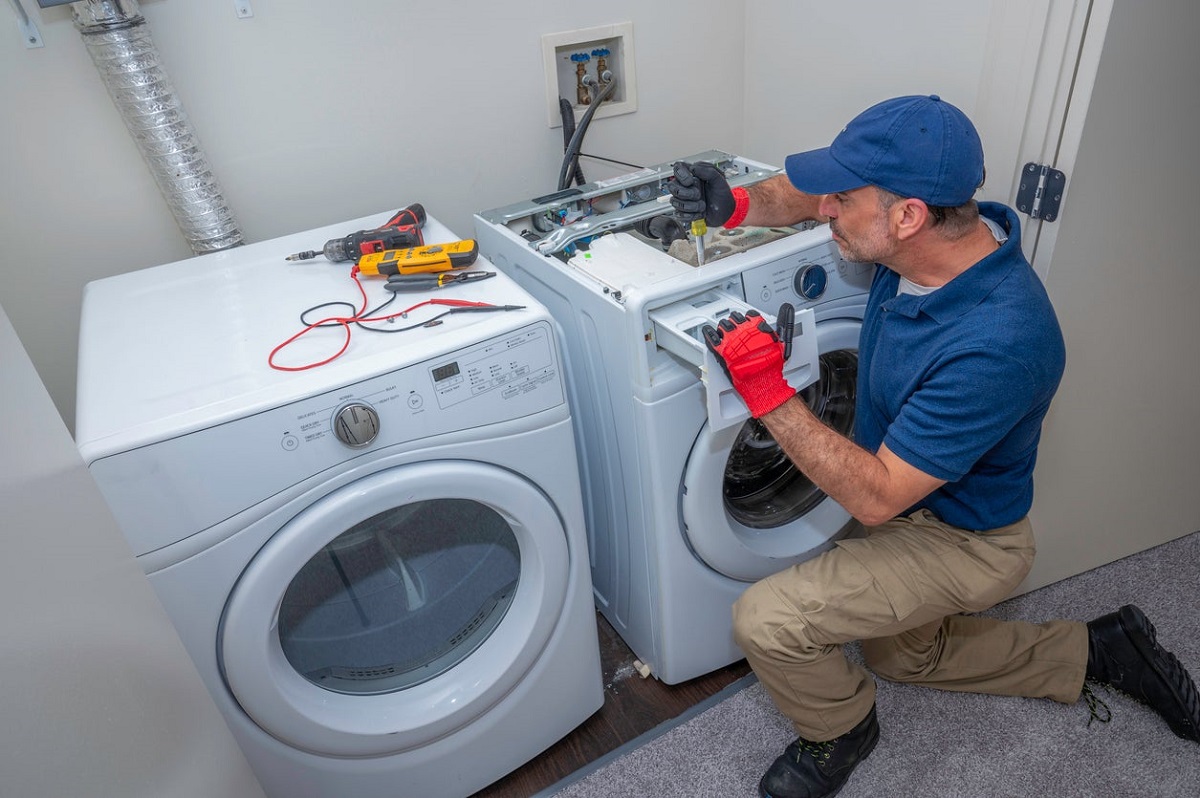
- Remove the vent cover or lint trap: Use a screwdriver to remove the vent cover or lint trap, exposing the vent pipe.
- Clean the vent pipe: Use a vacuum cleaner or lint brush to remove any lint or debris from the vent pipe. Pay attention to hard-to-reach areas and use a dryer vent cleaning kit if necessary.
- Inspect for obstructions and damage: Check the vent pipe for any obstructions, such as bird nests or debris. Additionally, look for any visible damage, such as cracks or breaks, that may require repair or replacement.
- Repair damaged vent pipe: If you find any cracks or breaks, you can use aluminum foil tape or duct tape as a temporary solution. However, it is recommended to replace the damaged section of the vent pipe for a more permanent fix.
- Ensure proper vent connections: Check that the vent pipe is properly connected to both the dryer and the exterior vent outlet. Use metal clamps or foil tape to secure the connections if needed.
- Clean the lint trap: Before reassembling the vent pipe, clean the lint trap thoroughly. Remove any lint buildup by hand or using a soft brush. A clean lint trap improves airflow and prevents future clogs.
- Reattach the vent cover or lint trap: Carefully place the vent cover or lint trap back in its original position and secure it with screws if necessary.
- Test the dryer: Plug the dryer back into the power source or turn on the gas supply if applicable. Run a test cycle to ensure that the dryer is functioning properly and that the vent is expelling air and moisture as expected.
- Maintain regular cleaning and inspections: To prevent future issues, make it a habit to clean the lint trap regularly and inspect the vent pipe for any signs of buildup or damage. Regular maintenance will help extend the life of your dryer and ensure optimal performance.
Remember, if you encounter more complex issues or are unsure about any aspect of the repair process, it is always best to consult a professional for guidance and assistance. They have the experience and knowledge to handle more intricate repairs and can ensure the safety and efficiency of your dryer vent system.
Tips and Safety Precautions
When fixing a dryer vent, it’s crucial to prioritize safety and take necessary precautions to protect yourself and your home. Here are some essential tips to keep in mind:
- Turn off the power: Always unplug the dryer from the power source or shut off the gas supply before attempting any repair work. This prevents the risk of electric shock or gas leaks.
- Wear protective gear: When working with the dryer vent, wear gloves to protect your hands from sharp edges and debris. Safety glasses are also recommended to shield your eyes.
- Work in a well-ventilated area: Ensure that the area around the dryer and vent is well-ventilated to avoid inhaling lint or other airborne particles. Open windows or use fans if necessary.
- Use the right tools: Use appropriate tools for each task, such as screwdrivers, vacuum cleaners, lint brushes, or dryer vent cleaning kits. Using the correct tools will make the repair process smoother and safer.
- Check for gas leaks: If you have a gas dryer, inspect the gas connections carefully for any leaks before and after making repairs. Apply a mixture of soap and water to the connections and look for bubbles, indicating a leak. If you suspect a gas leak, contact a professional immediately.
- Follow manufacturer guidelines: Refer to the dryer’s manual or the manufacturer’s instructions for specific information about your appliance. This includes recommended maintenance procedures and safety guidelines.
- Schedule regular maintenance: Even if you fix an issue with your dryer vent, it’s important to schedule regular maintenance to prevent future problems. Consider professional inspections and cleanings at least once a year to ensure optimal performance and safety.
- Monitor the dryer’s performance: After fixing the vent, keep an eye on the dryer’s performance. If you notice any unusual noises, smells, or decreased drying efficiency, it may indicate an underlying issue that requires further attention.
- Consider professional assistance for complex issues: If you encounter complex problems, such as extensive damage to the vent pipe or issues with the internal components of the dryer, it’s best to seek the help of a qualified professional. They have the expertise and specialized tools to handle these situations safely and effectively.
By following these tips and safety precautions, you can minimize the risk of accidents, ensure your well-being, and maintain the efficiency of your dryer vent system. Remember, safety should always be the top priority during any repair or maintenance work.
Common Issues and Troubleshooting
While maintaining your dryer vent system is important, problems can still arise even with regular care. Here are some common issues you might encounter and troubleshooting tips to help you resolve them:
- Poor drying performance: If your clothes are not drying efficiently or are taking much longer than usual, it may indicate a clogged or restricted vent. Start by cleaning the lint trap and vent pipe. If the issue persists, check for any blockages in the vent outlet and ensure that the vent pipe is properly connected.
- Dryer overheating: If the dryer is getting excessively hot or shutting off unexpectedly, it could be due to a blocked vent. Check for lint buildup in the vent pipe and clean it thoroughly. Also, inspect the vent cover and ensure it opens and closes smoothly.
- Foul odor: A musty or unpleasant smell coming from the dryer could be a sign of a clogged vent or trapped moisture. Clean the vent pipe and lint trap to remove any lint or debris that might be causing the odor. Additionally, make sure the vent outlet is clear and that air can flow freely.
- Noisy operation: If your dryer is making loud or unusual noises, it could be a sign of a loose or damaged vent pipe. Check all the connections and tighten any loose clamps. If there are any visible cracks or breaks in the vent, replace the damaged section.
- Lint buildup: Excessive lint accumulation is a common issue that can lead to reduced drying performance and fire hazards. Regularly clean the lint trap before or after each load. Additionally, schedule routine vent cleanings using a vacuum cleaner, lint brush, or a specialized dryer vent cleaning kit.
- Limited airflow: If you notice reduced airflow from the dryer vent, it may indicate an obstruction or a problem with the vent pipe. Inspect the vent outlet and remove any debris or blockages. If the problem persists, check the vent pipe for bends or kinks that may restrict airflow.
- Leaking vent: A leaking vent can cause water damage and increased humidity in your laundry area. Ensure that the vent pipe is securely connected and that there are no gaps or loose connections. If you suspect a leak, apply foil tape or duct tape to seal any openings temporarily, and consider replacing the vent pipe for a more permanent solution.
Remember, troubleshooting and resolving these issues should be done with caution. If you’re unsure about any troubleshooting steps or encounter more complex problems, it’s best to consult a professional for assistance. They can accurately diagnose the issue and provide the necessary repairs or recommendations to ensure the safety and functionality of your dryer vent system.
Conclusion
Taking care of your dryer vent is a crucial part of home maintenance. A properly functioning dryer vent not only ensures efficient drying performance but also reduces the risk of fire hazards and extends the life of your dryer. By understanding the role of a dryer vent, knowing when to seek professional help, and implementing DIY solutions, you can maintain a safe and efficient dryer vent system.
In this comprehensive guide, we’ve explored the importance of a properly functioning dryer vent and the potential issues that can arise. We’ve provided tips for troubleshooting common problems and steps for DIY repairs. Remember to prioritize safety by turning off the power, wearing protective gear, and following manufacturer guidelines.
While many dryer vent issues can be resolved through DIY fixes, some situations require professional assistance. Excessive lint accumulation, clogged or blocked vents, and gas dryer issues are examples of scenarios where it’s best to consult a professional. Their expertise and specialized tools will ensure a thorough and safe resolution.
Keep in mind the importance of regular maintenance and inspections to prevent future problems. Clean the lint trap after each load, schedule regular vent cleanings, and monitor the dryer’s performance for any signs of inefficiency or unusual behavior.
By being proactive and attentive to your dryer vent system, you can ensure optimal performance, improve the lifespan of your appliance, and promote the safety of your home. Remember, if you encounter complex issues or feel unsure about any aspect of the repair process, it’s always wise to seek professional help. Stay vigilant and keep your dryer vent in top shape for efficient and hassle-free laundry days.
Frequently Asked Questions about Who Can Fix A Dryer Vent
Was this page helpful?
At Storables.com, we guarantee accurate and reliable information. Our content, validated by Expert Board Contributors, is crafted following stringent Editorial Policies. We're committed to providing you with well-researched, expert-backed insights for all your informational needs.