Home>Home Maintenance>How Many Elbows Can A Dryer Vent Have
Home Maintenance
How Many Elbows Can A Dryer Vent Have
Modified: October 20, 2024
Learn how to maintain your home's dryer vent and discover the answer to how many elbows a dryer vent can have. Ensure proper airflow and reduce fire hazards.
(Many of the links in this article redirect to a specific reviewed product. Your purchase of these products through affiliate links helps to generate commission for Storables.com, at no extra cost. Learn more)
Introduction
When it comes to proper home maintenance, one often overlooked area is the dryer vent system. While we may diligently clean the lint trap after each load, we may not give much thought to the venting system that allows hot, moist air to escape from the dryer. However, a well-functioning dryer vent system is crucial for both the efficiency and safety of your home.
One important component of a dryer vent system is the use of elbows or bends. These elbows help to navigate the venting system around corners or obstacles, ensuring a smooth and efficient airflow. But just how many elbows can a dryer vent have, and what are the considerations when installing them?
In this article, we will explore the role of elbows in dryer vent systems and discuss the maximum number of elbows allowed. We will also examine the factors to consider when installing elbows and the potential risks of having too many elbows. Lastly, we’ll provide some tips for the proper maintenance of dryer vent elbows to keep your system functioning optimally.
Key Takeaways:
- Don’t Overbend: Keep your dryer vent system efficient and safe by limiting the number of elbows to four or fewer, as recommended by industry standards. Excessive elbows can lead to lint buildup and fire hazards.
- Elbow TLC: Regularly clean and inspect your dryer vent elbows to maintain optimal airflow, reduce fire risks, and extend the lifespan of your dryer. Proper maintenance ensures a safer and more efficient home.
Read more: How Many Vents Should A Roof Have
Why Do Dryer Vents Have Elbows?
Dryer vents are designed to remove hot and moist air from your dryer to the outside of your home. These vents play a crucial role in preventing the accumulation of excess heat and moisture, which could lead to mold growth, electrical malfunctions, or even fire hazards.
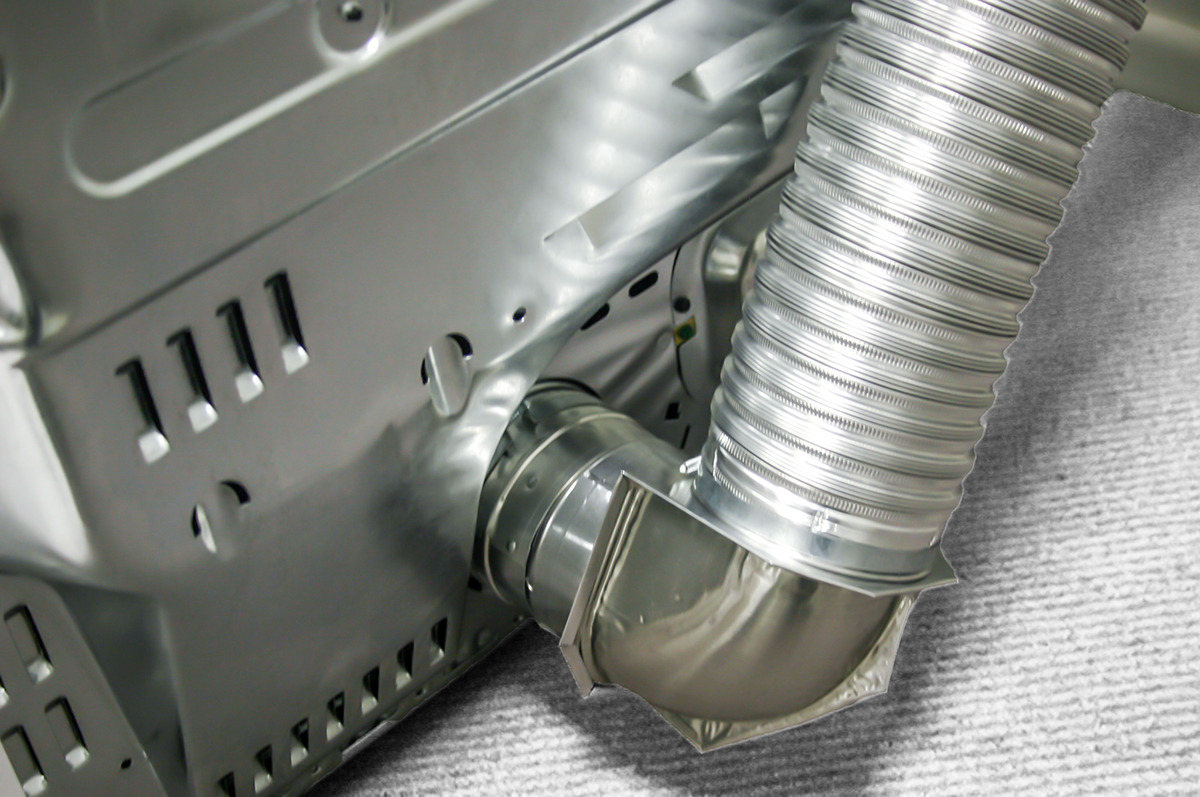
Elbows are often used in dryer vent systems to redirect the airflow around corners or obstacles. They allow the vent to navigate through walls, floors, and ceilings, ensuring that the warm air can be efficiently exhausted outside.
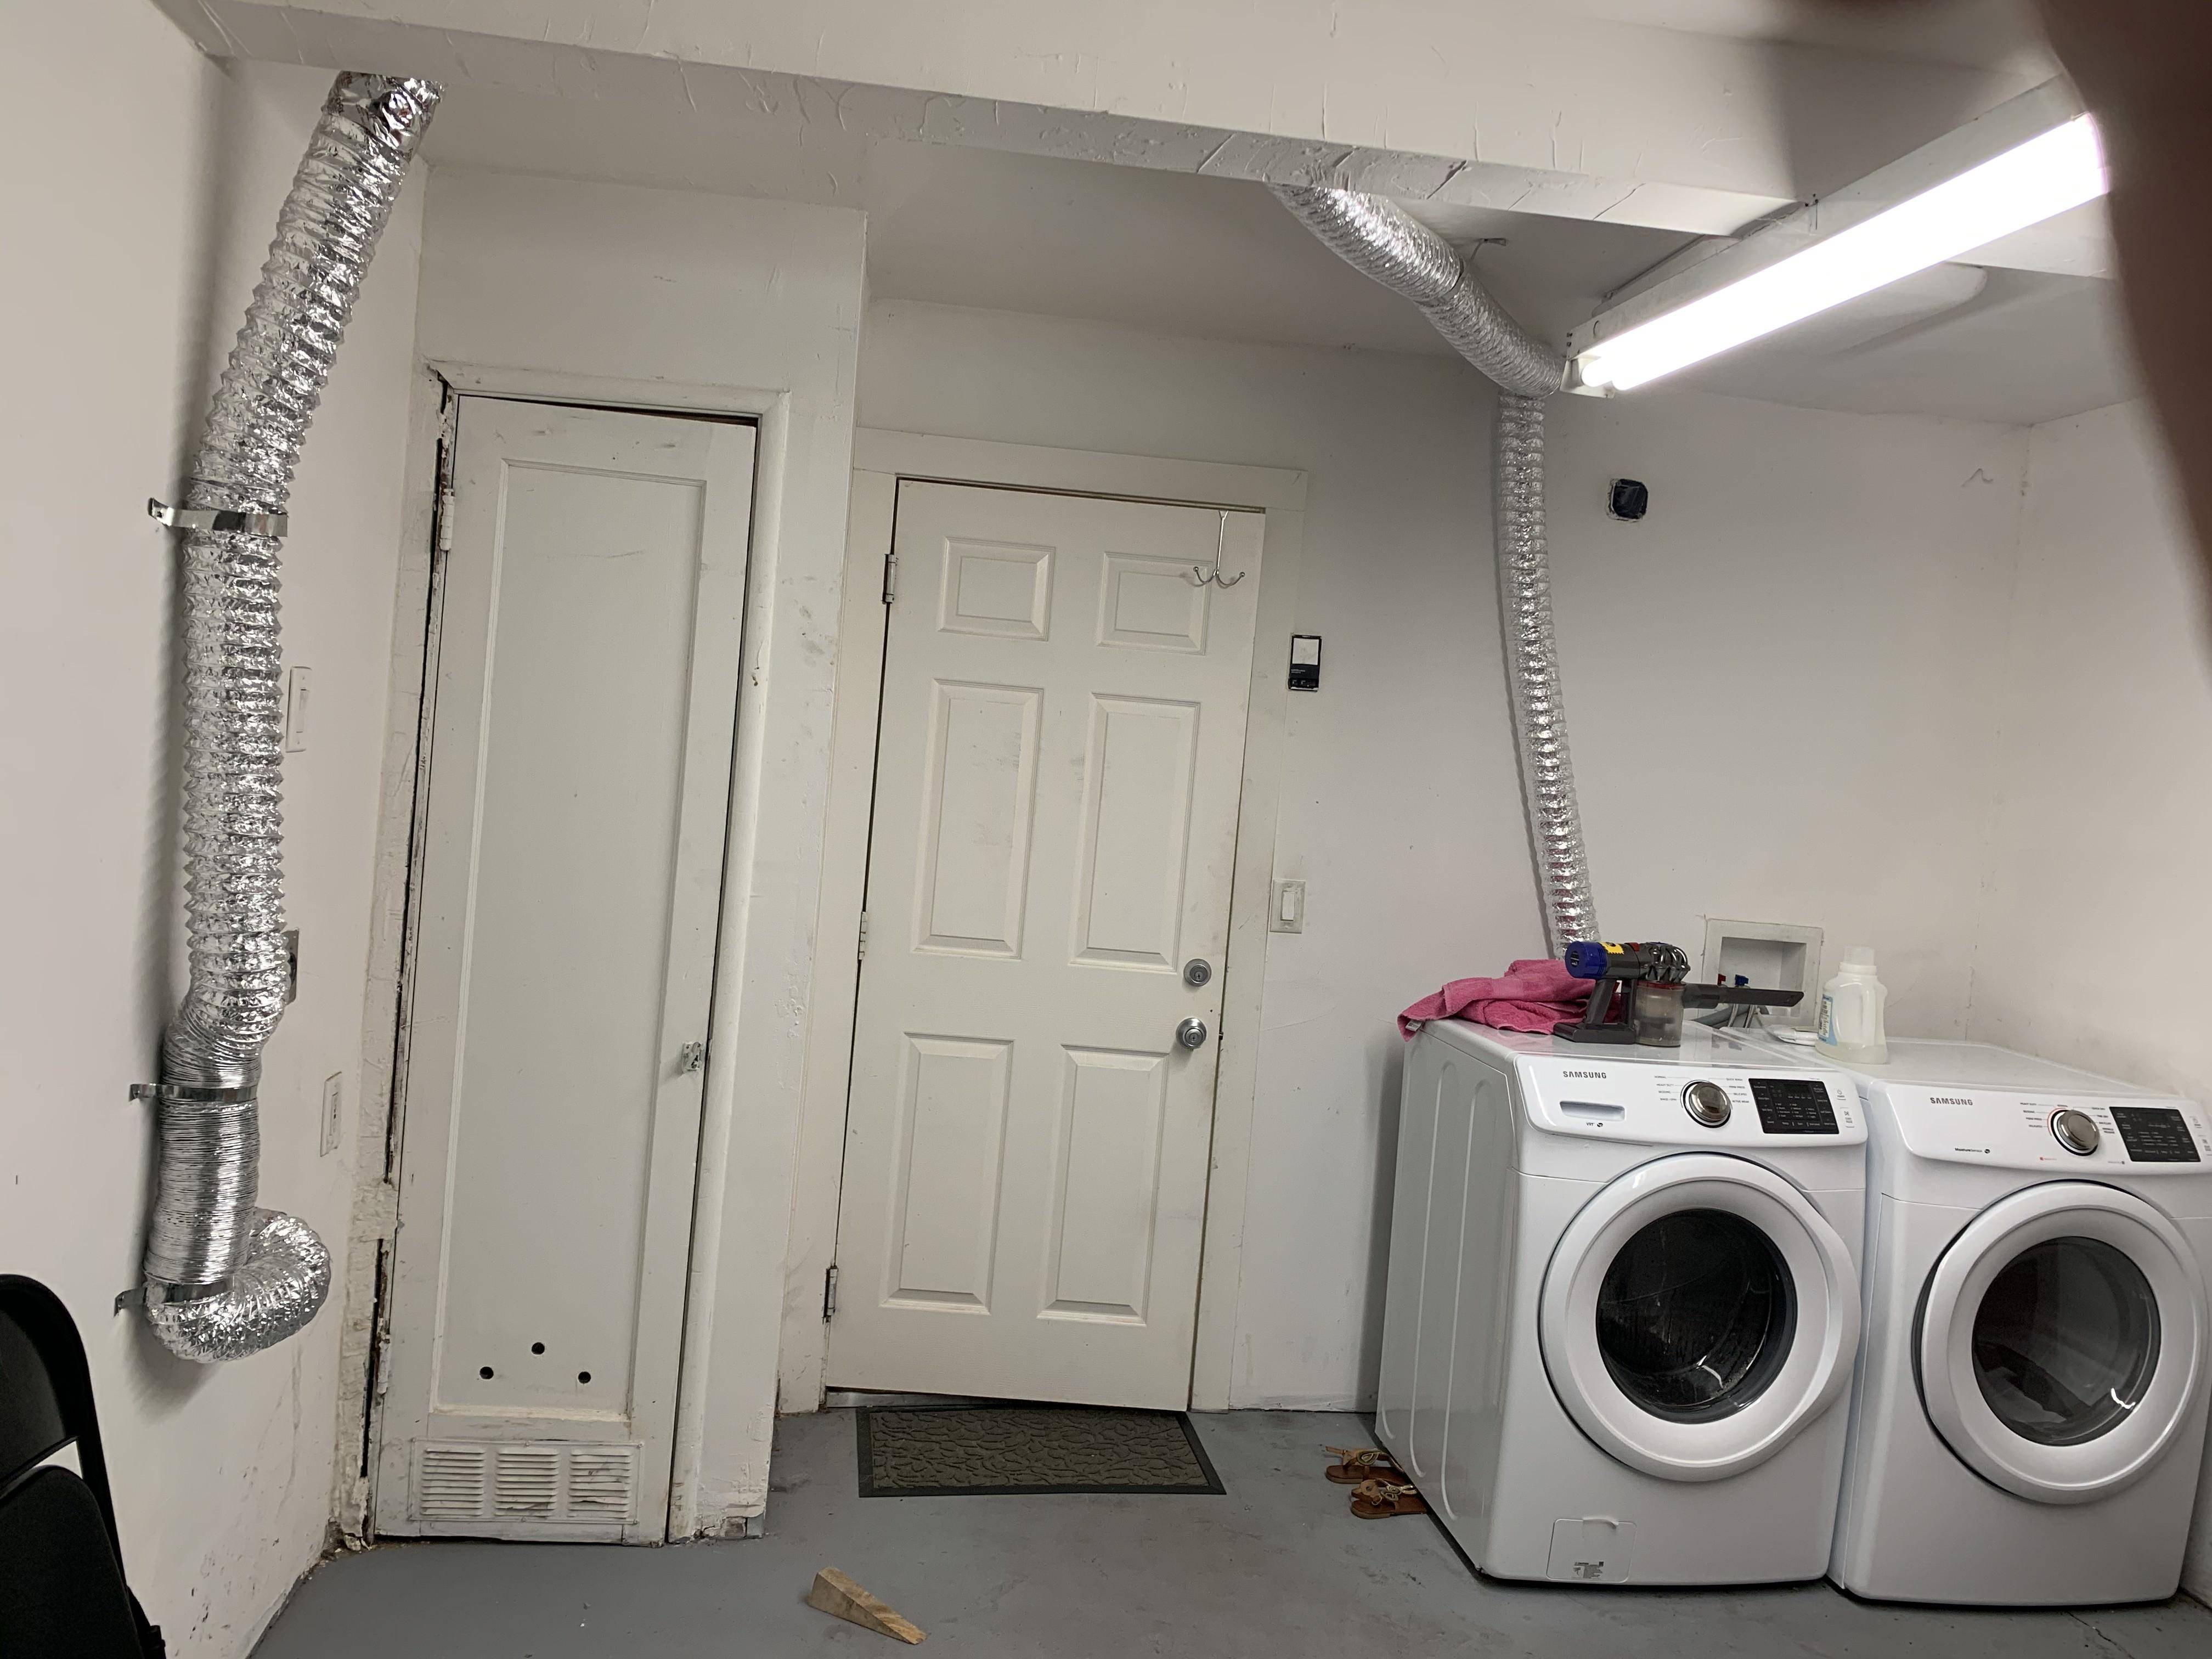
One common example of needing elbows in a dryer vent system is when the dryer is located in a laundry room situated in the center of the house. In this situation, the vent needs to travel through walls and possibly even up to the roof, requiring multiple elbows to navigate the path while maintaining adequate airflow.
Elbows also help to prevent kinks or bends in the venting system, which can restrict the airflow and decrease the efficiency of the dryer. By utilizing elbows, a more direct and efficient airflow is achieved, minimizing the potential buildup of lint and reducing the risk of dryer fires.
In addition to maintaining dryer efficiency, the use of elbows in dryer vent systems also aids in noise reduction. By angling the vent’s path, the elbows help to reduce the transfer of noise from the dryer to the surrounding areas of your home, resulting in a quieter laundry experience.
Overall, the use of elbows in dryer vent systems is crucial for ensuring the proper airflow, maintaining the efficiency of the dryer, preventing lint buildup, and reducing the risk of fire hazards. Proper installation of elbows is essential to maximize the performance and safety of your dryer vent system.
Maximum Number of Elbows Allowed
When it comes to the number of elbows or bends permitted in a dryer vent system, it is important to follow the guidelines and recommendations set forth by industry standards. These standards are in place to ensure that the venting system operates optimally and reduces the risk of potential issues such as lint buildup, reduced airflow, and fire hazards.
According to the National Fire Protection Association (NFPA) and the International Residential Code (IRC), the maximum number of elbows in a dryer vent system should generally not exceed four. This includes the elbows installed both on the dryer itself and within the venting system that runs through the walls and to the outside.
Exceeding the recommended maximum number of elbows can hinder the airflow and increase the likelihood of lint accumulation within the vent system. It can also lead to reduced dryer efficiency, longer drying times, and potential overheating, which raises the risk of a fire.
However, it’s important to note that the specific recommendations for the maximum number of elbows may vary based on the manufacturer’s guidelines and local building codes. It is essential to consult these resources when planning and installing your dryer vent system.
In addition to considering the maximum number of elbows, it’s crucial to maintain proper distances between the dryer and the exhaust vent outlet. The IRC specifies that the maximum length of the dryer exhaust duct should not exceed 25 feet, and each 90-degree elbow should account for an additional 5 feet of duct length. This guideline helps to maintain adequate airflow and reduce the risk of lint buildup.
Ultimately, it is advisable to consult with a professional HVAC technician or follow the manufacturer’s instructions when determining the appropriate number of elbows for your specific dryer vent system. They can provide valuable insight and ensure that your installation meets safety standards and local building codes.
Factors to Consider When Installing Elbows
When installing elbows in a dryer vent system, there are several factors to consider to ensure proper functionality and safety. Taking these factors into account will help you make informed decisions about the placement and installation of elbows in your specific situation. Here are some important considerations:
- Vent Path: Assess the path the vent needs to take to reach the outside of your home. Determine if there are any obstacles, such as walls, floors, or ceilings, that require the use of elbows to navigate around them. Plan the route carefully, considering the most direct and efficient path while minimizing the number of elbows needed.
- Elbow Type: Choose the appropriate type of elbow for your specific application. There are two common types: 45-degree and 90-degree elbows. The 45-degree elbows provide a gentler bend, promoting better airflow, while the 90-degree elbows create a sharper bend, which can increase resistance and reduce efficiency.
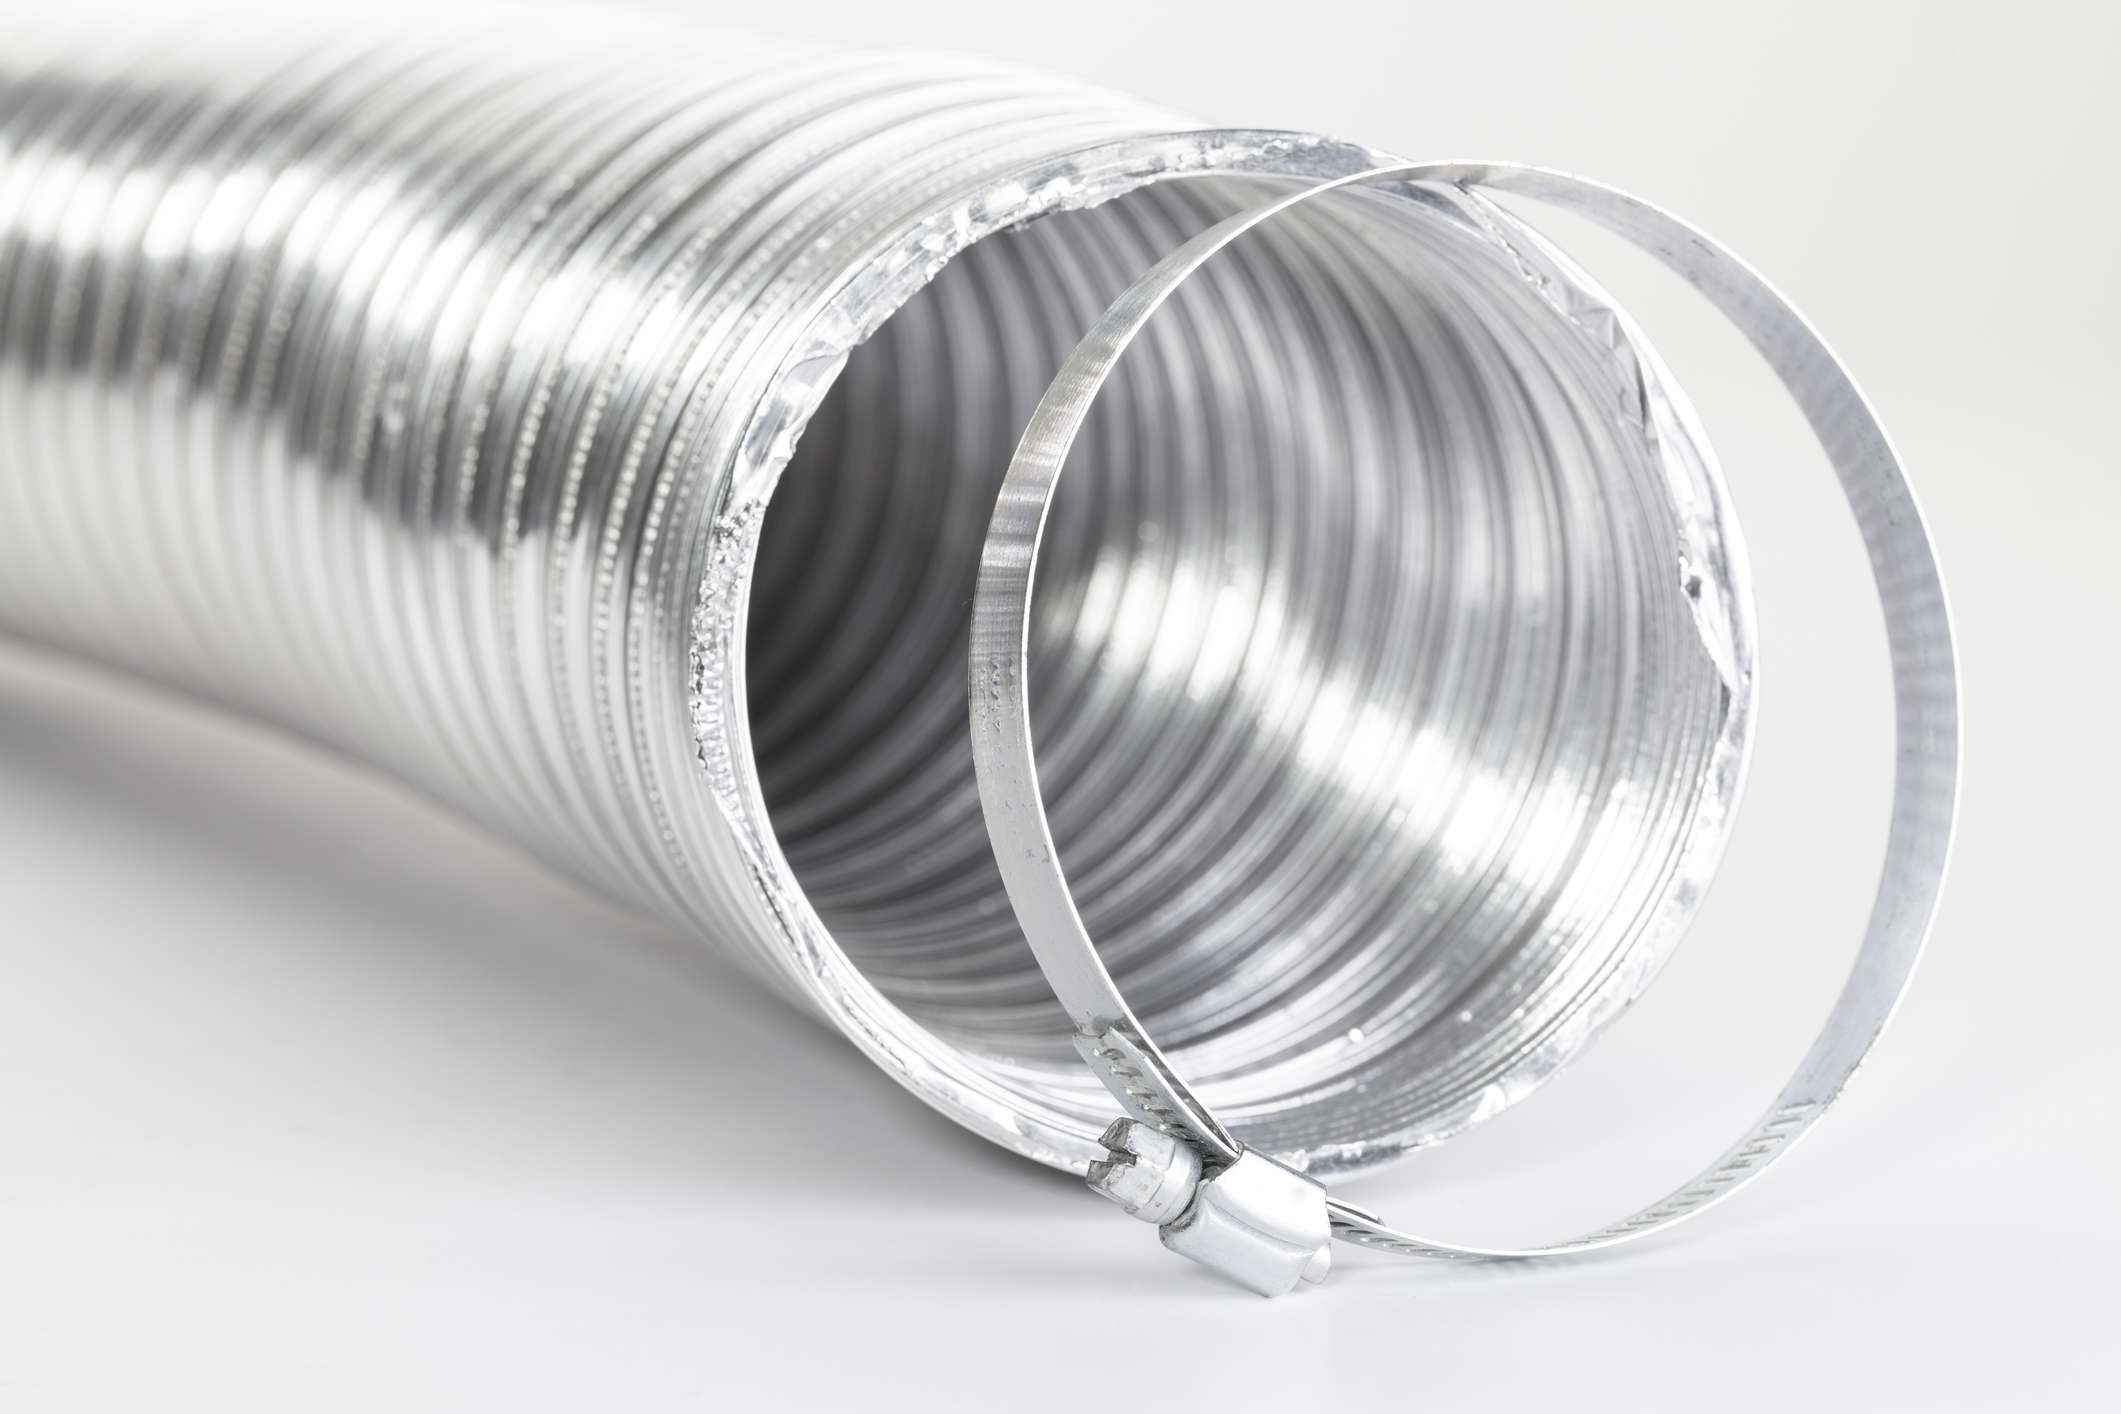
- Elbow Material: Select elbows made of durable and fire-resistant materials, such as rigid metal or heavy-duty plastic. Avoid using flexible or coiled materials, as they can restrict airflow and accumulate lint.
- Clearance Space: Ensure that there is enough space around the elbows to allow for easy access during routine maintenance and cleaning. Adequate clearance will also prevent obstructions that could impede proper airflow.
- Proper Alignment: Align the elbows correctly with the dryer exhaust outlet and the vent outlet outside the house. This alignment will ensure a smooth and unobstructed airflow, minimizing the risk of lint buildup and maximizing the performance of the dryer.
- Sealing: Properly seal the connections between the elbows and the venting system using high-quality foil tape or metal clamps. This will prevent air leaks and maintain the efficiency of the dryer vent system.
- Compliance: Adhere to local building codes and regulations regarding dryer vent installation. These codes may have specific requirements regarding the placement, materials, and length of the venting system, including the number of elbows allowed.
By considering these factors when installing elbows in your dryer vent system, you can ensure optimal performance, reduce the risk of issues such as lint buildup and restricted airflow, and promote the longevity and safety of your dryer.
It is recommended to limit the number of elbows in a dryer vent to a maximum of two. Each additional elbow can restrict airflow and increase the risk of lint buildup, leading to potential fire hazards.
Risks of Having Too Many Elbows
While elbows are necessary for navigating corners and obstacles in a dryer vent system, having too many elbows can pose risks to the functionality and safety of the system. Here are some potential risks associated with having an excessive number of elbows:
- Reduced Airflow: Each elbow creates resistance to the airflow, causing a decrease in the overall efficiency of the dryer vent system. When there are too many elbows, the cumulative resistance can significantly impair the airflow, resulting in longer drying times, reduced performance, and potential overheating of the dryer.
- Lint Accumulation: The use of multiple elbows can create pockets or areas where lint can accumulate. Lint is highly flammable and poses a significant fire hazard. When lint accumulates in these areas, it can increase the risk of a dryer fire, especially if it goes undetected and uncleaned for an extended period.
- Increased Energy Consumption: As the airflow becomes restricted due to excessive elbows, the dryer needs to work harder to push the air out. This increased workload can lead to higher energy consumption and, ultimately, higher utility bills.
- Excessive Heat Buildup: When the airflow is compromised, heat can build up within the dryer vent system. This heat buildup not only affects the efficiency of the dryer but also increases the risk of overheating and potential fires.
- Poor Dryer Performance: Too many elbows can result in insufficient ventilation, leading to inadequate drying of clothes. Damp or partially dried clothes can create an unpleasant odor and increase the risk of mold or mildew growth within the dryer.
- Difficulty in Maintenance: Cleaning and maintaining a dryer vent system with multiple elbows can be challenging. The bends and tight spaces make it more difficult to access and remove lint and debris, increasing the risk of neglecting regular maintenance tasks.
To mitigate these risks, it is essential to follow industry guidelines and recommendations regarding the maximum number of elbows. Keeping the number of elbows to a minimum while ensuring proper airflow and ventilation will help maintain the efficiency of the dryer, reduce the risk of lint buildup and fire hazards, and extend the lifespan of the dryer vent system.
In summary, while elbows are necessary for maneuvering dryer vent systems around corners and obstacles, it is crucial to strike a balance and avoid excessive use. By doing so, you can ensure the smooth operation, safety, and longevity of your dryer and its venting system.
Read more: How Long Can A Dryer Vent Be
Proper Maintenance of Dryer Vent Elbows
Maintaining the dryer vent elbows is essential to ensure the efficiency, safety, and longevity of your dryer vent system. Here are some key maintenance practices to follow:
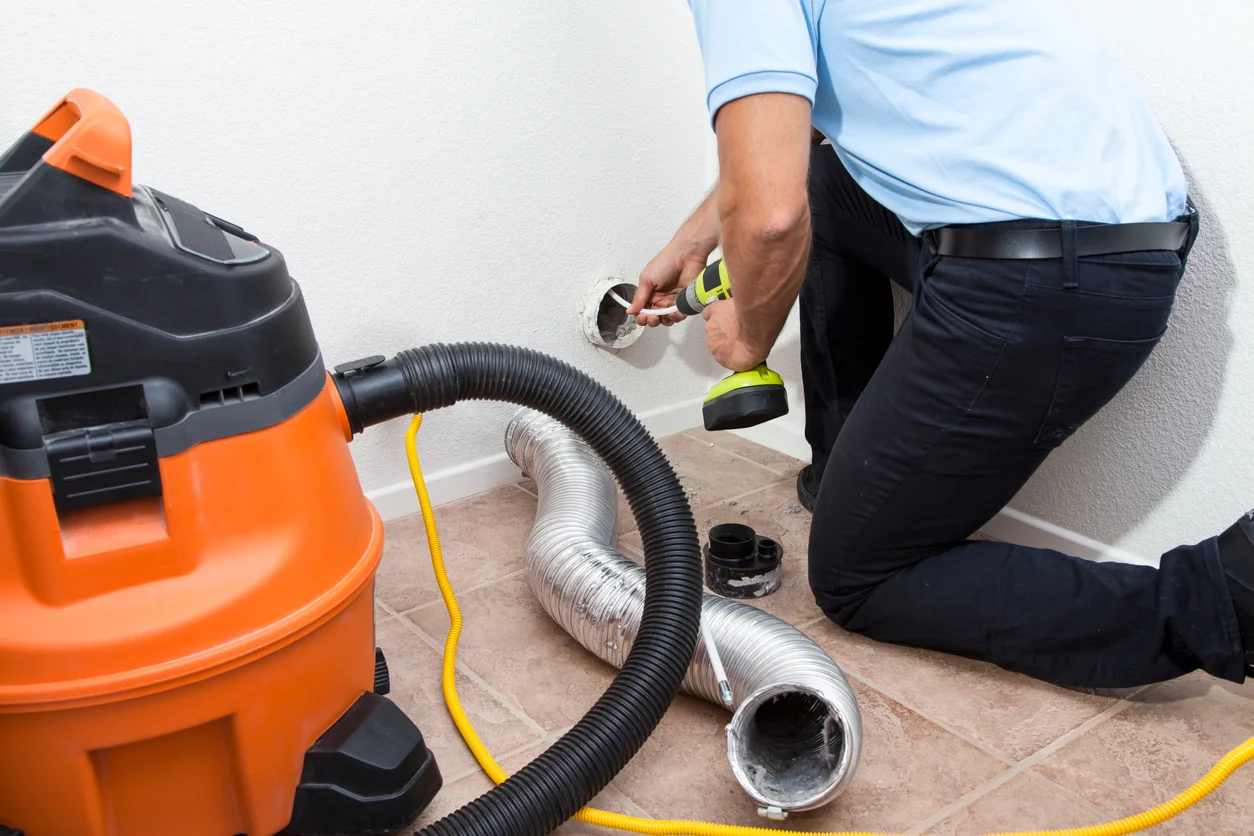
- Regular Cleaning: Clean the dryer vent system, including the elbows, on a regular basis to remove lint and debris buildup. Use a vent brush or vacuum attachment specifically designed for dryer vents to thoroughly clean the inside. Pay close attention to the elbows where lint tends to accumulate.
- Inspect for Damage: Regularly inspect the elbows for any signs of damage or wear, such as cracks, gaps, or loose connections. These issues can impair the functionality of the vent system and should be promptly repaired or replaced by a professional.
- Check Ventilation: Ensure that the airflow from the dryer is strong and continuous. If you notice reduced airflow or longer drying times, it may indicate a blockage in the vent system, including the elbows. Address the issue promptly to prevent lint buildup and potential fire hazards.
- Monitor Dryer Performance: Keep an eye on the performance of your dryer. If you notice unusual noises, excessive heat, or clothes that are not drying properly, it could be a sign of a ventilation problem caused by the elbows. Address any issues promptly to maintain the performance and efficiency of your dryer.
- Avoid Crushing or Bending: Do not crush or bend the elbows when moving or installing them. A bent or misshapen elbow can restrict airflow and hinder the overall performance of the dryer vent system.
- Secure Connections: Make sure the connections between the elbows and the venting system are securely fastened. Loose connections can lead to air leaks, reducing the efficiency of the system. Use high-quality foil tape or metal clamps to ensure a tight seal.
- Remove Obstructions: Regularly check the area surrounding the dryer vent elbows and remove any obstructions such as lint, dust, or debris. Keep the space around the elbows clear to promote proper airflow and prevent blockages.
- Professional Inspection: Consider scheduling a professional inspection of your dryer vent system, including the elbows, on a periodic basis. A certified technician can identify any potential issues, clean the system thoroughly, and ensure proper functionality and safety.
By following these maintenance practices, you can prevent lint buildup, maintain airflow, reduce the risk of fire hazards, and extend the lifespan of your dryer vent elbows. Regular maintenance not only ensures the efficiency and safety of your dryer but also saves energy and helps protect your home from potential dryer-related issues.
Remember, a properly maintained dryer vent system will not only enhance the performance of your dryer but also contribute to a safer and healthier home environment.
Conclusion
Proper installation and maintenance of dryer vent elbows are crucial for the efficient and safe operation of your dryer. Elbows play a vital role in navigating the venting system around corners and obstacles, ensuring smooth airflow and preventing the accumulation of lint and moisture.
It is important to adhere to industry guidelines and recommendations regarding the maximum number of elbows allowed in a dryer vent system. Excessive use of elbows can hinder airflow, increase the risk of lint buildup, reduce dryer efficiency, and raise the potential for fire hazards.
When installing elbows, consider factors such as vent path, elbow type, elbow material, clearance space, alignment, sealing, and compliance with local building codes. By considering these factors, you can effectively plan and install the elbows for optimal performance and safety.
Maintaining dryer vent elbows is equally essential. Regular cleaning, inspection for damage, monitoring dryer performance, and removing obstructions are key maintenance practices. By taking care of your dryer vent elbows, you can ensure efficient airflow, reduce the risk of fire hazards, and extend the lifespan of your dryer vent system.
Remember to consult professionals and follow manufacturer instructions for proper installation and maintenance. A certified technician can provide valuable insights and ensure that your dryer vent system meets safety standards and local building codes.
In conclusion, by understanding the role of elbows in the dryer vent system, following installation guidelines, and practicing regular maintenance, you can enjoy an efficient and safe dryer that operates at its best. Take the necessary steps to protect your home and ensure the longevity of your dryer by giving proper attention to the installation and maintenance of your dryer vent elbows.
Frequently Asked Questions about How Many Elbows Can A Dryer Vent Have
Was this page helpful?
At Storables.com, we guarantee accurate and reliable information. Our content, validated by Expert Board Contributors, is crafted following stringent Editorial Policies. We're committed to providing you with well-researched, expert-backed insights for all your informational needs.