Articles
11 Best Range Hood Roof Vent For 2025
Modified: June 10, 2025
Looking for the best range hood roof vent for 2025? Discover the top 11 options and make the right choice for your kitchen ventilation needs.
(Many of the links in this article redirect to a specific reviewed product. Your purchase of these products through affiliate links helps to generate commission for Storables.com, at no extra cost. Learn more)
Are you in search of the perfect range hood roof vent for the year 2025? Look no further! In this article, we will explore and showcase the 11 best range hood roof vents available on the market. Whether you are renovating your kitchen or simply in need of an upgrade, these select roof vents offer optimal ventilation, efficiency, and style. With various designs and features, there is a range hood roof vent to suit every kitchen's needs. Stay ahead of the curve and discover the top options for 2025!

Overall Score: 9/10
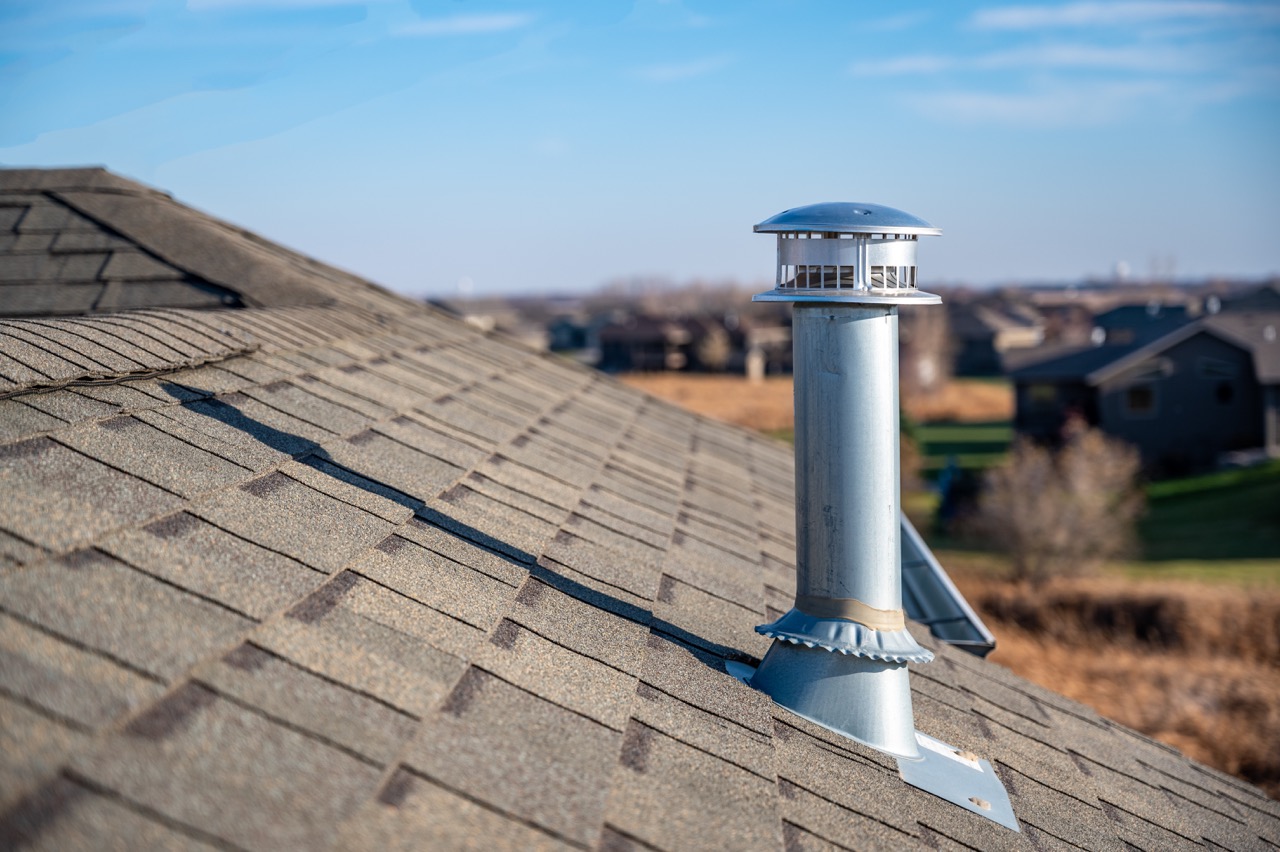
The Builder's Best 84033 Galvanized Steel Roof Vent Cap with Damper & Removable Screen is a heavy-duty and durable roof vent hood. It features a high-performance polyester powder-coated finish that provides excellent corrosion protection. With ASTM B117 certification, this vent cap has superior anti-corrosive properties compared to other brands. The riveted construction ensures durability and the pre-drilled holes allow for easy mounting. The vent cap also includes a flapper (damper) to prevent back drafts. It is ideal for bathroom or kitchen vents and can also be used for venting clothes dryers by removing the screens. Made in the USA by Builder's Best, this product is of high quality and reliability.
Key Features
- Extremely Durable: heavy duty 26 gauge galvanized roof vent hood
- Protection Against Corrosion: superior anti-corrosive properties
- Riveted construction; does not use caulk
- Includes pre-drilled holes for easy mounting
- Flapper (damper) prevents back drafts
- Ideal for bathroom or kitchen vents
- Removable screens for venting clothes dryers
- Quality made in the USA by Builder's Best, Inc.
Specifications
- Color: Black (New 2021)
- Dimension: 16.88Lx12.38Wx18.63H
- Size: 6" Diameter Collar
Pros
- Extremely durable and well-built
- Superior corrosion protection
- Easy to install
- Effective dampening of back drafts
- Removable screens for versatile venting options
Cons
- Requires careful installation on already shingled roofs
- Angle may not be sharp enough to prevent water intrusion
- Pricey compared to some other options
The Builder’s Best 84033 Galvanized Steel Roof Vent Cap with Damper & Removable Screen is a top-notch product that delivers on its promises. Its heavy-duty construction, superior corrosion protection, and versatile venting options make it an excellent choice for bathroom, kitchen, and dryer vents. While the installation may require some attention on already shingled roofs, the overall quality and performance of this vent cap justify the investment. With its removable screens and effective dampening of back drafts, it offers versatility and peace of mind. Made in the USA by Builder’s Best, you can trust in the quality and reliability of this product. Upgrade your ventilation system with the Builder’s Best 84033 Galvanized Steel Roof Vent Cap.

Overall Score: 8/10
The 2 Pack 6“ Replacement White Vent Fan Blades are the perfect solution for maintaining good air quality in your RV bathroom. These blades effectively exhaust lingering smells and built-up moisture, creating a healthy environment. Made of durable plastic, the fan blades resist rust and corrosion, ensuring a long lifespan. The direction of spin can be easily determined by looking down through the motor. They are compatible with Heng's, Elixir, Ventline (pre-1995), Jensen (pre-1995 range hood) roof vents and range hoods, as well as any 12 Volt motor with a 0.094-inch D-shaped shaft. Ensure an exact fit by comparing the unit measurements with your current exhaust fan motor. With a 6-inch overall diameter, 2-inch by 1.5-inch individual blades, and a 1.75-inch diameter center bore plate, these fan blades provide the perfect replacement solution. Enjoy a 1-year replacement service and improve air quality in your RV bathroom today!
Key Features
- Keep good air quality
- Long lifespan
- Decide your rotation
- Compatibility
- Dimension: Fan shade(6” overall diameter:2” x 1.5” individual blades; 1.75” diameter center bore plate; 2/25” diameter center D borehole)
- 1-year replacement service
Specifications
- Color: 2 Pack RV Fans
- Size: 2 RV Fan Blade
Pros
- Effectively exhausts smells and moisture
- Durable plastic resists rust and corrosion
- Easy to determine the direction of spin
- Compatible with various vent systems
- 1-year replacement service
Cons
- May require some effort for installation
- Not the right size hole for some users
The 2 Pack 6“ Replacement White Vent Fan Blades are a reliable solution for maintaining air quality in your RV bathroom. With their durable construction and compatibility with various vent systems, these fan blades provide long-lasting performance. They effectively exhaust unwanted smells and moisture, creating a healthy environment. The direction of spin can be easily determined, offering flexibility in installation. While some users may face challenges with installation, these fan blades deliver excellent value for the price. If you’re in need of replacement blades for your RV bathroom vent fan, these 6-inch fan blades are a perfect fit. Improve the air quality in your RV today!

Overall Score: 8/10
The SnowyFox 6" White RV Roof Vent is a durable and reliable option for maintaining high air quality in your motorhome. With easy installation and a quiet operation, this vent fan is a convenient choice for any RV owner. It is designed to fit various roof vents and range hoods, making it widely applicable. The fan blade is made of high-quality plastic, ensuring a longer lifespan. Additionally, the product comes with a 2-year warranty and quick customer support. While some customers have experienced packaging issues and a lack of screws, the overall quality and performance of the fan have received positive reviews. With a customer rating of 4.0/5, the SnowyFox RV Roof Vent is a reliable choice for improving air circulation in your RV.
Key Features
- Maintain High Air Quality
- Durable & Longer Lifespan
- Keep it Simple Stupid
- Quietly Brilliant
- Widely Applicable
- After-sales Warranty
Specifications
- Color: RV Vent Fan Blade
- Dimension: 6.60Lx6.60Wx2.20H
Pros
- Maintains good air quality in motorhomes
- Durable plastic construction for a longer lifespan
- Easy to install and convenient for RV use
- Quiet operation reduces environmental impact
- Fits various roof vents and range hoods
Cons
- Poor packaging and lack of instructions
- Screws not included
- May require modification for proper fit
The SnowyFox 6″ White RV Roof Vent is a reliable and efficient choice for enhancing air circulation and maintaining high air quality in your RV. Its durable construction and quiet operation make it a convenient option for any RV owner. While some customers have experienced packaging issues and had to purchase additional screws, the overall performance of the vent fan has received positive reviews. With its wide applicability and after-sales warranty, the SnowyFox RV Roof Vent is a worthwhile investment for improving your RV experience.

Overall Score: 8.5/10
The Broan-NuTone 634M Steel Roof Cap is a high-quality roof cap designed for use with range hoods, LoSone fans, and bath ventilation fans. It is constructed of sturdy, 24-gauge CRCQ steel and features a black electrically-bonded epoxy finish for durability. The roof cap includes a built-in backdraft damper and bird screen, providing reliable and secure ventilation. With a footprint of 18.75" x 14.25", it offers a well-balanced fit for easy installation with a 6" round duct. The Broan-NuTone 634M Steel Roof Cap is a reliable and efficient option for maximizing the air and sound performance of your fan or range hood.
Key Features
- High-quality roof cap for range hoods, Lo Sone fans, and bath ventilation fans
- Durable construction with sturdy 24-gauge CRCQ steel
- Includes built-in backdraft damper and bird screen
- Secure fit with a footprint of 18.75" x 14.25"
- Easy installation with a 6" round duct
Specifications
- Color: Black
- Dimension: 1.58Lx14.25Wx8.06H
- Size: 6"
Pros
- Sturdy and durable construction
- Reliable backdraft damper and bird screen
- Secure and well-balanced fit
- Easy installation with 6" round duct
Cons
- Potential shipping and handling damage to flashing flange
- Short collar may require additional sealing
- Flange could be wider for better shingle overlap
- Foam around door may dry rot over time
The Broan-NuTone 634M Steel Roof Cap is a high-quality and reliable option for maximizing the performance of your range hood or ventilation fan. With its sturdy construction, built-in damper and bird screen, and easy installation, it is designed to provide efficient and secure ventilation. However, customers should be aware of potential shipping and handling damage to the flashing flange and the need for additional sealing due to the short collar. Despite these minor drawbacks, the Broan-NuTone 634M Steel Roof Cap offers great value and durability for your ventilation needs.

Overall Score: 9/10
The Hon&Guan 6 Inch Removable Roof Vents Roof Dryer Vent Cap is a high-quality roof vent cover designed for effective ventilation and protection. Constructed with heavy gauge galvanized steel, this vent ensures durability and has strong corrosion resistance. It features an excellent design with a backdraft damper to prevent wind, rain, snow, and external damage from entering. The removable panel allows for easier cleaning, and it can be connected to any 4-inch hose. With easy installation, including a pipe extension for connecting to flex ducting, this roof vent is suitable for use with roof exhaust venting systems and 6 inch ducts. Hon&Guan promises absolute satisfaction with every purchase, offering risk-free shopping with the option for replacement or refund.
Key Features
- Excellent design with backdraft damper
- Constructed with heavy gauge galvanized steel
- Easy installation with pipe extension
- Removable panel for easier cleaning
- Suitable for use with roof exhaust venting systems
Specifications
- Size: 6 IN
Pros
- Prevents wind, rain, and snow from entering
- Durable and corrosion resistant
- Can be used with any 4-inch hose
- Easy to clean
- Suitable for roof exhaust venting systems
Cons
- Requires additional hardware and sealant for installation
- Adapter needed for connecting a 4-inch duct
The Hon&Guan 6 Inch Removable Roof Vents Roof Dryer Vent Cap is a reliable and efficient solution for ventilation and protection. With its excellent design and high-quality construction, it effectively keeps out external elements while allowing for maximum airflow. The removable panel makes cleaning a breeze, ensuring optimal performance. It is a versatile option that can be used with different hose sizes. While it may require additional installation accessories and an adapter for specific duct sizes, the overall quality and functionality of this roof vent make it a worthwhile investment. Whether for residential or commercial use, the Hon&Guan 6 Inch Removable Roof Vents Roof Dryer Vent Cap offers a reliable and durable solution for your ventilation needs.

Overall Score: 8/10
The Broan-NuTone 634 Broan Steel 3-1/4x 10" Roof Cap is a high-quality and reliable roof cap designed for range hoods, LoSone fans, and bath ventilation fans. Made from sturdy 24-gauge CRCQ steel, this roof cap is built to last and features a black electrically-bonded epoxy finish for added durability. It includes a built-in backdraft damper and bird screen for superior performance. With its 3.25" x 10" or 8" round duct compatibility, it offers easy installation and a secure fit. The Broan-NuTone 634 Roof Cap is a dependable solution for maximizing the air and sound performance of your fan or range hood.
Key Features
- High-quality roof cap for range hoods, Lo Sone fans, and bath ventilation fans
- Made of sturdy 24-gauge CRCQ steel for durability
- Includes built-in backdraft damper and bird screen
- Secure fit with a 3.25" x 10" or 8" round duct
- Easy installation for flexibility
Specifications
- Color: Steel
- Dimension: 20.00Lx15.00Wx8.00H
- Size: 1
Pros
- High-quality construction
- Durable and long-lasting
- Dependable performance
- Easy to install
- Secure fit
Cons
- Flimsy metal and sharp corners during installation
- Bird screen mounting could be improved
- No adapter for inlet ductwork
- Lacks an angle at the top to direct water around it
The Broan-NuTone 634 Broan Steel 3-1/4x 10″ Roof Cap is a reliable and well-constructed solution for maximizing the air and sound performance of your fan or range hood. Its sturdy steel construction ensures durability and lasting use, while the built-in backdraft damper and bird screen provide added reliability. The easy installation and secure fit make it a convenient choice for any ventilation system. However, take caution during installation due to the flimsy metal and sharp corners. Overall, this roof cap offers good value for the money, with only a few minor drawbacks.
")
Overall Score: 8/10
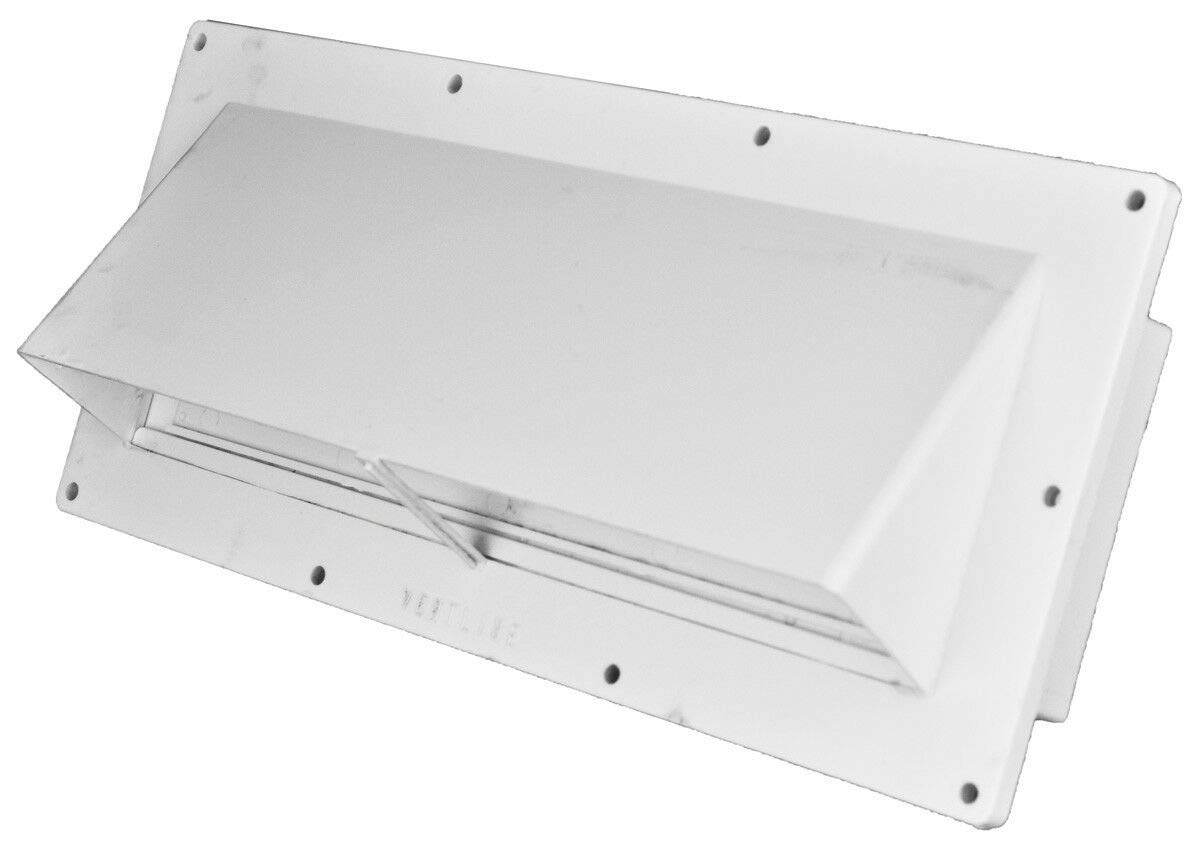
The Rooftop Exhaust Vent Cap with Damper and Bottom Extension is a high-quality exhaust vent cap designed for bathroom and kitchen venting systems. It is made with heavy gauge steel to ensure durability and includes a damper to prevent backdraft and a screen to keep out insects and birds. This vent cap is available in an 8-inch size and comes in brown color. It features a 3-inch long pipe extension for easy connection to flex tubing. Made in the USA, this vent cap is well-built and sturdy. It is easy to install and has received positive reviews for its quality and performance.
Key Features
- Designed for bathroom and kitchen exhaust venting systems
- Available in 8-inch size and brown color
- Includes 3-inch long pipe extension for easy connection
- Constructed with heavy gauge steel for durability
- Features a damper to prevent backdraft and a screen to keep out insects and birds
- Made in the USA
Specifications
- Color: Brown
- Size: 8 Inch
Pros
- Good quality and easy installation
- Well made and sturdy construction
- Works well with vent hood and exhaust fan
- Compared favorably to other vents in construction
Cons
- Not as heavy gauge as expected
- Critter screen needs mechanical attachment
- Screen can be easily knocked out during installation
- Thin construction
The Rooftop Exhaust Vent Cap with Damper and Bottom Extension is a reliable and well-constructed product for bathroom and kitchen venting systems. It provides good performance and is easy to install. While it may not be as heavy gauge as some users expected, it still offers durability and functionality. The screen attachment may require additional measures to ensure it stays in place. Overall, this vent cap is a great choice for those looking for a quality product to improve ventilation in their space.

Overall Score: 8/10
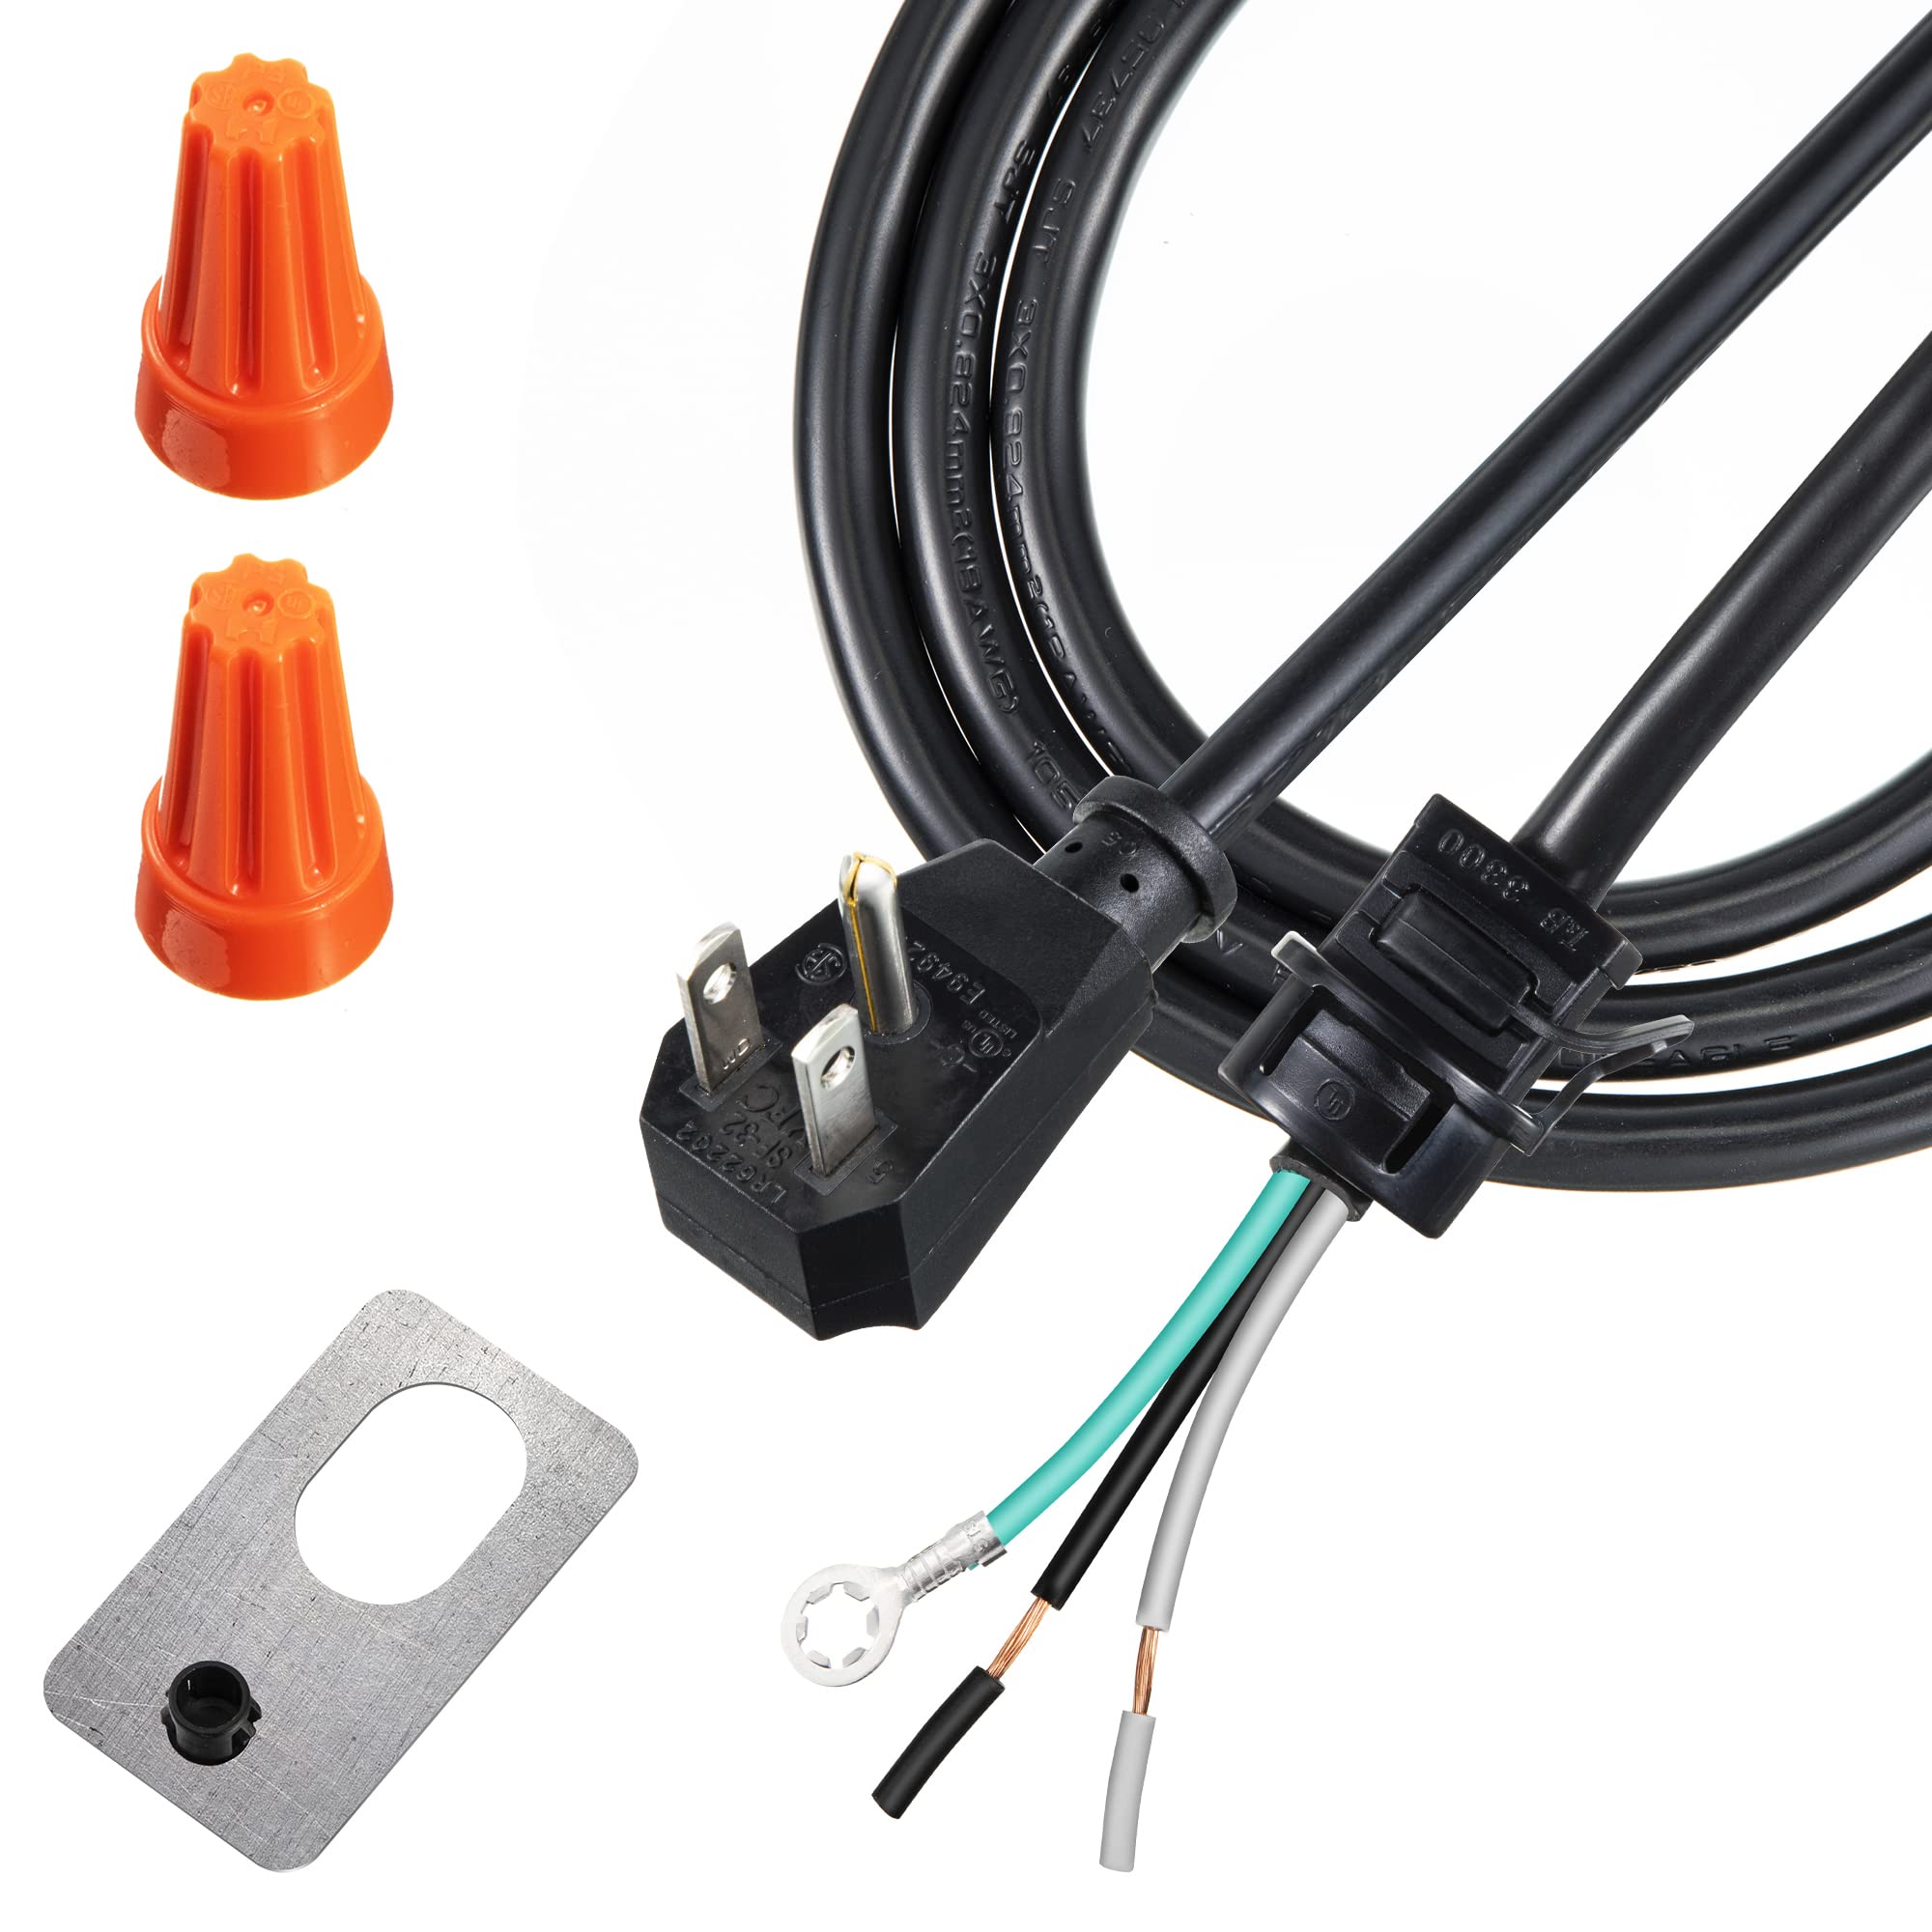
The RS-545SA RV Bathroom Vent Motor W/Fan Blade is a replacement part designed for RV bathroom vents and range hoods. It is compatible with popular brands such as Heng's, Elixir, Ventline, and Jensen. The motor operates on 12V DC and features a reversible rotation, making it versatile for different installations. The motor has a 0.094-inch round-shaped shaft, with a D-shaped shaft and a compact motor body. The package includes one motor and one 6-inch white fan blade. During installation, it is important to ensure the fan blade is securely attached to the shaft and that the screen is properly positioned. Upgrade your RV bathroom vent or range hood with this reliable replacement motor and fan blade combination.
Key Features
- 1 x motor and 1 x 6" fan blade
- Compatible with popular RV vent and range hood brands
- Reversible rotation for versatile installation
- Compact motor body with a D-shaped shaft
- Easy installation with clear instructions
Specifications
- Color: 12V RV Ventilation fan
- Size: 6" fan blade
Pros
- Compatible with various RV vent and range hood brands
- Reversible rotation for flexible installation
- Easy to install with clear instructions
Cons
- Only suitable for 12V DC operation
- May require additional modifications for certain models
The RS-545SA RV Bathroom Vent Motor W/Fan Blade is a reliable replacement option for RV owners looking to upgrade their bathroom vent or range hood. Its compatibility with popular brands and reversible rotation make it a versatile choice. The compact motor body and included fan blade ensure effective airflow. Although it is limited to 12V DC operation, installation is straightforward with clear instructions. However, some models may require additional modifications. Overall, it is a worthwhile investment for maintaining proper ventilation in your RV and improving air quality while on the road.

Overall Score: 6.4/10
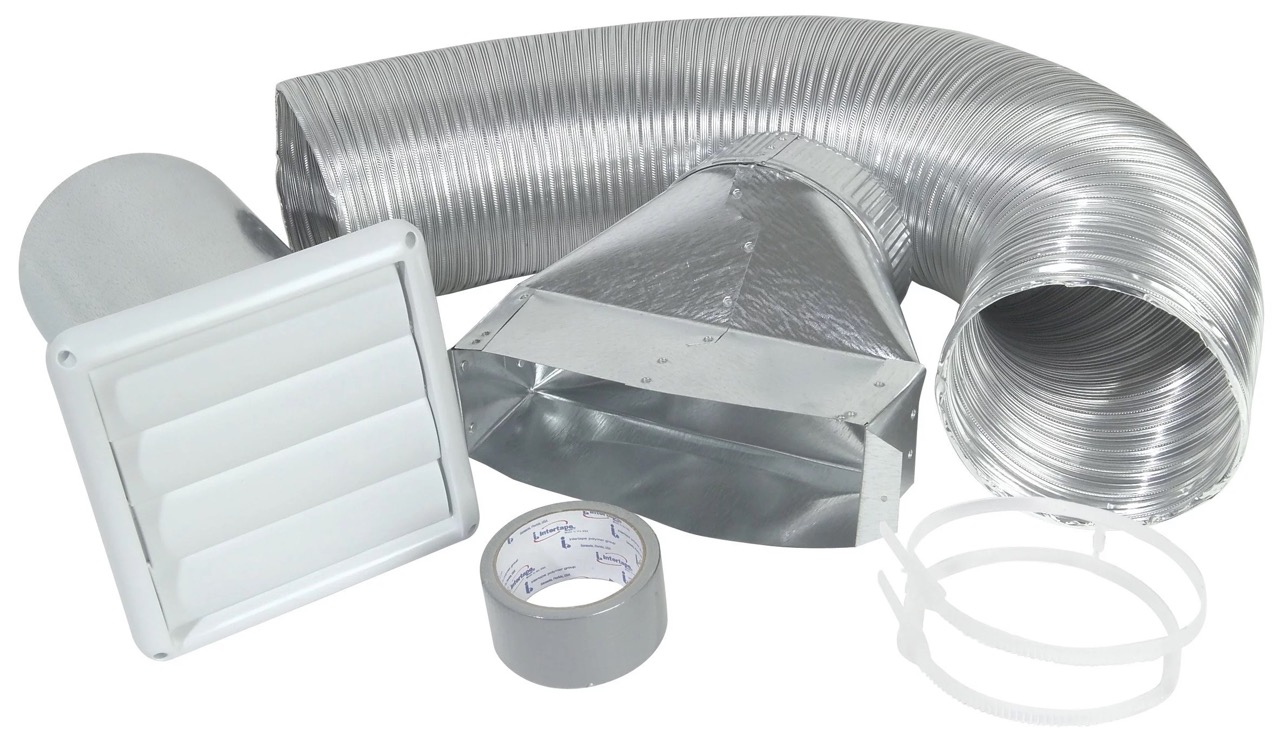
The Range Hood Roof Cap, Mill Finish, Up to 7" Round is a quality roof cap designed to fit 7" round ducts. It is manufactured by Lambro Industries and comes with a mill finish. This roof cap is the perfect solution for range hoods that require a 7" diameter vent. It is made of durable aluminum construction, ensuring long-lasting performance and minimal maintenance. The cap features a damper to regulate airflow and a bug screen to prevent unwanted guests. With its sturdy build and easy installation, this roof cap is the ideal choice for efficient ventilation. Get the Range Hood Roof Cap, Mill Finish, Up to 7" Round and enjoy the benefits it offers!
Key Features
- Lambro Industries Roof Cap Fits 7" Round Duct 116
- Lambro industries
Specifications
- Color: Mill Finish
- Dimension: 8.00Lx13.00Wx12.00H
- Size: 7 In.
Pros
- Fits range hoods with 7" diameter vent
- Good quality and reasonable price
- Durable aluminum construction
- Comes with a damper and bug screen
- Easy to install
Cons
- Flimsy metal and detached screen reported by some users
- Quality control issues for a few customers
- May not be completely waterproof
The Range Hood Roof Cap is a reliable option for those in need of a roof cap for their range hoods. With its proper fitting for 7″ round ducts and durable construction, it effectively serves its purpose. The added benefits of a damper and bug screen make it a convenient choice. However, there are some reported issues with flimsy metal and detached screens, which may affect its overall performance. Additionally, quality control problems have been highlighted by a few customers. While it is generally a decent and reasonably priced product, it may be worth considering extra waterproofing measures in case of heavy rainfall.

Overall Score: 7.2/10
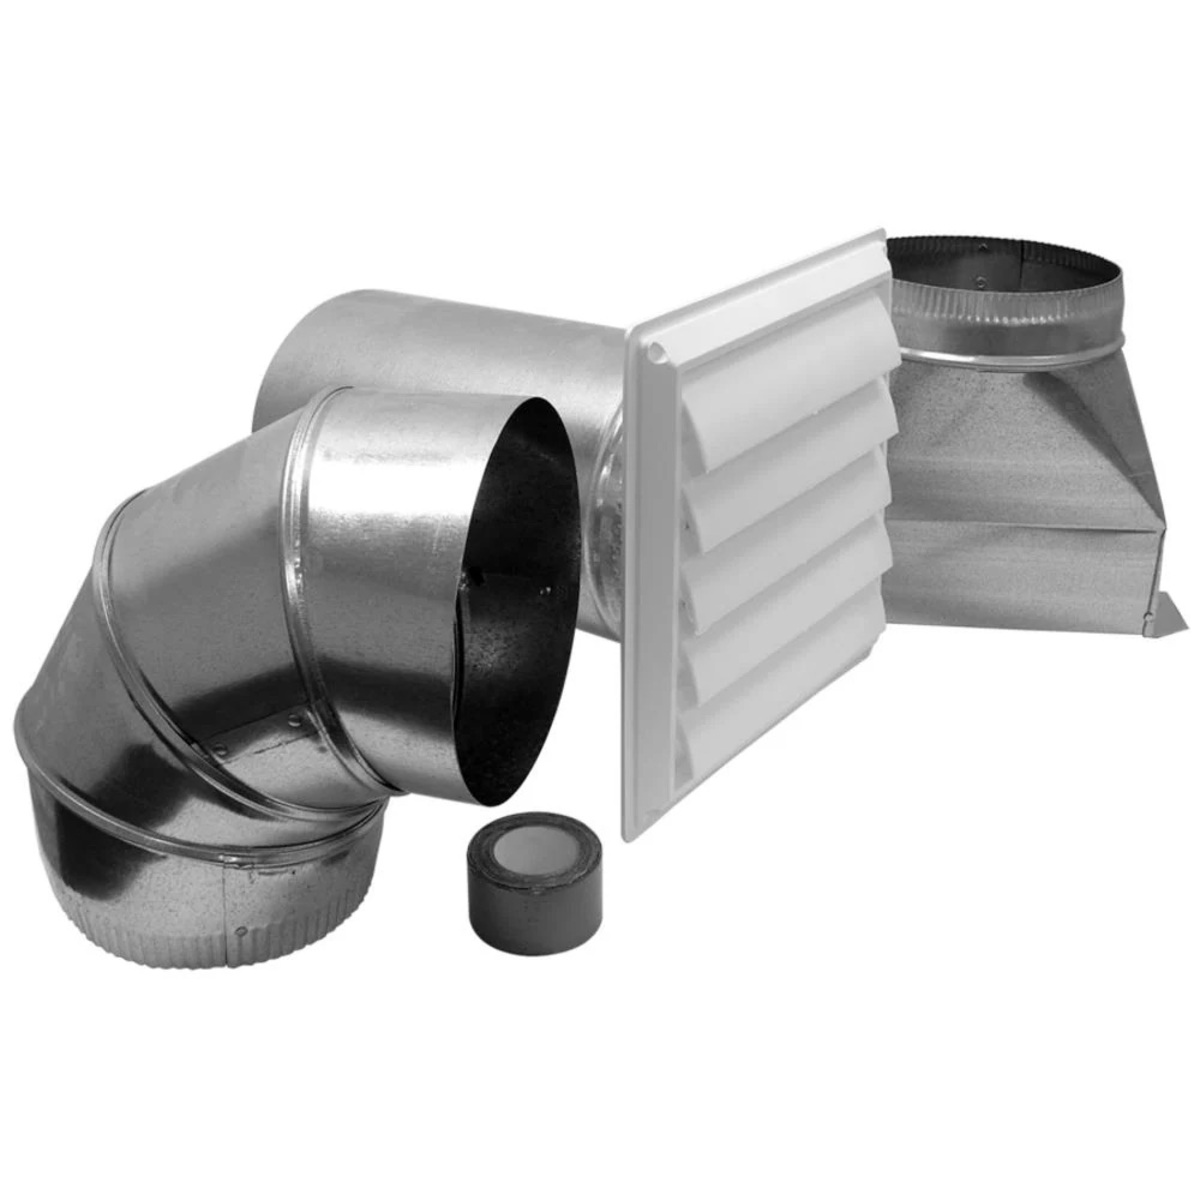
The Lambro 378 Range Hood Roof Vent Kit is a comprehensive kit that makes it easy to install a range hood vent in your kitchen. It includes a 7" black plastic roof vent, a 7" galvanized adjustable elbow, a 3 1/4" x 10" galvanized transition, 5 7" galvanized pipes, and a roll of duct tape. This kit can be used with over-the-range microwaves and fits both 7" round and 3 1/4" x 10" exhaust outlets. The through-the-roof venting ensures efficient air circulation. The kit is available in black color and is a cost-effective solution for your venting needs. With a customer rating of 3.8/5, it provides good value for money.
Key Features
- 7" Black Plastic Roof Vent
- 7" Galvanized Adjustable Elbow
- 3 1/4" x 10" Galvanized Transition
- 5 – 7" Galvanized Pipe – 17 1/2" Lengths
- Roll of Duct Tape
Specifications
- Color: Black
Pros
- Can be used with over-the-range microwaves
- Fits 7" round or 3 1/4" x 10" exhaust outlets
- Through the roof venting
Cons
- Quality could be better
- Arrived beat to hell
- Not what I expected
The Lambro 378 Range Hood Roof Vent Kit offers a convenient and affordable solution for venting your range hood or over-the-range microwave. While the quality could have been better and some customers received damaged or mismatched parts, overall, it receives positive reviews for its functionality and ease of installation. The kit includes all the necessary components and can be used with different exhaust outlet sizes. If you’re on a budget and need a roof vent kit, the Lambro 378 is worth considering.
Overall Score: 8/10
The Builder's Best 84035 Galvanized Steel Roof Vent Cap with Damper & Removable Screen is a high-quality and durable vent cap designed for bathroom or kitchen vents. It is made of heavy-duty 26 gauge galvanized steel with a high-performance polyester powder coated finish, ensuring extreme durability and protection against corrosion. The vent cap features riveted construction and does not use caulk, making it easy to install with pre-drilled holes. It also includes a flapper (damper) that prevents back drafts. The removable screens allow for venting clothes dryers as well. Made in the USA, this vent cap is a trusted choice for builders. Rated 4.4 out of 5 stars by customers.
Key Features
- Extremely Durable
- Protection Against Corrosion
- Riveted Construction
- Includes Flapper (Damper)
- Removable Screens
- Made in the USA
Specifications
- Color: Black (New 2021)
- Dimension: 11.00Lx10.00Wx7.25H
- Size: 4" Diameter Collar
Pros
- Extremely durable and high-quality construction
- Excellent protection against corrosion
- Easy to install with pre-drilled holes
- Versatile use for bathroom, kitchen, or dryer vents
- Made in the USA
Cons
- May require trimming for proper fit
- No packing materials included for protection during shipping
- Not suitable for vertical installation
The Builder’s Best 84035 Galvanized Steel Roof Vent Cap with Damper & Removable Screen is a top-notch choice when it comes to vent caps. Its heavy-duty construction, excellent corrosion protection, and easy installation make it a reliable option for any bathroom, kitchen, or dryer vent. The removable screens add versatility to its usage, while the made in the USA quality ensures durability. Despite a few minor drawbacks such as potential need for trimming and lack of packing materials, this vent cap offers great value for its price. If you’re looking for a sturdy and long-lasting vent cap, this one won’t disappoint.
Range Hood Roof Vent Buyer's Guide
Why is a range hood roof vent important?
- Range hood roof vents help eliminate smoke, odors, and airborne grease from your kitchen.
- They improve indoor air quality by reducing the accumulation of pollutants.
Things to consider before purchasing a range hood roof vent:
- Ventilation Efficiency:
- Consider the CFM (cubic feet per minute) rating of the range hood roof vent. Higher CFM indicates better ventilation efficiency.
- Ensure it is compatible with the size of your kitchen and cooking appliances.
- Determine the type and dimensions of the ducting required for installation.
- Check if the range hood roof vent comes with a built-in duct adapter or if additional accessories are needed.
- Look for range hood roof vents equipped with sound-reducing features such as insulated motors and quiet blowers.
- Ensure the noise level is comfortable for your kitchen environment.
- Measure the available space in your kitchen and choose a range hood roof vent that fits perfectly.
- Consider the design that complements your kitchen décor.
- Look for range hood roof vents with removable filters for easier cleaning.
- Consider models with self-cleaning features or dishwasher-safe filters for added convenience.
- Some range hood roof vents feature heat sensors that automatically adjust the ventilation speed based on cooking temperature.
- This can help maintain optimal air quality and prevent overheating.
- Opt for range hood roof vents that are Energy Star certified for reduced energy consumption.
- Models with LED lighting are not only energy-efficient but also provide better visibility while cooking.
- Ensure the range hood roof vent is compatible with your kitchen's exhaust system.
- Consult a professional if you are unsure about the installation process.
- Check the manufacturer's warranty period and the availability of reliable customer support.
- This ensures you have assistance if any issues arise post-purchase.
- Determine your budget range before researching to find the best range hood roof vent that fits your financial plan.
- Keep in mind that investing in a better quality range hood roof vent may provide long-term benefits.
Read also: 11 Best Non Vented Range Hood for 2025
Frequently Asked Questions about 11 Best Range Hood Roof Vent For 2025
While it is possible to install a range hood roof vent yourself, it is recommended to hire a professional for a safe and efficient installation, especially if you have little experience with exhaust systems.
To determine the appropriate size, measure the width of your cooktop or range. Ideally, the range hood roof vent should be at least as wide as the cooking surface to ensure effective ventilation.
It is advisable to clean or replace the filters every 3 to 6 months, depending on your cooking frequency. Regular maintenance ensures optimal performance and prevents the accumulation of grease and dirt particles.
Most range hood roof vents require an external duct for proper ventilation. However, some models offer ductless operation by using charcoal filters to trap and recirculate air back into the kitchen, although this may not be as effective in removing pollutants.
Yes, range hood roof vents work effectively for both gas and electric cooktops. However, it is essential to choose a vent with a higher CFM rating for gas cooktops, as they produce more air pollutants.
If your kitchen lacks a direct route to the roof for venting, you can consider using range hood roof vents that allow for sidewall venting. These vents can expel the air through an exterior wall instead of the roof.
Range hood roof vents are designed to be weather-resistant but not completely waterproof. It is crucial to ensure proper installation and regular maintenance to prevent water leaks or damage during heavy rain or snowfall.
It is not recommended to connect multiple range hood roof vents to a single ducting system. Each range hood roof vent should have its own ducting system to ensure optimum performance and avoid airflow restrictions.
Improperly installed or malfunctioning range hood roof vents can cause negative air pressure in your home. It is vital to ensure correct installation, proper ducting, and periodic maintenance to avoid such issues.
The lifespan of a range hood roof vent can vary depending on usage, maintenance, and quality. On average, a range hood roof vent can last between 10-15 years. Regular cleaning and filter replacement can prolong its lifespan.
While it is technically possible to connect a range hood roof vent without a range hood, it is not recommended, as the hood contributes to capturing and filtering airborne pollutants more effectively.
During installation, ensure the power supply is turned off, follow the manufacturer’s instructions carefully, and use appropriate safety equipment. If you are unsure, it is always best to consult a professional for installation.
Was this page helpful?
Trust Storables.com for unbiased and honest product reviews. Our reviews are rigorously assessed by our Expert Board Contributors and adhere to strict Editorial Standards. We ensure that each review is transparent and trustworthy, helping you make informed purchasing decisions.

0 thoughts on “11 Best Range Hood Roof Vent For 2025”