Home>Articles>Why Is My Samsung Fridge Ice Maker Leaking Water
Articles
Why Is My Samsung Fridge Ice Maker Leaking Water
Modified: August 16, 2024
Read our helpful articles on why your Samsung fridge ice maker might be leaking water and find solutions to fix the issue quickly.
(Many of the links in this article redirect to a specific reviewed product. Your purchase of these products through affiliate links helps to generate commission for Storables.com, at no extra cost. Learn more)
Introduction
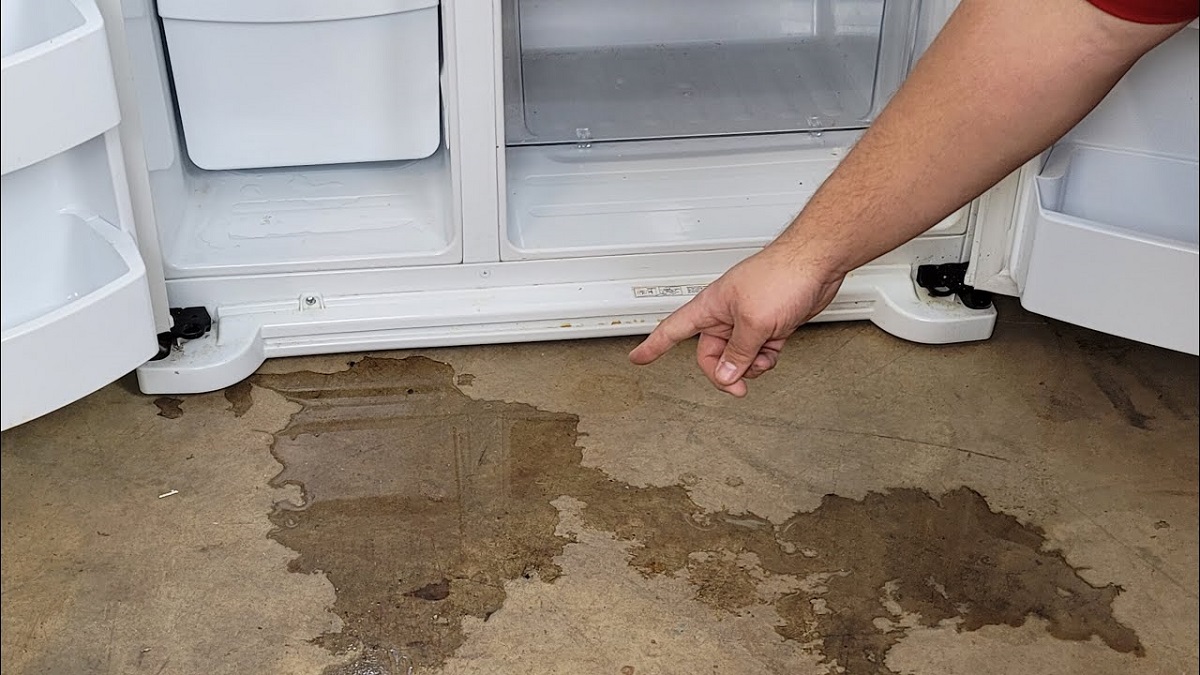
Having a Samsung fridge with an ice maker is a convenient feature that allows you to enjoy refreshing ice cubes without any hassle. However, if you notice water leaking from the ice maker, it can be quite frustrating and potentially lead to other problems such as water damage to your floors or a decrease in overall cooling efficiency. Understanding the common causes of a Samsung fridge ice maker leaking water and how to fix it can help you address the issue and prevent further damage.
There are several reasons why a Samsung fridge ice maker may start leaking water. It could be due to a problem with the water pressure, a faulty water inlet valve, a clogged water filter, a blocked defrost drain, or an improperly leveled fridge. By diagnosing and addressing the issue promptly, you can restore your ice maker’s functionality and avoid any potential damage.
Before attempting any repairs, it is essential to ensure your safety. Always unplug the refrigerator from the power source before inspecting or working on any components. Additionally, consider wearing protective gloves to prevent any injuries.
In this article, we will discuss the common causes of a Samsung fridge ice maker leaking water and provide practical solutions for fixing the issue. Whether you are a seasoned DIY enthusiast or a beginner, these troubleshooting steps will help you identify and resolve the problem.
Key Takeaways:
- Addressing water pressure, checking the water inlet valve, and inspecting the water filter are crucial steps to fix a leaking Samsung fridge ice maker. Regular maintenance can prevent future leaks and extend the ice maker’s lifespan.
- If DIY troubleshooting doesn’t resolve the issue, seek professional help for persistent leaks, electrical or mechanical problems, complex repairs, or safety concerns. Certified technicians can ensure the long-term functionality of your Samsung fridge ice maker.
Common Causes of Samsung Fridge Ice Maker Leaking Water
When you notice water pooling or dripping around your Samsung fridge’s ice maker, it’s important to understand the potential causes behind the issue. Here are some common reasons why a Samsung fridge ice maker may be leaking water:
- Water Pressure Issues: Fluctuations in water pressure can lead to leaks in the ice maker. If the water pressure is too high, it can force water past the fill cup and cause overflow. On the other hand, low water pressure may result in incomplete filling, leading to dripping.
- Water Inlet Valve Problems: The water inlet valve controls the water flow into the ice maker. If the valve is faulty or worn out, it might not close properly, causing water to continuously leak into the ice maker or drip onto the floor.
- Clogged Water Filter: A clogged or dirty water filter can restrict water flow and lead to ice maker leaks. Over time, mineral deposits and impurities can accumulate, hindering proper water passage. This can cause water to back up or overflow, resulting in leaks.
- Blocked Defrost Drain: The defrost drain is responsible for draining water away during the freezer’s defrost cycle. If the drain gets clogged with debris or ice, water can accumulate and overflow into the ice maker area, causing leaks.
- Improper Fridge Leveling: If your Samsung fridge is not properly leveled, it can tilt or lean to one side, leading to water leakage. A misaligned fridge can cause the ice maker to work inefficiently, leading to water overflow or leakage from improper ice cube formation.
Identifying the specific cause of the ice maker leak is crucial in determining the appropriate solution. In the next section, we will discuss how to diagnose the source of the leak and provide effective solutions to fix the issue.
Problem Diagnosis: Identifying the Source of the Leak
Before attempting any repairs, it is important to accurately pinpoint the source of the leak in your Samsung fridge ice maker. This will help you determine the most appropriate solution to fix the issue. Here are some steps to help you diagnose the problem:
- Observe the location of the leak: Carefully examine the area where the water is pooling or dripping. Is it coming from the ice maker itself, the water inlet valve, or the surrounding components? Taking note of the specific location will aid in troubleshooting.
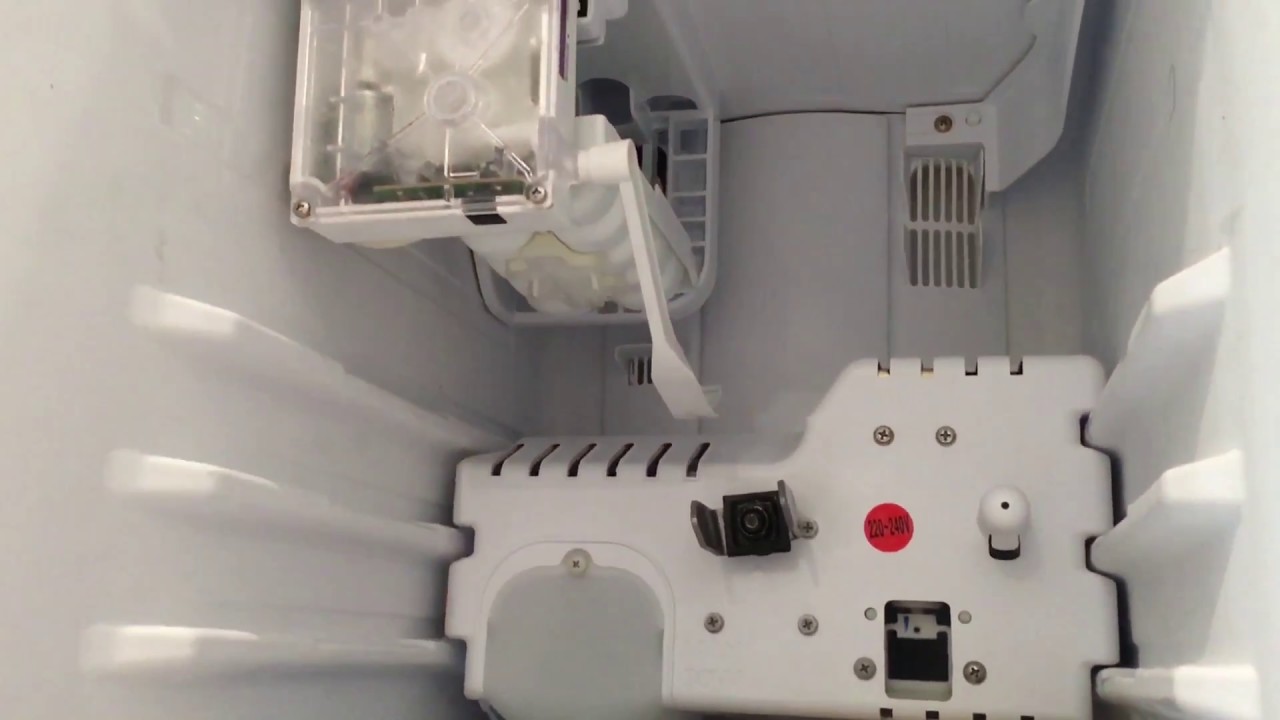
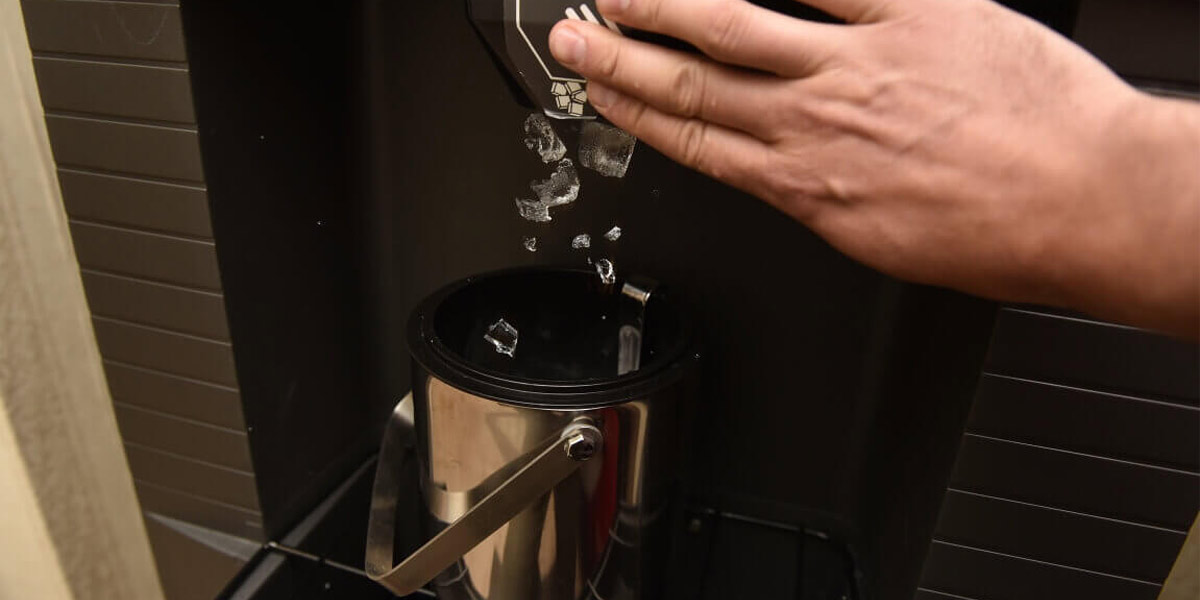
- Inspect the ice maker tray: Check if there are any cracks or damages in the ice maker tray that may be causing water to leak. Carefully remove the ice maker from the freezer and inspect it for any signs of wear or damage.
- Examine the water inlet valve: Inspect the water inlet valve for any signs of leakage or malfunction. Look for water stains or dripping water around the valve. If you notice any issues, such as a cracked or worn-out valve, it may need to be replaced.
- Check the water filter: Remove and inspect the water filter for any clogs or blockages. If the filter appears dirty or obstructed, it is likely affecting water flow and may need to be replaced. Keep in mind that some models have filters located outside the refrigerator, while others are inside the fridge itself.
- Clear the defrost drain: If you suspect a blocked defrost drain, locate the drain hole at the back of the freezer compartment. Use a long, flexible brush or a pipe cleaner to carefully remove any debris or ice obstructing the drain. After clearing the blockage, pour a small amount of water into the drain to ensure it flows freely.
- Ensure proper fridge leveling: Use a spirit level to ensure that your Samsung fridge is level from front to back and side to side. Adjust the leveling feet or wheels accordingly to ensure that the fridge stands straight and stable. This will help prevent any tilting or leaning that may contribute to water leakage.
By carefully examining these key areas, you should be able to identify the root cause of the leak in your Samsung fridge ice maker. In the next section, we will explore effective solutions to fix the specific issue you have identified.
Solutions for Fixing a Leaking Samsung Fridge Ice Maker
Once you have identified the source of the leak in your Samsung fridge ice maker, it’s time to take action and resolve the issue. Here are some effective solutions for fixing a leaking Samsung fridge ice maker:
- Adjusting the Water Pressure: If you suspect that high or low water pressure is causing the leak, adjusting the water pressure can help. Locate the shut-off valve connected to the water supply line and turn it slightly clockwise to decrease the pressure or counterclockwise to increase it. Make small adjustments and observe if the leakage improves.
- Checking the Water Inlet Valve: Inspect the water inlet valve for any signs of damage or leakage. If the valve is faulty, it may need to be replaced. Consult your Samsung fridge’s manual or contact a professional technician for guidance on replacing the water inlet valve.
- Inspecting the Water Filter: If your Samsung fridge has a water filter, remove and inspect it for any clogs or debris. Replace the filter if it appears dirty or obstructed. Refer to your fridge’s manual for specific instructions on replacing the water filter.
- Clearing the Defrost Drain: If a blocked defrost drain is causing the leak, clear the drain by using a long, flexible brush or pipe cleaner to remove any debris or ice. Once the blockage is cleared, pour a small amount of water into the drain to ensure proper drainage.
- Properly Leveling the Fridge: Ensure that your Samsung fridge is properly leveled by using a spirit level. Adjust the leveling feet or wheels as necessary to ensure the fridge stands straight and stable. This will help prevent tilting or leaning, which can contribute to water leakage from the ice maker.
It’s important to note that some repairs, such as replacing a faulty water inlet valve or water filter, may require professional assistance. If you are unsure or uncomfortable performing the repairs yourself, it is recommended to contact a certified technician to ensure proper and safe fixing of the issue.
By implementing these solutions, you should be able to fix the leak in your Samsung fridge ice maker and prevent further water leakage. However, if the problem persists or you are unable to identify the source of the leak, it may be necessary to seek professional help. In the next section, we will discuss when it’s appropriate to call for refrigerator repair services.
Adjusting the Water Pressure
If you suspect that the water pressure is causing your Samsung fridge ice maker to leak, adjusting the water pressure can potentially resolve the issue. Here’s how you can adjust the water pressure to fix the problem:
- Locate the shut-off valve: The shut-off valve controls the water supply to your refrigerator. It is usually located behind the fridge or under the sink.
- Turn off the water supply: Before making any adjustments, ensure that you turn off the water supply to your fridge by twisting the shut-off valve clockwise until it is tightly closed. This will prevent any water from flowing into the ice maker.
- Access the water supply line: You may need to pull out your fridge or remove any access panels to reach the water supply line. Take caution when moving the fridge to avoid damaging the flooring or the line itself.
- Adjust the water pressure: Once you have accessed the water supply line, locate the saddle valve or pressure regulator. This device allows you to control the water pressure. Use a screwdriver or adjustable wrench to turn the valve clockwise to decrease the pressure or counterclockwise to increase it. Make small adjustments and test the ice maker after each adjustment to determine if the leak has stopped.
- Observe the water flow: Once you have adjusted the water pressure, turn on the water supply valve and observe the water flow. It should now be at a steady and appropriate pressure for your ice maker.
It’s important to note that different refrigerator models may have varying methods for adjusting the water pressure. Always consult your Samsung fridge’s manual for specific instructions or contact a professional technician for assistance if you are unsure.
If adjusting the water pressure does not resolve the leak or you are experiencing other issues, such as low water flow or inconsistent ice production, it may indicate a more significant underlying problem. In such cases, it is recommended to seek professional help to diagnose and fix the issue.
By carefully adjusting the water pressure, you can potentially eliminate leaks in your Samsung fridge ice maker and ensure the proper functioning of your ice maker system.
Read more: Why Is My Samsung Ice Maker Not Dropping Ice
Checking the Water Inlet Valve
If you are experiencing water leakage from your Samsung fridge ice maker, a faulty water inlet valve could be the culprit. The water inlet valve controls the flow of water into the ice maker, and any malfunction can result in leaks. Here’s how you can check the water inlet valve to diagnose and potentially fix the issue:
- Disconnect the power: Safety should always be a priority when working with any electrical appliance. Unplug your fridge from the power source to avoid any potential electrical hazards.
- Locate the water inlet valve: The water inlet valve is typically located at the back of the refrigerator, near the water supply line.
- Inspect the water inlet valve: Carefully examine the water inlet valve for any visible signs of damage, such as cracks or leaks. If you notice any issues, it is likely that the valve needs to be replaced.
- Test the water inlet valve: You can use a multimeter to test the functionality of the water inlet valve. Set the multimeter to the continuity setting and place the leads on the respective terminals of the valve. If there is no continuity, it indicates that the valve is faulty and needs to be replaced.
- Replace the water inlet valve: If you have determined that the water inlet valve is faulty, it is recommended to replace it with a new one. Consult your Samsung fridge’s manual or contact a professional technician for guidance on obtaining and replacing the water inlet valve properly.
Keep in mind that working with electrical components and water sources can be hazardous. If you are uncomfortable or unsure about checking or replacing the water inlet valve yourself, it is best to seek assistance from a qualified technician.
Properly functioning water inlet valves are crucial for ensuring a consistent and regulated water flow into your ice maker. By checking the water inlet valve and replacing it if necessary, you can address leaks and restore the optimal performance of your Samsung fridge ice maker.
Check the water supply line for any leaks or blockages. Also, make sure the ice maker is level and the water inlet valve is functioning properly.
Inspecting the Water Filter
If your Samsung fridge is equipped with a water filter, it is essential to inspect it regularly for any clogs or blockages. A dirty or obstructed water filter can restrict water flow and lead to leaks in the ice maker. Here’s how you can inspect the water filter and take necessary steps to fix the issue:
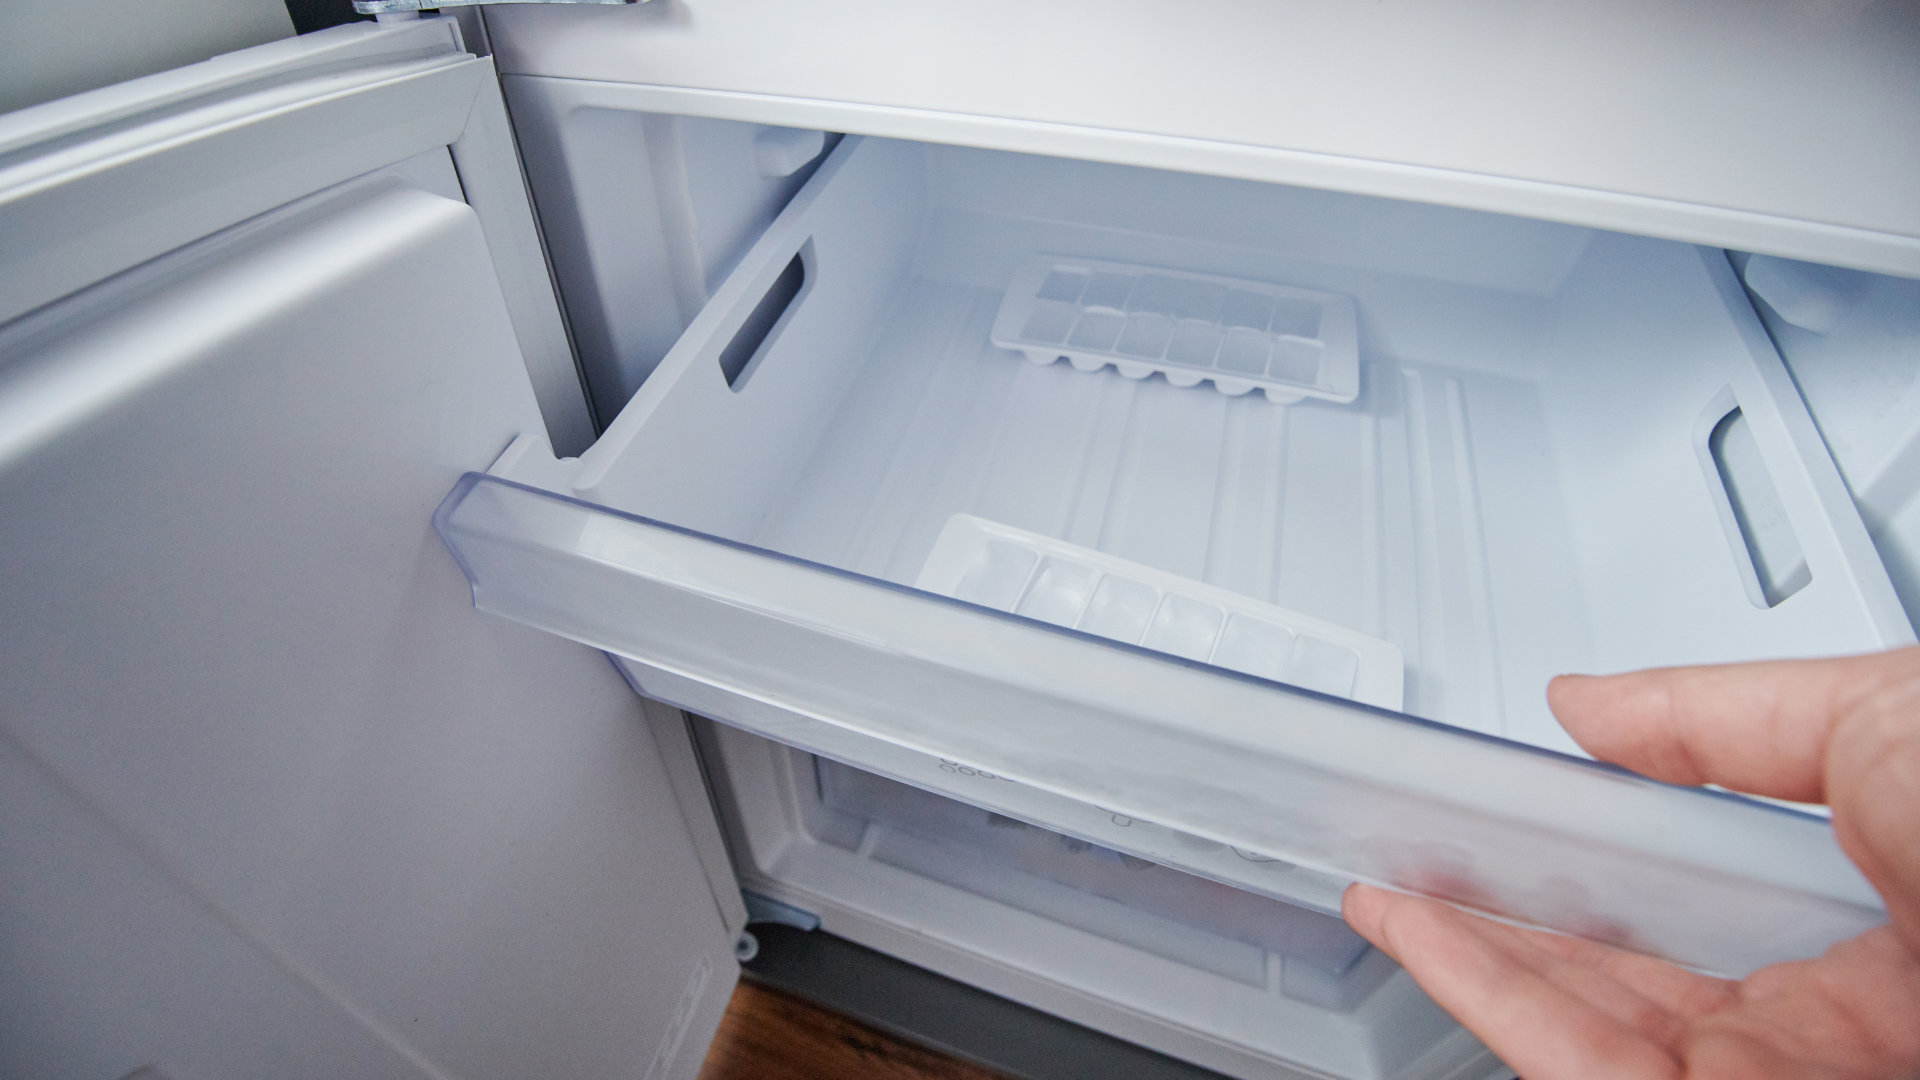
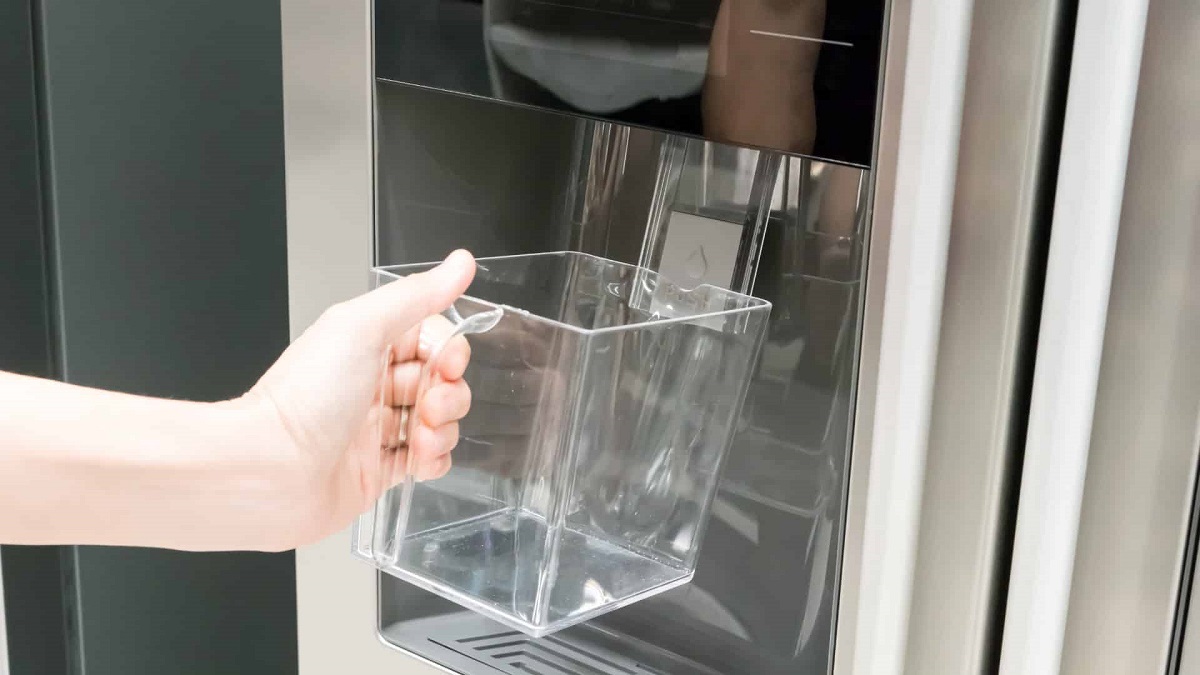
- Locate the water filter: The location of the water filter may vary depending on the model of your Samsung fridge. It can be found either inside the fridge compartment or behind a panel at the bottom front of the refrigerator.
- Turn off the water supply: Before inspecting the water filter, it is important to turn off the water supply to your fridge. Locate the shut-off valve connected to the water supply line and turn it clockwise to close it.
- Remove the water filter: Once the water supply is turned off, follow the instructions in your Samsung fridge’s manual to remove the water filter. Most filters have a twist-off mechanism or a push-button release.
- Inspect the water filter: Examine the water filter for any signs of clogs, discoloration, or sediment. If the filter appears dirty or obstructed, it is likely affecting water flow and may need to be replaced. Additionally, check for any damage or cracks in the filter.
- Replace the water filter: If you determine that the water filter is clogged or damaged, it is recommended to replace it with a new one. Follow the instructions in your Samsung fridge’s manual to properly install the new filter. Ensure that the filter is securely in place and that any protective caps or seals have been removed.
Regularly replacing the water filter is important for maintaining the quality of your ice and water, as well as preventing leaks in the ice maker. Most manufacturers recommend replacing the water filter every six months or as recommended by the manufacturer.
Remember to turn on the water supply after installing the new filter and check for any leaks. If the leak persists or you are unsure about inspecting or replacing the water filter yourself, it is advisable to consult a professional technician for assistance.
By properly inspecting the water filter and ensuring its cleanliness and functionality, you can prevent clogs and blockages that can lead to leaks in your Samsung fridge ice maker.
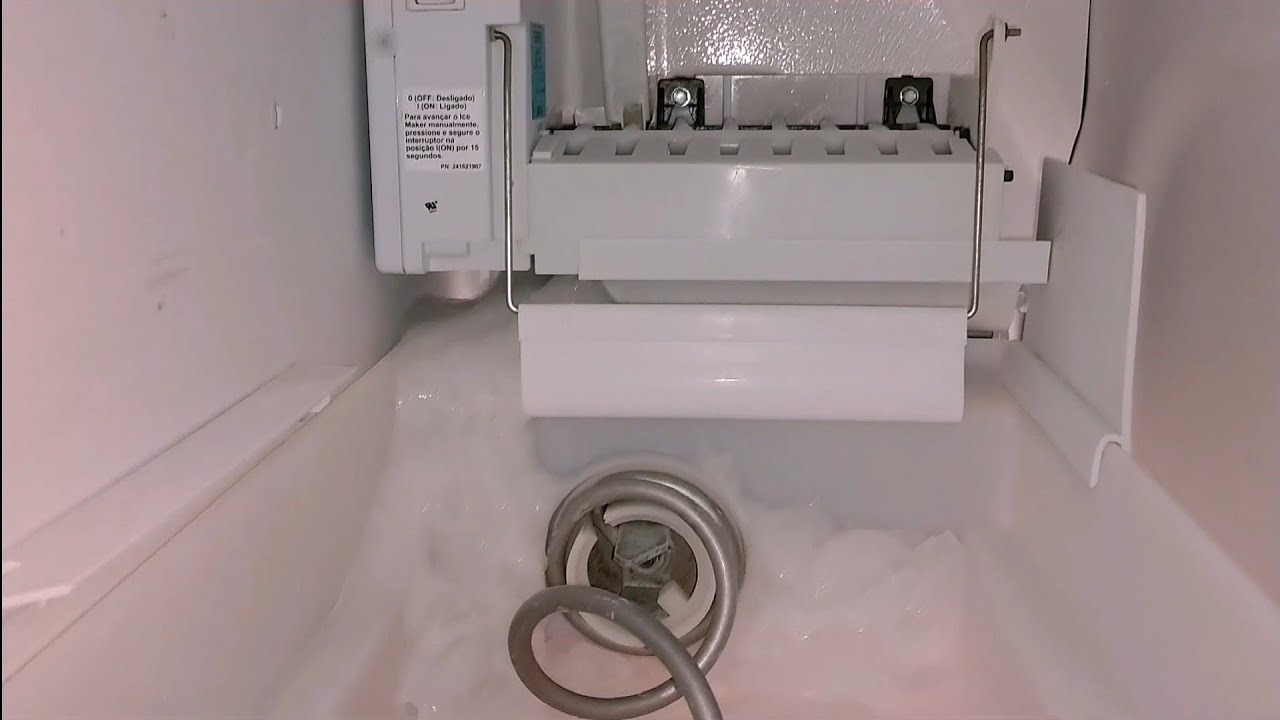
Clearing the Defrost Drain
If you suspect that a blocked defrost drain is causing your Samsung fridge ice maker to leak, clearing the drain can help resolve the issue. The defrost drain is responsible for draining water away during the freezer’s defrost cycle. Here’s how you can clear the defrost drain and prevent water leakage:
- Unplug your fridge: As a safety precaution, always unplug your fridge from the power source before working on any internal components.
- Locate the defrost drain: The defrost drain is typically located at the back of the freezer compartment. It may be covered by a panel or located near the bottom of the freezer.
- Remove any obstructions: Use a long, flexible brush, a pipe cleaner, or a turkey baster to carefully remove any debris or ice that may be blocking the drain. Gently insert the tool into the drain and move it back and forth to clear the obstruction. Be cautious not to damage the drain tube.
- Flush with warm water: After clearing the blockage, flush the defrost drain with warm water to ensure it is completely clear. You can use a turkey baster or pour warm water directly into the drain. Be careful not to overflow or inundate the area.
- Check for proper drainage: Once you have cleared the defrost drain, check if water drains properly. You can pour a small amount of water into the drain to ensure it flows freely into the drain pan at the bottom of the refrigerator. If the water drains properly, the issue should be resolved.
It’s important to note that the defrost drain can sometimes get blocked again due to various factors, such as food particles or ice buildup. Therefore, it’s advisable to periodically clean the drain to prevent future leaks.
If the defrost drain is difficult to access or you encounter any complications during the clearing process, it is recommended to seek assistance from a professional technician to avoid potential damage to your fridge.
By regularly clearing the defrost drain, you can prevent blockages and ensure proper drainage, thereby minimizing the chances of water leakage in your Samsung fridge ice maker.
Properly Leveling the Fridge
If your Samsung fridge is not properly leveled, it can tilt or lean to one side, leading to water leakage from the ice maker. Ensuring that your fridge is level is crucial for optimal performance and preventing leaks. Here’s how you can properly level your Samsung fridge:
- Empty the contents of the fridge: Before leveling the fridge, remove all items from the refrigerator, including any shelves or drawers that may obstruct the leveling process. This will make it easier to access the leveling feet or wheels.
- Locate the leveling feet or wheels: Depending on the model of your Samsung fridge, the leveling feet may be adjustable screws or wheels at the front or rear bottom corners of the appliance.
- Use a spirit level: Place a spirit level on top of the fridge from side to side and front to back. Check the level in both directions to determine if the fridge is leaning or tilting in any direction.
- Adjust the leveling feet: If the fridge is leaning to one side, use an adjustable wrench or screwdriver to adjust the height of the leveling feet. Turn them clockwise to raise the fridge in that corner and counterclockwise to lower it. Make small adjustments and check the levelness after each turn.
- Check the level again: After adjusting the leveling feet, place the spirit level on top of the fridge once more to confirm that it is level from side to side and front to back. Make further adjustments as needed until the fridge is stable and balanced.
Properly leveling your fridge not only helps prevent water leakage but also ensures that the doors close properly, preventing energy loss and maintaining a consistent internal temperature.
If you are unsure about how to level your Samsung fridge or encounter any difficulties during the process, it is recommended to consult your fridge’s manual or contact a professional technician for assistance. They can ensure that the leveling is done correctly and minimize the risk of any potential damage.
By taking the time to properly level your Samsung fridge, you can avoid unnecessary water leakage and promote the efficient performance of your ice maker.
Read more: Why Is My Ice Maker Not Getting Water
Professional Help: When to Call for Repair
While some issues with your Samsung fridge ice maker can be resolved through DIY troubleshooting and fixes, there are situations where it is best to seek professional help. Calling for repair is recommended in the following scenarios:
- Persistent leaks: If you have tried various troubleshooting steps and the water leakage from your ice maker continues to persist, it’s time to call a professional. Ongoing leaks may indicate more complex problems that require expert diagnosis and repair.
- Electrical or mechanical issues: If you suspect that the leaking issue is related to electrical or mechanical malfunctions, it is essential to have a certified technician handle the repairs. They have the knowledge and expertise to diagnose and address these specific issues safely.
- Complex repairs: Some repairs, such as replacing the water inlet valve or fixing the defrost mechanism, can be challenging for individuals without the necessary experience or tools. In such cases, it is best to leave the repairs to professionals who specialize in refrigerator repair services.
- Manufacturer’s warranty: If your Samsung fridge is still under warranty, it is advisable to contact the manufacturer or an authorized service center for repairs. Attempting to fix the issue yourself may void the warranty, leaving you responsible for the cost of repairs.
- Safety concerns: If you encounter any safety concerns during the troubleshooting process, such as exposed wiring or gas leaks, it is vital to prioritize your safety and call a professional immediately. These issues require immediate attention from a trained technician.
A professional refrigerator repair technician has the knowledge, experience, and proper tools to accurately diagnose and fix the issue with your Samsung fridge ice maker. They can also offer valuable advice on preventative maintenance to prevent future problems.
Remember to provide the technician with a detailed description of the issue, including any steps you have already taken to troubleshoot the problem. This will help them in their assessment and ensure a more efficient and effective repair process.
By recognizing when to seek professional help, you can save time, avoid potential further damage, and ensure the long-term functionality of your Samsung fridge ice maker.
Conclusion
Dealing with a leaking ice maker in your Samsung fridge can be a frustrating experience. However, by understanding the common causes and implementing appropriate solutions, you can successfully resolve the issue and prevent further water leakage.
In this article, we explored the common causes of a Samsung fridge ice maker leaking water, including water pressure issues, faulty water inlet valves, clogged water filters, blocked defrost drains, and improper fridge leveling. We discussed how to diagnose the problem, inspect the relevant components, and provided practical solutions for each issue.
Adjusting the water pressure, checking the water inlet valve, inspecting the water filter, clearing the defrost drain, and properly leveling your fridge are all effective steps you can take to address the leaking problem. However, it’s important to note that some repairs may require professional assistance to ensure proper and safe resolution.
Remember to consult your Samsung fridge’s manual for specific instructions and safety guidelines when troubleshooting and performing any repairs. If you are unsure or uncomfortable with any of the steps, it’s best to contact a professional technician for assistance.
By taking the necessary actions to fix the leaking ice maker in your Samsung fridge, you can once again enjoy the convenience of having refreshing ice cubes without the worry of water damage or decreased cooling efficiency.
Regular maintenance, such as replacing the water filter and periodically clearing the defrost drain, can also help prevent future leaks and prolong the lifespan of your fridge’s ice maker system.
If you encounter persistent leaks or complex issues beyond your knowledge or ability, it is advisable to seek professional help. Certified technicians have the expertise to diagnose and repair more complicated problems, ensuring the long-term functionality of your Samsung fridge ice maker.
Remember, a properly functioning ice maker is essential for enjoying cold beverages and keeping your food fresh. By addressing and resolving the leaking issue, you can maintain the optimal performance of your Samsung fridge ice maker and ensure a hassle-free experience in your kitchen.
Now that you've tackled the issue with your leaking ice maker, why stop there? Keeping your cooling companion in tip-top shape doesn't have to be a chore. If you're curious about how to keep your ice maker spotless and functioning efficiently, our guide on refrigerator maintenance is just what you need. Maybe you're wrestling with a non-cooperative portable ice maker? We’ve got the perfect rundown on common ice maker issues to help you out. And for those with a Samsung fridge, learning how to access and manage the ice maker can be a breeze with our straightforward instructions.
Frequently Asked Questions about Why Is My Samsung Fridge Ice Maker Leaking Water
Was this page helpful?
At Storables.com, we guarantee accurate and reliable information. Our content, validated by Expert Board Contributors, is crafted following stringent Editorial Policies. We're committed to providing you with well-researched, expert-backed insights for all your informational needs.


0 thoughts on “Why Is My Samsung Fridge Ice Maker Leaking Water”