Home>Ideas and Tips>DIY Guide: Installing Crown Molding Like A Pro
Ideas and Tips
DIY Guide: Installing Crown Molding Like A Pro
Published: September 25, 2024
Learn how to install crown molding like a pro with our step-by-step DIY guide. Enhance your home's elegance with expert tips and techniques.
(Many of the links in this article redirect to a specific reviewed product. Your purchase of these products through affiliate links helps to generate commission for Storables.com, at no extra cost. Learn more)
Introduction
Crown molding is one of the most elegant and sophisticated elements you can add to your home. It not only enhances the aesthetic appeal of your space but also adds a touch of class and sophistication. However, many homeowners shy away from installing crown molding due to the perceived complexity of the task. But with the right tools, materials, and a step-by-step guide, you can achieve professional-looking results without breaking the bank.
In this comprehensive DIY guide, we will walk you through the process of installing crown molding like a pro. From selecting the right materials to cutting and placing the molding, we will cover every detail to ensure that your project is a success.
Read more: DIY Guide To Installing Crown Molding
Step 1: Selecting Your Crown Molding
The first step in installing crown molding is selecting the right type of molding for your project. Crown molding comes in various profiles, sizes, and materials. Here are some tips to help you choose the perfect molding for your needs:
- Profile: Crown molding profiles range from simple to ornate. Choose a profile that complements your home's style and decor. For example, if you have a traditional or classic home, you might opt for a more ornate profile. For modern homes, a simpler profile might be more suitable.
- Size: The size of the crown molding will depend on the height of your ceilings and the overall aesthetic you want to achieve. Standard sizes include 3 5/8 inches, 4 inches, and 5 inches. For higher ceilings, you may want to opt for a larger size to ensure that the molding sits flush against the ceiling.
- Material: Crown molding can be made from various materials such as wood, MDF (Medium Density Fiberboard), and PVC. Wood is the most popular choice due to its durability and aesthetic appeal. MDF is a cost-effective option but may not be as durable as wood. PVC is ideal for bathrooms and kitchens where moisture is a concern.
Step 2: Determining the Angle of Your Cuts
One of the most critical steps in installing crown molding is determining the angle of your cuts. The angle at which you cut the molding will determine how it sits against the wall and ceiling. Here’s how to determine the spring angle:
- Spring Angle: The spring angle is the angle at which the crown molding leans away from the wall. Common spring angles include 38 degrees, 45 degrees, and 52 degrees. For high ceilings (over 10 feet), use a 52-degree spring angle. For standard ceilings (around 8 feet), use a 45-degree spring angle. For mantles or lower sections, use a 38-degree spring angle.
Step 3: Setting Up Your Cutting Platform
To ensure accurate cuts and to make the installation process smoother, you need to set up a cutting platform. Here’s how you can do it:
- Kreg Crown-Pro Jig: One of the most useful tools for cutting crown molding is the Kreg Crown-Pro jig. This jig creates an adjustable platform that allows you to cut your crown molding at the same angle it will sit against the wall. It includes an angle-finder tool to determine the spring angle and a red guide on the underside to match your desired angle.
Step 4: Cutting the Crown Molding
Cutting the crown molding accurately is crucial for a professional-looking installation. Here’s how you can cut it:
- Miter Saw: Use a miter saw to make precise cuts. Set your miter saw to the appropriate angle based on your spring angle calculation.
- Kreg Crown-Pro: If you have a Kreg Crown-Pro jig, assemble it according to the manufacturer’s instructions. Set the angle-finder tool to your desired spring angle and use the red guide on the underside of the jig to ensure accurate cuts.
- Trial Cuts: Before cutting all your molding pieces, make trial cuts in scrap wood to ensure that your setup is correct and that you’re getting the desired angle.
Read more: How To Install Crown Molding Lighting
Step 5: Making a Guide
Creating a guide helps you place the crown molding accurately in each corner. Here’s how you can make one:
- Cutting Two Small Pieces: Cut two small pieces of crown molding and glue or staple them together to form the angle you’re trying to achieve.
- Placing the Guide: Place this guide in each corner and trace the top and bottom edges with a pencil. This will help you measure from where to place the crown molding correctly.
Step 6: Measuring and Cutting for Each Wall
Once you have your guide in place, measure each wall to determine how much molding you need. Here’s how you can measure and cut for each wall:
- Measuring Walls: Measure each wall carefully, taking into account any obstructions or irregularities.
- Cutting Molding: Cut your molding pieces using your miter saw or Kreg Crown-Pro jig. For the two short walls, subtract about 3/16 inch from the wall length to ensure a snug fit.
- Cutting Long Walls: For longer walls, cut your molding pieces slightly longer than needed but not so long that they overlap excessively.
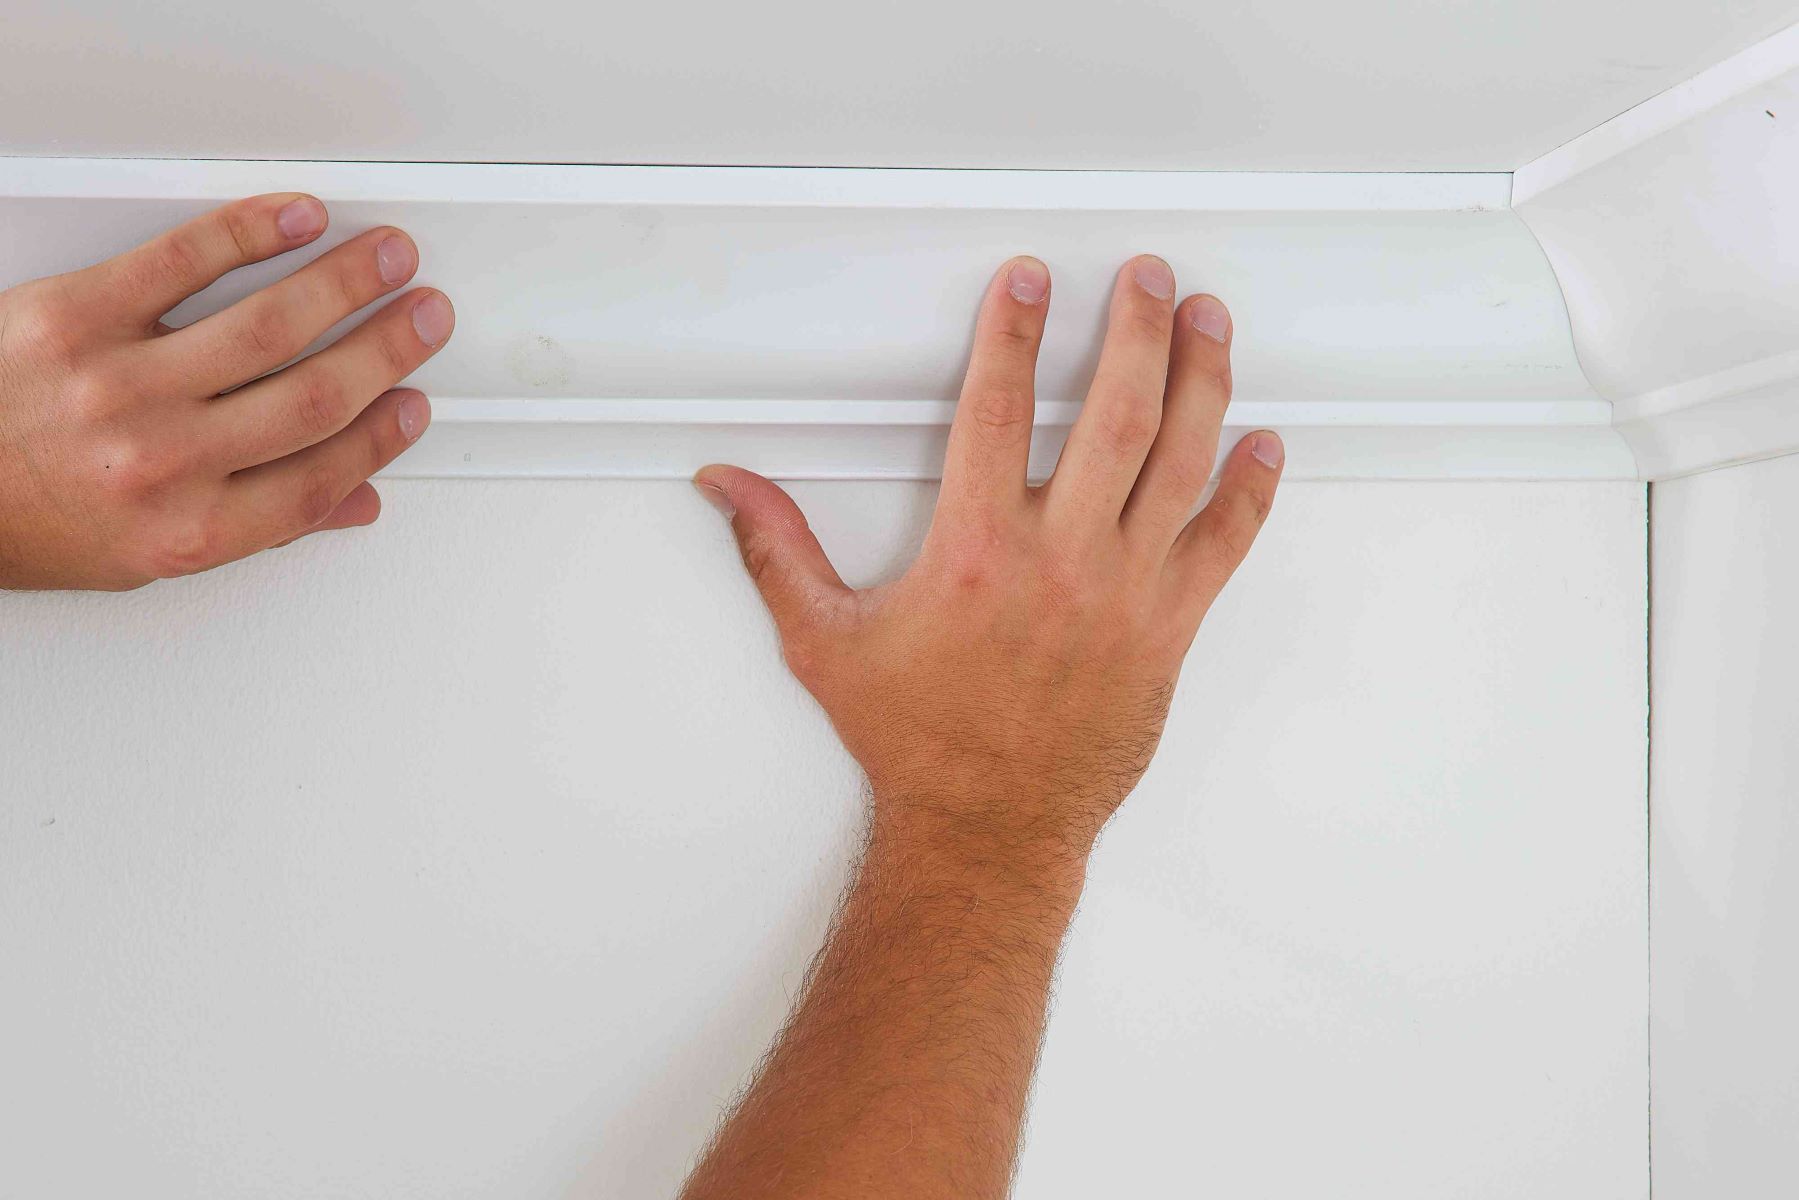
Step 7: Installing the Crown Molding
Now it’s time to install your crown molding. Here’s how you can do it:
Installing Short Walls First
- Start with Short Walls: Begin by installing the crown molding on the two shorter walls. This will help you get a feel for how the molding fits and will make it easier to align the longer pieces later.
- Nailing or Gluing: Use a nail gun or glue to secure the molding in place. Make sure it’s flush against both the wall and ceiling.
- Caulk Seams: Apply caulk to any gaps or seams where the molding meets the ceiling or wall.
Read more: How To Install Kitchen Cabinet Crown Molding
Installing Long Walls
- Aligning Long Walls: Once you’ve installed the short walls, align the long walls carefully using your guide.
- Nailing or Gluing: Secure these pieces in place using nails or glue, ensuring they’re flush with both the wall and ceiling.
- Caulk Seams: Apply caulk to any gaps or seams where these pieces meet.
Tips for Best Fit
- Trial Fitting: Before nailing or gluing any piece into place, perform a trial fit by placing it against both the wall and ceiling without securing it. This will help you identify any issues early on.
- Using Nailing Blocks: If you encounter areas where there’s no framing behind drywall, use nailing blocks to provide a solid surface for nailing.
- Using Glue: For areas where nailing isn’t possible, use high-quality adhesive specifically designed for trim work.
Step 8: Finishing Touches
After installing all your crown molding pieces, it’s time to add some finishing touches:
- Caulk Seams: Apply caulk to all seams where different pieces meet.
- Painting: If necessary, paint your crown molding to match your ceiling or wall color.
- Touch-ups: Perform any necessary touch-ups by sanding down rough edges or filling gaps with caulk.
Conclusion
Installing crown molding may seem daunting at first but with the right tools and a clear understanding of each step involved, it can be done successfully even by a DIY enthusiast. By following these steps—selecting the right materials, determining angles accurately, setting up a cutting platform, making guides for precise placement—and finishing with caulk and paint—you’ll achieve professional-looking results that enhance your home’s aesthetic appeal significantly.
Remember always account for waste when measuring materials and consider using built-up crown molding techniques which simplify installation by providing solid bases for nailing or gluing without dealing with complex angles directly on narrow edges of traditional single-piece moldings.
With patience and attention to detail combined with these tips from experienced professionals in home improvement projects like ours here at Storables—you too can transform any room into something truly elegant using nothing but simple yet powerful techniques behind installing crown moldings effectively!
Additional Tips & Tricks
Using Plasterboard for Enhanced Look
One trick used by some professionals involves placing wider strips of plasterboard along walls and ceilings before fitting crown molding on top. This method not only provides additional support but also gives an expensive look due to its thickness compared against standard moldings alone.
Prepping Molding Before Installation
Prepping your molding before installation makes it easier overall process especially when dealing with painted surfaces or textured ceilings requiring sanding down first before applying new coats paint afterward ensuring smooth finish throughout entire project duration.
Choosing Right Tools
Investing quality tools specifically designed tasks such as miter saws brad nailers makes significant difference outcome ultimately leading towards achieving desired results faster more efficiently than relying solely manual methods alone.
By following these guidelines carefully while incorporating additional tips tricks mentioned above—you’ll find yourself well-equipped tackle even most challenging projects related home improvements successfully
Was this page helpful?
At Storables.com, we guarantee accurate and reliable information. Our content, validated by Expert Board Contributors, is crafted following stringent Editorial Policies. We're committed to providing you with well-researched, expert-backed insights for all your informational needs.


0 thoughts on “DIY Guide: Installing Crown Molding Like A Pro”