Home>Articles>How To Install Crown Molding On A Vaulted Ceiling
Articles
How To Install Crown Molding On A Vaulted Ceiling
Modified: August 27, 2024
Learn step-by-step instructions and expert tips in our articles on how to install crown molding on a vaulted ceiling, transforming your space with elegance and charm.
(Many of the links in this article redirect to a specific reviewed product. Your purchase of these products through affiliate links helps to generate commission for Storables.com, at no extra cost. Learn more)
Introduction
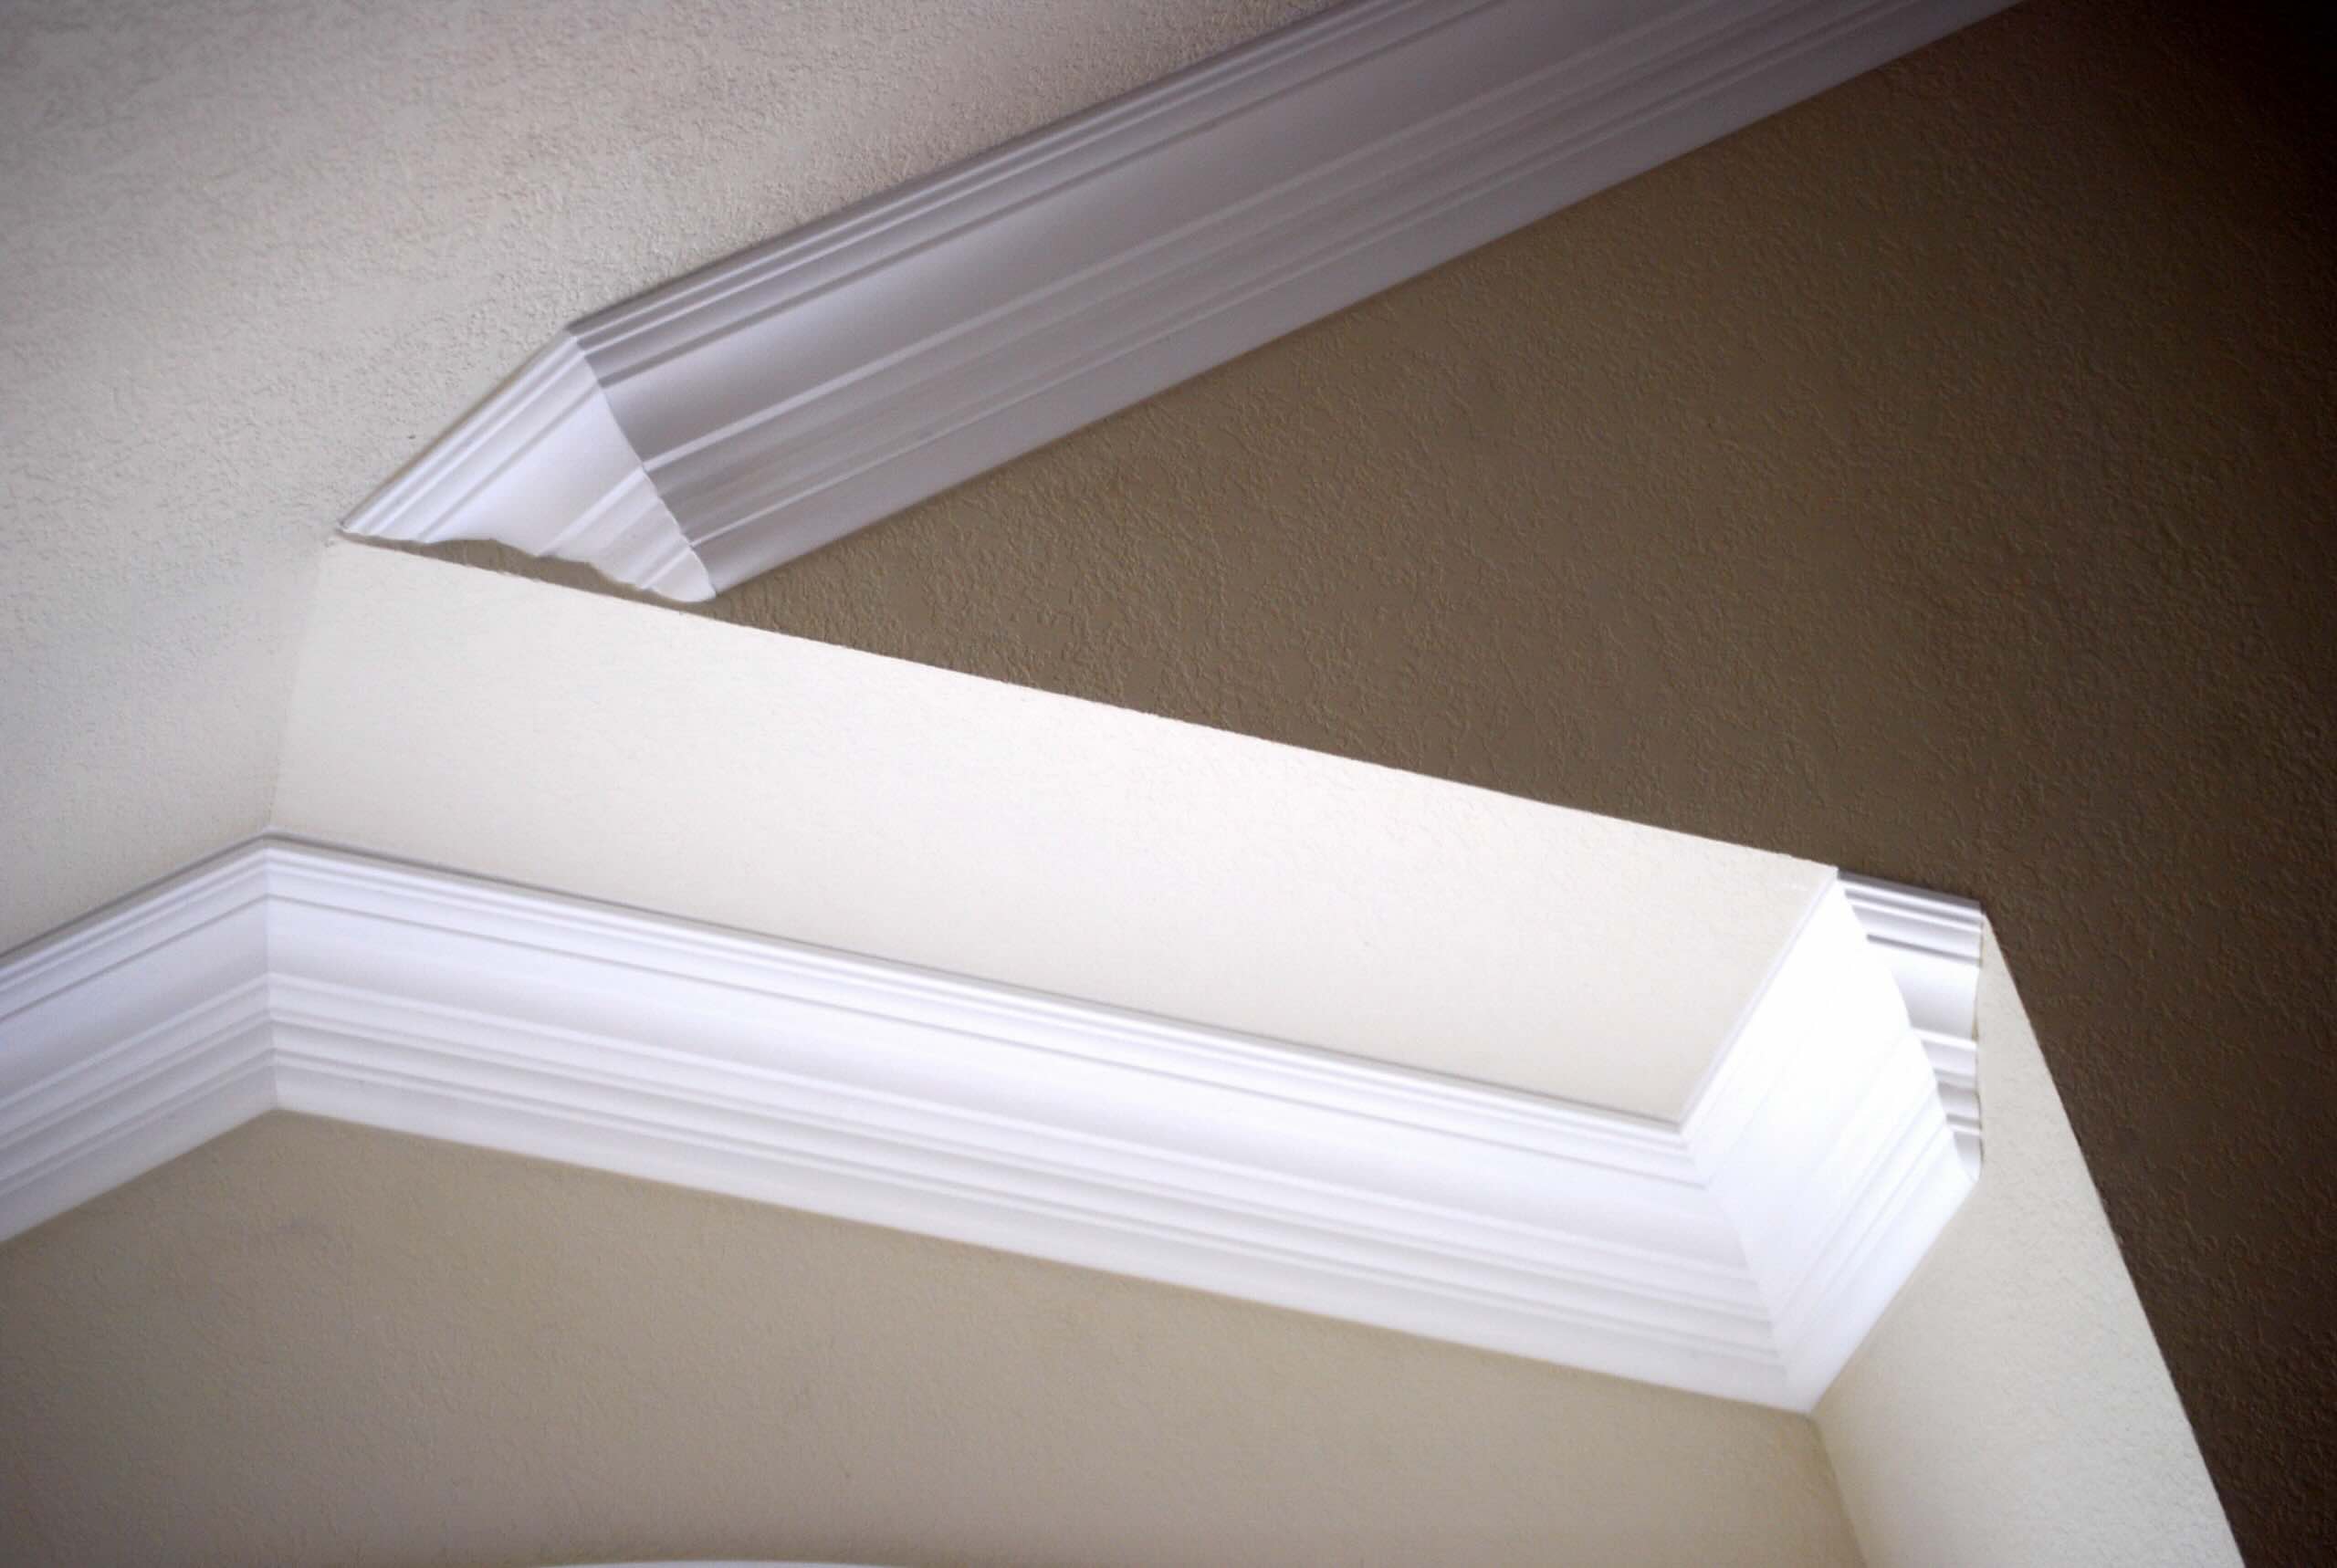
Welcome to the world of home improvement! If you’re looking to add a touch of elegance and sophistication to your space, installing crown molding on a vaulted ceiling can be the perfect solution. Crown molding not only adds visual interest and architectural detail, but it can also make your room look taller and more luxurious. But don’t let the idea of installing crown molding on a vaulted ceiling intimidate you. With the right tools, materials, and techniques, you can achieve professional-looking results.
Before we dive into the step-by-step process, it’s important to understand that safety should always be your top priority when working on any home improvement project. Make sure to wear appropriate protective gear, such as safety glasses and gloves, and use a sturdy ladder or scaffolding system that can support your weight and provide stability.
Now that we have the safety precautions covered, let’s take a look at the tools and materials you will need to get started.
Key Takeaways:
- Elevate your space with the elegance of crown molding on a vaulted ceiling. Prioritize safety, precise measurements, and meticulous installation for professional-looking results.
- Transform your room with the sophisticated touch of crown molding. From careful planning to flawless finishing, achieve a stunning and polished look with each step of the installation process.
Safety Precautions
When it comes to any DIY project, safety should always be your first concern. Before you begin installing crown molding on a vaulted ceiling, here are some important safety precautions to keep in mind:
- Ensure that the ladder or scaffolding you use is stable and secure. Do not attempt to balance on unstable surfaces.
- Wear appropriate safety gear, including safety glasses, gloves, and a dust mask. This will protect your eyes, hands, and lungs from any potential hazards.
- Take care to avoid any electrical wires or plumbing pipes that may be hidden behind the walls or ceiling. Use a stud finder to locate any obstructions before you start nailing or cutting.
- If you are using power tools, make sure to follow the manufacturer’s instructions and wear hearing protection to prevent damage to your hearing.
- Work in a well-ventilated area to ensure proper airflow and avoid inhaling harmful dust particles.
- Take breaks if you feel fatigued or overwhelmed. Rushing through a project can lead to accidents or errors.
- Do not attempt to install crown molding alone. Having a friend or family member as a spotter can provide an extra layer of safety.
By following these safety precautions, you can create a secure and hazard-free environment while you work on your crown molding installation project. Now, let’s move on to the tools and materials you will need for the job.
Tools and Materials Needed
Before you begin installing crown molding on a vaulted ceiling, it’s important to gather all the necessary tools and materials. Here’s a list of what you’ll need:
Tools:
- Measuring tape
- Miter saw or coping saw
- Power nailer or hammer and finishing nails
- Caulk gun
- Sandpaper or sanding block
- Paintbrush or paint roller
- Paint tray
- Drop cloth or plastic sheeting
- Painter’s tape
Materials:
- Crown molding – Choose a style and size that complements your room’s décor
- Construction adhesive
- Wood filler
- Primer
- Paint – Select a color that matches or complements your existing trim
- Caulk – Opt for a paintable caulk to seal any gaps or joints
Having the right tools and materials on hand will ensure that you can proceed smoothly with the installation process. Before making any purchase, it’s a good idea to measure your ceiling and calculate the amount of crown molding needed. This will help you avoid running out of materials or purchasing more than necessary.
Now that you have all the necessary tools and materials, it’s time to move on to the step-by-step process of installing crown molding on a vaulted ceiling. Let’s get started with measuring and planning.
Read more: How To Install Crown Molding Lighting
Step 1: Measure and Plan
Before you start installing crown molding on a vaulted ceiling, it’s essential to take accurate measurements and create a detailed plan. This will help ensure that you have the right amount of molding and make the installation process much smoother. Here’s how to do it:
- Start by measuring the perimeter of the room where the crown molding will be installed. Use a measuring tape to determine the length of each wall.
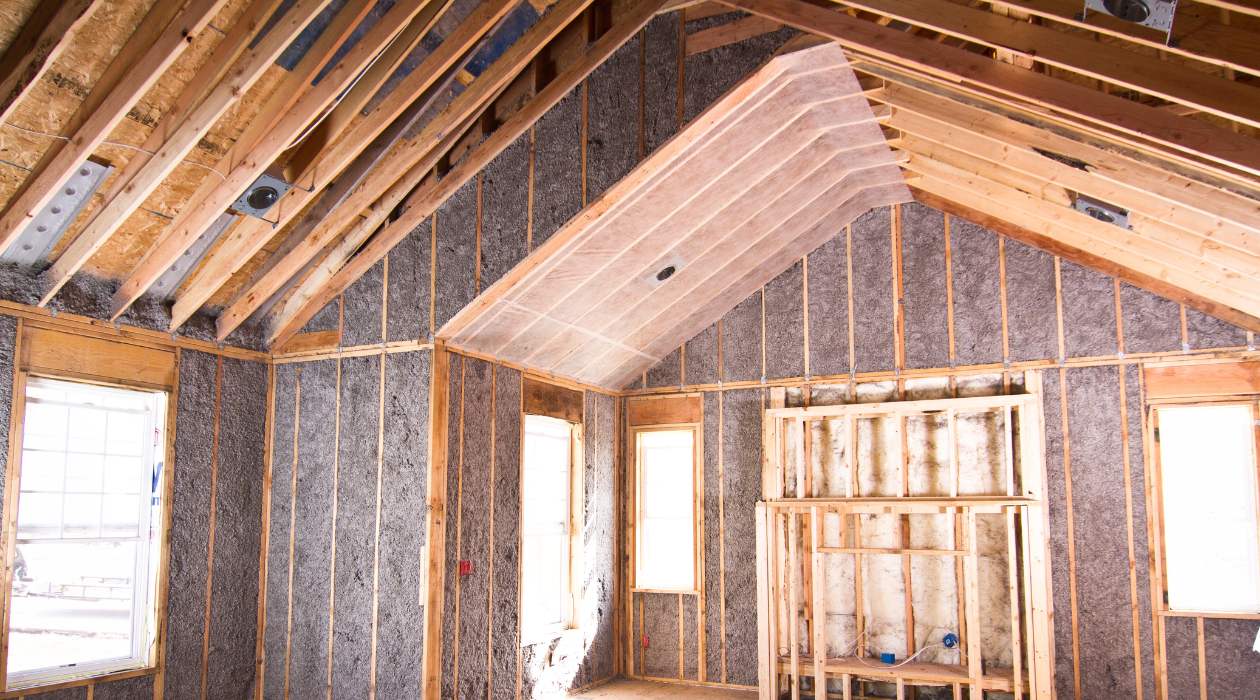
- Next, measure the height of the walls and the distance from the top of the wall to the peak of the vaulted ceiling. This will give you an idea of the angle and size of the crown molding needed.
- Once you have these measurements, it’s time to plan the placement of the crown molding. Consider the desired look and feel of the room, as well as any architectural features or obstructions that may affect the installation.
- Sketch a rough diagram of the room, indicating the layout of the crown molding and any specific angles or corners that need to be accounted for. This will serve as your reference guide during the installation process.
- Based on your measurements and plan, calculate the amount of crown molding needed. It’s always a good idea to add a bit of extra material to account for any mistakes or miscalculations.
By taking the time to measure accurately and plan ahead, you can ensure that your crown molding installation will be precise and visually appealing. With your measurements and plan in hand, you’re ready to move on to the next step: preparing the molding.
Step 2: Prepare the Molding
Now that you have your measurements and plan ready, it’s time to prepare the crown molding before installation. This step is crucial for achieving a seamless and professional-looking result. Here’s what you need to do:
- Start by inspecting the crown molding for any imperfections or damage. If you notice any dents, cracks, or rough edges, use sandpaper or a sanding block to smooth them out.
- If the molding comes unfinished, apply a coat of primer to prepare it for paint. Make sure to choose a primer that is compatible with both the material of the molding and the type of paint you will be using.
- Once the primer is dry, you can paint the crown molding in your desired color. Use a paintbrush or paint roller to apply even coats of paint, allowing sufficient drying time between each coat.
- If you’re using pre-finished molding, you can skip the priming and painting steps and move on to the next preparation task.
- Before installation, make sure to mark your crown molding pieces according to your diagram and plan. This will help avoid confusion and ensure accurate installation.
- If you need to make any angled cuts or cope the molding to fit around corners, use a miter saw or coping saw to carefully cut the molding at the correct angle.
- Once you have prepared your crown molding pieces, organize them in the order you will be installing them. This will save time and make the installation process more efficient.
By properly preparing your crown molding, you can address any imperfections, customize the color to match your room’s décor, and ensure a smooth installation process. With your molding ready, you’re now ready to move on to the next step: cutting the first piece.
Step 3: Cut the Molding for the First Piece
Now that your crown molding is prepared, it’s time to start the installation process. The first step is to cut the molding for the first piece. This piece is crucial as it sets the foundation for the rest of the installation. Here’s what you need to do:
- Measure the length of the wall where you will be installing the first piece of crown molding. Remember to account for any corners or angles.
- Using a miter saw or coping saw, carefully cut the crown molding at a 45-degree angle to match the length of the wall. Make sure to position the molding correctly in the saw, with the back of the molding resting against the saw fence and the bottom of the molding against the saw table.
- For inside corners, cut the molding at a 45-degree angle with the long point of the miter facing away from the wall. For outside corners, cut the molding at a 45-degree angle with the long point of the miter facing towards the wall.
- Once the first piece is cut, hold it up against the wall to ensure it fits correctly. Make any necessary adjustments to the angle or length of the molding before proceeding.
- If needed, use a coping saw to create a cope joint for inside corners. This will ensure a tight and seamless fit. To do this, cut along the profile of the molding to remove the material that will be overlapped by the next piece.
- Once you are satisfied with the fit of the first piece, set it aside and move on to the next step: installing the first piece of crown molding.
By taking the time to cut the first piece accurately and ensure a proper fit, you’ll set yourself up for a smoother installation process. Once you’ve mastered this step, you’ll be ready to install the first piece of crown molding on your vaulted ceiling. Let’s move on to the next step!
Step 4: Install the First Piece
With the first piece of crown molding cut and ready, it’s time to start installing it on your vaulted ceiling. This step sets the foundation for the rest of the installation. Follow these steps to ensure a secure and seamless installation:
- Apply a bead of construction adhesive along the back of the first piece of crown molding. This will help secure it to the wall.
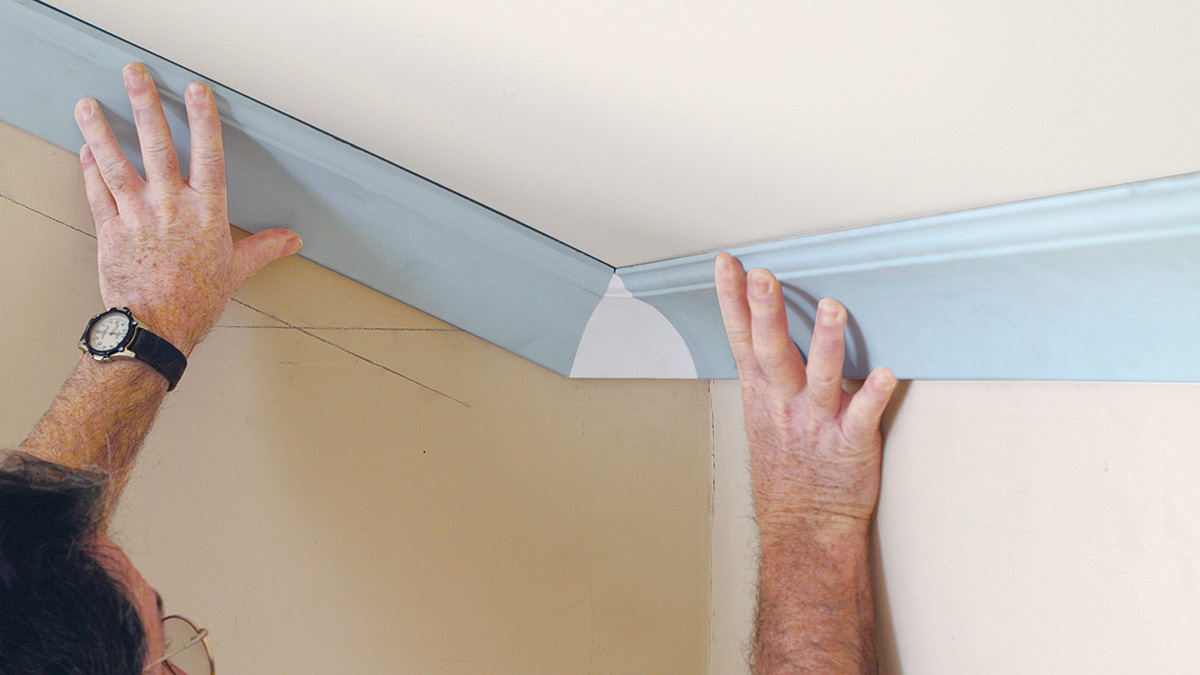
- Hold the molding up against the wall, aligning it with your measurements and plan. Make sure the bottom edge of the molding is flush with the wall.
- Using a power nailer or hammer and finishing nails, secure the molding to the wall at regular intervals. Aim for approximately every 16 inches along the length of the molding.
- Make sure the nails are driven in at an angle and oriented towards the ceiling. This will help ensure a tighter and more secure fit.
- Continue nailing the molding until the entire length of the first piece is securely attached to the wall.
- Check the alignment and levelness of the molding periodically during installation to maintain a straight and even line.
- Use a damp cloth or sponge to immediately wipe away any excess construction adhesive or paint that may have seeped out during installation.
- Check for any gaps or uneven areas between the molding and the wall. If necessary, gently tap the molding with a rubber mallet to adjust the position and ensure a tight fit.
Remember to take your time and work carefully to achieve a professional-looking result. Once you’ve successfully installed the first piece of crown molding, you’ll be ready to move on to the next step: measuring and cutting the remaining pieces.
When installing crown molding on a vaulted ceiling, it’s important to use flexible molding to accommodate the angles. Measure and cut the molding carefully to ensure a proper fit. Use construction adhesive and nails to secure the molding in place.
Read more: How To Install Kitchen Cabinet Crown Molding
Step 5: Measure and Cut the Remaining Pieces
With the first piece of crown molding installed, it’s time to move on to measuring and cutting the remaining pieces. Follow these steps to ensure precise and accurate cuts:
- Measure the distance between the installed piece of crown molding and the nearest corner or joint. Take into account any angles or curves in the vaulted ceiling.
- Transfer the measurements onto a new piece of crown molding, making sure to mark the angles and lengths accurately.
- Using a miter saw or coping saw, cut the molding at the appropriate angles and lengths to fit the measured distance. Double-check your measurements before making any cuts to avoid wasting material.
- For inside corners, cut the molding at a 45-degree angle with the long point of the miter facing away from the wall. For outside corners, cut the molding at a 45-degree angle with the long point of the miter facing towards the wall.
- If needed, use a coping saw to create cope joints for inside corners. This will ensure a tight and seamless fit.
- Once the remaining pieces are cut, hold them up against the wall to check the fit and make any necessary adjustments. It’s important to ensure that the crown molding lines up correctly and forms smooth transitions at corners and joints.
By measuring accurately and making precise cuts, you’ll ensure a seamless and visually appealing installation. Take your time during this step to ensure the best results. With the remaining pieces cut and checked for fit, you’re ready to move on to the next step: installing the remaining pieces of crown molding.
Step 6: Install the Remaining Pieces
With the measurements and cuts complete, it’s time to install the remaining pieces of crown molding on your vaulted ceiling. Follow these steps to ensure a smooth and cohesive installation:
- Apply a bead of construction adhesive along the back of each piece of crown molding. This will help secure them to the wall and provide added stability.
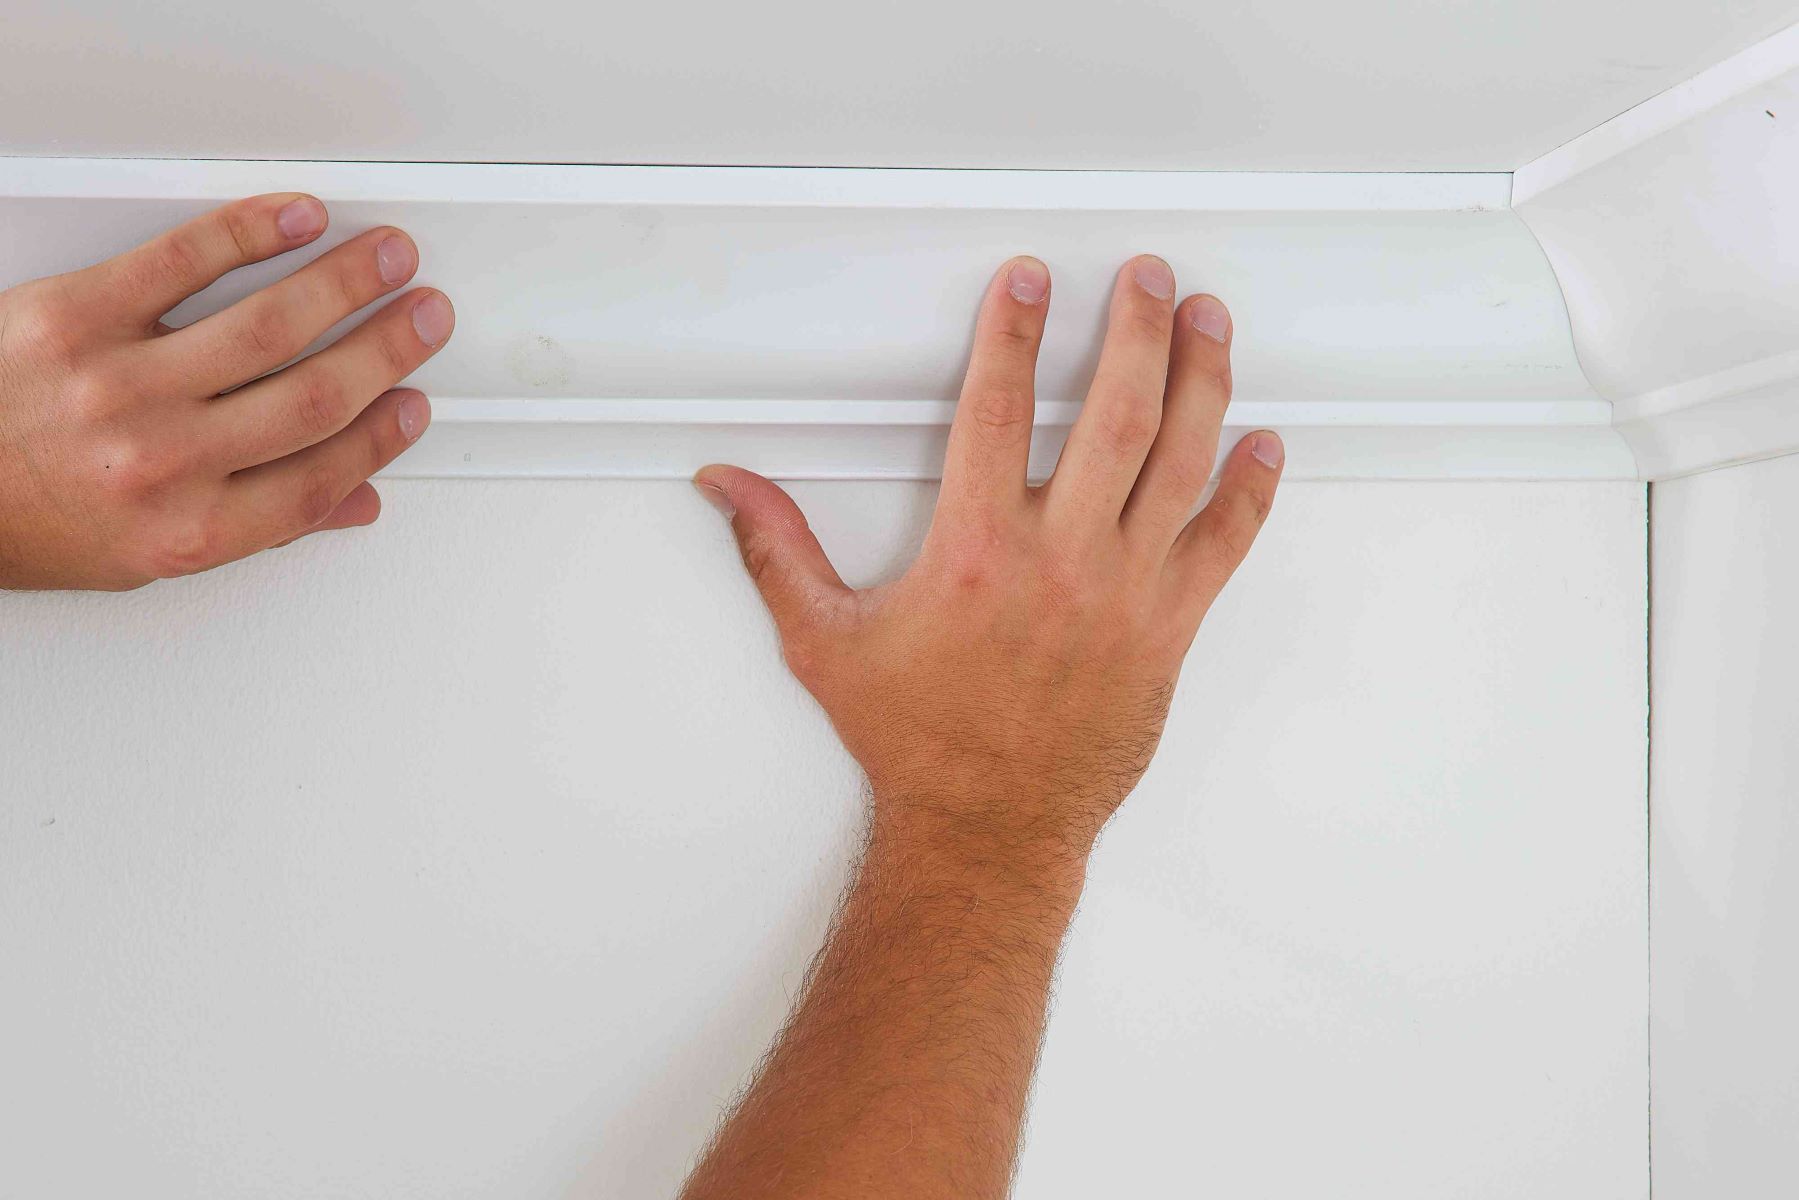
- Hold each piece of molding against the wall, aligning it with the installed piece and any corners or joints. Make sure the bottom edge of the molding is flush with the wall.
- Use a power nailer or hammer and finishing nails to secure each piece of molding to the wall. Aim for approximately every 16 inches along the length of the molding.
- Check the alignment and levelness of each piece as you install it to maintain a straight and even line.
- Continue installing the remaining pieces of crown molding in the same manner, following your measurements and plan.
- Check for any gaps or uneven areas between the molding and the wall. If necessary, gently tap the molding with a rubber mallet to adjust the position and ensure a tight fit.
- Ensure that all the pieces are securely attached and aligned properly before proceeding.
Take your time during this step to ensure a precise and seamless installation. The consistency and accuracy of each piece will contribute to the overall aesthetic of your crown molding on the vaulted ceiling. Once all the remaining pieces are installed, you’re ready to move on to the next step: filling nail holes and sanding.
Step 7: Fill Nail Holes and Sand
After installing the crown molding on your vaulted ceiling, it’s time to make it look flawless by filling in nail holes and sanding any imperfections. Follow these steps to achieve a smooth and polished finish:
- Inspect the crown molding for any nail holes or gaps that need to be filled. Use a sharp putty knife to remove any excess construction adhesive or paint that may have accumulated.
- Fill each nail hole with wood filler or putty, using a putty knife to ensure a smooth and level surface. Press firmly to pack the filler into the hole and remove any excess.
- Allow the wood filler to dry according to the manufacturer’s instructions. This typically takes a few hours, but it may vary depending on the product used.
- Once the wood filler is dry, use fine-grit sandpaper or a sanding block to gently sand the filled nail holes and any rough spots on the crown molding. Sand in a circular motion until the surface is smooth and seamless.
- Be careful not to oversand and remove too much material. Regularly wipe away any dust or debris with a clean cloth to assess your progress.
- For a more professional finish, you can also sand the entire length of the crown molding to ensure a consistent texture and remove any imperfections.
By filling in the nail holes and sanding the crown molding, you’ll achieve a flawless and polished appearance. This step will prepare the molding for the next stage: priming and painting.
Step 8: Prime and Paint the Molding
After filling in nail holes and sanding the crown molding on your vaulted ceiling, it’s time to prime and paint the molding to give it a finished look. Follow these steps to ensure a smooth and professional finish:
- Cover the surrounding area with a drop cloth or plastic sheeting to protect it from any paint drips or spills.
- Apply a coat of primer to the crown molding using a paintbrush or paint roller. Make sure to cover the entire surface evenly. Primer helps to create a smooth base and improves paint adhesion.
- Allow the primer to dry according to the manufacturer’s instructions. This usually takes a few hours, but it can vary depending on the product used.
- After the primer is completely dry, inspect the molding for any imperfections. Use fine-grit sandpaper to gently sand any rough areas or drips, and wipe away any dust with a clean cloth.
- Once the crown molding is prepped and smooth, you can proceed with painting. Select a paint color that matches or complements the existing trim or decor in your room.
- Apply the paint using a paintbrush or paint roller, working in smooth and even strokes. Start from one end of the molding and work your way to the other, ensuring full coverage.
- Allow the first coat of paint to dry completely. Depending on the paint type and manufacturer’s instructions, you may need to apply a second coat for a more flawless finish.
- After the final coat of paint has dried, inspect the crown molding for any touch-ups needed. Use a small paintbrush to carefully paint over any missed spots or areas that require additional coverage.
By priming and painting the crown molding, you’ll achieve a polished and cohesive look that enhances the overall aesthetics of your vaulted ceiling. Make sure to allow sufficient drying time between coats for the best results. Once the paint is dry and any touch-ups are complete, you can step back and admire the newly installed and beautifully finished crown molding.
Read more: DIY Guide To Installing Crown Molding
Conclusion
Congratulations! You have successfully installed crown molding on your vaulted ceiling, adding a touch of elegance and sophistication to your space. By following the step-by-step process outlined in this guide, you have achieved professional-looking results that will enhance the overall aesthetics of your room. Here’s a recap of the steps involved:
- Measure and Plan: Take accurate measurements and create a detailed plan to ensure a smooth installation process.
- Safety Precautions: Prioritize safety by wearing protective gear and working in a well-ventilated area.
- Tools and Materials Needed: Gather all the necessary tools and materials to make the installation process easier.
- Prepare the Molding: Inspect, prime, paint, and cut the crown molding to prepare it for installation.
- Cut the Molding for the First Piece: Measure and cut the molding for the first piece, ensuring a proper fit.
- Install the First Piece: Securely attach the first piece of crown molding to the wall using glue and nails.
- Measure and Cut the Remaining Pieces: Measure, mark, and cut the remaining molding pieces according to your plan.
- Install the Remaining Pieces: Attach the remaining pieces of crown molding, aligning them with corners and joints.
- Fill Nail Holes and Sand: Fill in nail holes, sand rough spots, and ensure a smooth surface.
- Prime and Paint the Molding: Apply primer and paint coats to achieve a flawless and finished look.
With your newly installed crown molding, your vaulted ceiling now boasts an elevated and sophisticated appearance. Take a step back and admire your handiwork. The detailed planning, precise measurements, and careful installation have paid off, resulting in a stunning transformation.
Remember, practice makes perfect, so don’t be discouraged if your first attempt isn’t flawless. With each project, you’ll gain more experience and improve your skills. Now that you’ve mastered the art of installing crown molding on a vaulted ceiling, you can apply your newfound expertise to other areas of your home.
Enjoy the beauty and refinement that crown molding brings to your space. Sit back, relax, and take pride in the beautiful craftsmanship you’ve accomplished. Happy decorating!
Now that you've mastered crown molding on a vaulted ceiling, consider enhancing other areas of your home. Transform your kitchen by adding crown molding to the cabinets, which adds elegance and increases your home’s value. Also, delve deeper into the architectural features of your home by learning more about vaulted ceilings, enriching your understanding and appreciation of your home's unique design.
Frequently Asked Questions about How To Install Crown Molding On A Vaulted Ceiling
Was this page helpful?
At Storables.com, we guarantee accurate and reliable information. Our content, validated by Expert Board Contributors, is crafted following stringent Editorial Policies. We're committed to providing you with well-researched, expert-backed insights for all your informational needs.


0 thoughts on “How To Install Crown Molding On A Vaulted Ceiling”