Home>Articles>How To Install Plastic Crown Molding As A Budget-Friendly Upgrade

Articles
How To Install Plastic Crown Molding As A Budget-Friendly Upgrade
Modified: December 7, 2023
Learn how to install plastic crown molding on a budget with our informative articles. Upgrade your home's style without breaking the bank.
(Many of the links in this article redirect to a specific reviewed product. Your purchase of these products through affiliate links helps to generate commission for Storables.com, at no extra cost. Learn more)
Introduction
Welcome to our guide on how to install plastic crown molding as a budget-friendly upgrade. Crown molding is a beautiful and elegant addition to any room. It adds a touch of sophistication and can completely transform the look and feel of a space. Traditionally, crown molding was made of wood, which can be costly and time-consuming to install. However, with plastic crown molding, you can achieve the same stunning results at a fraction of the cost.
Plastic crown molding is a durable, lightweight, and affordable alternative to traditional materials. It is easy to work with, making it ideal for DIY enthusiasts and those looking to save money on professional installation. In this guide, we will take you through the step-by-step process of installing plastic crown molding to help you achieve a high-end look on a budget.
Before we begin, it’s important to measure your space accurately and plan your crown molding installation. This will ensure you have the correct amount of molding and save you from any unnecessary trips to the hardware store. Once you’ve measured and planned, gather all the necessary materials and tools to complete the project. This includes the plastic crown molding, a miter saw or coping saw, adhesive or caulk, a measuring tape, a level, a pencil, a putty knife, sandpaper, and paint or finish to match your desired look.
Now let’s dive into the step-by-step process of installing plastic crown molding. We’ll guide you through each phase, from preparing the surface to finishing touches, to ensure a successful and visually appealing installation. So, grab your tools and let’s get started on transforming your space with plastic crown molding!
Key Takeaways:
- Transform your space with plastic crown molding, a budget-friendly alternative to traditional wood. Follow our step-by-step guide for a seamless and elegant DIY installation.
- Achieve a high-end look on a budget by installing plastic crown molding. Embrace your DIY skills and enjoy the sophisticated ambiance it brings to your room.
Read more: How To Install Crown Molding Lighting
Materials Needed
Before you begin installing plastic crown molding, it’s important to gather all the necessary materials. Having everything you need on hand will streamline the installation process and ensure a smooth workflow. Here is a list of the materials you’ll need:
- Plastic crown molding: Measure your space and purchase enough molding to cover the desired area. Make sure to account for any corners or angles.
- Miter saw or coping saw: This will be used to make accurate and precise cuts on the molding.
- Adhesive or caulk: Choose an adhesive or caulk that is suitable for plastic molding and will provide a strong bond.
- Measuring tape: This will help you accurately measure the length of the molding and mark your cuts.
- Level: Use a level to ensure that your crown molding is straight and properly aligned.
- Pencil: Use a pencil to mark the measurements and cut lines on the molding.
- Putty knife: This will be useful for applying adhesive or caulk and smoothing out any imperfections.
- Sandpaper: You’ll need sandpaper to smooth down the joints and make the molding surface even.
- Paint or finish: Choose a paint color or finish that matches your desired look and complements the room decor.
- Safety goggles and gloves: These are important for protecting your eyes and hands during the installation process.
By having all of these materials ready, you’ll be well-prepared and equipped to install plastic crown molding efficiently and effectively. It’s always a good idea to double-check your supply list before starting the installation to make sure you haven’t missed anything.
Now that you have your materials ready, it’s time to move on to the next step: measuring and planning your crown molding installation.
Step 1: Measure and Plan
The first step in installing plastic crown molding is to accurately measure your space and plan the layout. This will ensure that you purchase the correct amount of molding and have a clear plan for installation. Here’s how to do it:
- Start by measuring the length of each wall where you plan to install crown molding. Use a measuring tape and record these measurements.
- Next, measure the height of the walls from floor to ceiling. Again, record these measurements for reference.
- Take note of any corners or angles in the room. It’s important to measure these sections accurately to ensure a seamless installation.
- Based on your measurements, calculate the total length of crown molding needed. Add a little extra to account for any mistakes or adjustments during installation.
- Once you have your measurements and total length, you can determine how many pieces of molding you’ll need. Divide the total length by the length of each piece of molding to get the number of pieces required.
- Consider the layout and design of the room. Decide if you want to install crown molding on all walls or just select areas. It’s also important to plan whether you’ll need inside or outside corner pieces to complete the look.
Taking the time to measure and plan your crown molding installation will save you from buying too much or too little molding. It will also help you visualize the final result and ensure a cohesive and well-designed look. Once you have your measurements and a clear plan, you can move on to gathering the required tools for the installation process.
Now that you have measured and planned, it’s time to gather the tools necessary to complete the installation. In the next step, we will go over the essential tools needed for installing plastic crown molding.
Step 2: Gather the Required Tools
Before you can begin installing plastic crown molding, it’s essential to gather all the necessary tools. Having the right tools on hand will make the installation process smoother and more efficient. Here are the tools you’ll need:
- Miter saw or coping saw: A miter saw is recommended for making precise angled cuts on the crown molding. If you don’t have a miter saw, a coping saw can be used as an alternative.
- Measuring tape: Use a measuring tape to accurately measure the length of the molding and mark your cuts.
- Level: A level will help ensure that your crown molding is straight and properly aligned on the wall.
- Pencil: Use a pencil to mark your measurements and cut lines on the molding.
- Putty knife: A putty knife will come in handy for applying adhesive or caulk and smoothing out any imperfections.
- Sandpaper: You’ll need sandpaper to smooth down the joints and create a seamless surface for the crown molding.
- Adhesive or caulk: Choose an adhesive or caulk that is suitable for plastic molding and will provide a strong bond.
- Paint or finish: Select a paint color or finish that matches your desired look and complements the room decor.
- Safety goggles and gloves: It’s important to protect your eyes and hands during the installation process.
By having all of these tools ready, you’ll be well-prepared to tackle the installation process. It’s a good idea to double-check that you have everything you need before beginning, as it will save you time and ensure a smoother workflow.
Now that you have gathered the required tools, you’re ready to move on to the next step: preparing the surface for the installation of the plastic crown molding.
Step 3: Prepare the Surface
Before you start installing the plastic crown molding, it’s important to prepare the surface to ensure proper adhesion and a smooth installation. Here are the steps to prepare the surface:
- Clean the walls: Remove any dirt, dust, or grease from the walls where the crown molding will be installed. A damp cloth or mild detergent can be used to clean the surface thoroughly.
- Smooth out imperfections: Inspect the walls for any bumps, holes, or rough spots. Use a putty knife and spackling compound to fill in any holes and smooth out any rough areas. Allow the compound to dry and then sand it down until the wall surface is even and smooth.
- Remove any existing molding: If there is any existing crown molding or baseboard trim, remove it carefully using a pry bar or a hammer and chisel. Make sure to take your time and avoid damaging the walls.
- Apply a primer: Applying a primer to the walls before installing the crown molding will help the adhesive or caulk adhere better. Use a paintbrush or roller to apply a thin coat of primer and allow it to dry according to the manufacturer’s instructions.
By preparing the surface properly, you’ll create a clean and smooth foundation for the plastic crown molding. This will ensure a secure and visually appealing installation. Once you have prepared the surface, it’s time to move on to the next step: cutting the crown molding to the appropriate lengths.
In the next section, we will guide you through the process of cutting the plastic crown molding to fit your space perfectly.
Read more: How To Install Kitchen Cabinet Crown Molding
Step 4: Cut the Crown Molding
Now that the surface is prepared, it’s time to cut the plastic crown molding to fit your space perfectly. This step is crucial for achieving a seamless and professional-looking installation. Here’s how to cut the crown molding:
- Measure and mark the molding: Use a measuring tape to measure the length of the wall where you will be installing the crown molding. Mark the measurement on the molding using a pencil.
- Set the miter saw or coping saw: If you are using a miter saw, adjust the angle and position of the blade according to the corner angle you need to cut. If you are using a coping saw, keep it at a 90-degree angle.
- Make the first cut: Place the molding in the miter saw or resting on a stable surface for the coping saw. Align the marked line with the blade and carefully make your first cut. Take your time and ensure that the cut is precise and clean.
- Measure and mark the next cut: Measure the length from the end of the first cut to the corner where the next piece will join. Mark this measurement on the molding.
- Set the miter saw or coping saw again: Adjust the angle of the blade based on the corner angle you need for the next cut. Place the molding in the saw and align the marked line with the blade.
- Make the second cut: Carefully cut along the marked line, ensuring accuracy and a smooth finish.
- Repeat the process: Continue measuring, marking, and cutting the molding for all the walls and corners of the room. Remember to double-check the measurements and angles for accuracy.
It’s important to take your time when cutting the crown molding to ensure precise and clean cuts. Remember to wear protective goggles to protect your eyes during the cutting process. If you are not comfortable using a power tool like a miter saw, a coping saw can be used as an alternative for cutting the molding.
Once you have cut all the necessary pieces of crown molding, it’s time to move on to the next step: installing corner blocks or inside/outside corners. This will add a decorative touch and help create a polished look for your crown molding installation.
When installing plastic crown molding, make sure to measure and cut accurately to avoid wasting materials. Use a miter saw for precise cuts and adhesive for easy installation.
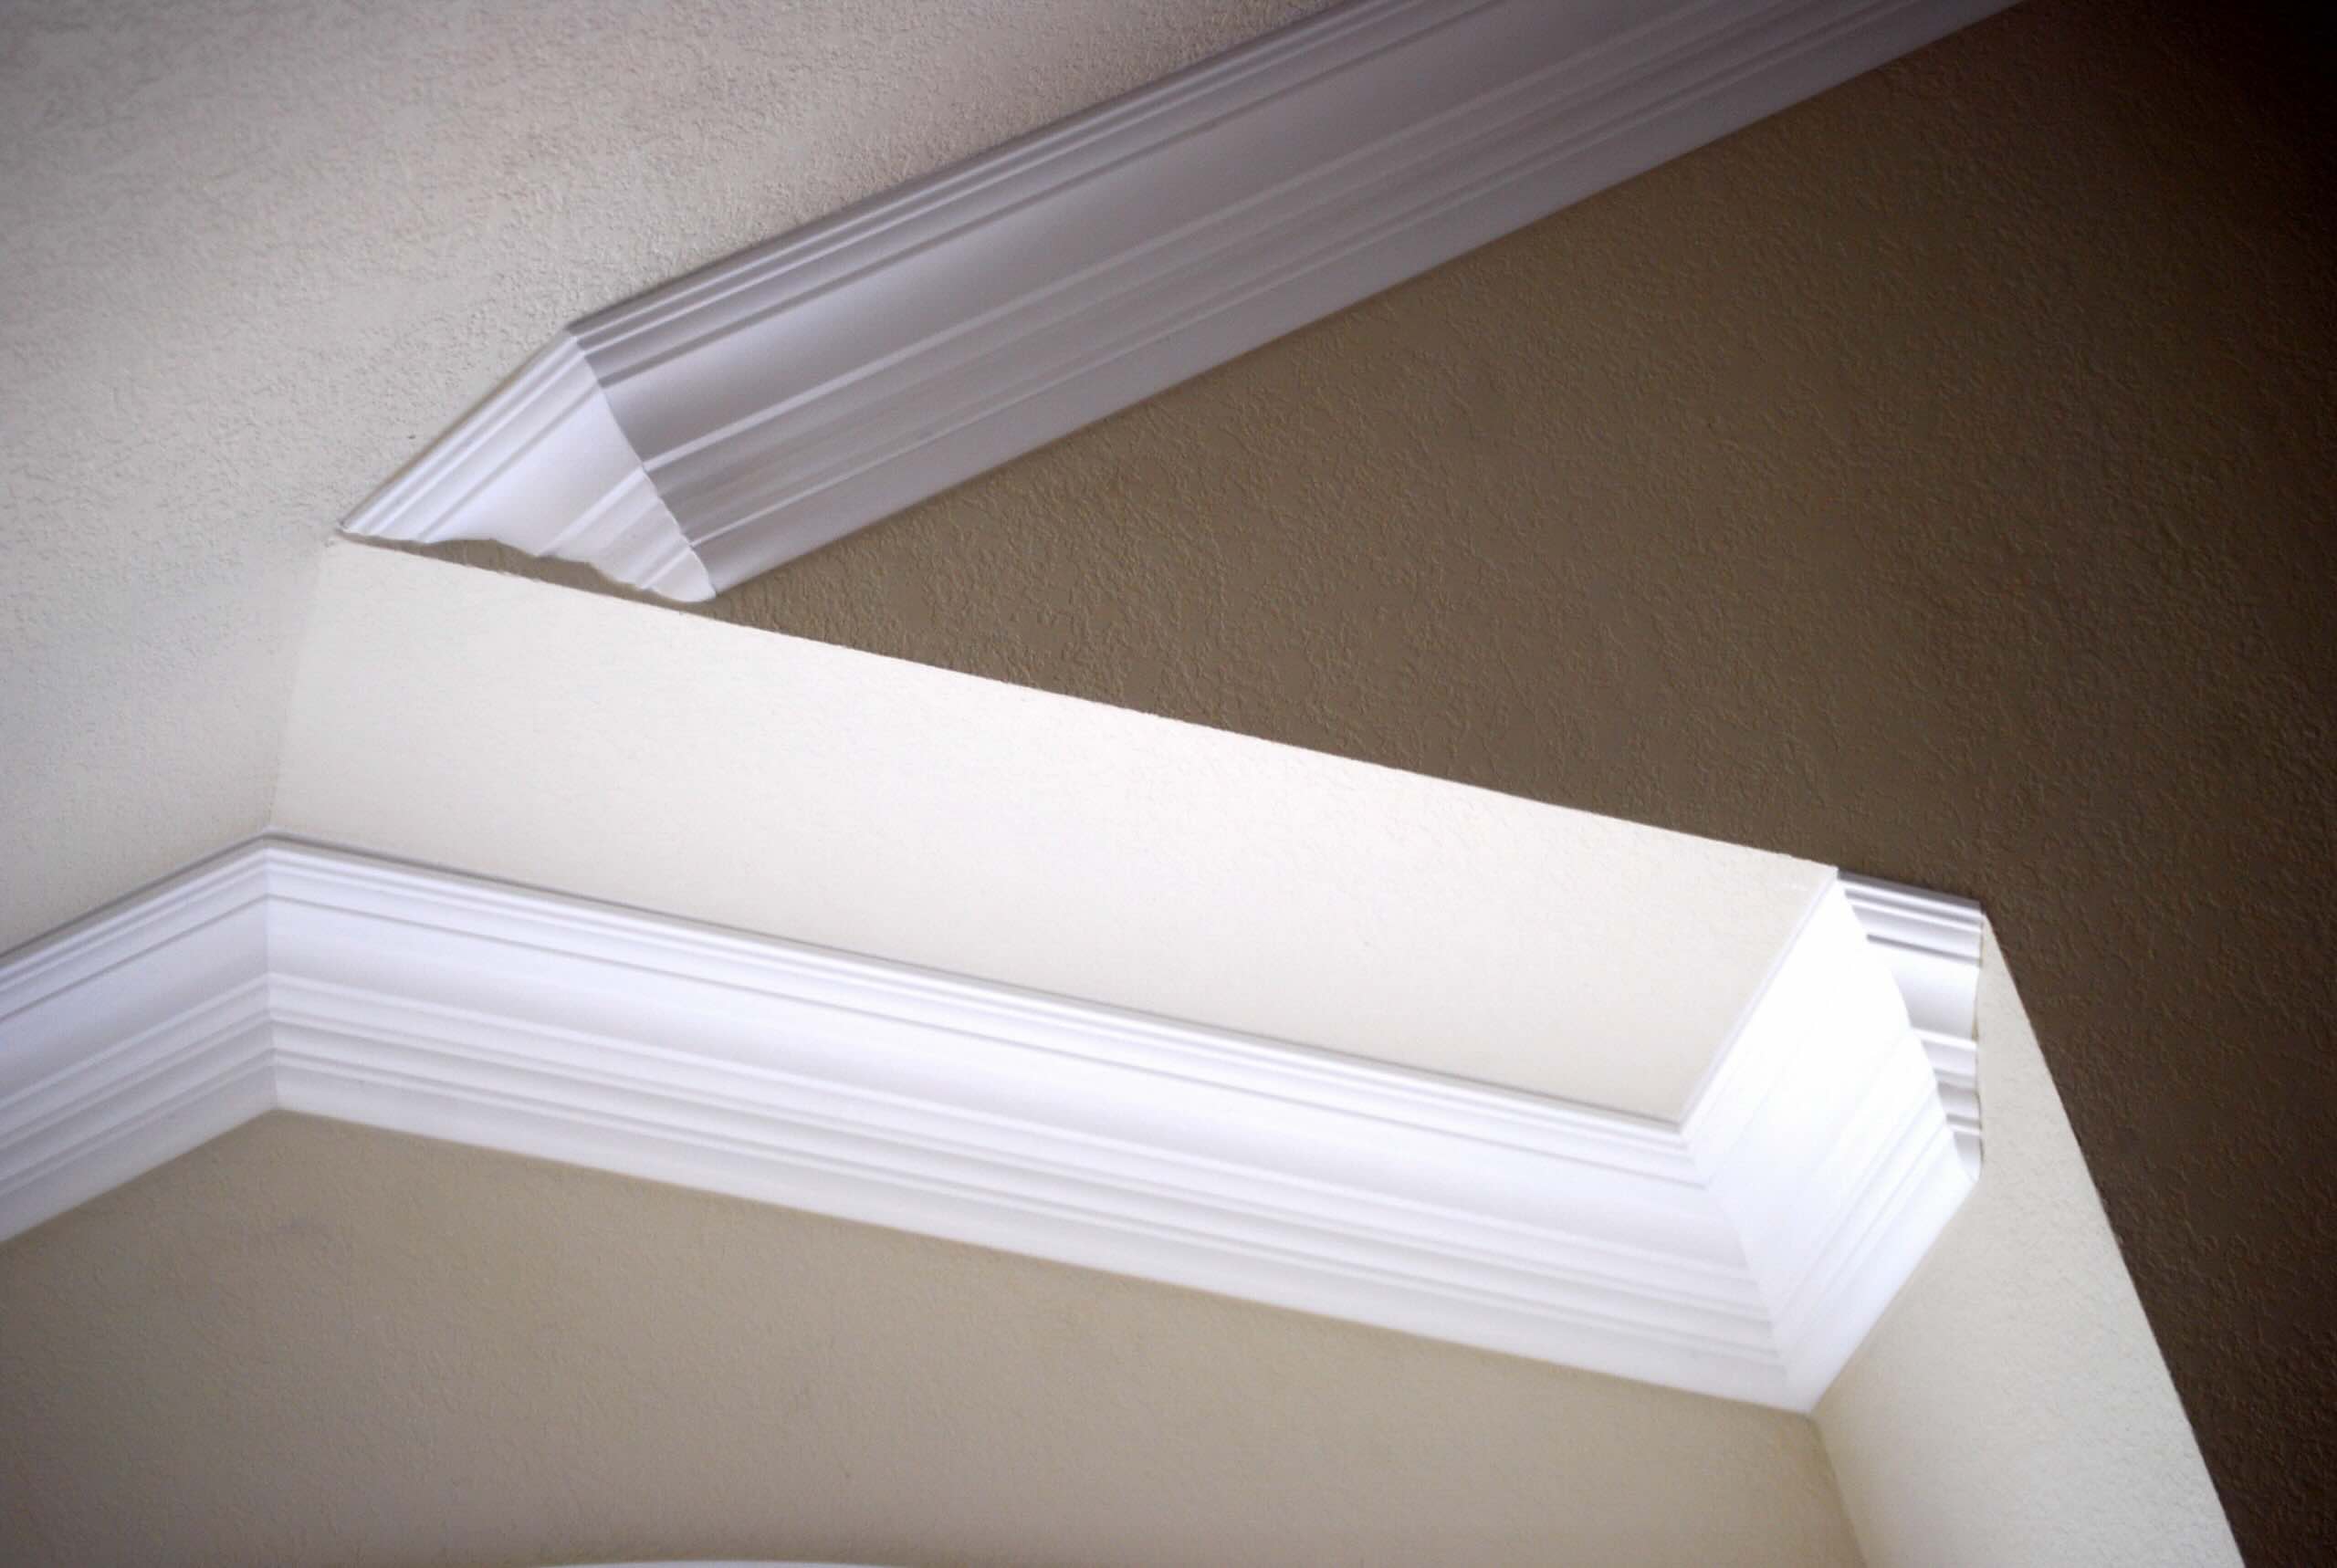
Step 5: Install Corner Blocks or Inside/Outside Corners
Installing corner blocks or inside/outside corners is an optional but aesthetically pleasing addition to your plastic crown molding installation. These decorative elements can give your molding a polished and finished look. Here’s how to install them:
- Measure and mark the location: Determine the placement of the corner blocks or inside/outside corners. Measure and mark the spot on the wall where they will be installed.
- Apply adhesive or caulk: Apply a small amount of adhesive or caulk to the back of the corner block or inside/outside corner piece. Make sure to spread the adhesive evenly.
- Press it into place: Carefully place the corner block or corner piece onto the marked spot on the wall. Press it firmly to ensure a strong bond with the surface.
- Hold it in place: Use painter’s tape or masking tape to hold the corner block or corner piece in place while the adhesive or caulk dries. Follow the manufacturer’s instructions for the recommended drying time.
- Repeat the process: If you have multiple corners in the room, repeat the process for each corner. Make sure to measure and mark the location accurately to ensure a symmetrical and balanced look.
Corner blocks and inside/outside corners are available in a variety of styles and designs, allowing you to choose one that complements your overall aesthetic. They add a decorative element to your crown molding and can enhance the visual appeal of the room. Take your time during this step to ensure proper alignment and secure installation.
Now that you have installed the corner blocks or inside/outside corners, it’s time to move on to the next step: applying adhesive or caulk to secure the plastic crown molding in place.
Step 6: Apply Adhesive or Caulk
Applying adhesive or caulk is a crucial step in securing the plastic crown molding in place and ensuring a durable installation. Here’s how to apply adhesive or caulk:
- Choose the right product: Select an adhesive or caulk that is specifically designed for use with plastic molding. Read the manufacturer’s instructions to ensure compatibility with your materials.
- Cut the tip of the tube: Using a utility knife or scissors, cut the tip of the adhesive or caulk tube at a 45-degree angle. Start with a small opening to control the flow of the product.
- Load the tube into a caulking gun (if applicable): If using a caulk tube, insert it into a caulking gun for easier and more precise application. Follow the manufacturer’s instructions for loading the tube into the gun.
- Apply the adhesive or caulk: Starting at one end of the crown molding, apply a thin bead of adhesive or caulk along the backside of the molding. Be sure to apply it evenly along the entire length to ensure proper adhesion.
- Press the molding into place: Carefully press the crown molding onto the wall, aligning it with the corner blocks or inside/outside corners. Apply pressure evenly along the entire length to ensure a strong bond.
- Wipe away excess adhesive or caulk: Use a damp cloth or sponge to remove any excess adhesive or caulk that may have squeezed out during installation. This will ensure a neat and clean finish.
- Allow the adhesive or caulk to dry: Follow the manufacturer’s instructions regarding the drying time of the adhesive or caulk. It’s important to allow sufficient drying time before moving on to the next steps.
By applying adhesive or caulk, you’ll ensure that the plastic crown molding is securely attached to the wall. Take your time during this step to apply the adhesive or caulk evenly and neatly. It’s important to follow the manufacturer’s instructions for drying time to allow for a strong bond.
Now that the plastic crown molding is secured in place, it’s time to move on to the next step: attaching the molding to the wall.
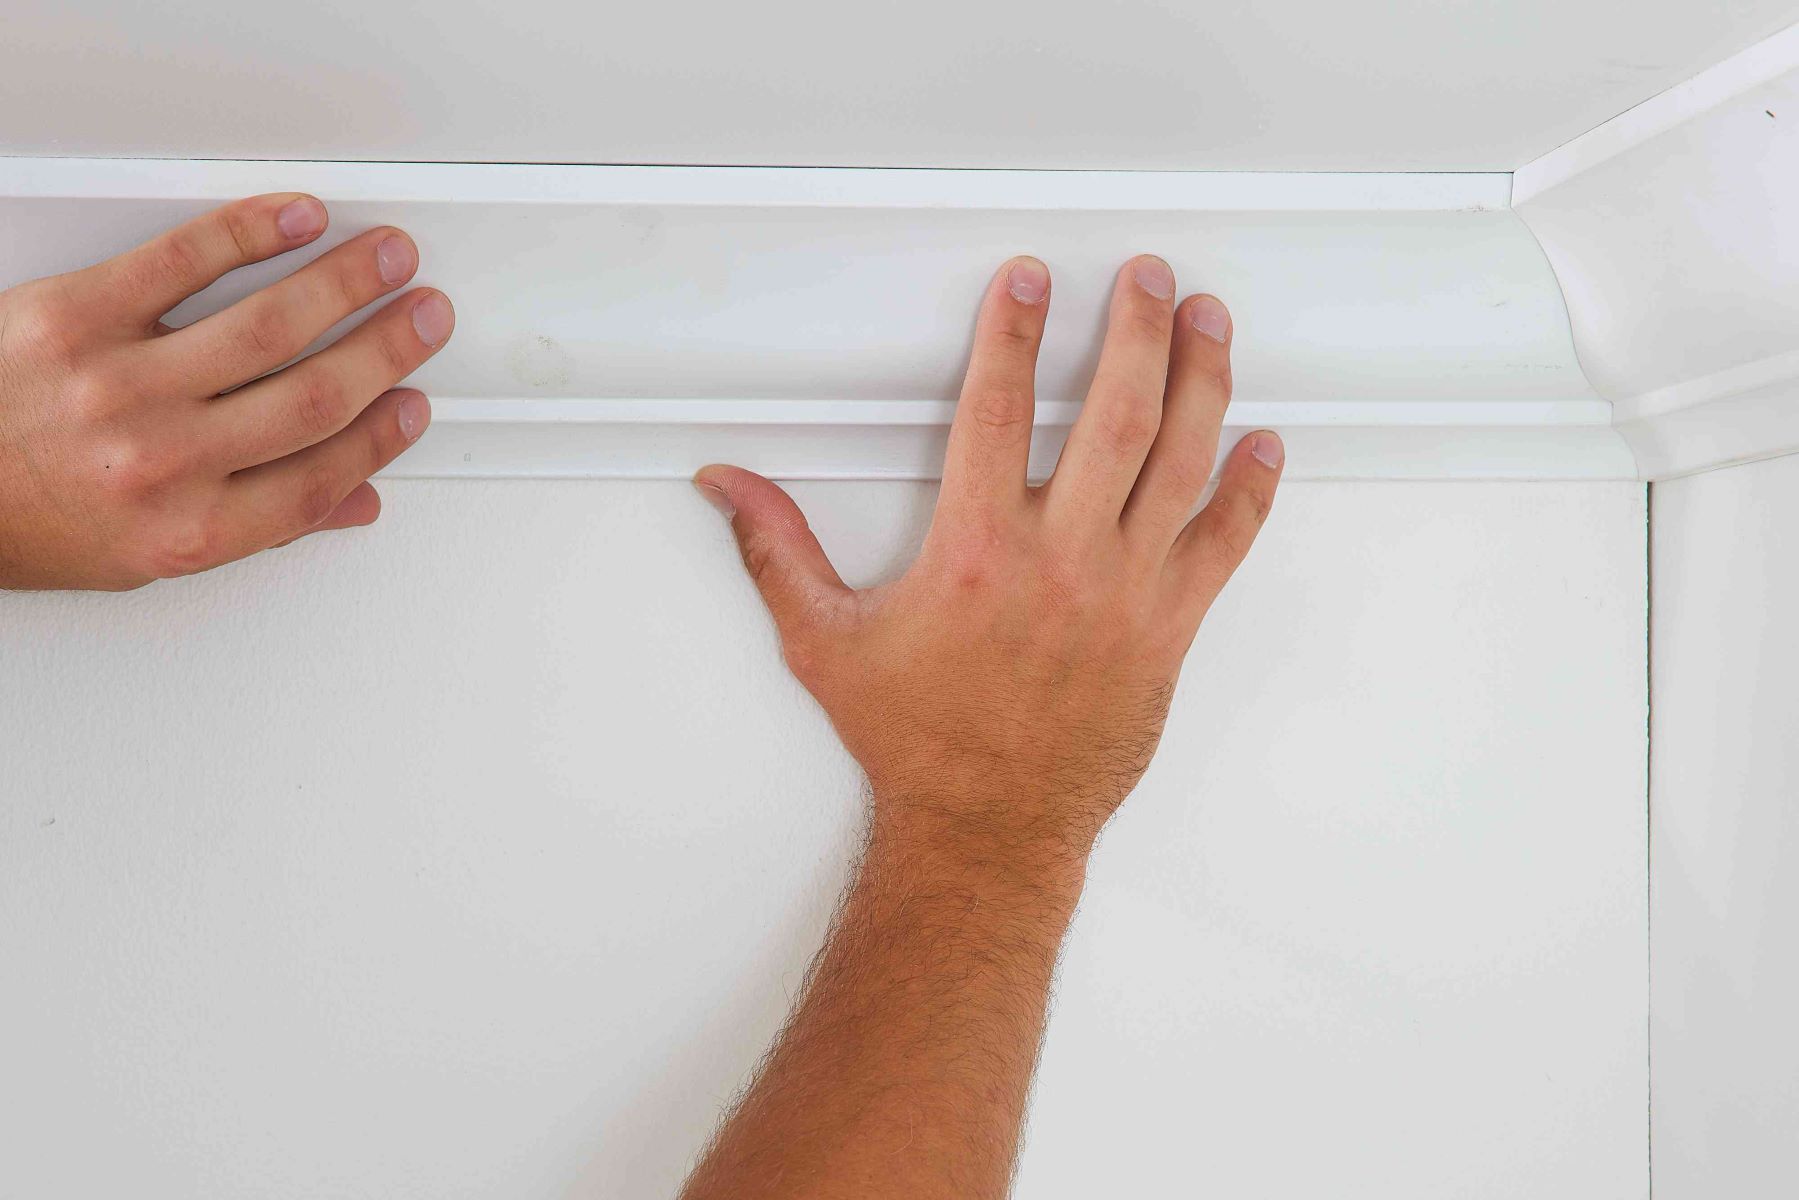
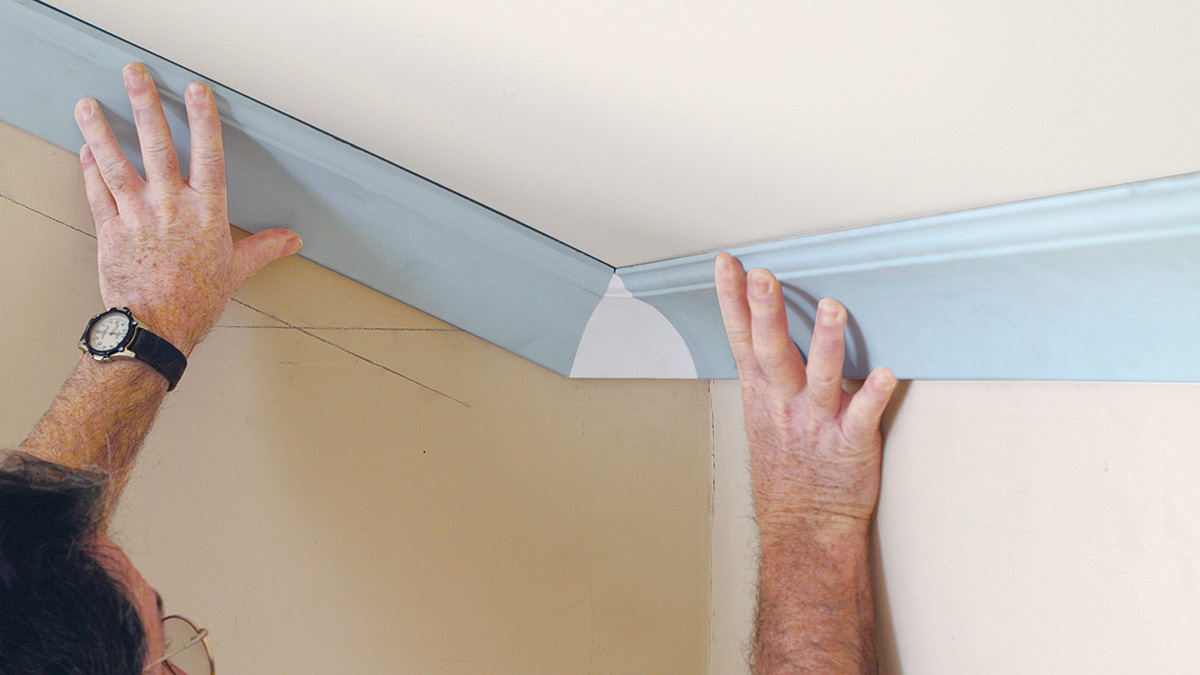
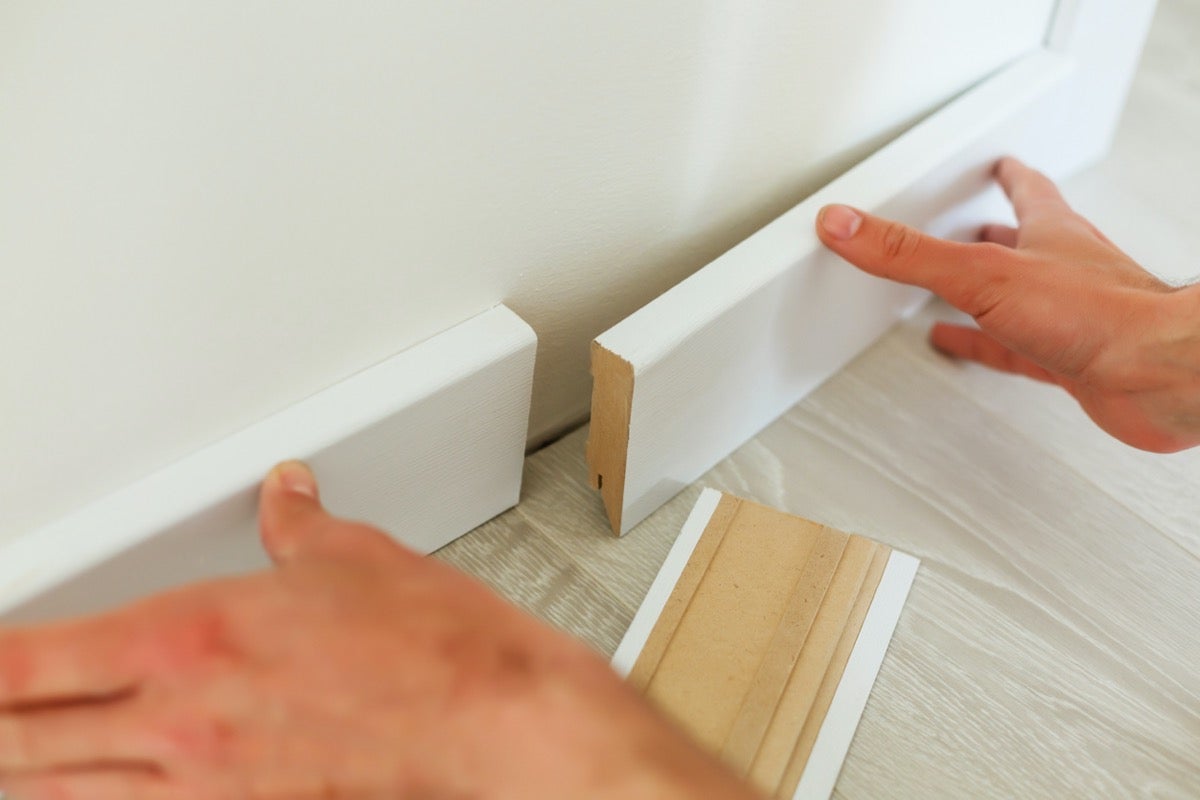
Step 7: Attach the Crown Molding
Now that the adhesive or caulk has dried, it’s time to attach the plastic crown molding to the wall. This step will bring your installation to life and showcase the elegance of the molding. Here’s how to attach the molding:
- Align the molding: Carefully align the plastic crown molding with the corner blocks or inside/outside corners. Ensure that it is level and straight along the entire length.
- Press it into place: Apply gentle but firm pressure to the molding, pressing it firmly against the wall. This will help the adhesive or caulk create a strong bond.
- Secure with finishing nails (optional): If desired, you can secure the crown molding further by using finishing nails. Pre-drill holes in the molding and then carefully hammer in the nails, making sure not to damage the molding.
- Continue with the remaining molding pieces: Repeat the process for the remaining sections of the crown molding, ensuring proper alignment and levelness.
- Check for gaps or unevenness: Once all the molding pieces are attached, carefully inspect the joints and corners for any gaps or unevenness. If necessary, adjust the molding or use a putty knife to fill in any gaps with caulk or adhesive.
Take your time during this step to ensure that each piece of crown molding is securely attached and properly aligned. Use a level to check that the molding is straight and not crooked. If using finishing nails, be careful not to hammer them too hard and risk damaging the molding.
Now that the plastic crown molding is attached to the wall, it’s time to move on to the next step: filling and sanding the joints to create a seamless finish.
Read more: DIY Guide To Installing Crown Molding
Step 8: Fill and Sand the Joints
After attaching the plastic crown molding, it’s important to fill and sand the joints to create a seamless and professional-looking finish. This step will ensure that the molding appears as one continuous piece rather than individual sections. Here’s how to fill and sand the joints:
- Inspect the joints: Carefully inspect the joints where the molding pieces meet. Look for any gaps or inconsistencies that need to be filled.
- Fill the gaps: Use a putty knife and a small amount of caulk to fill in any gaps or seams between the molding pieces. Ensure that the caulk is evenly applied and fills any uneven spaces.
- Smooth the caulk: Use the putty knife to smooth out the caulk and create a seamless transition between the molding pieces. Wipe away any excess caulk with a damp cloth.
- Allow the caulk to dry: Follow the manufacturer’s instructions for the drying time of the caulk. It’s important to allow sufficient drying time before proceeding to the next step.
- Sand the joints: Once the caulk is completely dry, use fine-grit sandpaper to gently sand the joints. This will smooth out any rough edges and create a seamless finish.
- Wipe away dust: After sanding, use a damp cloth to wipe away any dust or debris from the molding. This will leave the surface clean and ready for the next step.
Take your time during this step to ensure that the joints are filled and sanded smoothly. Pay attention to detail to achieve a flawless finish. Sanding the joints will create a seamless transition between the molding pieces and enhance the overall appearance of the installation.
Now that the joints are filled and sanded, it’s time to move on to the next step: painting or finishing the plastic crown molding to complete the look.
Step 9: Paint or Finish the Crown Molding
Painting or finishing the plastic crown molding is the final touch that will bring your installation to life and complement the overall aesthetic of the room. Here’s how to paint or finish the crown molding:
- Clean the molding: Use a damp cloth or sponge to remove any dust or debris from the molding. Make sure the surface is clean and dry before proceeding.
- Apply a primer (optional): If desired, you can apply a coat of primer to the plastic crown molding. Primer helps the paint adhere better and provides a smoother finish. Follow the manufacturer’s instructions for the recommended drying time.
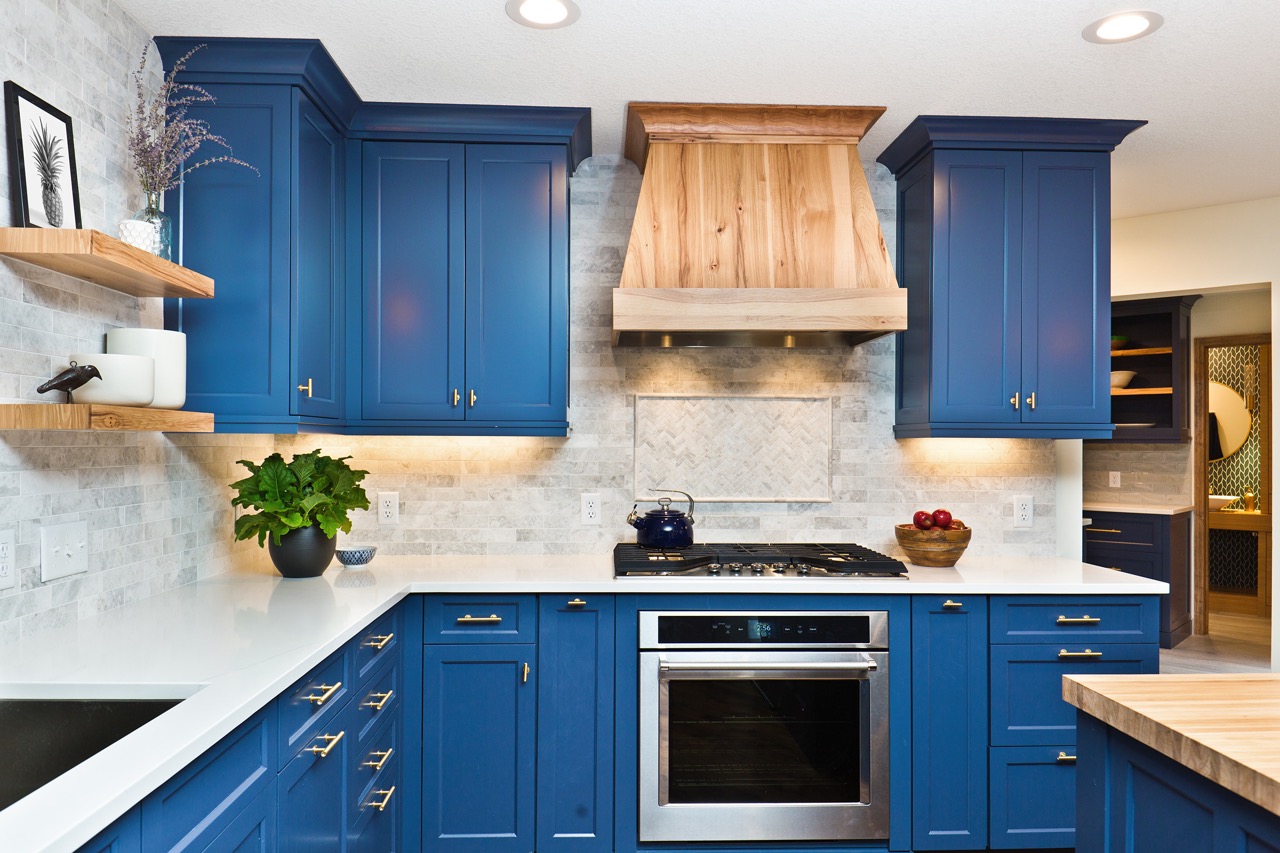
- Select the paint or finish: Choose a paint color or finish that matches your desired look and complements the room’s decor. Consider whether you want a glossy, satin, or matte finish, and select high-quality paint designed for plastic surfaces.
- Apply the paint or finish: Use a brush or a roller to apply an even coat of paint or finish to the plastic crown molding. Start from one end and work your way to the other, ensuring consistent coverage. Allow the first coat to dry according to the manufacturer’s instructions.
- Apply a second coat (optional): Depending on the desired finish and color intensity, you may choose to apply a second coat of paint or finish. This will provide a more vibrant and durable result. Allow the second coat to dry completely.
- Inspect for any touch-ups: Once the paint or finish is dry, carefully inspect the crown molding for any areas that may require touch-ups. Use a small brush to address any imperfections or missed spots.
Take your time when painting or finishing the crown molding to ensure a smooth and professional-looking result. Allow each coat to dry fully before applying the next one. Consider using painter’s tape to protect adjacent surfaces from accidental paint drips or smudges.
Now that your plastic crown molding is painted or finished, it’s time for the final step: step back and enjoy your budget-friendly upgrade!
Step 10: Enjoy Your Budget-Friendly Upgrade!
Congratulations! You have successfully installed plastic crown molding and transformed your space into an elegant and sophisticated environment. Now it’s time to step back, relax, and enjoy the fruits of your labor. Here’s how to embrace and appreciate your budget-friendly upgrade:
- Take a moment to admire your work: Stand back and appreciate the beauty and charm that the plastic crown molding has brought to your room. Notice how it adds a touch of elegance and creates a finished look.
- Celebrate your accomplishment: Share your achievement with friends or family members. Let them admire the transformation and the impact it has made on the overall ambiance of the space.
- Personalize your newly enhanced space: Once the molding is in place, take the opportunity to decorate the room to your liking. Add artwork, furniture, or other accessories that complement the new crown molding and create a cohesive and inviting environment.
- Showcase your DIY skills: Be proud of your DIY skills and the money-saving advantage of choosing plastic crown molding. Share your experience and success with others who may be inspired to undertake similar projects.
- Maintain and care for your crown molding: Keep your plastic crown molding looking its best by regularly cleaning it with a soft, damp cloth. Pay attention to any areas that may require touch-ups or maintenance to ensure its longevity and continued beauty.
By following these steps and embracing your budget-friendly upgrade, you can enjoy a transformed space that exudes elegance and sophistication. Take the time to appreciate your hard work and the impact it has made on your home or office.
Thank you for following our guide on how to install plastic crown molding as a budget-friendly upgrade. We hope you have found this step-by-step process helpful and that it has inspired you to embark on your own DIY projects. Enjoy your newly enhanced space!
Frequently Asked Questions about How To Install Plastic Crown Molding As A Budget-Friendly Upgrade
Was this page helpful?
At Storables.com, we guarantee accurate and reliable information. Our content, validated by Expert Board Contributors, is crafted following stringent Editorial Policies. We're committed to providing you with well-researched, expert-backed insights for all your informational needs.


0 thoughts on “How To Install Plastic Crown Molding As A Budget-Friendly Upgrade”