Home>Ideas and Tips>Home Recording Studio Design: Create Your Own Music Space
Ideas and Tips
Home Recording Studio Design: Create Your Own Music Space
Published: August 29, 2024
Design your own home recording studio with our guide on acoustics, soundproofing, and equipment selection for high-quality music production.
(Many of the links in this article redirect to a specific reviewed product. Your purchase of these products through affiliate links helps to generate commission for Storables.com, at no extra cost. Learn more)
Creating a home recording studio is an exciting venture for any music enthusiast. Whether you're a professional musician or an aspiring artist, having a dedicated space to record and produce music can significantly enhance your creative process. In this article, we'll delve into the essential elements of designing a home recording studio, from acoustics and soundproofing to equipment selection and workflow optimization.
Understanding the Basics
Before diving into the specifics of studio design, it's crucial to understand the fundamental principles that govern a successful home recording studio. These principles include achieving high-quality sound, ensuring a smooth workflow, and maintaining affordability.
Sonically: Master Record Quality
The primary goal of any recording studio is to produce high-quality sound. This means investing in equipment that can capture and reproduce audio with precision and clarity. Key components include:
- Microphones: High-quality microphones are essential for capturing detailed and accurate sound. Popular options include condenser microphones like the Neumann U87 or dynamic microphones like the Shure SM57.
- Preamps: Preamps amplify the signal from your microphone, ensuring that it reaches the recording device without distortion. Look for preamps with high gain and low noise.
- Audio Interfaces: These devices connect your microphones to your computer and allow you to record and monitor your audio. Popular options include the Focusrite Scarlett series and the PreSonus AudioBox.
Workflow: Creative Efficiency
A well-designed workflow is crucial for maintaining productivity and creativity in your studio. This includes:
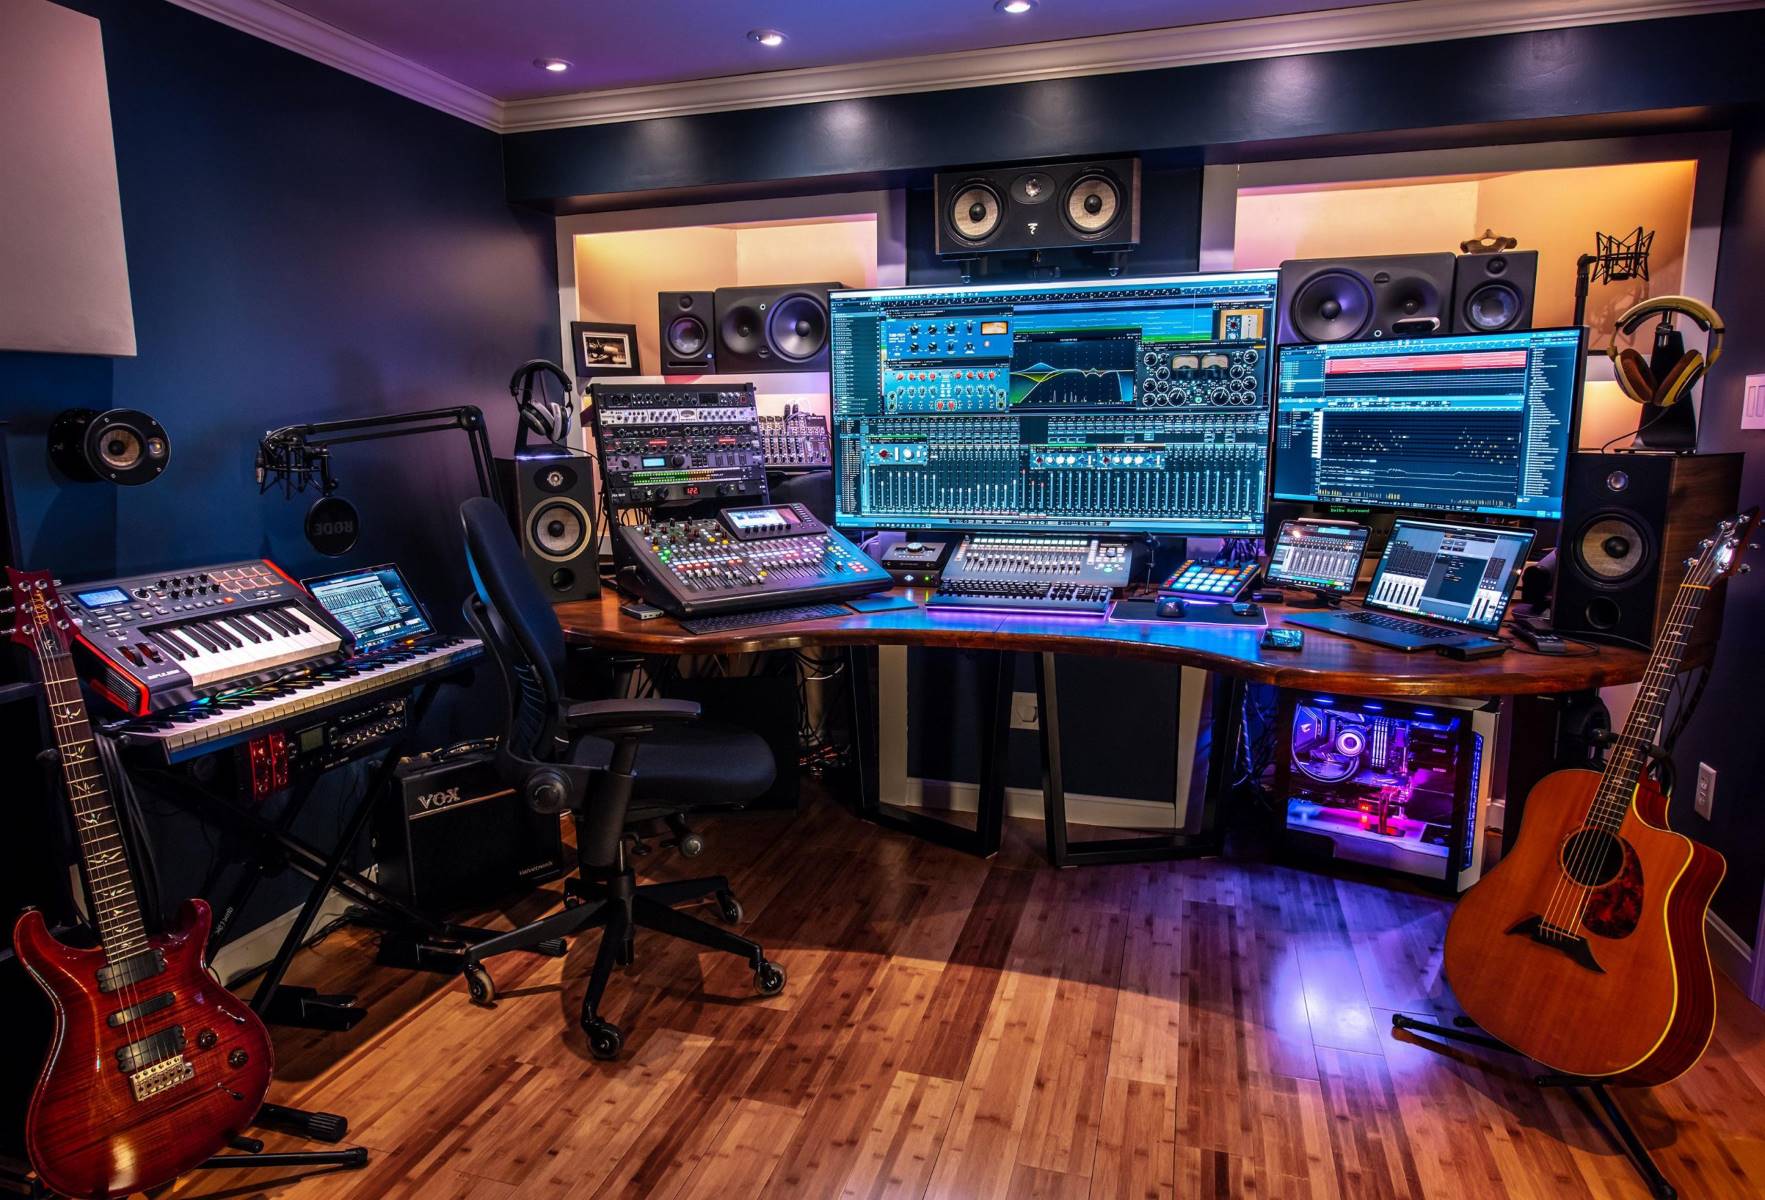
- Computer and Software: A reliable computer with sufficient RAM and storage is vital for running DAWs (digital audio workstations) like Pro Tools, Logic Pro, or Ableton Live.
- Monitors: Accurate monitoring is essential for mixing and mastering. Look for studio monitors that provide flat frequency response, such as the KRK RP5 G3 or Yamaha HS8.
- Control Surface: A control surface like the Novation Launchkey or Akai MPC can streamline your workflow by providing tactile controls for navigating your DAW.
Affordability: Budget-Friendly Options
While high-end equipment can produce exceptional results, it's not necessary to break the bank to create a functional home recording studio. Here are some budget-friendly options:
- Affordable Computers: A Mac Mini or an older MacBook Pro can run Pro Tools and other DAWs efficiently. Consider refurbished or used options to save money.
- Subscription Services: Services like Splice offer a vast library of loops and samples that can be easily integrated into your tracks without breaking the bank.
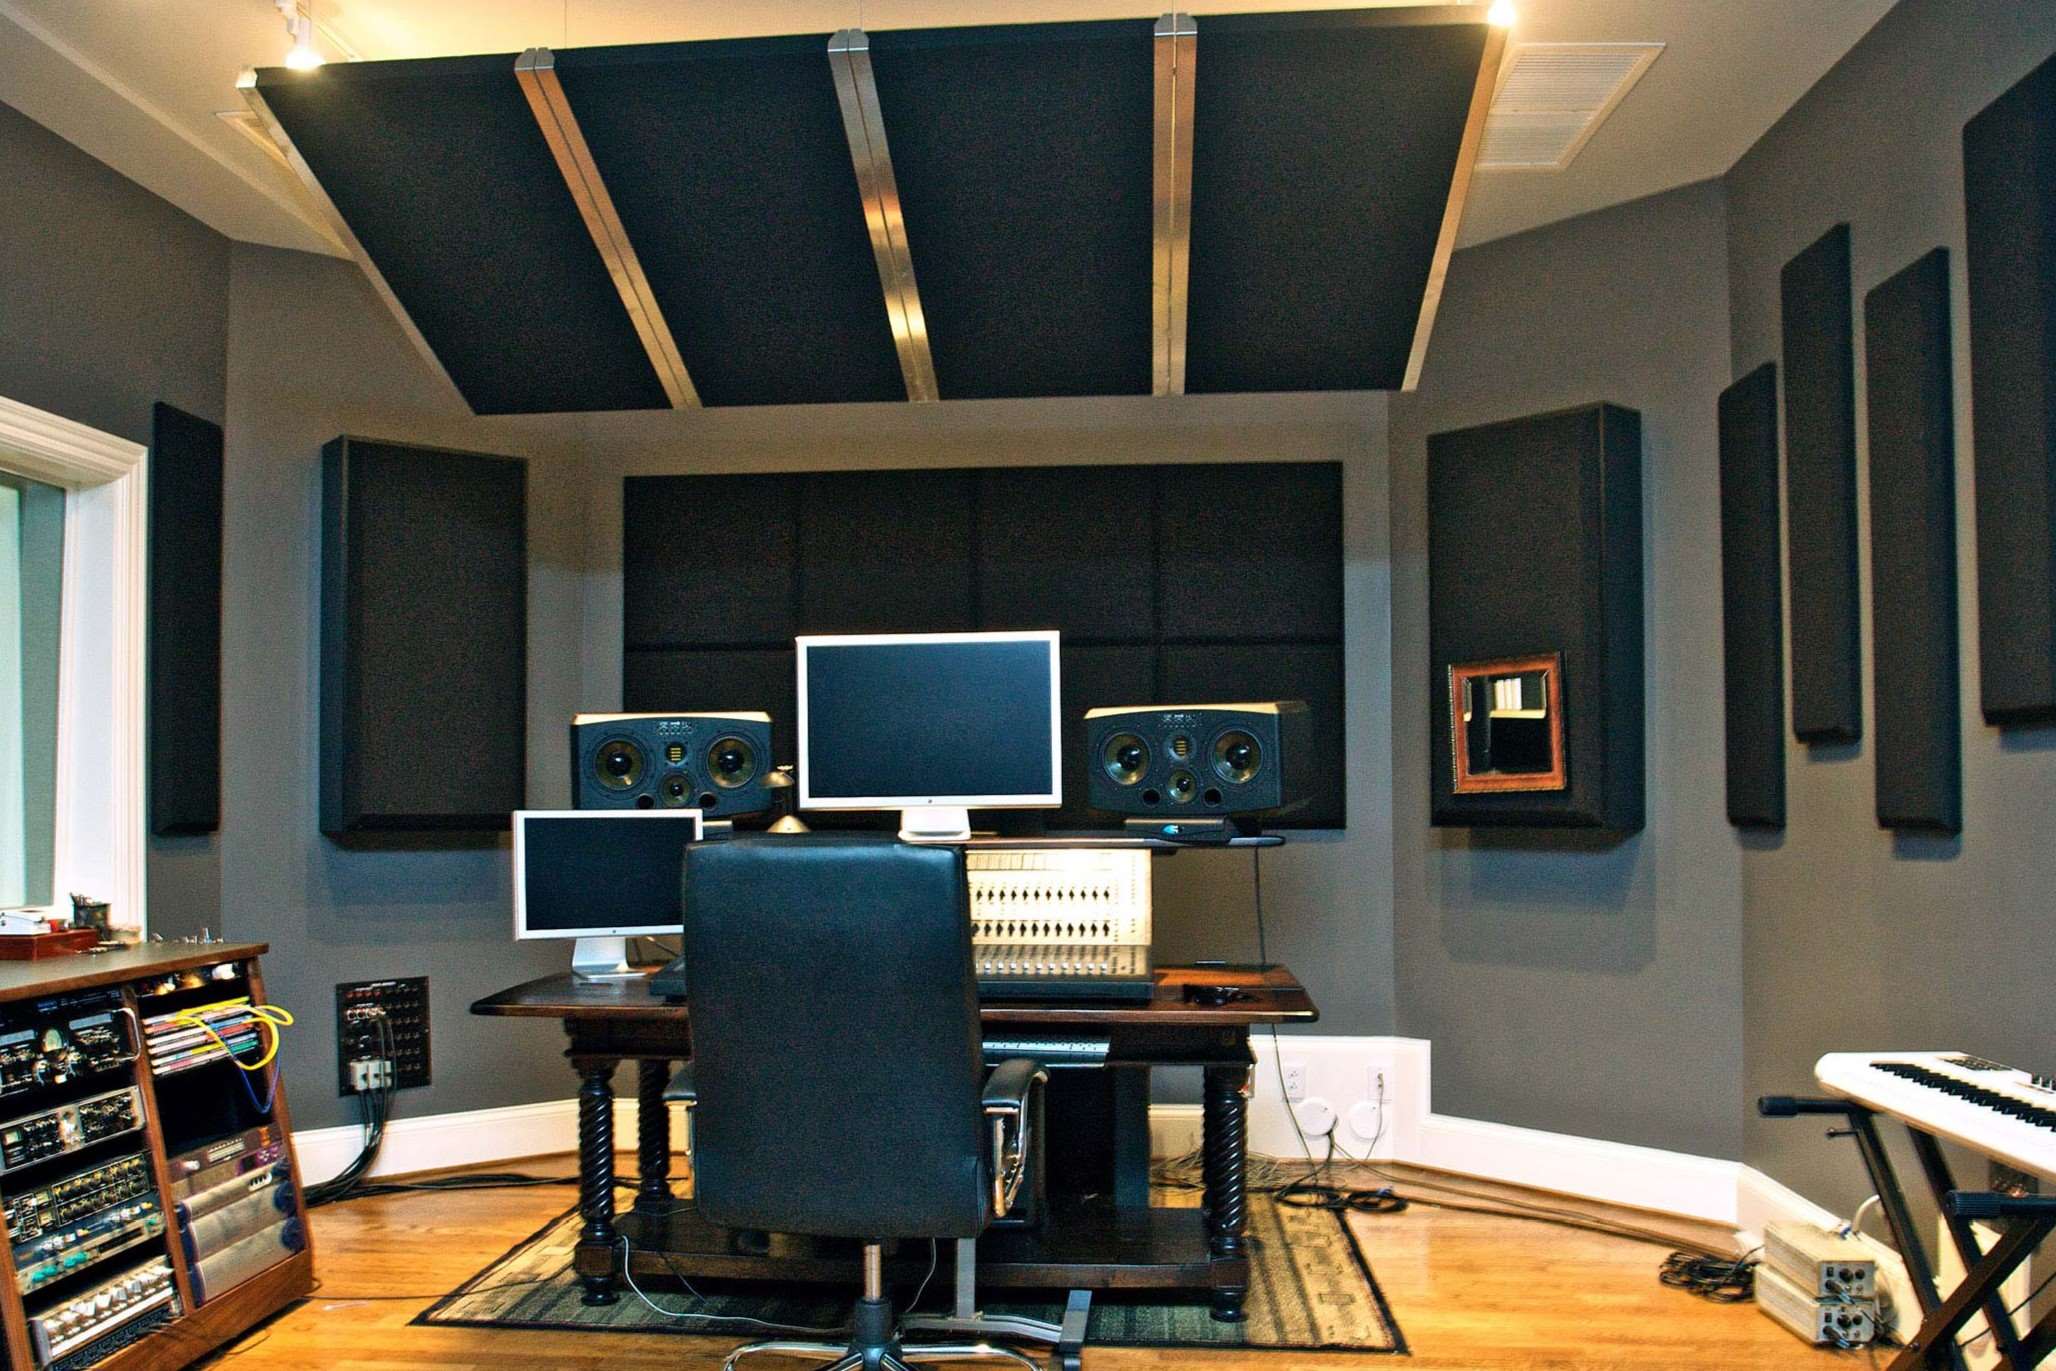
Acoustics and Soundproofing
Acoustics and soundproofing are often overlooked but are critical components of any recording studio. Here’s how you can address these issues:
Acoustics
Acoustic treatment involves modifying the physical space to control reverberation and echo. This includes:
- Acoustic Panels: These panels absorb sound waves, reducing reverberation and improving overall sound quality. You can make your own panels using Owens Corning 703 or purchase them from specialized manufacturers.
- Diffusers: Diffusers scatter sound waves, creating a more even sound field. DIY diffusers can be made using materials like plywood and fabric.
- Bass Traps: Bass traps are specifically designed to absorb low-frequency sound waves, which can cause resonance in small rooms.
Soundproofing
Soundproofing involves reducing the transmission of sound through walls, floors, and ceilings. This includes:
- Mass Loaded Vinyl: This material can be applied to walls and ceilings to reduce sound transmission.
- Acoustic Caulk: Caulk can be used to seal gaps around windows, doors, and other openings.
- Soundproofing Blankets: These blankets are designed to absorb sound and can be hung on walls or ceilings.
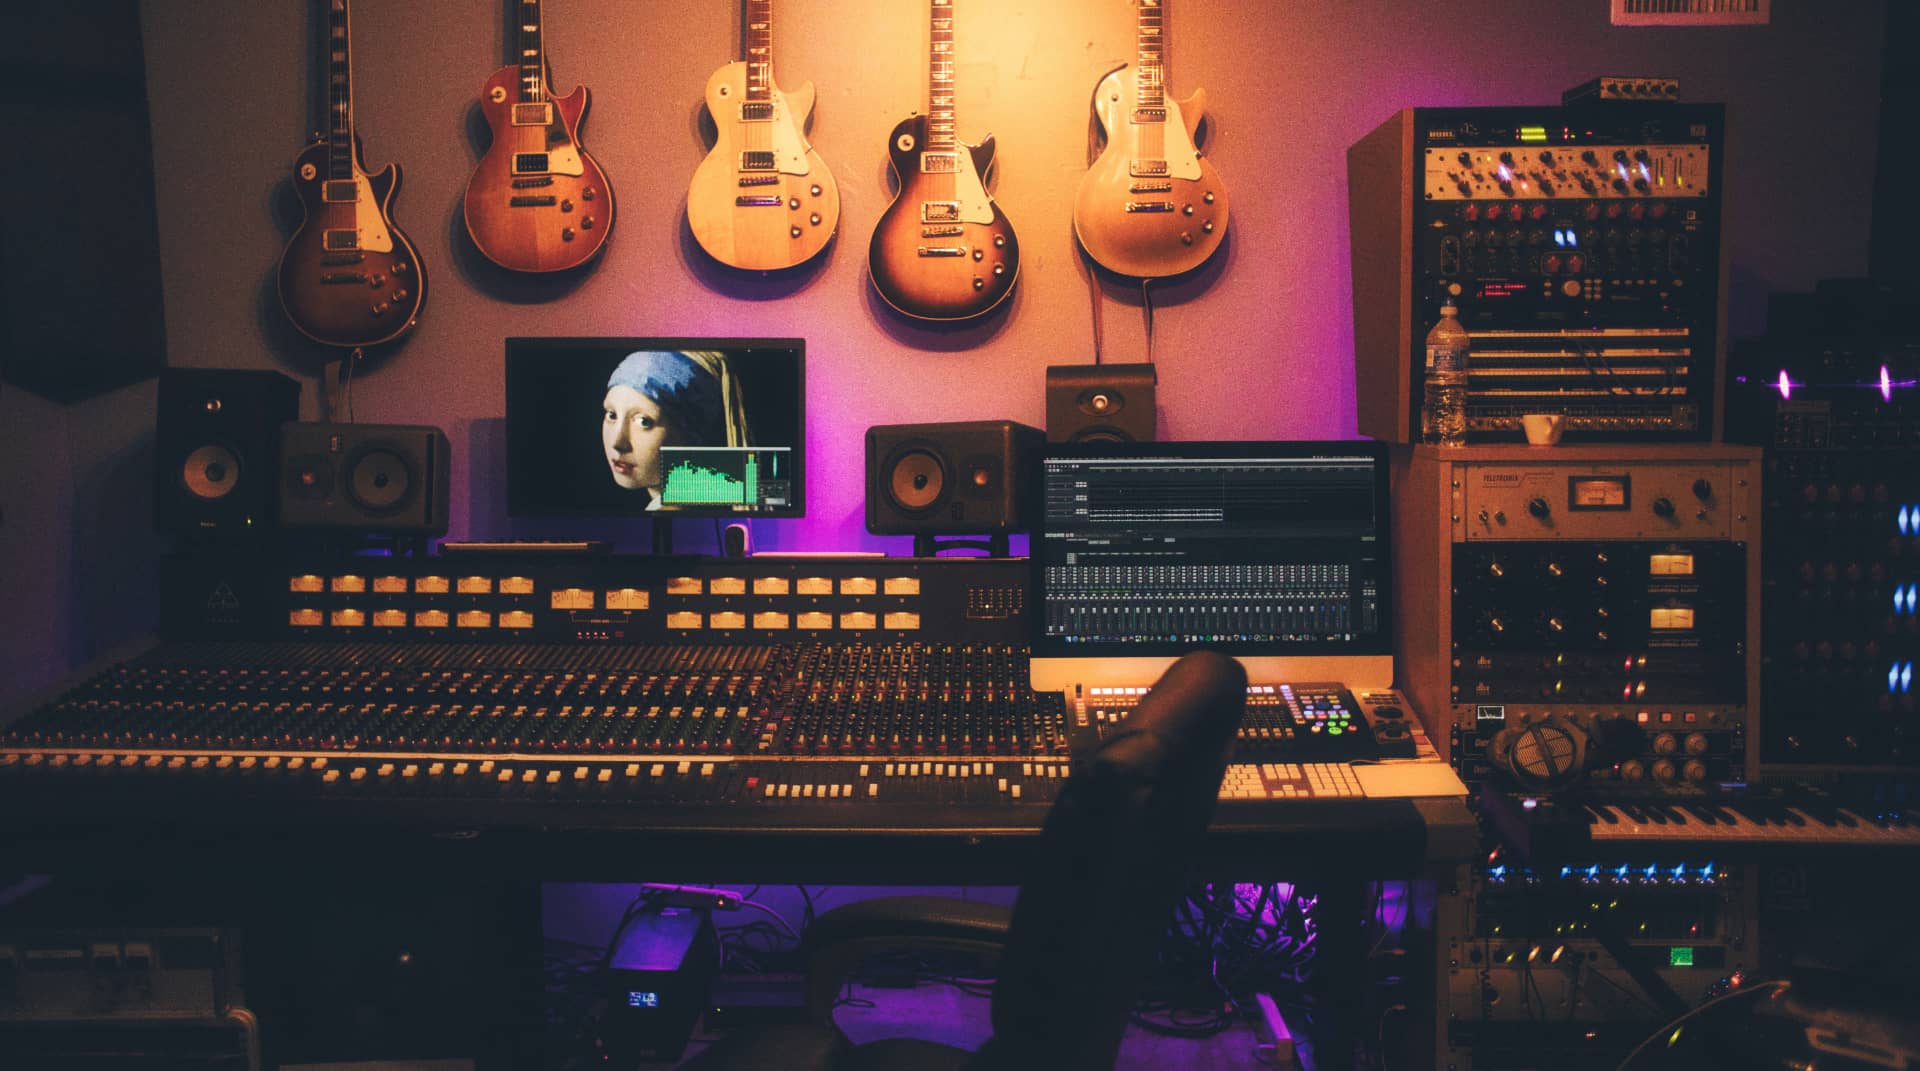
Designing Your Studio
Designing your home recording studio involves more than just selecting equipment; it also requires careful consideration of the physical space. Here are some tips to keep in mind:
Layout
A well-designed layout ensures that all your equipment is easily accessible and that you can move around comfortably. Consider the following:
- Workstation: Place your workstation (computer, monitor, and control surface) in a central location where you can easily access all your equipment.
- Microphone Placement: Position microphones in a way that allows for optimal sound capture without causing unnecessary clutter.
- Cable Management: Use cable organizers or zip ties to keep cables tidy and prevent tripping hazards.
Lighting and Vibe
The lighting and overall vibe of your studio can significantly impact your creativity and comfort level. Here are some suggestions:
- Natural Light: If possible, position your studio near a window to take advantage of natural light. However, ensure that the light is not too harsh or distracting.
- Artwork and Decor: Add artwork or decorative elements that inspire creativity and make the space visually appealing.
- Comfort: Invest in a comfortable chair and ensure that the room is well-ventilated to prevent fatigue and discomfort.
Equipment Selection
Choosing the right equipment for your home recording studio can be overwhelming, especially with the numerous options available. Here are some key pieces of equipment you'll need:
Microphones
As mentioned earlier, high-quality microphones are essential for capturing detailed sound. Here are some popular options:
- Condenser Microphones: Neumann U87, AKG C414
- Dynamic Microphones: Shure SM57, Sennheiser MD421
Preamps
Preamps amplify the signal from your microphone without introducing distortion. Look for preamps with high gain and low noise:
- Universal Audio Apollo: Known for its high-quality preamps and built-in AD/DA conversion.
- Focusrite ISA One: Offers high gain and low noise, making it ideal for capturing detailed sound.
Audio Interfaces
Audio interfaces connect your microphones to your computer and allow you to record and monitor your audio:
- Focusrite Scarlett Series: Popular among home recording enthusiasts due to its ease of use and high-quality sound.
- PreSonus AudioBox Series: Offers a range of options from basic to advanced, making it suitable for various recording needs.
Monitors
Accurate monitoring is crucial for mixing and mastering:
- KRK RP5 G3: Known for its flat frequency response and clear sound reproduction.
- Yamaha HS8: Offers accurate monitoring with a flat frequency response.
Control Surface
A control surface can streamline your workflow by providing tactile controls for navigating your DAW:
- Novation Launchkey: Designed specifically for Ableton Live but compatible with other DAWs as well.
- Akai MPC: A versatile control surface that can be used with various DAWs.
Workflow Optimization
Optimizing your workflow involves setting up your studio in a way that maximizes productivity and creativity. Here are some tips:
DAW Selection
Choose a DAW that fits your needs and skill level. Popular options include:
- Pro Tools: Industry standard for professional recording studios but also suitable for home use.
- Logic Pro: A powerful DAW developed by Apple, ideal for Mac users.
- Ableton Live: Popular among electronic music producers due to its flexibility and ease of use.
Sample Libraries
Sample libraries like Splice offer a vast collection of loops and samples that can be easily integrated into your tracks without breaking the bank.
Plug-ins
Plug-ins can enhance your sound quality and provide additional features such as compression, reverb, and EQ. Popular plug-in suites include:
- Universal Audio UAD Plug-ins: Known for their high-quality emulations of classic gear.
- FabFilter Pro-Q: A versatile EQ plug-in that offers precise control over your frequencies.
Budget-Friendly Options
Creating a home recording studio doesn’t have to break the bank. Here are some budget-friendly options:
Affordable Computers
Consider using an older MacBook Pro or a Mac Mini as they can run Pro Tools and other DAWs efficiently. Refurbished or used options can save you money.
Subscription Services
Services like Splice offer a vast library of loops and samples that can be easily integrated into your tracks without breaking the bank.
DIY Acoustic Panels
Making your own acoustic panels using materials like Owens Corning 703 can be cost-effective and effective in reducing reverberation.
Common Mistakes to Avoid
When designing your home recording studio, there are several common mistakes to avoid:
Bad Layout
Avoid cluttering your space with unnecessary equipment. Plan ahead and ensure that all your essential gear is easily accessible.
Bad Lighting & Vibe
Ensure that your studio has good lighting and a comfortable vibe. Natural light is ideal but avoid harsh lighting that might distract you from your work.
Messy Home Studios
Keep your studio organized by using cable organizers or zip ties to keep cables tidy. This will prevent tripping hazards and make it easier to find what you need quickly.
Too Much Gear
Avoid buying too much gear at once. Start with the essentials and gradually add more equipment as needed.
Forgetting About Acoustics & Soundproofing
Don’t forget about acoustics and soundproofing. These elements are crucial in ensuring high-quality sound and minimizing external noise.
Conclusion
Creating a home recording studio is a rewarding experience that requires careful planning and attention to detail. By focusing on achieving high-quality sound, optimizing your workflow, and maintaining affordability, you can set up a functional studio that meets your needs. Remember to avoid common mistakes such as bad layout, poor lighting, and neglecting acoustics and soundproofing. With the right equipment and a well-designed space, you'll be well on your way to producing high-quality music in the comfort of your own home.
By following these guidelines and tips, you'll be able to create a home recording studio that not only meets but exceeds your expectations. Whether you're a seasoned musician or just starting out, investing time and effort into designing your studio will pay off in the long run by enhancing your creative process and producing professional-grade music.
Was this page helpful?
At Storables.com, we guarantee accurate and reliable information. Our content, validated by Expert Board Contributors, is crafted following stringent Editorial Policies. We're committed to providing you with well-researched, expert-backed insights for all your informational needs.


0 thoughts on “Home Recording Studio Design: Create Your Own Music Space”