Home>diy>Architecture & Design>How To Design A Music Studio In A House
Architecture & Design
How To Design A Music Studio In A House
Modified: January 23, 2024
Learn how to design a music studio in your house with expert architecture design tips. Create the perfect space to unleash your creativity and produce amazing music.
(Many of the links in this article redirect to a specific reviewed product. Your purchase of these products through affiliate links helps to generate commission for Storables.com, at no extra cost. Learn more)
Introduction
Welcome to the world of music! Whether you are a professional musician or an enthusiastic hobbyist, designing a music studio in your house can be a game changer. Having a dedicated space to create, practice, and record your music not only enhances your creativity but also provides a sanctuary for artistic expression.
In this article, we will guide you through the process of designing a music studio in your house. From choosing the right room to optimizing the acoustics, selecting the essential equipment, and creating a comfortable environment, we’ve got you covered. So, grab your headphones and let’s dive in!
Creating a music studio in your house offers several advantages. It allows you to have a space that is solely dedicated to your musical pursuits, providing privacy and freedom from distractions. Additionally, having a home studio can save you time and money by eliminating the need to book external recording sessions or rehearsal spaces.
Before diving into the design process, it’s crucial to consider your specific needs and goals. Are you a solo artist or part of a band? Do you primarily focus on recording or live performance? Understanding your requirements will help you make informed decisions along the way.
In the following sections, we will explore step by step how to design a music studio that meets your unique needs and maximizes your musical potential. From selecting the right room to incorporating essential equipment, optimizing the acoustics, and creating a conducive environment, we will cover it all.
By following these guidelines, you will not only have a functional and efficient music studio, but also a space that inspires creativity and enables you to unleash your musical talent. So, let’s get started on this exciting journey of building your dream music studio right in the comfort of your home!
Key Takeaways:
- Transform your house into a haven for musical creation and expression by following 8 steps to design a dream music studio. Create an inspiring space that reflects your style and maximizes your musical potential.
- From choosing the right room to optimizing acoustics, strategic equipment placement, and personalization, design a music studio that inspires creativity and enables you to unleash your musical talent.
Step 1: Choose the Right Room
The first step in designing a music studio in your house is to choose the right room. The room you select will greatly impact the overall sound quality and functionality of your studio. Here are some factors to consider when selecting the right room:
- Size: The size of the room is crucial for achieving optimal acoustics. A larger room with higher ceilings will generally produce a more natural and balanced sound. However, if you have limited space, don’t worry! There are ways to optimize the acoustics in smaller rooms as well. Just keep in mind that the size of the room should be proportional to the instruments and equipment you plan to use.
- Shape: The shape of the room can also affect the sound quality. Ideally, a rectangular or square-shaped room is preferred, as it allows for better sound distribution. Avoid irregularly shaped rooms with many corners, as they can cause sound reflections and standing waves.
- Location: Consider the location of the room within your house. Choose a room that is away from high-traffic areas or noise sources, such as busy streets or mechanical rooms. This will help minimize outside noise interference and create a quiet environment for recording and practicing.
- Isolation: Assess the level of sound isolation in the room. Look for a room with solid walls, minimal windows, and good insulation. A well-isolated room will prevent sound leakage and external noise from entering, ensuring a more professional and focused environment.
- Accessibility: Think about the accessibility of the room. Consider factors such as proximity to power outlets, ease of moving equipment in and out, and the availability of natural light. These considerations will make your studio more convenient to work in and help optimize your workflow.
Once you have identified a potential room, take some time to test the acoustics. Clap your hands, play some music, and listen for any undesirable echoes, resonances, or excessive reverberation. An overly reflective room can negatively impact the quality of your recordings and mix. If needed, you can make acoustic enhancements later in the design process.
Remember, choosing the right room is the foundation of your music studio. Take the time to carefully evaluate your options and find a space that meets your specific needs and preferences. The right room will provide the ideal environment for you to create, practice, and enjoy your music to the fullest.
Step 2: Acoustics and Soundproofing
Once you have chosen the right room for your music studio, the next step is to optimize the acoustics and ensure proper soundproofing. Good acoustics are essential for accurate audio monitoring, recording, and mixing, while soundproofing prevents sound leakage and external noise interference. Here are some tips to achieve optimal acoustics and soundproofing in your music studio:
- Room Treatment: Start by treating your room with acoustic panels or diffusers. These can be placed strategically on the walls, ceiling, and corners to absorb or scatter sound waves, reducing reflections and improving the overall sound quality. Consider using a combination of absorptive and diffusive panels for a balanced acoustic environment.
- Bass Traps: Low-frequency bass sound waves tend to accumulate in the corners of a room, causing uneven bass response. Installing bass traps in the corners helps absorb these low-frequency waves, resulting in a more balanced and accurate bass response.
- Reflection Points: Identify the reflection points in your room where sound waves bounce off walls and create unwanted echoes. Place acoustic panels or diffusers at these points to minimize reflections and maintain clarity in your recordings and mixes.
- Soundproofing: Soundproofing is crucial to prevent sound leakage into and out of your music studio. Use materials like mass-loaded vinyl, acoustic foam, and specialized soundproofing insulation to create a barrier against external noise. Seal any gaps or cracks in walls, doors, and windows to minimize sound transmission.
- Floating Floors and Ceilings: Floating floors and ceilings provide additional sound isolation by decoupling them from the structure of the building. This reduces the impact of footfall noise and airborne vibrations on the overall acoustics of the room.
When it comes to acoustics and soundproofing, it’s important to strike a balance between absorption and diffusion. Too much absorption can lead to a dead-sounding room, while insufficient absorption can result in excessive reverberation and reflections. Experiment with different placement and configurations of acoustic treatment to find the optimal balance for your specific needs.
Furthermore, consider investing in quality studio monitors and headphones for accurate audio monitoring. These will help you make precise judgments about the sound quality of your recordings and mixes.
By addressing the acoustics and soundproofing in your music studio, you are ensuring a controlled and accurate listening environment. This will facilitate better recordings, mixes, and ultimately, the production of high-quality music.
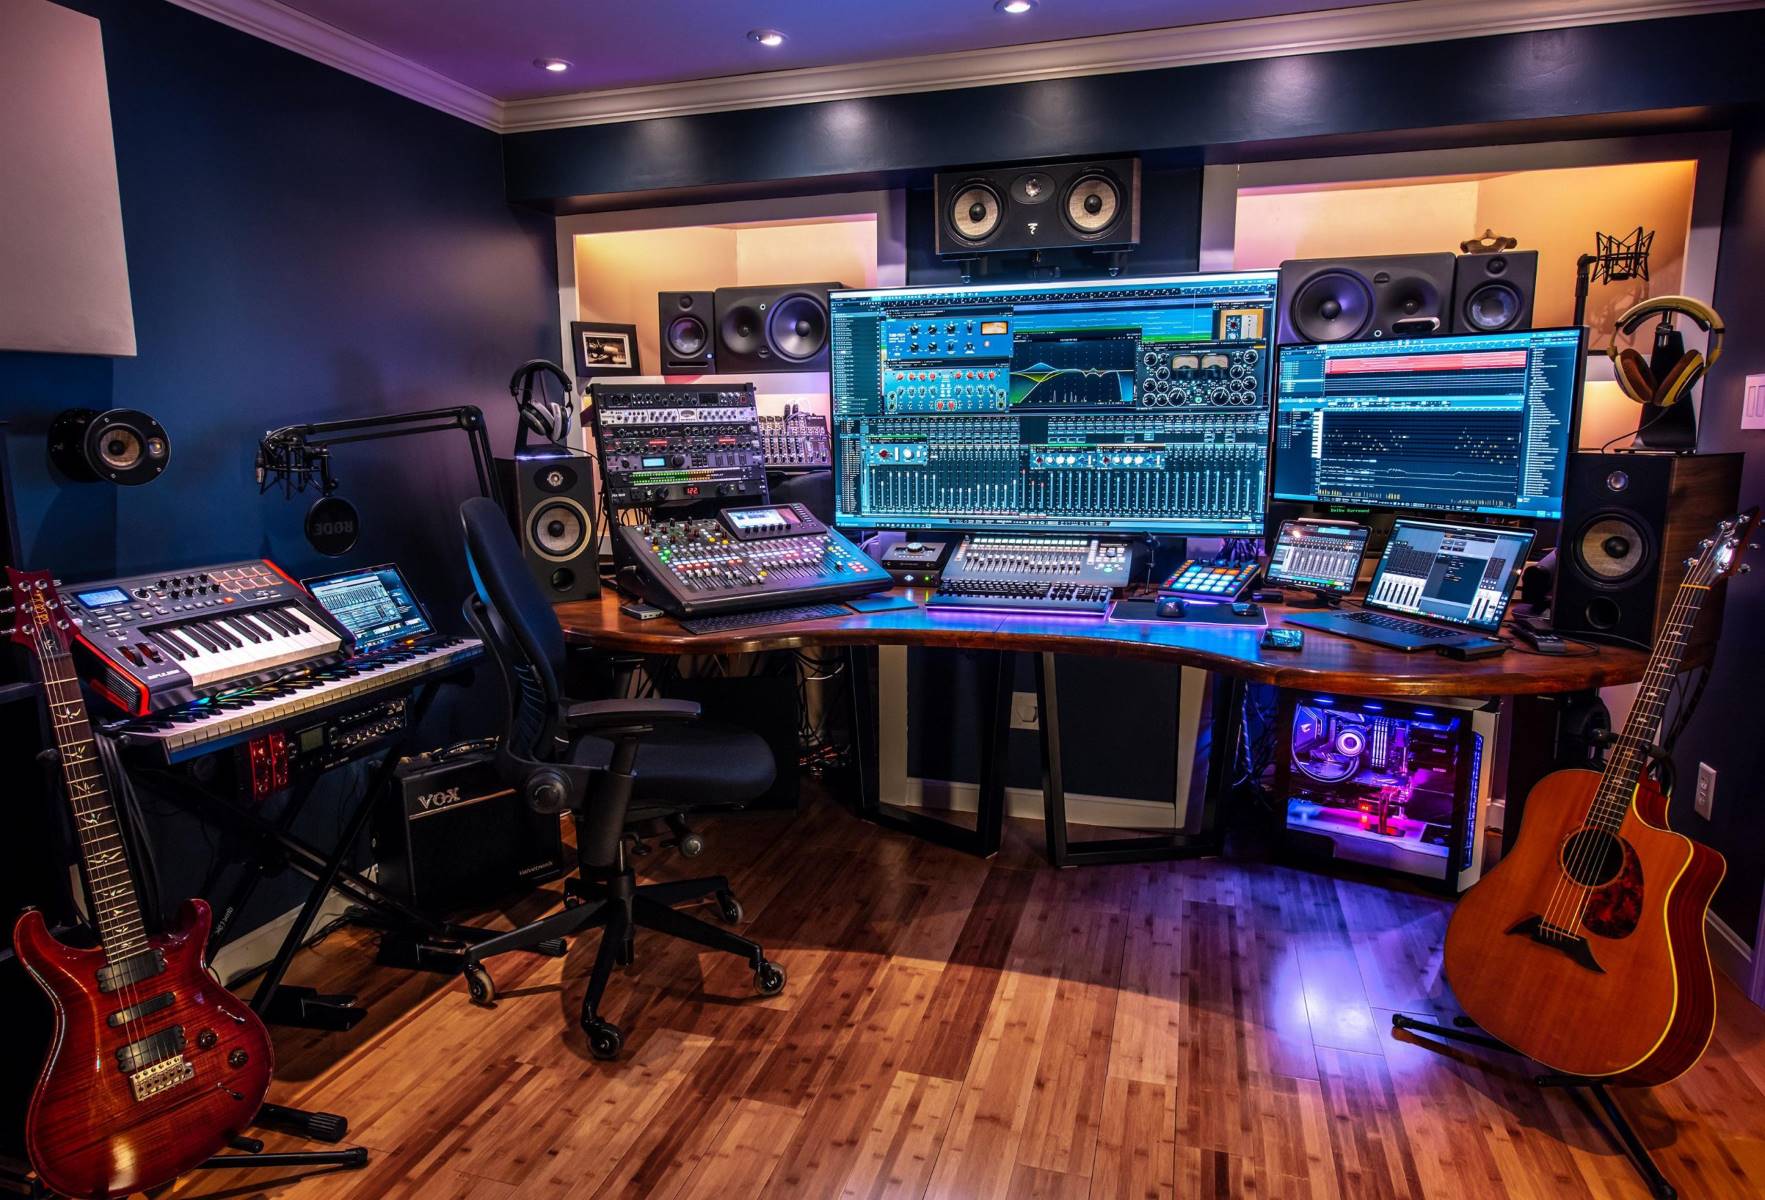
Step 3: Essential Equipment and Placement
Now that you have optimized the acoustics and soundproofing of your music studio, it’s time to delve into the essential equipment you’ll need and how to strategically place them for optimal performance. Here are some key considerations:
- Computer and Recording Interface: A reliable computer and recording interface are the backbone of any modern music studio. Choose a computer system with enough processing power to handle your recording and mixing software. Pair it with a high-quality audio interface that allows you to connect your instruments, microphones, and studio monitors.
- Microphones: Different microphones serve various recording purposes. Consider having a versatile condenser microphone for vocals and acoustic instruments, dynamic microphones for capturing loud sources, and specialized microphones for specific instruments or recording techniques. Experiment with placement and microphone selection to capture the best sound for your recordings.
- Studio Monitors: Invest in a pair of accurate and reliable studio monitors for critical listening. Place them at an equal distance from the listening position and ensure they form an equilateral triangle with your ears. Adjust the height and angle to avoid reflections from surfaces and achieve an optimal listening experience.
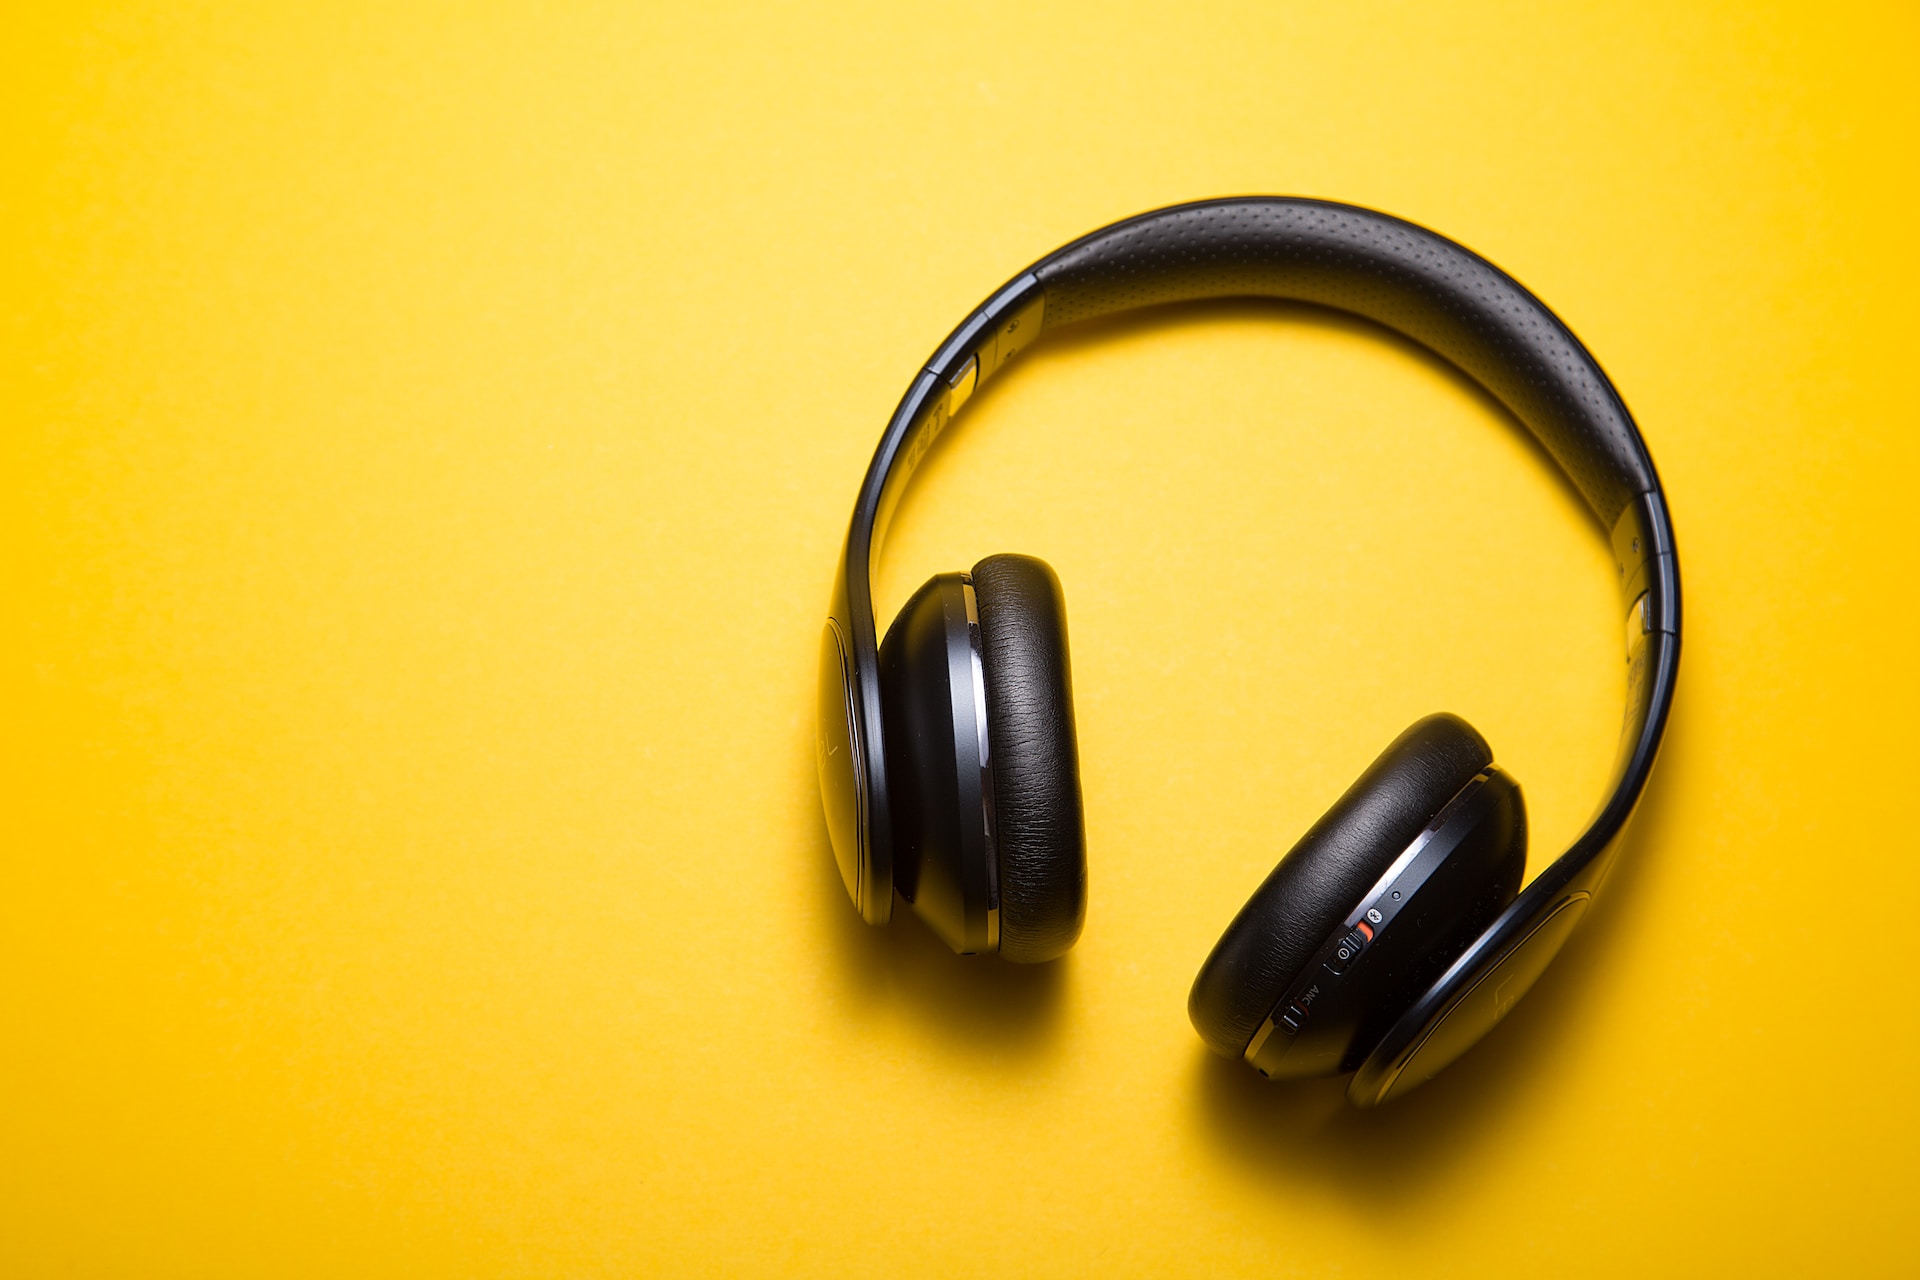
- Headphones: High-quality headphones are essential for detailed monitoring and mixing. They allow you to check for any imperfections or subtle nuances in your recordings. Choose a pair of headphones known for their accuracy and comfort.
- MIDI Controllers and Keyboards: MIDI controllers and keyboards are versatile tools for creating and recording music. Whether you prefer a compact MIDI keyboard or a full-sized piano-style keyboard, ensure it fits comfortably in your studio and allows for easy access and playability.
- Outboard Gear: Consider incorporating outboard gear such as compressors, equalizers, and effect processors to enhance your recordings and mixes. Place them within reach, allowing for easy adjustments and quick access during your creative process.
- Racks and Patchbays: Organize your equipment neatly by using racks and patchbays. This will help you manage cables, streamline connectivity, and ensure efficient workflow. Label your equipment and cables to easily identify and troubleshoot any issues.
When it comes to equipment placement, aim for ergonomic efficiency and ease of use. Arrange your equipment in a way that allows for comfortable reach and accessibility during recording and mixing sessions. Keep cables tidy and organized, minimizing the risk of tripping or accidental disconnections.
Don’t forget to consider the heating and ventilation needs of your equipment. Ensure proper airflow and ventilation to prevent overheating and ensure the longevity of your gear.
By having the essential equipment in your music studio and strategically placing them, you are setting yourself up for seamless workflow, efficient recording sessions, and optimal sonic performance.
Step 4: Ergonomic Layout and Furniture
Creating an ergonomic layout in your music studio is crucial for a comfortable and efficient working environment. A well-designed layout not only enhances your productivity but also promotes good posture and reduces the risk of strain or injury. Here are some key considerations for achieving an ergonomic layout:
- Workstation Setup: Start by arranging your workstation in a way that promotes good posture and minimizes strain. Position your computer monitor at eye level to avoid straining your neck. Place your keyboard and mouse at a comfortable height, allowing your arms to rest naturally on the desk. Consider using an adjustable chair and a footrest for additional support.
- Seating: Invest in a comfortable and ergonomic chair that provides proper lumbar support. Look for adjustable features such as seat height, backrest tilt, and armrest height. Make sure the chair allows you to sit with your feet flat on the floor and maintain a natural spinal alignment.
- Instrument Setup: If you play any instruments, ensure they are positioned ergonomically. Adjust the height and angle of your guitar or keyboard stand for comfortable playing. Consider using a microphone stand that allows for easy adjustment and caters to your preferred playing position.
- Workflow Optimization: Design your studio layout to optimize your workflow. Arrange your equipment and furniture in a way that minimizes movement and allows for easy access. Place frequently used items such as music sheets, headphones, and accessories within reach. Consider having a dedicated area for note-taking or a whiteboard for jotting down ideas and reminders.
- Cable Management: Keep your studio cables organized and out of the way to prevent tripping hazards and maintain a tidy workspace. Use cable clips, cable ties, or cable management systems to secure and route your cables neatly. Labeling cables can also help with easy identification and troubleshooting.
- Acoustic Treatment Placement: Ensure your acoustic treatment, such as panels and diffusers, is strategically placed for optimal sound absorption and diffusion. Consider wall-mounted or freestanding options that do not obstruct movement and are aesthetically pleasing.
- Comfortable Flooring: Choose flooring materials that provide comfort and support during long studio sessions. Carpeting or anti-fatigue mats can help reduce strain on your legs and feet. Additionally, these materials can help with sound absorption and reduce reflections.
Creating an ergonomic layout in your music studio is all about finding the right balance between functionality and comfort. Experiment and make adjustments as needed to ensure your studio setup promotes good posture, reduces strain, and allows for smooth and efficient workflow.
Investing in ergonomic furniture and optimizing your workspace will not only enhance your productivity and creativity, but also contribute to your overall health and well-being as a musician.
When designing a music studio in a house, consider soundproofing the space to minimize noise disturbance to others in the house and to ensure high-quality recordings.
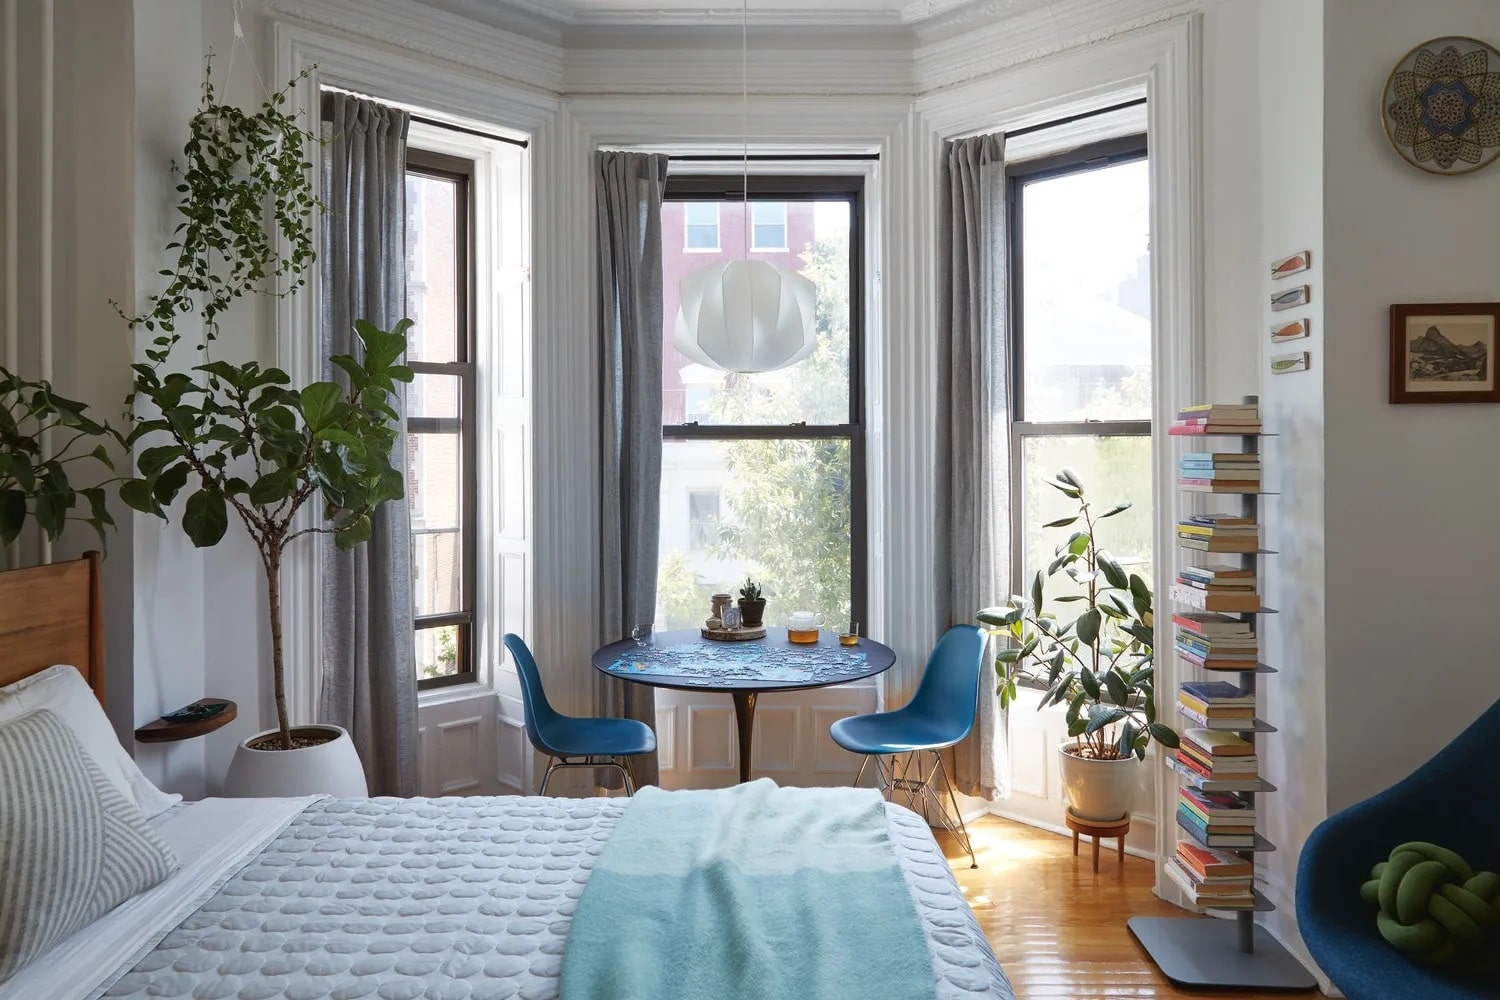
Step 5: Lighting and Ambiance
Lighting and ambiance play a crucial role in creating a pleasant and inspiring atmosphere in your music studio. Proper lighting not only enhances visibility but also affects your mood and concentration. Here are some tips to consider when designing the lighting and ambiance of your music studio:
- Natural Light: If possible, take advantage of natural light by positioning your studio in a room with windows. Natural light not only provides a refreshing and invigorating atmosphere but also helps reduce eye strain during long hours of work. However, be mindful of any potential sunlight glare or unwanted reflections on screens or instruments.
- Task Lighting: Install appropriate task lighting to illuminate specific areas in your studio. Consider adjustable desk lamps for focused lighting on your workstation or instruments. Use LED bulbs with a neutral or cool color temperature to provide bright and clear lighting without altering color perception.
- Ambient Lighting: Create a cozy and relaxing ambiance with ambient lighting. Indirect lighting options such as wall sconces, string lights, or LED strips can add a warm and inviting glow to your studio. Experiment with different lighting intensities and colors to find the ambiance that suits your creative mood.
- Dimmers and Lighting Control: Install dimmer switches or smart lighting control systems to adjust the lighting intensity according to your preference. This allows you to create different atmospheres for different activities, such as recording, mixing, or simply relaxing and listening to music.
- Color Scheme: Choose a color scheme that enhances your studio’s aesthetic and reflects your personal style. Consider using calming and earthy tones for a soothing environment, or vibrant colors to add energy and creativity. Use color accents on walls, furniture, or décor items to create visual interest and stimulate inspiration.
- Avoid Harsh Lighting: Steer clear of harsh and direct lighting that can cause eye strain and discomfort. Harsh lighting can also create unwanted shadows or glares that can interfere with your visual perception and affect your work. Opt for diffused or indirect lighting options to create a soft and even illumination.
- Lighting Control: Consider incorporating lighting control systems that allow you to create different lighting scenes. This enables you to adjust your studio’s lighting for different purposes, such as recording, mixing, or relaxation. Automate your lighting control to create a seamless and intuitive environment.
Remember that lighting and ambiance are not only functional but also have a significant impact on your creativity and mood in the studio. Experiment with different lighting setups and ambiance options to find what works best for you.
By optimizing your studio’s lighting and ambiance, you can create a visually appealing and inspiring environment that enhances your musical experience and brings out your best performances.
Step 6: Cable Management and Power Supply
Effective cable management and a reliable power supply are essential aspects of designing a functional and organized music studio. Proper cable management not only reduces clutter but also improves the safety and efficiency of your setup. Here are some tips to consider for managing cables and ensuring a stable power supply:
- Cable Organization: Start by organizing your cables in a systematic and neat manner. Use cable ties, velcro straps, or cable management solutions to bundle and route your cables along walls, under desks, or through cable conduits. Labeling your cables can also help in identifying and troubleshooting any issues.
- Cable Length: Measure and select appropriate cable lengths to avoid excessive slack or tension. Excess cables can create hazards and interfere with equipment placement, while cables that are too short can limit flexibility and maneuverability. Consider using cable management accessories such as cable extensions or retractable reels for added convenience.
- Power Strip Placement: Strategically position your power strips or surge protectors to facilitate easy access and minimize cable tangling. Mount them under your desk or on the wall, ensuring they are within reach but not in the way of foot traffic or equipment movement.
- Power Conditioning: Consider investing in a power conditioner or uninterruptible power supply (UPS) to protect your equipment from power surges, electrical noise, and voltage fluctuations. These devices provide clean and stable power, ensuring optimal performance and protecting your valuable gear.
- Separate Audio and Power Cables: To minimize interference and noise, keep your audio cables separate from power cables. Avoid running audio cables alongside power cables or crossing them at right angles. Maintaining a distance between them reduces the risk of electromagnetic interference (EMI) and ensures cleaner audio signals.
- Proper Grounding: Ensure that your studio’s electrical system is correctly grounded to eliminate electrical noise and potential safety hazards. Use grounded power outlets and verify that your equipment is properly connected to the ground. Consider consulting with an electrician to ensure compliance with local electrical codes and regulations.
- Backup Power: Protect your recordings and equipment by having a backup power solution in place. This can include a backup generator, a separate power circuit with battery backup, or uninterrupted power supply (UPS) units for critical equipment. This ensures that you can continue working even in the event of a power outage.
Efficient cable management and a stable power supply are vital for maintaining a tidy and functional music studio. By implementing these practices, you can reduce cable-related issues and minimize the risk of electrical interference, providing a more organized and reliable environment for your work.
Remember to periodically inspect your cables and power connections for any signs of wear or damage. Replace frayed or damaged cables promptly to prevent potential hazards and maintain the integrity of your setup.
Step 7: Storage and Organization
Proper storage and organization are essential for maintaining a tidy and efficient music studio. A well-organized space not only enhances productivity but also protects your equipment and ensures easy access to your tools and supplies. Here are some tips for effective storage and organization in your music studio:
- Storage Furniture: Invest in suitable storage furniture such as shelves, cabinets, drawers, and racks. These provide designated spaces to store your instruments, equipment, cables, accessories, and other essentials. Choose furniture that fits your studio’s size and layout, and consider using vertical storage options to maximize space.
- Categorize and Label: Categorize your items based on their type or usage. For example, group instruments together, separate audio cables from power cables, and organize accessories like picks, strings, and drumsticks. Label your storage areas, containers, and shelves to easily identify and locate items when needed.
- Cable Management: As mentioned in the previous step, proper cable management is crucial for an organized studio. Use cable ties, velcro straps, or cable management solutions to keep your cables neat and tangle-free. Consider dedicating a specific storage area or compartment for cables to avoid clutter and confusion.
- Instrument Stands and Hangers: Utilize instrument stands and wall hangers to safely store and display your guitars, violins, or other stringed instruments. This not only saves space but also keeps your instruments easily accessible and protected from damage or accidental falls.
- Accessory Containers: Use containers, cases, or organizers to store small accessories such as picks, strings, drumsticks, and connectors. This ensures that they are easily visible and within reach when needed. Consider transparent or labeled containers for easy identification and quick access.
- Spare Part Storage: If you have spare parts, connectors, or maintenance tools for your equipment, designate a specific area or container for their storage. Keep them organized and labeled, so you can quickly find what you need for repairs or adjustments.
- Studio Desk Organization: Organize your studio desk efficiently to minimize clutter and improve workflow. Use desk organizers, cable trays, or drawers to keep essential items close at hand. Avoid overcrowding the desk with unnecessary items, as this can hinder your workspace and lead to disorganization.
- Regular Cleaning and Maintenance: Schedule regular cleaning and maintenance sessions to keep your studio space clean and dust-free. Wipe down surfaces, clean your equipment, and perform routine maintenance tasks to ensure optimal performance and longevity of your gear.
Effective storage and organization in your music studio contribute to a productive and inspiring atmosphere. By implementing these strategies, you’ll not only create a visually appealing space but also save time by easily finding what you need for your musical endeavors.
Remember to regularly assess and update your storage solutions as your collection of instruments and equipment grows. Adapt your organization system to accommodate new items and maintain a clutter-free studio environment.
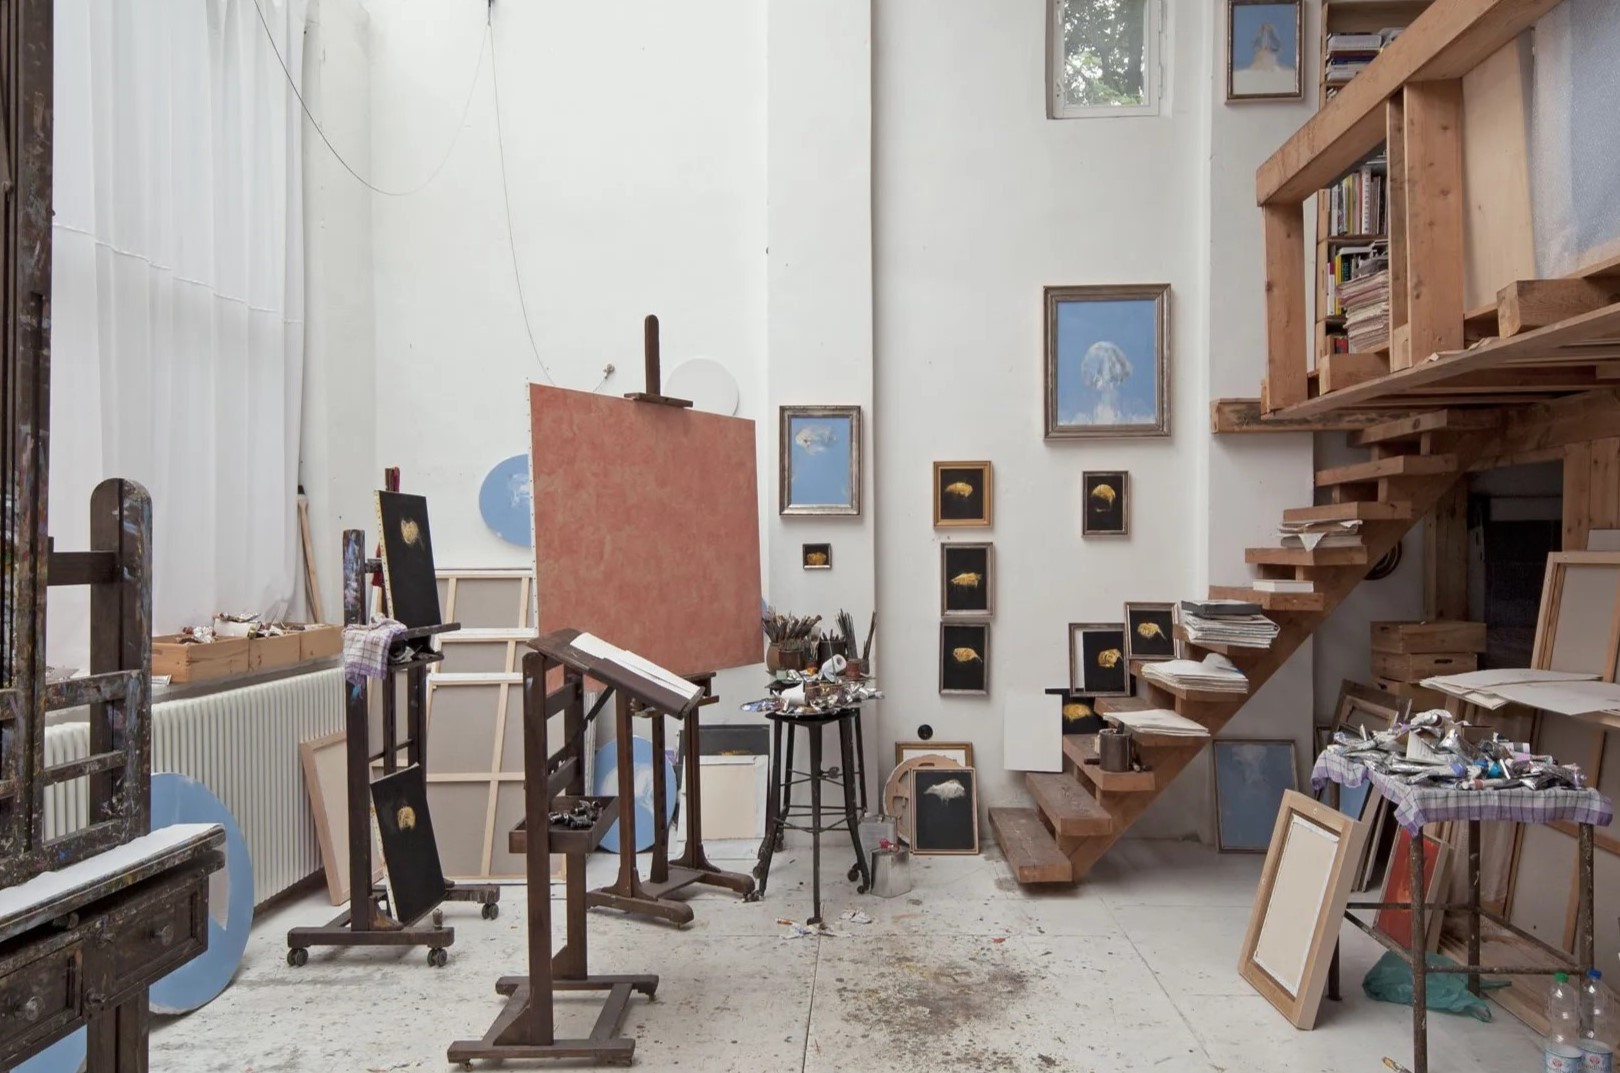
Step 8: Decor and Personalization
The final step in designing your music studio is adding decor and personal touches that reflect your style and create an inspiring atmosphere. Decor and personalization not only make your studio visually appealing but also contribute to the overall mood and creative energy. Here are some ideas to consider for decorating and personalizing your music studio:
- Wall Art: Hang artwork, posters, or photographs that inspire you and reflect your musical influences. Consider album covers, concert posters, or prints of your favorite musicians. These can add a touch of personality and serve as a source of inspiration while you work in your studio.
- Acoustic Panels: If you have acoustic panels installed for sound treatment, consider customizing them with printed fabric or artwork. This adds both functionality and visual interest to your studio space.
- Personal Collections: Display your musical instruments or equipment collections as a focal point in your studio. Showcase unique or vintage pieces that tell a story and contribute to the overall aesthetic of the space.
- Inspiration Board: Create an inspiration board where you can pin quotes, lyrics, photos, or magazine clippings that resonate with you. This serves as a visual reminder of your musical goals, influences, and aspirations.
- Comfortable Seating Area: Dedicate a cozy corner with comfortable seating where you can relax, listen to music, or have informal jam sessions. Include pillows, cushions, or bean bags to create a cozy and inviting spot within your studio.
- Personal Memorabilia: Display personal memorabilia or mementos that hold sentimental value, such as concert tickets, awards, or autographed items. These personal touches add a sense of nostalgia and make your studio feel uniquely yours.
- Accent Lighting: Incorporate decorative lighting elements to enhance the ambiance in your studio. Consider string lights, LED strips, or decorative lamps to create a warm and inviting atmosphere during recording or relaxation sessions.
- Plants and Greenery: Introduce plants or greenery into your studio to add life and freshness to the space. Indoor plants not only enhance the aesthetic appeal but also improve air quality and create a calming environment for your musical pursuits.
- Inspiring Colors: Choose color schemes that reflect the mood and atmosphere you want to create in your studio. Consider using vibrant colors for an energetic and creative vibe or soothing tones for a relaxed and focused environment.
Remember, the goal is to create a space that inspires and energizes your creativity. Personalize your music studio to reflect your unique style and preferences, making it a place where you feel inspired and motivated to create your best music.
As you decorate and personalize your music studio, remember to strike a balance between aesthetics and functionality. Ensure that your decorations do not interfere with the acoustics or clutter your workspace, allowing you to maintain an organized and productive environment.
With the finishing touches of decor and personalization, your music studio will truly become a reflection of your passion and a space where you can unleash your creative potential.
Conclusion
Congratulations on designing your dream music studio in your house! By following these eight steps, you have created a space that not only meets your needs but also inspires your creativity and enhances your musical pursuits. Let’s recap what we’ve covered:
In Step 1, you learned the importance of choosing the right room for your music studio. Consider factors such as size, shape, location, isolation, and accessibility to create an optimal environment for your musical endeavors.
In Step 2, we discussed how to optimize the acoustics and soundproofing of your studio. By using acoustic treatments, bass traps, and careful room setup, you can create a balanced and controlled sound environment.
Step 3 focused on essential equipment and their strategic placement. From computers and recording interfaces to microphones, monitors, and keyboards, organizing your equipment ensures efficient workflow and optimum performance.
Step 4 emphasized the importance of an ergonomic layout and furniture. By designing a setup that supports good posture and comfort, you can minimize strain and maximize your productivity in the studio.
In Step 5, we explored the significance of lighting and ambiance. Proper lighting, both natural and artificial, can create a pleasant and inspiring atmosphere. Consider task lighting, ambient lighting, and different color schemes to set the mood.
Step 6 highlighted the importance of cable management and a reliable power supply. By organizing cables, managing power strips, and investing in power conditioning, you can create a safer, more efficient, and clutter-free studio environment.
In Step 7, we tackled storage and organization. By using storage furniture, categorizing items, and keeping your studio tidy, you can easily locate and access your instruments, equipment, and accessories.
Lastly, in Step 8, we discussed the significance of decor and personalization. Adding your personal touch, displaying artwork, and incorporating personal mementos create a space that reflects your style, inspires your creativity, and makes your music studio truly yours.
By following these steps, you have transformed your house into a haven for musical creation and expression. Remember to periodically evaluate and adapt your music studio as your needs evolve and your collection of instruments and equipment grows.
Now that you have a well-designed and inspiring music studio in your house, unleash your creativity, practice your craft, and enjoy the journey of making music in the comfort of your own home!
Frequently Asked Questions about How To Design A Music Studio In A House
Was this page helpful?
At Storables.com, we guarantee accurate and reliable information. Our content, validated by Expert Board Contributors, is crafted following stringent Editorial Policies. We're committed to providing you with well-researched, expert-backed insights for all your informational needs.


0 thoughts on “How To Design A Music Studio In A House”