Home>Furniture>Kitchen Furniture>How To Create Your Very Own Guinness Kegerator
Kitchen Furniture
How To Create Your Very Own Guinness Kegerator
Modified: August 27, 2024
Looking for articles on how to set up a Guinness kegerator? Check out our comprehensive guides and expert tips to get started on the perfect pint pour.
(Many of the links in this article redirect to a specific reviewed product. Your purchase of these products through affiliate links helps to generate commission for Storables.com, at no extra cost. Learn more)
Introduction
Having a Guinness kegerator in your home can take your beer-drinking experience to a whole new level. With a perfectly poured pint of smooth and creamy Guinness right at your fingertips, you can enjoy the pub-like ambiance right in your own living room. But setting up a Guinness kegerator may seem like a daunting task, especially if you’re new to the world of kegging. Don’t worry, we’ve got you covered!
In this article, we will guide you through the step-by-step process of creating your very own Guinness kegerator. From selecting the right kegerator to assembling and installing the tap system, we will cover everything you need to know to get started. So grab a cold one, sit back, and let’s dive into the exciting world of Guinness kegerators!
Before we get started, it’s important to note that setting up a Guinness kegerator requires some basic knowledge of kegging and tap systems. If you’re completely new to this, don’t worry – we’ll explain everything in simple terms to make it easy for beginners to follow along. So let’s roll up our sleeves and get ready to create the ultimate beer dispensing system!
Key Takeaways:
- Setting up a Guinness kegerator at home is an exciting project that requires careful consideration of kegerator selection, proper preparation, and meticulous assembly. With attention to detail and patience, you can enjoy the perfect pint of creamy Guinness in the comfort of your own home.
- Maintenance and cleanliness are essential for the long-term enjoyment of a Guinness kegerator. Regular cleaning, timely keg replacement, and monitoring of CO2 supply and temperature ensure a consistently excellent Guinness pouring experience. Cheers to creating unforgettable memories with your homemade Guinness kegerator!
Read also: 14 Amazing Guinness Kegerator For 2025
Step 1: Selecting the Right Kegerator
The first step in creating your Guinness kegerator is selecting the right kegerator unit. There are a few key factors to consider when making this decision:
- Size: Determine how many kegs you want to fit inside the kegerator. Guinness kegs typically come in 1/2 barrel (15.5 gallons) and 1/6 barrel (5 gallons) sizes. Make sure to choose a kegerator that can accommodate your desired keg sizes.
- Temperature Control: Guinness is best served at a cooler temperature, typically around 38-40°F (3-4°C). Look for a kegerator that offers precise temperature control to ensure that your Guinness is served at the perfect temperature.
- CO2 Tank Compatibility: Guinness kegs require a specific type of gas – a combination of nitrogen and carbon dioxide (CO2). Ensure that the kegerator you choose is compatible with a dual-gas system or can be easily modified to accommodate a nitrogen tank.
- Reliability and Durability: Look for a kegerator that is well-built and made from high-quality materials. You want your kegerator to be reliable and last for years to come.
- Price: Consider your budget when selecting a kegerator. Prices can vary depending on the brand and features of the unit. Decide on a budget that works for you and find a kegerator that fits within that range.
Once you have determined your requirements and preferences for a kegerator, it’s time to start shopping. Research different brands and models, read reviews, and compare prices to find the best option for your needs. Keep in mind that while a Guinness-specific kegerator is not required, having a unit designed for kegging will make the setup process easier.
When you have chosen your kegerator, make the purchase and have it delivered to your home. Now that you have the kegerator, it’s time to move on to the next step – preparing the kegerator for the Guinness setup.
Step 2: Preparing the Kegerator
Before you can start assembling the components and installing the tap system, it’s important to properly prepare the kegerator. Here’s what you need to do:
- Clean the Interior: Begin by cleaning the interior of the kegerator. Remove all shelves, racks, and parts that are not necessary for the keg setup. Use a mild detergent and warm water to thoroughly clean the inside of the unit. Rinse it well and allow it to dry completely before proceeding to the next step.
- Adjust the Temperature: Set the temperature controller of the kegerator to the desired temperature range for serving Guinness, which is typically around 38-40°F (3-4°C). Allow the kegerator to cool down to the set temperature before proceeding.
- Install Drip Tray: Attach a drip tray to the front of the kegerator, positioned below the area where the tap will be installed. The drip tray will catch any spills or drips, keeping your serving area clean and tidy.
- Check CO2 Connections: Inspect the CO2 connections inside the kegerator. Ensure that all fittings and connections are secure and properly tightened. If necessary, use a wrench or pliers to tighten any loose connections.
- Pre-chill the Glasses: For the best Guinness experience, pre-chill your beer glasses in the freezer. This will help maintain the perfect temperature and prevent the beer from foaming excessively when poured.
By properly preparing the kegerator, you’re creating a clean and suitable environment for your Guinness setup. It’s important to ensure that the kegerator is free from any residue or contaminants that could affect the quality and taste of the beer. With the kegerator now prepared, it’s time to move on to the next step – assembling the components for your Guinness kegerator.
Step 3: Assembling the Components
Now that your kegerator is prepared, it’s time to assemble the components needed for your Guinness kegerator setup. Here’s what you’ll need to do:
- Attach the Beer Line: Start by attaching the beer line, which is the tubing that will connect the keg to the tap system. Insert one end of the beer line onto the coupler attached to the keg. Make sure it is securely attached.
- Position the Keg: Place the keg inside the kegerator, ensuring that it is stable and securely positioned. Make sure the beer line is not twisted or bent, as this could restrict the flow of beer from the keg to the tap.
- Install the Tap Handle: Attach the tap handle to the tap system. The tap handle is what you will use to pour the Guinness from the keg. Make sure it is securely screwed onto the tap.
- Connect the Beer Line to the Tap: Connect the other end of the beer line to the tap system. Ensure it is securely attached and that there are no leaks. You may need to use a wrench or pliers to tighten the connections if necessary.
- Attach the Gas Line: Attach the gas line to the appropriate gas inlet on the keg coupler. This is where the nitrogen and CO2 blend will enter the keg to create the perfect carbonation and smoothness of the Guinness. Make sure the connection is secure.
- Connect the Gas Line to the CO2 Regulator: Connect the other end of the gas line to the CO2 regulator. The regulator allows you to control the pressure of the gas going into the keg. Ensure the connection is tight and secure.
- Adjust the Gas Pressure: Adjust the gas pressure on the CO2 regulator to the recommended setting for Guinness, which is typically around 30-35 PSI (pounds per square inch). This will ensure the proper carbonation and dispensing of the beer.
Once you have assembled all the components and made the necessary connections, double-check that everything is secure and leak-free. Take a moment to admire your work – you’re one step closer to enjoying the perfect pint of Guinness from your very own kegerator!
In the next step, we will guide you through the process of installing the tap system for your Guinness kegerator, so let’s move on to Step 4.
Step 4: Installing the Tap System
Installing the tap system is a crucial step in creating your Guinness kegerator. The tap system allows you to dispense the beer from the keg with ease. Here’s how to install the tap system:
- Locate the Tap Tower Hole: Check your kegerator for a pre-drilled hole or marked area for the tap tower installation. This is typically located on the top of the kegerator and is designed to accommodate the tap tower.
- Position the Tap Tower: Place the tap tower over the designated hole, ensuring that it fits securely. Depending on the model of your kegerator, there may be screws or brackets provided to secure the tap tower in place. Follow the manufacturer’s instructions for attachment.
- Connect the Beer Line to the Tap Tower: Take the beer line connected to the tap and insert it into the top of the tap tower. Ensure it is securely fastened and that there are no leaks.
- Secure the Drip Tray: If not already done during the preparation step, attach the drip tray to the front of the tap tower. This will catch any spills or drips during the dispensing process.
- Check for Leaks: Once the tap system is installed, check for any leaks in the connections. Turn on the gas supply and carefully inspect each connection for air or beer leaks. If you find any leaks, tighten the connections as needed.
With the tap system now installed, you’re almost ready to pour your first pint of Guinness. However, before we proceed, it’s crucial to connect the CO2 supply to the kegerator, which we will cover in the next step.
So far, you have selected the right kegerator, prepared the unit, and assembled the components for your Guinness kegerator. Stay tuned for Step 5, where we will guide you through connecting the CO2 supply.
When setting up a Guinness kegerator, make sure to use a nitrogen gas blend (75% nitrogen, 25% CO2) for proper carbonation and a creamy head on the beer.
Read more: 10 Ways To Grow Your Very Own Indoor Garden
Step 5: Connecting the CO2 Supply
Connecting the CO2 supply to your Guinness kegerator is essential for pressurizing the keg and dispensing the beer properly. Here’s how to connect the CO2 supply:
- Locate the CO2 Tank: Begin by locating the CO2 tank that you will be using to supply gas to the kegerator. Ensure that the tank is full of a nitrogen-CO2 blend suitable for Guinness.
- Attach the Regulator to the CO2 Tank: Take the CO2 regulator and attach it to the valve on top of the CO2 tank. Insert the regulator stem into the valve and turn it clockwise to secure it in place. Make sure it is tightly attached but be careful not to over-tighten.
- Turn the Regulator Knob: Once the regulator is connected, slowly turn the knob on the regulator counterclockwise to begin the flow of gas. Set the pressure to the recommended range for Guinness, which is typically around 30-35 PSI.
- Connect the Gas Line: Take the gas line connected to the CO2 regulator and insert the other end into the gas inlet on the keg coupler. Ensure it is securely attached with no leaks.
- Check for Leaks: After connecting the gas line, carefully inspect all connections for leaks. Apply a mixture of soapy water to the connections and look for any bubbles, which indicate a gas leak. Tighten the connections if necessary.
Once you have connected the CO2 supply and confirmed that there are no leaks, you are now ready to move on to the next step – testing the system to ensure everything is working correctly.
In Step 6, we will guide you through the process of testing the Guinness kegerator to ensure a smooth and perfect pour. So let’s proceed and get ready to enjoy your favorite Irish stout!
Step 6: Testing the System
Now that you have set up your Guinness kegerator and connected the CO2 supply, it’s time to test the system and ensure everything is working properly before you start pouring pints. Here’s how to test the system:
- Check for Proper Carbonation: Turn on the gas supply and allow the keg to carbonate for at least 24 hours. This will ensure that the Guinness is properly carbonated and ready to be served.
- Verify the Temperature: Confirm that the temperature inside the kegerator is within the recommended range for Guinness, typically around 38-40°F (3-4°C). Use a thermometer to measure the temperature accurately.
- Purge the Beer Line: Before pouring your first pint, it’s important to purge the beer line of any air. To do this, open the tap and let a small amount of beer flow through the line until all the air bubbles are eliminated. This will ensure a smoother pour.
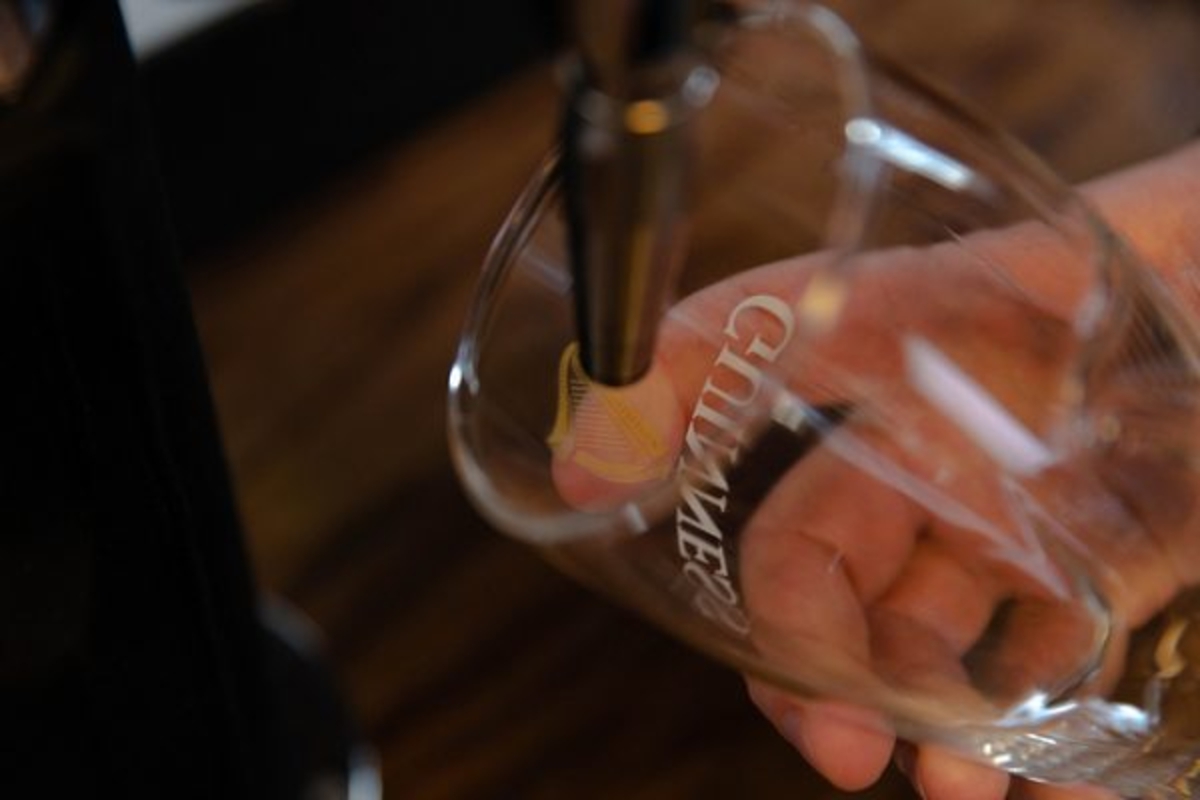
- Pour a Test Pint: Now it’s time to pour your first pint of Guinness! Slowly open the tap handle and tilt your glass at a 45-degree angle. Allow the beer to cascade and settle, forming the iconic creamy head. When the glass is about three-quarters full, straighten it and continue pouring until you reach the desired amount.
- Observe the Pour: Take note of the consistency and appearance of the pour. A properly poured Guinness should have a dark body with a creamy and thick head that lingers. If the pour is too foamy or the head dissipates quickly, adjust the CO2 pressure slightly and repeat the process until you achieve the desired results.
- Taste and Enjoy: Take a moment to savor your test pint of Guinness. Pay attention to the taste, mouthfeel, and overall satisfaction. If everything is to your liking, congratulations – you have successfully set up your Guinness kegerator!
If you encounter any issues during the testing process, such as excessive foaming or inconsistent pour, don’t worry. Adjustments may be needed to the CO2 pressure or temperature settings. Experimentation and fine-tuning are part of the process, so don’t be afraid to make adjustments as needed.
Now that you have thoroughly tested the system and confirmed that everything is working smoothly, it’s time for the final touches and some essential maintenance. Step 7 will guide you through these final steps, so let’s move forward to ensure a long-lasting and enjoyable Guinness kegerator experience.
Step 7: Final Touches and Maintenance
Congratulations on successfully setting up your Guinness kegerator and pouring your first pint of creamy goodness! To ensure that your kegerator continues to provide you with the perfect pints of Guinness, it’s important to complete some final touches and establish a regular maintenance routine. Here’s what you need to do:
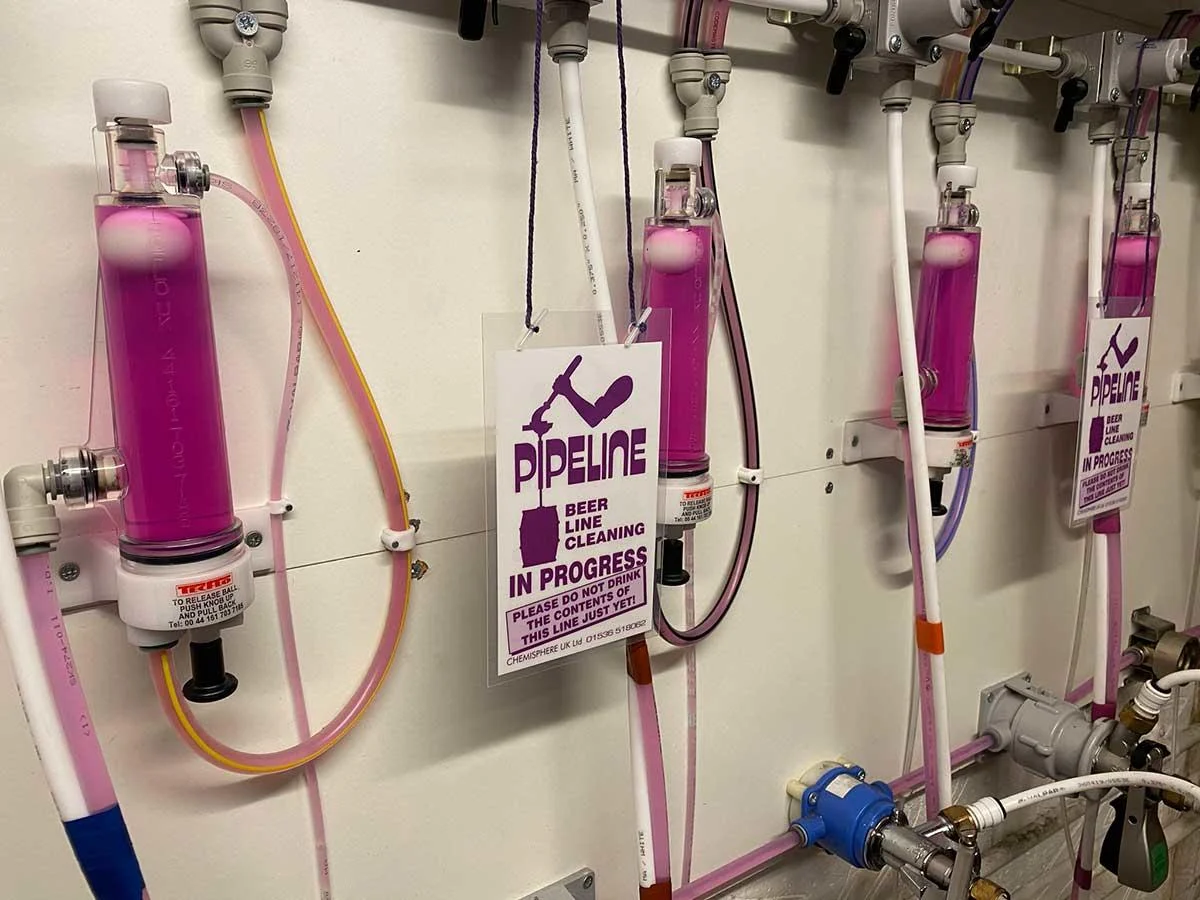
- Clean the Tap System: After each keg, it is essential to clean the tap system to prevent any buildup of beer residue or bacteria. Disassemble the tap system and clean all the parts using warm water and a mild cleaning solution. Rinse thoroughly and allow them to air dry before reassembling.
- Replace Kegs in a Timely Manner: Guinness kegs have a limited shelf life once they are tapped. It’s crucial to consume the beer within a reasonable timeframe to ensure its freshness and quality. Replace empty or near-empty kegs promptly to maintain the best taste and experience.
- Perform Routine CO2 Tank Checks: Regularly inspect the CO2 tank for any signs of damage or leaks. Ensure that the tank is properly secured and has enough pressure for dispensing Guinness. If the tank is low, refill it or exchange it for a full one to keep your kegerator operational.
- Maintain Proper Temperature: Monitor the temperature inside the kegerator regularly using a thermometer. Make necessary adjustments to the temperature controller to ensure that it remains within the recommended range of 38-40°F (3-4°C).
- Keep the Drip Tray Clean: Clean the drip tray regularly to prevent the buildup of grime, spills, and unpleasant odors. Remove the tray, wash it with warm soapy water, and thoroughly dry it before placing it back in position.
- Keep Glasses Well-Maintained: Clean your beer glasses thoroughly before each use to remove any residues that could affect the flavor and appearance of your Guinness. Hand wash them with mild detergent and rinse with cold water to ensure they are pristine.
By following these final touches and maintenance tips, you can ensure that your Guinness kegerator remains in optimal condition, producing great-tasting pints of Guinness for years to come. Remember, the key to a memorable Guinness experience is freshness, cleanliness, and attention to detail.
Now that you have completed all the steps and learned how to set up and maintain your Guinness kegerator, it’s time to sit back, relax, and enjoy your favorite Irish stout in the comfort of your own home. Cheers!
Conclusion
Setting up a Guinness kegerator can be a fun and rewarding project that allows you to enjoy the authentic pub experience right at home. With the step-by-step guide provided in this article, you now have the knowledge to create your very own Guinness kegerator and pour the perfect pint of smooth and creamy Guinness.
Throughout the process, we discussed the importance of selecting the right kegerator, preparing the unit, assembling the components, installing the tap system, connecting the CO2 supply, testing the system, and completing the final touches and maintenance. Each step plays a vital role in ensuring that your Guinness kegerator operates smoothly and delivers consistently excellent pints of beer.
Remember, practice makes perfect. Don’t be discouraged if it takes a few attempts to dial in the perfect pour. Fine-tuning the CO2 pressure, temperature, and pouring technique may be necessary to achieve the optimal Guinness experience.
As you enjoy your Guinness kegerator, always prioritize cleanliness and maintenance. Regularly clean the tap system, replace kegs as needed, monitor the CO2 tank, ensure proper temperature control, and keep your glasses spotlessly clean.
With your Guinness kegerator up and running, you can now impress your friends and family with your bartending skills, host fabulous gatherings, and indulge in the rich flavor and creamy head of a perfectly poured pint of Guinness.
So, raise your glass, make a toast, and savor every sip of your homemade Guinness. Cheers to creating fantastic memories and enjoying the art of pouring the perfect pint from your very own Guinness kegerator!
Frequently Asked Questions about How To Create Your Very Own Guinness Kegerator
Was this page helpful?
At Storables.com, we guarantee accurate and reliable information. Our content, validated by Expert Board Contributors, is crafted following stringent Editorial Policies. We're committed to providing you with well-researched, expert-backed insights for all your informational needs.


0 thoughts on “How To Create Your Very Own Guinness Kegerator”