Home>Home Security and Surveillance>How To Make Your Own Security Camera
Home Security and Surveillance
How To Make Your Own Security Camera
Modified: March 6, 2024
Learn how to create your own security camera at home using easily available materials. Enhance your home security and surveillance with this DIY solution.
(Many of the links in this article redirect to a specific reviewed product. Your purchase of these products through affiliate links helps to generate commission for Storables.com, at no extra cost. Learn more)
Introduction
Home security and surveillance have become essential in today’s world. With increasing concerns about safety and the need to protect our property, having a reliable security system is crucial. While there are many options available on the market, they can often be expensive or lack the specific features we desire.
Fortunately, with a little know-how, it’s possible to create your own security camera system that meets your specific needs while saving you money. In this article, we will explore the step-by-step process of making your own security camera from scratch.
We will cover everything from choosing the right camera to installing it in the perfect location, connecting it to power and Wi-Fi, and setting up the system for optimal performance. By the end of this article, you’ll have all the knowledge you need to create a customized and effective security camera system for your home.
Before we dive into the process, let’s take a look at the materials you’ll need to get started.
Key Takeaways:
- You can create your own security camera system by following simple steps, saving money and customizing it to fit your needs for home protection.
- Choosing the right camera, preparing the enclosure, and connecting to Wi-Fi are key steps in building a DIY security camera system for enhanced home security.
Read more: Who Owns Blink Security Cameras
Materials Needed
Before you embark on the journey of creating your own security camera, it’s important to gather the necessary materials. Here’s a list of items you’ll need:
- Camera module or smartphone with camera: Your security camera will need a camera module or a smartphone with a high-quality camera. The camera module can be purchased online, and smartphones with good cameras are readily available.
- Raspberry Pi or single-board computer: A Raspberry Pi or any other single-board computer is needed to act as the brain of your security camera system. It will process the video feed and handle other functions.
- Enclosure: You’ll need a sturdy and weatherproof enclosure to protect your camera and electronic components from the elements.
- Power supply: Choose a power supply that matches the requirements of your camera and single-board computer. Ensure it provides a stable and continuous power source.
- SD card: The Raspberry Pi or single-board computer will need an SD card to store the operating system and software.
- Mounting hardware: Depending on where you plan to install your security camera, you may need mounting brackets, screws, or other hardware to secure it in place.
- Network connection: To connect your security camera to the internet, you’ll need a reliable Wi-Fi network or an Ethernet connection.
- Software: You’ll require software to configure and manage your security camera system. Research and choose software that suits your needs.
Gather these materials before starting the process, ensuring you have everything you need to create your own security camera system.
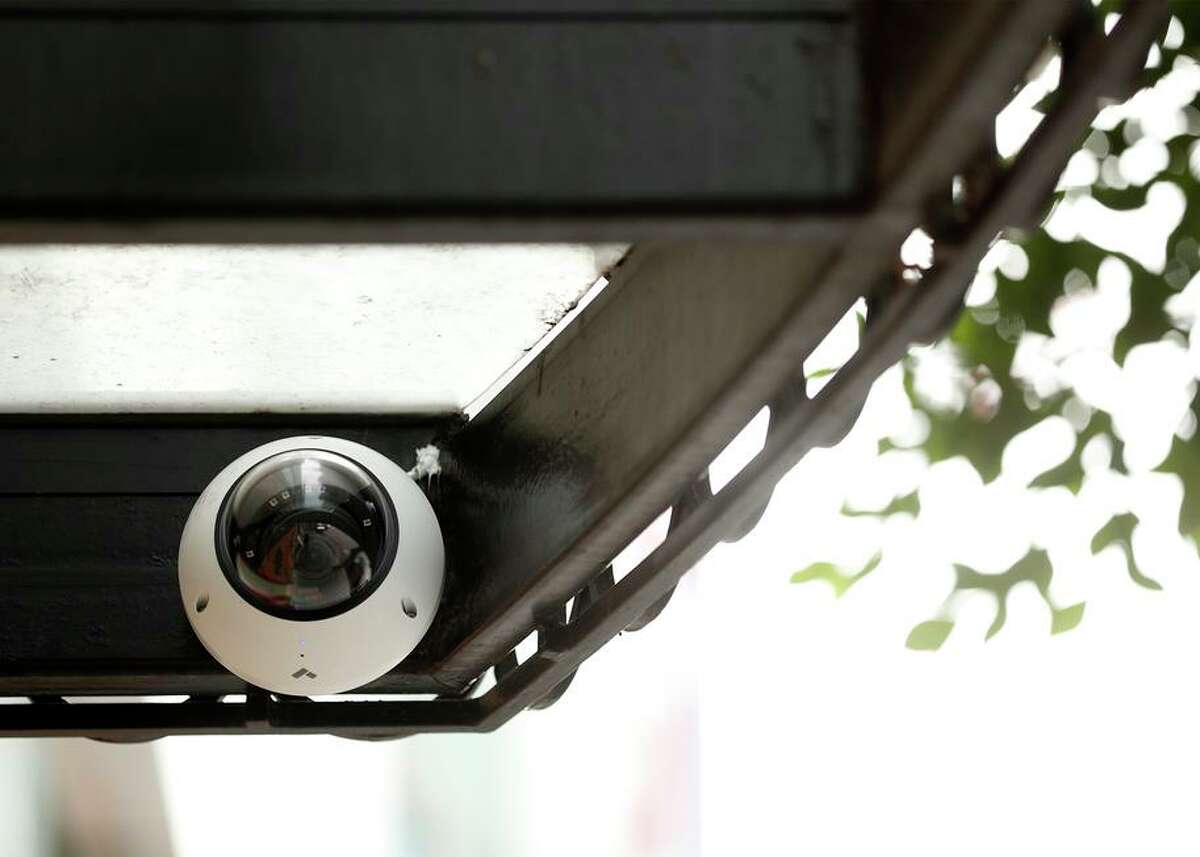
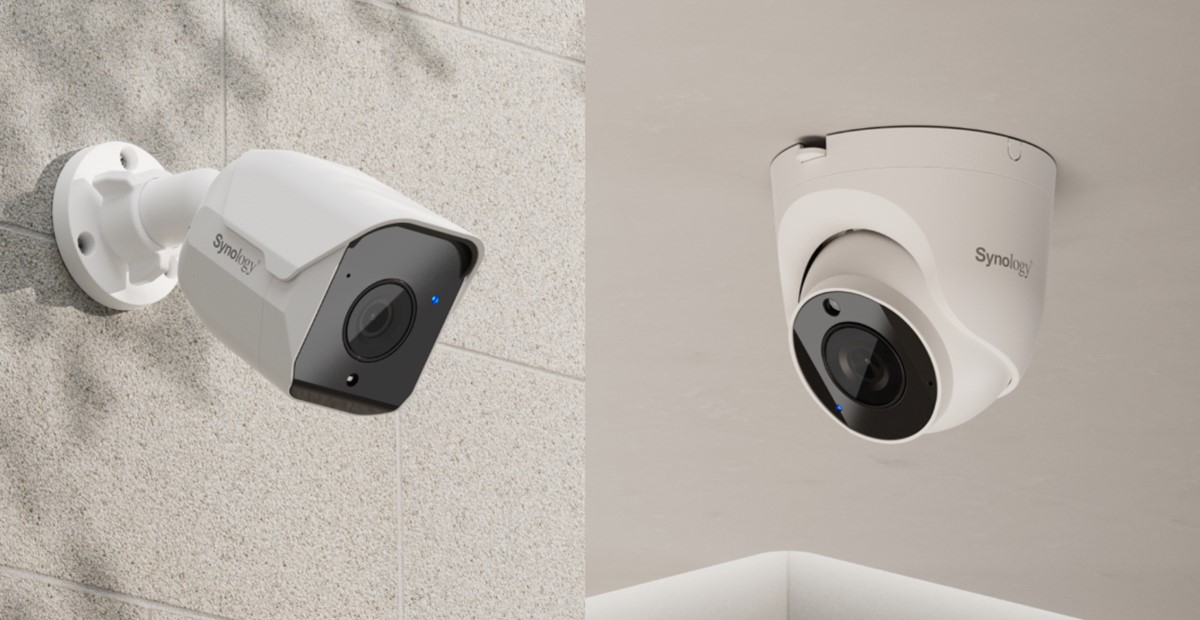
Step 1: Choosing a Camera
Choosing the right camera is a critical step in creating your own security camera system. Consider the following factors when selecting a camera:
- Resolution: Look for a camera with a high resolution, preferably 1080p or higher, to ensure clear and detailed footage.
- Night vision: If you want your security camera to monitor your property during the night, opt for a camera with infrared LEDs for better night vision capabilities.
- Field of view: Determine the area you want your camera to cover and choose a camera with a suitable field of view to capture the desired area effectively.
- Weatherproofing: If you plan to install your camera outdoors, make sure it is weatherproof or housed in a weatherproof enclosure to withstand the elements.
- Connectivity: Consider whether you want a camera that connects via Wi-Fi or requires an Ethernet connection.
- Additional features: Some cameras come with additional features like motion detection, two-way audio, or cloud storage. Assess your needs and preferences to choose a camera with the desired features.
Research different camera models, read reviews, and compare specifications to find the perfect camera for your security camera project. Once you’ve chosen the camera, move on to the next step: preparing the enclosure.
Step 2: Preparing the Enclosure
Once you have selected the camera, the next step is to prepare the enclosure that will house the camera and other electronic components. Consider the following guidelines:
- Choose a suitable enclosure: Select an enclosure that is sturdy, weatherproof, and large enough to accommodate the camera and single-board computer. Plastic or metal enclosures are commonly used.
- Drill necessary holes: Determine the locations for the camera lens, power cable, network cable (if applicable), and any other required holes. Use a drill to create these openings in the enclosure.
- Ensure proper sealing: To protect the camera and electronic components from moisture and dust, apply a sealant around any openings and ensure a tight seal between the enclosure’s parts.
- Consider ventilation: If your camera or single-board computer generates heat, ensure the enclosure has proper ventilation to prevent overheating. This can be achieved by drilling small holes or adding ventilation fans.
- Mounting options: Depending on where you plan to install your security camera, consider adding mounting brackets or other hardware to the enclosure for easy installation.
Take your time in preparing the enclosure, as it will play a crucial role in protecting your camera and ensuring its longevity. Once the enclosure is ready, you can move on to the next step: installing the camera.
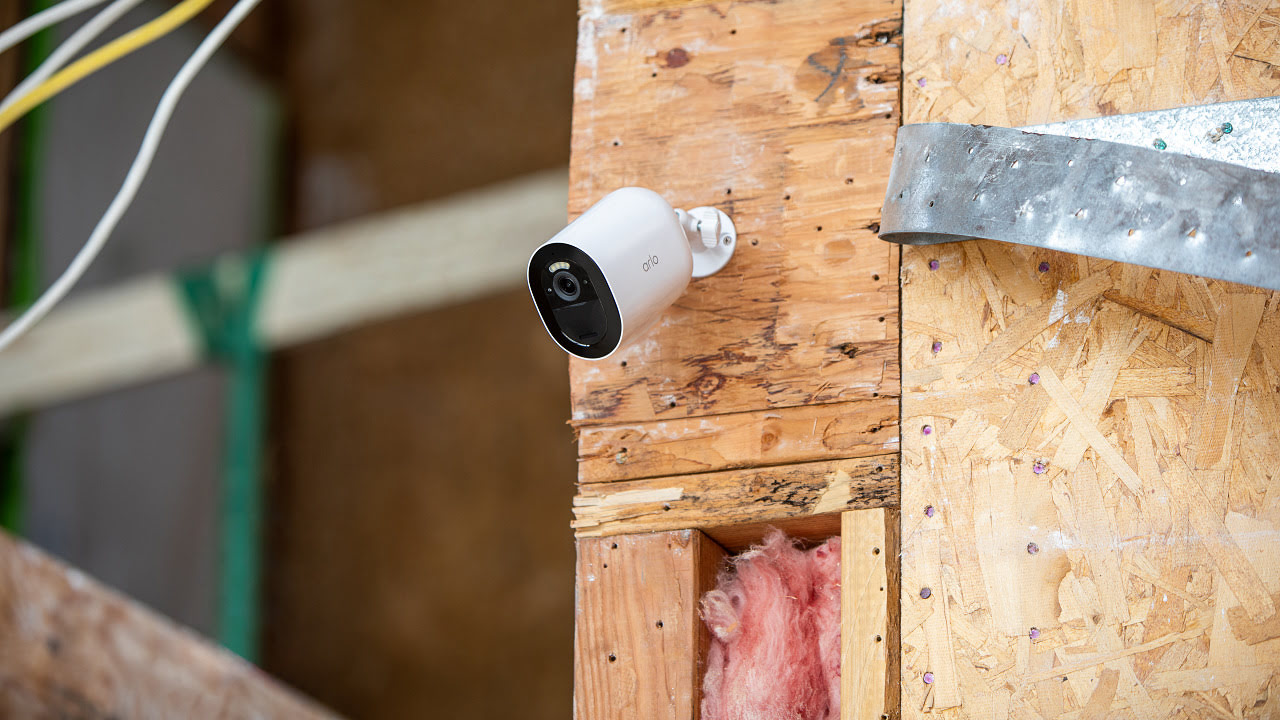
Step 3: Installing the Camera
Now that you have prepared the enclosure, it’s time to install the camera. Follow these steps for a successful installation:
- Position the camera: Determine the optimal location for your camera, considering the area you want to monitor. Make sure the camera has a clear line of sight and covers the desired area effectively.
- Secure the camera: Attach the camera module or smartphone securely inside the enclosure using screws or mounting brackets. Ensure it is positioned correctly, aligned with the drilled holes in the enclosure.
- Route the cables: Carefully route the power cable and network cable (if applicable) through the drilled holes in the enclosure. Keep the cables organized and prevent any strain on the connectors.
- Align the camera lens: Adjust the camera lens inside the enclosure to achieve the desired field of view. Test the camera’s view to ensure it captures the intended area effectively.
- Seal the enclosure: Once the camera is securely installed, seal the enclosure properly using the recommended sealant. This will protect the camera and electronics from moisture and dust.
Take your time with the installation process, ensuring that everything is properly secured and aligned. Double-check the camera’s position and make any necessary adjustments before moving on to the next step: connecting to a power source.
When making your own security camera, make sure to choose a high-resolution camera and a reliable motion detection system to capture clear footage of any intruders.
Read more: How To Make Your Own Blinds
Step 4: Connecting to Power Source
With the camera installed, it’s time to connect it to a stable power source. Follow these steps to ensure a proper power connection:
- Gather the necessary power supply: Depending on the requirements of your camera and single-board computer, choose a power supply that matches the specifications. Ensure it provides a stable and continuous power source.
- Connect the power cable: Insert the power cable into the appropriate connector on the camera. Make sure it is firmly connected and properly aligned.
- Route the power cable: Carefully route the power cable through the drilled hole in the enclosure, ensuring it does not obstruct the camera’s view or get pinched or strained.
- Connect to a power outlet: Plug the power cable into a suitable power outlet or power source. Ensure the outlet is easily accessible and provides a reliable power supply.
- Test the power connection: Once the camera is connected to power, check if it powers on and starts functioning properly. Monitor any LED indicators on the camera to confirm a successful power connection.
Remember to follow proper electrical safety precautions while connecting the camera to the power source. Ensure that the power supply and connections are secure and well-insulated. With the camera successfully powered on, you can now proceed to the next step: connecting to Wi-Fi.
Step 5: Connecting to Wi-Fi
To access and manage your security camera remotely, you’ll need to connect it to your home Wi-Fi network. Follow these steps to establish a Wi-Fi connection:
- Access the camera’s settings: Depending on the camera model, access the camera’s settings menu either through a mobile app or a web browser.
- Locate the Wi-Fi settings: Look for the Wi-Fi settings or network settings section within the camera’s settings menu.
- Scan for Wi-Fi networks: Initiate a scan for available Wi-Fi networks. Your camera should display a list of nearby networks.
- Select your Wi-Fi network: Choose your home Wi-Fi network from the list of available networks. If necessary, enter the network password to establish the connection.
- Confirm the connection: Once you’ve selected the Wi-Fi network and entered the password, confirm the connection. Your camera should now attempt to connect to the Wi-Fi network.
- Wait for the connection: Give the camera some time to establish the Wi-Fi connection. Monitor the camera’s LED indicators or the settings menu to confirm a successful connection.
- Verify the connection: Test the connection by accessing the camera’s live feed or settings through the mobile app or web browser. If you can see the live feed or access the camera’s settings remotely, the Wi-Fi connection is successful.
Ensure that your camera is within range of your Wi-Fi network and that you have a strong and stable Wi-Fi signal in the area where the camera is installed. With the camera connected to Wi-Fi, you can proceed to the next step: setting up the security camera system.
Step 6: Setting up the Security Camera System
Now that your camera is installed and connected to Wi-Fi, it’s time to set up the security camera system. This involves configuring the software and settings to ensure optimal functionality. Follow these steps to get your security camera system up and running:
- Choose the software: Research and choose the software that best suits your needs and is compatible with your camera and single-board computer. There are various options available, including both free and paid software.
- Download and install the software: Visit the software’s official website and download the appropriate version for your camera and operating system. Follow the installation instructions provided by the software developer.
- Launch the software: Once the software is installed, launch it and access the settings menu or setup wizard.
- Configure the camera: Within the software’s settings, locate the camera configuration options. Follow the on-screen instructions to add your camera to the system. This typically involves entering the camera’s IP address or scanning a QR code.
- Adjust camera settings: Depending on your preferences, you may have options to adjust various camera settings, such as brightness, contrast, motion detection sensitivity, and recording settings. Customize these settings according to your needs.
- Set up remote access: If you want to access your security camera system remotely, you may need to configure port forwarding or set up a dynamic DNS service. Follow the instructions provided by the software or consult online guides for assistance.
- Test the system: Once the configuration is complete, test the security camera system by accessing the live feed, recording videos, and checking the system’s functionality. Make any necessary adjustments to ensure optimal performance.
By diligently following these steps, your security camera system will be ready to monitor your property and provide you with peace of mind. Proceed to the final step: testing the camera.
Step 7: Testing the Camera
After setting up the security camera system, it’s crucial to thoroughly test the camera to ensure its proper functioning. Follow these steps to conduct a comprehensive camera test:
- Check the live feed: Access the live feed of your security camera through the software’s interface or mobile app. Make sure the camera’s view is clear, and there are no distortions or abnormalities in the footage.
- Verify motion detection: Test the camera’s motion detection capabilities by moving within its field of view. The camera should promptly detect and record any movement, based on the configured sensitivity settings.
- Ensure continuous recording: If you have set up continuous recording, verify that the camera is successfully storing the footage on the designated storage device. Check if the recordings are clear, synchronized, and accessible for playback.
- Test night vision: If your camera has night vision capabilities, simulate low-light conditions and verify that the night vision mode is activated, allowing for clear footage even in darkness.
- Test remote access: If you have enabled remote access, try accessing the camera’s live feed and settings from a different network or through a mobile app. Ensure that the remote access feature is working smoothly.
- Verify notifications (if applicable): If your camera is configured to send notifications, such as through email or push notifications, test if you receive timely alerts when motion is detected or any predefined events occur.
- Monitor system performance: Observe the system’s overall performance, including its responsiveness, stability, and resource usage. Check if the camera system operates smoothly without any lag or crashes.
Testing the camera thoroughly will help you identify and resolve any potential issues before relying on it for security purposes. Make any necessary adjustments or fine-tuning based on the test results to optimize the camera’s performance.
Congratulations! You have successfully created your own security camera system. This cost-effective and personalized solution will provide you with peace of mind and enhanced security for your home. Keep in mind that regular maintenance and monitoring are essential to ensure the continued effectiveness of your security camera system.
Remember to comply with local laws and regulations regarding the use of surveillance equipment, and always respect the privacy of others.
Wishing you the best of luck with your DIY security camera system!
Read more: How To Make Your Own Mattress
Conclusion
Creating your own security camera system can be a rewarding and cost-effective way to enhance the safety and security of your home. By following the step-by-step process outlined in this article, you have gained the knowledge and skills necessary to build a customized security camera system that meets your specific needs.
We started by selecting the right camera based on resolution, night vision, field of view, and additional features. Then, we moved on to preparing the enclosure, ensuring it is weatherproof, properly sealed, and accommodates the camera and other electronic components.
Once the enclosure was ready, we proceeded with the installation of the camera, ensuring it was securely positioned and aligned correctly. Next, we connected the camera to a stable power source, making sure the connections were secure and well-insulated.
With the camera powered on, we focused on connecting it to the Wi-Fi network. This allowed us to access the camera remotely and manage it from anywhere. After that, we proceeded to set up the security camera system by configuring the software, adjusting camera settings, and enabling remote access.
Finally, we conducted a thorough camera test to ensure its proper functioning, including checking the live feed, motion detection, night vision, remote access, and overall system performance. Testing is essential to identify and resolve any issues or fine-tune the camera system for optimal performance.
By taking the initiative to create your own security camera system, you have not only saved money but also gained a deeper understanding of how the technology works. Remember to maintain and monitor your system regularly to ensure it remains effective in providing you with the desired level of security.
With your DIY security camera system in place, you can now enjoy increased peace of mind and a heightened sense of security for yourself and your loved ones. Stay vigilant and take comfort in knowing that you have taken proactive measures to protect your home.
Now, it’s time to put your newfound knowledge into action. Get started on building your own security camera system and embark on a journey towards a safer and more secure home.
Frequently Asked Questions about How To Make Your Own Security Camera
Was this page helpful?
At Storables.com, we guarantee accurate and reliable information. Our content, validated by Expert Board Contributors, is crafted following stringent Editorial Policies. We're committed to providing you with well-researched, expert-backed insights for all your informational needs.