Home>Storage Ideas>How To DIY Decorative Storage Boxes With Lids


Storage Ideas
How To DIY Decorative Storage Boxes With Lids
Modified: August 28, 2024
Looking for your next DIY project? Check out these cool DIY Decorative storage boxes with lids that are super easy, quick and within budget!
(Many of the links in this article redirect to a specific reviewed product. Your purchase of these products through affiliate links helps to generate commission for Storables.com, at no extra cost. Learn more)
Decorative storage boxes with lids are a blessing in disguise. They double up as storage bins, as well as cool decorative assets. Albeit, there are many different ways to make them, but not all might be your cup of tea. So here are four fresh and easy ways that will allow you to build your storage boxes within minutes.
The materials required can be easily found at home or are cheaper than a full meal. Additionally, while most of these serve the indoor storage needs, we also have an outdoor storage box idea for you to try. Have a look, and you’ll enjoy making them.
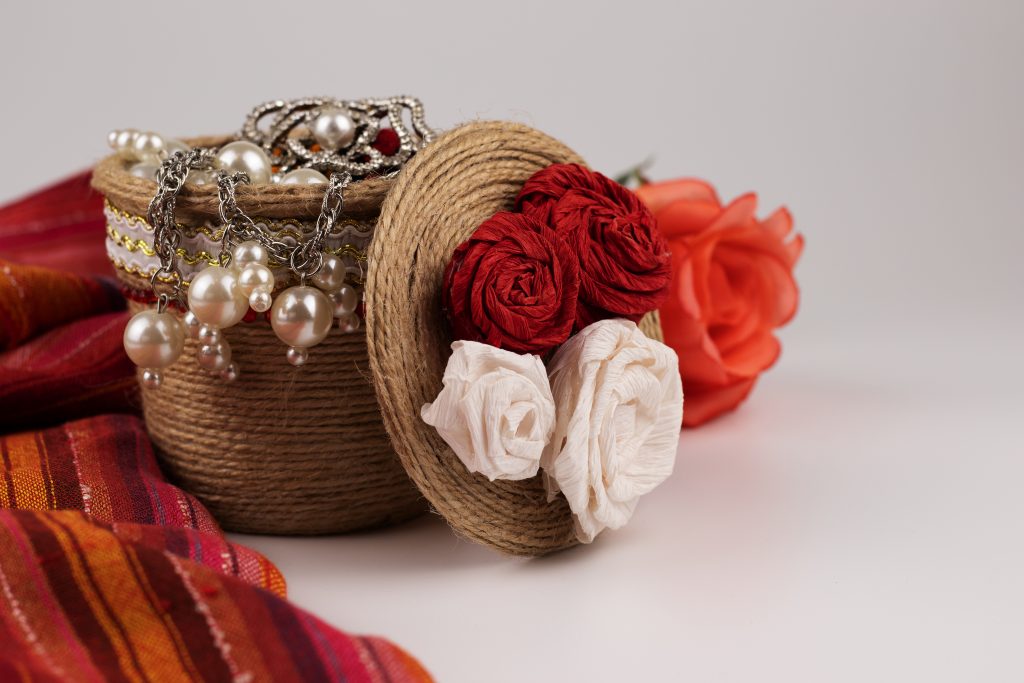
How To Make A DIY Decorative Rope Basket With Lid For Storage?
A rope basket is one of the most commonly used ideas to decorate DIY storage boxes. Yet, it still looks beautiful and goes well with all kinds of interiors. Besides, there are loads of options to decorate it and change its appearance over time. So without further ado, let’s head towards all that you will need to make your DIY Rope Basket for storage with a lid.
Items you will need:
- Cardboard box (any shape)
- Rope (preferably of jute, or soft cotton rope)
- Fabric (for interior)
- Scissors
- Glue gun
- Spray adhesive
- Scale for measurements
- Decoratives (pom poms, ribbon flowers)
Steps To Make DIY Rope Basket With Lid For Storage
- First of all, we will start with the interior. Take a piece of fabric and cut it according to the interior measurements with extra material for seams. Also, fold out the excess fabric from the mouth of the box towards the outer sides.
(This border on the top will give a neat look to your box. It will help the lid to stay in place, in case roping up till the brim hampers the closing.)
- Now, use a spray adhesive or apply glue with a brush in the interiors of the box. You may start with the base and then move to the sides. And lastly, on the outer side as well.
(Tip: Paste opposite sides first for a better interior finish.)
- Next, grab the rope and thin-off its end using scissors. This is to reduce the visibility of the joint where the roping begins.
- Now on to the central part. Start applying glue from the glue gun in a thin line from the lower side.
(Tip: Start from your least favorite side so that if any joints are visible, it won’t be on the front.)
- While you move the way up, press the rope tightly towards the box as well as the previous line. This helps in minimizing the space between lines and avoids gaps.
- If the lid of your DIY storage bins has an external friction fit, do not go all the way up and stop till where the lid closes. Now, if you remember in step one, we left an external border. And this outer border will remain exposed at the top, whenever the box is opened.
- Then, it is the lid’s turn. Depending on the shape of the lid, start from an edge, on the top side, and move towards the middle. Then wrap the bottom of the lid.
- For decorating this, you may use ribbons or laces from an old dress. Or perhaps use different colored ropes for a layered outlook. Additionally, you can even use metallic spray paint and give it a lustrous finish. You may also dye the ropes in different colors and see the magic unfold as you wrap the box.
(Tip: Just in case your basket does not come with a lid, you can make one on your own. Cut out a layer of cardboard sufficient to rest on top of your basket. And then wrap on the rope, and a lid for your storage box will be ready in minutes. You may paste the fabric you used for the interior on the underside of the lid as well.)
How To Make Dazzling DIY Decorative Storage Boxes With Lids
Have you stored a plastic box in which your favorite chocolates or cookies came in? So why not level it up into a storage box with a lid? All you will need are a few handy supplies and almost an hour of elbow grease. So read on!
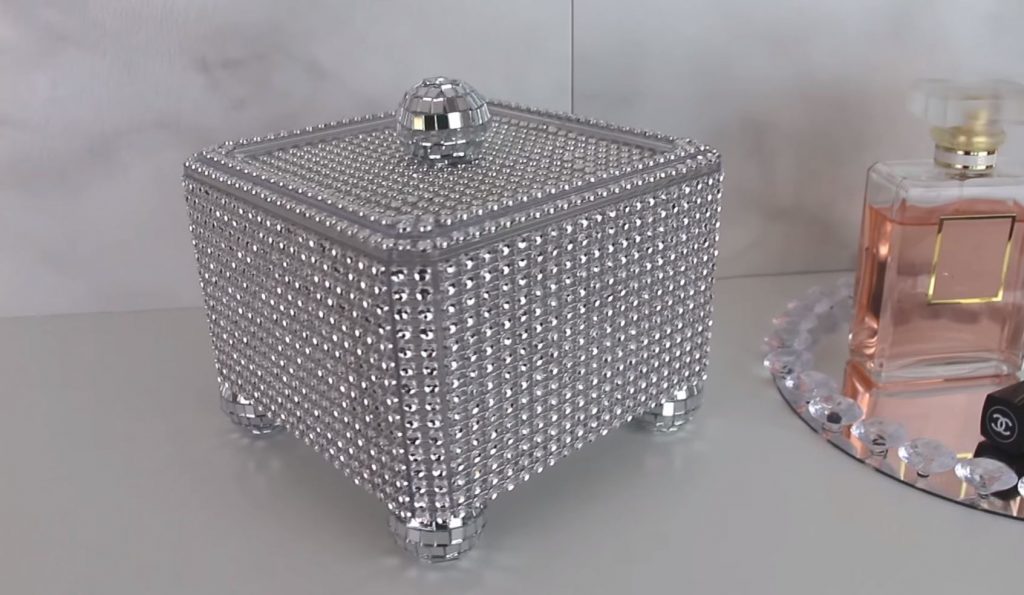
Image by StoreeOfMyLife
Supplies To Collect:
- A box (preferably transparent), with lid
- Adhesive Diamond wrap or ribbon, any color
- Spherical ornaments (preferably mirrored or the same color as the diamond wrap)
- Glue gun or strong adhesive
Read also: 14 Best Deck Storage Boxes Outdoor For 2025
Steps To Make Bling DIY Decorative Storage Boxes With Lids
- Ensure that the box is clean before you begin.
- If your diamond wrap is self-adhesive, remove the backing and apply it on the side of the box. For non-adhesive diamond wraps, use a transparent glue and stick the cover around the box.
- Cut the diamond wraps into smaller ribbons depending on the gaps after the first application of diamond wrap.
- Follow the previous step for the lid.
- Then, take the spherical ornaments. Apply a dot of glue and stick this to the bottom of the box as support. Please note that this step is optional.
- Additionally, you can apply another ornament on the top of the lid in the middle like a knob. And your box is ready.
This blingy storage box will be excellent for your jewelry and smaller essentials!
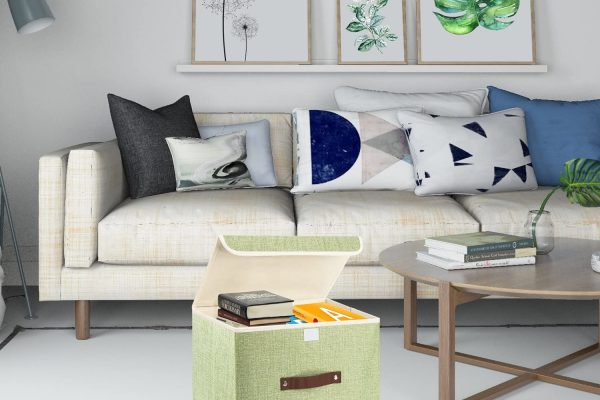
How To Make A Fabric Covered Storage Box With Lid
The best part about making a DIY fabric covered storage box is the endless possibilities to decide the outer appearance. You may use an old T-shirt, table cloth, a dress, curtains, and almost any fabric to cover a storage box. Just ensure that the fabric material has a bright color or print that will go well in the area where you intend to place this storage box.
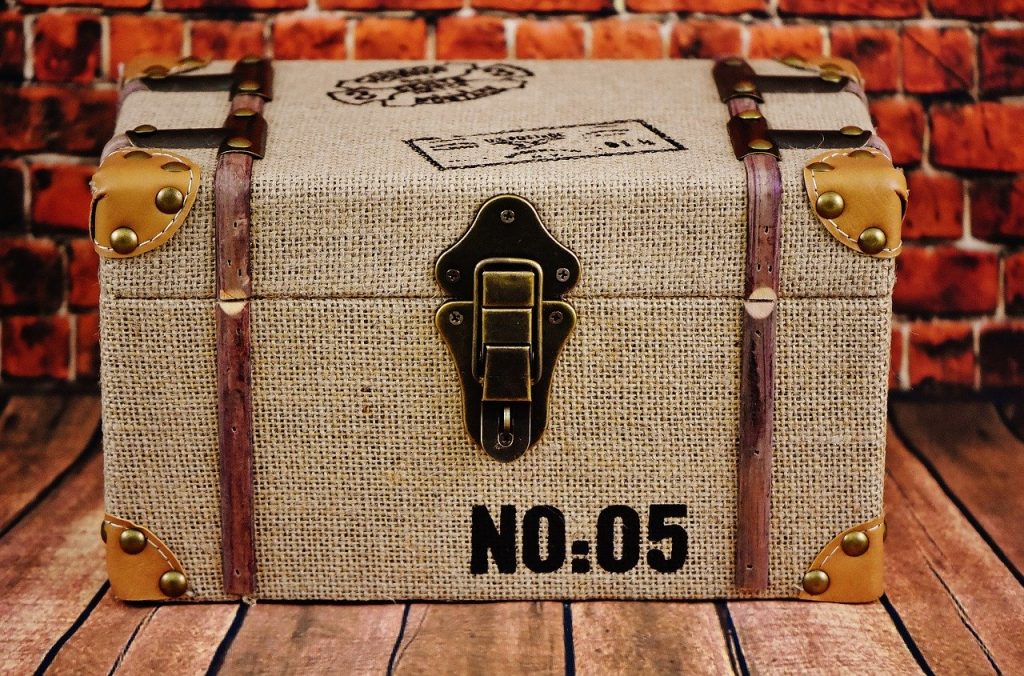
Image by Alexas_Fotos from Pixabay
The decorative storage box with lid in the image above features a jute fabric, along with optional decoratives like leather-like fabric on corners, and metallic buttons, etc.
Supplies You Will Need:
- A cardboard box (any size)
- Extra cardboard for the base
- Fabric
- Scissors
- Cutter or knife
- Permanent glue or spray adhesive
- Thin foam sheet
- Decoratives: Lace, buttons, sequin, bow, etc.
(Note: Please ensure that the fabric is big enough to cover the box as well as the inner sides for additional neatness.)
Steps To Make Fabric Covered Storage Box With Lid
- If your cardboard box has a removable lid, you may adjust and reduce its height using a cutter or knife. If the lid is attached, you may skip this step.
- Now lay the fabric on a flat surface and place the cardboard box on top of it.
- Cut out the fabric from all four corners so that there is minimal overlapping of cloth while wrapping. After cutting, your fabric must be in a plus shape or similar to it. Also, the length of the sides must be long enough to reach the inner base of the storage box.
- Now bring in your glue or spray adhesive and apply it on the bottom of the box and paste the fabric. And then, apply glue on one side of the box and stick the fabric to the respective side. At the same time, press out any bubbles or pockets that may develop.
(Tip: You may use a paintbrush to evenly apply the glue if you don’t have a spray adhesive.)
- Next, apply the glue on the inner side of the box, you just covered from outside. And take the cloth all over till the internal base.
- Repeat steps 4 and 5 with the opposite side of the box.
- Then move over to perform steps 4 and 5 on the remaining two sides. But this time, fold the extra edges of the fabric inward to have an almost seamless finish.
- Now, measure the base of the cardboard box and cut out a piece from the extra cardboard. Please note that this piece must be able to fit in as the base inside the storage box.
- Time to cover the base, but you must upholster it with a layer of Foam to make it noise-free.
- Oops! Forgot the lid? Easy! Just apply glue and paste the fabric over the top side of the lid. Upholstering the top of the box is a piece of optional advice.
- For decorating, you may glue a piece of lace around the upper side of the box all around it. Besides, you may feel free to stick buttons, bows, sequins, or other decoratives as your creativity suggests.
Read also: 13 Best Decorative Storage Box For 2025
How To Make Upholstered Ottoman Decorative Storage Box
Looking for more significant outdoor storage boxes? These neat decorative storage boxes with lids that double as an upholstered ottoman will look great in multiple locations. From your reading room to the garden’s outdoor storage box, you will be awed by its beauty and benefits.
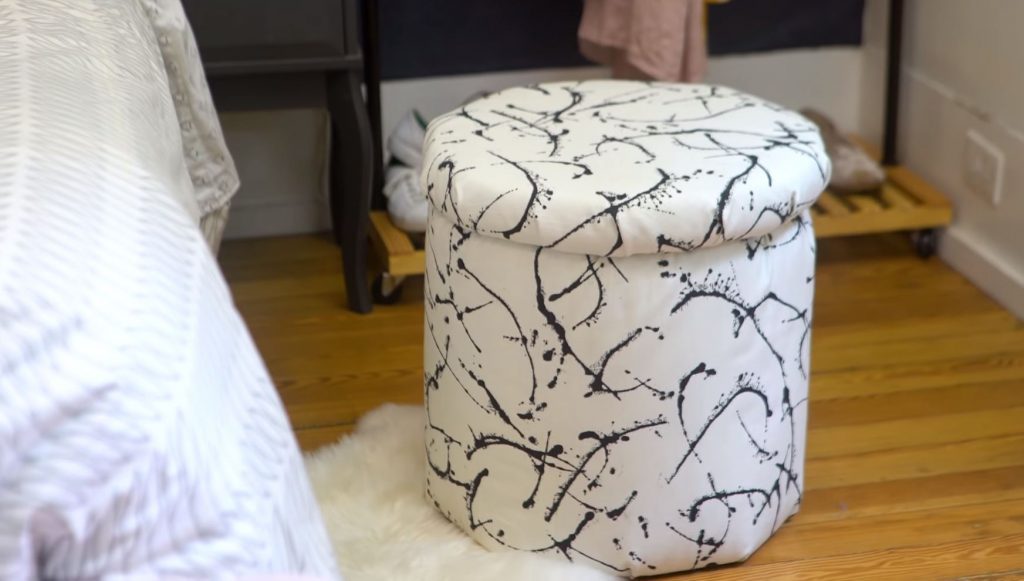
Photo by HGTV Handmade
Here’s What You Need:
- Bucket or crate
- Two wooden ply board for the lid
- Glue gun
- Wood glue
- Cotton or Foam for padding
- Scissor
- Durable fabric for covering
- Some spare fabric
Steps To Make Upholstered Ottoman Decorative Storage Box
The two wooden ply boards for the lids must be of two sizes. One, to act as the top of the ottoman. Second, slightly smaller, to be posted below the first and keeps the lid in place. A hardware store will be the best place to find these.
- Cut the padding to a couple of inches over the height of the bucket. Also, wrap it around the bucket or crate and again cut two to three inches extra from the required width.
- Now that your padding is ready to place the bucket on its side. Leave extra padding on either edge of the bucket. Use a glue gun and apply on the bucket in horizontal patches and keep pressing the filling onto it.
(Tip: Use multiple layers of the padding together if it is too thin. This is important so that the decorative storage boxes with lids look much more classy.)
- In the end, apply extra glue to ensure that the padding stays in place.
- Now cut off the extra padding. Also, trim the additional padding from the top and bottom with scissors.
- Time to wrap! Cut the cloth just like you cut the padding.
(Tip: Ensure that the seams of the cloth meet when wrapped around the decorative storage boxes with lids.)
6. Apply glue on the basket vertically and paste one seam of the fabric. No need to glue all over under the fabric.
- To glue the other end of the fabric, fold the seam inwards, apply glue and press it gently.
- Glue the extra fabric on the bottom of the basket by pressing the cloth towards the base. Repeat this for folding the excess fabric on the top brim of the storage bucket.
- For the lid, cut the plyboard to the size that fits your bucket’s top.
- Cut the Foam to the size of the lid. To upholster the lid, you need a minimum of one-inch Foam or up to two or three. If your Foam is thinner, use multiple layers.
- Using hot glue, paste the Foam onto the bigger board. Use spare fabric to layer over the Foam, but stick this fabric only on the other side of the lid. Use this layer to press the sides of the Foam over the edges. Cut off the extra fabric at the end.
- Now cover this board with the outer fabric, and cut off the extra fabric.
- Then paste the smaller board on the bottom side of the lid using wooden glue. Apply the glue generously. Press it firmly or apply weight to ensure it sticks properly. Therefore, this will be visible on the bottom of the lid.
Your decorative storage bin or outdoor storage box rather is ready to serve you. You may begin to use it to place your favorite books or wine bottles, and place it outdoors for quick access.
So, these were our top picks for making DIY decorative storage boxes with lids. You will surely enjoy trying your hands on one or more of these super easy and simple steps.
Was this page helpful?
At Storables.com, we guarantee accurate and reliable information. Our content, validated by Expert Board Contributors, is crafted following stringent Editorial Policies. We're committed to providing you with well-researched, expert-backed insights for all your informational needs.

0 thoughts on “How To DIY Decorative Storage Boxes With Lids”