Articles
How To Build Vegetable Planter Boxes
Modified: October 30, 2024
Learn how to build beautiful garden vegetable planter boxes and create your own thriving garden with our step-by-step guide. Grow your own fresh produce!
(Many of the links in this article redirect to a specific reviewed product. Your purchase of these products through affiliate links helps to generate commission for Storables.com, at no extra cost. Learn more)
Introduction
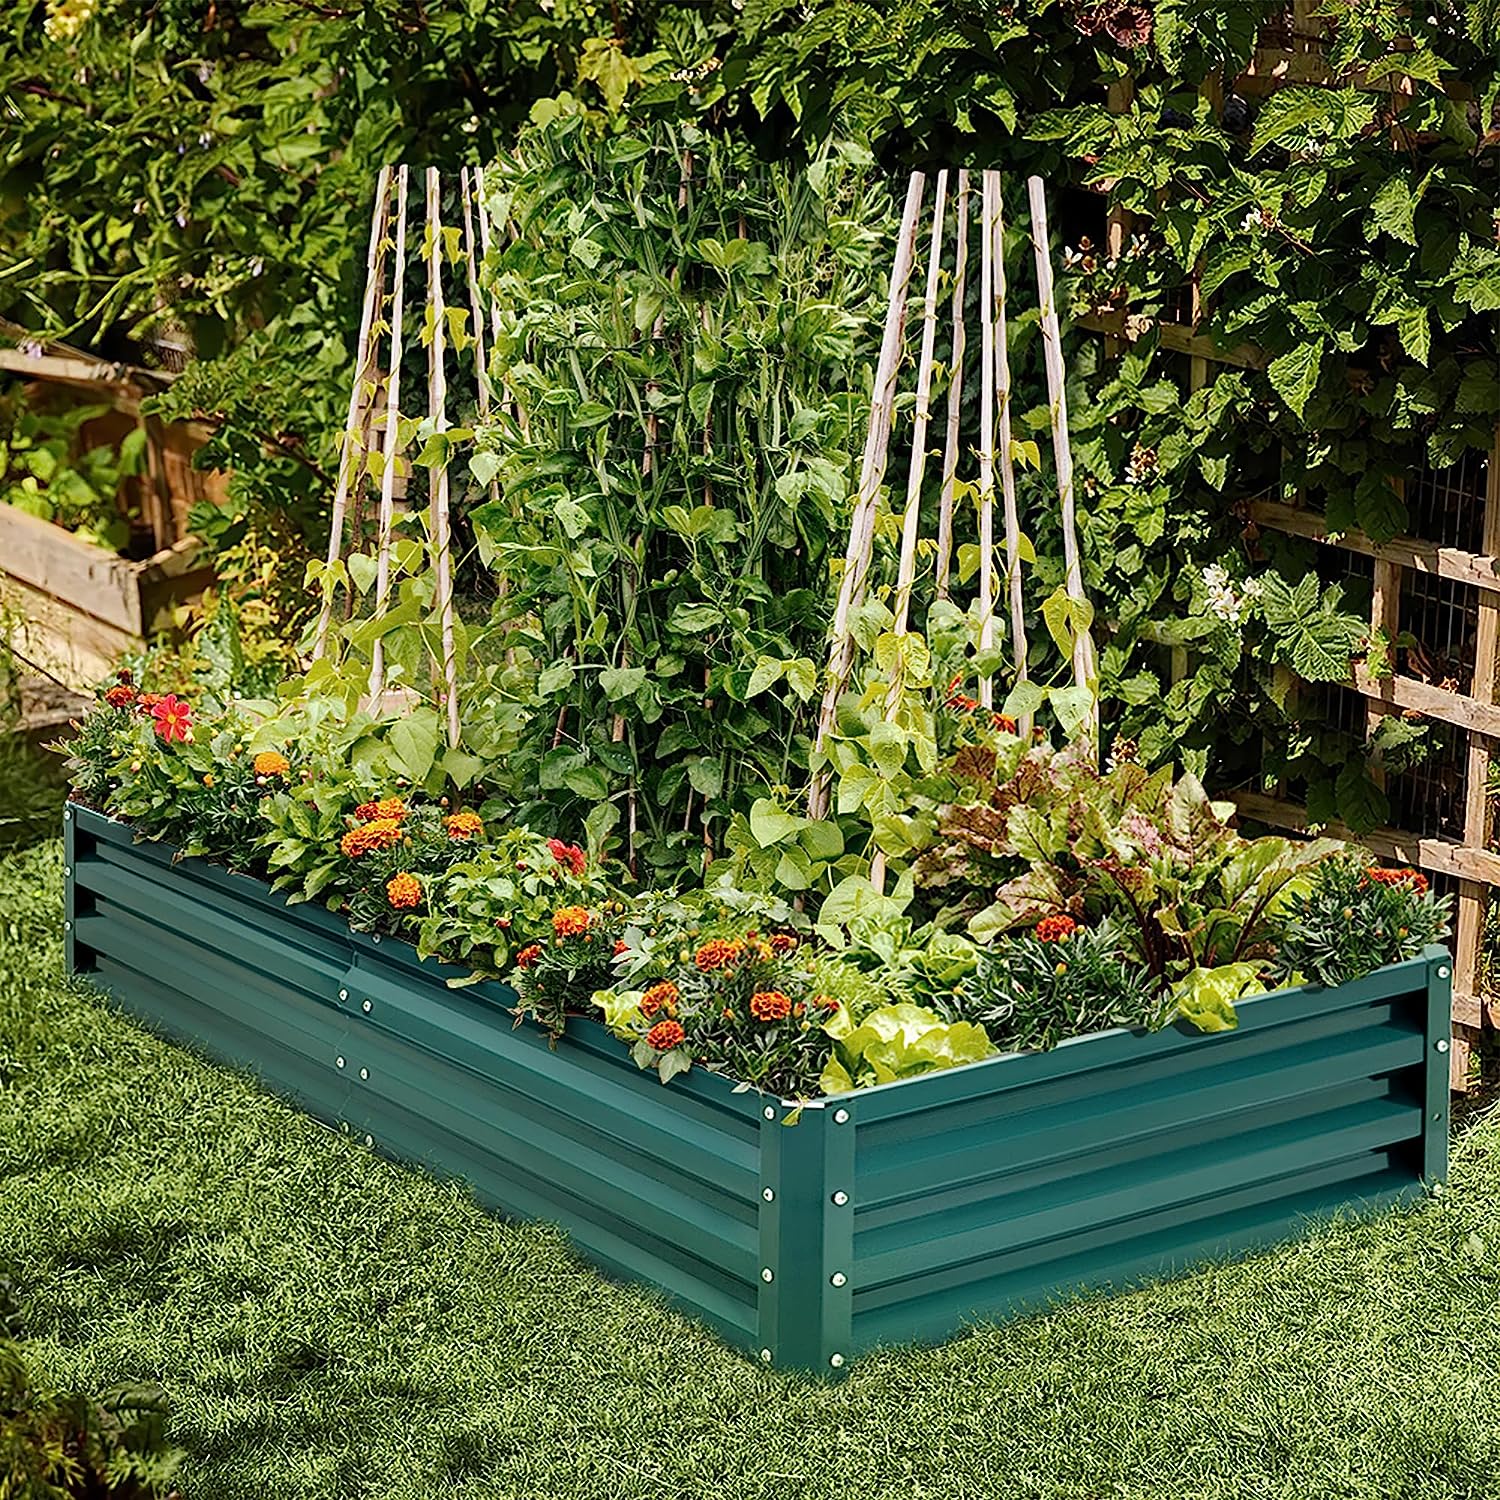
Welcome to the world of vegetable gardening! Whether you’re a seasoned gardener looking to expand your growing space or a beginner wanting to try your hand at homegrown produce, building vegetable planter boxes is a fantastic way to get started. Planter boxes offer numerous benefits, such as better soil control, improved drainage, and easier maintenance. Plus, they add a touch of aesthetic appeal to your garden or outdoor space.
In this article, we’ll guide you through the process of building your own vegetable planter boxes. From choosing the right location to planting your favorite vegetables, we’ll cover all the essential steps for a successful gardening experience. So, put on your gardening gloves, grab your tools, and let’s get started.
Before we dive into the practical aspects of building planter boxes, let’s take a moment to appreciate the advantages they offer. Planter boxes provide a contained and controlled environment for your vegetables, which means you can create the perfect growing conditions and customize the soil according to your plants’ needs. They also help reduce weed growth, prevent soil erosion, and protect your plants from pests and diseases. Additionally, planter boxes can be placed in any location, be it a sunny balcony, a small backyard, or even a rooftop, making them suitable for urban dwellers.
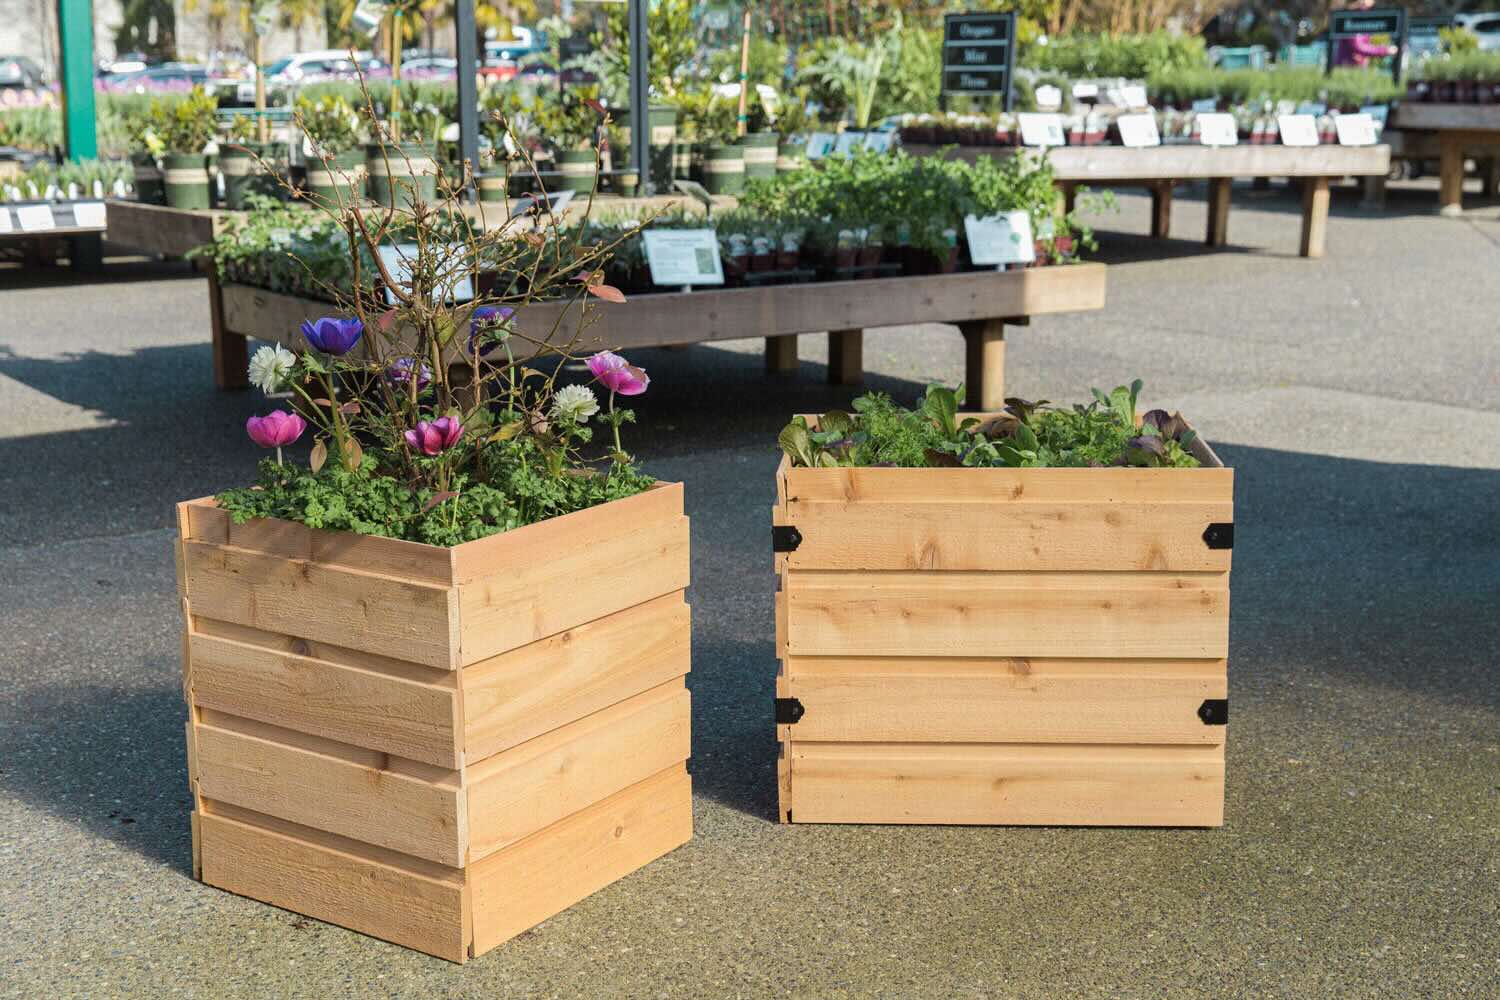
Building your own planter boxes allows you to get creative and design them to suit your preferences. You can choose from various materials, such as wood, plastic, or metal, and customize the size and shape to fit your available space. Not only will you have the satisfaction of creating something with your own hands, but you’ll also have control over the quality of materials used, ensuring the longevity of your planter boxes.
So, whether you’re a novice or an experienced gardener, building vegetable planter boxes can be a rewarding and enjoyable project. Not only will you have an abundance of fresh and delicious homegrown vegetables right at your doorstep, but you’ll also have a beautiful and functional addition to your outdoor living space. So without further ado, let’s move on to the first step: choosing the right location for your planter boxes.
Key Takeaways:
- Building vegetable planter boxes offers a rewarding gardening experience, providing control over the growing environment and a beautiful addition to outdoor spaces. Enjoy the satisfaction of nurturing homegrown produce!
- Proper care and maintenance of vegetable planter boxes ensure ongoing health and productivity, leading to abundant harvests and the joy of savoring fresh, homegrown vegetables. Embrace the beauty and abundance of nature!
Read more: What To Plant In Planter Boxes
Materials Needed
Before you start building your vegetable planter boxes, it’s essential to gather all the necessary materials. Having everything prepared beforehand will ensure a smooth and efficient construction process. Here’s a list of the materials you’ll need:
- Wood: Choose a high-quality and durable wood, such as cedar, redwood, or cypress. Avoid using treated lumber, as the chemicals used in the treatment can leach into the soil and affect your plants. The amount of wood needed depends on the size and number of planter boxes you plan to build.
- Screws: Opt for corrosion-resistant screws that are suitable for outdoor use. Make sure they are long enough to securely fasten the wood pieces together.
- Drill: A power drill with drill bits will be necessary to create pilot holes for the screws and make assembly easier.
- Measuring Tape: You’ll need a measuring tape to measure the dimensions of your planter boxes accurately.
- Saw: Depending on the size and design of your planter boxes, you may need a handsaw or a circular saw to cut the wood pieces to the desired lengths. Ensure the saw is appropriate for cutting wood.
- Sandpaper: Sandpaper will be useful for smoothing out rough edges and surfaces, giving your planter boxes a polished finish.
- Landscape Fabric: This fabric will act as a barrier between the soil and the wood to prevent it from rotting. It also helps with drainage and weed control.
- Staple Gun: A staple gun is needed to secure the landscape fabric to the inside of the planter boxes.
- Hammer: A hammer will come in handy for any additional tasks that require pounding nails or adjusting the wood pieces.
- Level: To ensure your planter boxes are straight and even, a level will be essential to check the horizontal and vertical alignment. A small torpedo level or a laser level can be used.
- Soil: Once your planter boxes are built, you’ll need a high-quality soil mix suitable for growing vegetables. Consider using a mix that includes compost, perlite, and vermiculite.
- Vegetable Seedlings or Seeds: Don’t forget to pick out the vegetables you want to grow in your planter boxes. Choose varieties that thrive in your climate and are suitable for container gardening.
These are the basic materials you’ll need to construct your vegetable planter boxes. Depending on your design preferences, you may require additional decorative elements or protective finishes. Now that we have everything ready, let’s move on to the first step: choosing the right location for your planter boxes.
Step 1: Choosing the Right Location
One of the most important factors for successful vegetable gardening is choosing the right location for your planter boxes. The location should provide optimal growing conditions for your plants while considering factors such as sunlight exposure, space availability, and convenience. Here are some considerations when selecting the perfect spot:
- Sunlight: Most vegetables require at least 6-8 hours of direct sunlight daily. Choose a location that receives ample sunlight throughout the day. South-facing areas usually offer the best sun exposure. Avoid placing your planter boxes in shaded areas or close to tall trees or buildings that may cast shadows.
- Space: Assess the available space in your garden or outdoor area and determine how many planter boxes you can accommodate. Take into account the dimensions of the planter boxes and leave enough space between them for easy access and maintenance.
- Accessibility: Consider the proximity of your planter boxes to your house or water source. It’s important to have convenient access for watering, harvesting, and general care. Also, think about potential obstacles such as fences or other structures that may hinder access.
- Soil Quality: Pay attention to the quality of the soil in the chosen location. Avoid areas with poor drainage or compacted soil. If the soil is unsuitable for vegetable gardening, plan to fill your planter boxes with a high-quality soil mix.
- Climate: Take your local climate into account when choosing the location. Some plants thrive in cooler conditions, while others prefer warmer climates. Understanding your climate and selecting suitable vegetables will increase your chances of a successful harvest.
- Aesthetics: Consider the visual appeal of your planter boxes when choosing the location. They can act as decorative elements in your garden, so ensure the placement complements the overall design of your outdoor space.
Once you have assessed these factors, you can pinpoint the ideal location for your planter boxes. Keep in mind that you can always move your planter boxes if necessary, but choosing a suitable location from the start will save you time and effort.
After selecting the right location, it’s time to move on to the next step: measuring and designing your planter boxes. This crucial step will determine the size and shape of your boxes, allowing you to create a customized gardening space. Stay tuned for our next step in building your vegetable planter boxes!
Step 2: Measuring and Designing the Planter Boxes
Now that you have chosen the perfect location for your vegetable planter boxes, it’s time to start measuring and designing them. Proper measurement and design are crucial for creating functional and aesthetically pleasing planter boxes. Here’s what you need to do:
1. Determine the Size: Start by deciding how big you want your planter boxes to be. Consider the space available, the number of plants you want to grow, and the root depth required for your chosen vegetables. A larger planter box will allow for more plants and provide better soil moisture retention, but ensure it’s still manageable for maintenance.
2. Mark the Dimensions: Use a measuring tape to measure and mark the desired length, width, and height of your planter boxes on the wood. A pencil or marker will work well for marking the measurements. Double-check the measurements to ensure accuracy.
3. Cut the Wood Pieces: Once you have marked the dimensions, use a saw (handsaw or circular saw) to cut the wood pieces accordingly. Remember to wear safety goggles and follow proper safety measures during the cutting process. If you don’t have the necessary tools, you can have the wood cut at a local home improvement store.
4. Design Considerations: You can get creative with the design of your planter boxes. Consider adding decorative elements, such as beveled corners or chamfered edges, to enhance the aesthetic appeal. You can also experiment with different shapes, such as square, rectangular, or even tiered boxes for a unique look.
5. Double-check the Fit: Once you have cut the wood pieces, assemble and fit them together to ensure they align properly. Use a level to check if the sides and ends are straight and level. Make any necessary adjustments before moving on to the next step.
6. Plan for Drainage: Proper drainage is essential for the health of your plants. Consider adding drainage holes to the bottom of your planter boxes. These holes will prevent water from pooling and ensure the roots have adequate oxygen. Plan for multiple drainage holes spaced evenly on the bottom of the boxes.
7. Sand the Edges: To avoid splinters and give your planter boxes a smooth finish, use sandpaper to sand the edges and surfaces of the wood pieces. Be sure to remove any rough surfaces that could potentially harm you or your plants.
By carefully measuring and designing your planter boxes, you can create a customized gardening space that fits your specific needs and preferences. Once you’re satisfied with the measurements and design, you are ready to move on to the next step: gathering and preparing the materials. Stay tuned!
Step 3: Gathering and Preparing the Materials
With your planter box design finalized, it’s time to gather all the necessary materials and prepare them for construction. By ensuring you have everything you need in advance, you can streamline the building process and avoid unnecessary delays. Here’s what you need to do:
1. Wood and Hardware: Gather all the wood pieces you cut according to your planter box design. Ensure they are of high quality and free from any defects. Double-check if you have enough screws or nails to secure the wood together. If necessary, purchase additional supplies.
2. Drilling Pilot Holes: To make the assembly process easier and prevent the wood from splitting, it’s advisable to drill pilot holes for the screws or nails. Use an appropriately sized drill bit to create these holes. Place the holes at regular intervals along the edges where the wood will be joined.
3. Sanding: Before assembling the planter boxes, take the time to sand all the wood pieces. Sanding helps to remove any rough edges or splinters, resulting in a smooth surface. Use sandpaper or a sanding block to achieve this.
4. Landscape Fabric: Cut pieces of landscape fabric to fit the interior of your planter boxes. This fabric will act as a barrier between the soil and the wood, preventing the soil from direct contact and minimizing the risk of rotting. Ensure the fabric covers the bottom and sides of the planter boxes, with excess fabric hanging over the edges.
5. Stapling the Fabric: Using a staple gun, secure the landscape fabric to the inside of the planter boxes. Start with the bottom and then move on to the sides. Pull the fabric taut to avoid any sagging. Make sure to staple the fabric securely in place, ensuring it won’t come loose when filled with soil.
6. Preparing the Drainage Holes: If you haven’t done so during the design phase, now is the time to add drainage holes to the bottom of each planter box. Use a drill with an appropriate-sized drill bit to create several evenly spaced holes. These holes will ensure proper drainage and prevent water from accumulating at the bottom of the box.
7. Gathering Soil and Plants: While not directly related to the construction process, it’s a good idea to gather the soil and the vegetable seedlings or seeds you plan to plant in your planter boxes. Choose a high-quality soil mix suitable for growing vegetables, and select healthy seedlings or reliable seeds from a reputable source.
By responsibly gathering and preparing all the necessary materials, you’ll be fully equipped to begin constructing your vegetable planter boxes. With the materials ready, it’s time to move on to the next step: building the base of the planter boxes. Stay tuned!
Read more: How To Build Planters Out Of Decking
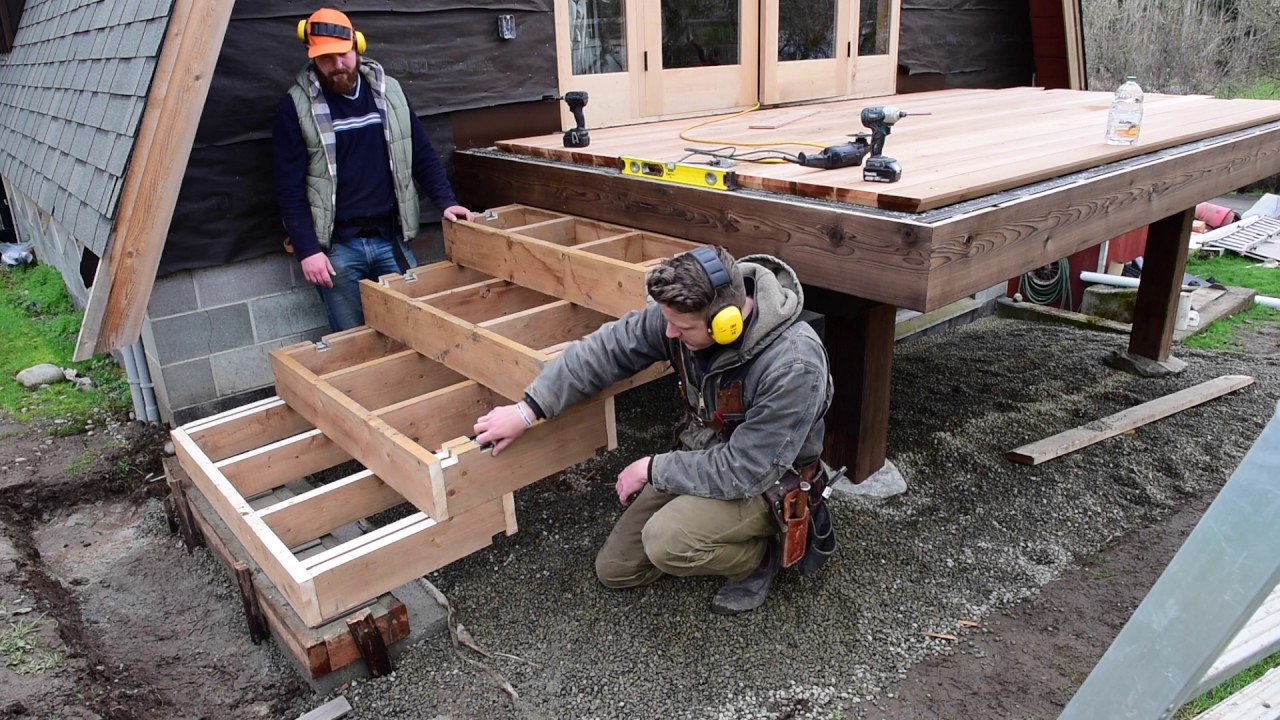
Step 4: Building the Base of the Planter Boxes
With all the materials prepared, it’s time to start building the base of your planter boxes. The base provides stability and support for the entire structure. Follow these steps to construct a sturdy and secure base:
1. Lay Out the Bottom Boards: Begin by laying out the bottom boards of the planter box. These boards will form the base. Ensure the boards are aligned and evenly spaced. Use a measuring tape and a level to double-check the alignment and adjust if necessary.
2. Secure the Bottom Boards: With the bottom boards in place, it’s time to secure them together using screws or nails. Place the screws or nails at regular intervals along the edges of the boards, making sure they are driven through the sides of the boards into the ends of the bottom boards. This will provide stability and prevent the boards from shifting.
3. Reinforce the Corners: To reinforce the corners and add extra strength to the base, you can utilize corner brackets or metal angles. Attach them securely to the inside corners of the planter box using screws.
4. Check for Sturdiness: Once the base is assembled, ensure that it is sturdy and level. Give it a gentle shake to test for any wobbling or instability. If any adjustments are needed, make them at this stage to ensure a solid foundation for the rest of the planter box.
5. Apply a Protective Finish (Optional): If desired, you can apply a protective finish to the exterior of the planter box. This will help prolong its lifespan and protect it from weathering. Consider using an exterior wood stain or paint designed for outdoor use. Follow the manufacturer’s instructions for proper application and drying time.
By following these steps, you will have successfully built the base of your planter boxes. The sturdy foundation will provide support and stability for the rest of the structure. Now that the base is complete, it’s time to move on to the next step: constructing the sides and ends of the planter boxes. Stay tuned!
Step 5: Constructing the Sides and Ends of the Planter Boxes
With the base of the planter boxes complete, it’s time to move on to constructing the sides and ends. This step will transform your project into recognizable planter boxes. Follow these steps to ensure a successful construction process:
1. Position the Side Boards: Begin by positioning the side boards vertically against the base. Ensure they are flush with the edges of the base and aligned properly. Use clamps or have someone assist you in holding the pieces in place.
2. Secure the Side Boards: With the side boards in position, it’s time to secure them to the base. Using screws or nails, attach the side boards to the base, driving the fasteners through the sides of the boards into the base. Place fasteners at regular intervals along the length of the boards.
3. Secure the End Boards: Once the side boards are securely attached, position the end boards horizontally at the ends of the planter box. Align them with the top edges of the side boards and ensure they are flush with the corners. Use clamps or assistance to hold them in place.
4. Attach the End Boards: Attach the end boards to both the side boards and the base of the planter box using screws or nails. Drive the fasteners through the end boards into the side boards and base at regular intervals. This will securely join all the pieces together.
5. Check for Alignment and Squareness: As you secure the side and end boards, periodically check for alignment and squareness. Use a measuring tape or a square to ensure the corners are at 90-degree angles. Make any necessary adjustments to ensure a proper fit.
6. Reinforce Corners: To add extra strength and stability, you can reinforce the corners of the planter box. Consider using corner brackets or metal angles to securely attach the corners together. This will help prevent any shifting or loosening of the joints over time.
7. Apply a Protective Finish (Optional): Optionally, you can apply a protective finish to the exterior of the planter box. This will help protect it from weathering and enhance its appearance. Choose a finish suitable for outdoor use and follow the manufacturer’s instructions for application.
Following these steps will result in well-constructed sides and ends for your planter boxes. Take your time and ensure each piece is securely fastened together. With the sides and ends complete, you’re one step closer to having fully assembled planter boxes. Stay tuned for the next step: adding drainage holes to your planter boxes.
When building vegetable planter boxes, make sure to use untreated wood to avoid chemicals leaching into the soil. Additionally, consider adding a layer of landscape fabric to prevent weeds from growing.
Step 6: Adding Drainage Holes
Proper drainage is essential for the health and vitality of your plants in the planter boxes. In this step, you will learn how to add drainage holes to ensure excess water can escape, preventing waterlogging and root rot. Follow these steps to add proper drainage:
1. Determine Hole Placement: Plan where you want to place the drainage holes in the bottom of your planter boxes. Ideally, you should have multiple holes spaced evenly across the base to allow for adequate water drainage.
2. Choose Drill Bit Size: Select a drill bit size appropriate for your drainage holes. The size of the drill bit will depend on the type of plants you are growing and the soil mix you are using. Smaller holes are suitable for fine-textured soils, while larger holes are needed for heavier soils.
3. Mark Hole Locations: Use a pencil or marker to mark the desired locations for the drainage holes on the inside of the planter box. Ensure the marks are equally spaced and cover the surface area sufficiently.
4. Drill the Holes: Carefully drill through the marked spots on the bottom of the planter box using the chosen drill bit. Apply gentle, even pressure and keep the drill bit perpendicular to the surface. Go slowly to avoid damaging the surrounding wood or splintering.
5. Clean Up Any Splinters: After drilling the drainage holes, inspect the edges to ensure there are no sharp splinters or rough areas. Use sandpaper to smooth out any rough edges and remove splinters. This will help prevent injury to your plants’ roots when they come into contact with the edges.
6. Test for Drainage: Before filling the planter box with soil, it’s a good idea to conduct a drainage test. Pour some water into the planter box and observe how quickly it drains through the holes. If the water drains too slowly, consider enlarging the holes slightly or adding additional ones to improve the drainage.
7. Place a Saucer or Tray: To protect the surface beneath the planter boxes, consider placing a saucer or tray underneath to catch any excess water that drains out. This will help prevent water damage and keep your outdoor area clean and tidy.
By adding proper drainage holes, you ensure that your plants’ roots have adequate oxygen and prevent water from pooling at the bottom of the planter boxes. With good drainage, your plants will thrive and avoid the risks of overwatering. Now that the drainage holes are in place, you’re ready for the next step: applying a protective finish (optional). Stay tuned!
Step 7: Applying a Protective Finish (Optional)
Applying a protective finish to your planter boxes is an optional step that can extend their lifespan and enhance their appearance. A protective finish can help protect the wood from weathering, moisture, and UV damage, ensuring your planter boxes remain in excellent condition for years to come. Here’s how you can apply a protective finish:
1. Choose the Right Finish: Select a finish that is suitable for outdoor use and safe for plants. You can choose from various options, such as exterior-grade wood stain, water-based sealers, or outdoor paint specifically designed for wood. Consider the look you want to achieve and the level of protection needed for your planter boxes.
2. Prepare the Planter Boxes: Ensure that the planter boxes are clean and dry before applying the protective finish. Remove any dust, dirt, or debris from the surface of the wood using a brush or a cloth. If there are any rough spots, sand them lightly to create a smooth surface for the finish to adhere to.
3. Test the Finish (Optional): If you’re unsure about the color or finish appearance, it’s a good idea to test it on a small, inconspicuous area of the planter box. This will allow you to evaluate the color, coverage, and overall look before applying it to the entire surface.
4. Apply the Finish: Using a brush, roller, or sprayer, apply the protective finish evenly to the exterior surface of the planter boxes. Follow the manufacturer’s instructions for the specific finish you are using. Ensure that you cover all sides, edges, and corners of the planter boxes for uniform protection.
5. Allow for Drying and Curing: After applying the finish, allow sufficient time for it to dry and cure, following the manufacturer’s recommended drying time. Keep the planter boxes in a well-ventilated area during this process to ensure proper drying and to avoid any buildup of fumes or odors.
6. Reapply if Necessary: Depending on the type of finish you choose, you may need to reapply it periodically to maintain the protection and appearance of your planter boxes. Check the manufacturer’s instructions for guidance on reapplication timing and frequency.
By applying a protective finish to your planter boxes, you not only enhance their visual appeal but also provide added protection against the elements. A well-maintained finish will keep the wood looking its best and help prolong the life of your planter boxes.
With the optional protective finish step completed, you’re ready for the next step in the process: filling the planter boxes with the appropriate soil mixture. Stay tuned!
Read more: How To Make A Patio Planter Box
Step 8: Filling the Planter Boxes with Soil
Now that your planter boxes are constructed and prepared, it’s time to fill them with the appropriate soil mixture. The right soil is crucial for the growth and success of your plants, providing them with the necessary nutrients and a well-draining environment. Follow these steps to properly fill your planter boxes with soil:
1. Select a High-Quality Soil Mix: Choose a high-quality soil mix suitable for growing vegetables. Look for a mix that is well-draining, rich in organic matter, and specifically formulated for container gardening. You can purchase a pre-mixed soil blend or create your own by combining components like compost, perlite, and vermiculite.
2. Prepare the Soil Mixture: If you choose to create your own soil mix, thoroughly mix all the components together until evenly combined. Ensure that the mixture is well-aerated and free from clumps or debris. This will provide the ideal environment for healthy root development.
3. Fill the Planter Boxes: Begin filling the planter boxes with the soil mixture, starting from the bottom. Use a garden trowel or your hands to distribute the soil evenly, filling each corner and ensuring that there are no air gaps. Continue adding soil until the planter box is nearly full, leaving a small space at the top to accommodate watering.
4. Level the Soil: Use a gardening tool, such as a rake or the backside of a garden trowel, to level the soil surface. Ensure that it is even and flat, avoiding any mounds or depressions that could affect water distribution. A level surface will provide a uniform planting environment for your vegetables.
5. Soil Amendments (Optional): Depending on your specific plant requirements, you may want to consider adding soil amendments at this stage. This can include organic fertilizers, compost, or other additives to further enhance the soil’s fertility and nutrient content. Follow the recommended application rates and guidelines for the specific amendments you choose to use.
6. Water the Soil: Before planting your vegetables, thoroughly water the soil in the planter boxes. This will help settle the soil and ensure proper moisture distribution. Water until you see water draining out through the drainage holes, indicating sufficient saturation.
7. Let the Soil Settle: Allow the soil to settle for a day or two before planting your vegetables. This will help prevent excessive settling and ensure a stable environment for your plants.
By following these steps, you’ll fill your planter boxes with a nutrient-rich, well-draining soil mixture that is ideal for vegetable cultivation. With the soil preparation complete, you’re now ready for the exciting next step: planting your favorite vegetables. Stay tuned!
Step 9: Planting Your Vegetables
Now that your planter boxes are filled with nutrient-rich soil, it’s time to bring them to life by planting your favorite vegetables. Proper planting techniques ensure healthy growth and abundant harvests. Follow these steps to successfully plant your vegetables:
1. Determine Plant Spacing: Refer to the seed packet or plant label to determine the recommended spacing for each vegetable. This will help you determine how many plants can comfortably fit in your planter boxes. Remember to leave enough space between each plant to allow for growth and airflow.
2. Dig Planting Holes: Use a trowel or your hands to dig planting holes that are deep and wide enough to accommodate the root systems of your vegetables. Make sure the holes are spaced according to the recommended plant spacing.
3. Insert and Settle Plants: Carefully remove the seedlings from their containers, and gently place them into the prepared holes. Gently backfill the soil around the roots, ensuring they are adequately covered. Press the soil gently to eliminate any air pockets and encourage good root-to-soil contact.
4. Water After Planting: Immediately after planting, water the newly planted vegetables thoroughly. This will help settle the soil around the roots and provide the plants with the necessary moisture to establish themselves. Ensure the soil is evenly moist without becoming waterlogged.
5. Provide Support (If Needed): Some vegetable plants, such as tomatoes or vine varieties, may require additional support as they grow. Install stakes, trellises, or cages as needed to provide structural support and prevent the plants from falling or sprawling.
6. Mulching (Optional): Consider applying a layer of organic mulch around the base of your plants. Mulch helps retain soil moisture, suppress weed growth, and regulate soil temperature. Choose mulch that is appropriate for your vegetable plants, such as straw, wood chips, or compost.
7. Follow Care Instructions: Each vegetable has unique care requirements, so be sure to read the specific care instructions for the plants you have chosen. This may include watering schedules, fertilization needs, and any other specific care practices to ensure healthy growth and abundant yields.
8. Regular Maintenance: Keep a close eye on your vegetable plants and perform regular maintenance tasks as needed. This includes watering as necessary, monitoring for pests or diseases, and providing any additional care requirements specific to your plant variety.
By following these planting steps and providing proper care and maintenance, you’ll set your vegetable plants up for success. With each passing day, you’ll witness their growth and soon enjoy a bountiful harvest. Congratulations on successfully planting your vegetables!
Now that your planter boxes are thriving with vegetables, let’s move on to the final step: caring for your vegetable planter boxes to ensure their longevity and continued productivity. Stay tuned!
Step 10: Caring for Your Vegetable Planter Boxes
After all the hard work you’ve put into building and planting your vegetable planter boxes, it’s important to continue caring for them to ensure their health and productivity. Regular maintenance and attention will help your plants thrive and provide you with a bountiful harvest. Follow these steps to care for your vegetable planter boxes:
1. Watering: Monitor the moisture levels in the soil and water your plants as needed. Keep in mind that container-grown plants may require more frequent watering than those grown directly in the ground. Water deeply, ensuring the entire root ball is adequately moist, but avoid overwatering to prevent waterlogged soil and root rot.
2. Fertilizing: Feed your plants with a balanced organic fertilizer or compost every few weeks to provide them with essential nutrients for healthy growth. Follow the instructions on the fertilizer packaging to determine the appropriate dosage and frequency.
3. Pest and Disease Control: Regularly inspect your plants for any signs of pests or diseases, such as chewed leaves, holes, or discoloration. Implement an integrated pest management (IPM) approach, which may include using organic insecticides or introducing beneficial insects to control pests naturally. If you notice signs of disease, promptly remove and dispose of affected plant material to prevent its spread.
4. Pruning and Harvesting: Regularly prune your plants to remove dead or yellowing leaves and encourage bushier growth. Harvest your vegetables when they reach the desired size and maturity. Regular harvesting will encourage continuous production and prevent overripe or overcrowded plants.
5. Support and Trellising: If you have vegetable plants that require support, regularly check and adjust any stakes, trellises, or cages to ensure they are providing adequate support. Proper support will prevent the plants from bending or breaking under the weight of the foliage or fruits.
6. Weed Control: Keep an eye out for weeds and remove them regularly. Weeds compete with your vegetable plants for nutrients and water, so it’s important to maintain a weed-free environment. Consider mulching around the base of your plants to help suppress weed growth.
7. Monitor Environmental Conditions: Pay attention to the weather and adjust your care routine accordingly. Provide shade or additional watering during hot, dry periods, and protect your plants from strong winds or frost by moving them to a more sheltered location, if necessary.
8. Regular Observation: Take time to observe your plants regularly. Look for any changes in growth, discoloration, or unusual behavior. By being attentive, you can address any issues promptly and maintain the health and vitality of your plants.
By consistently caring for your vegetable planter boxes, you’ll create an environment that promotes vigorous growth and abundant harvests. With proper maintenance and attention, your planter boxes will continue to provide you with fresh and delicious homegrown vegetables for seasons to come.
Congratulations on completing all the steps and successfully caring for your vegetable planter boxes. Enjoy the fruits of your labor, and happy gardening!
Conclusion
Congratulations on completing your journey of building and caring for your vegetable planter boxes! Through each step, you have transformed raw materials into functional and beautiful structures that now house your thriving vegetable garden. The process of planning, measuring, constructing, and maintaining your planter boxes has not only provided you with an opportunity to grow your own fresh and nutritious vegetables but has also added a touch of beauty to your outdoor space.
By choosing the right location and materials, measuring and designing your planter boxes, building their sturdy bases, constructing the sides and ends, adding drainage holes, applying protective finishes, filling them with nutrient-rich soil, and planting your favorite vegetables, you have embarked on a rewarding gardening journey. With care and attention to watering, fertilizing, pest control, pruning, and harvesting, you will continue to enjoy the fruits of your labor throughout the growing season.
Gardening in planter boxes offers many advantages. It allows you to take control of your growing environment, provides a contained and manageable space for gardening, and brings the joy of gardening to those who lack traditional garden plots. It is a wonderful way to connect with nature, reduce stress, and reap the rewards of homegrown produce.
Remember to adapt your care routine according to the individual needs of your plants and to stay attentive to any signs of pests, diseases, or environmental stress. Regular observation and maintenance will help you address any issues promptly and ensure the ongoing health and productivity of your vegetable planter boxes.
As you continue to care for your planter boxes and enjoy the fruits of your labor, take the time to appreciate the beauty and abundance that nature provides. Celebrate each harvest and savor the flavors of the fresh vegetables that you have nurtured from tiny seeds.
Thank you for joining us on this gardening adventure. We hope this guide has empowered you with the knowledge and inspiration to create your own vegetable planter boxes and enjoy the satisfaction of growing your own food. Now, go out and continue to explore the wonderful world of gardening!
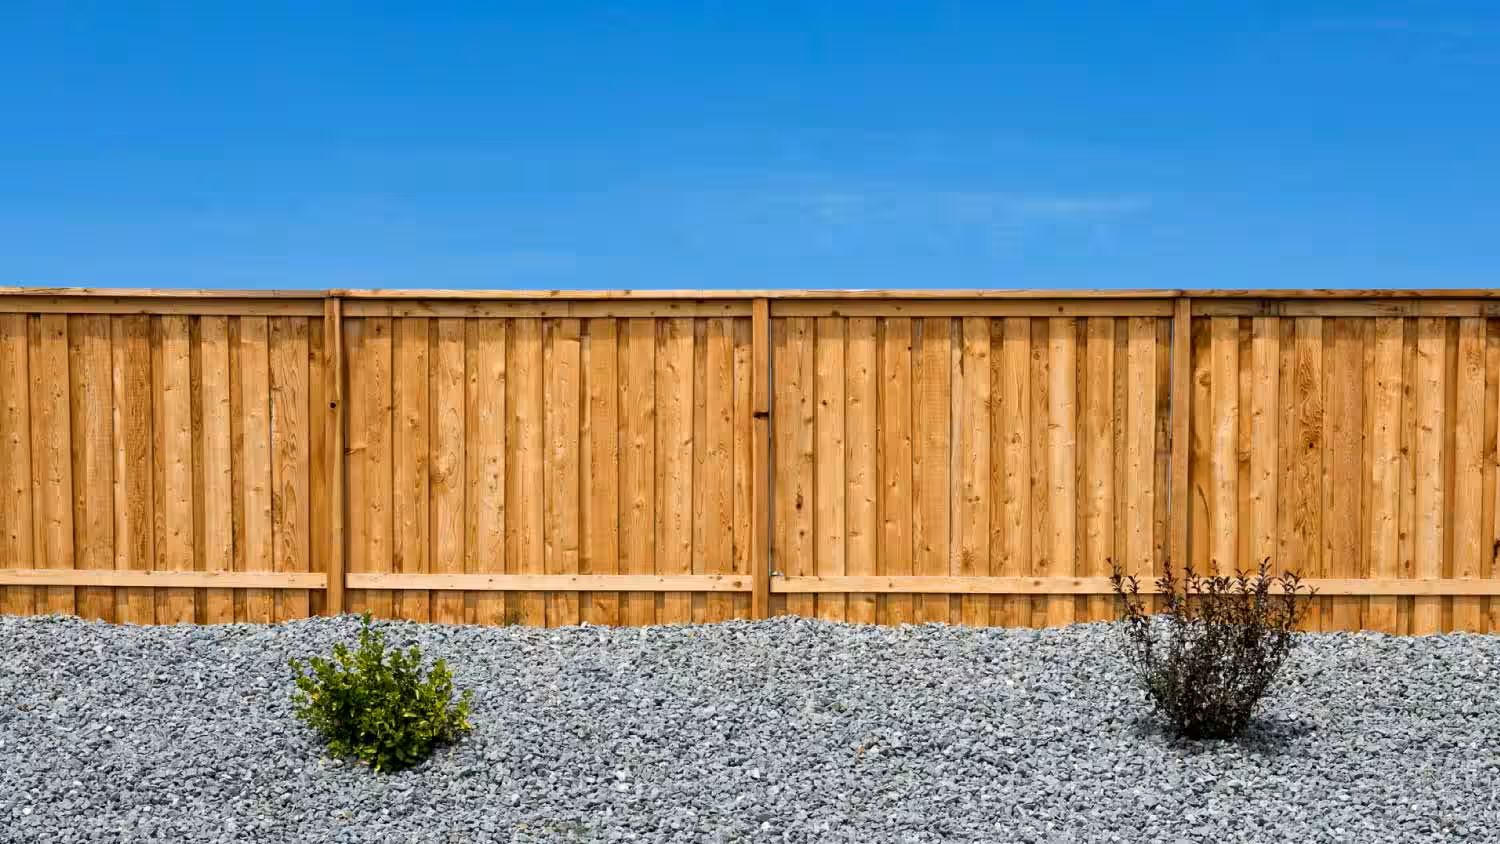
Now that you've mastered building your own vegetable planter boxes, why stop there? Extend your green thumb prowess with our inspiring collection of garden fence ideas. Not only do these fences add charm, but they also protect your precious plantings. Ready to grow more than just veggies? Dive into our comprehensive guide on nurturing a full-fledged vegetable garden. From sprouting seeds to harvesting, we've got all bases covered, ensuring your garden thrives season after season.
Frequently Asked Questions about How To Build Vegetable Planter Boxes
Was this page helpful?
At Storables.com, we guarantee accurate and reliable information. Our content, validated by Expert Board Contributors, is crafted following stringent Editorial Policies. We're committed to providing you with well-researched, expert-backed insights for all your informational needs.

0 thoughts on “How To Build Vegetable Planter Boxes”