Home>Storage Ideas>Kitchen Storage>How To Clean Silver And Prevent Tarnish Using Pantry Ingredients
Kitchen Storage
How To Clean Silver And Prevent Tarnish Using Pantry Ingredients
Modified: August 27, 2024
Discover effective ways to clean and prevent tarnish on silver using common ingredients found in your kitchen pantry. Explore these kitchen storage ideas to keep your silverware shining and protected.
(Many of the links in this article redirect to a specific reviewed product. Your purchase of these products through affiliate links helps to generate commission for Storables.com, at no extra cost. Learn more)
Introduction
Welcome to the world of beautiful silverware and decor that can add a touch of elegance to any space. However, if you own silver items, you may have encountered the common problem of tarnish. Tarnish not only diminishes the shine and beauty of silver, but it can also be a hassle to remove. But fret not, because we have some kitchen storage ideas to help you effectively clean silver and prevent tarnish using pantry ingredients.
Before we dive into the cleaning solutions, let’s first understand why silver tarnishes in the first place. Tarnish occurs when silver reacts with sulfur in the air, forming a layer of silver sulfide on the surface. This reaction is accelerated when silver comes into contact with moisture, chemicals, or certain foods. Understanding the causes of tarnish will help you prevent it and keep your silver items looking their best.
It’s important to note that there are different types of silver, such as sterling silver, silver-plated items, and silver jewelry. Each type requires specific care and cleaning methods. So gather your supplies and let’s explore the world of DIY silver cleaning solutions.
Key Takeaways:
- Embrace pantry ingredients like baking soda, lemon juice, and white vinegar to effectively clean and prevent tarnish on your silver items, keeping them lustrous and elegant for years to come.
- Implement proper storage techniques, anti-tarnish strips, and regular cleaning to maintain the beauty of your silver jewelry, ensuring it remains dazzling and tarnish-free for every wear.
Read more: How To Store Jewelry To Prevent Tarnish
Why Does Silver Tarnish?
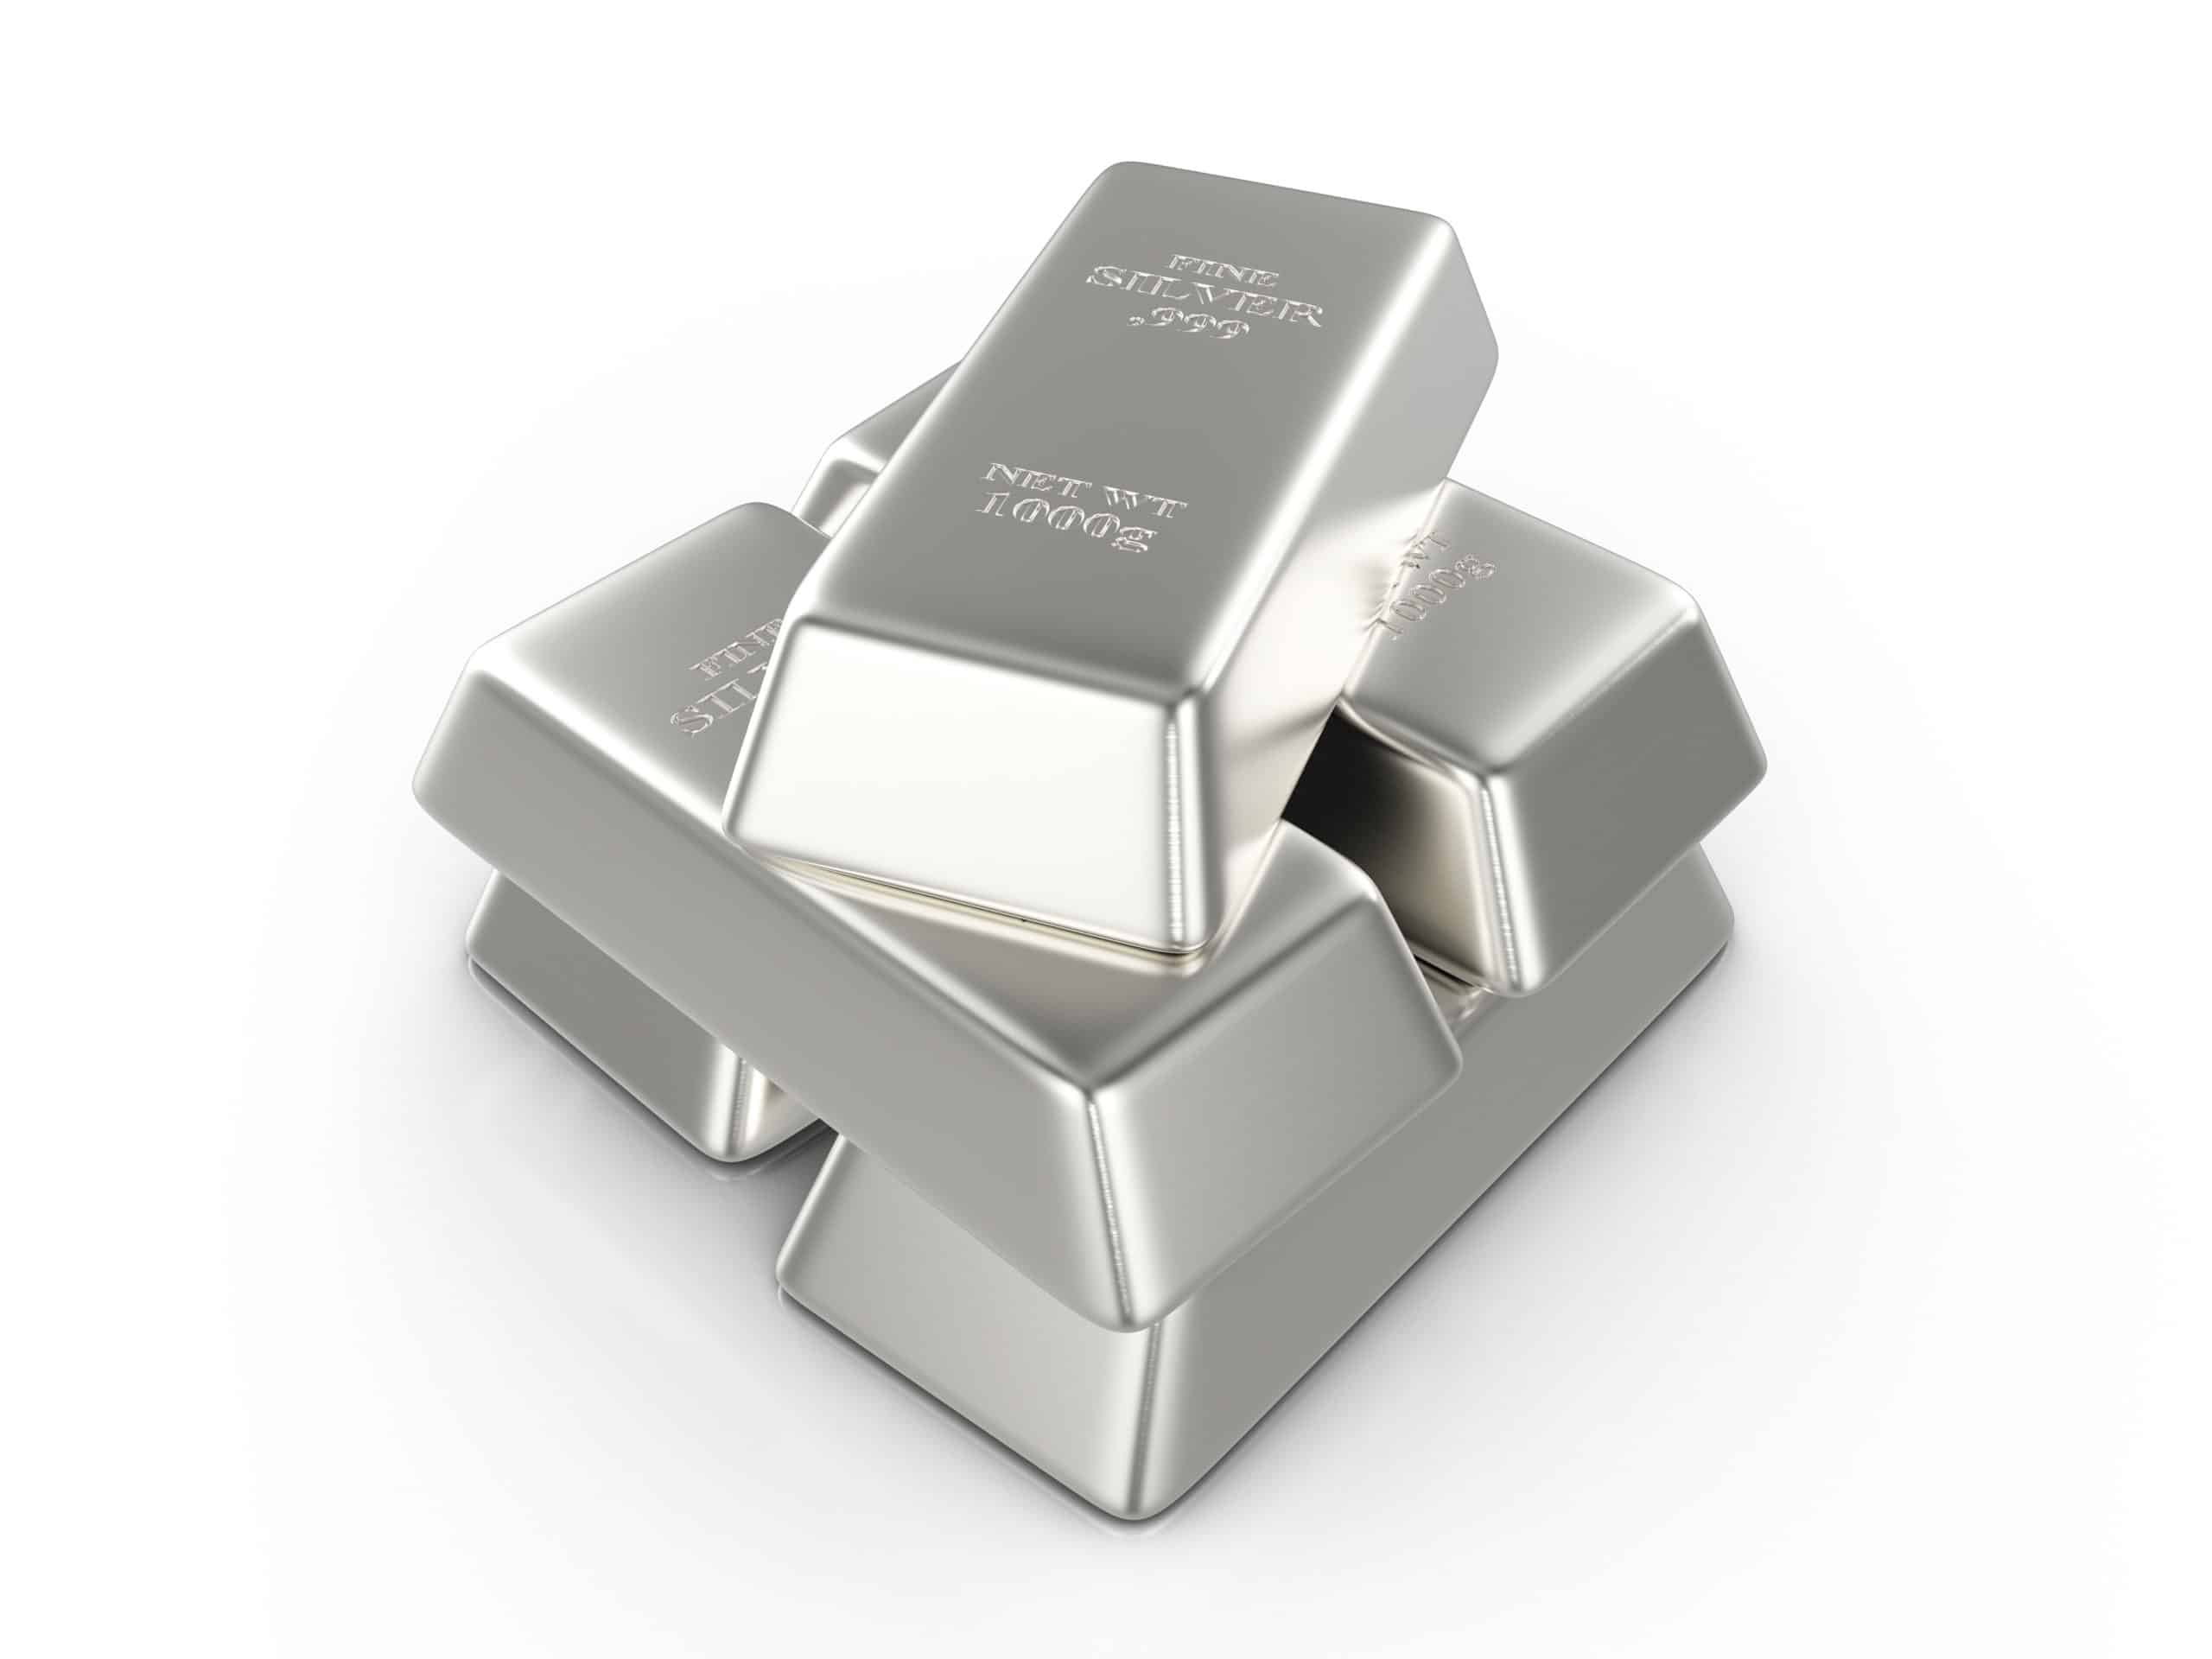
Silver is a precious metal known for its lustrous shine and beauty. However, over time, it can lose its brilliance due to tarnish. Understanding why silver tarnishes can help you take preventive measures and keep your silver items looking their best.
One of the primary reasons for silver tarnish is the reaction between the silver metal and sulfur in the air. When silver comes into contact with sulfur compounds, a chemical reaction occurs, leading to the formation of silver sulfide. This silver sulfide layer is what we commonly refer to as tarnish.
The presence of sulfur compounds in the air can vary depending on geographic location, industrial activities, and even household items like certain types of paints or rubber. Other factors that can contribute to tarnish include moisture, contact with certain foods (such as eggs and mayonnaise), and exposure to chemicals like those found in cleaning products.
Interestingly, tarnish forms more quickly in humid environments, which is why silver items in coastal areas or tropical climates may require more frequent cleaning. Similarly, silver jewelry that comes into frequent contact with lotions, perfumes, and sweat may tarnish more rapidly.
It’s important to note that not all silver items are equally prone to tarnish. Solid sterling silver, which contains 92.5% pure silver and 7.5% copper or other metals, is less susceptible to tarnishing than silver-plated items or jewelry. The copper or other metals in sterling silver act as a protective barrier, slowing down the tarnish process. On the other hand, silver-plated items have a thin layer of silver over another base metal (usually copper or brass), making them more vulnerable to tarnish.
Now that we understand the reasons behind silver tarnish, let’s explore how we can effectively clean silver and prevent tarnish using simple pantry ingredients.
Understanding the Types of Silver
When it comes to silver, there are various types to consider, each with its own characteristics and care requirements. Understanding the different types of silver will help you determine the best cleaning methods and storage techniques for your specific silver items.
Sterling Silver: Sterling silver is the most common type of silver used in jewelry and household items. It is composed of 92.5% pure silver and 7.5% other metals, typically copper. This alloy blend gives sterling silver its durability and resistance to tarnish. With proper care, sterling silver can retain its shine for years. When cleaning sterling silver, it’s important to avoid abrasive cleaning methods that can scratch the surface.
Silver-Plated Items: Silver-plated items are made of a base metal, such as copper or brass, with a thin layer of silver electroplated over the top. These items have a beautiful silver appearance but are more susceptible to tarnish compared to sterling silver. When cleaning silver-plated items, it’s important to be gentle to avoid damaging the delicate silver layer. Avoid abrasive cleaners and harsh polishing techniques.
Silver Jewelry: Silver jewelry, including necklaces, bracelets, and rings, come in various forms. These can be made from sterling silver, silver-plated materials, or even mixed metals with a silver finish. When cleaning silver jewelry, it’s essential to consider any gemstones or delicate components. Some gemstones may require specific cleaning methods to avoid damage, so always research the proper care techniques for your specific jewelry pieces.
Antique Silver: Antique silver refers to older silver items that may have a patina or aged appearance. This patina is often highly valued by collectors, as it adds character and authenticity to the piece. Cleaning antique silver requires a delicate approach to preserve the patina while removing any surface dirt. It’s best to consult with an antique silver expert or do thorough research before attempting to clean antique silver on your own.
By understanding the different types of silver, you can tailor your cleaning and storage methods to ensure the longevity and beauty of your silver items. Now, let’s gather the essential supplies needed to clean silver effectively using pantry ingredients.
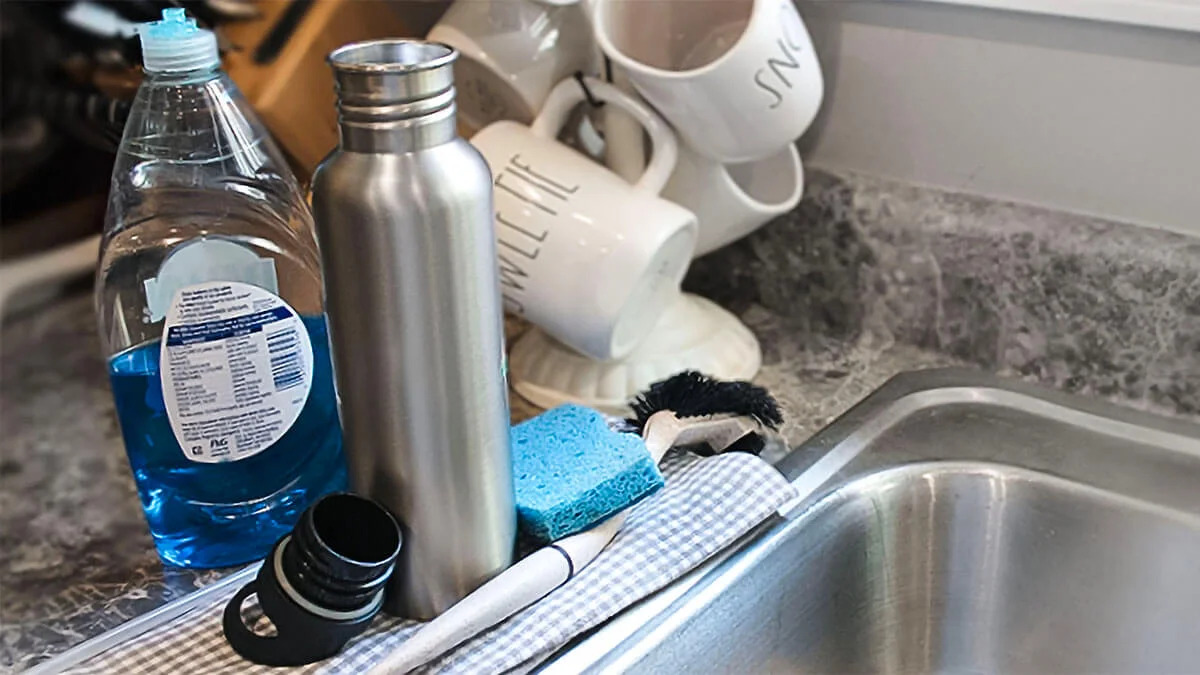
Essential Supplies Needed
Before you embark on the journey of cleaning your silver items using pantry ingredients, it’s important to gather the essential supplies to ensure effective and safe cleaning. Here are the items you’ll need:
- Baking Soda: Baking soda is an excellent natural cleaning agent that can help remove tarnish and restore the shine of your silver items. Its gentle abrasive properties make it suitable for cleaning without causing damage.
- Lemon Juice: Lemon juice contains natural acids that have the power to dissolve tarnish and bring back the luster of silver. The citric acid in lemon juice helps break down the tarnish, making it easier to clean.
- White Vinegar: White vinegar is another pantry staple that can be effective in removing tarnish. Its acidic properties can help dissolve tarnish buildup and restore the shine of your silver items.
- Toothpaste: Toothpaste, specifically non-gel and non-whitening varieties, can be used as a gentle silver cleaner. The mild abrasives in toothpaste can help remove tarnish while leaving a polished finish.
- Aluminum Foil: Aluminum foil is essential for some cleaning methods as it helps facilitate a chemical reaction that removes tarnish. It acts as a catalyst when combined with other ingredients like baking soda or salt.
- Soft Cloth or Microfiber Towel: A soft cloth or microfiber towel is necessary for gently wiping and polishing your silver items after cleaning. Avoid using abrasive materials that can scratch the surface.
- Clean Water: Clean water is crucial for rinsing your silver items after using cleaning solutions. Use lukewarm water to rinse off any residue and ensure that all cleaning agents are removed.
Having these essential supplies on hand will make the cleaning process more convenient and efficient. Now that you have everything you need, let’s explore a variety of homemade silver cleaning solutions using these pantry ingredients.
Homemade Silver Cleaning Solutions
When it comes to cleaning silver, you don’t need to rely on harsh chemicals or expensive commercial products. Pantry ingredients can be highly effective in removing tarnish and restoring the shine of your silver items. Here are some homemade silver cleaning solutions that you can easily make at home:
Read more: How To Store Silver From Tarnishing
Method 1: Baking Soda and Aluminum Foil
This method utilizes a simple chemical reaction between baking soda, aluminum foil, and hot water to quickly remove tarnish.
- Line a container or sink with aluminum foil.
- Add hot water to the container, enough to fully submerge your silver items.
- Add 1 tablespoon of baking soda for every cup of hot water.
- Place your silver items in the solution, ensuring they make contact with the aluminum foil.
- Let the silver soak for a few minutes, allowing the tarnish to transfer from the silver to the aluminum foil.
- Remove the silver items, rinse them with clean water, and gently dry them with a soft cloth.
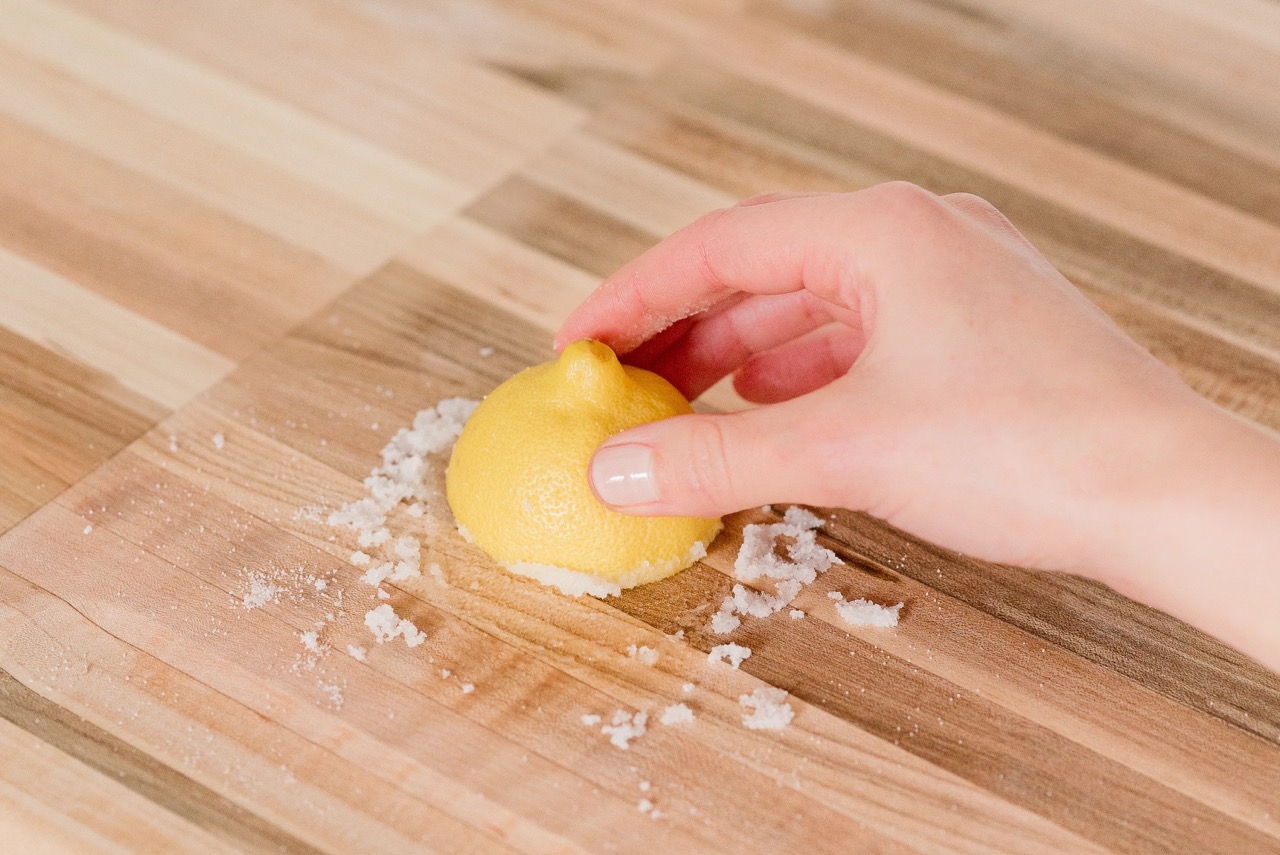
Method 2: Lemon Juice
Lemon juice contains natural acids that can effectively remove tarnish from silver items.
- Squeeze fresh lemon juice into a bowl.
- Dip a soft cloth or sponge into the lemon juice.
- Gently rub the tarnished areas of your silver items.
- Rinse the silver items with clean water and dry them with a soft cloth.
Method 3: White Vinegar and Baking Soda
This method combines the cleaning power of white vinegar and baking soda to remove tarnish.
- Mix equal parts white vinegar and water in a container.
- Add 2 tablespoons of baking soda for every cup of the vinegar-water solution.
- Submerge your silver items in the solution and let them soak for a few minutes.
- Gently scrub the tarnished areas with a soft cloth or sponge.
- Rinse the silver items with clean water and dry them thoroughly.
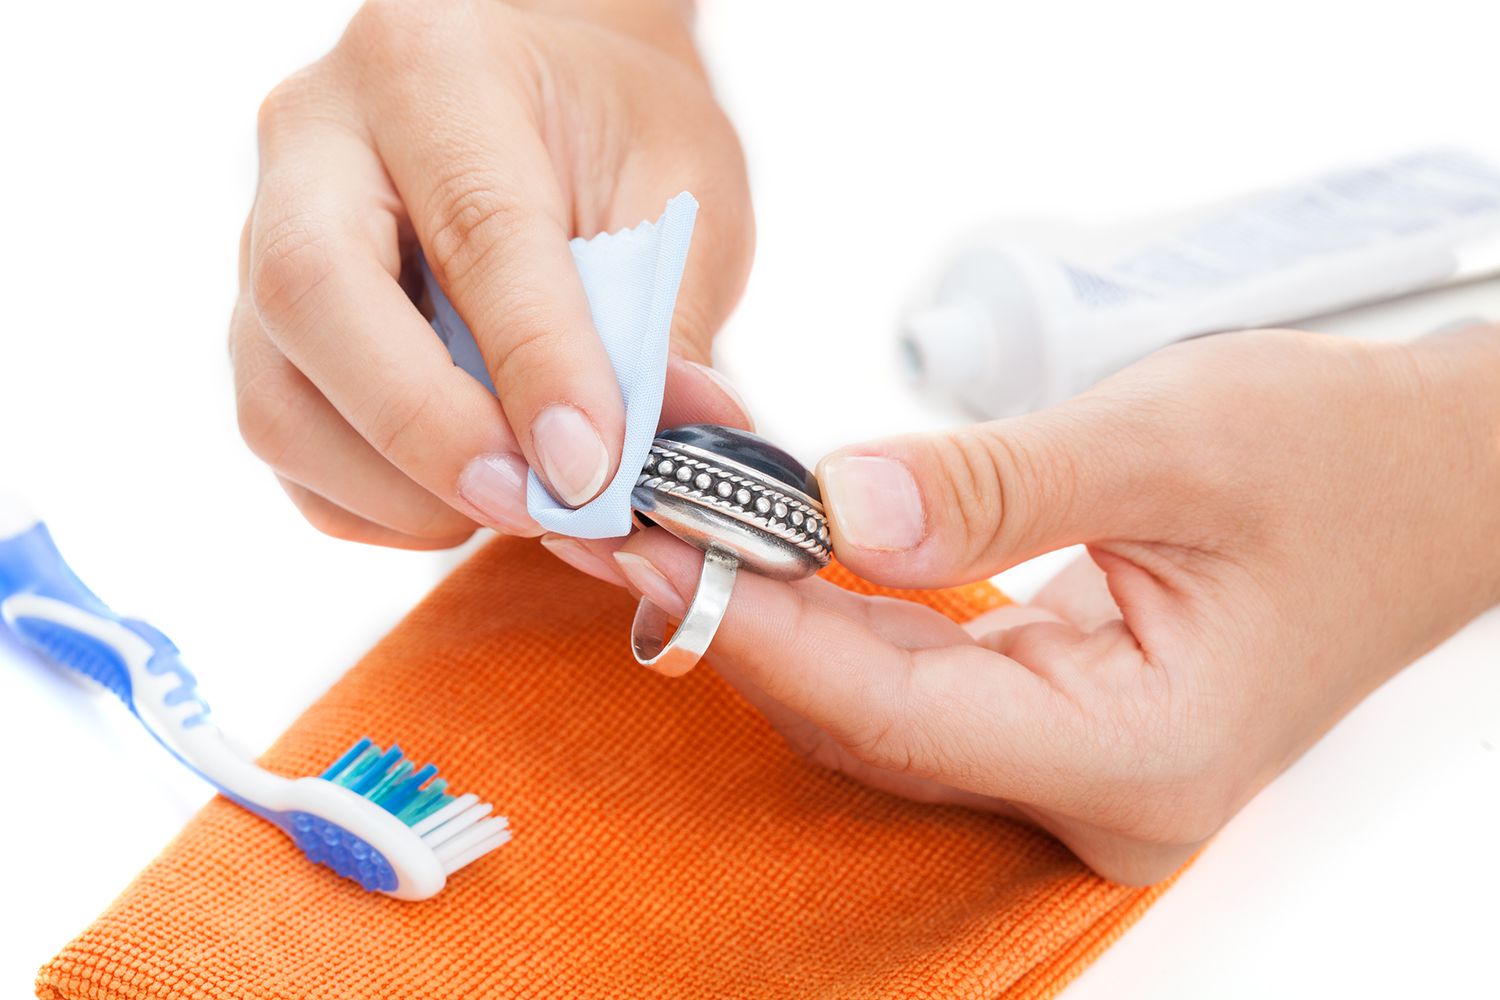
Method 4: Toothpaste
Toothpaste can be used as a gentle silver cleaner, especially for small items like jewelry.
- Apply a small amount of non-gel, non-whitening toothpaste to a soft cloth or toothbrush.
- Gently rub the tarnished areas of your silver items.
- Rinse the silver items with clean water and dry them with a soft cloth.
Remember to always test these cleaning solutions on a small, inconspicuous area of your silver items before applying them to the entire surface. Additionally, if your silver items have delicate gemstones or intricate designs, it’s best to consult a professional jeweler for appropriate cleaning methods.
Now that you know how to clean your silver items using pantry ingredients, let’s explore some techniques to prevent tarnish and keep your silver looking its best.
Method 1: Baking Soda and Aluminum Foil
If you’re looking for a quick and effective way to remove tarnish from your silver items, this method using baking soda and aluminum foil is a great option. The combination of these two ingredients creates a chemical reaction that helps restore the shine to your silver pieces. Follow these simple steps to bring back the luster of your silver:
- Line a container or sink with aluminum foil, making sure the shiny side is facing up. The foil acts as a catalyst to speed up the tarnish-removal process.
- Fill the container with enough hot water to fully submerge your silver items.
- Add 1 tablespoon of baking soda for every cup of hot water in the container. Stir the mixture gently to dissolve the baking soda.
- Place your tarnished silver items into the solution, ensuring they make direct contact with the aluminum foil. It’s essential to fully immerse your silver so that all tarnished areas come into contact with the reactive mixture.
- Let the silver soak for a few minutes, allowing the chemical reaction to take place. You may notice fizzing or bubbling, which indicates that the tarnish is being lifted off the silver surface.
- Using tongs or gloves, carefully remove the silver items from the solution.
- Rinse the silver thoroughly with clean water to remove any remaining baking soda residue. Make sure to use lukewarm water to avoid sudden temperature changes that could potentially damage the silver.
- Gently dry the silver items with a soft cloth, ensuring they are completely dry before storing them or using them again.
This method is especially effective for removing heavy tarnish from silver items like cutlery, trays, or decorative pieces. The combination of the baking soda and aluminum foil creates a chemical reaction that transfers the tarnish from the silver to the foil, leaving your items clean and shiny.
Remember, always handle your silver items with care, avoiding abrasive materials that could scratch or damage the surface. If your silver has intricate designs or delicate gemstones, it’s best to consult a professional for cleaning advice.
Now that you have learned how to remove tarnish using baking soda and aluminum foil, let’s explore another method using lemon juice.
Method 2: Lemon Juice
Lemon juice, with its natural acidic properties, can be a fantastic option for removing tarnish from your silver items. This method is not only effective but also provides a fresh, citrusy scent. Follow these simple steps to restore the shine to your silver using lemon juice:
- Squeeze fresh lemon juice into a bowl. Alternatively, you can use pre-packaged lemon juice, but fresh lemon juice is generally more effective.
- Dip a soft cloth or sponge into the lemon juice, making sure it is thoroughly saturated.
- Gently rub the tarnished areas of your silver items using the lemon juice-soaked cloth or sponge.
- Continue rubbing until you see the tarnish starting to lift off the silver. You may notice a slight yellow discoloration on the cloth, which is an indication that the tarnish is being removed.
- Rinse the silver items with clean water to remove any lemon juice residue, ensuring that all traces of the juice are gone.
- Gently dry the silver items with a soft cloth, making sure they are completely dry before storing or using them again.
It’s important to note that lemon juice is a mild acid and works best for mild to moderate tarnish. For heavily tarnished silver, you may need to use a different cleaning method or combine lemon juice with other ingredients, such as baking soda or white vinegar, for more effective cleaning.
This method is ideal for smaller silver items like jewelry, cutlery, or smaller decorative pieces. The acidity of the lemon juice helps break down the tarnish and restore the luster of the silver. Plus, the refreshing scent of lemons adds a pleasant touch to the cleaning process.
Remember to always handle your silver items gently and avoid using abrasive materials that can scratch or damage the surface. If your silver has delicate gemstones or intricate designs, consult a professional for appropriate cleaning methods.
Now that you have learned how to use lemon juice to remove tarnish, let’s move on to another effective method using white vinegar and baking soda.
Method 3: White Vinegar and Baking Soda
If you’re searching for a powerful homemade cleaning solution to remove tarnish from your silver items, look no further than white vinegar and baking soda. This dynamic duo creates a chemical reaction that helps dissolve tarnish and restore the shine of your silver. Follow these simple steps to effectively clean your silver using white vinegar and baking soda:
- Mix equal parts white vinegar and water in a container. The amount of solution you create will depend on the size of the silver items you’re cleaning.
- Add 2 tablespoons of baking soda for every cup of the vinegar-water solution. Stir the mixture gently until the baking soda is dissolved.
- Place your tarnished silver items into the solution, ensuring they are fully submerged. Allow the silver to soak for a few minutes, giving the vinegar and baking soda mixture time to work its magic.
- Using a soft cloth or sponge, gently scrub the tarnished areas of your silver items. The combination of the vinegar and baking soda will help loosen and remove the tarnish.
- Rinse the silver thoroughly with clean water, ensuring that all traces of the vinegar and baking soda mixture are removed.
- Dry the silver items thoroughly with a soft cloth or towel, making sure they are completely dry before storing or using them again.
This method is highly effective for removing tarnish from a variety of silver items, from jewelry to utensils and decorative pieces. The acid in the vinegar helps dissolve the tarnish, while the baking soda acts as a gentle abrasive to lift off any stubborn stains. The result is beautifully restored silver with a renewed shine.
Remember to always handle your silver items with care and use gentle scrubbing motions to avoid scratching the surface. If your silver has delicate gemstones or intricate designs, it’s best to consult a professional for appropriate cleaning methods specific to those components.
Now that you have successfully cleaned your silver using white vinegar and baking soda, let’s explore another method that utilizes toothpaste as an effective tarnish remover.
Method 4: Toothpaste
Did you know that toothpaste, typically used for oral hygiene, can also be an effective cleaner for removing tarnish from your silver items? Toothpaste contains mild abrasives that can help gently polish and remove tarnish, restoring the shine and luster of your silver. Follow these simple steps to use toothpaste as a tarnish remover:
- Choose a non-gel and non-whitening toothpaste, as these varieties typically contain mild abrasives that are best suited for cleaning.
- Squeeze a small amount of toothpaste onto a soft cloth or toothbrush.
- Gently rub the tarnished areas of your silver items using the toothpaste-coated cloth or toothbrush. Use circular motions or light strokes to remove the tarnish.
- Continue rubbing until the tarnish begins to lift off and the silver starts to regain its shine. Be patient and thorough during this process.
- Rinse the silver items with clean water to remove any remaining toothpaste residue, making sure to remove all traces of the toothpaste.
- Dry the silver thoroughly with a soft cloth, ensuring they are completely dry before storing or using them again.
It is important to note that toothpaste should only be used on solid silver items and not on silver-plated items, as the abrasives may damage the delicate silver plating. Additionally, avoid using toothpaste on silver jewelry with gemstones or intricate designs, as it may be difficult to remove the toothpaste from small crevices.
This method is particularly effective for smaller silver items like rings, earrings, or pendants, where intricate detailing can make tarnish harder to remove. The gentle abrasives in the toothpaste help lift off the tarnish, revealing the natural shine of your silver.
Remember to always use a gentle touch when using toothpaste, as excessive pressure or scrubbing can cause scratches on the silver surface. If you have any doubts or concerns, it’s best to seek professional advice for cleaning delicate or valuable silver items.
Now that you have successfully used toothpaste as a tarnish remover, you can continue to explore ways to prevent tarnish and keep your silver items looking their best.
Read more: How To Clean Silver-Plated Silverware
Preventing Tarnish on Silver
Prevention is key when it comes to keeping your silver items tarnish-free. By implementing a few simple practices, you can minimize the frequency and severity of tarnish, ensuring that your silver retains its shine for longer periods. Here are some effective ways to prevent tarnish on silver:
Proper Storage Techniques:
One of the most critical aspects of preventing tarnish is storing your silver items correctly. Here are a few tips:
- Keep your silver in a dry, cool environment to minimize exposure to moisture and humidity, which can accelerate tarnishing.
- Store each piece of silver in an airtight container or a ziplock bag to reduce contact with air and prevent tarnish formation.
- Add a piece of chalk or activated charcoal to the storage area to absorb any moisture or sulfur compounds that may be present.
- Avoid storing silver in direct sunlight or near sources of heat, as extreme temperatures can speed up the tarnishing process.
Using Anti-Tarnish Strips:
Anti-tarnish strips or tabs are small packets that release chemicals that absorb tarnish-causing elements in the air. They are an excellent preventative measure to keep your silver items tarnish-free.
- Place anti-tarnish strips or tabs in your silver storage containers or display cases.
- Ensure the strips are not in direct contact with the silver items to avoid potential chemical reactions.
- Replace the anti-tarnish strips or tabs every few months or as directed by the manufacturer, as they lose their effectiveness over time.
Cleaning and Polishing:
Regular cleaning and polishing can help remove any accumulated dirt or oils on your silver items, preventing tarnish from forming. Here are a few tips:
- Handle your silver pieces with clean, dry hands to prevent transferring oils or dirt onto the surface.
- After each use, gently wipe your silver items with a soft cloth to remove any residue or fingerprints.
- Periodically clean your silver using gentle cleaning methods, such as the ones mentioned earlier, to prevent tarnish buildup.
- Polish your silver items using a silver polishing cloth or a soft cloth with a silver polish specifically designed for your type of silver. Follow the manufacturer’s instructions for best results.
By following these preventive measures and incorporating regular cleaning and maintenance into your routine, you can significantly reduce the frequency and severity of tarnish on your silver items. Taking care of your silver will ensure that it continues to shine and adds beauty to your surroundings for years to come.
Now that you have learned how to prevent tarnish, it’s time to apply these tips and techniques to care for your precious silver jewelry.
Read more: How To Store Dry Foods To Prevent Pests
Proper Storage Techniques
Proper storage plays a crucial role in preventing tarnish and maintaining the shine and beauty of your silver items. Here are some essential techniques to ensure you store your silver correctly:
1. Keep it Clean and Dry:
Before storing your silver, make sure it is clean and completely dry. Any moisture or residue can contribute to tarnish formation. Use a soft cloth to gently wipe the silver and remove any fingerprints, oils, or dirt.
2. Use Anti-Tarnish Materials:
Consider using anti-tarnish materials to protect your silver items. For example:
- Avoid storing silver in plastic bags, as they can trap moisture. Instead, use acid-free tissue paper or a soft cloth to wrap each item individually.
- Place pieces of activated charcoal or anti-tarnish strips in the storage area. These materials help absorb moisture and neutralize tarnish-causing compounds in the air.
3. Separate and Protect Items:
To prevent scratching and damage, store each silver item separately or use dividers to keep them from touching. This is particularly important for delicate pieces like silver jewelry.
4. Choose a Suitable Storage Container:
Invest in a storage container specifically designed for silver items. Look for containers with anti-tarnish properties or those lined with tarnish-resistant fabric. Alternatively, you can use a wooden box lined with acid-free paper to store your silver.
5. Minimize Exposure to Air:
Avoid prolonged exposure to air, as it can accelerate tarnish formation. Keep your silver items in airtight containers or ziplock bags that seal out air. You may also consider using vacuum-sealed bags for long-term storage.
6. Avoid Extreme Conditions:
Store your silver in a cool and dry environment away from direct sunlight, heat sources, and fluctuations in temperature. Extreme heat or cold can damage the silver and expedite tarnish formation.
7. Take Precautions for Long-Term Storage:
If you plan to store your silver for an extended period, consider the following precautions:
- Regularly inspect your stored silver to ensure no tarnish is developing. If you notice any signs of tarnish, address it immediately.
- Consider adding a moisture absorber, such as silica gel packets, to avoid excess humidity in the storage area.
- If possible, periodically remove and handle your stored silver to prevent it from sitting untouched for too long.
By practicing proper storage techniques, you can significantly reduce the likelihood of tarnish and keep your silver items looking their best for years to come. Take the time to implement these measures, and you’ll be rewarded with beautifully preserved silver ready to shine on any occasion.
Using Anti-Tarnish Strips
Anti-tarnish strips are a valuable tool in preventing tarnish on your silver items. These small, highly effective packets contain chemicals that absorb tarnish-causing elements in the air, helping to preserve the shine and luster of your silver. Here’s how to use anti-tarnish strips to protect your silver:
1. Choose Quality Strips:
When purchasing anti-tarnish strips, look for high-quality ones specifically designed for silver storage. Quality strips are typically made from materials that release effective tarnish inhibitors.
2. Determine the Number of Strips:
The number of anti-tarnish strips you need depends on the size of your storage area and the amount of silver you have. As a general rule, use one strip per eight cubic feet of storage space.
3. Place the Strips Correctly:
Position the anti-tarnish strips strategically in your storage containers or display cases. Here are a few placement tips:
- Ensure the anti-tarnish strips are not in direct contact with your silver items, as direct contact may cause potential chemical reactions or discoloration.
- Position the strips evenly throughout the storage area to maximize their effectiveness.
- If you have multiple storage containers, place a strip in each container to provide tarnish protection for all your silver items.
4. Replace the Strips Regularly:
While anti-tarnish strips are effective, their tarnish-inhibiting properties will diminish over time. To ensure ongoing protection, replace the anti-tarnish strips every 6 to 12 months or as recommended by the manufacturer. This will ensure that your silver items continue to receive the maximum benefit.
5. Store in a Controlled Environment:
In addition to using anti-tarnish strips, store your silver in a controlled environment to minimize tarnish formation. Keep the storage area cool, dry, and away from extreme temperature fluctuations.
6. Perform Regular Inspections:
Periodically inspect your silver items to check for any signs of tarnish or discoloration. Regular inspections will allow you to address any issues promptly and take necessary measures, such as replacing the anti-tarnish strips if needed.
Using anti-tarnish strips is a simple and effective way to slow down tarnish formation on your silver. By incorporating these strips into your storage routine, you can maintain the beauty and shine of your silver items for longer periods.
Now that you know how to use anti-tarnish strips, let’s move on to exploring proper cleaning and care techniques for your silver jewelry.
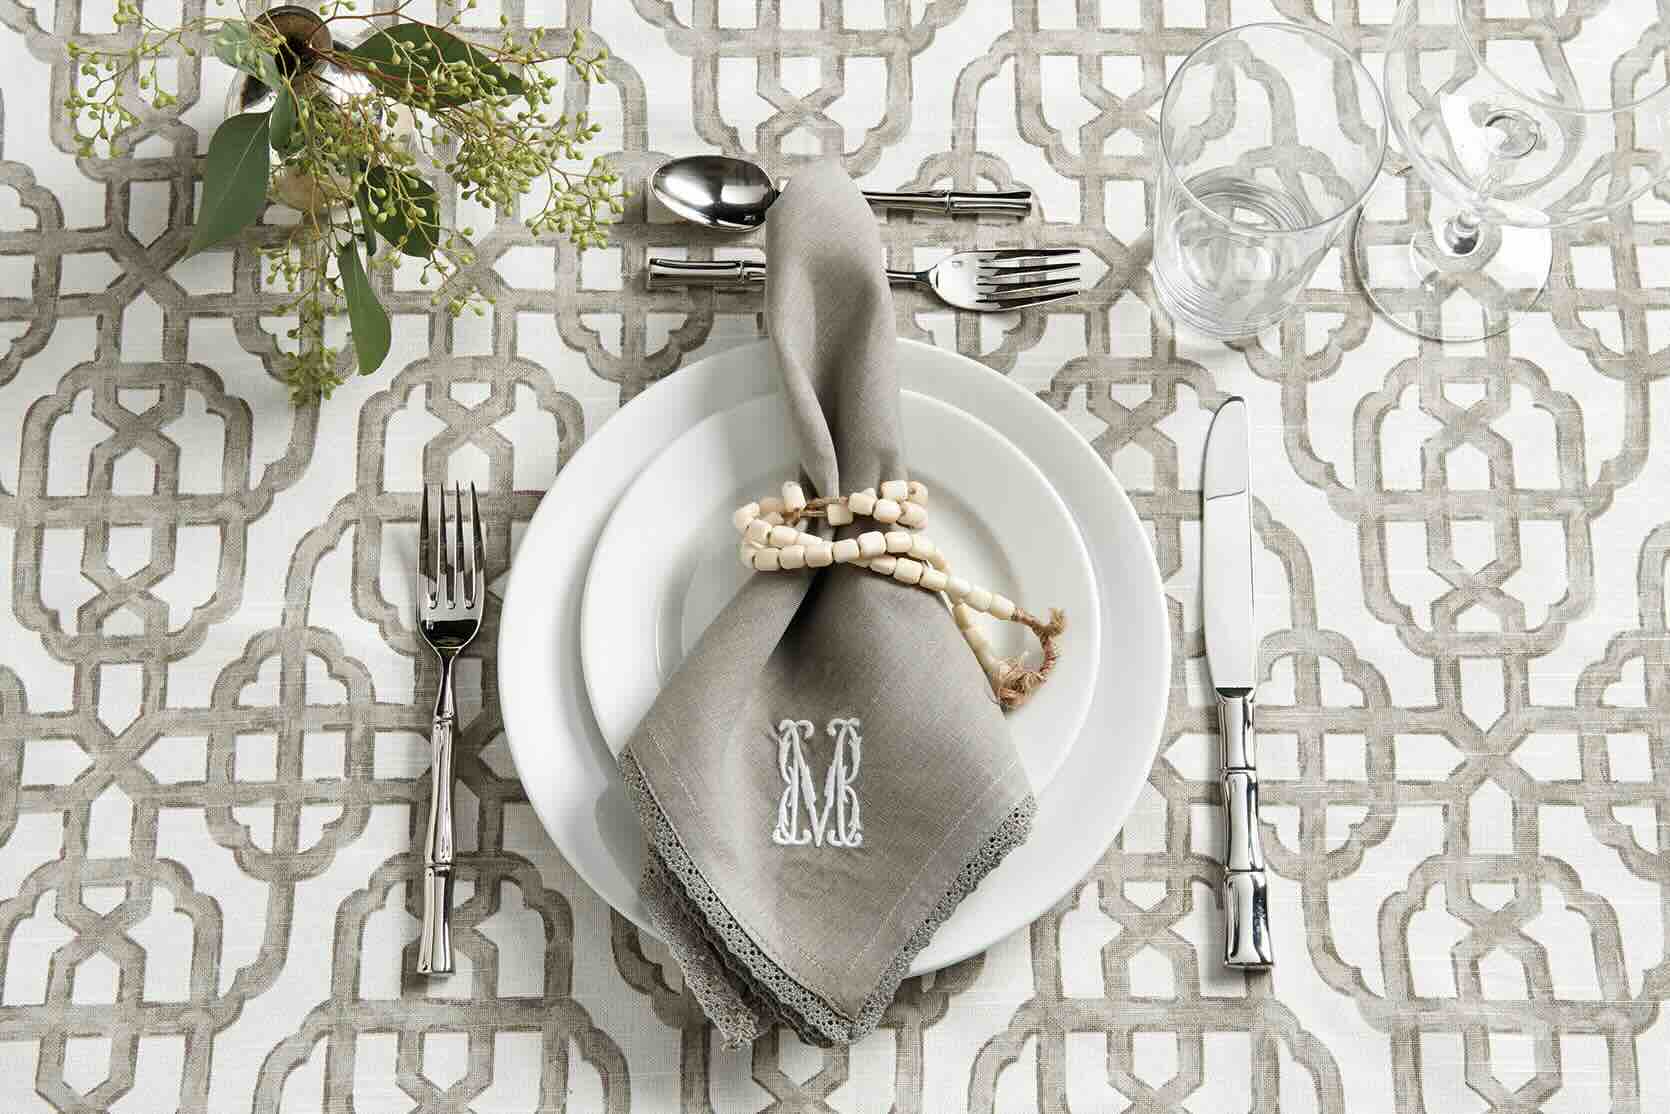
Cleaning and Caring for Silver Jewelry
Silver jewelry is not only beautiful but also versatile, making it a popular choice for accessorizing. To ensure that your silver jewelry remains stunning and tarnish-free, it’s important to follow proper cleaning and care techniques. Here are some tips to help you clean and care for your silver jewelry:
Read more: How To Clean A Very Old Silver Waffle Iron
1. Regular Cleaning:
Regular cleaning is key to preventing tarnish buildup on your silver jewelry. Follow these steps:
- Use a soft cloth or a silver polishing cloth specifically designed for jewelry to gently wipe your silver pieces after each wear. This will remove oils, dirt, and sweat that can contribute to tarnish.
- If your silver jewelry has intricate designs or gemstones, use a soft toothbrush or a cotton swab dipped in mild soapy water to clean hard-to-reach areas. Be gentle to avoid damaging delicate components.
- Rinse your silver jewelry under warm water to remove any soap residue. Be cautious not to drop your jewelry down the drain.
- Promote drying by patting your silver jewelry with a soft, lint-free cloth. Avoid rubbing vigorously, as this can cause scratching.
2. Avoid Harsh Chemicals:
Keep your silver jewelry away from harsh chemicals that can accelerate tarnish and damage the metal. Avoid wearing silver jewelry when coming into contact with the following substances:
- Perfume, hairspray, and other beauty products
- Chlorine, such as in swimming pools or hot tubs
- Household cleaning products
- Heavily chlorinated water or hard water
3. Proper Storage:
Store your silver jewelry in a clean and dry place to minimize exposure to moisture and air. Follow these storage techniques:
- Keep each piece of jewelry in a separate pouch or a ziplock bag to prevent scratching and tangling.
- Add an anti-tarnish strip to your jewelry storage to help absorb tarnish-causing elements in the air.
- Store your jewelry away from direct sunlight and extreme temperatures, as they can cause discoloration or damage.
4. Gentle Polishing:
If your silver jewelry develops tarnish, you can gently polish it to restore its shine. Here’s a simple polishing method:
- Apply a small amount of silver polish to a soft cloth or a polishing cloth.
- Gently rub the tarnished areas of your jewelry using gentle, circular motions.
- Rinse the jewelry under warm water to remove any residual polish.
- Dry and buff the jewelry with a soft cloth until it regains its shine.
It’s important to note that not all silver jewelry is created equal. Some pieces may have delicate gemstones or intricate designs that require specialized care. Consult the manufacturer’s guidelines or seek advice from a professional jeweler to ensure you’re using the appropriate cleaning methods for your specific jewelry.
By following these cleaning and care techniques, you can keep your silver jewelry looking its best and enjoy its beauty and brilliance for years to come.
Now that you’ve learned how to care for your silver jewelry, you’re equipped with the knowledge to keep it shining and tarnish-free.
Read more: How To Remove Tarnish From Silverware
Conclusion
Taking care of your silver items and preventing tarnish is essential to preserve their beauty and shine. By utilizing pantry ingredients and following the proper cleaning and storage techniques outlined in this article, you can effectively clean your silver and prevent tarnish from forming. Whether it’s silverware, jewelry, or decorative pieces, these kitchen storage ideas can help you maintain the luster and elegance of your silver collection.
Understanding why silver tarnishes and the different types of silver is crucial in determining the appropriate care and cleaning methods. By knowing the reasons behind tarnish formation, you can implement preventive measures to keep your silver items tarnish-free for longer periods.
The homemade silver cleaning solutions provided offer practical and easily accessible alternatives to commercial silver cleaners. From using baking soda and aluminum foil to lemon juice, white vinegar, and toothpaste, these pantry ingredients can safely and effectively remove tarnish, restoring the natural shine of your silver items.
Additionally, we explored proper storage techniques and the use of anti-tarnish strips to minimize tarnish formation. By storing silver in a controlled environment, using anti-tarnish materials, and following the recommended storage practices, you can significantly reduce the likelihood of tarnish and keep your silver items looking their best.
Furthermore, we discussed the cleaning and care of silver jewelry, emphasizing the importance of regular cleaning, avoiding harsh chemicals, proper storage, and gentle polishing techniques. By following these guidelines, you can ensure that your silver jewelry remains dazzling and tarnish-free.
In conclusion, caring for your silver items is an investment in maintaining their beauty and longevity. By implementing the tips and techniques outlined in this article, you can enjoy the elegance of your silver collection for years to come.
So, keep your silver shining brightly, embrace the kitchen storage ideas, and let your silver items add a touch of elegance to your life.
Frequently Asked Questions about How To Clean Silver And Prevent Tarnish Using Pantry Ingredients
Was this page helpful?
At Storables.com, we guarantee accurate and reliable information. Our content, validated by Expert Board Contributors, is crafted following stringent Editorial Policies. We're committed to providing you with well-researched, expert-backed insights for all your informational needs.
0 thoughts on “How To Clean Silver And Prevent Tarnish Using Pantry Ingredients”