Home>Articles>How To Restore A Griswold Waffle Iron And Its Alaska Spring Handle

Articles
How To Restore A Griswold Waffle Iron And Its Alaska Spring Handle
Modified: August 27, 2024
Learn how to restore a Griswold waffle iron with the Alaska spring handle. Step-by-step articles guide you through the process
(Many of the links in this article redirect to a specific reviewed product. Your purchase of these products through affiliate links helps to generate commission for Storables.com, at no extra cost. Learn more)
Introduction
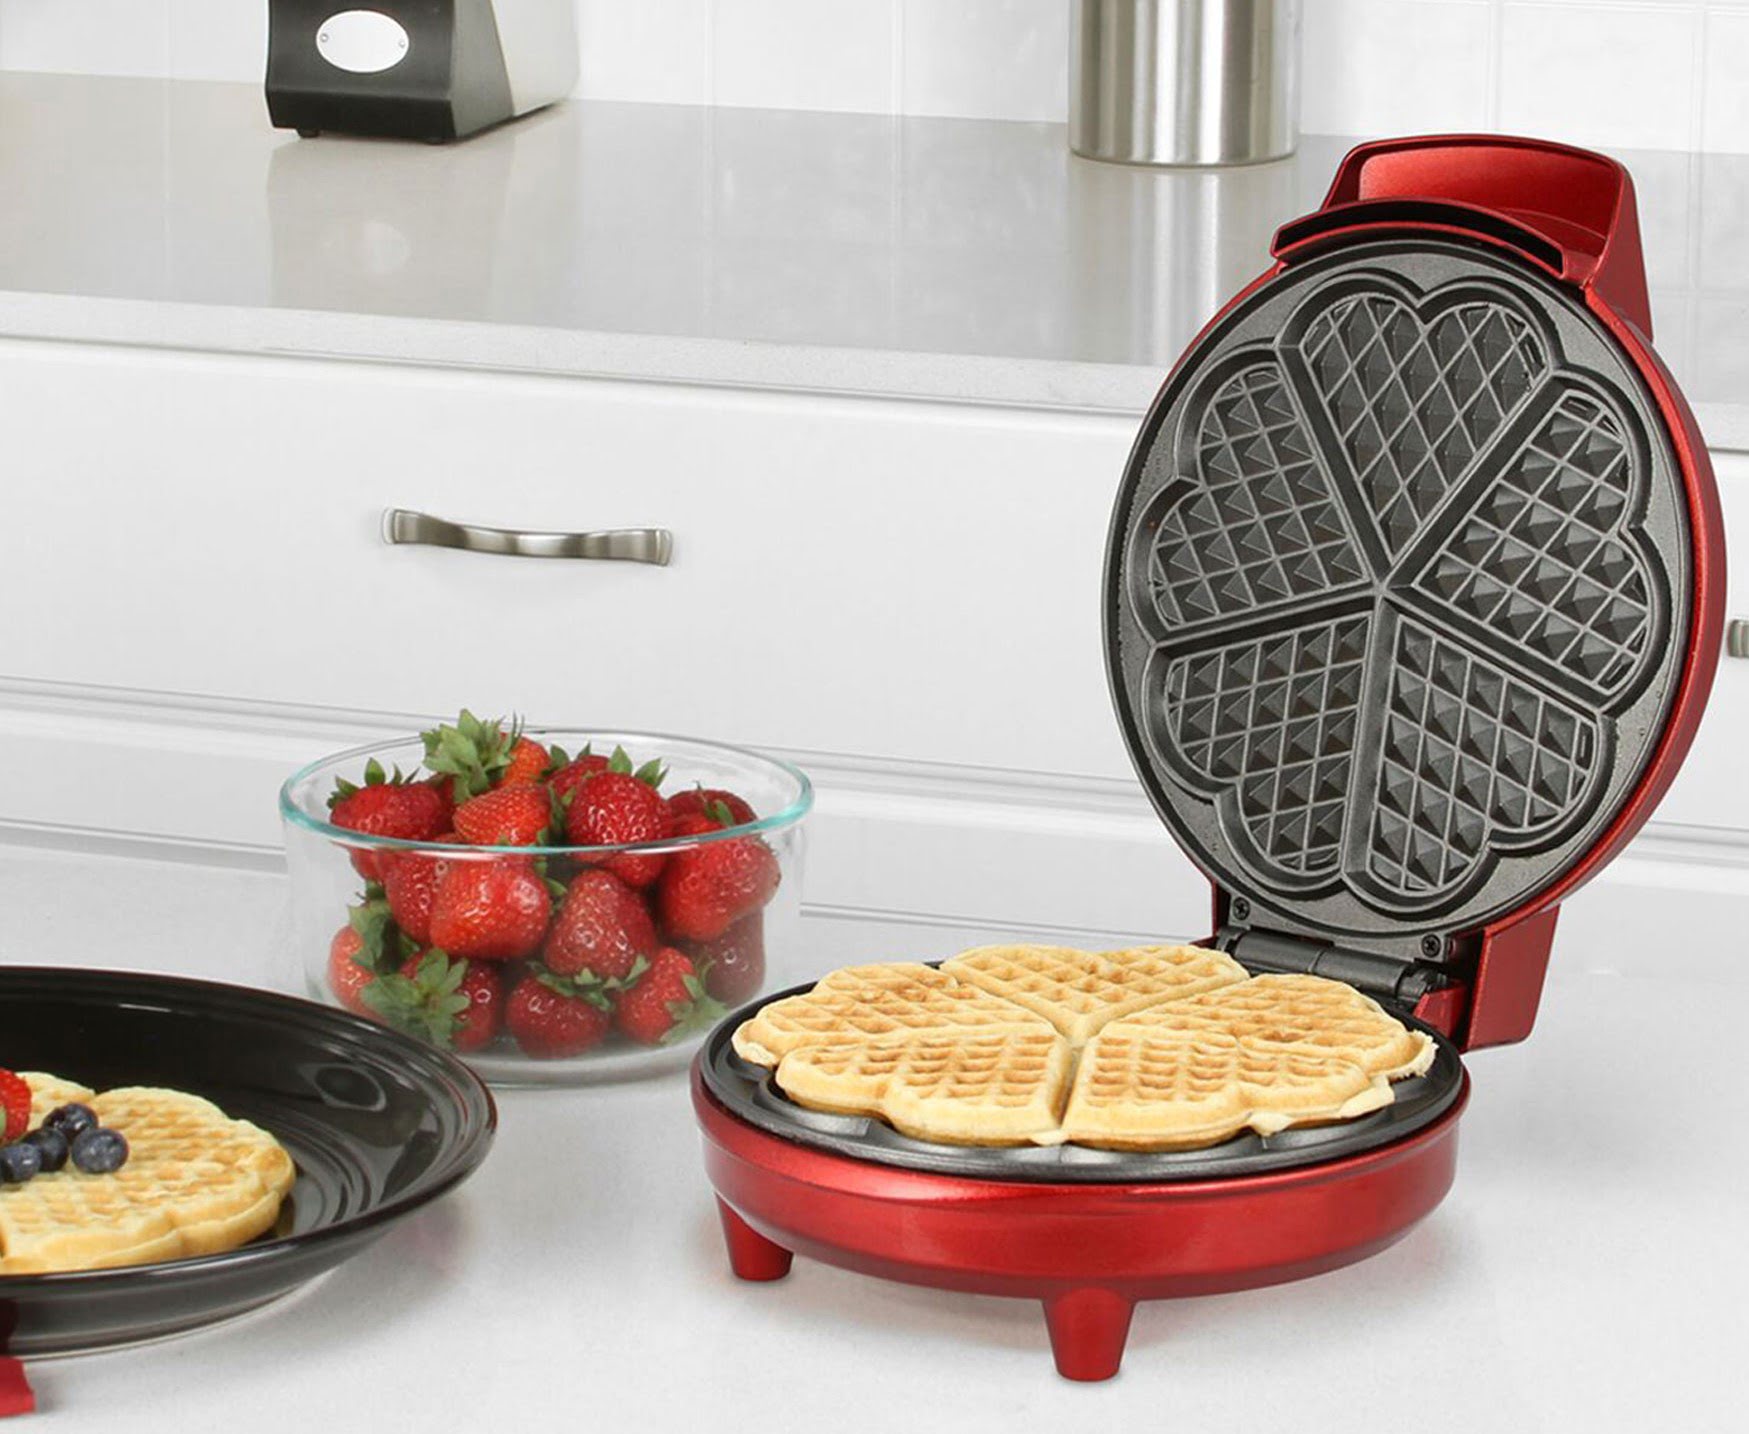
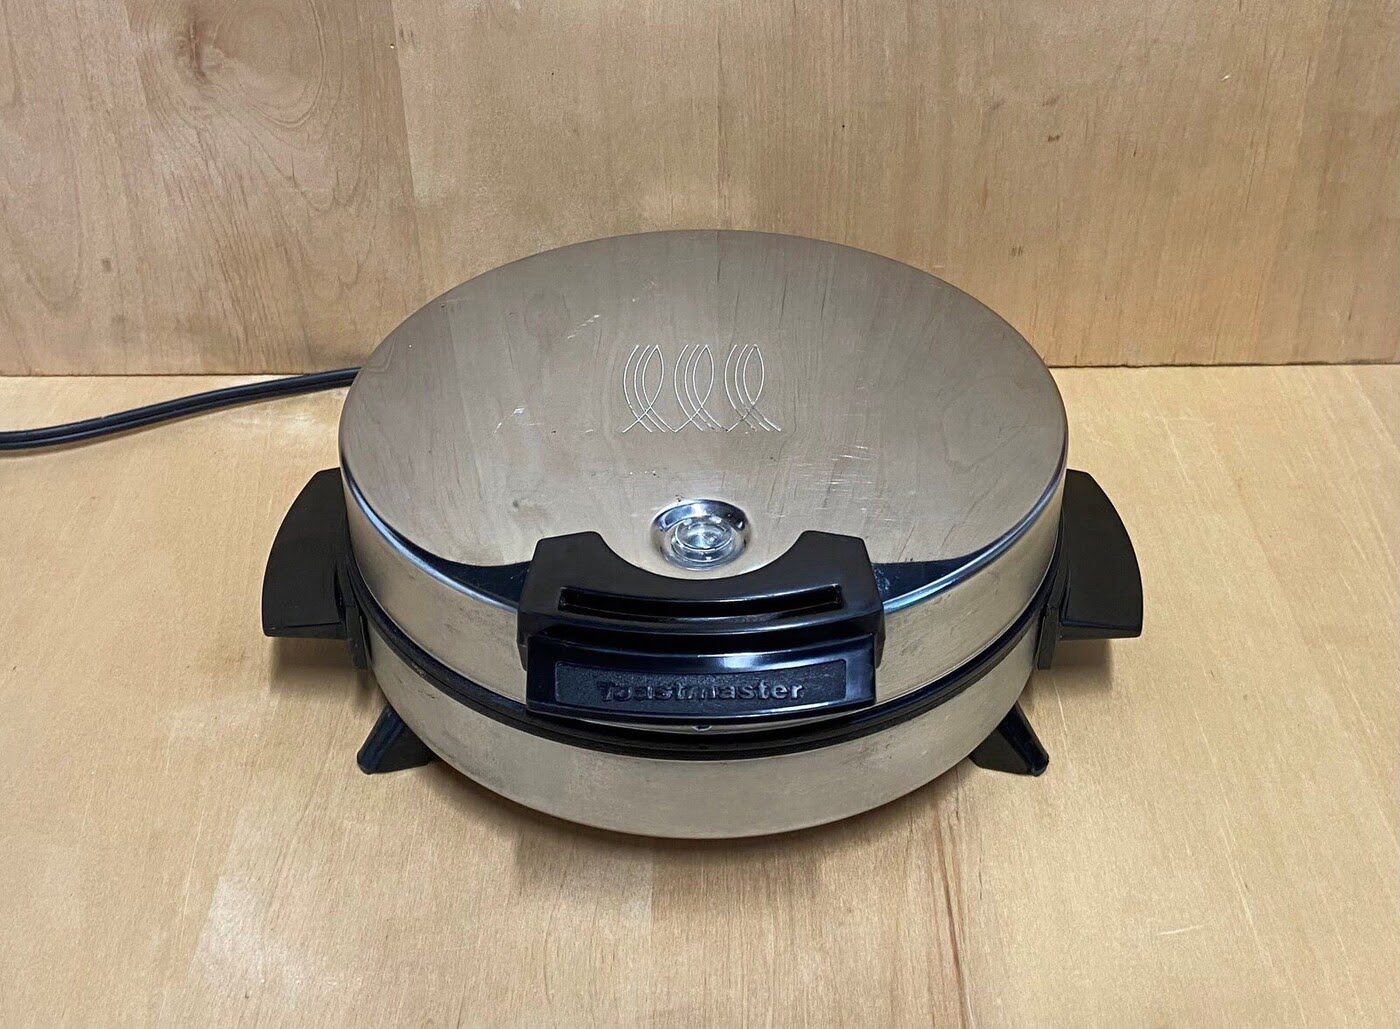
Welcome to this comprehensive guide on how to restore the Griswold Waffle Iron Alaska Spring Handle. The Griswold waffle iron is a classic piece of kitchenware that has been cherished by many for its ability to create delicious, crispy waffles. Over time, however, the handle may become worn, rusted, or damaged, compromising the functionality and aesthetic appeal of this beloved appliance.
This article will walk you through the step-by-step process of disassembling the waffle iron, cleaning the individual parts, restoring the handle, and reassembling the waffle iron to its original glory. With a few simple tools and a little bit of patience, you can bring your Griswold Waffle Iron Alaska Spring Handle back to life, ready to create perfect waffles for years to come.
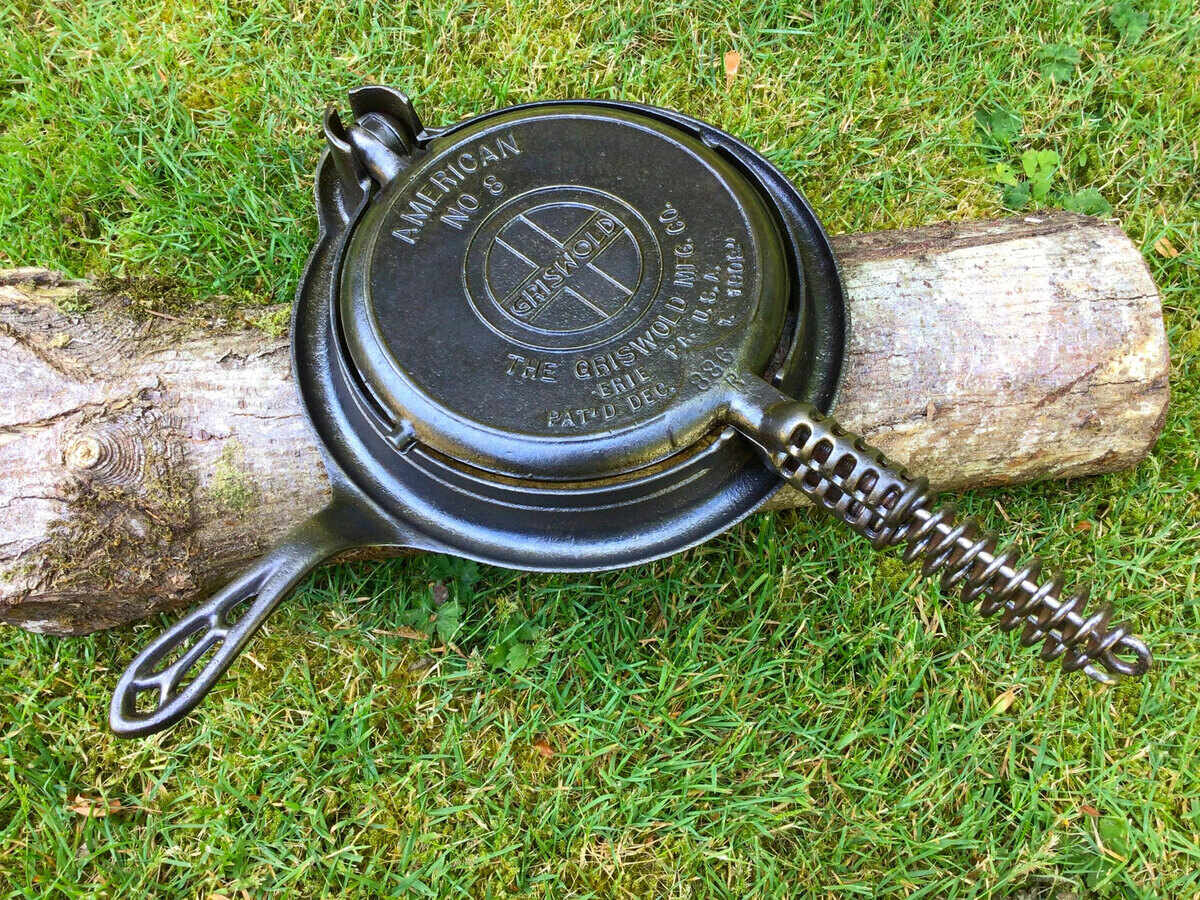
Before we dive into the restoration process, it’s important to understand the significance of the Griswold waffle iron and its Alaska Spring Handle. Griswold Manufacturing was a prominent American manufacturer of cast iron cookware from the late 1800s until the mid-20th century. Their waffle irons were highly regarded for their exceptional craftsmanship and ability to produce evenly cooked waffles.
The Alaska Spring Handle, specifically used in some models of the Griswold waffle iron, added an extra layer of functionality and convenience. This unique handle design allowed users to easily open and close the waffle iron, ensuring evenly distributed heat and perfectly cooked waffles.
Now that you have a basic understanding of the Griswold Waffle Iron Alaska Spring Handle, let’s gather the materials and tools needed for the restoration process.
Key Takeaways:
- Revive your beloved Griswold Waffle Iron Alaska Spring Handle with simple tools and patience, ensuring years of perfect waffle-making ahead.
- Gain valuable knowledge and skills in vintage kitchenware maintenance while restoring your Griswold Waffle Iron, ready to create crispy waffles for years to come.
Understanding the Griswold Waffle Iron Alaska Spring Handle
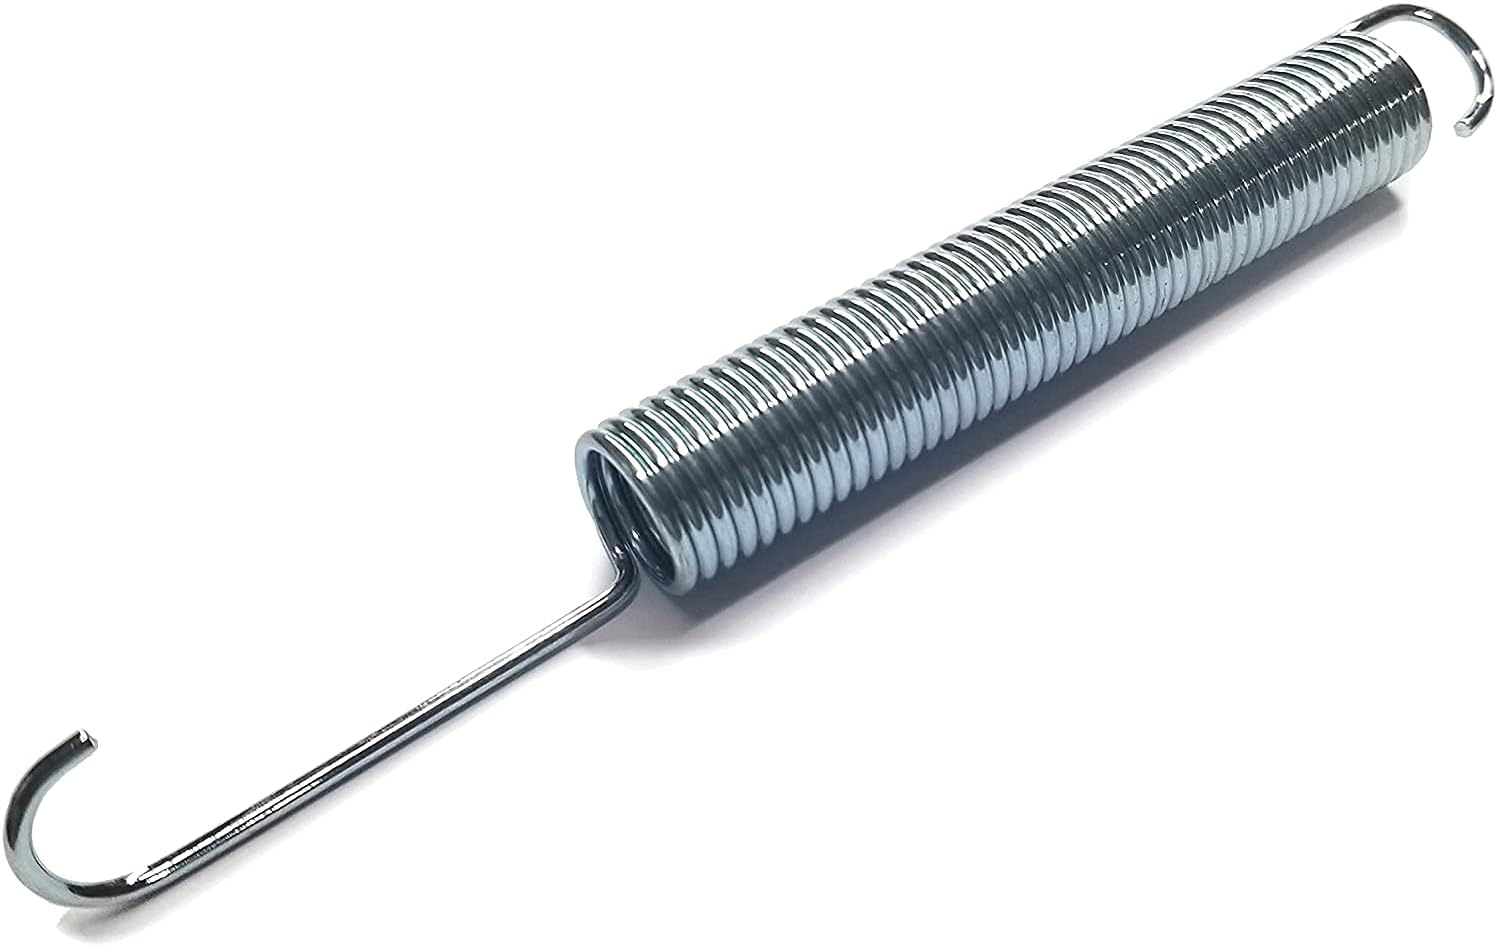
The Griswold Waffle Iron Alaska Spring Handle is a distinctive feature of certain models of the Griswold waffle iron. This handle design not only provides a comfortable grip but also serves an important function in the cooking process. The Alaska Spring Handle consists of a sturdy metal frame with a spring mechanism that allows for easy opening and closing of the waffle iron.
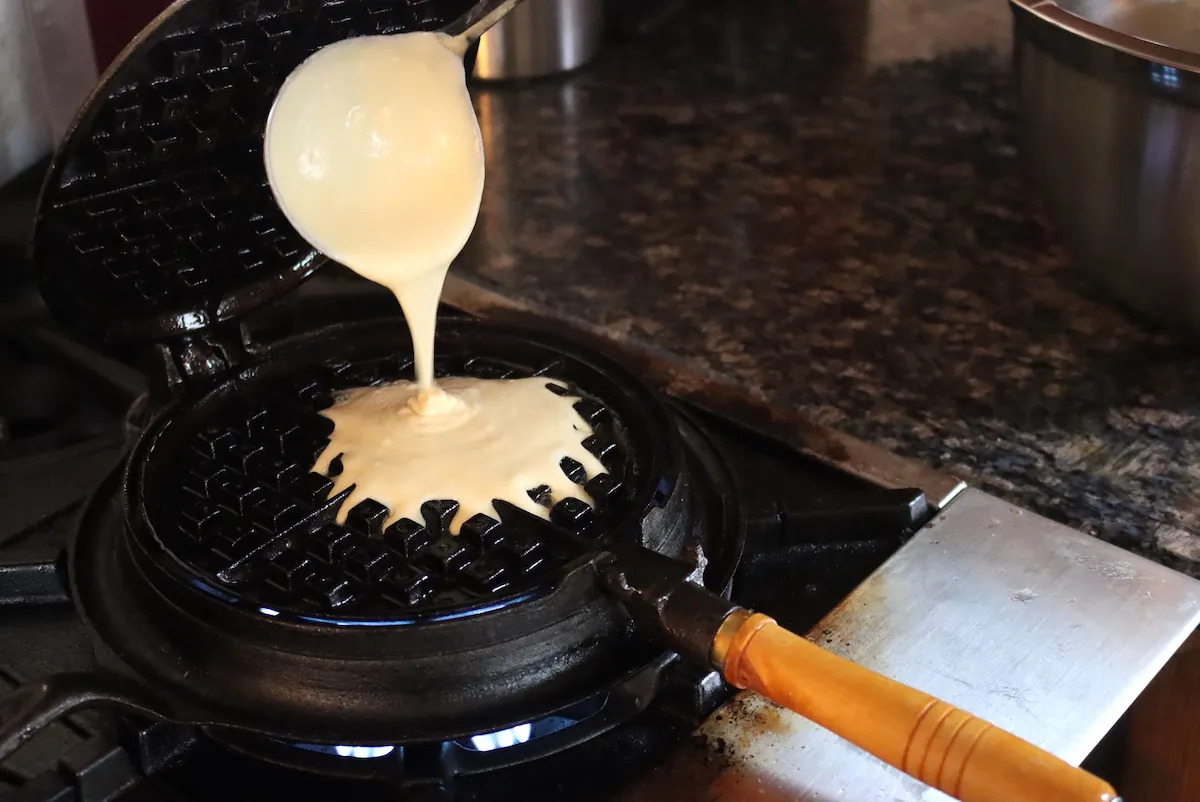
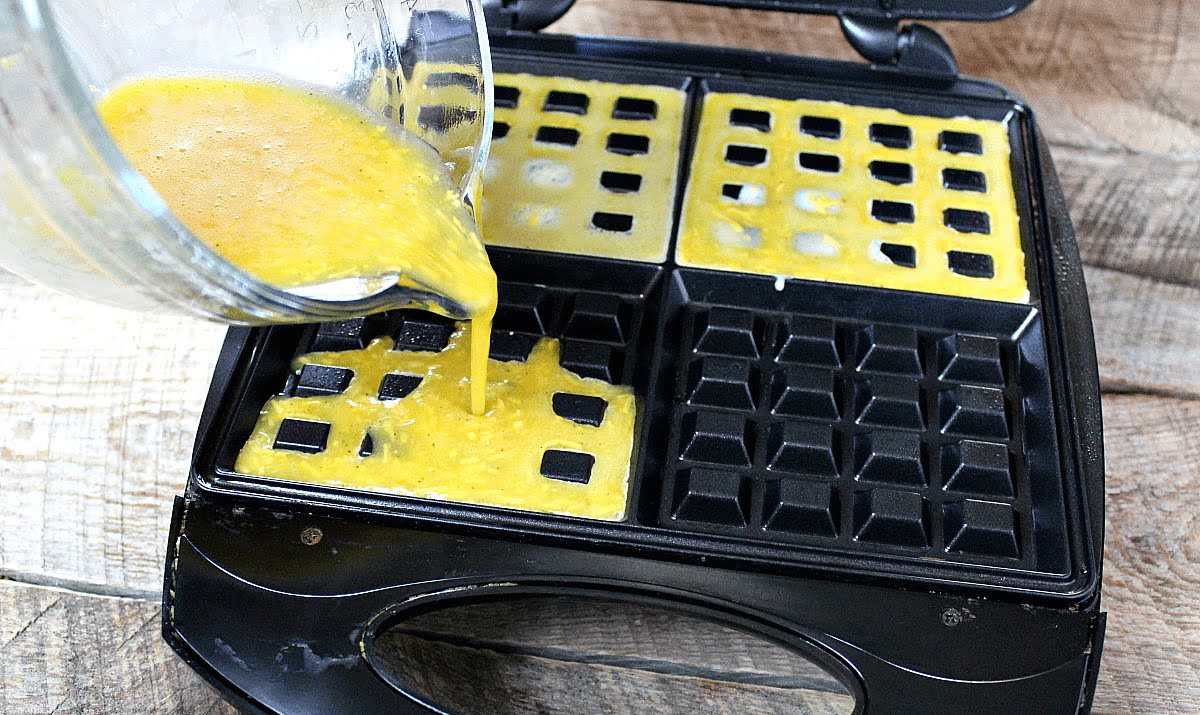
When the handle is pulled up, the top and bottom plates of the waffle iron separate, creating space for the batter to be poured in. Once the batter is added, the handle is pushed down, and the plates come back together, ensuring that the batter is evenly distributed and cooked to perfection.
The spring mechanism in the Alaska Spring Handle plays a crucial role in maintaining consistent pressure between the plates. This ensures that the waffle cooks evenly on both sides, resulting in a crispy exterior and a fluffy interior.
Over time, the Alaska Spring Handle may become worn, rusted, or damaged due to regular use and exposure to heat and moisture. This can affect the functionality of the handle and compromise the overall performance of the waffle iron. However, with some simple restoration techniques, you can bring the handle back to its original condition and enjoy perfectly cooked waffles once again.
Restoring the Griswold Waffle Iron Alaska Spring Handle involves disassembling the waffle iron, cleaning the individual parts, restoring the handle, and reassembling the appliance. In the next sections, we will discuss the materials and tools needed for the restoration process, as well as the step-by-step instructions to guide you through each stage. So let’s gather our supplies and get ready to restore your Griswold Waffle Iron Alaska Spring Handle!
Materials and Tools Needed
Before you begin the restoration process for your Griswold Waffle Iron Alaska Spring Handle, it’s important to gather all the necessary materials and tools. Here’s a list of what you’ll need:
- Phillips-head screwdriver
- Flathead screwdriver
- Needle-nose pliers
- Scrub brush
- Mild dish soap
- Warm water
- White vinegar
- Steel wool or fine-grit sandpaper
- High-temperature paint (optional, if you want to repaint the handle)
The screwdrivers and needle-nose pliers will be used to disassemble and reassemble the waffle iron. The scrub brush, mild dish soap, warm water, and white vinegar are essential for cleaning the individual parts of the waffle iron, including the handle, plates, and exterior. Steel wool or fine-grit sandpaper will help remove any rust or stubborn residue.
If you decide to refinish the handle or remove any existing paint, you may also need high-temperature paint. Be sure to choose a paint that is suitable for use on metal surfaces and can withstand high heat.
It’s important to note that while the materials listed above will cover the basics of restoring the Griswold Waffle Iron Alaska Spring Handle, you may find additional tools or supplies helpful depending on the specific condition of your waffle iron. It’s always a good idea to assess the state of your appliance and adjust your restoration process accordingly.
Now that you have gathered all the necessary materials and tools, we can move on to the step-by-step instructions for restoring your Griswold Waffle Iron Alaska Spring Handle. Stay tuned for the next section where we will begin the disassembly process.
Step 1: Disassembling the Waffle Iron
Before starting the restoration process, it’s important to disassemble the Griswold Waffle Iron to access its individual parts. This will allow for thorough cleaning and restoration of the handle. Follow these steps to disassemble the waffle iron:
- Ensure that the waffle iron is completely cool to avoid any risk of burns.
- Open the waffle iron and locate the screws that hold the top and bottom plates together. These screws are usually located on the underside of the waffle iron.
- Using a Phillips-head screwdriver, carefully remove the screws one by one. Keep them in a safe place to avoid misplacing them.
- With the screws removed, gently separate the top and bottom plates of the waffle iron. Be cautious of any residual heat that may still be present.
- Once the plates are separated, locate the Alaska Spring Handle assembly. This includes the handle, hinge mechanism, and any additional parts associated with the handle.
- Using a flathead screwdriver or needle-nose pliers, carefully detach the handle from the hinge mechanism. Pay attention to any clips, pins, or hooks that may be securing the handle in place.
By following these steps, you will successfully disassemble the Griswold Waffle Iron and have access to its individual parts for cleaning and restoration. Remember to handle the waffle iron parts with care to avoid any damage or injury.
Now that the waffle iron is disassembled, we can move on to the next step – cleaning the individual parts to remove dirt, rust, and grime. Stay tuned for the next section, where we’ll discuss the cleaning process in detail.
Step 2: Cleaning the Waffle Iron Parts
Once you have disassembled the Griswold Waffle Iron, it’s time to clean the individual parts to remove any dirt, rust, or residue that may have accumulated over time. Cleaning the waffle iron parts thoroughly will ensure optimum performance and longevity. Here’s how to clean each component:
Handle:
- Fill a sink or basin with warm water and add a few drops of mild dish soap.
- Submerge the handle in the soapy water and use a scrub brush to gently scrub away any dirt or grime. Pay extra attention to any crevices or hard-to-reach areas.
- Rinse the handle thoroughly under running water to remove any soap residue.
- If the handle has rust spots or stubborn stains, dampen a piece of steel wool or fine-grit sandpaper and gently rub the affected areas until the rust or stains are removed.
- Once the handle is clean, dry it thoroughly with a clean cloth or allow it to air dry completely.
Plates:
- Fill the sink or basin with warm water and add a few drops of mild dish soap.
- Submerge the plates in the soapy water and use a scrub brush or sponge to remove any batter or residue. Ensure that both sides of the plates are cleaned thoroughly.
- If there are any stubborn stains or residue, create a paste using baking soda and water. Apply the paste to the affected areas and let it sit for a few minutes. Use a scrub brush or sponge to scrub the stains away.
- Rinse the plates thoroughly under running water to remove any soap or baking soda residue.
- Dry the plates with a clean cloth or allow them to air dry completely.
Exterior:
- Dampen a clean cloth or sponge with a mixture of warm water and mild dish soap.
- Gently wipe down the exterior of the waffle iron, paying attention to any spots or stains.
- For any stubborn stains or residue, dampen a cloth with white vinegar and gently rub the affected areas.
- Rinse the exterior of the waffle iron with clean water to remove any soap or vinegar residue.
- Dry the exterior with a clean cloth.
By following these cleaning steps, you will ensure that all parts of the Griswold Waffle Iron are free from dirt, rust, and residue. This will help improve the overall functionality and appearance of the waffle iron. In the next section, we will move on to restoring the handle to its original condition. Stay tuned!
To restore a Griswold Waffle Iron Alaska Spring Handle, start by cleaning off any rust with a wire brush or steel wool. Then, apply a thin coat of vegetable oil and bake it in the oven at 350°F for an hour to season the iron.
Step 3: Restoring the Handle
Now that the Griswold Waffle Iron parts are clean and free from dirt and rust, it’s time to focus on restoring the Alaska Spring Handle to its original condition. This step will help improve the functionality and appearance of the handle. Follow these steps to restore the handle:
- If the handle has any existing paint or coating that you want to remove, use a paint stripper or sandpaper to strip off the old paint. This will create a clean surface for the restoration process.
- If there are any rusty patches on the handle, you can use steel wool or fine-grit sandpaper to gently scrub the rust away. Be careful not to apply too much pressure to avoid damaging the handle.
- After removing any paint or rust, clean the handle once again using mild dish soap and warm water. This will ensure that any residue from the restoration process is removed.
- If you wish to repaint the handle, choose a high-temperature paint that is suitable for use on metal surfaces. Apply a thin and even coat of paint to the handle using a brush or spray, following the manufacturer’s instructions.
- Allow the paint to dry completely. This may take a few hours, so be patient and avoid using the handle until the paint is fully cured.
If you prefer to keep the handle in its original condition without repainting, you can skip the painting step and focus on preserving its natural beauty. Apply a thin coat of oil or wax to protect the handle from rust and moisture. Be sure to follow the instructions provided with the oil or wax product.
Once you have restored the handle, it’s time to move on to the next step – reassembling the Griswold Waffle Iron. Stay tuned for the next section, where we will guide you through the reassembly process.
Step 4: Reassembling the Waffle Iron
With the Griswold Waffle Iron parts clean and the handle fully restored, it’s time to put everything back together. Reassembling the waffle iron is an important step to ensure proper functioning and to enjoy delicious waffles once again. Follow these steps to reassemble the waffle iron:
- Begin by locating the hinge mechanism that holds the handle in place on one side of the waffle iron.
- Line up the holes on the handle with the corresponding holes on the hinge mechanism.
- Insert any clips, pins, or hooks that secure the handle to the hinge. Make sure they are properly aligned and securely fastened.
- Once the handle is attached, carefully position the top plate of the waffle iron above the bottom plate, aligning the screw holes.
- Using the Phillips-head screwdriver, insert the screws and tighten them until they are snug, being careful not to over-tighten.
Ensure that all screws are in place and secure, as this will prevent any loose parts during the cooking process. Double-check that the handle operates smoothly, allowing for easy opening and closing of the waffle iron.
With the waffle iron successfully reassembled, we’re almost ready to start cooking. However, there’s one more crucial step to ensure everything is in working order – testing and fine-tuning the waffle iron.
Proceed to the next section to learn how to test and fine-tune your Griswold Waffle Iron to achieve the perfect waffles. Stay tuned!
Step 5: Testing and Fine-Tuning
Congratulations! You have successfully restored and reassembled your Griswold Waffle Iron. Now it’s time to test and fine-tune its performance to ensure you achieve perfectly cooked waffles every time. Follow these steps to test and fine-tune your waffle iron:
- Preheat your waffle iron according to the manufacturer’s instructions. Make sure it reaches the desired temperature before proceeding.
- Prepare your waffle batter according to your favorite recipe or the instructions provided with your waffle mix.
- Once the waffle iron is preheated, open it and carefully pour the prepared batter onto the center of each plate, taking care not to overfill.
- Close the waffle iron and latch it securely, making sure the handle locks in place.
- Allow the waffle to cook for the recommended time, keeping an eye on its progress. The cooking time may vary depending on your recipe and personal preference.
- Once the waffle is cooked to your desired level of crispness, carefully open the waffle iron and remove the cooked waffle using a heat-resistant spatula.
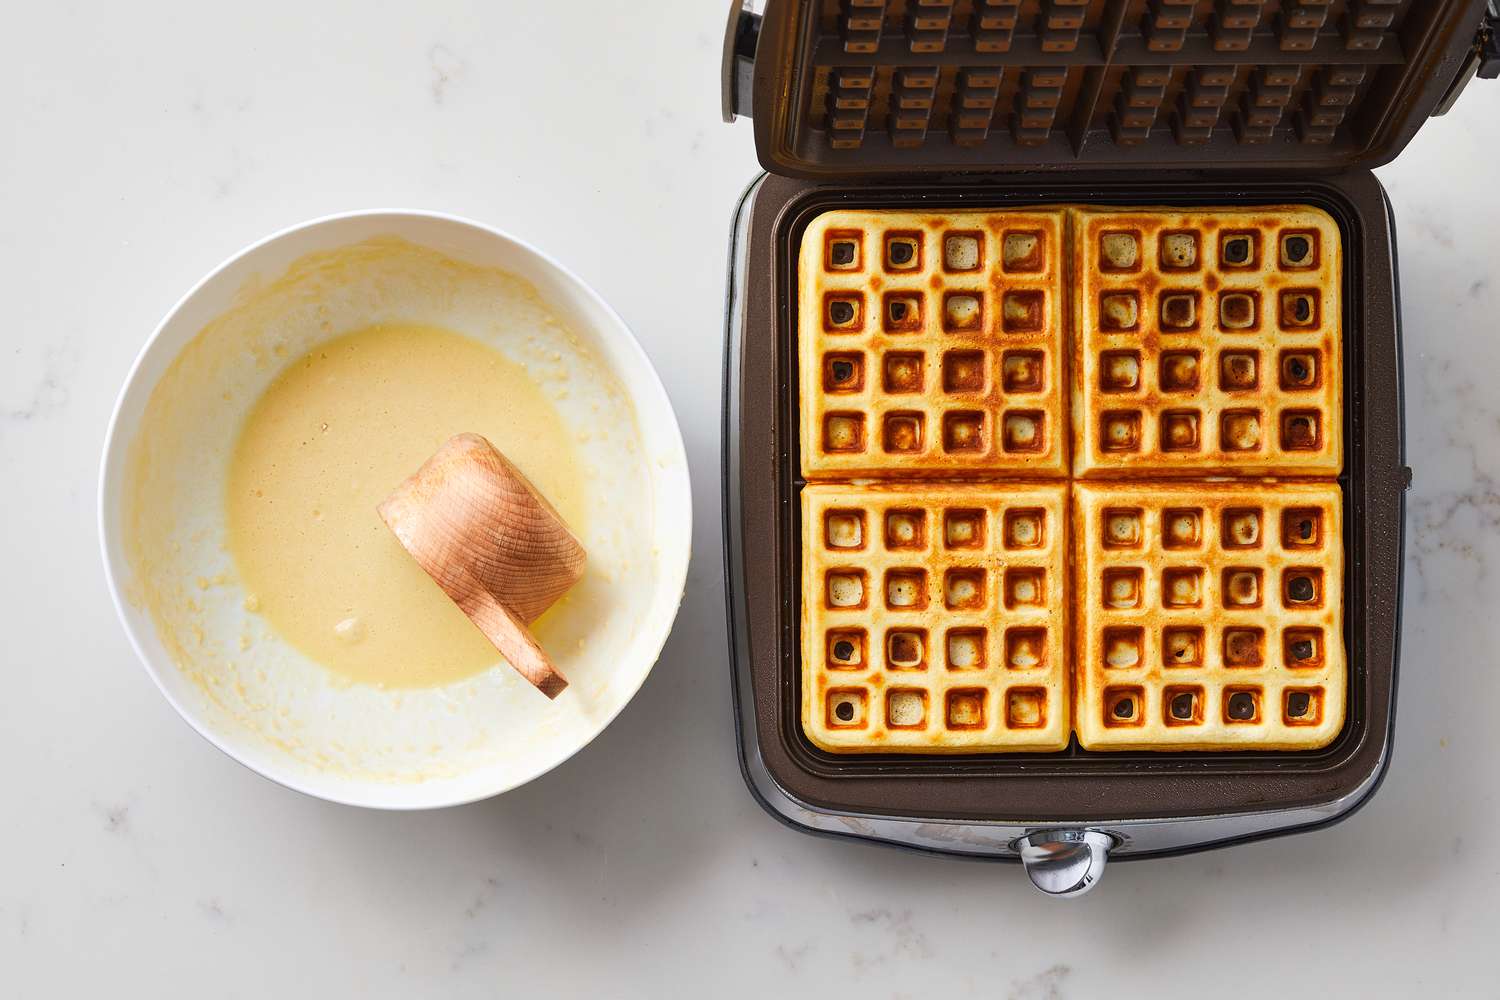
- Evaluate the result. Check if the waffle is evenly cooked, with a golden brown exterior and a fluffy interior. Pay attention to any areas that may be unevenly cooked or sticking to the plates.
- If needed, adjust the cooking time or temperature according to your preferences. You can increase or decrease the cooking time, or adjust the heat setting if your waffle iron allows it.
- Repeat the testing and fine-tuning process as needed until you achieve the perfect waffle results.
Remember to follow any specific guidelines provided by the manufacturer for your particular model of the waffle iron. Fine-tuning the cooking process may require some experimentation to achieve the desired results.
Now that you have tested and fine-tuned your Griswold Waffle Iron, you are ready to enjoy delicious, homemade waffles with friends and family. Remember to properly maintain and clean your waffle iron after each use to keep it in optimal condition.
Thank you for following this step-by-step guide on how to restore the Griswold Waffle Iron Alaska Spring Handle. We hope this article has been helpful in reviving your beloved kitchen appliance. Happy waffle-making!
Conclusion
Congratulations on successfully restoring your Griswold Waffle Iron Alaska Spring Handle! By following the step-by-step guide in this article, you have breathed new life into your cherished kitchen appliance. You have also learned about the significance of the Griswold waffle iron and its unique Alaska Spring Handle, as well as the materials and tools needed for the restoration process.
Through the disassembly, cleaning, restoration, and reassembly process, you have not only improved the functionality and performance of your waffle iron but also gained valuable knowledge and skills in maintaining and restoring vintage kitchenware. Your freshly restored waffle iron is now ready to create delicious, crispy waffles for you and your loved ones to enjoy.
Remember to regularly clean and maintain your waffle iron to ensure its longevity and optimum performance. By taking good care of it, your Griswold Waffle Iron will continue to be an essential part of your kitchen for many years to come.
We hope this article has provided you with the guidance and inspiration needed to restore your Griswold Waffle Iron Alaska Spring Handle. Now, it’s time to fire up the iron, pour that batter, and savor the delightful taste of homemade waffles!
Thank you for joining us on this restoration journey. Happy waffle-making!
Frequently Asked Questions about How To Restore A Griswold Waffle Iron And Its Alaska Spring Handle
Was this page helpful?
At Storables.com, we guarantee accurate and reliable information. Our content, validated by Expert Board Contributors, is crafted following stringent Editorial Policies. We're committed to providing you with well-researched, expert-backed insights for all your informational needs.


0 thoughts on “How To Restore A Griswold Waffle Iron And Its Alaska Spring Handle”