Home>Storage Ideas>Kitchen Storage>How To Clean Your Range Hood Filter To Prevent Grease Clogs

Kitchen Storage
How To Clean Your Range Hood Filter To Prevent Grease Clogs
Modified: October 27, 2024
Learn how to prevent grease clogs in your kitchen with our easy guide on cleaning your range hood filter. Discover effective kitchen storage ideas as well.
(Many of the links in this article redirect to a specific reviewed product. Your purchase of these products through affiliate links helps to generate commission for Storables.com, at no extra cost. Learn more)
Introduction
Welcome to the wonderful world of kitchen storage ideas! If you’re someone who loves to cook and spend time in the kitchen, then you know how important it is to have an organized and efficient space. And one of the key components of a well-functioning kitchen is proper storage for all your cooking tools and essentials.
Having a clutter-free and well-organized kitchen not only makes it easier to find what you need when you need it, but it also allows you to make the most of the available space. And when it comes to kitchen storage, there are countless options and creative ideas to explore.
In this comprehensive guide, we will dive deep into the world of kitchen storage ideas. Whether you have a small kitchen and need clever solutions to maximize space or you have a larger kitchen and want to enhance its functionality, we’ve got you covered. From pantry organization to clever cabinet solutions, we’ll explore a wide range of ideas that will transform your kitchen into a functional and beautiful space.
But that’s not all! We’ll also delve into topics like kitchen drawer organization, spice rack ideas, and even ways to optimize storage in your refrigerator. We’ll provide you with practical tips, expert advice, and even some DIY projects that will allow you to turn your kitchen into a storage paradise.
Additionally, we’ll discuss different materials and containers that can help you keep your kitchen items in order. From stacking storage bins and drawer dividers to glass jars and magnetic knife strips, we’ll explore the vast array of options available to you.
And let’s not forget about style! We’ll touch upon kitchen storage ideas that not only keep things organized but also add a touch of aesthetic appeal to your space. We’ll explore various color schemes, finishes, and design elements that will make your kitchen feel welcoming and visually appealing.
So get ready to revolutionize your kitchen storage! From small tweaks to major overhauls, these ideas will inspire you to transform your kitchen into a space that is both functional and beautiful. Let’s dive in and explore the world of kitchen storage possibilities!
Key Takeaways:
- Regularly cleaning your range hood filter is crucial for effective grease removal, reduced fire hazards, improved air quality, enhanced range hood performance, and extended appliance lifespan.
- Prioritize safety precautions, thorough inspection, proper soaking, gentle scrubbing, complete drying, and correct reinstallation to ensure a clean and well-functioning range hood filter.
Read more: How To Clean Grease From Range Hood
Importance of Regular Range Hood Filter Cleaning
When it comes to keeping your kitchen clean and maintaining a healthy cooking environment, regular range hood filter cleaning is crucial. The range hood filter plays a vital role in removing grease, smoke, and odors from the air, ensuring that they don’t circulate back into your kitchen or get recirculated throughout your home.
Here are some key reasons why you should prioritize regular range hood filter cleaning:
- Effective Grease Removal: Over time, the range hood filter can become clogged with grease, inhibiting its ability to effectively capture grease particles from the air. This can lead to a buildup of grease in your kitchen, including on your cabinets, walls, and other surfaces. By cleaning the filter regularly, you ensure that it remains unclogged and can continue to efficiently remove grease.
- Reduced Fire Hazard: Grease buildup in the range hood filter can pose a significant fire hazard. When grease accumulates in the filter, it can become highly flammable. In the event of a stovetop fire, a clogged filter increases the risk of the flames spreading to the filter and potentially causing a more dangerous situation. Regular cleaning helps minimize this risk and ensures the safe operation of your range hood.
- Better Air Quality: A clean range hood filter is essential for maintaining good indoor air quality. When the filter is clogged, it becomes less effective at capturing smoke, odors, and other airborne particles. This can result in lingering smells and poor air circulation in your kitchen. By cleaning the filter regularly, you can ensure that it is working at its optimal capacity, improving the air quality in your kitchen.
- Improved Range Hood Performance: A clean filter allows your range hood to operate more efficiently. When the filter is clogged, the airflow is restricted, reducing the range hood’s ability to effectively remove smoke, steam, and odors. This can result in a less effective venting system and increased moisture buildup in your kitchen. Regular filter cleaning ensures that your range hood performs optimally and keeps your kitchen clean and well-ventilated.
- Extended Lifespan of the Range Hood: Regular maintenance, including filter cleaning, can significantly extend the lifespan of your range hood. When the filter is clean, it reduces the strain on the motor, preventing it from overworking and potentially burning out. By properly maintaining your range hood, you can enjoy its benefits for many years to come.
Overall, regular range hood filter cleaning is essential for keeping your kitchen clean, safe, and enjoyable. It ensures effective grease removal, reduces fire hazards, improves air quality, enhances range hood performance, and extends the lifespan of your appliance. So don’t neglect this important maintenance task and make it a part of your regular kitchen cleaning routine.
Tools and Materials Needed
Before you begin cleaning your range hood filter, it’s important to gather the necessary tools and materials. Having everything on hand will make the process more efficient and ensure that you have everything you need to get the job done. Here are the tools and materials you will need:
- Disposable gloves: Wear disposable gloves to protect your hands from grease and grime.
- Plastic garbage bag or drop cloth: Lay down a plastic garbage bag or a drop cloth to catch any debris or dirt that may fall during the cleaning process. This will make cleanup easier.
- Warm water: Fill a large basin, sink, or bucket with warm water. This will be used to soak and clean the filter.
- Dishwashing liquid or degreaser: Choose a mild dishwashing liquid or a degreaser specifically designed for kitchen cleaning. This will help remove grease and grime from the filter.
- Soft-bristle brush or sponge: Use a soft-bristle brush or sponge to scrub the filter and remove any stuck-on grease or dirt.
- Old toothbrush: An old toothbrush can be handy for cleaning hard-to-reach areas and crevices of the filter.
- Microfiber cloth or clean towel: Use a microfiber cloth or a clean towel to dry the filter after cleaning.
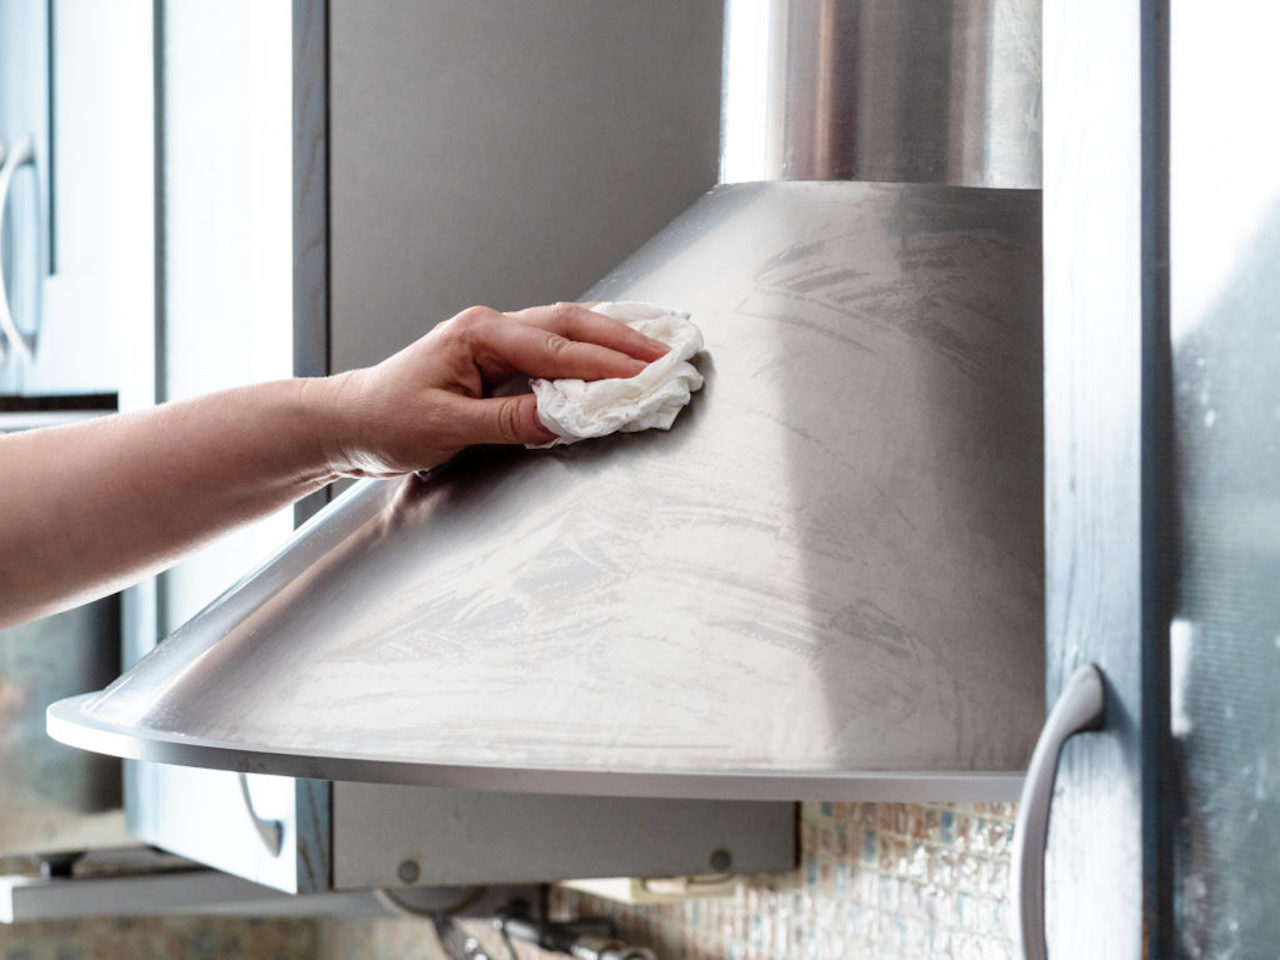
- All-purpose cleaner: If the range hood itself needs cleaning, have an all-purpose cleaner ready to wipe down the exterior surfaces.
- Screwdriver: Depending on the type of range hood, you may need a screwdriver to remove the filter. Check your range hood’s user manual for specific instructions.
Having these tools and materials ready before you begin your range hood filter cleaning will make the process smoother and more efficient. It’s important to remember that different range hoods may have different cleaning requirements, so always refer to your appliance’s user manual for specific instructions.
Now that you have everything you need, let’s move on to the step-by-step process of cleaning your range hood filter and ensuring it functions optimally!
Step 1: Safety Precautions
Before you begin cleaning your range hood filter, it’s important to take some safety precautions to ensure your well-being and prevent any accidents. Here are some essential safety measures to follow:
- Turn off the range hood: Before you start cleaning the filter, make sure the range hood is turned off and unplugged. This will prevent any accidental activation of the range hood while you’re working on it and reduce the risk of electrical shocks.
- Wear protective gloves: Grease and grime can accumulate on the filter, so it’s essential to protect your hands by wearing disposable gloves. This will shield your skin from potential irritants and make the cleaning process more hygienic.
- Ensure proper ventilation: Cleaning the range hood filter can release odors and fumes, so it’s important to open windows or turn on exhaust fans to ensure proper ventilation in your kitchen. This will help to dissipate any odors and maintain a comfortable and safe environment while you work.
- Prepare a clean workspace: Lay down a plastic garbage bag or a drop cloth to catch any debris or dirt that may fall during the cleaning process. This will make cleanup easier and prevent any mess from spreading to other surfaces.
- Read the user manual: Different range hood models may have specific cleaning instructions, so it’s important to refer to the user manual to understand the manufacturer’s recommendations and guidelines. This will help you avoid any potential damage to the range hood and ensure a safe and effective cleaning process.
- Check for sharp edges: Some range hood filters may have sharp edges, so it’s important to handle them with caution to avoid any accidental cuts or injuries. Take your time to inspect the filter and ensure that you handle it safely throughout the cleaning process.
By following these safety precautions, you can minimize the risk of accidents and ensure a safe cleaning process for your range hood filter. Remember, safety should always be the top priority when working with appliances and cleaning products in your kitchen.
Now that you’ve taken the necessary safety measures, it’s time to move on to the next step: removing the range hood filter.
Step 2: Removing the Range Hood Filter
Now that you’ve taken the necessary safety precautions, it’s time to remove the range hood filter. The process may vary depending on the type of range hood you have, so it’s important to consult your appliance’s user manual for specific instructions. However, here are general steps to follow:
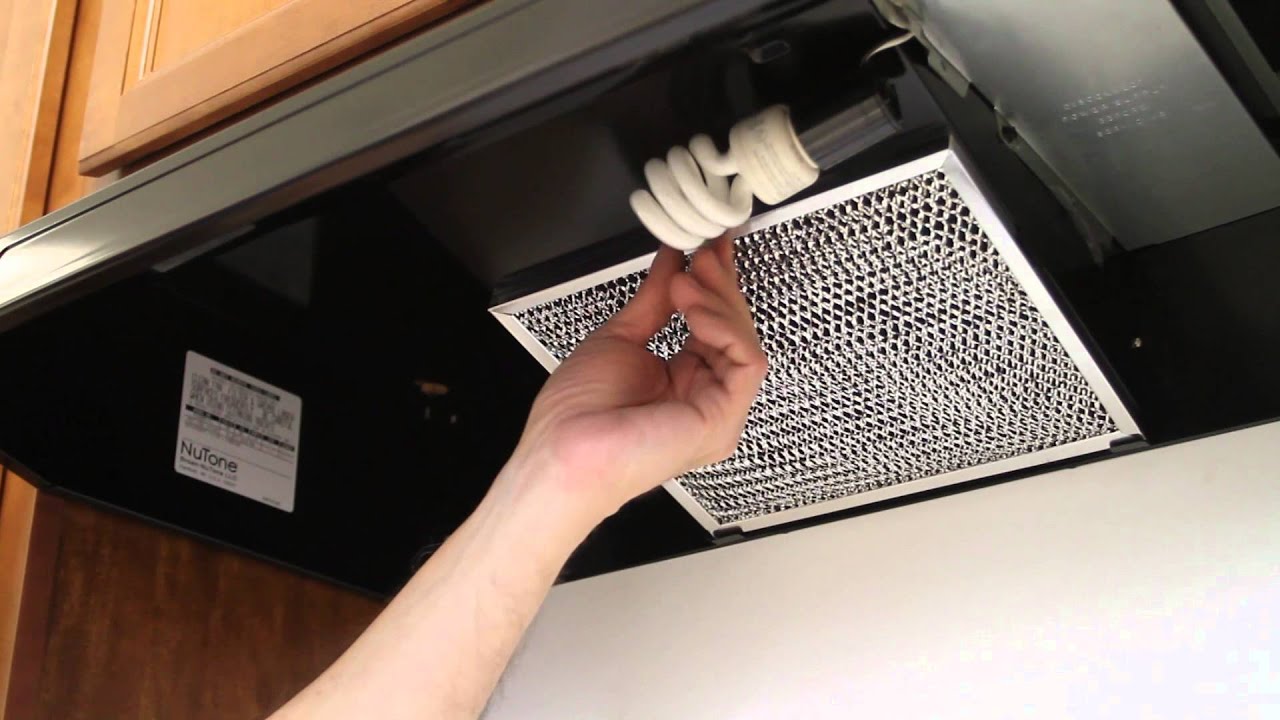
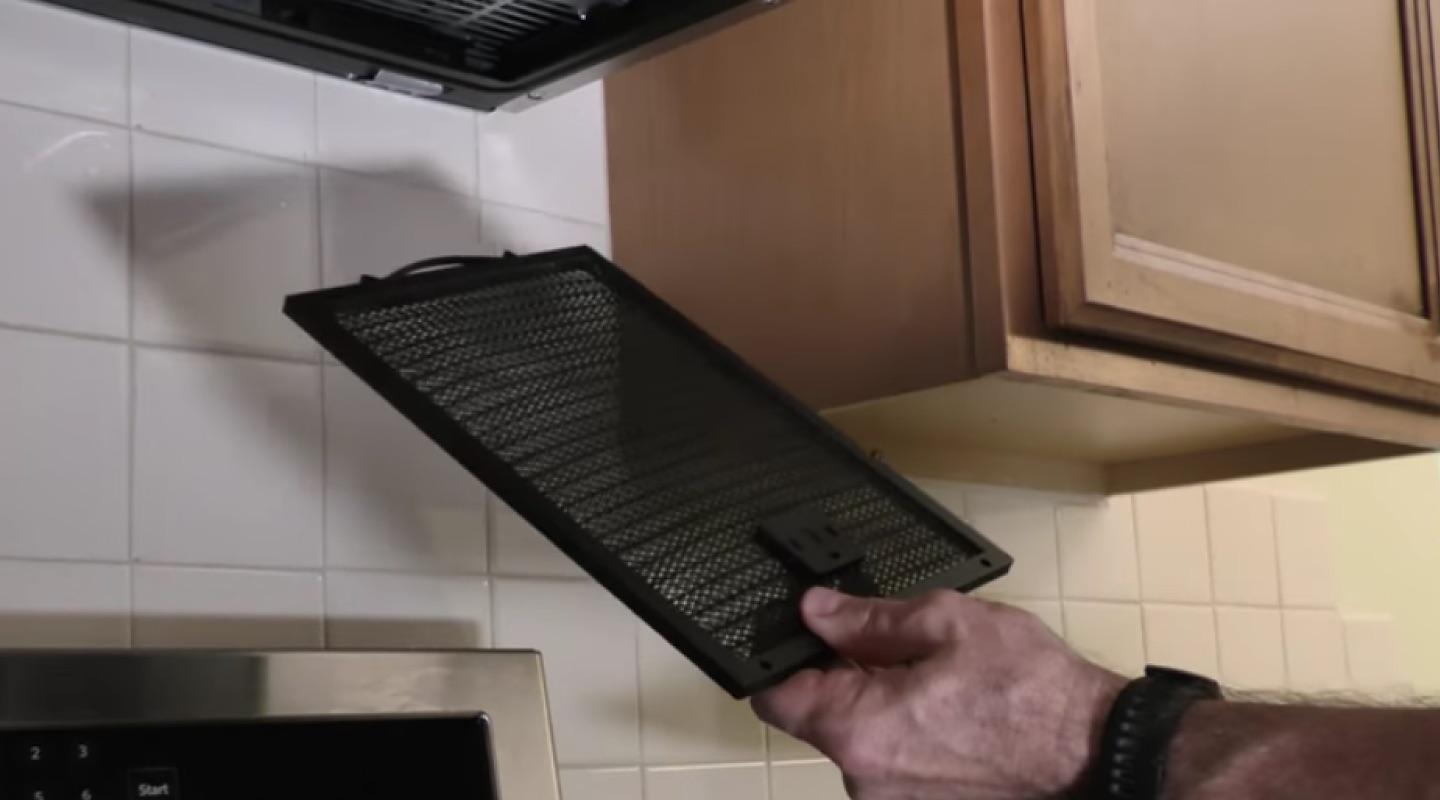
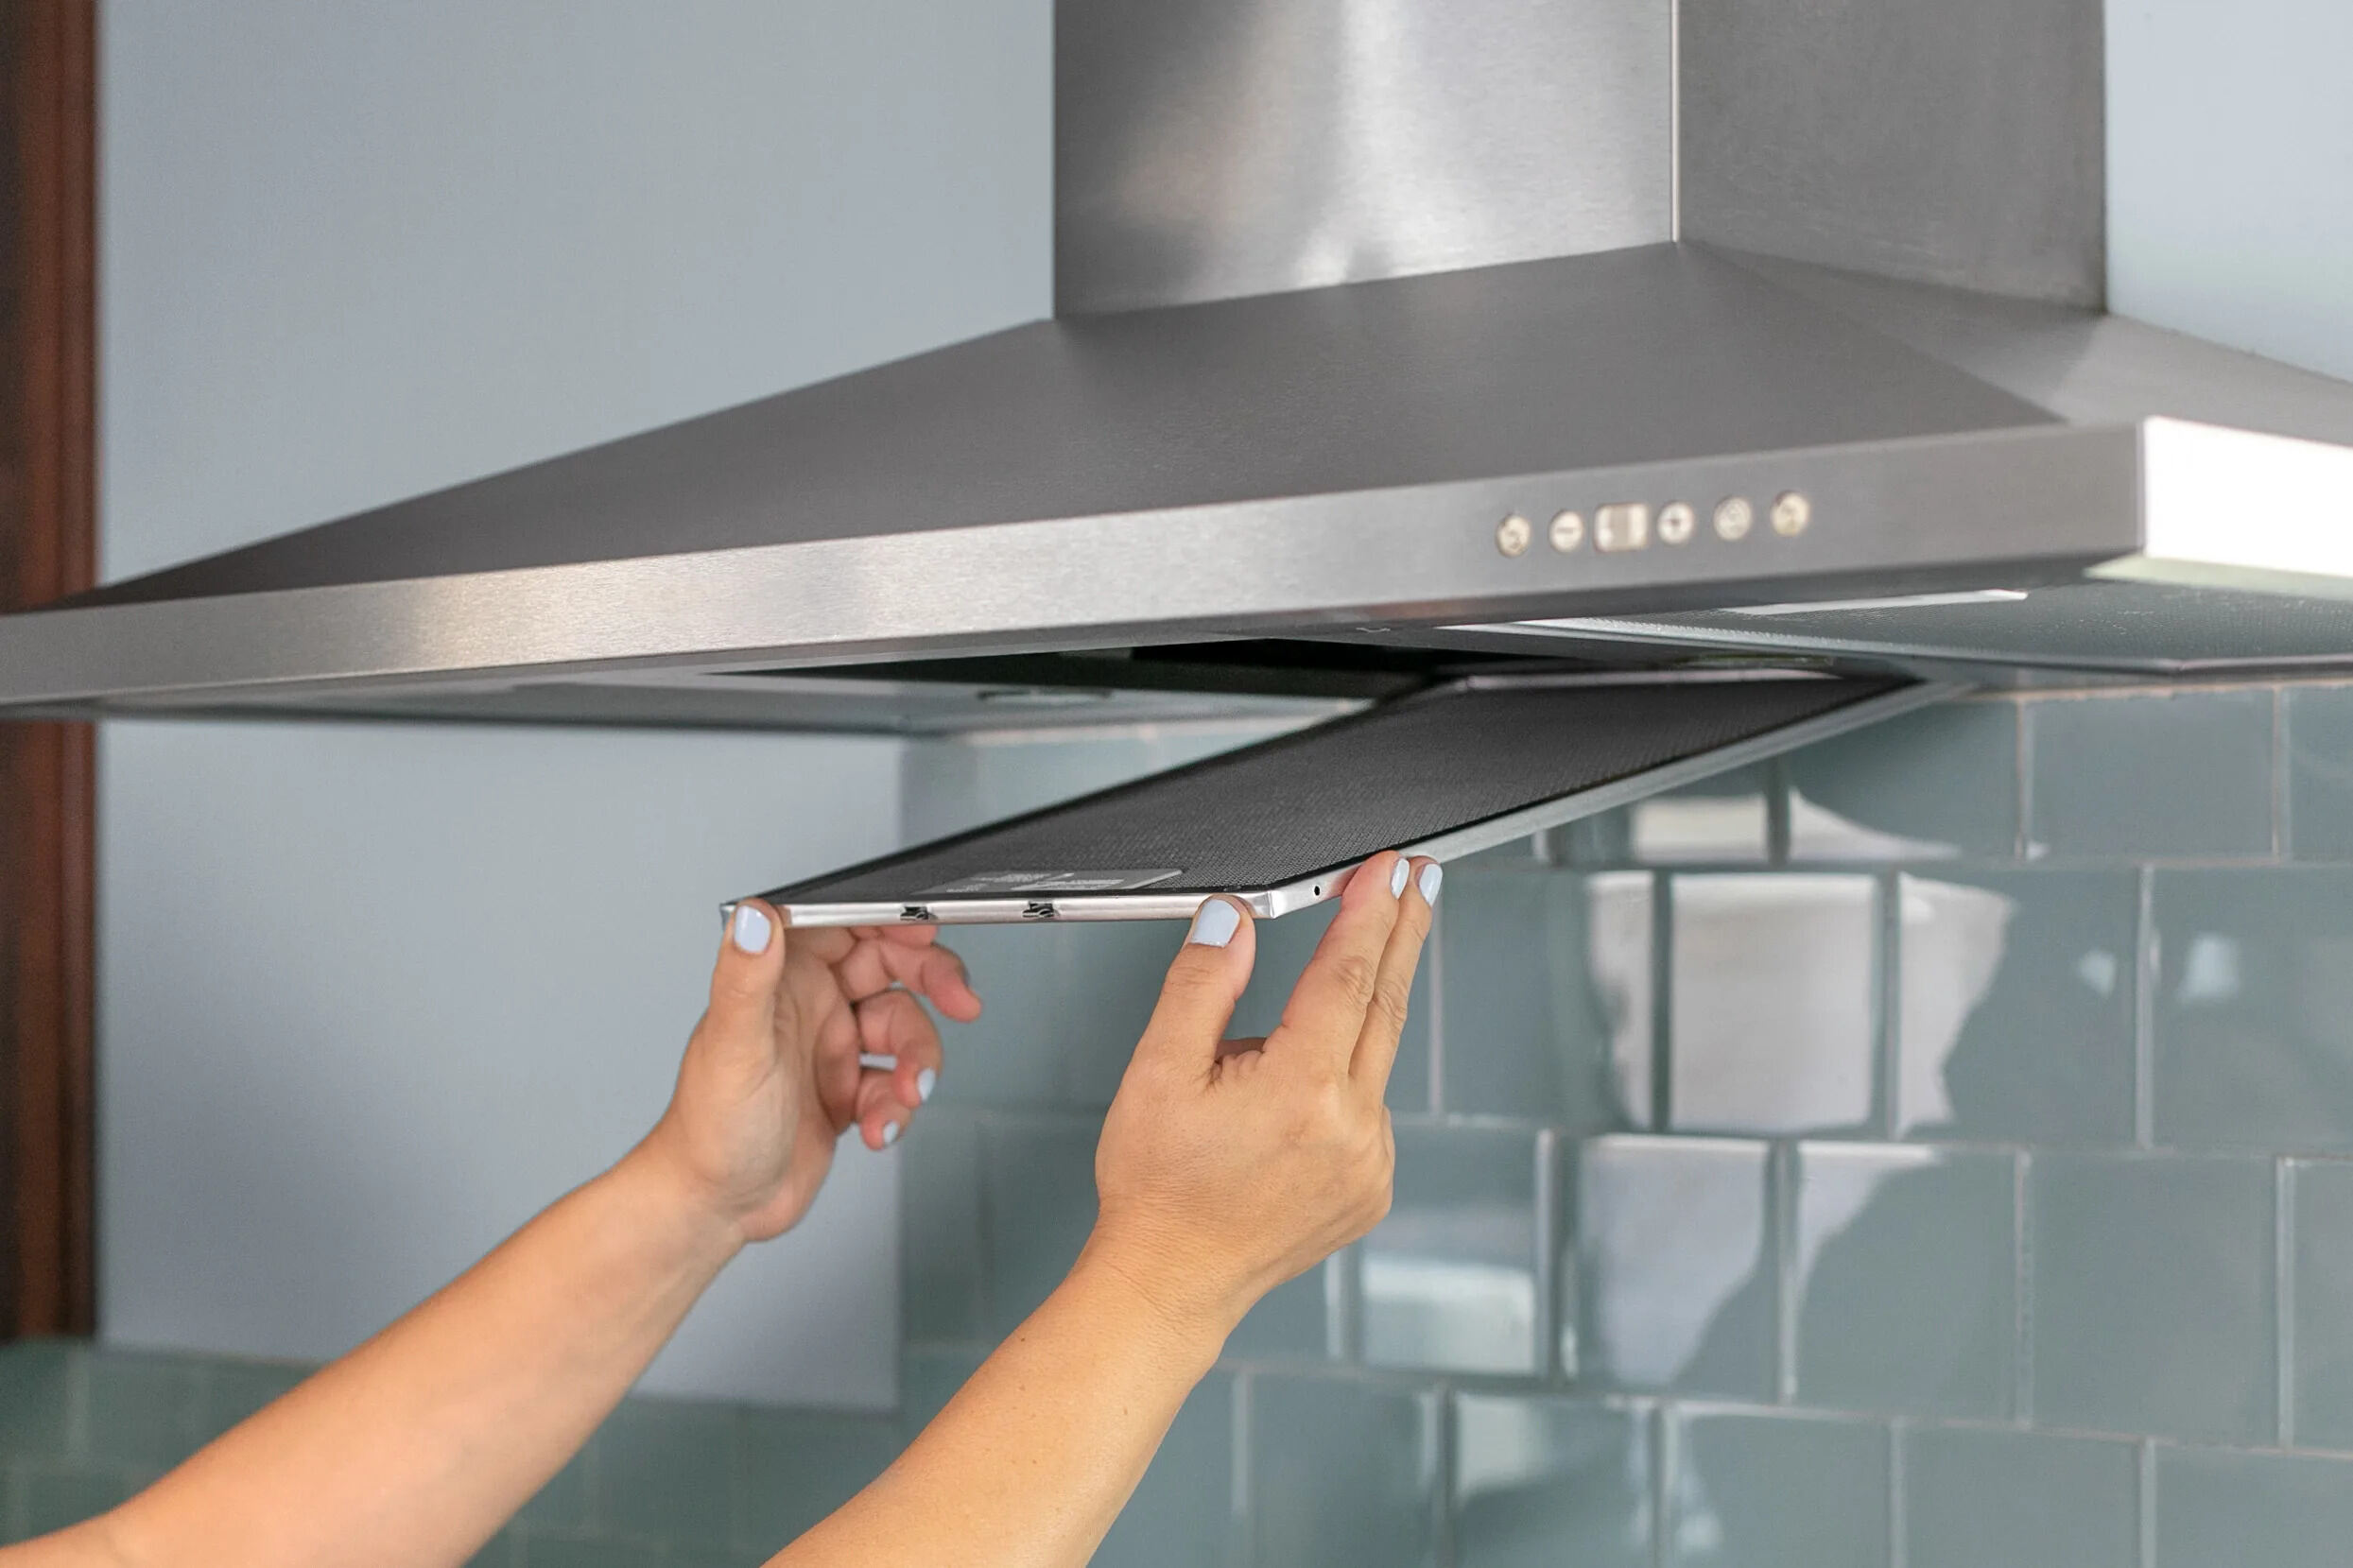
- Locate the filter: The filter is typically located underneath the range hood, either on the bottom or on the sides. Refer to your user manual if you’re unsure about its exact location.
- Remove any protective grates or covers: Some range hood filters may be concealed behind grates or covers. Use a screwdriver or follow the manufacturer’s instructions to remove these protective elements and gain access to the filter.
- Detach the filter: Once you have access to the filter, gently pull it out or unscrew it, depending on how it is secured in place. Take your time and be careful not to damage the filter or the surrounding areas.
- Inspect the filter: Once you’ve removed the filter, take a moment to inspect it. Look for any signs of damage, excessive grease buildup, or trapped debris. This will help you determine the extent of cleaning required and whether the filter needs replacement.
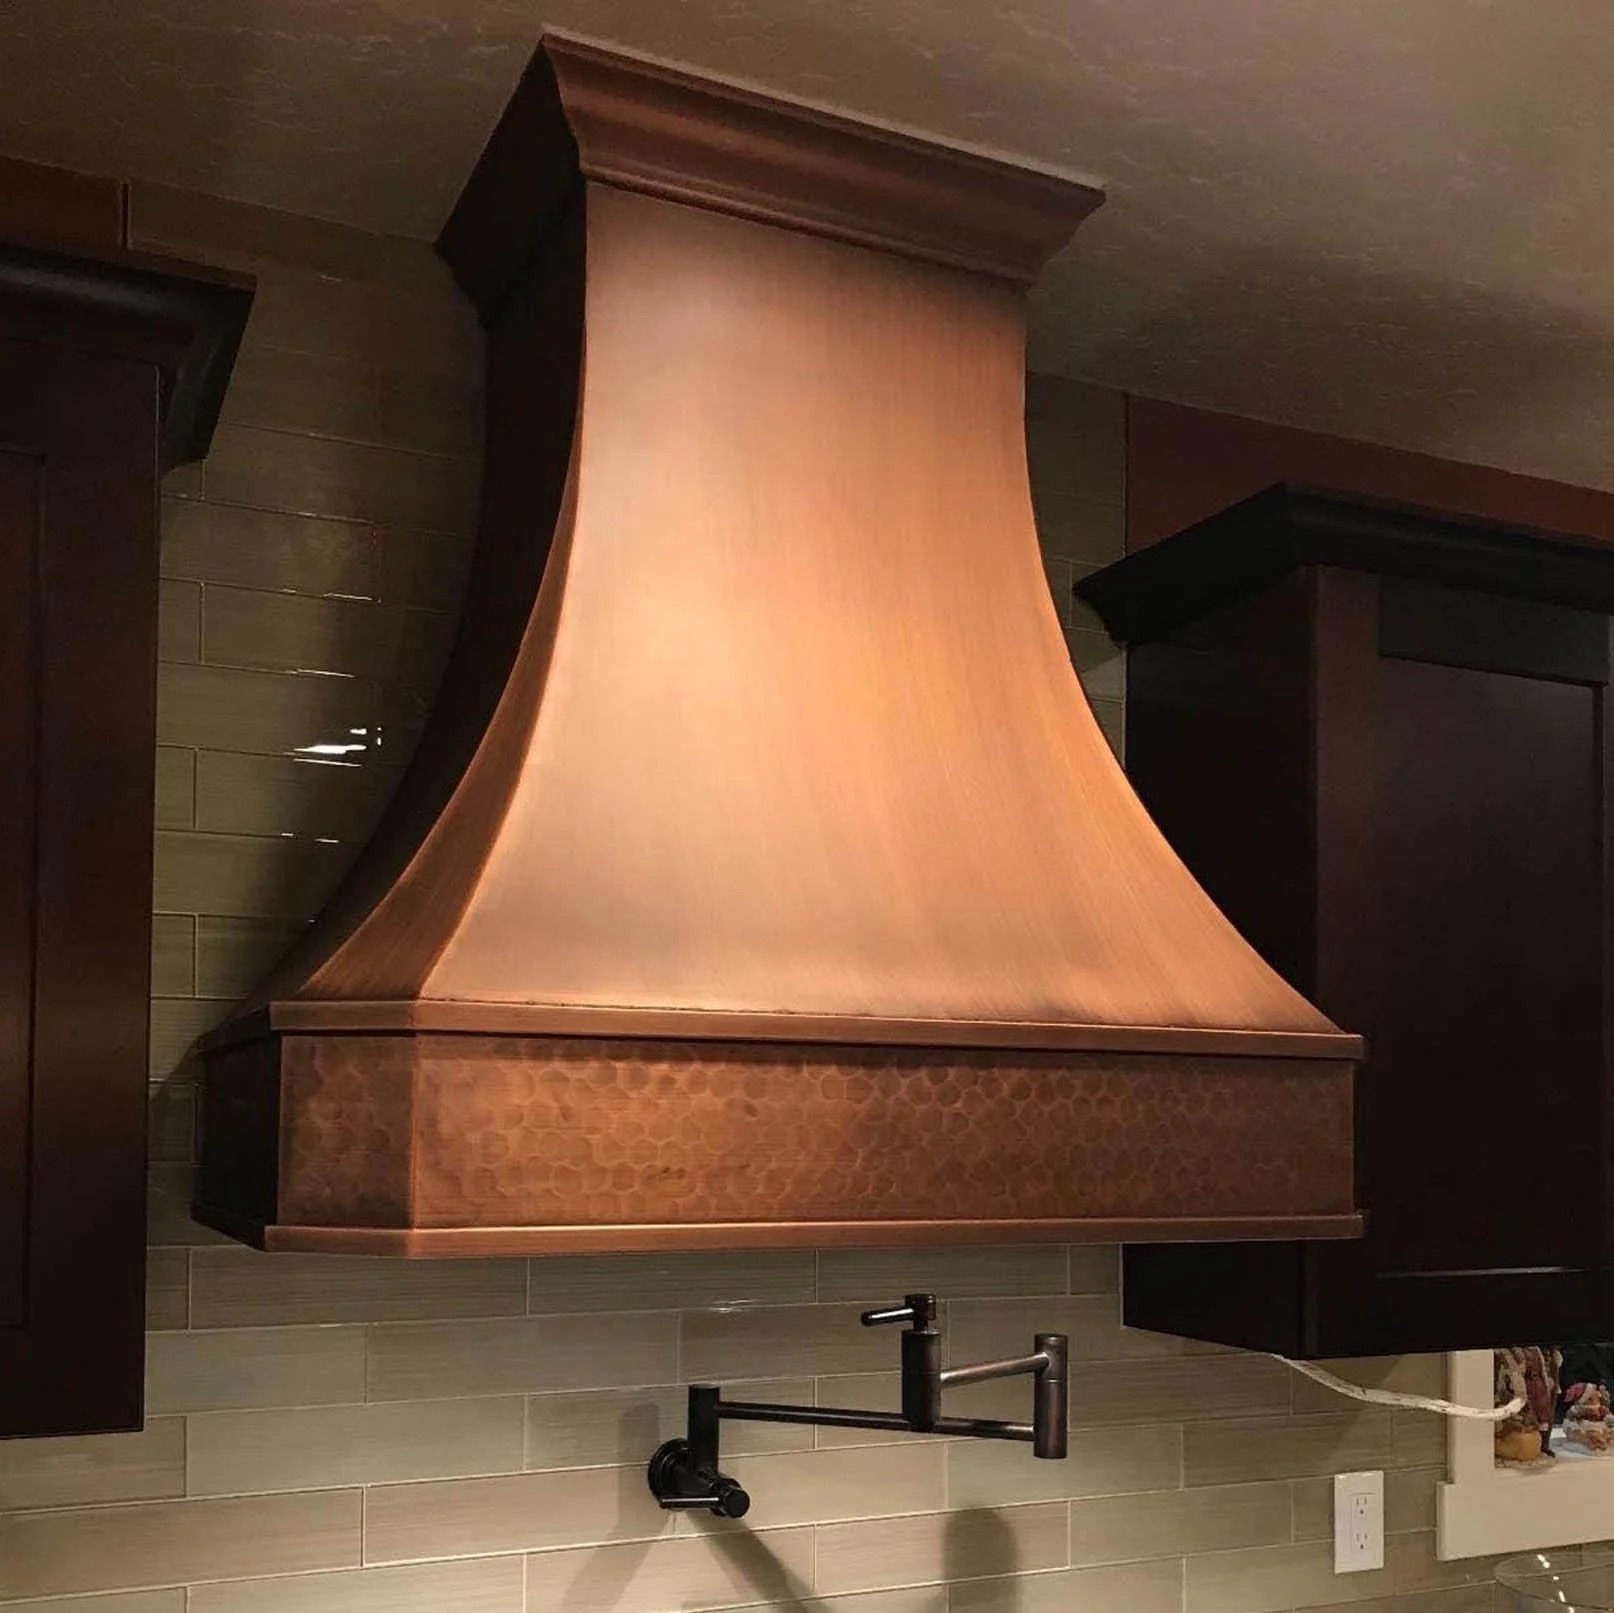
- Note the filter type: It’s important to identify the type of filter you have. Range hood filters can be made of aluminum, charcoal, mesh, or other materials. Knowing the filter type will help you choose the appropriate cleaning method and products.
Remember, the specific steps for removing the range hood filter may vary depending on your appliance. Always consult your user manual for detailed instructions to ensure that you remove the filter correctly and safely.
With the range hood filter successfully removed, you’re ready to move on to the next step: inspecting the filter and assessing its condition.
Step 3: Inspecting the Filter
Now that you have removed the range hood filter, it’s time to inspect it for any signs of damage, excessive grease buildup, or trapped debris. This step is important because it will help you determine the extent of cleaning required and whether the filter needs replacement. Here’s how to inspect the filter:
- Check for damage: Examine the filter closely for any signs of damage, such as bends, tears, or holes. If you notice any significant damage, it may be time to replace the filter with a new one.
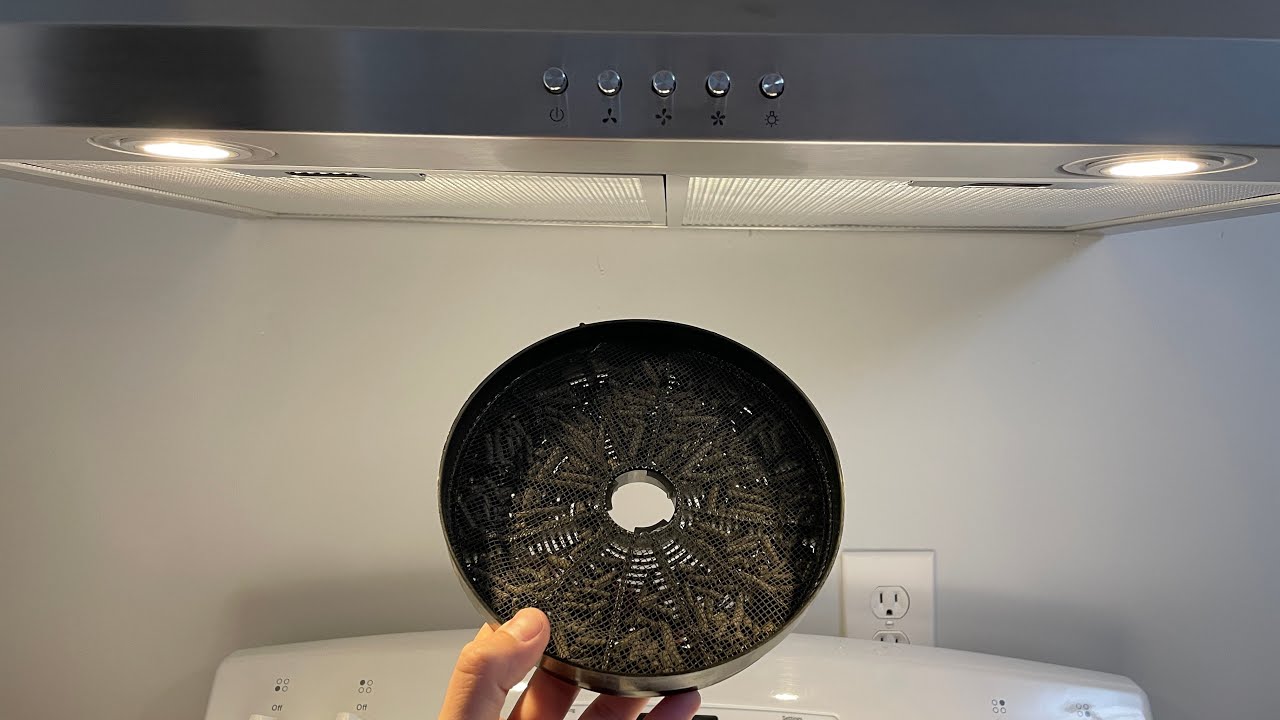
- Look for grease buildup: Grease is one of the main culprits that accumulate on the range hood filter. Inspect the filter for signs of excessive grease buildup, which may appear as a thick layer or a sticky residue. If the filter is heavily coated in grease, it will require a more thorough cleaning.
- Inspect for trapped debris: Aside from grease, other debris like food particles, dust, and dirt may become trapped in the filter. Take a close look at the filter and check for any visible debris that needs to be removed during the cleaning process.
- Assess the condition: Based on your observations, assess the overall condition of the filter. If it is slightly dirty but otherwise intact, it can likely be cleaned and reused. However, if the filter is damaged, excessively dirty, or beyond cleaning, it’s time to consider replacing it with a new filter.
Note that range hood filters come in different types and materials, such as aluminum, charcoal, or mesh. The cleaning method may vary depending on the filter type, so refer to your user manual or manufacturer’s instructions for specific guidelines on cleaning and maintenance.
Inspecting the filter allows you to gauge its condition and determine the best course of action. If the filter is in good shape but dirty, you can move on to the next step: soaking and cleaning the filter. However, if the filter is damaged or excessively dirty, replacing it may be necessary for optimal range hood performance.
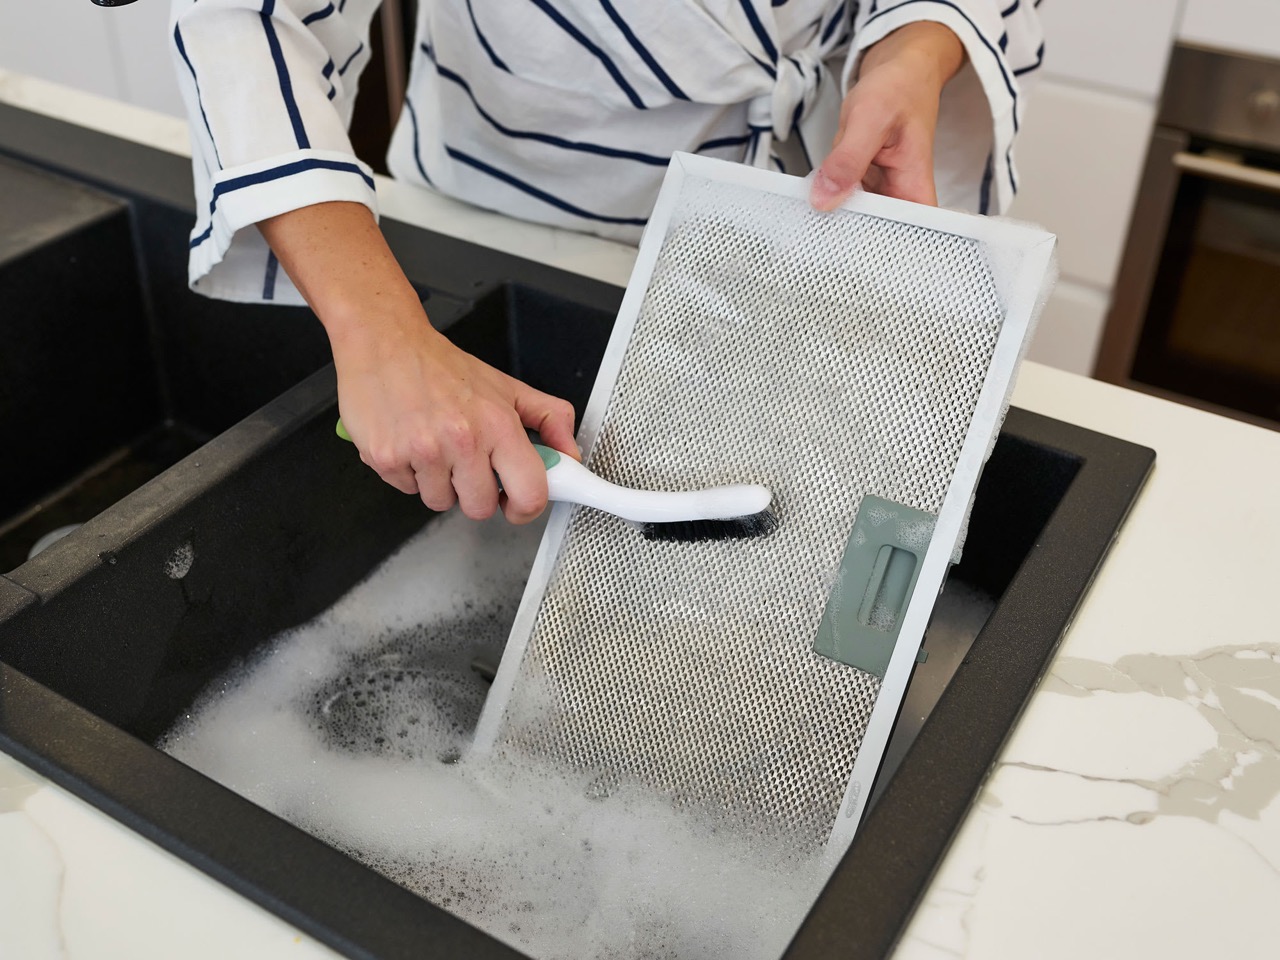
Soak the range hood filter in hot, soapy water for 10-15 minutes to loosen the grease. Use a soft brush to scrub away any remaining residue, then rinse and dry thoroughly before re-installing.
Step 4: Soaking the Filter
Now that you have inspected the range hood filter and determined that it can be cleaned, it’s time to move on to the next step: soaking the filter. This step involves immersing the filter in a cleaning solution to loosen and remove grease, dirt, and other contaminants. Here’s how to soak the filter effectively:
- Prepare a cleaning solution: Fill a large basin, sink, or bucket with warm water. Add a small amount of mild dishwashing liquid or a kitchen-specific degreaser to create a cleaning solution. Follow the product instructions for appropriate dilution ratios if using a degreaser.
- Submerge the filter: Carefully place the range hood filter into the cleaning solution, ensuring that it is fully submerged. Gently press the filter down to ensure it is completely covered by the solution. Allow it to soak for about 15 to 30 minutes. The warm water and cleaning solution will help break down grease and grime, making it easier to clean.
- Agitate the filter: After the filter has soaked for the recommended time, use a soft-bristle brush or sponge to gently agitate the filter. This will help loosen any stubborn grease or dirt particles from the filter’s surface. Be gentle to avoid damaging the filter, especially for aluminum or mesh filters.
- Pay attention to crevices: Use an old toothbrush or a small brush to clean any hard-to-reach areas or crevices of the filter. This will help ensure a thorough cleaning and removal of any trapped debris or grease buildup in those areas.
- Rinse thoroughly: Once you’ve agitated and cleaned the filter, rinse it thoroughly with clean water. Make sure to remove any remnants of the cleaning solution and any loose debris or grease that may still be clinging to the filter.
Keep in mind that soaking times may vary depending on the recommended duration provided by the manufacturer or the severity of grease buildup on the filter. If you’re using a specific filter cleaning product, follow the product instructions for the appropriate soaking time and procedure.
After you have completed the soaking process and rinsed the filter, you’re ready to move on to the next step: scrubbing and cleaning the filter to remove any remaining grease and dirt.
Step 5: Scrubbing and Cleaning the Filter
Now that you’ve soaked the range hood filter and removed any loose debris, it’s time to move on to the next step: scrubbing and cleaning the filter. This step involves using a soft-bristle brush or sponge to remove any remaining grease and dirt, ensuring that the filter is thoroughly cleaned. Here’s how to scrub and clean the filter effectively:
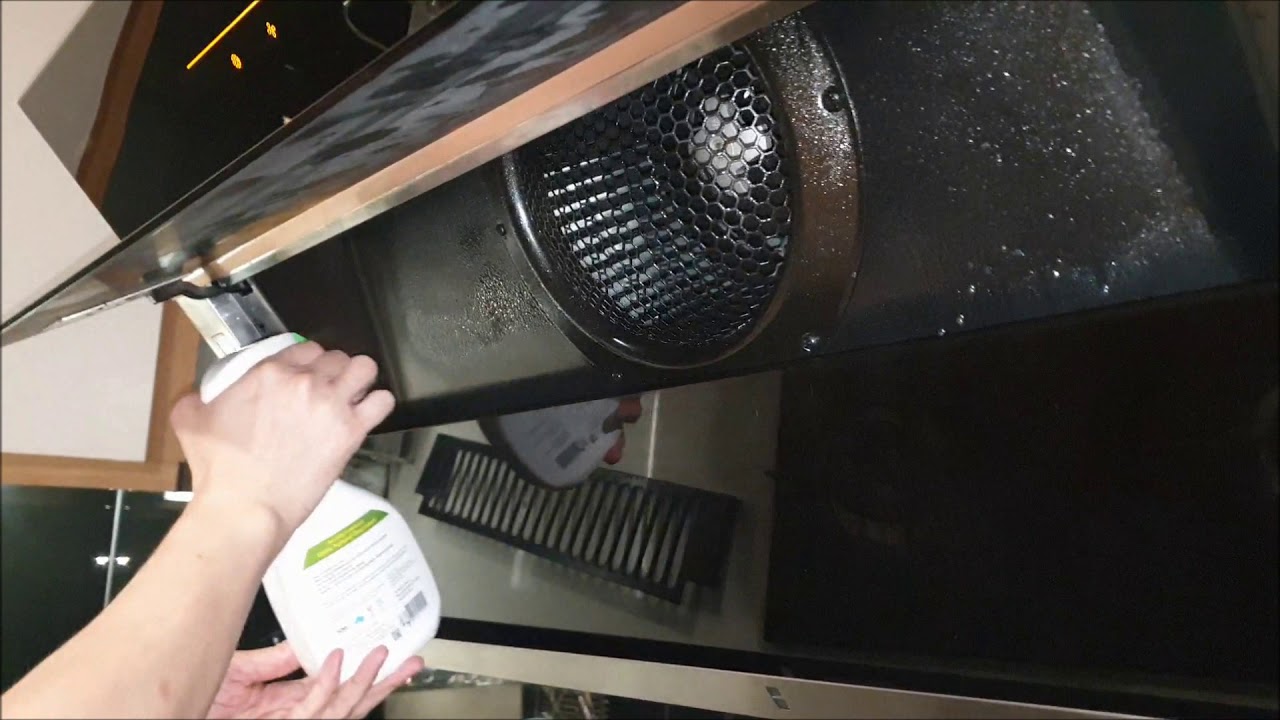
- Apply dishwashing liquid or degreaser: Apply a small amount of dishwashing liquid or a kitchen-specific degreaser directly to the filter. Focus on areas with stubborn grease or dirt buildup. Allow the cleaning solution to sit on the filter for a few minutes to help break down the remaining residue.
- Scrub the filter: Using a soft-bristle brush or sponge, gently scrub the filter in a back-and-forth motion to remove the remaining grease and dirt. Pay particular attention to areas that have heavy buildup or stains. Be gentle with the filter to avoid causing any damage or bending the filter if it’s made of aluminum or mesh.
- Clean hard-to-reach areas: Use an old toothbrush or a small brush to clean any crevices or hard-to-reach areas of the filter. These areas may require a more thorough scrubbing to ensure all debris is removed.
- Rinse under running water: Once you’ve finished scrubbing the filter, rinse it thoroughly under running water. Make sure to remove all traces of the cleaning solution and any loosened grease and dirt. Rinse both sides of the filter to ensure a thorough cleaning.
- Inspect for cleanliness: After rinsing, take a moment to inspect the filter for any remaining residue or dirt. If necessary, repeat the scrubbing and rinsing process until the filter appears clean and free of debris.
Depending on the severity of the grease buildup and the type of filter you have, you may need to repeat the scrubbing and cleaning process multiple times to achieve a satisfactory result. Remember to be patient and persistent to ensure a thorough cleaning.
Once you are satisfied with the cleanliness of the filter, it’s time to move on to the next step: drying the filter before reinstalling it.
Step 6: Drying the Filter
After cleaning the range hood filter, it’s crucial to ensure that it is completely dry before reinstalling it. Properly drying the filter helps prevent any trapped moisture that can lead to mold or mildew growth. Follow these steps to effectively dry the filter:
- Shake off excess water: Gently shake the filter to remove any excess water. This will help speed up the drying process and prevent water from pooling in the filter.
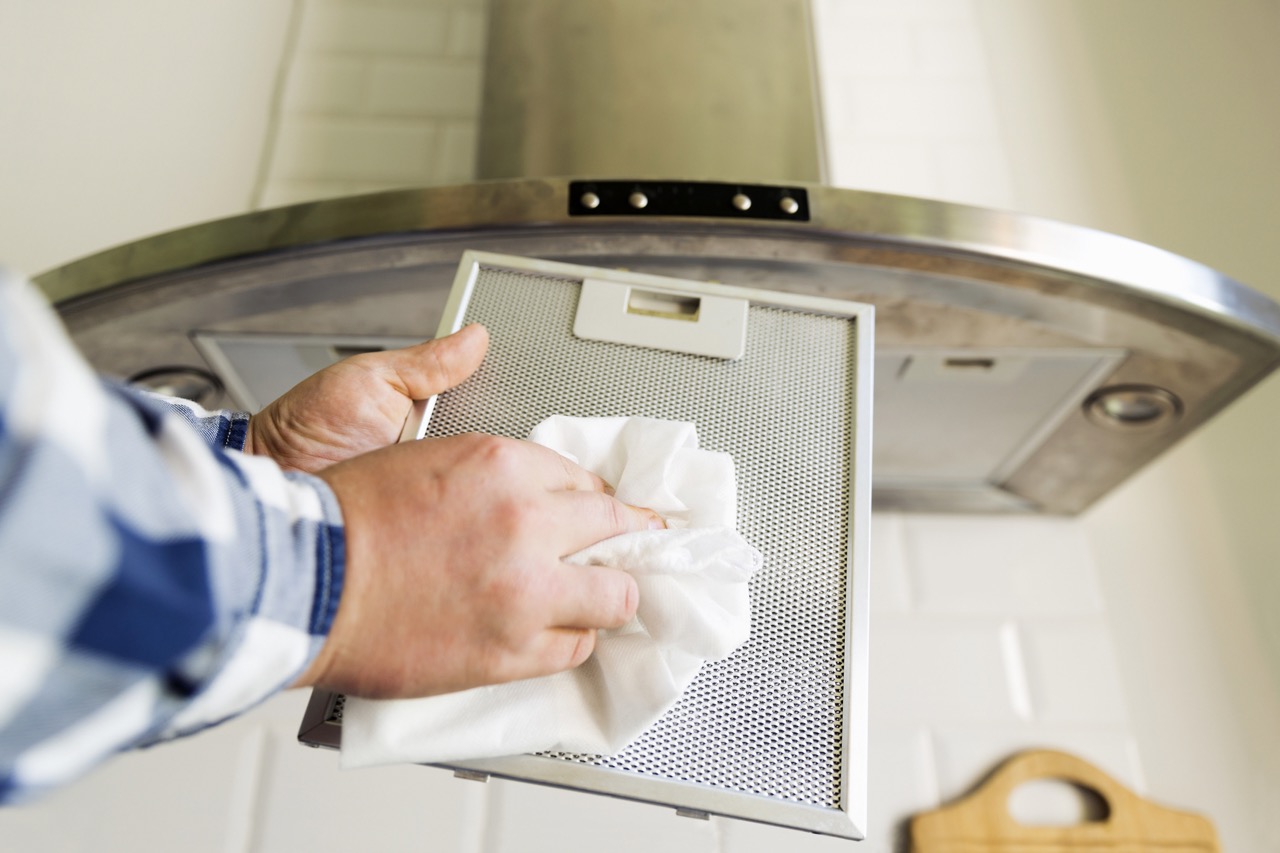
- Pat dry with a clean towel: Use a clean microfiber cloth or a towel to pat the filter and absorb any remaining moisture. Ensure that all surfaces of the filter are dry to the touch.
- Air dry: Find a clean and dry area where the filter can air dry completely. A well-ventilated spot, such as near an open window or outside, is ideal. Place the filter on a clean surface or hang it up with enough space between the filter and the surface or other objects to allow for proper airflow.
- Avoid using heat: It is important to avoid using heat sources such as hair dryers or placing the filter near direct sunlight to speed up the drying process. High heat can cause damage to certain filter materials.
- Allow ample drying time: The drying time will vary depending on factors such as the material of the filter and the humidity levels in your environment. It’s best to allow the filter to air dry naturally for at least 24 hours to ensure it is completely dry before reinstalling it.
Remember, installing a wet or damp filter can compromise the functionality of your range hood and potentially lead to mold or mildew growth. Taking the time to thoroughly dry the filter will ensure that it is in optimal condition for efficient operation.
Once the filter is completely dry, you’re ready for the final step: reinstalling the filter and enjoying a clean and well-functioning range hood once again!
Step 7: Reinstalling the Filter
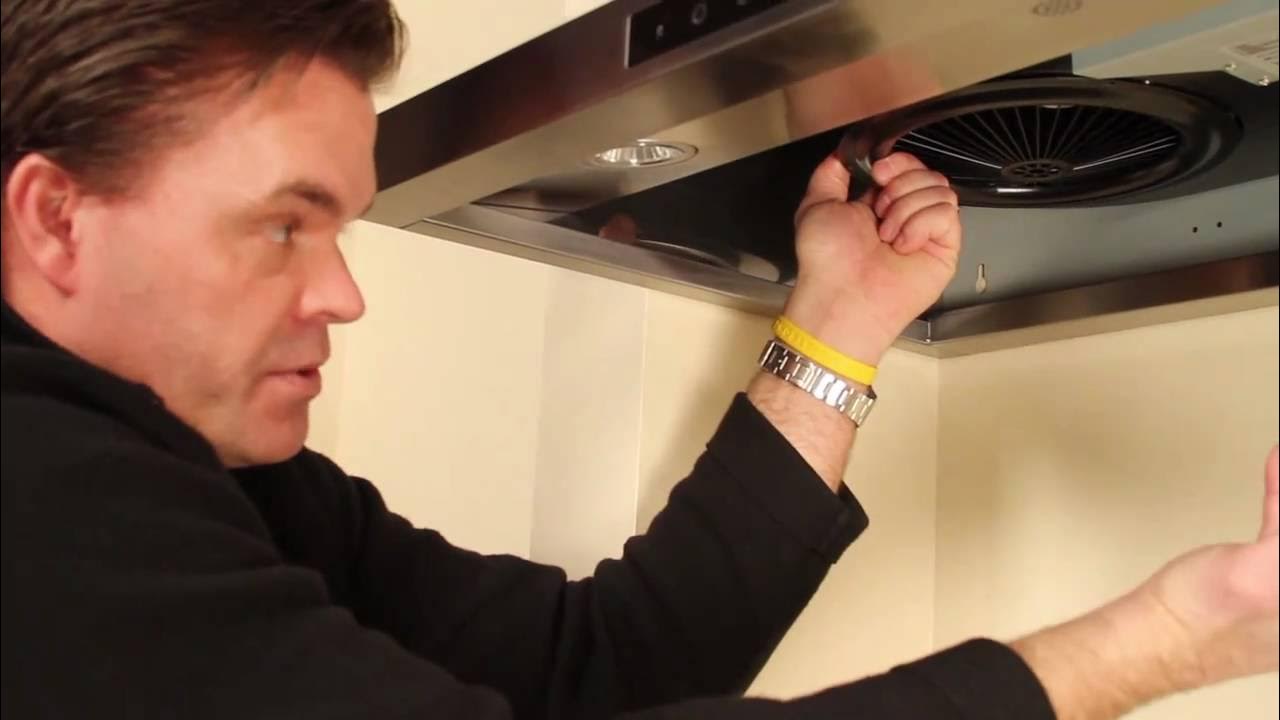
Now that you have cleaned and dried the range hood filter, it’s time to reinstall it in your range hood. Reinstalling the filter properly ensures that it functions effectively in capturing grease and maintaining good ventilation in your kitchen. Follow these steps to reinstall the filter:
- Refer to the user manual: Consult your range hood’s user manual for specific instructions on how to properly position and secure the filter. Different range hoods may have different methods of installation.
- Align the filter: Place the filter back into the range hood, taking care to align it correctly and nestle it securely in its designated slot. Ensure that it fits snugly and is centered properly.
- Secure the filter: Use the appropriate method to secure the filter in place. Some filters may require screwing or snapping them back into position, while others simply need to be pushed or slid back into place. Follow the instructions specific to your range hood model.
- Double-check the installation: After securing the filter, gently tug or push on it to ensure it is securely installed and won’t dislodge during operation. Make sure it is stable and doesn’t move or rattle when gently shaken.
- Turn on the range hood: Once the filter is securely installed, plug in and turn on the range hood to test its functionality. Ensure that the air is being properly ventilated and that the range hood is operating smoothly without any unusual noises or obstructions.
Properly reinstalling the filter is important to maintain the efficiency and effectiveness of your range hood. It ensures that the filter remains in place and functions optimally to remove grease, smoke, and unpleasant odors from your kitchen.
With the filter successfully reinstalled, you have completed the entire process of cleaning and maintaining your range hood filter. Congratulations! By following these steps regularly, you can ensure a clean and well-functioning range hood that keeps your kitchen fresh and free from grease buildup.
Remember to consult your range hood’s user manual for any specific instructions or recommendations regarding filter maintenance and cleaning frequency. Now, sit back, relax, and enjoy the benefits of a clean and well-maintained range hood in your kitchen!
Conclusion
Congratulations! You have successfully ventured into the world of kitchen storage ideas and learned how to keep your range hood filter clean and functional. By following the steps outlined in this comprehensive guide, you can ensure that your range hood operates efficiently, keeps your kitchen free from grease buildup, and maintains good indoor air quality.
Regular range hood filter cleaning is essential for several reasons. It allows for effective grease removal, reduces fire hazards, improves air quality, enhances range hood performance, and extends the lifespan of your appliance. By incorporating this maintenance task into your regular kitchen cleaning routine, you can keep your kitchen environment clean, safe, and enjoyable.
Throughout this guide, we explored various steps, tools, and materials needed for range hood filter cleaning. We emphasized the importance of safety precautions, such as turning off the range hood and wearing protective gloves, to ensure your well-being during the cleaning process.
We discussed the significance of inspecting the filter before cleaning, assessing its condition, and determining whether it requires replacement. We delved into the process of soaking the filter to loosen and remove grease and dirt, as well as scrubbing and cleaning the filter to ensure thorough removal of residues.
We also highlighted the importance of properly drying the filter to prevent moisture-related issues and finished off with the crucial step of reinstalling the filter back into the range hood. Each step was carefully explained, offering guidance and tips to optimize the cleaning process.
Remember, always refer to your range hood’s user manual for specific instructions and recommendations, as different models may have slightly different cleaning requirements.
By maintaining a clean range hood filter and incorporating other kitchen storage ideas, you can transform your kitchen into a functional and beautiful space. Explore the world of pantry organization, clever cabinet solutions, and creative storage options to maximize space and enhance the functionality of your kitchen.
Whether you have a small kitchen and need to make the most of limited space or you’re looking to add style and organization to a larger kitchen, there are countless ideas and solutions available. From drawer dividers and stacking storage bins to glass jars and magnetic knife strips, you have the power to create a customized and efficient kitchen storage system.
With your newfound knowledge and creativity, you can embark on a journey to optimize your kitchen storage and elevate your cooking experience. So, go ahead and explore the world of kitchen storage ideas to create a space that is not only practical but also visually appealing, making meal preparation a joyous and enjoyable experience.
Now, armed with these kitchen storage ideas and the know-how to clean your range hood filter, it’s time to put your plans into action. Get ready to transform your kitchen into a clutter-free and organized haven that matches your cooking prowess and reflects your personal style!
Frequently Asked Questions about How To Clean Your Range Hood Filter To Prevent Grease Clogs
Was this page helpful?
At Storables.com, we guarantee accurate and reliable information. Our content, validated by Expert Board Contributors, is crafted following stringent Editorial Policies. We're committed to providing you with well-researched, expert-backed insights for all your informational needs.


0 thoughts on “How To Clean Your Range Hood Filter To Prevent Grease Clogs”