Home>Storage Ideas>Kitchen Storage>Organizing A Kitchen: 21 Tricks Organizers Use To Keep Order
Kitchen Storage
Organizing A Kitchen: 21 Tricks Organizers Use To Keep Order
Modified: September 1, 2024
Discover 21 genius kitchen storage ideas used by organizers to maintain order and tidiness in your kitchen. Maximize space and find practical solutions with these efficient tricks.
(Many of the links in this article redirect to a specific reviewed product. Your purchase of these products through affiliate links helps to generate commission for Storables.com, at no extra cost. Learn more)
Introduction
Welcome to the world of kitchen organization! We all know that maintaining order in the kitchen can be a daunting task. Pots and pans seem to pile up, utensils go missing, and pantry shelves become a chaotic mess. But fear not, because professional organizers have mastered the art of kitchen organization and have some amazing tricks up their sleeves to help you keep your kitchen in tip-top shape.
In this article, we will explore 21 expert-approved tips and tricks to help you organize your kitchen like a pro. From decluttering and sorting to utilizing storage solutions and maximizing cabinet space, we’ve got you covered.
So, roll up your sleeves, put on your favorite apron, and let’s dive into the wonderful world of kitchen organization!
Key Takeaways:
- Declutter and categorize your kitchen items to free up space and make organizing easier. Utilize storage solutions like drawer dividers, hanging racks, and stackable containers to maximize space and keep everything neatly organized.
- Maintain a well-organized kitchen by establishing daily maintenance habits, regularly rotating pantry items, and involving the whole household in keeping the kitchen tidy. Simplify your kitchen organization and enjoy a stress-free and efficient cooking space.
Decluttering and Sorting
The first step to achieving a well-organized kitchen is to declutter and sort through your belongings. Take the time to go through your cabinets, drawers, and pantry to identify items that you no longer need or use. Here are a few tips to get you started:
- Empty it all out: Begin by emptying out your cabinets and drawers. This will allow you to see everything you have and assess what needs to be decluttered.
- Sort into categories: As you go through each item, sort them into categories such as utensils, cookware, bakeware, and pantry items. This will make it easier to organize later.
- Consider functionality: Assess each item’s functionality. If you haven’t used something in months or it’s broken beyond repair, it’s time to let it go.
- Donate or discard: Create separate piles for items that can be donated or discarded. Remember, one person’s trash could be another person’s treasure.
- Maximize storage space: Take this opportunity to assess your storage space. Are there any vertical racks, organizers, or shelf dividers that could help maximize your space?
By decluttering and sorting through your kitchen items, you’ll free up space for the things you truly need and use. Plus, it will make the organizing process much easier and more efficient.
Utilizing Storage Solutions
Once you have decluttered and sorted your kitchen items, it’s time to make use of storage solutions to keep everything in its rightful place. Here are some clever storage solutions that organizers use to maximize space:
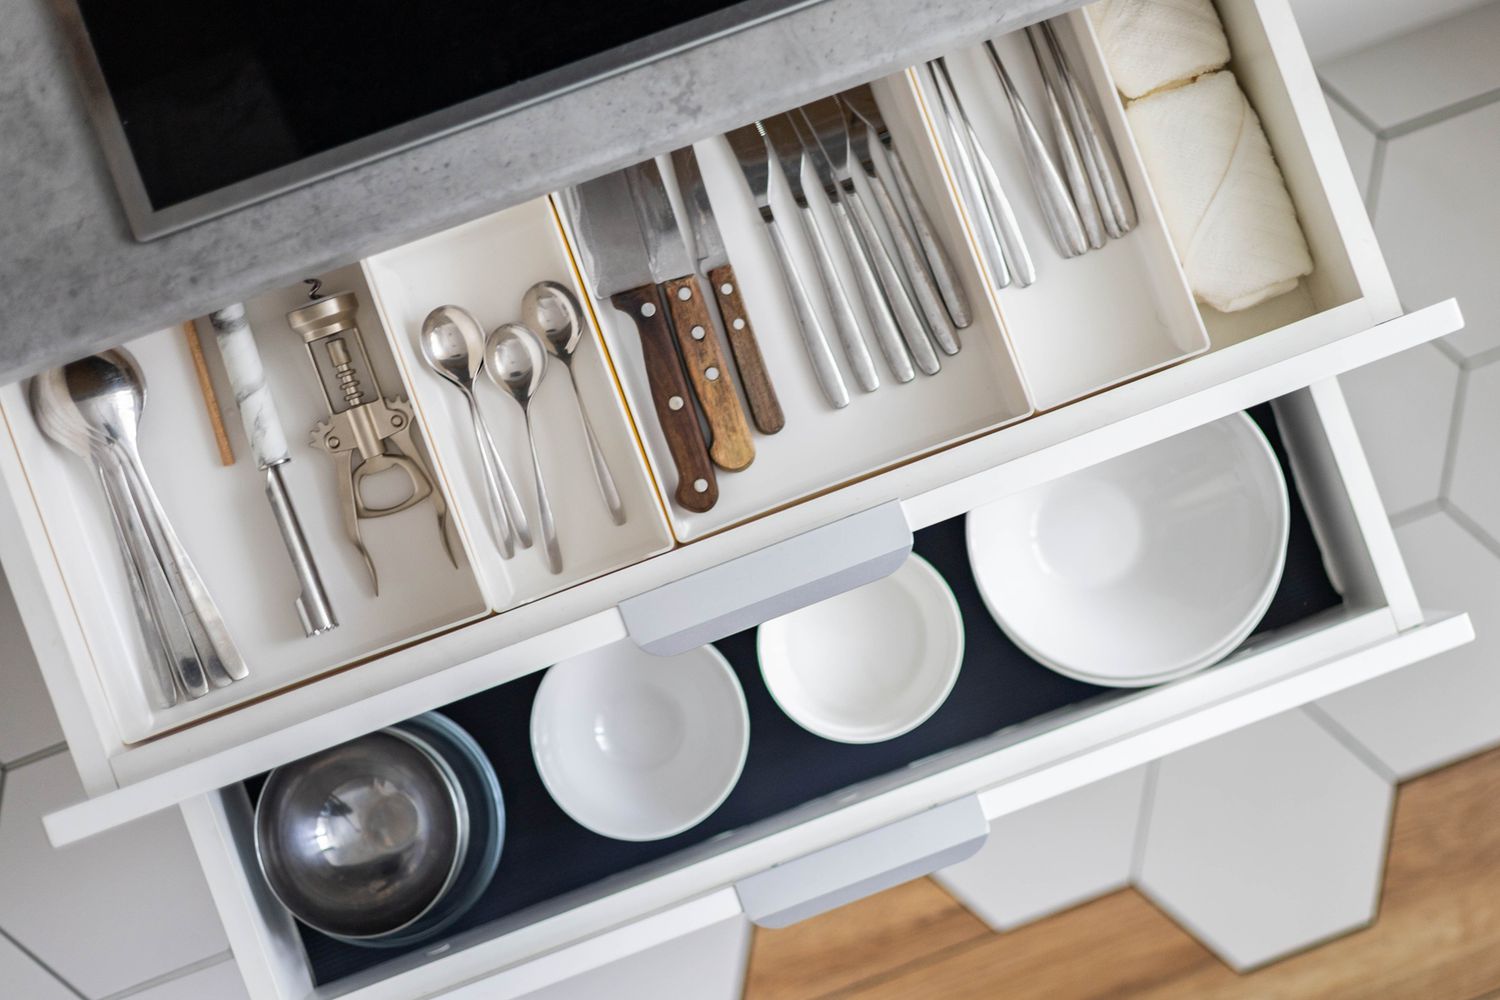
- Drawer dividers: Use drawer dividers to separate and organize utensils, cutlery, and small cooking tools. This will help prevent them from getting tangled or lost in the drawer.
- Pull-out shelves: Install pull-out shelves in cabinets to make it easier to access items stored in the back. This eliminates the need to reach and rummage through deep cabinets.
- Hanging racks: Hang pots, pans, and even mugs on a hanging rack to free up cabinet space. This not only adds a decorative element to your kitchen but also makes it easy to find and grab the items you need.
- Stackable containers: Invest in stackable containers for storing pantry items such as cereal, pasta, and snacks. This allows you to maximize vertical space and keeps your pantry items neatly organized.
- Over-the-door organizers: Utilize the back of cabinet doors by installing over-the-door organizers. These can be used to store spices, cleaning supplies, or even cutting boards.
- Lazy Susans: Place a Lazy Susan in corner cabinets to make it easy to access items stored in the back. This rotating tray allows you to easily reach for items without having to move everything in front of them.
By incorporating storage solutions like these, you’ll be able to make the most of your kitchen space and keep everything neatly organized. Remember to assess your specific needs and select storage solutions that work best for your kitchen layout and the items you have.
Maximizing Cabinet Space
Cabinets are a crucial component of kitchen storage, and maximizing their space can greatly enhance the organization of your kitchen. Here are some clever tips to make the most of your cabinet space:
- Adjustable shelves: Most cabinets have adjustable shelves that can be raised or lowered to accommodate items of various sizes. Take advantage of this feature to customize your cabinet space.
- Use the vertical space: Install tension rods vertically inside cabinets to create additional usable space. You can hang dish towels, pot lids, or cutting boards on these rods.
- Install door-mounted organizers: Make use of the inside of cabinet doors by installing door-mounted organizers. These can hold anything from measuring cups to foil and plastic wrap.
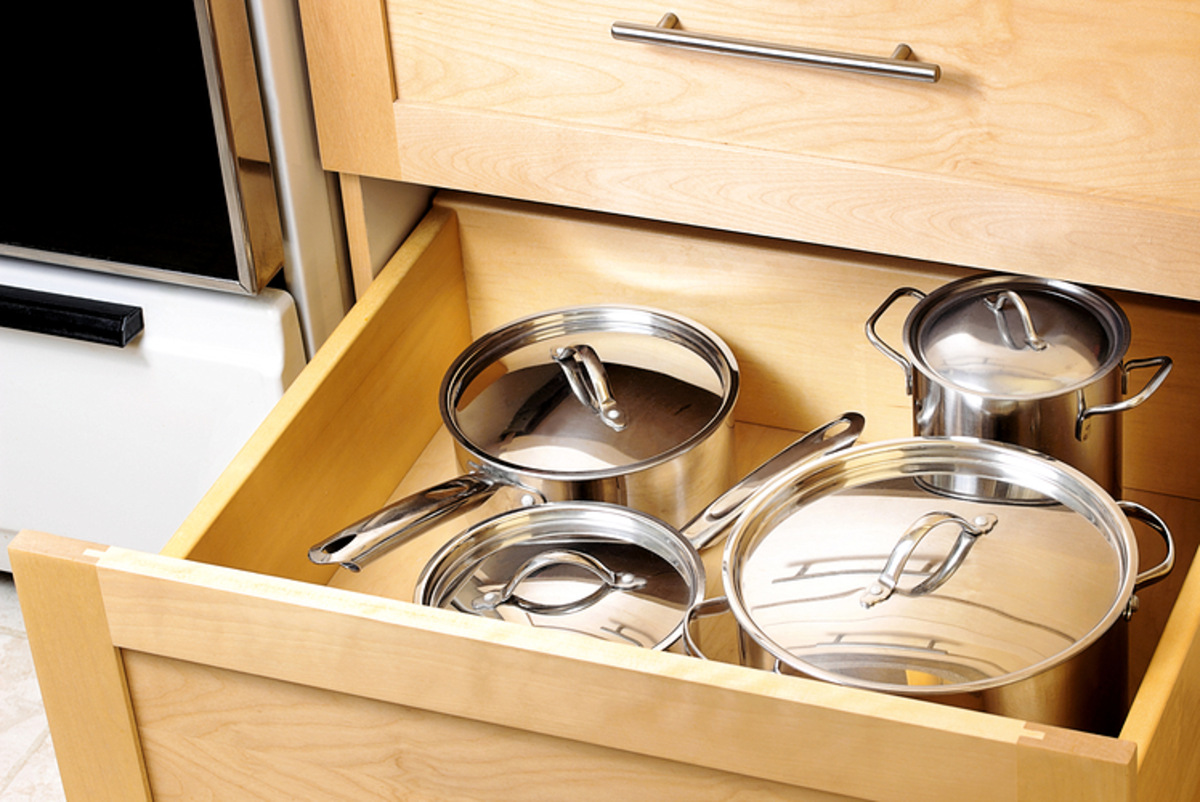
- Stack pots and pans: Stack pots and pans of similar sizes to save space. Use pot protectors or soft fabric in between to prevent scratching.
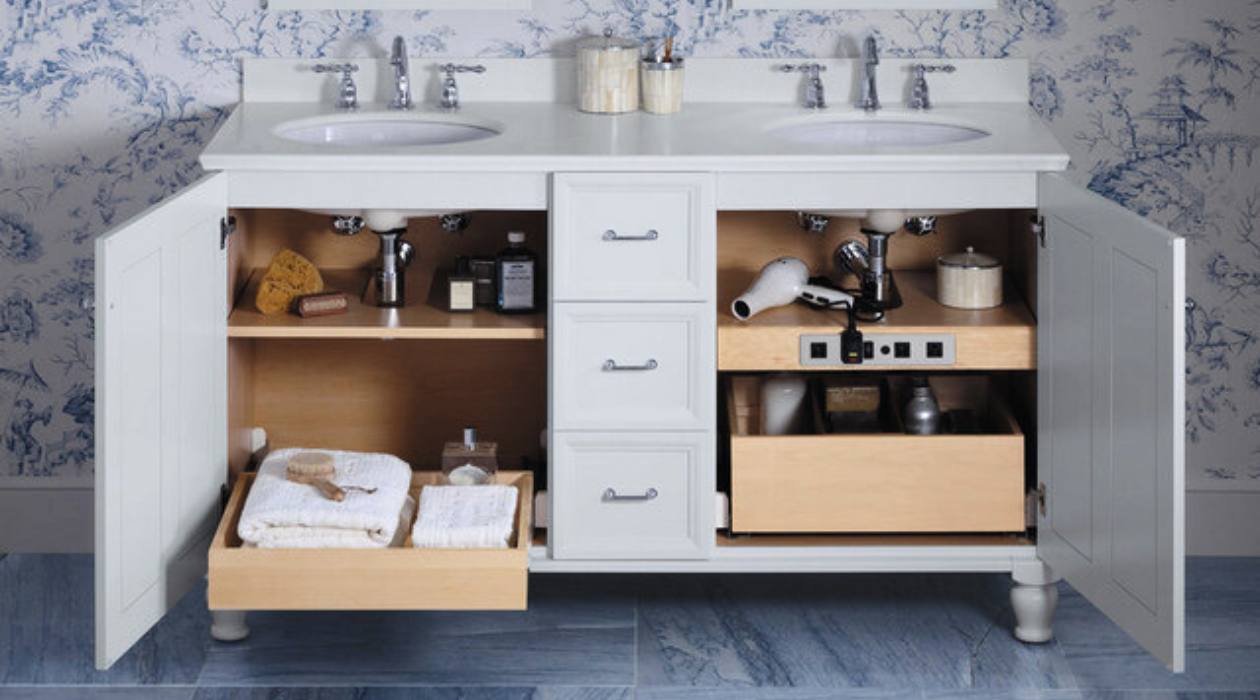
- Utilize under-sink storage: Invest in sliding drawers or racks that fit under your sink to maximize this often underutilized area. Store cleaning supplies, trash bags, and extra sponges in an organized manner.
By implementing these strategies, you can effectively utilize every inch of your cabinet space and keep your kitchen essentials easily accessible and neatly organized.
Organizing Pantry Items
A well-organized pantry can make all the difference in an efficient kitchen. Here are some expert tips for organizing your pantry items:
- Group similar items: Arrange pantry items into categories such as grains, canned goods, baking supplies, and snacks. This makes it easier to locate specific items.
- Use clear containers: Transfer items like pasta, rice, and cereal into clear, airtight containers. This not only keeps them fresh but also allows you to see when supplies are running low.
- Label everything: Use labels on containers and shelves to identify what goes where. This prevents confusion and ensures items are returned to their designated spots.
- Implement a first-in, first-out system: When restocking your pantry, place newer items behind older ones. This ensures that older items are used first, reducing the chances of expiration or spoilage.
- Organize with bins or baskets: Use bins or baskets to group similar items together and make it easier to pull them out as needed. For example, dedicate a bin for snacks, another for baking supplies, and so on.
- Consider a lazy Susan: Install a rotating lazy Susan in corner pantry cabinets. This makes it easier to access items stored in the back without rummaging through the entire shelf.
By implementing these pantry organization tips, you’ll create a streamlined and functional space where you can easily find and access your ingredients and pantry staples.
Efficient Refrigerator Organization
A well-organized refrigerator not only ensures food safety but also makes it easier to find and access items when you need them. Here are some tips for efficient refrigerator organization:
- Categorize your shelves: Assign specific areas of your refrigerator for different food categories, such as fruits, vegetables, dairy, and leftovers.
- Utilize clear bins or containers: Use clear plastic bins or containers to group similar items together. This helps keep the refrigerator organized and makes it easier to locate and pull out specific items.
- Label your bins: Label your bins or containers to identify what goes where. This avoids confusion and helps family members know where items belong.
- Keep frequently used items at eye level: Place items you use most often, like condiments or beverages, at eye level for easy access.
- Utilize the door space: The refrigerator door is ideal for storing condiments, jars, and small bottles. Take advantage of the built-in shelves and compartments to keep these items organized.
- Rotate food based on expiration dates: Regularly check the expiration dates of items in your refrigerator and rotate older items to the front to ensure they are used before they spoil.
- Maximize drawer space: Use designated drawers for storing fruits, vegetables, and deli meats. Keep them organized by using liners or dividers to separate different types of produce.
By implementing these refrigerator organization tips, you’ll be able to maintain a neat and tidy fridge, reduce food waste, and easily find what you’re looking for when hunger strikes.
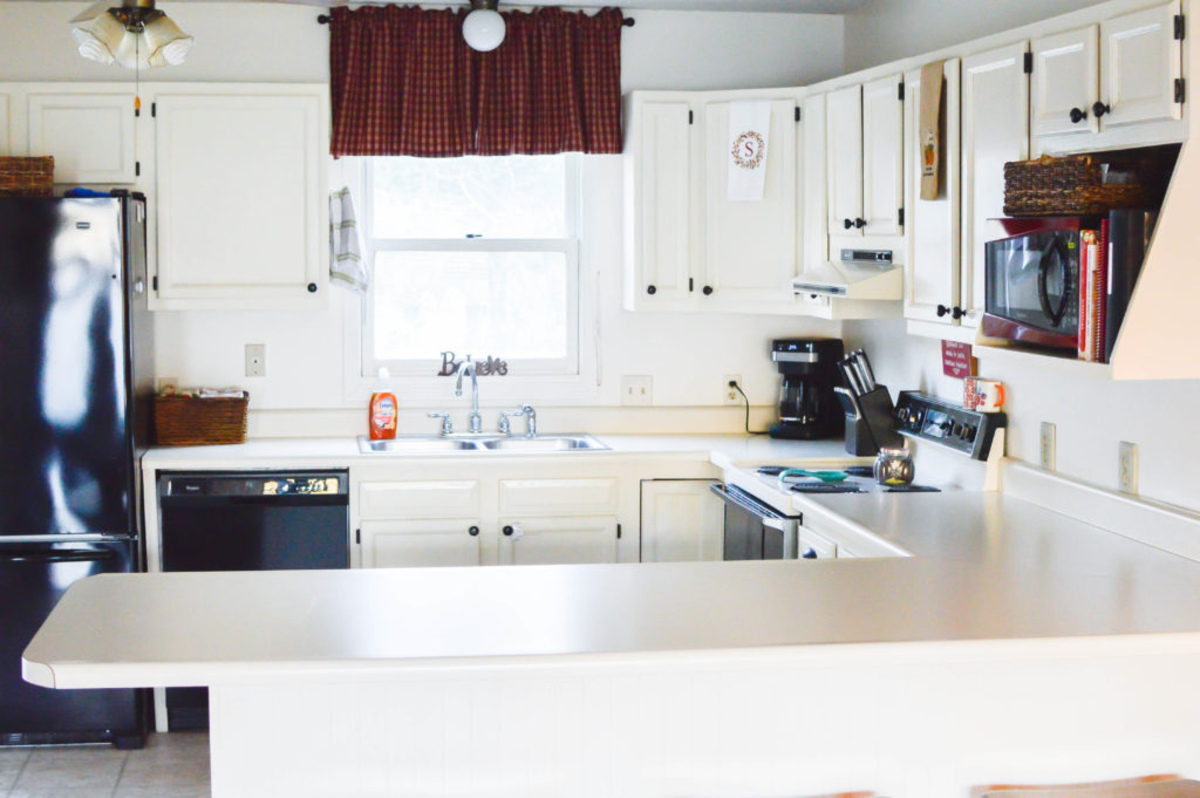
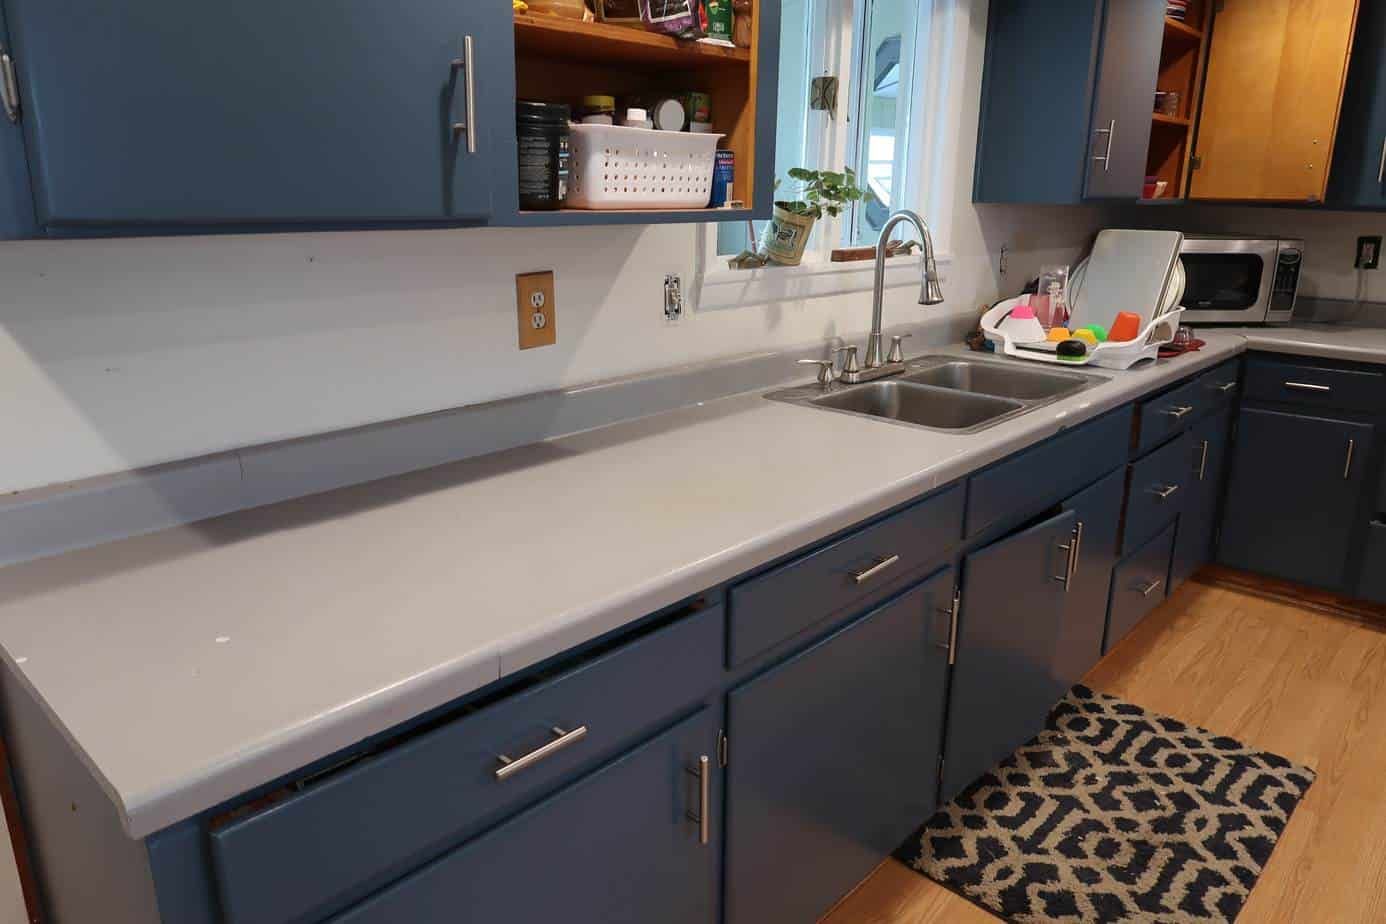
Tidy Countertop Solutions
Countertops are often the landing spots for various kitchen items, making them prone to clutter. However, with some smart organizing solutions, you can keep your countertops tidy and free up valuable workspace. Here’s how:
- Create designated zones: Assign specific areas on your countertop for different purposes, such as food preparation, small appliances, and utensils.
- Store frequently used items: Keep frequently used items, like cutting boards and knives, within easy reach near your food preparation area.
- Invest in vertical storage: Maximize vertical space by using wall-mounted racks or hooks to hang items such as mugs, paper towel holders, or spice racks.
- Use decorative baskets or containers: Place decorative baskets or containers on your countertops to store items like fruit, bread, or frequently used spices. This helps contain clutter in a stylish way.
- Consider a hanging pot rack: If you have limited cabinet space, hang a pot rack from the ceiling to store your pots and pans. This frees up valuable cabinet space and adds a decorative element to your kitchen.
- Keep mail and papers organized: Create a designated spot for mail and papers to prevent them from cluttering your countertops. Use a stylish tray or wall-mounted file organizer to keep things tidy.
- Utilize under-cabinet storage: Install under-cabinet hooks or baskets to hang coffee mugs, cooking utensils, or even a paper towel holder.
By implementing these tidy countertop solutions, you’ll have a clutter-free workspace and a visually appealing kitchen that’s both functional and organized.
Sorting and Storing Cookware
Cookware is an essential part of any kitchen, but it can quickly become a challenge to keep it organized. Here are some tips for sorting and storing your cookware efficiently:
- Sort by type: Group similar cookware items together, such as pots, pans, baking sheets, and lids. This will make it easier to find what you need when you’re cooking.
- Stackable pots and pans: Invest in stackable pots and pans to save space. Look for sets that can nest inside each other to maximize storage.
- Use adjustable dividers: Consider using adjustable dividers or tension rods inside drawers or cabinets to create compartments for your cookware. This helps to keep everything organized and prevents scratching or damage.
- Hang pots and pans: If you have limited cabinet space, install a pot rack or hooks on a wall or ceiling to hang your pots and pans. This not only saves space but also adds a decorative touch to your kitchen.
- Utilize lid organizers: Store pot and pan lids separately to avoid clutter. Use a lid organizer or a wire rack to keep them neatly stored and easily accessible.
- Consider a pegboard: Install a pegboard on a wall to hang your cookware, including pots, pans, and utensils. This customizable storage solution allows you to arrange your cookware in a way that works best for you.
- Store with care: Place a soft liner or felt pads between stacked pots and pans to prevent scratches. This will help preserve the longevity of your cookware.
By following these tips for sorting and storing your cookware, you’ll have a well-organized kitchen with easy access to your pots, pans, and other essential cooking tools.
Creating a Functional Spice Rack
A well-organized spice rack can transform your cooking experience. With easy access to all your spices, you’ll be able to enhance flavors in your dishes without the hassle of searching through cluttered cabinets. Here are some tips for creating a functional spice rack:
- Choose a dedicated space: Designate a specific area in your kitchen for your spice rack. It could be a wall-mounted shelf, a cabinet, or even a small countertop rack.
- Consider the layout: Arrange your spices in a way that makes sense to you. You can organize them alphabetically, by cuisine, or by frequency of use.
- Use uniform spice jars: Transfer your spices to uniform jars or containers. This not only creates a clean, streamlined look but also makes it easier to read labels and access spices.
- Label your spices: Clearly label each spice jar with its name or use a labeling system that’s easy to identify. This helps you quickly locate the spice you need while cooking.
- Consider spice racks with tiers or steps: Opt for spice racks that have multiple shelves or steps to display the labels of all your spices. This makes it easier to see what you have and avoid overlooking any options.
- Make use of drawer inserts: If you prefer to keep your spices hidden, consider using drawer inserts or spice drawer organizers to keep them neatly stored. This also protects them from sunlight and heat.
- Use magnetic spice containers: Invest in magnetic spice containers that can be attached to the side of your refrigerator or a magnetic board. This saves space and keeps your spices within reach.
- Group spices by type: Arrange your spices by type, such as herbs, baking spices, or international spices. This helps you easily find what you need based on the category of your recipe.
By following these tips, you can create a functional spice rack that not only keeps your spices organized but also adds a touch of culinary flair to your kitchen. Say goodbye to rummaging through cluttered cabinets and hello to easy access to all your spices!
Organizing Kitchen Utensils
Kitchen utensils are essential tools for cooking and preparing food, but keeping them organized can be a challenge. Here are some tips for organizing your kitchen utensils efficiently:
- Sort and declutter: Begin by sorting through your utensils and getting rid of any duplicates or items you no longer use. This decluttering process will make it easier to organize the utensils you actually need.
- Divide into categories: Group similar utensils together. For example, you can separate spatulas, ladles, whisks, and tongs.
- Choose a utensil holder: Select a utensil holder that suits your style and kitchen décor. This can be a ceramic crock, a metal container, or even a repurposed glass jar.
- Consider drawer dividers: If you prefer to store your utensils in drawers, use drawer dividers to keep them separated and organized. This makes it easier to find the utensil you need without rummaging through a jumbled mess.
- Hang utensils: Install hooks or a wall-mounted rack to hang utensils on the wall. This not only saves drawer or countertop space but also adds a decorative element to your kitchen.
- Utilize countertop space: If you have limited drawer space, keep frequently used utensils in a stylish container on the countertop. This makes them easily accessible while keeping them organized.
- Consider magnetic strips: Attach magnetic strips to the inside of cabinet doors or on a wall to hold metal utensils, such as knives. This keeps them within reach and frees up valuable drawer space.
- Label or color-code: To easily find specific utensils, consider labeling or color-coding them. Use labels or colored bands to identify different categories or family members’ utensils.
By implementing these tips for organizing kitchen utensils, you’ll have a well-organized cooking space where you can easily find the right tool for any culinary task. Say goodbye to digging through messy drawers or searching for misplaced utensils!
Storing and Organizing Bakeware
Bakeware, such as baking sheets, cake pans, and muffin tins, can take up a significant amount of space in your kitchen cabinets. Here are some tips for efficiently storing and organizing your bakeware:
- Assess your space: Take a look at your kitchen cabinets and identify the best area to store your bakeware. Consider whether vertical or horizontal storage would work best for your available space.
- Utilize vertical dividers: Install vertical dividers or wire racks in your cabinet to create compartments for storing baking sheets and cutting boards upright. This maximizes space and prevents items from getting stacked on top of each other.
- Invest in adjustable racks or shelves: Purchase adjustable racks or shelves that can accommodate different sizes of baking pans. This allows you to customize the storage space based on your specific needs.
- Consider hanging racks: If you have limited cabinet space, install a hanging rack on the inside of a cabinet door or on a wall to hang your baking pans and molds. This frees up cabinet space and makes them easily accessible.
- Use stackable storage containers: Place smaller bakeware items, such as muffin tins or cake pans, inside stackable storage containers. This helps keep them organized and prevents them from sliding around or getting scratched.
- Separate with wire file organizers: Invest in wire file organizers and use them vertically inside cabinets to create dividers for separating baking pans or cooling racks. This keeps them neat and easy to grab when needed.
- Label or color-code: Consider labeling or color-coding your bakeware to easily identify different types or sizes. Use labels or colored tags to make finding the right bakeware a breeze.
By following these tips, you can efficiently store and organize your bakeware, making it easy to access and keeping your kitchen cabinets clutter-free. Now you’ll be ready to whip up delicious treats without any fuss!
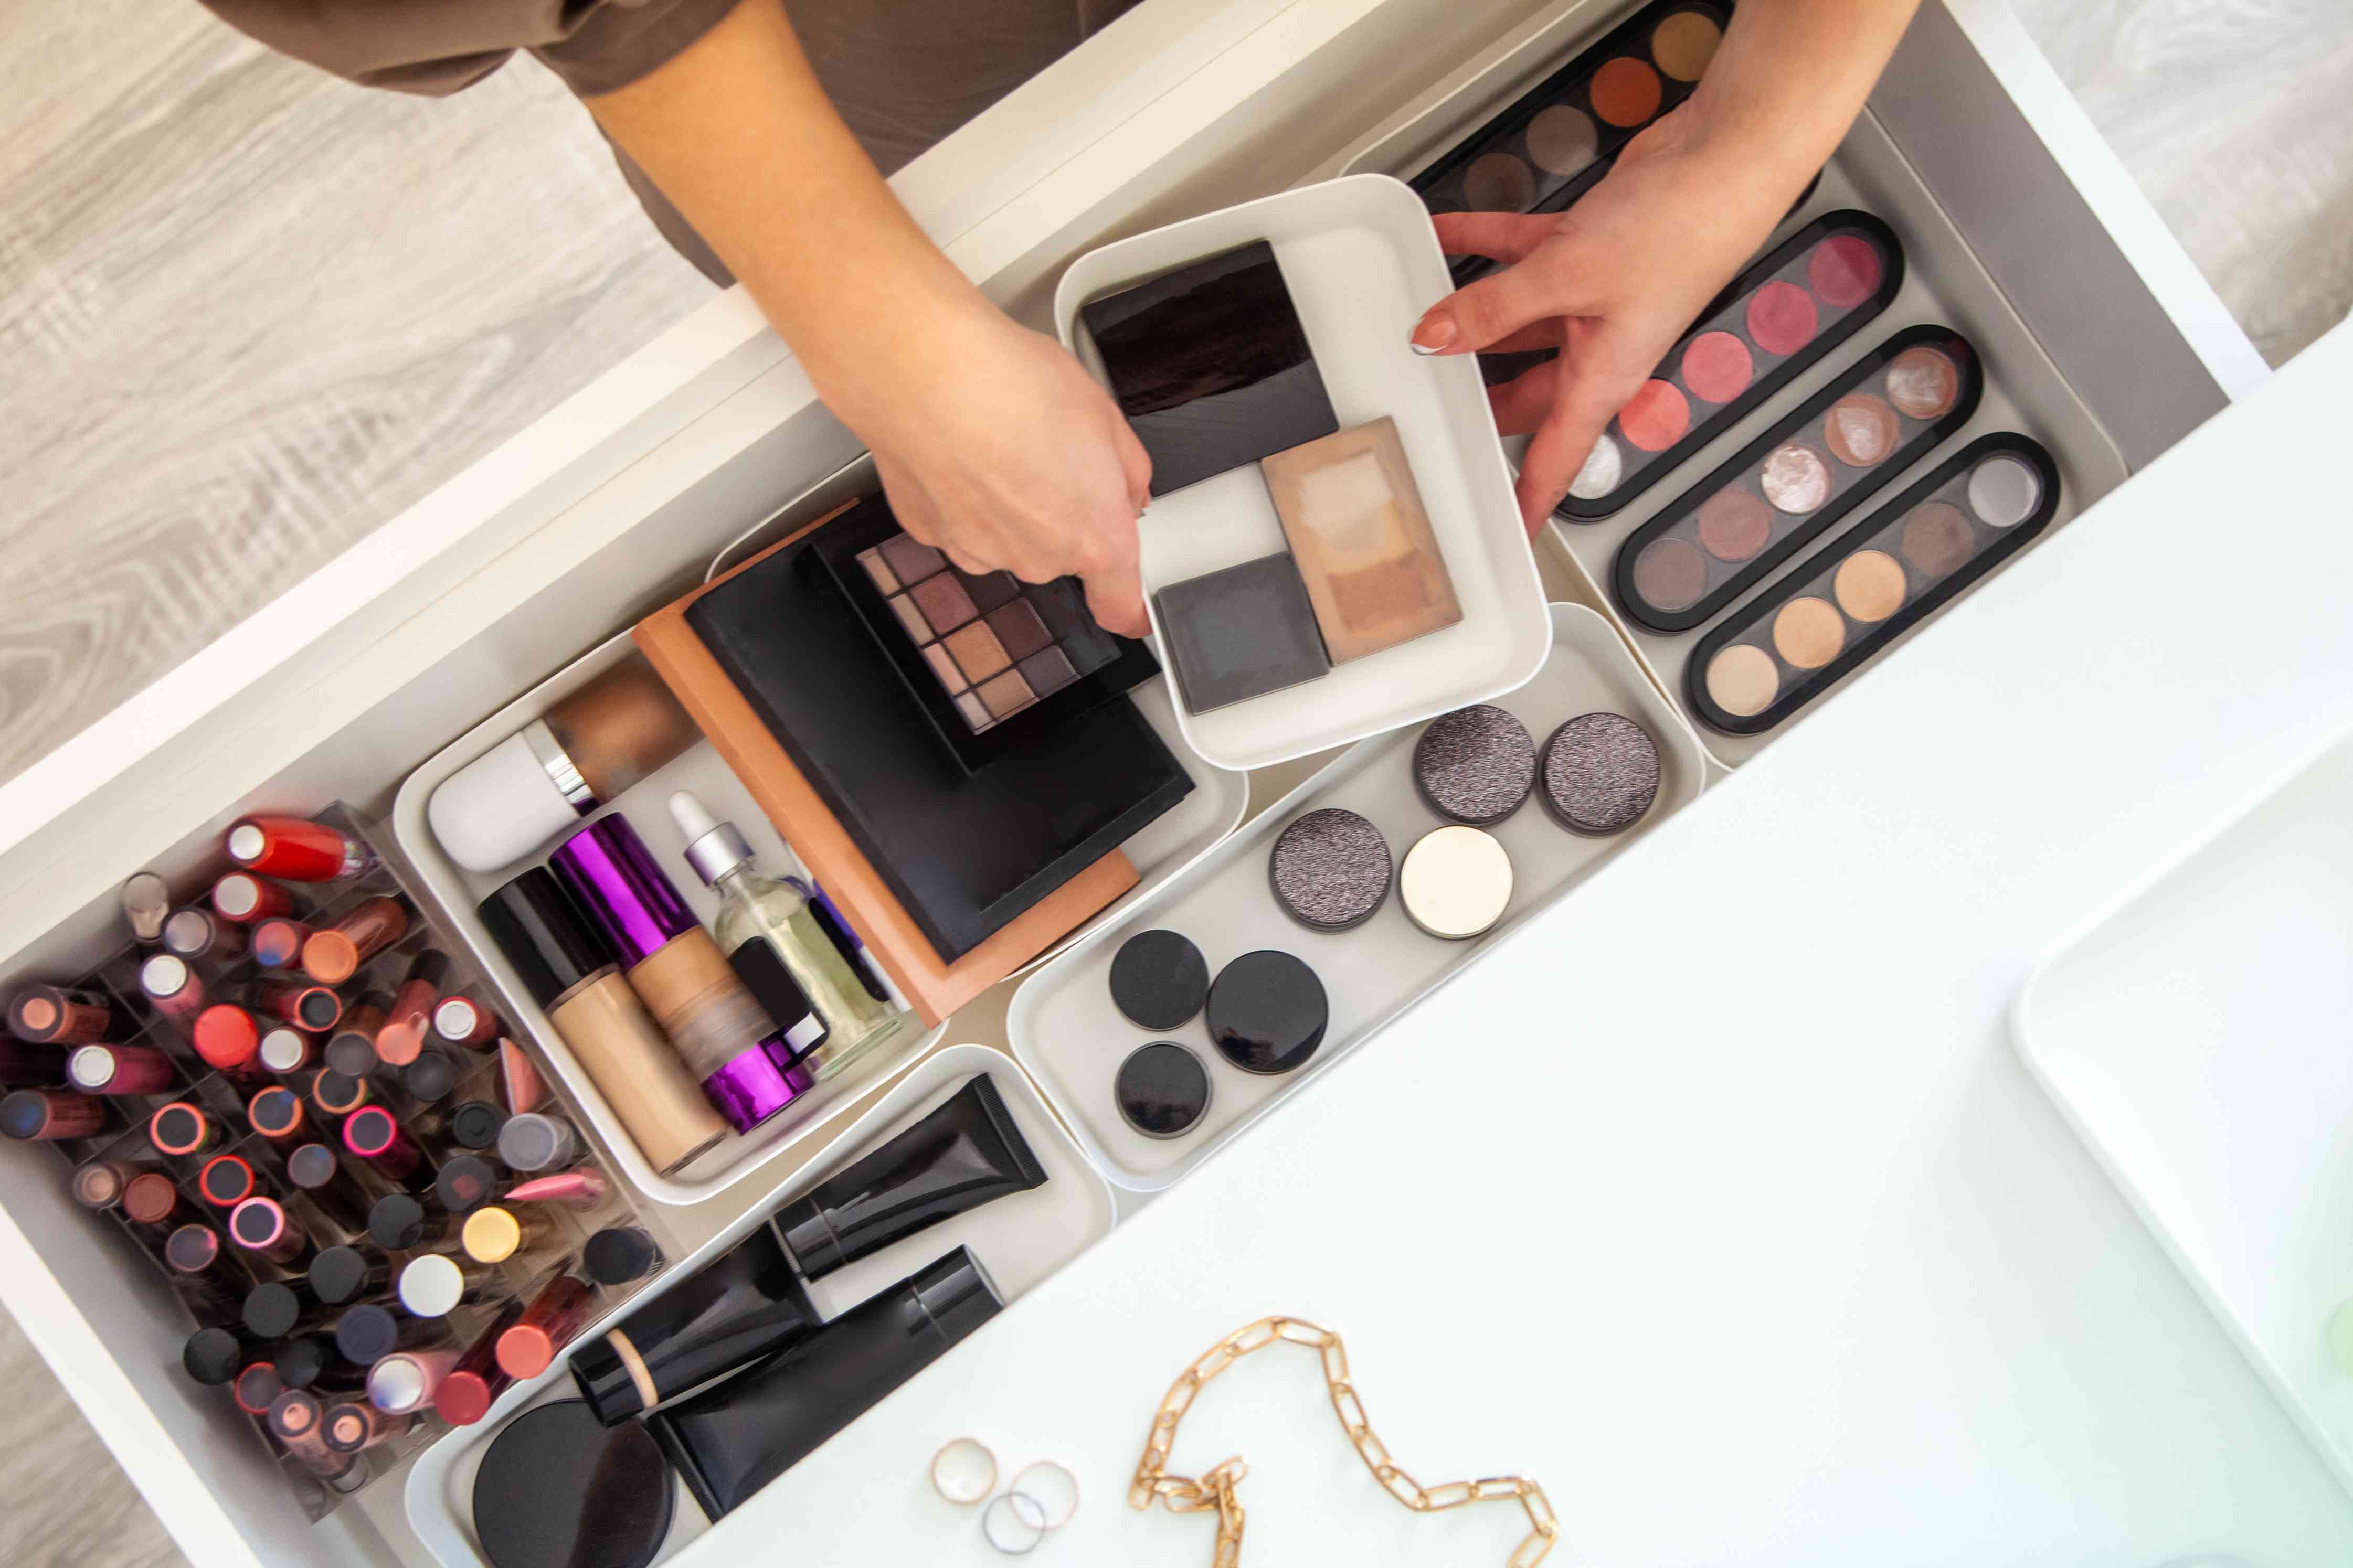
Use drawer dividers to separate and organize utensils, making it easier to find what you need and keep the kitchen clutter-free.
Efficiently Arranging Cutting Boards and Baking Sheets
Cutting boards and baking sheets are essential tools in the kitchen, but they can be tricky to store and organize due to their size and shape. Here are some tips for efficiently arranging your cutting boards and baking sheets:
- Vertical storage: Store cutting boards and baking sheets vertically between dividers or wire racks. This allows you to easily slide them in and out without having to lift and stack heavy items.
- Use a file organizer: Place a vertical file organizer inside a cabinet to create compartments for holding cutting boards and baking sheets upright. This prevents them from shifting and falling over.
- Invest in a bakeware organizer: Consider purchasing a bakeware organizer specifically designed to hold cutting boards, baking sheets, and other flat items. These organizers often have adjustable slots to accommodate different sizes.
- Use a tension rod: Install a tension rod vertically in a cabinet or on the inside of a pantry door. Hang your cutting boards and baking sheets from the rod using S-hooks. This saves space and makes them easily accessible.
- Repurpose a magazine holder: Use a magazine holder turned on its side to store cutting boards and baking sheets upright. This is an affordable and effective way to keep them neatly organized.
- Separate with dividers: If you have deep drawers, use dividers to create sections for organizing cutting boards and baking sheets horizontally. This prevents them from sliding around and makes it easy to find the one you need.
- Install a pegboard: Mount a pegboard on the wall and insert pegboard hooks to hang cutting boards and baking sheets. This not only keeps them organized but also adds a decorative element to your kitchen.
By efficiently arranging your cutting boards and baking sheets using these tips, you’ll have a well-organized kitchen where you can easily access and store these essential kitchen tools. Say goodbye to wrestling with stacked messes and hello to a streamlined and functional setup!
Managing Food Storage Containers
Food storage containers are a staple in every kitchen, but managing them can be a challenge. From matching lids to finding enough space, it’s important to have an organized system in place. Here are some tips for managing your food storage containers:
- Declutter and match: Start by decluttering your collection of food storage containers. Get rid of any containers with missing or damaged lids, as well as those that you no longer use or need. Match each container with its corresponding lid to ensure they are a perfect fit.
- Use stackable containers: Invest in stackable food storage containers, as they save space and make it easier to organize. Look for sets that nest inside each other when not in use.
- Standardize container sizes: Consider using a specific size or brand of food storage containers to keep everything uniform. This makes stacking and storing them more efficient.
- Dedicate a cabinet or drawer: Designate a specific cabinet or drawer for storing your food storage containers. This helps you easily locate them and prevents them from taking over your entire kitchen.
- Use adjustable dividers: Install adjustable dividers or organizers within the cabinet or drawer to create separate compartments for different sizes and types of containers.
- Keep lids separate: Use a separate container, bin, or lid organizer to store all the lids in one place. This prevents them from getting lost or cluttering up your storage space.
- Consider drawer inserts: If cabinet space is limited, use drawer inserts or dividers to neatly organize your food storage containers. This makes it easy to see the options and grab the one you need without having to stack or search through a pile.
- Label containers: Label your food storage containers with the contents and date of storage. This helps you keep track of leftovers and makes it easier to know what’s inside without opening every container.
- Store lids vertically: If you have limited space, store lids vertically in a dish rack or a file organizer. Arrange them by size so you can easily access the one you need.
By implementing these tips for managing your food storage containers, you’ll have an organized system where you can easily find matching pieces and maximize your storage space. Say goodbye to lid chaos and messy stacks, and enjoy a clutter-free and efficient food storage area in your kitchen!
Organizing Small Appliances
Small kitchen appliances can make our lives easier, but they can also create clutter if not properly organized. Here are some tips for organizing your small appliances:
- Assess your usage: Start by evaluating which appliances you use frequently and those that are rarely used. Consider donating or selling appliances that are taking up precious space but seldom see the light of day.
- Create a dedicated space: Designate a specific area in your kitchen, such as a cabinet or pantry shelf, for storing small appliances. This will help keep them organized and easily accessible.
- Group similar appliances: Arrange your small appliances into categories based on their functionality. For example, group coffee-related appliances together or store blenders and food processors in the same area.
- Utilize vertical space: Install shelves or use stackable storage units to maximize vertical space. This allows you to store appliances on top of each other, saving valuable countertop or cabinet space.
- Consider pull-out shelves: If you have deep cabinets, install pull-out shelves or organizers to easily access appliances stored in the back. This eliminates the need to dig through the entire cabinet to find what you need.
- Use cord management solutions: Wrap up excess cords and keep them organized with cord management solutions, such as cable ties or Velcro straps. This helps prevent tangles and keeps your storage area neat and hazard-free.
- Keep manuals and accessories together: Designate a specific drawer or folder to keep appliance manuals, warranties, and any additional accessories. This way, everything is in one place when you need it.
- Label cords and containers: Use labels to identify which appliance each cord belongs to. You can also label storage containers or shelves to easily locate specific appliances.
- Store frequently used appliances within reach: Keep the appliances you use daily or frequently on the countertop or in an easily accessible cabinet. This saves you time and effort when preparing meals.
By implementing these strategies for organizing your small appliances, you’ll have a clutter-free and functional kitchen where you can easily find and use your favorite gadgets. Enjoy the convenience of a well-organized space that enhances your cooking experience!
Efficiently Arranging Pots and Pans
Pots and pans are essential tools in the kitchen, but storing them can be challenging due to their bulky shapes and sizes. Here are some tips for efficiently arranging your pots and pans:
- Declutter and assess: Start by decluttering your collection of pots and pans. Remove any items that are damaged, rarely used, or no longer functional. This will free up space and make organizing easier.
- Nest when possible: Nest pots and pans of similar sizes together to save space. This reduces clutter and prevents items from taking up unnecessary room in your cabinets or drawers.
- Utilize vertical dividers: Install vertical dividers or adjustable wire racks in your cabinets to separate and store pots and pans vertically. This provides easy access to each item without having to lift and move multiple items.
- Invest in pot and pan racks: Consider installing pot and pan racks in your cabinets or on the wall. These racks have hooks or slots to hang your cookware, saving valuable cabinet space and allowing for easy organization.
- Use a lid organizer: Store pot and pan lids separately to prevent clutter and make it easier to find the correct lid. Use a lid organizer or a wire file organizer placed vertically to keep them neatly organized.
- Consider a hanging pot rack: If you have limited cabinet space, hang a pot rack from the ceiling or install a wall-mounted pot rack to free up valuable cabinet space. This adds a decorative element to your kitchen while keeping your pots easily accessible.
- Organize by frequency of use: Arrange your pots and pans based on their frequency of use. Keep the ones you use most often within easy reach, such as on lower shelves or in pull-out drawers.
- Use adjustable drawer dividers: Utilize adjustable dividers in deep drawers to create compartments for pots and pans. This prevents them from shifting or scratching each other.
- Consider lid storage: If space permits, allocate a specific area or use a lid organizer to store pot and pan lids. This keeps them organized and prevents them from taking up unnecessary space.
By efficiently arranging your pots and pans using these tips, you’ll have a well-organized kitchen with easily accessible cookware. Say goodbye to digging through cluttered cabinets and hello to a streamlined and efficient cooking experience!
Sorting and Storing Glassware
Glassware, such as drinking glasses, wine glasses, and mugs, adds elegance and functionality to your kitchen. To keep your glassware organized and protected, follow these sorting and storing tips:
- Sort by type: Begin by categorizing your glassware by type, such as water glasses, wine glasses, and coffee mugs. This allows you to easily locate the specific type of glassware you need.
- Declutter and donate: If you have more glassware than you can use or store, consider decluttering by donating or giving away the excess items. This helps free up space and ensures that others can enjoy them.
- Protect fragile items: Use bubble wrap, tissue paper, or dish towels to separate and protect fragile glassware, especially during storage or when moving. This helps prevent chips, cracks, or breakage.
- Store by frequency of use: Keep frequently used glassware within easy reach, such as at eye level or in lower cabinets, for quick and convenient access.
- Use adjustable shelves: Install adjustable shelves in your cabinets to accommodate different heights of glassware. This maximizes storage space and prevents taller glasses from toppling over.
- Install hanging racks: Hang stemware racks or hooks underneath cabinets to store wine glasses or delicate glassware. This not only saves cabinet space but also adds a touch of elegance to your kitchen.
- Stack or nest glasses: If you have limited cabinet space, stack or nest glasses of the same type within each other to save room. Use protective padding between glasses to prevent scratching.
- Consider glassware dividers: Insert adjustable glassware dividers within cabinets or drawers to create separate compartments for different types of glassware. This keeps them organized and reduces the risk of breakage.
- Utilize open shelving: Display your beautiful glassware on open shelves or glass-front cabinets. This adds a decorative element to your kitchen and makes it easy to showcase your collection.
By sorting and storing your glassware with these tips in mind, you can maintain a well-organized kitchen while showcasing your beautiful glassware. Cheers to a functional and stylish glassware storage solution!
Organizing Dishware and Utensils
Dishware and utensils are essential components of any kitchen, and organizing them properly can make a big difference in your daily routines. Here are some tips for organizing your dishware and utensils efficiently:
- Declutter and Donate: Start by decluttering your dishware and utensils. Get rid of any chipped, cracked, or mismatched pieces. Consider donating unused items that are taking up space.
- Group by Function: Organize your dishware and utensils by function or type. Group plates, bowls, and serving dishes together, and separate utensils into categories like spoons, forks, and knives.
- Utilize Adjustable Dividers: Use adjustable dividers in your drawers or cabinets to create separate compartments for dishware and utensils. This helps prevent items from shifting and keeps everything neatly organized.
- Stack Dishware Neatly: Stack plates and bowls by size, with the largest on the bottom. Place a protective liner or napkin between each item to prevent scratches.
- Invest in Drawer Organizers: Use dedicated drawer organizers to separate utensils. Dividers or trays with various compartments can keep different utensils types organized and easy to find.
- Arrange by Frequency of Use: Store frequently used dishware and utensils in easily accessible areas, such as lower shelves or top drawers. Reserve higher or harder-to-reach areas for less frequently used items.
- Consider Plate Racks or Dish Dividers: Incorporate plate racks or vertical dish dividers in cabinets to neatly stack your dishes. This prevents them from sliding or chipping.
- Use Cabinet Door Organizers: Utilize the inside of cabinet doors by installing door-mounted organizers. These can hold lids, cutting boards, or even measuring cups and spoons.
- Label or Color-Code: Label shelves or use colored markers to designate specific areas for different dishware and utensils. This makes it easier for family members or guests to find what they need.
By implementing these tips, you’ll have a well-organized kitchen where your dishware and utensils are easily accessible and neatly arranged. Enjoy the convenience of a clutter-free space for efficient meal preparation and dining!
Read more: How To Organize Customer Orders
Creating an Efficient Dish Drying System
After washing your dishes, having an efficient dish drying system can help streamline your kitchen routines and keep your countertops clean and clutter-free. Here are some tips to create an efficient dish drying system:
- Invest in a Dish Drying Rack: Purchase a high-quality dish drying rack with enough space to accommodate your daily dishwashing needs. Look for one that has separate compartments for plates, cups, and utensils.
- Position the Drying Rack Near the Sink: Place the dish drying rack near the sink to allow for easy transfer of wet dishes. This helps to minimize water spills and keeps your drying area organized.
- Utilize the Space above the Sink: If you have limited countertop space, consider installing a hanging dish drying rack above your sink. This allows the dishes to drip directly into the sink, keeping the countertops free.
- Opt for a Dish Drying Mat: If you prefer not to use a dish drying rack, invest in a dish drying mat that absorbs water and cushions delicate dishes. Place it next to the sink and spread out your dishes for air drying.
- Separate Utensils: Use a utensil holder or compartment on the dish drying rack to separate your utensils. This prevents them from tangling and eases the process of putting them away once dry.
- Dry Dishes Vertically: Prop up plates vertically in the dish drying rack to maximize space and promote faster drying. This also makes it easier to see and access each plate when putting dishes away.
- Leave Space for Air Circulation: Arrange your dishes in the rack, leaving plenty of space between each item. This allows air to circulate, helping the dishes dry more quickly and reducing the risk of moisture buildup.
- Consider Drying Time: When organizing your dish drying system, plan to wash dishes in a way that allows for proper drying time before you need to use them. This ensures that they are completely dry and ready to be put away.
- Maintain and Clean the Drying Area: Regularly clean and disinfect your dish drying area to prevent the buildup of bacteria. Wipe down the dish drying rack, mat, and surrounding countertops to keep everything fresh and hygienic.
By implementing these tips, you’ll create an efficient dish drying system that helps your dishes dry quickly and keeps your kitchen organized. Enjoy the benefits of having a tidy and functional dish drying space!
Maximizing Drawer Space
Drawers are valuable real estate in the kitchen, providing convenient storage for utensils, gadgets, and various kitchen essentials. To make the most of your drawer space and keep everything organized, consider the following tips:
- Purge and declutter: Start by decluttering your drawers and getting rid of any items you no longer need or use. Letting go of unnecessary items creates room for the ones you truly need.
- Use adjustable drawer dividers: Invest in adjustable drawer dividers to create customized compartments according to your specific needs. This allows you to separate items and maximize the available space.
- Stack or nest items: Stack items such as cutting boards, baking sheets, and cooling racks vertically within the drawer to save space. Nesting measuring cups and spoons also helps to maximize the available room.
- Consider multi-tiered organizers: Utilize multi-tiered organizers that expand vertically, creating layers within the drawer. These organizers are perfect for storing spices, jars, or small items that would otherwise take up a lot of horizontal space.
- Make use of drawer inserts: Utilize drawer inserts or trays with various compartments to keep smaller items, such as utensils or gadgets, neatly arranged and easily accessible.
- Hang items on the side of the drawer: Attach small hooks or adhesive clips on the sides of the drawer to hang lightweight items like oven mitts, measuring spoons, or small tools. This clever solution maximizes space and keeps items within reach.
- Utilize drawer fronts for storage: Attach adhesive containers or magnetic strips to the inside of the drawer front to hold small items like spices, clips, or notes. This makes use of otherwise unused space.
- Store infrequently used items elsewhere: Reserve prime drawer space for items you use frequently, such as utensils and everyday tools. Store less frequently used or seasonal items in a separate location to free up space.
By implementing these strategies, you’ll be able to maximize the space within your kitchen drawers, keeping everything neatly organized and easily accessible. Say goodbye to drawer clutter and hello to a more functional and efficient kitchen!
Tidying up Kitchen Gadgets and Accessories
Kitchen gadgets and accessories can accumulate quickly, making it challenging to keep your kitchen organized. To maintain a clutter-free and functional space, try the following tips to tidy up your kitchen gadgets and accessories:
- Assess and declutter: Start by assessing your kitchen gadgets and accessories. Determine which ones you use regularly and which ones you can do without. Let go of items that are broken, unused, or duplicate.
- Group similar items together: Categorize your gadgets and accessories based on their function or use. Group items like baking tools, cooking utensils, or small appliances together to make it easier to find and retrieve them when needed.
- Utilize drawer dividers or organizers: Use drawer dividers or organizers to create compartments for different gadgets and accessories. This keeps them neat and prevents them from clumping together.
- Hang gadgets or use wall-mounted racks: Install hooks or magnetic strips on the wall or inside cabinet doors to hang gadgets with handles or small utensils. This not only saves space but also provides easy access to frequently used items.
- Keep frequently used items at arm’s reach: Store commonly used gadgets and accessories within easy reach on the countertop or in a top drawer. This minimizes the need to rummage through multiple places to find what you need.
- Use clear or labeled containers: Use clear or labeled containers to organize small gadgets or accessories that tend to get lost easily. This makes it easier to see what you have and prevents items from becoming jumbled.
- Consider vertical storage: Utilize vertical storage by using shelf risers or stackable bins. This allows you to maximize vertical space and stack gadgets or smaller accessories neatly.
- Store gadgets near their designated workspace: Keep gadgets and accessories near the area where you use them most. For example, store baking tools near the baking station and grilling accessories near the grill. This reduces clutter and minimizes the need to search for items.
- Regularly clean and maintain: Clean gadgets and accessories regularly to ensure they stay in good condition. Follow manufacturer instructions for cleaning and maintenance to prolong their lifespan.
By implementing these tidying tips, you’ll have a more organized and efficient kitchen. Your gadgets and accessories will be easily accessible, making your cooking and meal preparation tasks more enjoyable and streamlined.
Organizing Cleaning Supplies
Organizing cleaning supplies is essential to keep your cleaning routine efficient and hassle-free. By implementing a system, you can easily find what you need and maintain a tidy space. Here are some tips for organizing your cleaning supplies:
- Declutter and consolidate: Begin by decluttering your cleaning supplies. Dispose of any expired or unused products and consolidate multiples of the same item.
- Categorize your supplies: Group cleaning supplies according to their function. Create categories such as surface cleaners, bathroom cleaners, window cleaners, and laundry supplies.
- Designate a specific storage area: Select a specific cabinet, shelf, or closet to store your cleaning supplies. Keeping them in one location makes it easier to find what you need and prevents clutter in other areas.
- Use storage containers or bins: Choose storage containers or bins to hold small cleaning supplies and tools. This helps keep them organized and prevents them from rolling around or getting lost.
- Label containers: Label containers or use clear bins to easily identify the contents. This ensures that you can quickly find the specific supplies you need.
- Utilize door-mounted organizers: Maximize space by adding door-mounted organizers to the inside of cabinet doors. These organizers are perfect for storing small brushes, sponges, and gloves.
- Arrange products by size: Organize cleaning products by size, with taller bottles at the back and shorter ones at the front. This allows for better visibility and easier access to each product.
- Keep frequently used supplies accessible: Place frequently used cleaning supplies within easy reach. Store them on lower shelves or in a cleaning caddy for quick access when tackling routine tasks.
- Secure hazardous materials: Keep hazardous or toxic cleaning products safely out of reach of children and pets. Store them in locked cabinets or higher shelves to ensure their proper handling.
- Regularly check and restock: Periodically review your cleaning supplies to check for expired products or items in need of replacement. Restock as necessary to maintain a well-stocked and effective cleaning arsenal.
By implementing these organizing tips, you’ll have a well-arranged cleaning supplies area. This will not only make cleaning more efficient and enjoyable but also contribute to a cleaner and more organized home overall.
Simplifying and Maintaining Kitchen Organization
Organizing your kitchen is not a one-time task; it requires ongoing effort to maintain a clean and functional space. By simplifying your kitchen organization and establishing maintenance routines, you can enjoy a stress-free and efficient cooking environment. Here are some tips to simplify and maintain kitchen organization:
- Minimize clutter: Regularly declutter your kitchen by getting rid of items you no longer use or need. Donate or sell excess utensils, gadgets, and appliances to create more space and streamline your kitchen.
- Establish designated spots: Assign specific areas for different items in your kitchen. Designate spots for utensils, pots and pans, dishes, and cleaning supplies. This simplifies finding and returning items to their rightful place.
- Implement daily maintenance habits: Develop daily habits, such as cleaning up after each meal, putting away dishes immediately, and wiping countertops regularly. These small actions can make a big difference in preventing clutter and maintaining a clean kitchen.
- Regularly rotate pantry items: Check pantry items regularly and rotate them based on their expiration dates. Move older items to the front and utilize them first to prevent food waste and maintain a well-organized pantry.
- Create a meal planning system: Plan your meals in advance to reduce food waste and make grocery shopping more efficient. This helps to keep your refrigerator and pantry organized and ensures you have the necessary ingredients on hand.
- Group items by frequency of use: Arrange your kitchen items so that those used most frequently are easily accessible. Store everyday dishes, glasses, and commonly used utensils at eye level or in easily reachable drawers or cabinets.
- Regularly clean and declutter countertops: Commit to keeping your countertops clear of unnecessary items. Remove items that don’t belong and find designated storage for gadgets, small appliances, and other kitchen tools.
- Utilize labeling and clear containers: Label containers, jars, or bins to identify their contents easily. Use clear containers for pantry items and dry goods to ensure visibility and simplify organization.
- Routinely review and adjust: Regularly assess your kitchen organization systems to ensure they are still working for you. Make adjustments as needed based on changing needs or lifestyle.
- Involve the whole household: Teach and encourage family members to maintain an organized kitchen. Assign specific tasks to each person to help keep the kitchen tidy, such as dishwashing, clearing the table, or organizing groceries.
By simplifying your kitchen organization and establishing consistent maintenance routines, you’ll create a kitchen that is both functional and stress-free. Embrace the satisfaction of an organized kitchen, and enjoy the benefits of a simplified and efficient cooking space!
Frequently Asked Questions about Organizing A Kitchen: 21 Tricks Organizers Use To Keep Order
Was this page helpful?
At Storables.com, we guarantee accurate and reliable information. Our content, validated by Expert Board Contributors, is crafted following stringent Editorial Policies. We're committed to providing you with well-researched, expert-backed insights for all your informational needs.


0 thoughts on “Organizing A Kitchen: 21 Tricks Organizers Use To Keep Order”