Home>Technology>Home Entertainment Systems>How To Hide Television Wires
Home Entertainment Systems
How To Hide Television Wires
Modified: August 27, 2024
Learn how to easily hide television wires with our expert guide on home entertainment systems. Upgrade your living space for a sleek and clutter-free look.
(Many of the links in this article redirect to a specific reviewed product. Your purchase of these products through affiliate links helps to generate commission for Storables.com, at no extra cost. Learn more)
Introduction
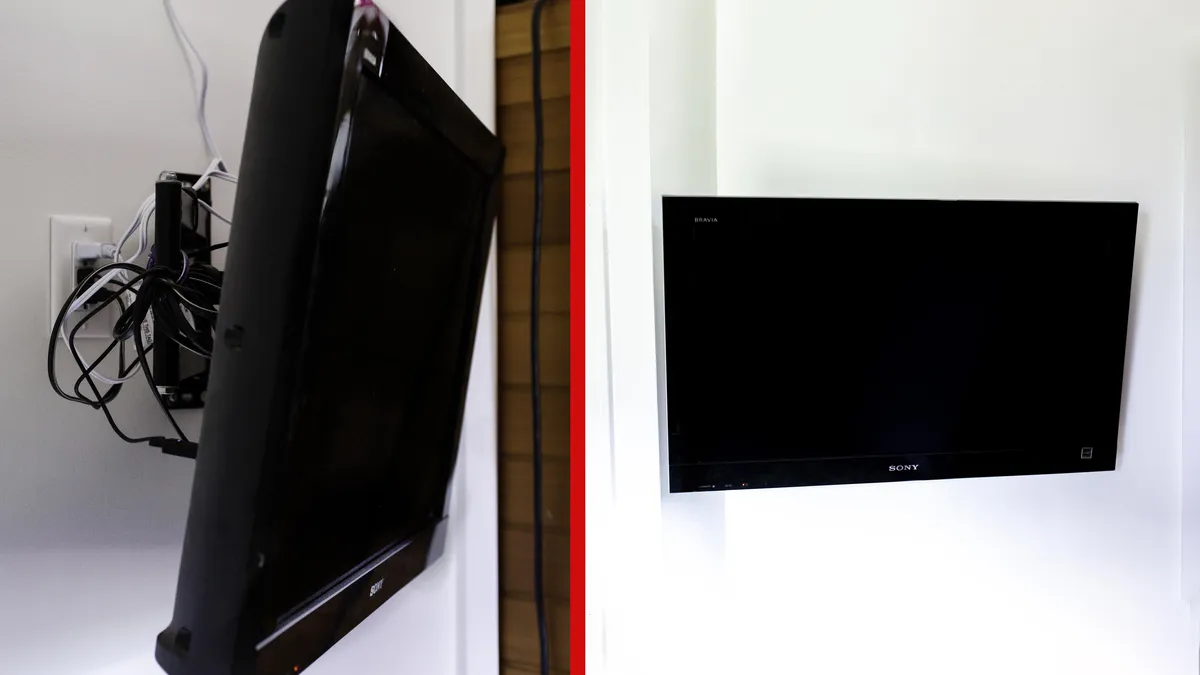
Having a sleek and clutter-free home entertainment system is the dream of every homeowner. But when it comes to television setups, one of the biggest challenges is dealing with the unsightly tangle of wires. Fortunately, there are effective solutions to hide those wires and create a clean and organized look in your living room.
In this article, we will guide you through the process of hiding television wires, from planning the cable management to securing and organizing the wires. With just a few tools and materials, you can achieve a professional-looking setup that not only improves the aesthetics of your home but also enhances your overall viewing experience.
Key Takeaways:
- Say goodbye to unsightly TV wires with careful planning, the right tools, and cable management solutions. Enjoy a clutter-free home entertainment system that enhances both aesthetics and functionality.
- Transform your living space with a sleek and organized home entertainment system. Hide TV wires with precision, secure and organize them, and enjoy a seamless viewing experience.
Read more: How To Hide Chandelier Wires
Tools and Materials Needed
Before you begin hiding your television wires, make sure you have the following tools and materials on hand:
- Power drill
- Screwdriver
- Stud finder
- Level
- Cable management kit (such as cable raceways or wall-mounted cable covers)
- Zip ties or cable clips
- Tape measure
- Pencil or marker
- Drywall saw or utility knife
These tools will help you properly plan, route, and hide the wires for your television setup. It’s important to have the right tools to ensure a safe and efficient installation process.
Additionally, it’s a good idea to have a friend or family member assist you during this process, as an extra pair of hands can be invaluable when mounting the television and routing the wires.
Now that you have all the necessary tools and materials, let’s move on to the steps involved in hiding television wires.
Step 1: Planning the Cable Management
Before you start drilling holes and concealing wires, take some time to plan out your cable management strategy. This will ensure a neat and organized setup that meets your specific needs. Here’s what you need to consider:
- Identify the cable routes: Look at your television and determine where the cables need to go. Consider the location of power outlets, cable/satellite connections, and any other devices you may have.
- Measure the cable lengths: Measure the distance between your television and each connection point to determine how much cable you will need. If possible, add a few extra inches for flexibility.
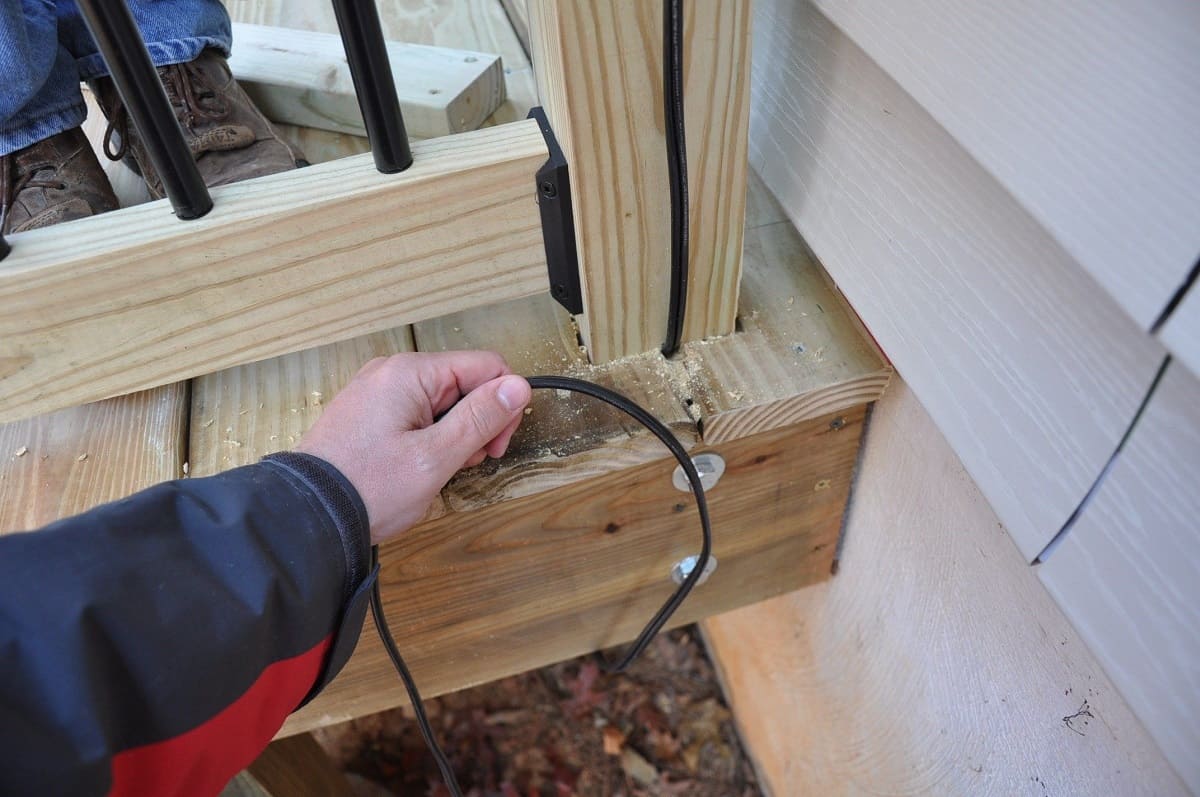
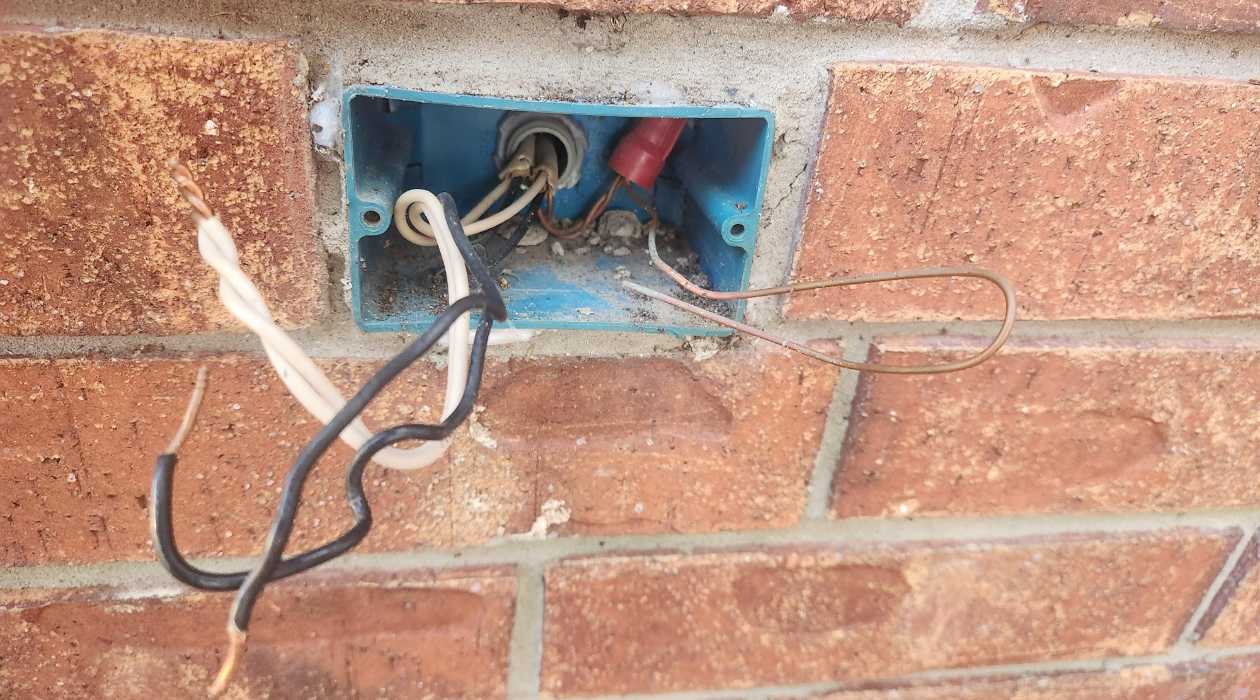
- Consider the wall type: Take note of the type of wall you will be working with. For example, if you have drywall, you may need to use cable raceways or wall-mounted cable covers. On the other hand, if you have a brick or concrete wall, you may need to drill holes and use cable conduits.
- Identify potential obstacles: Check for any obstacles such as studs, pipes, or electrical wires that may affect your cable routing. Use a stud finder to locate studs in the wall, which can provide support for your television mount.
- Plan for future additions: Think about any future devices or cables you may need to add to your setup. Leave some extra space or consider using a larger cable management solution to accommodate future expansion.
By carefully planning your cable management strategy, you can ensure a seamless installation process and avoid any surprises or complications along the way.
Once you have a clear plan in place, you are ready to move on to the next step: choosing the right cable management solution.
Step 2: Choosing the Right Cable Management Solution
With a well-thought-out plan in hand, it’s time to select the cable management solution that best suits your needs and complements your home’s aesthetics. Here are some options to consider:
- Cable raceways: Cable raceways are adhesive plastic channels that can be mounted on the wall or baseboard. They offer a simple and effective way to conceal wires and can be easily painted to match your wall color.
- Wall-mounted cable covers: These covers are designed to be mounted directly onto the wall, creating a seamless look. They typically have a hinged design that allows you to easily access and manage the cables.
- Cable conduits: Conduits are rigid or flexible tubes that can be installed within the wall to hide wires. This method provides a clean and permanent solution but requires more time and effort for installation.
- Cable sleeves: Cable sleeves are flexible fabric covers that can be wrapped around bundles of wires. They are a cost-effective and easy-to-install option that provides a clean and organized look.
Consider the advantages and disadvantages of each option, such as ease of installation, flexibility for future changes, and how well it blends with your decor. Remember to also take into account the number and thickness of the cables you need to conceal.
Once you have decided on the right cable management solution, you can proceed with the installation process, knowing that your wires will be neatly concealed and organized. In the next step, we will prepare the television and wall for cable management.
Step 3: Preparing the Television and Wall
Before you start routing and concealing the wires, it’s important to properly prepare the television and wall to ensure a smooth and secure installation. Follow these steps to get started:
- Mount the television: If your television is not already mounted on the wall, follow the manufacturer’s instructions to securely mount it using the appropriate wall mount. Make sure it is level and at a comfortable viewing height.
- Locate the connection points: Identify the locations where you will be connecting cables, such as HDMI ports, power outlets, and audio/visual inputs. Mark these points with a pencil or marker.
- Prepare the wall: If you are using cable raceways or wall-mounted cable covers, clean the wall surface and ensure it is free from any dirt or debris. For cable conduits, use a drywall saw or utility knife to create the necessary openings in the wall.
- Plan the cable exit point: Decide where the cables will exit the wall or cable cover. This should be a location that allows for easy access and a clean cable run to your devices.
- Check the stability: Double-check the stability of your television mount and ensure it is securely attached to the wall. This will help prevent any potential accidents or damage to your equipment.
By properly preparing the television and wall, you can create a solid foundation for your cable management setup. Once you have completed these steps, you are ready to move on to the next phase: routing and concealing the wires.
Use cable management solutions such as cord covers, raceways, or wall-mounted channels to hide television wires. These options can help keep wires organized and out of sight, creating a cleaner and more polished look for your entertainment area.
Read more: How To Hide Your Television
Step 4: Routing and Concealing the Wires
Now that your television and wall are properly prepared, it’s time to start routing and concealing the wires. Follow these steps to achieve a clean and organized cable setup:
- Start with the power cord: Begin by routing the power cord from your television to the nearest power outlet. Use cable raceways, cable sleeves, or cable clips to secure the power cord along the wall or baseboard.
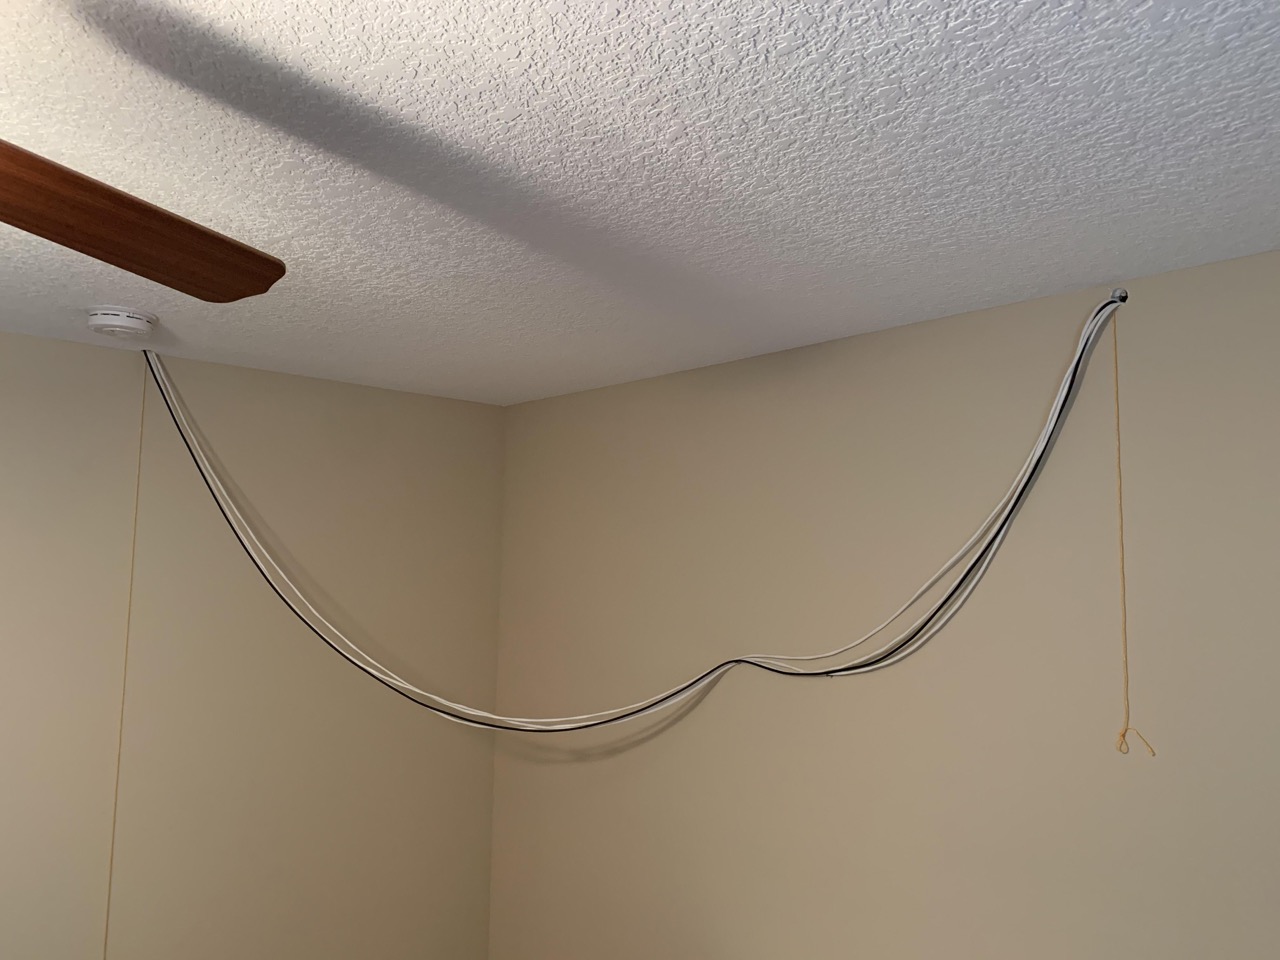
- Route other cables: Next, route the remaining cables one by one, such as HDMI cables, audio/video cables, and Ethernet cables. Use the chosen cable management solution to conceal and guide the cables along the wall.
- Avoid sharp bends: When routing the cables, avoid sharp bends or twists, as this can cause signal interference or damage to the cables. Use gentle curves and cable clips to guide the cables smoothly along the desired path.
- Use adhesive strips: If using cable raceways or wall-mounted cable covers, secure them to the wall using adhesive strips or screws according to the manufacturer’s instructions. This will ensure they stay in place and provide a seamless finish.
- Keep cables organized: Use zip ties or cable clips to bundle and secure multiple cables together. This helps prevent tangling and keeps the cables neatly organized.
As you route and conceal the wires, periodically step back and assess the overall appearance. Make any necessary adjustments to ensure the cables are hidden as much as possible and the installation looks clean and professional.
Once you have routed and concealed all the necessary cables, it’s time to move on to the next step: securing and organizing the wires.
Step 5: Securing and Organizing the Wires
After routing and concealing the wires, it’s important to secure and organize them to maintain a tidy and efficient cable management system. Follow these steps to ensure your wires are secure and well-organized:
- Use zip ties: Secure the bundled cables together using zip ties. Make sure the zip ties are not pulled too tightly to avoid damaging the cables. Leave some slack for flexibility in case you need to adjust or add cables in the future.
- Label the cables: Consider labeling the cables to easily identify their purpose. You can use cable labels or colored tape to differentiate between HDMI cables, audio cables, and other connections. This will make troubleshooting and future cable management much easier.
- Hide excess cable length: If you have excess cable length, neatly coil it up and secure it with zip ties or cable clips. This will prevent tangles and make your cable setup look cleaner.
- Use cable management accessories: Depending on your setup, consider using cable management accessories such as cable clips, cable hiders, or cable sleeves to further organize and hide the cables. These accessories can provide a more streamlined and professional appearance for your entertainment system.
- Ensure proper ventilation: When securing the cables, make sure not to obstruct any ventilation ports on your TV or other devices. Proper airflow is essential for preventing overheating and maintaining optimal performance.
By securing and organizing the wires, you create a neat and functional cable management system that not only improves the aesthetics of your home but also reduces the risk of tripping hazards and cable damage.
Now that your wires are secured and organized, it’s time to move on to the final step: testing and adjusting the cable setup to ensure everything is in working order.
Step 6: Testing and Adjusting the Cable Setup
Once you have completed routing, concealing, securing, and organizing the wires, it’s crucial to test the cable setup to ensure everything is functioning properly. Follow these steps to test and adjust your cable management system:
- Connect the devices: Connect all the necessary devices, such as cable boxes, game consoles, and sound systems, to your television using the concealed cables. Ensure that each cable is securely connected to the appropriate input/output port.
- Power on the devices: Turn on the television and other connected devices to verify that they receive power and display properly. Check for any error messages or issues with the picture or sound quality.
- Test signal transmission: Play a variety of content from different sources to test the signal transmission through the connected cables. Verify that audio and video signals are being transmitted accurately and without interference.
- Check for cable strain: Inspect the cables to ensure that there is no strain or tension on the connections. If any cables appear tight or bent at severe angles, make adjustments to provide more slack or re-route the cables if necessary.
- Revisit cable management: Take a final look at your cable management system and make any necessary adjustments or refinements. Conceal any visible cables or untidy areas that may have been overlooked initially.
By thoroughly testing and adjusting your cable setup, you can address any potential issues and ensure a seamless and reliable home entertainment experience.
Congratulations! You have successfully hidden your television wires and achieved a clean and organized home entertainment system. Not only does this enhance the visual appeal of your living space, but it also eliminates potential tripping hazards and improves the overall functionality of your setup.
With the right planning, tools, and cable management solutions, you can enjoy a clutter-free environment while immersing yourself in your favorite shows, movies, and games.
Remember to periodically reassess and maintain your cable management system as your setup evolves over time. This will help you stay organized and ensure that your home entertainment experience remains top-notch.
Thank you for following this guide, and happy viewing!
Conclusion
Congratulations! You have successfully transformed your home entertainment system by hiding those unsightly television wires. By following the steps outlined in this guide, you have created a clean and organized setup that not only enhances the aesthetics of your living space but also improves the functionality and safety of your home entertainment experience.
Starting with careful planning, you identified the cable routes, measured the necessary lengths, and considered the type of walls and potential obstacles. Choosing the right cable management solution ensured that your wires were neatly concealed and seamlessly integrated into your decor. With proper preparation of the television and wall, you created a solid foundation for the cable management process.
Routing and concealing the wires with precision and care allowed for a clutter-free look, while securing and organizing the cables ensured that they remained in place and organized. Testing and adjusting the cable setup ensured that everything was functioning properly and provided an opportunity to make any necessary refinements to the cable management system.
By successfully hiding your television wires, you have not only achieved a visually appealing setup but also eliminated potential tripping hazards and created a more enjoyable environment for your home entertainment experience.
Remember to periodically assess and maintain your cable management system as your setup evolves over time. This will help you stay organized and continue to enjoy a clean and efficient home entertainment system.
Thank you for following this comprehensive guide. Now you can sit back, relax, and immerse yourself in your favorite shows, movies, and games without the distraction of tangled wires. Enjoy your enhanced home entertainment system!
Frequently Asked Questions about How To Hide Television Wires
Was this page helpful?
At Storables.com, we guarantee accurate and reliable information. Our content, validated by Expert Board Contributors, is crafted following stringent Editorial Policies. We're committed to providing you with well-researched, expert-backed insights for all your informational needs.


0 thoughts on “How To Hide Television Wires”