
Furniture
How To Hide Chandelier Wires
Modified: August 28, 2024
Learn how to hide chandelier wires easily with these furniture hacks. Create a seamless look in your space while keeping unsightly wires out of sight.
(Many of the links in this article redirect to a specific reviewed product. Your purchase of these products through affiliate links helps to generate commission for Storables.com, at no extra cost. Learn more)
Introduction
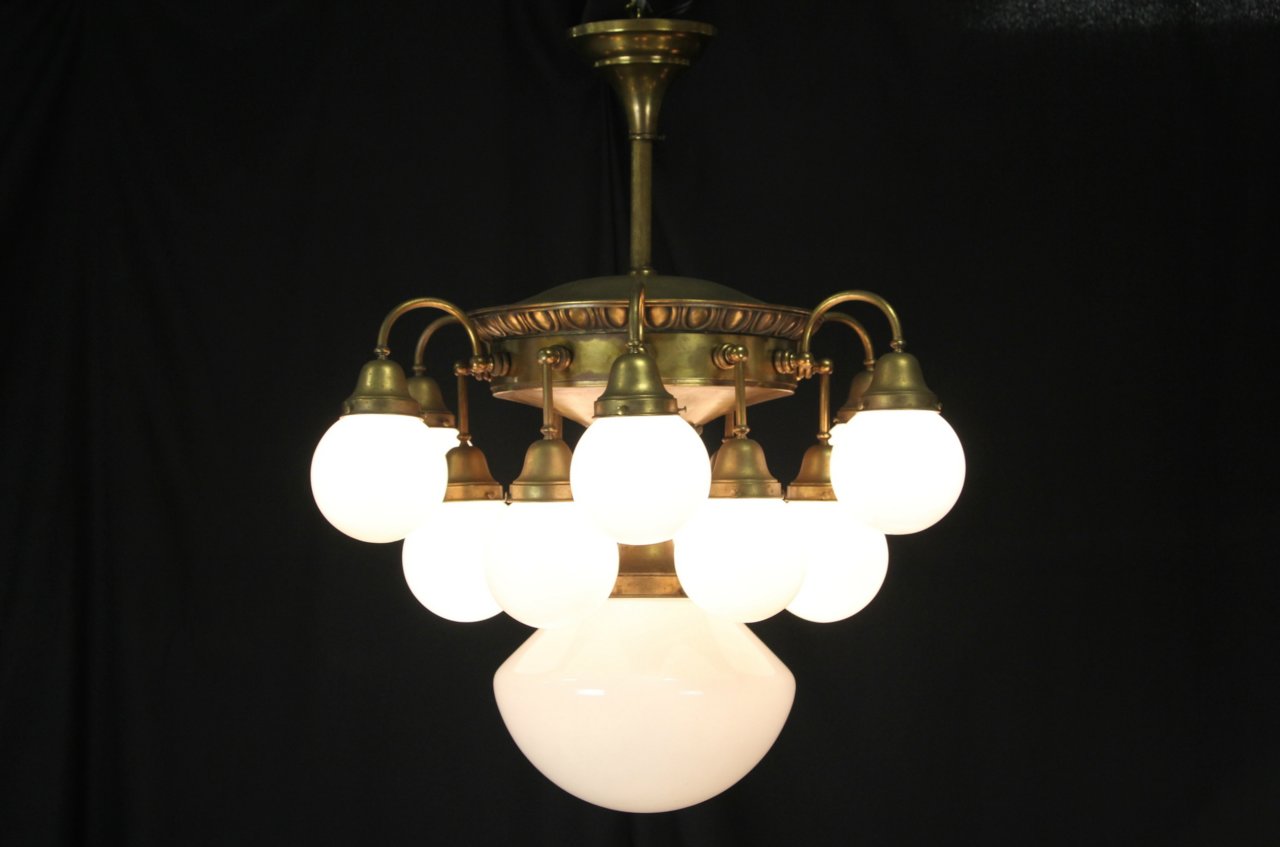
Welcome to our comprehensive guide on how to hide chandelier wires. Chandeliers are not only elegant and visually stunning, but they also provide beautiful ambient lighting that can transform any space. However, the unsightly wires that hang down can detract from the overall aesthetic appeal. If you’re looking to achieve a seamless and polished look for your chandelier installation, hiding the wires is a crucial step.
In this article, we will take you through a step-by-step process on how to hide chandelier wires effectively. We’ll explore various methods and techniques that will not only conceal the wires but also enhance the overall appearance of your chandelier.
Before we get started, it’s important to note that working with electrical components can be dangerous if not done correctly. We highly recommend consulting a professional electrician if you’re unsure about any steps or if you’re uncomfortable working with electrical wiring. Safety should always be the top priority.
That being said, if you’re confident in your DIY skills and follow the instructions carefully, you can successfully hide your chandelier wires and achieve a clean and polished look. So, let’s dive in and learn how to hide chandelier wires like a pro!
Key Takeaways:
- Transform your chandelier installation with hidden wires using crown molding, wire raceways, cable covers, or a ceiling medallion for a seamless and polished look that enhances your space’s aesthetics.
- Prioritize safety and consult a professional electrician if unsure, but confidently tackle the task of hiding chandelier wires with the right tools and methods, creating an elegant and inviting ambiance in your home.
Read more: How To Wire A Chandelier With A Ground Wire
Step 1: Gather necessary tools and materials
Before you begin the process of hiding your chandelier wires, it’s essential to gather all the tools and materials you’ll need. Having everything ready beforehand will make the process smoother and more efficient. Here are the items you’ll need:
- Wire cutters
- Tape measure
- Marker or pencil
- Crown molding
- Construction adhesive
- Cable raceways
- Cable covers
- Fish tape or coat hanger wire
- Ceiling medallion (optional)
Wire cutters are necessary for cutting and adjusting the wires, while a tape measure helps you accurately measure the length of crown molding and raceways. Using a marker or pencil, you can mark the spots where you’ll be installing the moldings and covers.
Crown molding is an excellent option for hiding chandelier wires as it provides a decorative touch to the ceiling while concealing the wires behind it. Make sure to choose a style and size that complements your chandelier and the overall aesthetics of your space.
Construction adhesive is crucial for securely attaching the crown molding to the ceiling. It ensures that the molding stays in place and doesn’t come off. Look for an adhesive specifically designed for molding or general purpose construction adhesive.
Cable raceways are another option for hiding chandelier wires. These are plastic or metal channels that can be mounted on the wall or ceiling, providing a discreet pathway for the wires. They come in various sizes and designs, so choose one that suits your needs and complements your decor.
Cable covers are a great solution for hiding exposed wires along walls or ceilings. These covers are typically made of plastic and can be painted to match the color of the surrounding surface, creating an even more seamless look.
If you’re planning to run the wires across a longer distance, fish tape or coat hanger wire can be helpful in guiding and pulling the wires through tight spaces or behind walls.
Lastly, a ceiling medallion can be used to not only hide the wires but also add a decorative element to your chandelier installation. It is a circular or ornate plate that is mounted on the ceiling around the chandelier. Ceiling medallions come in various styles and sizes, so choose one that complements your chandelier and adds a touch of elegance to the overall look.
Once you have all the necessary tools and materials ready, you can proceed to the next step of turning off the power supply before working on the chandelier.
Step 2: Turn off the power supply
Before you begin working on your chandelier and wires, it is crucial to ensure your safety by turning off the power supply. This step is essential to prevent any accidents or electrical shocks, so please follow the instructions carefully:
- Locate your home’s electrical panel or circuit breaker box. This is typically found in the basement, garage, or utility room.
- Open the panel or box to reveal the circuit breakers.
- Look for the circuit breaker that controls the power to the chandelier. This may be labeled as “chandelier,” “lighting,” or “dining room,” depending on your electrical panel’s organization. If you’re unsure which breaker controls the chandelier, you can turn off the main power to the entire house to be safe.
- Flip the switch on the circuit breaker to the “off” position. This will cut off the power supply to the chandelier and ensure that it is safe to work on.
- To double-check, turn on the chandelier switch in the room. If there is no power, you have successfully turned off the power supply.
Remember, safety should always be the top priority when working with electrical components. If you are unsure about any step or uncomfortable working with electricity, it is always advisable to seek the assistance of a professional electrician.
Once you have turned off the power supply, you can proceed to the next step of removing the chandelier from its mounting.
Step 3: Remove the chandelier
With the power supply turned off, it’s time to remove the chandelier from its mounting. Follow these steps to ensure a safe and efficient removal:
- Before you begin, prepare a safe and sturdy area where you can temporarily place the chandelier. This can be a large table, workbench, or any other surface that can support the weight of the chandelier.
- Carefully remove any decorative elements or light bulbs from the chandelier. It’s best to place them in a secure location to avoid any damage or loss.
- Locate the retaining nuts or screws that hold the chandelier in place. These are usually located at the top of the chandelier where it connects to the mounting bracket or ceiling canopy.
- Using a screwdriver or appropriate tool, loosen and remove the retaining nuts or screws. You may need a ladder or step stool for better access to the chandelier.
- Gently lower the chandelier from the mounting bracket. Be cautious of the weight and size of the chandelier to avoid any accidents or damage.
- Safely place the chandelier on the prepared surface, making sure it is stable and secure.
Removing the chandelier allows you to have better access to the wires and makes it easier to hide them effectively. Take your time during this step to ensure the safety of both yourself and the chandelier.
Once the chandelier is safely removed, you can proceed to the next step of assessing the wire situation and determining the best method for hiding them.
Step 4: Assess the wire situation
Now that you have removed the chandelier, it’s time to assess the wire situation. This step involves examining the placement and condition of the wires to determine the best approach for hiding them. Follow these steps to properly assess the wire situation:
- Closely examine the wires that were previously attached to the chandelier. Take note of their length, thickness, and any bends or twists in the wires.
- Identify the route that the wires took from the electrical supply to the chandelier. This will help you determine the best hiding method based on the location and accessibility of the wires.
- Check for any damages or frayed sections in the wires. If you notice any signs of wear or damage, it’s crucial to address and repair them before proceeding.
- Consider the existing structure of the room. Look for areas where you can easily hide the wires, such as behind crown molding, along the edge of a wall, or inside cable raceways.
- Take into account the desired aesthetic and functionality. Determine whether you prefer a completely hidden wiring system or a partially exposed one that adds a decorative element to the space.
By carefully assessing the wire situation, you can determine the most suitable method for hiding the chandelier wires. This will ensure that the wires are concealed effectively while aligning with your aesthetic preferences and the existing structure of the room.
Once you have assessed the wire situation, you can proceed to the next step of concealing the wires behind crown molding.
Read more: How To Extend Chandelier Wire
Step 5: Conceal the wires behind crown molding
One popular and effective method for hiding chandelier wires is to conceal them behind crown molding. Crown molding not only adds a decorative touch to the ceiling but also provides a discreet pathway to hide the wires. Follow these steps to conceal the wires behind crown molding:
- Measure the length of the wire route from the chandelier to the nearest wall or outlet. This will help you determine the amount of crown molding you will need.
- Using a tape measure and a marker or pencil, mark the spots on the ceiling where the crown molding will be installed. Ensure that the marks align with the wire route and provide enough space to cover the wires.
- Cut the crown molding to the appropriate lengths using a saw or miter box. Make precise cuts according to the marked measurements.
- Apply construction adhesive to the back of the crown molding and press it firmly against the ceiling, covering the marked spots. Hold it in place for a few seconds to allow the adhesive to bond.
- Secure the crown molding in place using finishing nails or screws. Be careful not to damage the wires or conduit while securing the molding.
- Carefully tuck the chandelier wires behind the newly installed crown molding. Ensure that the wires are neatly tucked away and hidden from view.
- If needed, you can use small clips or adhesive cable holders to secure the wires along the backside of the crown molding.
- Once the wires are concealed, touch up any visible nails or screws with paint or matching touch-up markers to ensure a seamless look.
By using crown molding, you can achieve a clean and polished look for your chandelier installation while effectively hiding the wires. The crown molding acts as a decorative element that enhances the overall aesthetics of the room.
Continue reading to learn more about using wire raceways to hide the chandelier wires in Step 6.
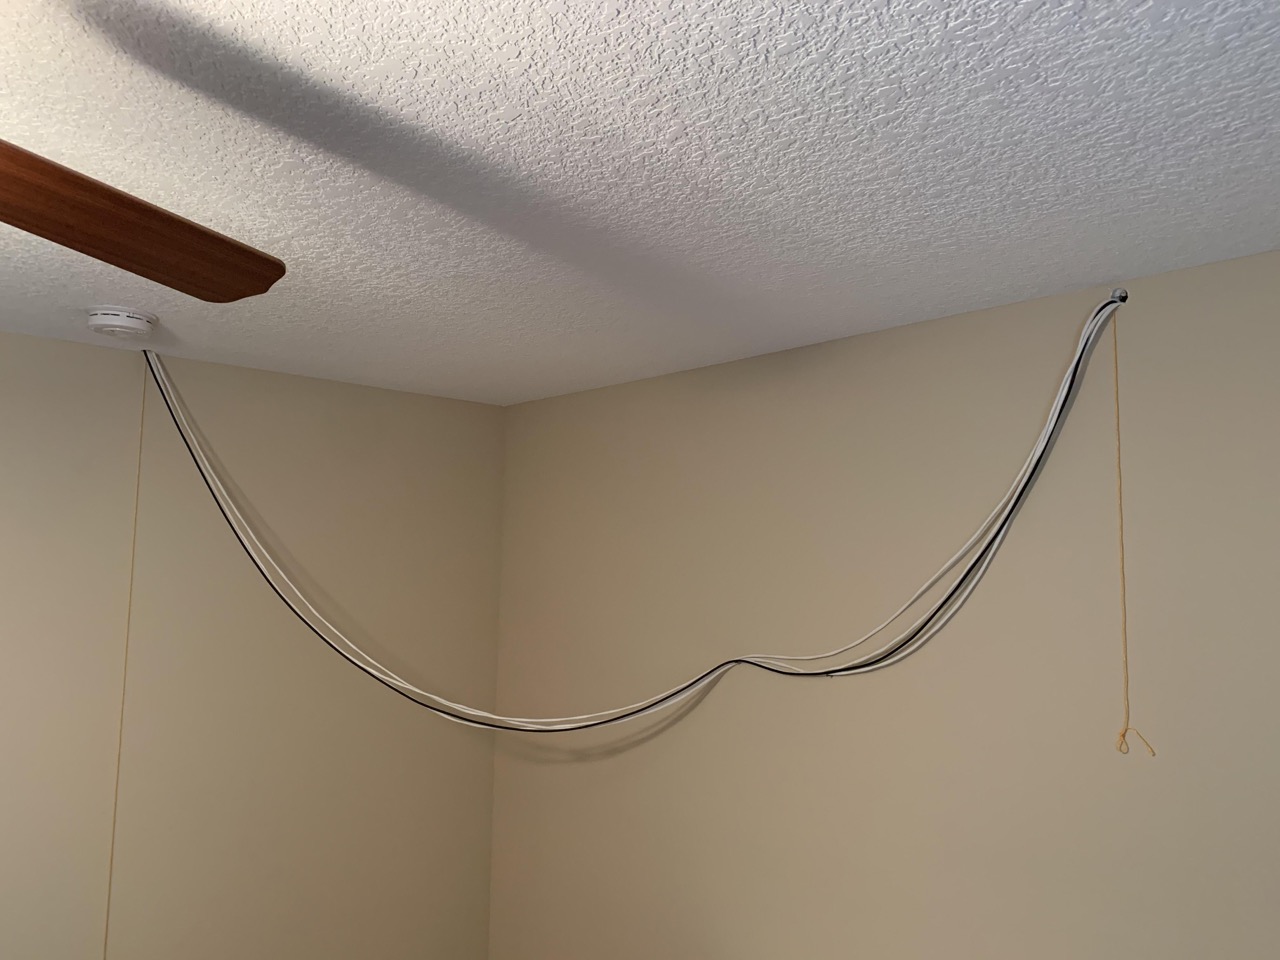
Use a cord cover or raceway to conceal chandelier wires along the ceiling and walls. These can be painted to match the wall color for a seamless look.
Step 6: Use wire raceways to hide the wires
If concealing chandelier wires behind crown molding is not feasible or doesn’t align with your aesthetic preferences, an alternative method is to use wire raceways. Wire raceways are plastic or metal channels that provide a discreet pathway for hiding wires along walls or ceilings. Follow these steps to use wire raceways to hide your chandelier wires:
- Determine the route that the wires will take from the chandelier to the nearest wall or outlet. This will help you plan the installation of the wire raceways.
- Measure and mark the spots on the wall or ceiling where the wire raceways will be installed. Ensure that the marks align with the wire route and provide enough space to accommodate the wires.
- Cut the wire raceways to the appropriate lengths using a saw or utility knife. Make straight, precise cuts to fit the marked measurements.
- Attach the wire raceways to the wall or ceiling using adhesive backing or screws. Follow the manufacturer’s instructions for proper installation.
- Carefully thread the chandelier wires through the wire raceways, ensuring that they are neatly tucked away and hidden from view.
- If necessary, use clips or adhesive cable holders inside the wire raceways to secure the wires and prevent them from moving or becoming visible.
- Once the wires are concealed, touch up any visible screws or adhesive marks with paint or matching touch-up markers to ensure a seamless look.
Wire raceways provide a practical solution for hiding chandelier wires, especially when crown molding is not an option or doesn’t suit your decor style. They offer a clean and organized appearance, keeping the wires hidden while maintaining a professional finish.
Continue reading to discover another method for camouflaging chandelier wires using cable covers in Step 7.
Step 7: Utilize cable covers to camouflage the wires
If you want a more surface-level solution for hiding chandelier wires, cable covers can be a great option. Cable covers are plastic or metal channels that can be easily mounted on the wall or ceiling to conceal wires. They come in various sizes, styles, and colors to blend seamlessly with your interior decor. Follow these steps to utilize cable covers and camouflage your chandelier wires:
- Determine the route that the wires will take from the chandelier to the nearest wall or outlet. This will help you plan the installation of the cable covers.
- Measure and mark the spots on the wall or ceiling where the cable covers will be installed. Ensure that the marks align with the wire route and provide enough space to accommodate the wires.
- Cut the cable covers to the appropriate lengths using a saw or utility knife. Make precise cuts to fit the marked measurements.
- Attach the cable covers to the wall or ceiling using adhesive backing or screws, following the manufacturer’s instructions for proper installation.
- Neatly bundle the chandelier wires together and tuck them inside the cable covers, ensuring they are fully concealed from view.
- Ensure that the cable covers are securely fastened to the wall or ceiling and that the wires are held in place without any chance of becoming visible.
- If necessary, paint the cable covers to match the surrounding surface or use a color that complements your decor for a seamless integration.
Using cable covers can be a quick and effective way to camouflage your chandelier wires while maintaining a clean and organized appearance. They provide a subtle concealment solution that blends well with your interior design, allowing you to showcase your chandelier without any visual distractions.
Continue reading to learn about another method for hiding chandelier wires using a ceiling medallion in Step 8.
Step 8: Install a ceiling medallion to hide the wires
Installing a ceiling medallion is not only a great way to add a decorative touch to your chandelier, but it can also serve as a clever method to hide the wires effectively. A ceiling medallion is a circular or ornate plate that is mounted on the ceiling around the chandelier. By utilizing a ceiling medallion, you can create a seamless look while concealing the wires. Follow these steps to install a ceiling medallion:
- Choose a ceiling medallion that complements the style and size of your chandelier. Ensure that the medallion is large enough to fully cover the area where the wires enter the ceiling.
- Turn off the power supply at the breaker box to ensure safety while working on the chandelier and wires.
- Disconnect the chandelier wires from the electrical box, making sure to properly cap and secure them to prevent any contact with bare wire ends.
- Hold the ceiling medallion against the ceiling, aligning it with the wiring hole in the center. Mark the position of the medallion on the ceiling using a pencil or marker.
- Apply a suitable adhesive or construction adhesive to the back of the medallion, following the manufacturer’s instructions.
- Press the medallion firmly against the ceiling, aligning it with the marked position. Hold it in place for a few seconds to allow the adhesive to bond.
- If necessary, use finishing nails or screws around the perimeter of the medallion to ensure a secure and stable installation.
- Reconnect the chandelier wires to the electrical box, following the appropriate wiring instructions.
- Turn on the power supply and test the chandelier to ensure it is working correctly.
By installing a ceiling medallion, you can create a visually appealing focal point while effectively hiding the wires that connect your chandelier to the electrical supply. The medallion adds a touch of elegance and can serve as a statement piece, enhancing the overall aesthetics of your chandelier installation.
Now that you have successfully hidden the wires, it’s time to proceed to the next step of reinstalling the chandelier in Step 9.
Read more: How To Hide Television Wires
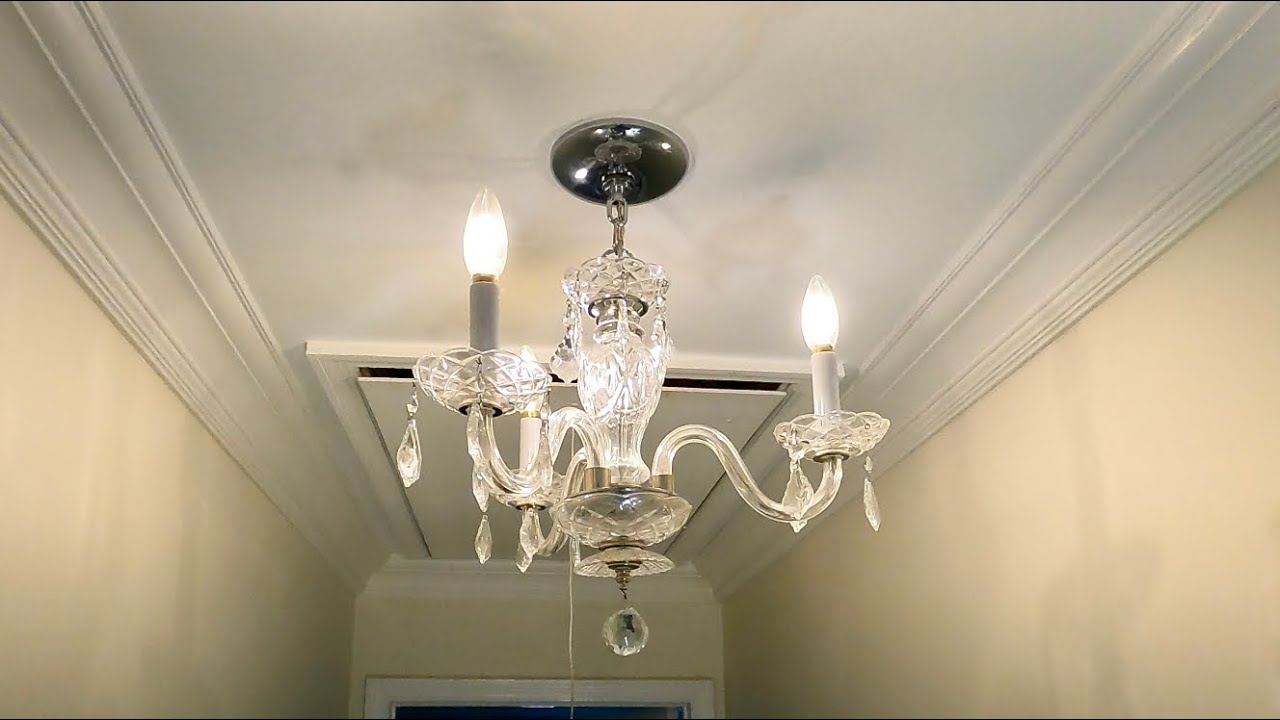
Step 9: Reinstall the chandelier
Now that you have successfully hidden and concealed the chandelier wires, it’s time to reinstall the chandelier and bring back its stunning presence. Follow these steps to reinstall your chandelier:
- Prepare the chandelier for installation by ensuring all decorative elements, light bulbs, and shades are securely in place.
- Align the mounting bracket of the chandelier with the electrical box on the ceiling. Insert the mounting screws and tighten them securely.
- Take the chandelier wires that you previously concealed and carefully reconnect them to the corresponding wires in the electrical box. Twist the exposed wire ends together and securely fasten them with wire nuts.
- Gently tuck any excess wire back into the electrical box, making sure it doesn’t interfere with the chandelier or any moving parts.
- Once the wires are securely connected, lift the chandelier and align it with the mounting bracket. Carefully secure the chandelier to the mounting bracket using the retaining nuts or screws.
- Ensure that the chandelier is level and properly aligned. Make any necessary adjustments to ensure it hangs correctly.
- Tighten the retaining nuts or screws securely, ensuring that the chandelier is stable and secure.
- Turn on the power supply at the breaker box and test the chandelier to ensure it is working correctly.
- Step back and admire your beautifully installed chandelier with the wires neatly hidden and concealed.
By following these steps, you can successfully reinstall your chandelier, feeling confident in both its aesthetic appeal and safe electrical connections. Take the time to adjust the chandelier’s height and positioning to achieve the desired look and lighting effect in your space.
Congratulations! You have accomplished the process of hiding your chandelier wires and showcasing a beautifully installed chandelier. Enjoy the transformed ambiance and the visual impact it adds to your living space.
Remember to exercise caution and prioritize safety throughout the entire process. If you’re unsure about any step or uncomfortable working with electrical components, consult a professional electrician for assistance.
Thank you for following this comprehensive guide on how to hide chandelier wires. We hope it has been informative and helpful in your home improvement journey.
Conclusion
Successfully hiding chandelier wires is a crucial step in achieving a seamless and polished look for your chandelier installation. Whether you choose to conceal the wires behind crown molding, use wire raceways, or utilize cable covers, the end result will be a chandelier that enhances the beauty and ambiance of your space.
Throughout this comprehensive guide, we have provided step-by-step instructions on various methods for hiding chandelier wires. We emphasized the importance of safety and recommended consulting a professional electrician if needed. By following these instructions, you can confidently tackle the task while maintaining a safe working environment.
Remember, each method has its own unique advantages and may depend on factors such as the aesthetics of your space, accessibility of the wires, and your personal preference. Consider the overall design of your room and select the method that best suits your needs.
After successfully hiding the wires, you can reinstall your chandelier and enjoy the beauty it brings to your home. A chandelier serves as a centerpiece and provides stunning illumination, transforming any space into an elegant and inviting area.
We hope this guide has been informative and has equipped you with the knowledge and confidence to hide chandelier wires like a professional. With careful planning, the right tools, and attention to detail, you can achieve a seamless and visually appealing chandelier installation.
Remember, the key is to ensure both functionality and aesthetics while prioritizing safety. If you ever feel unsure or uncomfortable, it is always best to seek professional assistance.
Enjoy the process of transforming your space with a hidden chandelier, and revel in the ambiance and beauty it brings to your home!
Frequently Asked Questions about How To Hide Chandelier Wires
Was this page helpful?
At Storables.com, we guarantee accurate and reliable information. Our content, validated by Expert Board Contributors, is crafted following stringent Editorial Policies. We're committed to providing you with well-researched, expert-backed insights for all your informational needs.


0 thoughts on “How To Hide Chandelier Wires”