Articles
How To Build A Concrete Retaining Wall
Modified: January 8, 2024
Discover step-by-step articles on how to build a durable concrete retaining wall. Gain expert tips and tricks for a successful DIY project.
(Many of the links in this article redirect to a specific reviewed product. Your purchase of these products through affiliate links helps to generate commission for Storables.com, at no extra cost. Learn more)
Introduction
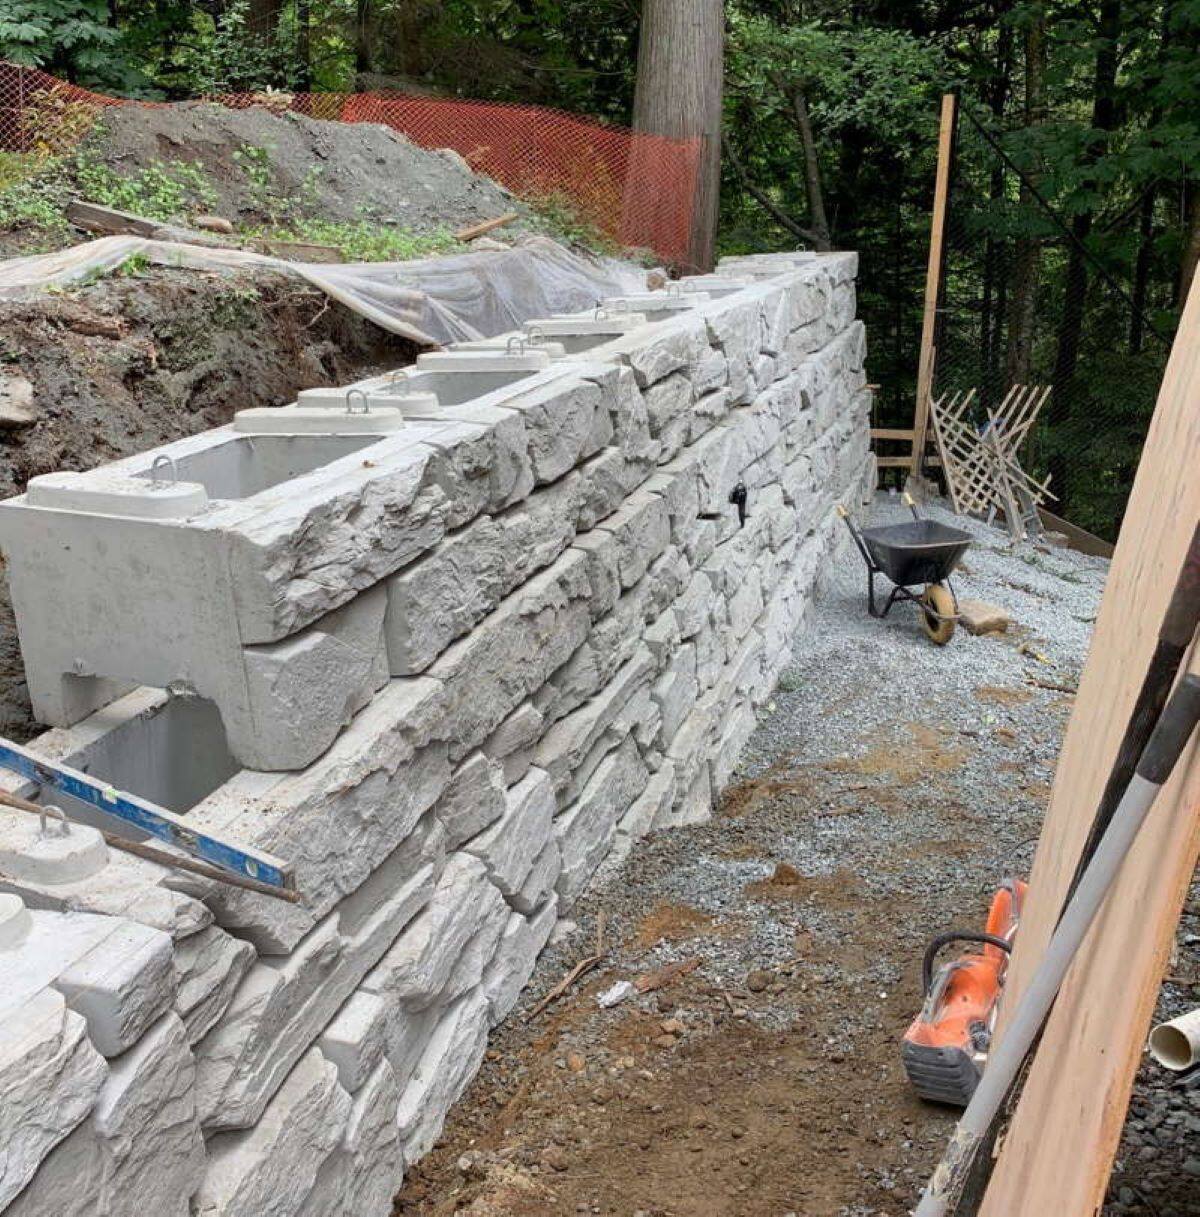
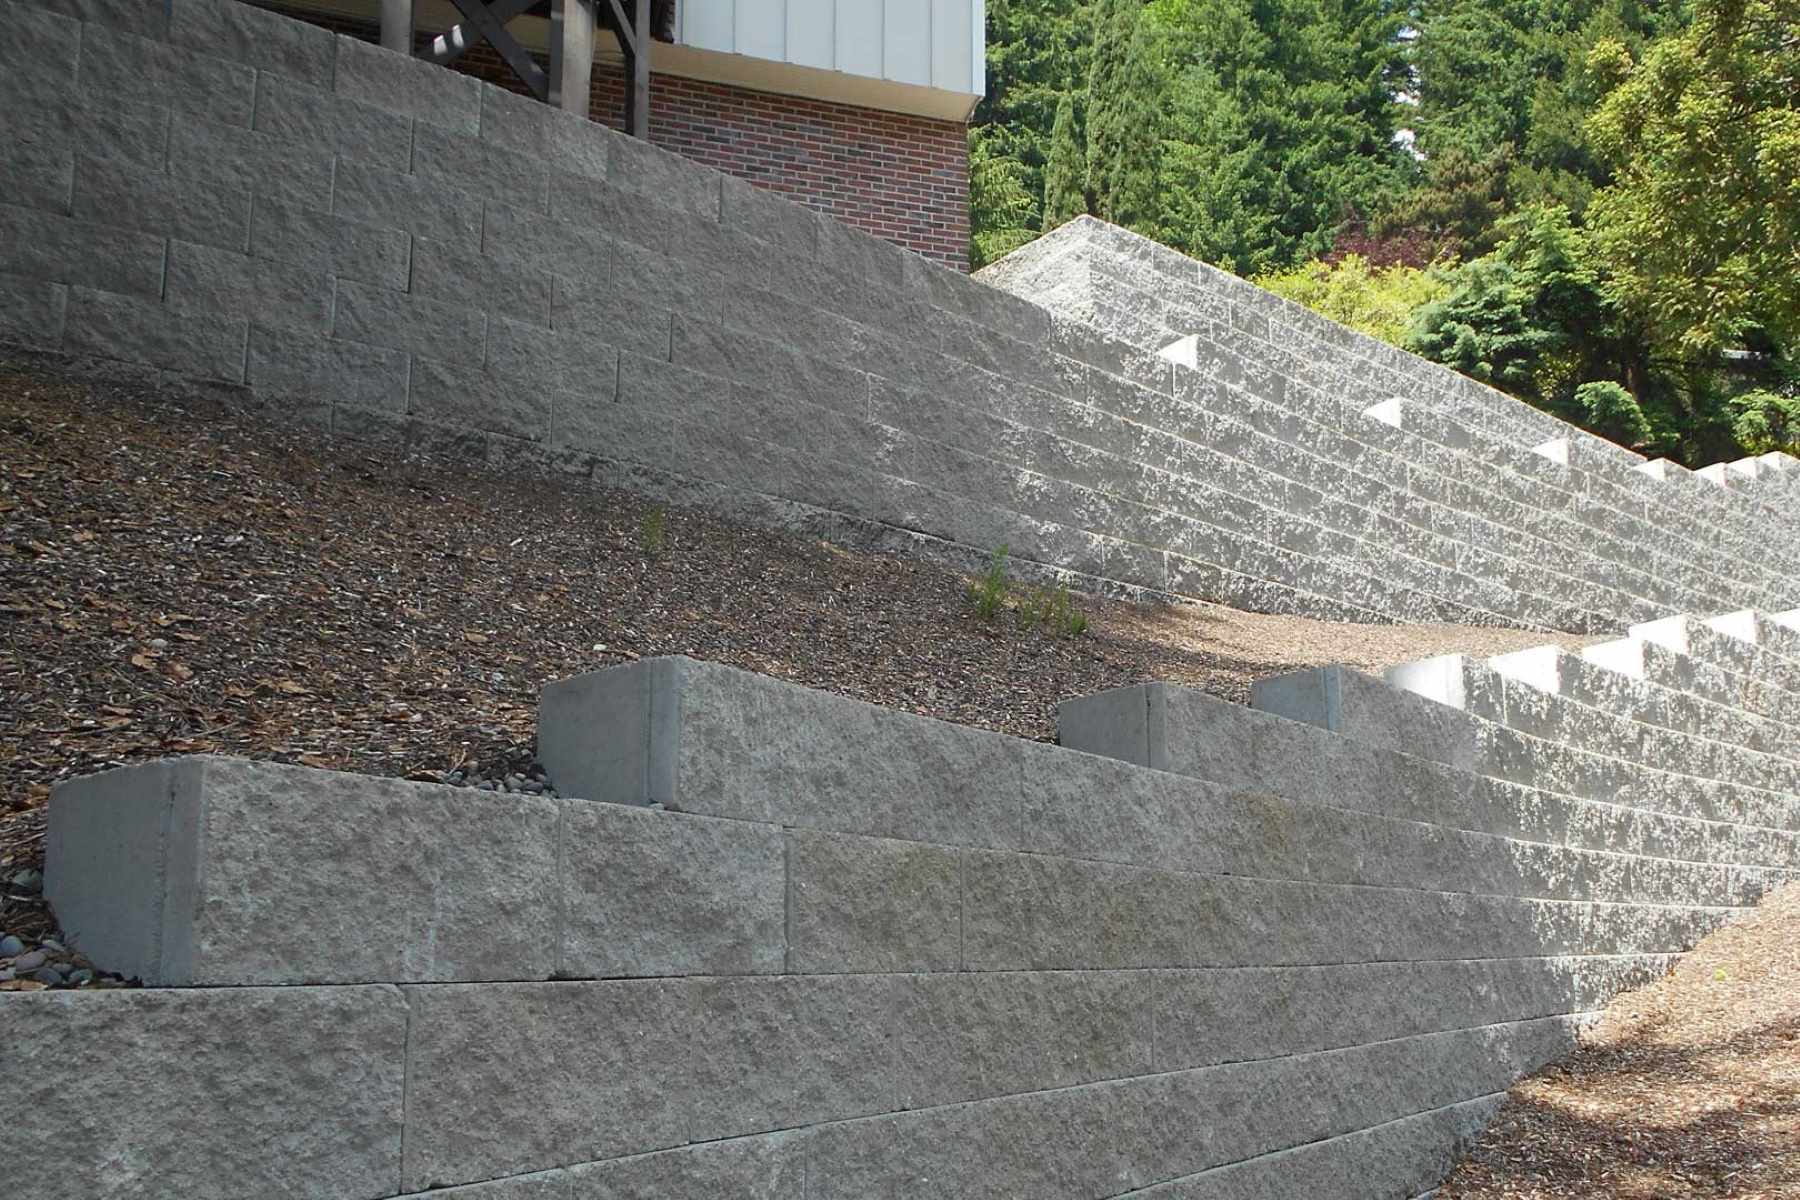
Retaining walls are essential structures used in landscaping and construction to hold back soil and prevent erosion. They not only provide functional support but can also enhance the aesthetic appeal of outdoor spaces. One popular type of retaining wall is a concrete retaining wall, known for its durability and strength.
Building a concrete retaining wall may seem like a daunting task, but with proper planning and preparation, it can be accomplished by DIY enthusiasts or professional contractors. In this article, we will guide you through the step-by-step process of building a concrete retaining wall, from the initial planning stages to the finishing touches.
Before diving into the construction process, it’s important to understand the purpose of a retaining wall. Typically, retaining walls are used to create level platforms on uneven terrain, prevent soil erosion on slopes, or create functional spaces such as terraces or raised flower beds. Concrete retaining walls are particularly suitable for larger projects requiring strength and long-term stability.
Before you start building, make sure to check local regulations and obtain any necessary permits. It’s also recommended to consult with a professional engineer or contractor to ensure the design and construction meet structural requirements.
Now, let’s move on to the first step in building a concrete retaining wall: planning and preparation.
Key Takeaways:
- Building a concrete retaining wall requires thorough planning, precise site preparation, and careful execution. From determining the purpose to applying the finishing touches, each step contributes to the strength and aesthetics of the wall.
- Proper maintenance and periodic inspections are essential for the longevity of a concrete retaining wall. By prioritizing safety, following guidelines, and addressing any issues promptly, you can ensure the wall’s stability and durability.
Read more: How To Build Stairs In A Retaining Wall
Step 1: Planning and Preparation
Planning is a crucial step in any construction project, and building a concrete retaining wall is no exception. Here are the key considerations to keep in mind during the planning and preparation phase:
- Determine the Purpose: Identify the purpose of your retaining wall. Are you creating a level garden space, preventing soil erosion, or adding structural support? This will help you determine the size, height, and design of the wall.
- Survey the Site: Conduct a thorough site survey to assess the topography, soil conditions, and drainage patterns. This information will help you determine the appropriate location for the retaining wall and any necessary adjustments to the design.
- Set a Budget: Determine your budget for the project, taking into account the cost of materials, equipment rental, and any professional help required. This will help you make informed decisions throughout the construction process.
- Create a Design: Sketch out a design for your retaining wall, considering factors such as height, slope, and any additional features like steps or curves. You can consult design resources or enlist the help of a professional to ensure the structural integrity and aesthetics of the wall.
- Gather Materials and Tools: Make a list of the materials and tools needed for the construction of the retaining wall. This typically includes concrete blocks or poured concrete, gravel, rebar, formwork materials, a shovel, a wheelbarrow, a level, and a trowel.
- Prepare the Work Area: Clear the work area of any obstructions, debris, or vegetation. Ensure there is enough space for the wall installation, excavation, and maneuvering of machinery or equipment if required.
- Consider Drainage: Adequate drainage is crucial to prevent water buildup behind the retaining wall. Determine if you need to install a drainage system, such as weep holes or a French drain, and plan for its integration into the wall design.
By carefully planning and preparing for your concrete retaining wall project, you can ensure a smoother construction process and a successful end result. Once you have completed the planning phase, it’s time to move on to site and foundation preparation, which we will explore in the next step.
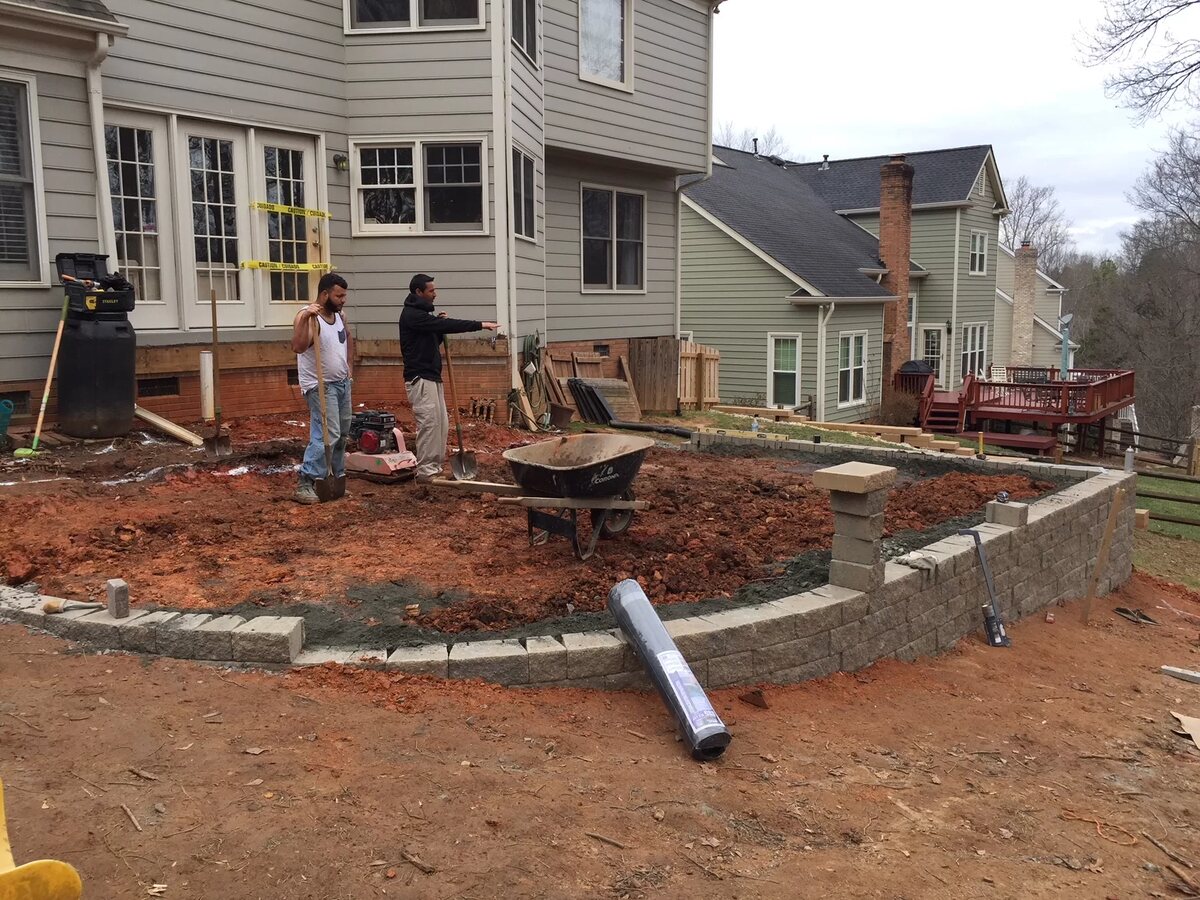
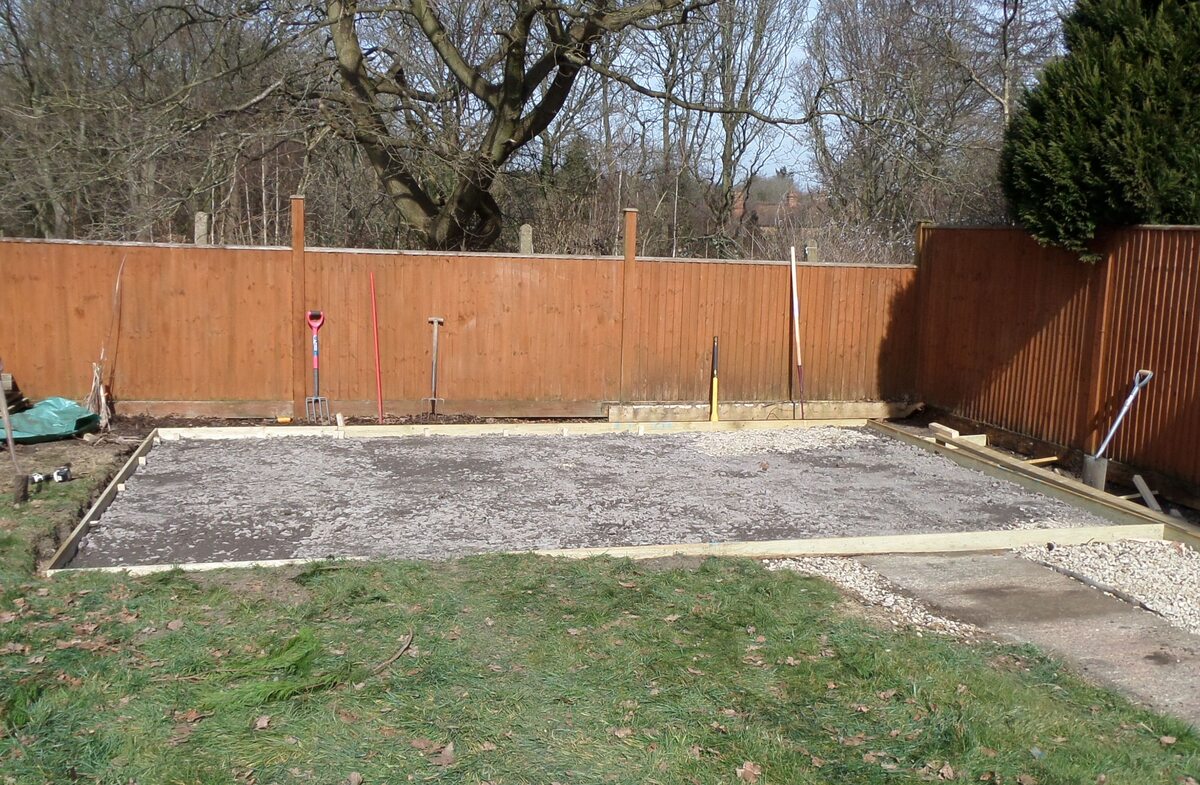
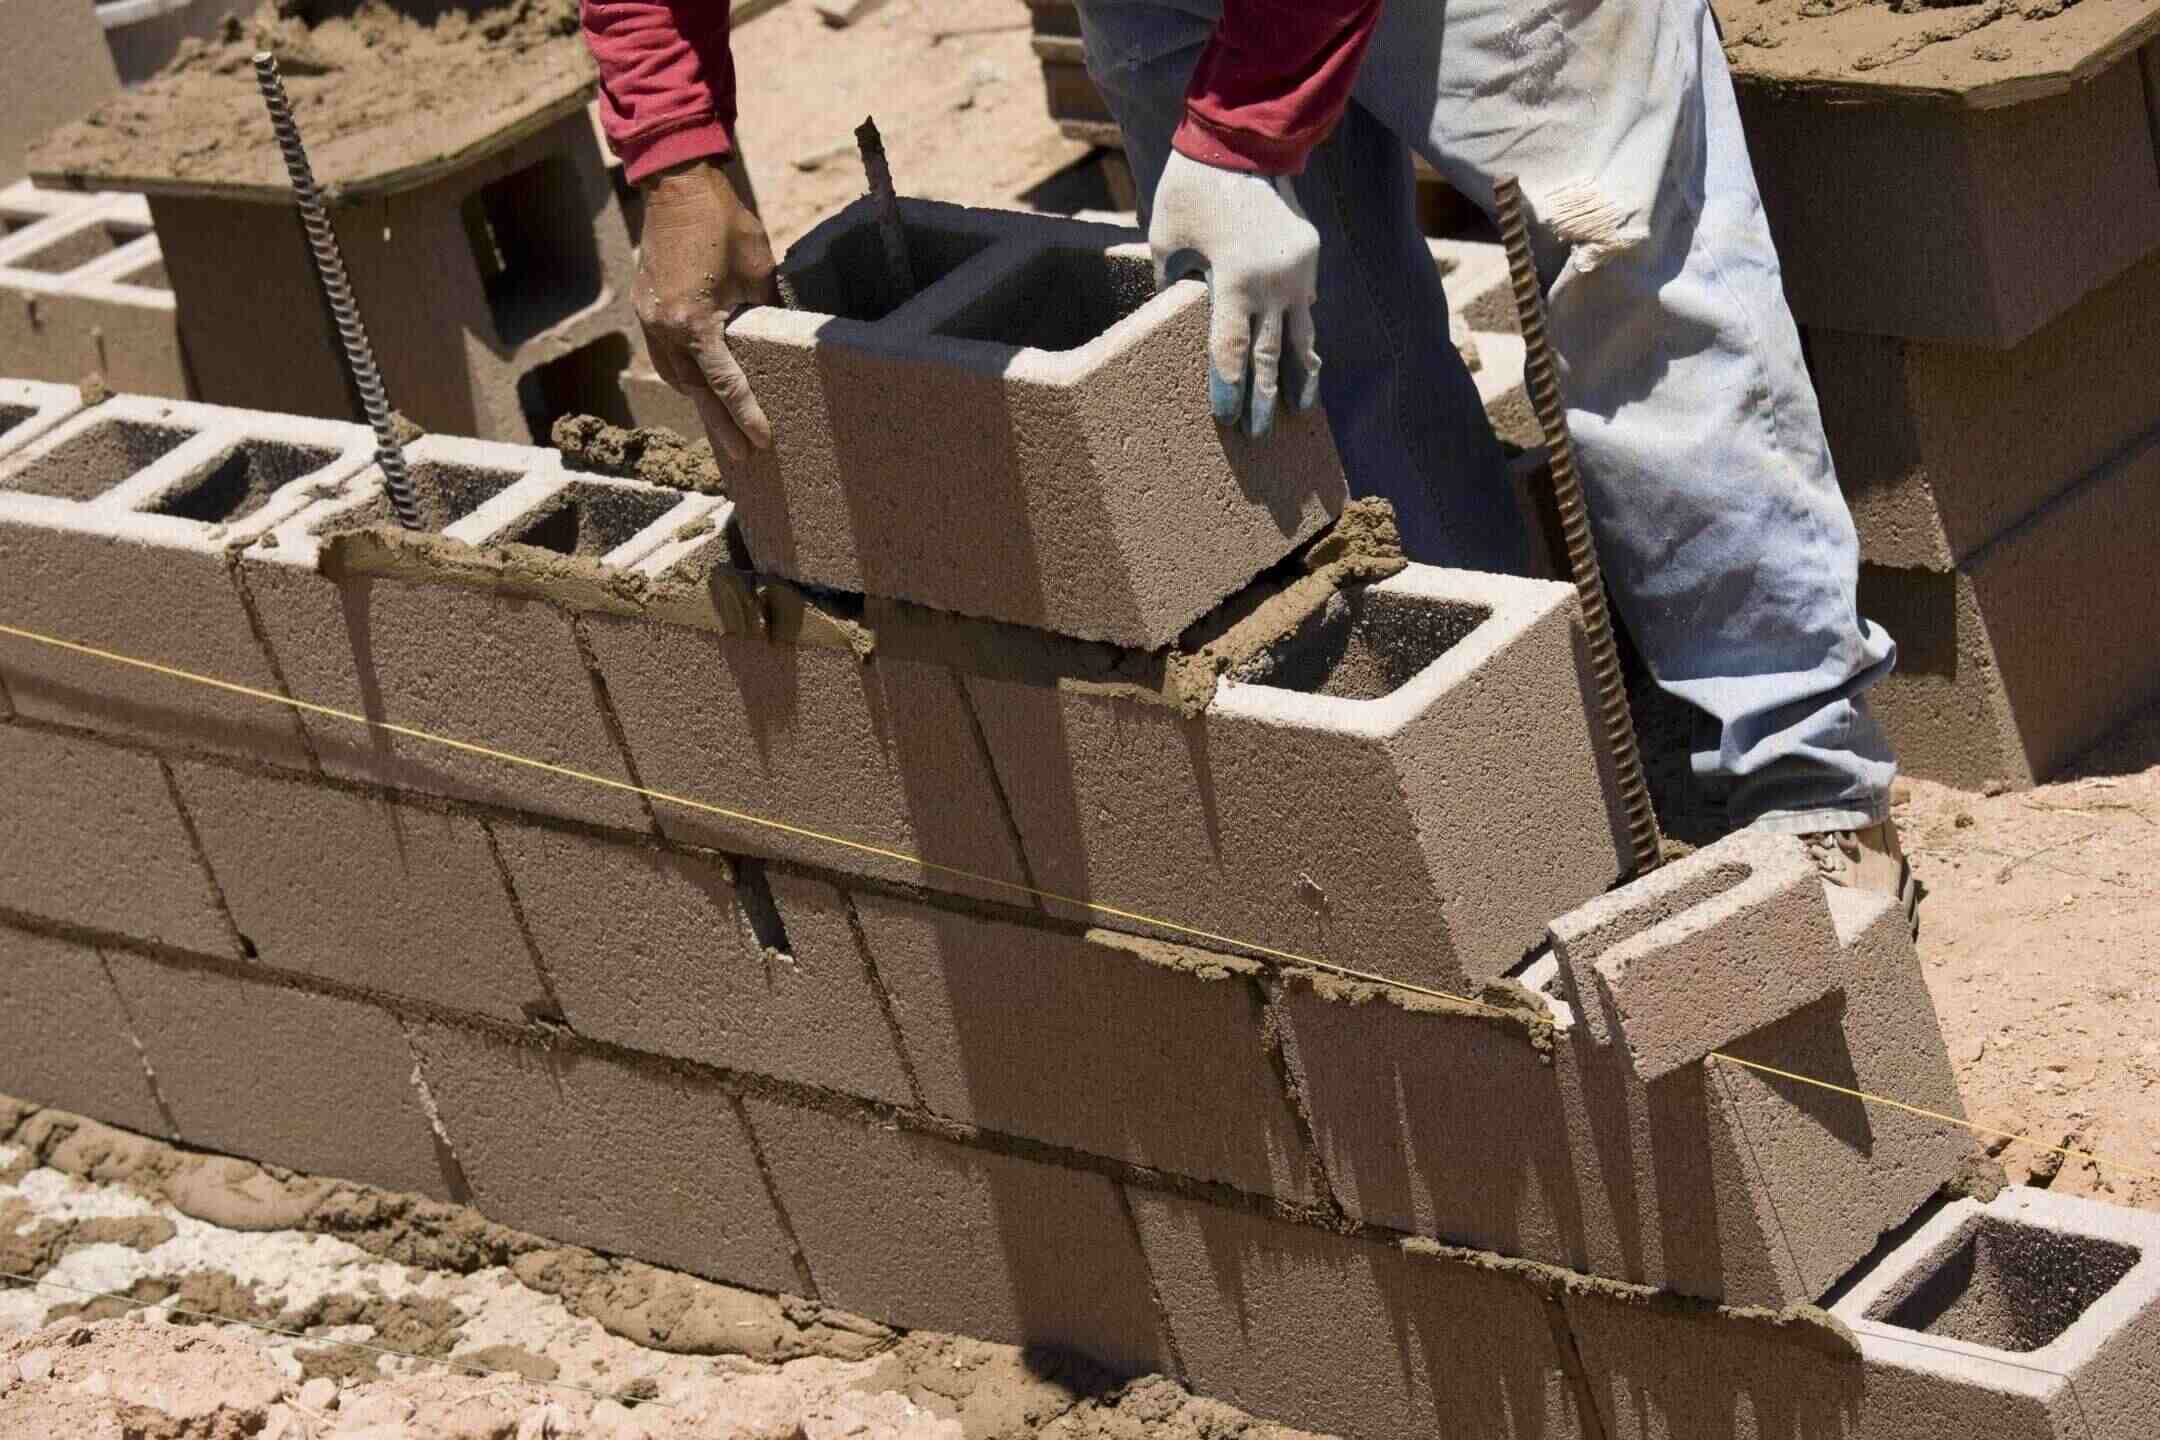
Step 2: Site and Foundation Preparation
Once you have completed the planning phase for your concrete retaining wall, it’s time to prepare the site and establish a solid foundation. Proper site and foundation preparation is crucial to ensure the stability and longevity of your retaining wall. Here are the key steps to follow:
- Mark the Wall Alignment: Use stakes and string to mark the alignment of your retaining wall. This will help guide the excavation process and ensure straight and even construction.
- Excavate the Area: Begin by excavating the area where the wall will be built. Remove any existing vegetation, rocks, or debris. The depth and width of the excavation will depend on the specific requirements of your retaining wall design.
- Create a Level Trench: After excavation, create a level trench along the marked alignment. This trench will serve as the footing for your retaining wall. Use stakes and a string level to ensure the trench is level across its length.
- Add Gravel Base: Next, add a layer of gravel to the trench to create a stable base for the retaining wall. Compact the gravel using a hand tamper or a mechanical compactor to ensure proper stability.
- Install Drainage Material: If your retaining wall design includes a drainage system, now is the time to install the necessary materials. This may include perforated drainage pipes, geotextile fabric, or gravel behind the wall to facilitate proper drainage.
- Compact the Base: After installing the drainage material, compact the gravel base again to ensure it is firmly in place. Use a compactor or a hand tamper to achieve proper compaction.
- Install Reinforcement: Depending on the height and design of your retaining wall, you may need to install reinforcement in the form of rebar. This will add additional strength and stability to the wall. Follow the design specifications and guidelines to properly install the reinforcement.
- Level and Compact the Foundation: Finally, ensure that the foundation is level and compacted. Use a long, straight board and a level to check for any unevenness. Adjust as necessary and compact the area once again to prepare it for the pouring of the concrete.
By properly preparing the site and establishing a solid foundation, you lay the groundwork for a sturdy and reliable concrete retaining wall. With this step complete, you’re now ready to move on to the next phase: building the formwork for your retaining wall.
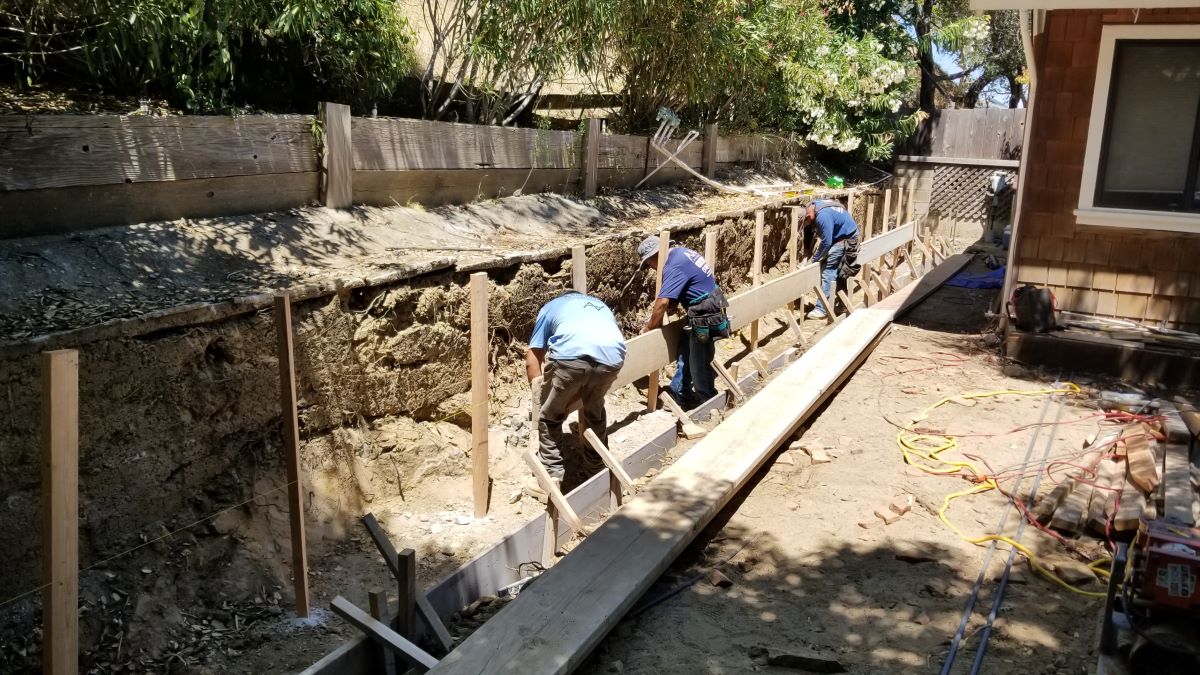
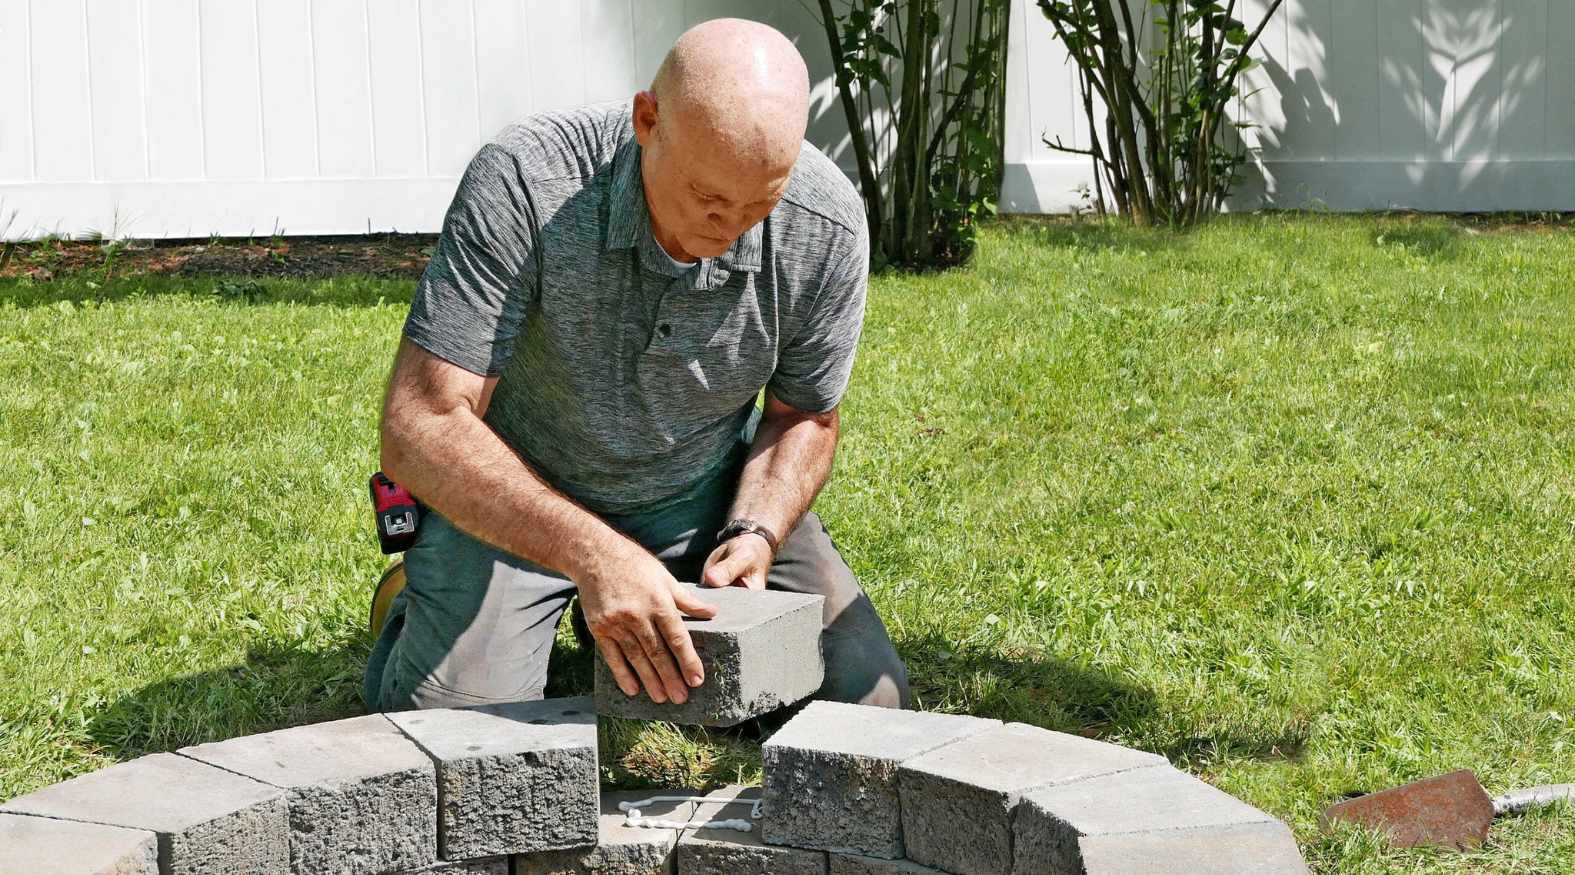
Step 3: Building the Formwork
Formwork is the temporary structure used to shape and contain the poured concrete until it hardens. Building the formwork is a critical step in the construction of a concrete retaining wall, as it determines the shape and dimensions of the wall. Follow these steps to build the formwork:
- Measure and Cut the Form Panels: Begin by measuring and cutting the form panels according to the desired height and length of the wall. Use high-quality plywood or sturdy boards for the formwork.
- Align the Form Panels: Set up the form panels along the trench, ensuring that they are aligned correctly. Use wedges or stakes to support and hold the form panels in place.
- Secure the Form Panels: Use sturdy nails or screws to fasten the form panels securely. Ensure that the formwork is rigid and strong, as it will need to support the weight of the concrete.
- Add Form Ties: Form ties are used to hold the formwork panels together. Install form ties at regular intervals along the entire length of the formwork. These ties will prevent the formwork from bulging or shifting during the pouring of the concrete.
- Install Braces: To provide additional support and stability, install diagonal braces inside the formwork. These braces cross from the top of one form panel to the bottom of the adjacent one.
- Check for Level and Plumb: Use a level and a plumb line to ensure that the formwork is perfectly level and vertical. Adjust as necessary by adding or removing shims or wedges.
- Seal the Joints: To prevent leakage of concrete, seal any gaps or joints in the formwork using caulk or duct tape. This will help ensure that the poured concrete remains contained within the formwork.
- Install Concrete Reinforcements: If your retaining wall design requires additional reinforcements, such as vertical rebar or wire mesh, install them inside the formwork according to the design specifications.
Building a sturdy and well-constructed formwork is essential for the successful pouring and curing of the concrete. Once the formwork is in place, you can move on to the next step: mixing and pouring the concrete for your retaining wall.
Step 4: Mixing and Pouring Concrete
Mixing and pouring the concrete is a crucial step in building a concrete retaining wall. It is important to get the right consistency and ensure the concrete is poured evenly to achieve a strong and durable wall. Follow these steps to mix and pour the concrete:
- Prepare the Concrete Mix: Follow the instructions on the bag of concrete mix to prepare the proper ratio of water and mix. Use a concrete mixer or a wheelbarrow to mix the concrete until it reaches a uniform consistency, free of lumps.
- Start Pouring: Begin pouring the concrete into the formwork, starting from one end and working your way to the other. Pour in layers, filling the formwork gradually. Use a shovel or a trowel to distribute the concrete evenly and eliminate any air pockets.
- Consolidate the Concrete: Once the concrete is poured, use a vibrating tool or a tamping rod to consolidate the concrete and remove any trapped air bubbles. This will improve the strength and integrity of the wall.
- Continue Pouring and Compact: Continue pouring the concrete and compacting it until the formwork is completely filled. Ensure that the concrete is level with the top of the form panels.
- Smooth the Surface: Smooth the surface of the concrete using a trowel. This will create a uniform and visually appealing finish. For a more textured appearance, you can use a broom or brush to create a brushed finish.
- Cure the Concrete: Allow the concrete to cure and harden according to the manufacturer’s instructions. This usually requires keeping the concrete moist and protected from extreme temperatures for a specific period. Proper curing is essential for the long-term strength and durability of the retaining wall.
As you mix and pour the concrete, make sure to work efficiently to prevent any delay in the pouring process. It is also important to have additional help if needed to ensure a continuous flow of work.
With the concrete poured, you’re now ready to move on to the next step: installing reinforcement bars for added strength and stability.
When building a concrete retaining wall, make sure to properly compact the soil behind the wall to prevent future settlement and potential wall failure.
Read more: How To Build A Brick Retaining Wall
Step 5: Installing Reinforcement Bars
Installing reinforcement bars, also known as rebar, is an important step in ensuring the strength and stability of your concrete retaining wall. Rebar provides added support and helps to prevent cracking and shifting of the wall over time. Follow these steps to install reinforcement bars:
- Prepare the Rebar: Cut the rebar according to the required lengths and shapes specified in your retaining wall design. Use a hacksaw or a rebar cutter to ensure clean and accurate cuts.
- Place the Horizontal Bars: Begin by laying the horizontal rebar at regular intervals along the length of the wall. These bars should run perpendicular to the direction of the wall. Use rebar chairs or blocks to lift the rebar off the ground and maintain the correct spacing within the concrete.
- Add Vertical Bars: Install the vertical rebar at predetermined spots along the wall, typically where it intersects with the horizontal bars. Use rebar ties or wire to secure the intersection points and create a stable framework.
- Secure Corner Bars: For added reinforcement at the corners of the wall, install additional rebar bars that extend vertically from the base up to the top of the wall. These corner bars will provide extra strength and prevent any potential cracking or damage at the corners.
- Check Alignment and Spacing: Ensure that the rebar is properly aligned and spaced according to the design specifications. Use a level or a plumb line to check for vertical alignment, and a measuring tape to confirm the correct spacing between the bars.
- Tie and Secure the Rebar: Use rebar ties or wire to secure the intersections and connections between the rebar bars. Make sure the ties are tight and secure to prevent shifting or movement during the concrete pouring process.
- Double-Check the Placement: Before proceeding to the next step, double-check the placement of the rebar to ensure it is correctly aligned and securely in place. Any adjustments or corrections should be made at this stage.
Proper installation of reinforcement bars is crucial for the strength and longevity of your concrete retaining wall. Take your time during this step to ensure accuracy and precision in the placement of the rebar. With the rebar in place, you’re ready to move forward with the next step: applying a concrete finish to the wall.
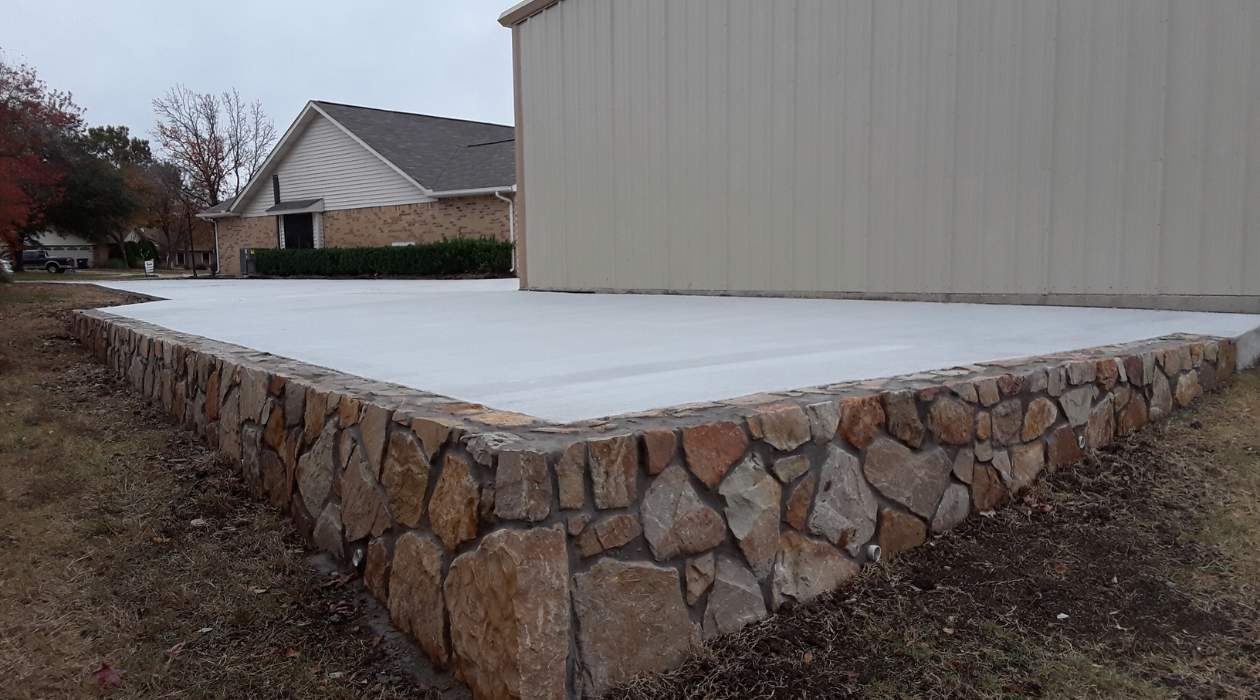
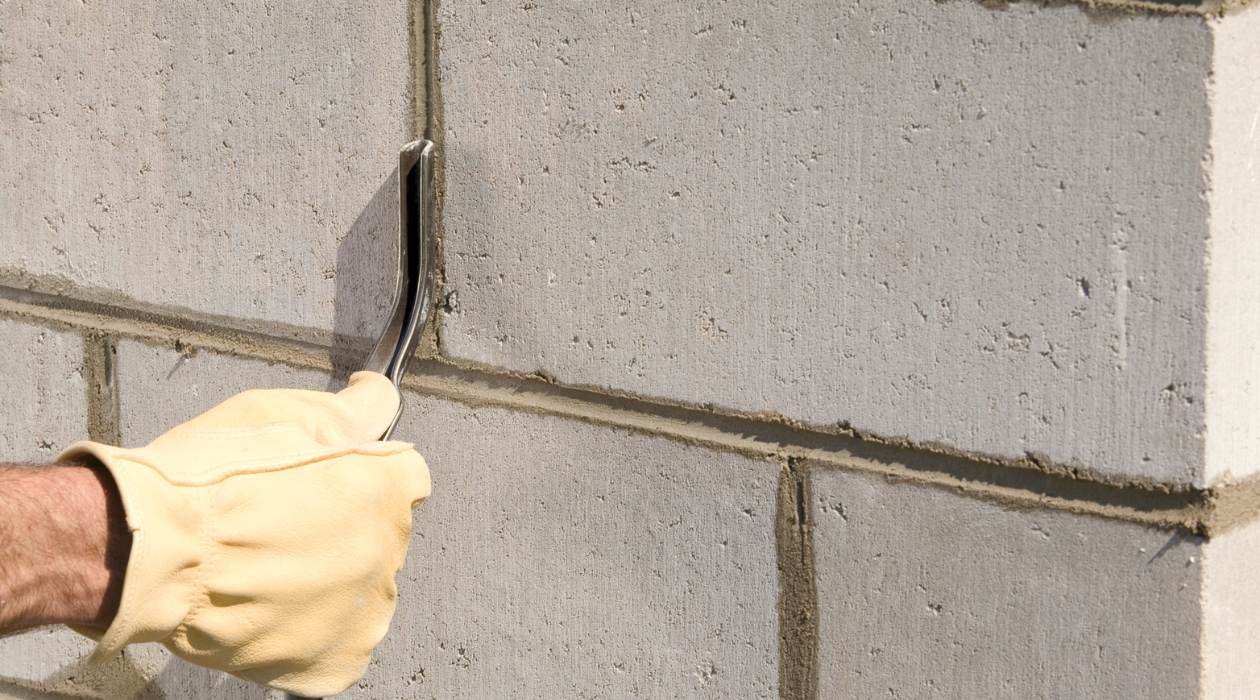
Step 6: Applying Concrete Finish
Applying a concrete finish to your retaining wall not only enhances its appearance but also adds a protective layer that helps to seal and protect the underlying concrete. There are various techniques you can use to achieve different finishes, depending on your desired aesthetic. Follow these steps to apply a concrete finish:
- Clean the Surface: Before applying any finish, make sure the surface of the concrete retaining wall is clean and free from any debris or loose particles. Use a broom or a brush to sweep away any dirt or debris.
- Choose the Finish: Decide on the type of finish you want for your wall. Some popular options include smooth finishes, exposed aggregate finishes, or textured finishes. Research different techniques and finishes to determine the best fit for your project.
- Prepare the Tools and Materials: Depending on the chosen finish, gather the necessary tools and materials. This may include concrete finishing tools such as trowels, floats, brushes, or rollers, as well as any additional materials required for specialized finishes.
- Apply a Smooth Finish: For a smooth finish, use a steel trowel to spread a thin layer of mortar or a concrete resurfacer on the surface of the wall. Work in small sections, smoothing out the material with even strokes to achieve a uniform appearance. Repeat this process until the entire wall is covered.
- Create an Exposed Aggregate Finish: To create an exposed aggregate finish, apply a layer of a special concrete mix with decorative aggregates such as pebbles or small stones. Allow the mix to partially set, then carefully wash away the top layer of concrete to reveal the exposed aggregates underneath.
- Add Texture: For a textured finish, you can use a texture roller, stamp, or trowel to create patterns and textures on the surface of the wall. There are a variety of pre-made textures available, or you can create your own custom texture by manipulating the wet concrete with various tools.
- Cure and Protect: After applying the desired finish, make sure to follow the manufacturer’s instructions to properly cure and protect the concrete. This typically involves keeping the surface moist and protected from extreme temperatures to ensure optimal strength and longevity.
Applying a concrete finish is a creative step in the construction of your retaining wall and allows you to add a personal touch to the look and feel of the wall. Take your time during this step to ensure a high-quality finish that meets your expectations.
With the concrete finish applied, you’re now ready for the final step: completing any finishing touches and cleanup to wrap up the construction process.
Step 7: Finishing Touches and Cleanup
Completing the finishing touches and cleanup is the final step in the construction of your concrete retaining wall. This step involves adding any final details to enhance the functionality and aesthetics of the wall, as well as tidying up the work area. Follow these steps to finish your retaining wall:
- Inspect the Wall: Carefully inspect the wall to ensure everything is in place and meets your expectations. Check for any cracks, unevenness, or imperfections that may need to be addressed.
- Make Adjustments: If you notice any issues during the inspection, make the necessary adjustments or repairs. This may involve patching any cracks, leveling uneven areas, or improving the overall appearance of the wall.
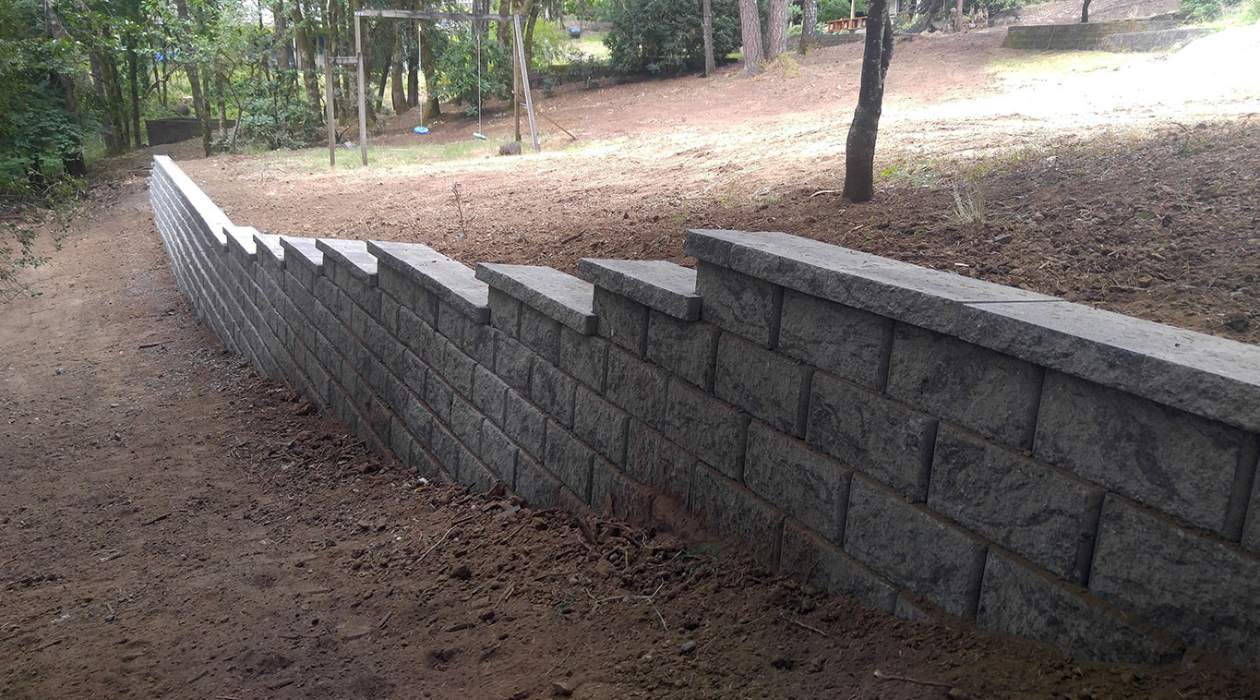
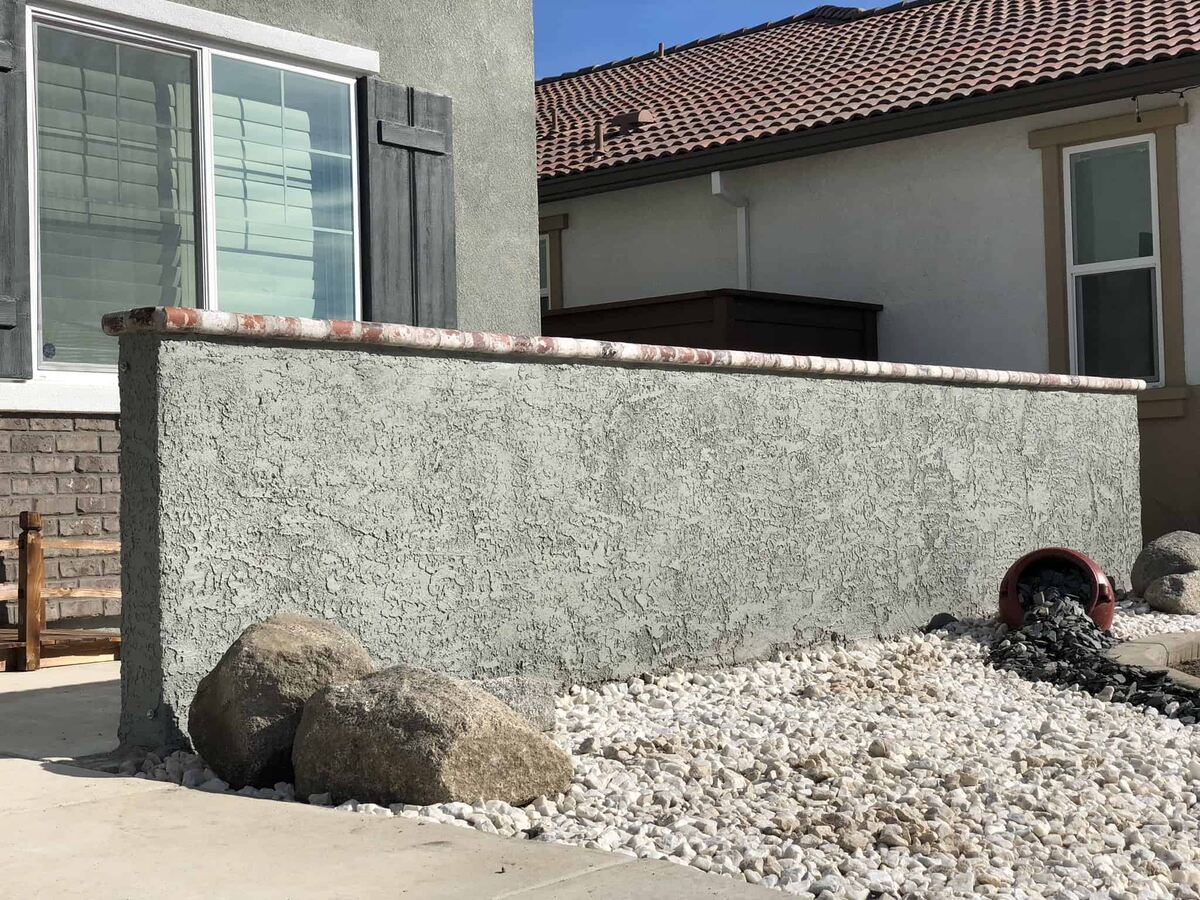
- Add Finishing Details: Consider adding finishing details to enhance the functionality and visual appeal of the retaining wall. This may include adding capstones, decorative trim, or paint to match your overall design scheme.
- Clean Up the Work Area: Once the wall is complete, clean up the surrounding area. Remove any remaining formwork, excess concrete, or debris from the construction process. Dispose of materials responsibly or recycle them as necessary.
- Restore the Landscaping: If your retaining wall is part of a larger landscaping project, restore the surrounding area to its intended state. This may involve reseeding the soil, replanting vegetation, or adding other landscaping elements to enhance the overall appearance.
- Inspect and Maintain: Regularly inspect and maintain your concrete retaining wall to ensure its longevity. Check for any signs of damage or wear and perform any necessary maintenance or repairs to keep the wall in optimal condition.
- Enjoy Your Finished Retaining Wall: Finally, step back and admire your completed retaining wall. Take pride in the hard work and attention to detail that went into its construction. Your new concrete retaining wall will not only provide functionality but also serve as a beautiful addition to your outdoor space.
Completing the finishing touches and cleanup is the final step in the construction process of your concrete retaining wall. By taking the time to inspect, adjust, and maintain your wall, you can ensure its durability and enjoy the benefits for years to come.
Congratulations on completing your concrete retaining wall project!
Conclusion
Building a concrete retaining wall can be a challenging but rewarding project that adds both functionality and aesthetic appeal to your outdoor space. By following the step-by-step process outlined in this article, you can successfully construct a durable and visually appealing retaining wall.
From the initial planning and site preparation to the final finishing touches, each step plays a crucial role in ensuring the strength and longevity of the wall. Through careful consideration of the purpose, proper site preparation, accurate formwork construction, reinforced with rebar, and a well-applied concrete finish, you can create a retaining wall that not only serves its functional purpose but also enhances the overall aesthetics of your landscape.
Throughout the construction process, remember to prioritize safety by wearing protective gear, taking precautions when working with concrete and heavy machinery, and following local regulations and guidelines.
Proper maintenance and periodic inspections are essential to keep your concrete retaining wall in optimal condition. Regularly check for any signs of damage or wear, and address them promptly to prevent further issues. With proper care, your concrete retaining wall will provide stability, prevent soil erosion, and withstand the test of time.
Whether you choose to embark on this project as a DIY enthusiast or hire professional contractors, the end result will be a functional and visually pleasing concrete retaining wall that enhances both the beauty and functionality of your outdoor space.
Now that you have gained the knowledge and understanding of the step-by-step process, it’s time to put it into action and build your own concrete retaining wall.
Now that you've mastered building a sturdy concrete retaining wall, why not spruce up your garden's appeal? Our guide on garden fence ideas offers creative ways to enhance your outdoor space with practical and stylish barriers. Whether you're aiming for a cozy retreat or a sleek, modern look, these tips will help you choose the perfect fence that complements your landscaping efforts. Don't miss out on transforming your garden into a delightful sanctuary!
Frequently Asked Questions about How To Build A Concrete Retaining Wall
Was this page helpful?
At Storables.com, we guarantee accurate and reliable information. Our content, validated by Expert Board Contributors, is crafted following stringent Editorial Policies. We're committed to providing you with well-researched, expert-backed insights for all your informational needs.


0 thoughts on “How To Build A Concrete Retaining Wall”