Home>Home Security and Surveillance>How To Hide Outdoor Security Camera Wires

Home Security and Surveillance
How To Hide Outdoor Security Camera Wires
Modified: August 16, 2024
Learn how to hide outdoor security camera wires with our step-by-step guide. Enhance your home security and surveillance system while maintaining a clean and organized appearance.
(Many of the links in this article redirect to a specific reviewed product. Your purchase of these products through affiliate links helps to generate commission for Storables.com, at no extra cost. Learn more)
Introduction
Home security is a top priority for many homeowners, and outdoor security cameras play a crucial role in keeping your property safe. These cameras act as a watchful eye, providing valuable surveillance footage of the exterior of your home. While the benefits of having outdoor security cameras are undeniable, one challenge that often arises is how to hide the unsightly wires that connect these cameras to the power source and recording device.
Not only can exposed wires be an eyesore and detract from the aesthetic appeal of your property, but they can also be vulnerable to tampering or damage. Luckily, there are several effective methods to hide outdoor security camera wires and maintain a clean and professional installation.
In this article, we will guide you through the process of hiding outdoor security camera wires. We will discuss the tools and materials you will need, tips for planning camera placement, steps for preparing the camera installation, methods for hiding the wires, and finally, how to test your camera to ensure it is functioning properly.
By following these guidelines, you can ensure that your outdoor security cameras not only provide maximum security but also blend seamlessly into the exterior of your home.
Key Takeaways:
- Hiding outdoor security camera wires is crucial for a clean and professional installation. By planning camera placement, running wires strategically, and concealing them creatively, you can achieve effective surveillance while maintaining the aesthetic appeal of your property.
- Thoroughly testing the functionality of your outdoor security cameras is essential. Ensure proper power, monitor video feed, test night vision and motion detection, and evaluate remote access for a seamless and effective surveillance system.
Read more: How To Hide An Outdoor Security Camera
Understanding Outdoor Security Camera Wiring
Before diving into the process of hiding outdoor security camera wires, it’s important to have a basic understanding of how these cameras are wired. Outdoor security cameras typically require two types of wiring: power cables and video cables.
The power cables are used to provide electricity to the camera, allowing it to operate and capture footage. These cables connect to a power source, such as an electrical outlet or a power adapter, and supply the necessary power to the camera.
On the other hand, video cables are used to transmit the captured footage from the camera to a recording device or a monitor. These cables are responsible for transferring the video signal, allowing you to view the live feed or recorded footage.
Some outdoor security cameras use separate power and video cables, while others utilize a single cable that combines both functions. Additionally, wireless cameras eliminate the need for physical wiring altogether by connecting to the internet or a Wi-Fi network.
It’s crucial to determine the type of wiring your outdoor security cameras require before proceeding with the installation process. This information can usually be found in the camera’s user manual or by consulting the manufacturer’s specifications.
Once you understand the specific wiring requirements of your outdoor security cameras, you can move on to planning the camera placement and preparing for the installation process.
Tools and Materials Needed
Before you begin hiding outdoor security camera wires, gather the necessary tools and materials to ensure a smooth and successful installation. Here’s a list of the items you will need:
Tools:
- Power drill
- Hole saw drill bits
- Screwdriver
- Wire strippers
- Pliers
- Tape measure
- Fish tape or wire snake
- Wire staples or clips
- Cable management clips or conduit
- Ladder or step stool
Materials:
- Outdoor security cameras
- Power cables
- Video cables (if separate from power cables)
- Power adapters
- Extension cords (if needed)
- Weatherproof enclosures or mounting brackets
- Wireless transmitters/receivers (if using wireless cameras)
- Waterproof cable connectors or junction boxes
- Weatherproof wire nuts or connectors
- Cable ties or zip ties
- Waterproof sealant
Make sure to choose outdoor security cameras and cables that are specifically designed for outdoor use and are weatherproof. This will ensure that they can withstand the elements and provide reliable performance in various weather conditions.
It’s also important to consult local building codes and regulations, as certain jurisdictions may have specific requirements for outdoor security camera installations. Adhering to these rules will help you avoid any potential legal issues and ensure a safe and compliant installation.
With the necessary tools and materials in hand, you’re now ready to plan the camera placement and begin preparing for the installation process.
Read more: How To Hide Wires On Nest Outdoor Camera
Planning the Camera Placement
Properly planning the placement of your outdoor security cameras is essential for effective surveillance and ensuring optimal coverage of your property. Here are some key factors to consider when planning the camera placement:
1. Identify Vulnerable Entry Points:
Take a walk around the perimeter of your property and identify the areas that are most vulnerable to break-ins or unauthorized access. These may include doors, windows, gates, or other points of entry. Placing cameras strategically near these areas will provide you with a clear view of any potential threats.
2. Consider the Field of View:
Determine the field of view you want to capture with each camera. This will depend on factors such as the size of your property and the specific areas you want to monitor. Make sure to position the cameras in a way that covers the desired area without any blind spots.
3. Evaluate Lighting Conditions:
Take note of the lighting conditions in different areas of your property. Consider camera placement in well-lit areas to ensure clearer footage, especially during nighttime. If certain areas are poorly lit, consider installing additional lighting fixtures or choosing cameras with built-in night vision capabilities.
Read more: How To Wire Outdoor Security Cameras
4. Concealment and Deterrence:
Keep in mind that an outdoor security camera should serve both as a surveillance tool and a deterrent for potential intruders. Place cameras at a height and angle that makes them visible to anyone approaching your property. This will not only act as a deterrent but also serve as a reminder that your property is under surveillance.
5. Wiring Considerations:
While planning the placement, consider the proximity to power sources and the accessibility for running the necessary wiring. Determine the most efficient routes for running the cables while minimizing their visibility and vulnerability.
By carefully analyzing these factors and creating a well-thought-out camera placement plan, you will maximize the effectiveness of your outdoor security cameras and ensure comprehensive coverage of your property.
Preparing the Camera Installation
Once you have finalized the camera placement plan, it’s time to prepare for the installation process. This involves a series of steps to ensure a smooth and successful installation of your outdoor security cameras. Here’s what you need to do:
1. Read the User Manual:
Before proceeding with the installation, thoroughly read the user manual provided by the manufacturer. This will familiarize you with the specific installation requirements and any special instructions for your particular camera model.
Read more: How To Hide An Outdoor Camera
2. Gather Tools and Materials:
Refer to the list of tools and materials needed for the installation process. Ensure that you have all the required items readily available before starting the installation.
3. Check for Compatibility:
Ensure that the cameras, cables, and accessories you have are compatible with each other. Double-check the specifications and ensure that everything is in working order before proceeding.
4. Test Camera Functionality:
Before installing the cameras, it’s a good practice to test their functionality. Connect each camera to a power source and recording device or monitor to verify that the video feed is clear and without any issues.
5. Create a Mounting Plan:
Determine the best method for mounting your cameras. Depending on your camera model, you may have the option to mount them on walls, ceilings, or other surfaces. Consider using mounting brackets or weatherproof enclosures to protect the cameras from the elements.
Read more: How To Hide From Security Cameras
6. Plan Cable Routes:
Plan the routes for running the cables from the cameras to the power source and recording device. Choose the most direct and inconspicuous route while avoiding obstacles such as doors or windows. Take measurements to ensure you have enough cable length to reach the desired locations.
7. Ensure Electrical Safety:
Before working with any electrical connections, make sure to turn off the power to the designated circuits. This will minimize the risk of electrical shock while handling the camera installation.
By carefully preparing for the camera installation, you will streamline the process and minimize any potential issues or setbacks. Once you have completed these preparatory steps, you can proceed with mounting the cameras and running the necessary wires.
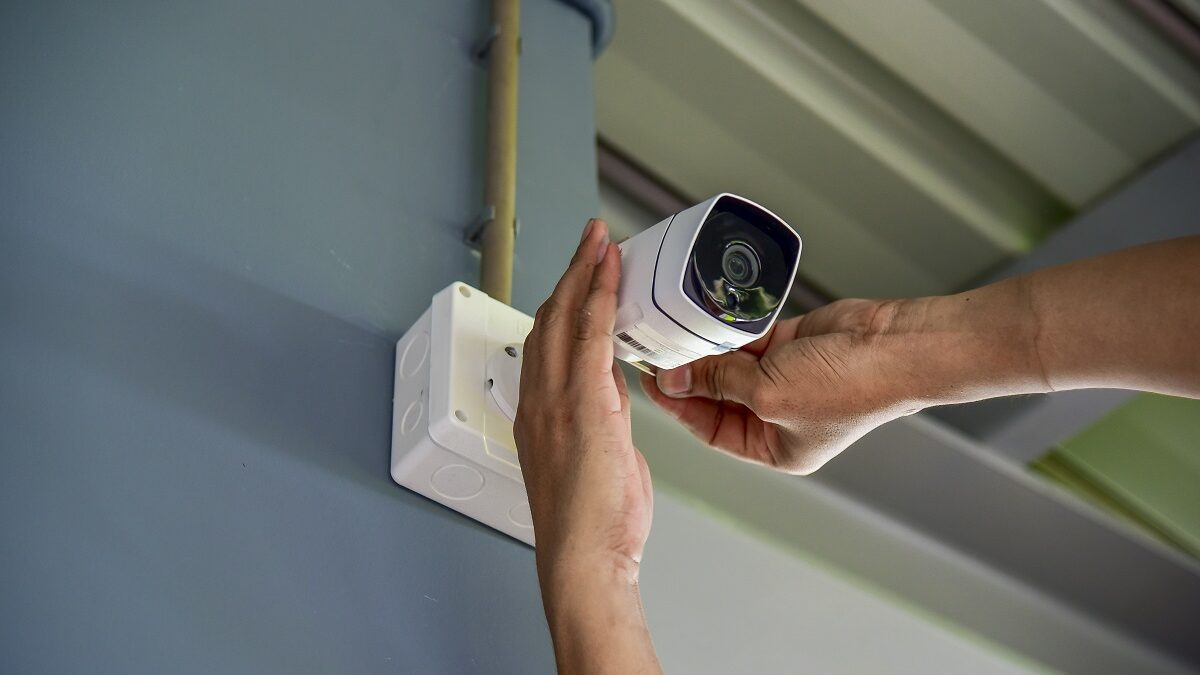
Mounting the Camera
Mounting the outdoor security cameras is a crucial step in the installation process. Proper mounting ensures stability, optimal positioning, and maximum coverage of the desired areas. Follow these steps to mount your cameras securely:
1. Choose the Mounting Location:
Refer to your camera placement plan and select the designated mounting locations. Ensure that the chosen spots provide an unobstructed view of the desired areas and align with the field of view you want to capture.
Read more: How To Hide Outdoor Lighting Wires
2. Prepare the Mounting Surface:
Clean the surface where you intend to mount the camera. Remove any dirt, debris, or loose paint that may affect the adhesive or mounting hardware. If necessary, sand down any rough patches or apply a fresh coat of paint to ensure a smooth and secure attachment.
3. Install the Mounting Bracket:
If your camera requires a mounting bracket, follow the manufacturer’s instructions to attach it securely to the mounting surface. Use the appropriate screws or anchors to ensure a stable connection.
4. Secure the Camera:
Attach the camera to the mounting bracket or base. Ensure that it is securely fastened, using the provided screws or locking mechanism. Tighten the screws firmly, but be careful not to overtighten and damage the camera or mounting bracket.
5. Adjust the Camera Position:
Once the camera is mounted, adjust its position to achieve the desired angle and view. Tilt and rotate the camera as needed to ensure optimal coverage of the target area. Consider using a level to ensure the camera is straight and properly aligned.
Read more: How To Hide An Indoor Security Camera
6. Tighten and Secure:
Double-check that all screws and connections are tightened securely. This will help prevent any movement or vibrations that can affect the camera’s stability or alter its intended position.
Repeat these steps for each outdoor security camera you are installing, ensuring that they are all mounted securely and in accordance with your camera placement plan.
With the cameras mounted, you can now move on to the next step: running and hiding the wires to give your installation a clean and professional appearance.
Running the Wires
Running the wires for your outdoor security cameras is a crucial step in the installation process. Properly routing the cables ensures a clean and organized setup while minimizing their visibility. Follow these steps to run the wires effectively:
1. Plan the Cable Routes:
Refer to your camera placement plan and identify the most efficient routes for running the cables. Consider the shortest and least visible paths, avoiding obstacles such as doors, windows, or sharp edges that could damage the cables.
2. Use Conduits or Cable Management Clips:
To protect and conceal the wires, consider using conduits or cable management clips. Conduits are plastic or metal tubes that encase the cables, providing both protection and a clean appearance. Alternatively, cable management clips can be used to secure the wires along walls or other surfaces, keeping them tidy and out of sight.
Read more: How To Hack Into A Wired Security Camera
3. Measure and Cut the Cables:
Measure the required cable length for each camera and cut the cables accordingly. Leave some extra length to allow for flexibility and easier connection to the power source and recording device.
4. Use Wire Staples or Clips:
If you choose not to use conduits, secure the cables using wire staples or clips. These can be nailed or secured to walls, ceilings, or other surfaces to hold the wires in place. Be careful not to staple or clip the wires too tightly, as it could cause damage or interfere with the camera’s functionality.
5. Use Fish Tape or Wire Snake:
If you need to run the wires through walls, ceilings, or other confined spaces, consider using a fish tape or wire snake. These tools can help guide the wires through tight spaces, making the installation process smoother and preventing any damage to the cables.
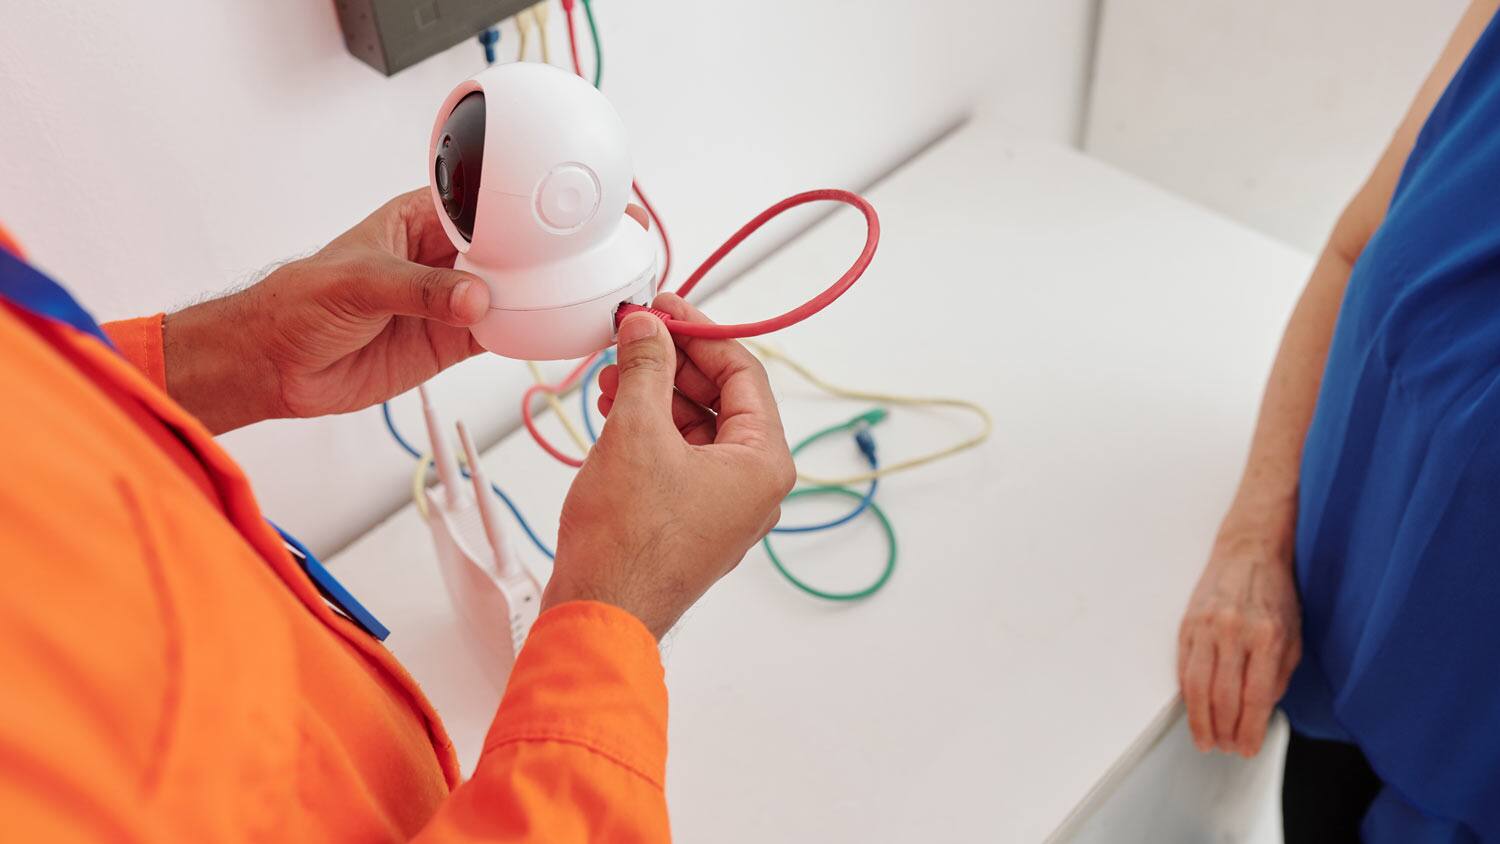
6. Connect the Wires:
Connect the power cables and video cables to the respective ports on the cameras. Ensure a secure and proper connection, following the manufacturer’s instructions. Use waterproof cable connectors or junction boxes to protect the connections from moisture and weather conditions.
Read more: How To Hide A Trail Camera For Home Security
7. Test the Connections:
Before finalizing the wire routing, test the connections to ensure that the cameras are receiving power and transmitting the video feed correctly. Check for any loose connections or faulty cables that may affect the camera’s performance.
By following these steps and running the wires strategically, you can achieve a clean and organized setup for your outdoor security cameras, minimizing their visibility and maximizing the effectiveness of your surveillance system.
Hiding the Wires
Once you have successfully run the wires for your outdoor security cameras, the next step is to hide them to achieve a clean and professional installation. Here are some effective methods to hide the wires:
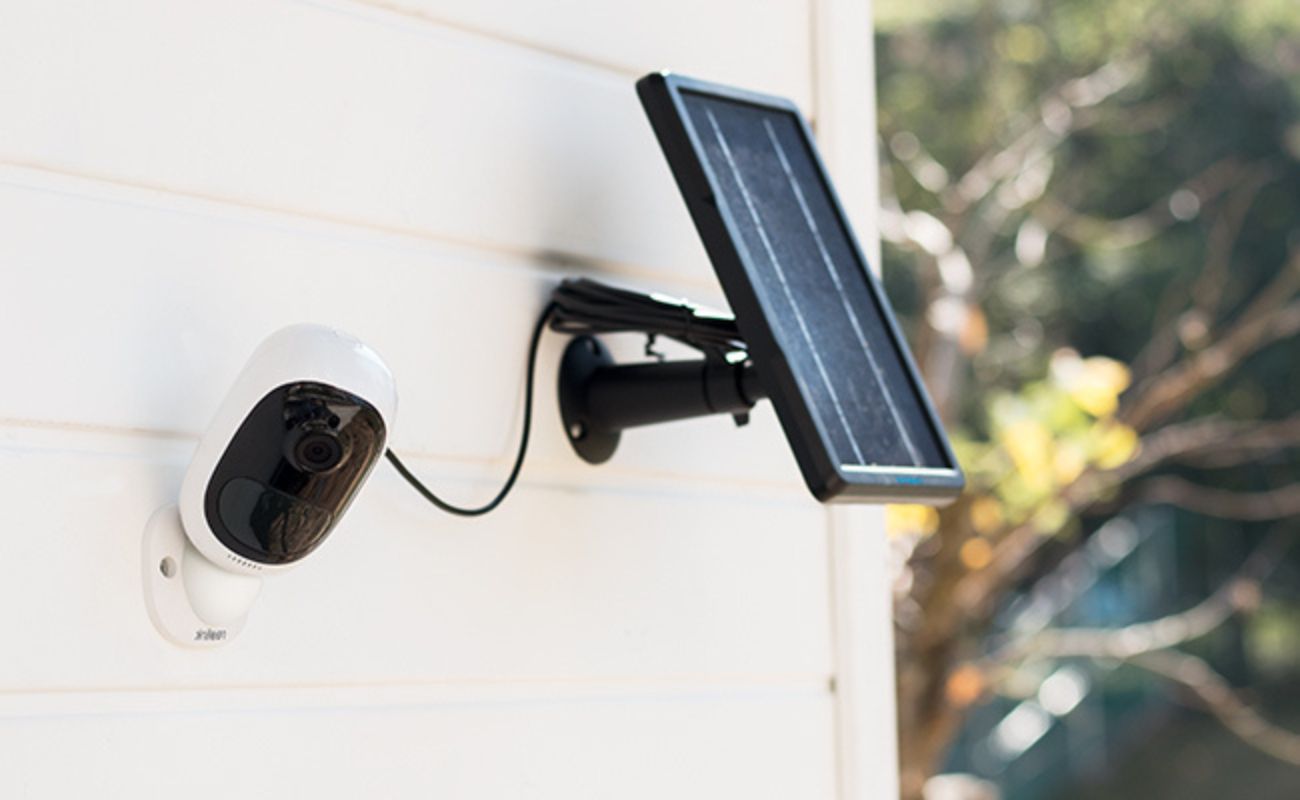
1. Utilize Outdoor Fixtures:
If your property has existing outdoor fixtures, such as lights or electrical outlets, you can make use of them to hide the wires. Route the cables along the same path as the existing fixtures, making sure they blend in seamlessly.
2. Conceal with Landscaping:
Strategically place plants, shrubs, or other landscaping elements to conceal the wires. Use natural features of your landscape, such as bushes or trees, to hide the cables while maintaining an aesthetically pleasing outdoor environment.
3. Hide behind Structures:
Take advantage of architectural features, such as fences, walls, or pillars, to hide the wires. Route the cables behind these structures, ensuring they are securely fastened and protected from damage. Paint or match the cable color to the structure’s surface for a seamless blend.
4. Use Cable Concealers:
Consider using cable concealers, such as cord covers or raceways, to hide the wires along walls, floors, or other surfaces. These concealers come in various sizes and colors, allowing you to choose one that matches your decor and provides a neat and organized appearance.
5. Bury the Wires:
If you have the capability, burying the wires underground is one of the most effective ways to hide them. Dig a shallow trench, lay the cables, and cover them with soil. Ensure the wires are protected with waterproof conduit or tubing to prevent any damage from moisture or soil conditions.
6. Paint or Camouflage:
If the wires cannot be completely hidden, consider painting them to match the surrounding surface or camouflage them with patterns or designs that blend with the environment. This technique can help make the wires less noticeable and minimize their impact on the overall aesthetics.
Remember, while hiding the wires is important for a clean installation, it’s also crucial to ensure that the cables are protected from damage and weather conditions. Use weatherproof enclosures, waterproof connectors, and other appropriate measures to safeguard the wires and maintain their functionality.
By employing these methods, you can effectively hide the wires of your outdoor security cameras, creating a polished and seamless look while keeping your property well-protected.
Testing the Camera
After completing the installation and hiding the wires of your outdoor security cameras, it’s essential to thoroughly test their functionality to ensure that they are operating correctly. Follow these steps to test your cameras:
1. Power On the System:
Ensure that the power source to your cameras is turned on. Double-check that all connections are secure, including the power cables and video cables.
2. Monitor the Video Feed:
Use a computer, smartphone, or monitor connected to the recording device to monitor the video feed from each camera. Check if the live footage is being displayed properly and if you can see a clear image from each camera.
3. Verify the Camera Angles:
Review the camera angles and coverage areas to ensure that they match your desired surveillance requirements. Use the live video feed to adjust the camera angles, if needed, to maximize the coverage and eliminate any blind spots.
Read more: What Is The Best Wired Security Camera
4. Test Night Vision (if applicable):
If the cameras have built-in night vision capabilities, test them in low-light or nighttime conditions. Make sure that the night vision feature is working correctly and that the infrared lights are providing clear visibility in dark environments.
5. Check for Motion Detection:
If your cameras are equipped with motion detection features, test them by walking in front of each camera to ensure that motion is being detected accurately. Verify that the recording device is capturing any detected motion and that you are receiving notifications, if applicable.
6. Evaluate Remote Access:
If you have enabled remote access to your cameras, such as through a mobile app, test the functionality by accessing the live video feed from outside of your home network. Ensure that you can view the cameras remotely and that the connection is stable and reliable.
7. Review Recording Quality:
If your cameras are set to record footage, review the quality of the recorded videos. Check for clarity, details, and any issues such as pixelation or distortion. Make any necessary adjustments to the camera settings or recording device to improve the quality if needed.
By thoroughly testing your outdoor security cameras, you can identify and address any potential issues or adjustments that need to be made. This will ensure that your surveillance system is functioning at its best and providing the level of security and peace of mind you desire.
Read more: How Is The Geeni Outdoor Camera Wired In
Conclusion
Hiding outdoor security camera wires is an important step in creating a clean and professional installation. By following the steps outlined in this article, you can ensure that your outdoor security cameras not only provide effective surveillance but also blend seamlessly into the exterior of your home.
Begin by understanding the wiring requirements of your cameras and gathering the necessary tools and materials. Plan the camera placement carefully, considering vulnerable entry points, field of view, lighting conditions, and concealment options. Prepare for the installation by reading the user manual, testing camera functionality, creating a mounting plan, and planning cable routes.
Mount the cameras securely, adjusting their position for optimal coverage. Run the wires using conduits, cable management clips, or strategic placement behind fixtures, structures, or landscaping. Conceal the wires to create a clean and professional look, utilizing techniques such as burying, hiding with landscaping, using cable concealers, or painting to match the surroundings.
Once the installation is complete and the wires are hidden, thoroughly test the functionality of the cameras. Power on the system, monitor the video feed, verify camera angles and coverage, test night vision and motion detection features, and evaluate remote access and recording quality.
In conclusion, by following these steps and incorporating creative methods to hide your outdoor security camera wires, you can achieve a seamless and effective surveillance system for your home. Ensuring maximum security, while maintaining the aesthetic appeal of your property.
Remember to consult local building codes and regulations, as well as manufacturer guidelines, throughout the installation process. This will ensure compliance and the safe and effective operation of your outdoor security cameras.
Protect your home and enjoy the peace of mind that comes with a well-installed and hidden outdoor security camera system.
Frequently Asked Questions about How To Hide Outdoor Security Camera Wires
Was this page helpful?
At Storables.com, we guarantee accurate and reliable information. Our content, validated by Expert Board Contributors, is crafted following stringent Editorial Policies. We're committed to providing you with well-researched, expert-backed insights for all your informational needs.