Home>Technology>Smart Home Devices>How To Change HP Printer IP Address
Smart Home Devices
How To Change HP Printer IP Address
Modified: March 2, 2024
Learn how to change the IP address of your HP printer to optimize its performance and connectivity with other smart home devices. Follow our step-by-step guide for easy setup.
(Many of the links in this article redirect to a specific reviewed product. Your purchase of these products through affiliate links helps to generate commission for Storables.com, at no extra cost. Learn more)
Introduction
Setting up a smart home can be an exciting endeavor, offering convenience and efficiency in managing various devices. Among these devices, an HP printer plays a crucial role in meeting daily printing needs. However, to ensure seamless connectivity and functionality, it's essential to understand how to change the IP address of your HP printer. In this comprehensive guide, we'll explore the reasons for changing the IP address, the preparatory steps, the process of making the change, and troubleshooting common issues that may arise. By the end of this article, you'll feel confident in managing the IP address of your HP printer, empowering you to optimize its performance within your smart home network.
Let's dive into the details of why changing the IP address of your HP printer can be beneficial and how to accomplish this task seamlessly.
Key Takeaways:
- Changing the IP address of your HP printer can optimize network performance, enhance security, and troubleshoot connectivity issues, ensuring seamless integration within your smart home environment.
- Before changing the IP address, prepare by assessing your network, accessing printer documentation, ensuring stable network connection, backing up printer settings, and deciding on static or dynamic IP address allocation.
Read more: How To Add A Printer With An IP Address
Why Change the IP Address of Your HP Printer
Before delving into the process of changing the IP address of your HP printer, it’s important to understand the reasons behind this task. The IP address serves as a unique identifier for devices within a network, enabling them to communicate with each other. There are several compelling reasons why you might need to change the IP address of your HP printer:
- Network Optimization: Changing the IP address of your HP printer can help optimize network performance, especially if you’re experiencing connectivity issues or slow printing speeds. By assigning a new IP address, you can potentially resolve conflicts and improve overall network efficiency.
- IP Address Conflict: In some cases, multiple devices within the network may end up with the same IP address, leading to conflicts and communication errors. Changing the IP address of your HP printer can mitigate these conflicts and ensure seamless communication.
- Security Enhancement: Updating the IP address can contribute to bolstering the security of your smart home network. By regularly changing the IP address of your HP printer, you can reduce the risk of unauthorized access and potential security breaches.
- Network Reconfiguration: If you’ve recently reconfigured your home network or installed a new router, changing the IP address of your HP printer may be necessary to align it with the updated network settings.
- Troubleshooting Connectivity Issues: When encountering persistent connectivity issues with your HP printer, changing the IP address can serve as a troubleshooting step to resolve network-related problems.
By understanding the underlying reasons for changing the IP address of your HP printer, you can make informed decisions to enhance network performance, security, and overall functionality within your smart home environment.
Preparing to Change the IP Address
Before embarking on the process of changing the IP address of your HP printer, it’s crucial to prepare adequately to ensure a smooth transition. Here are the essential steps to take before initiating the IP address change:
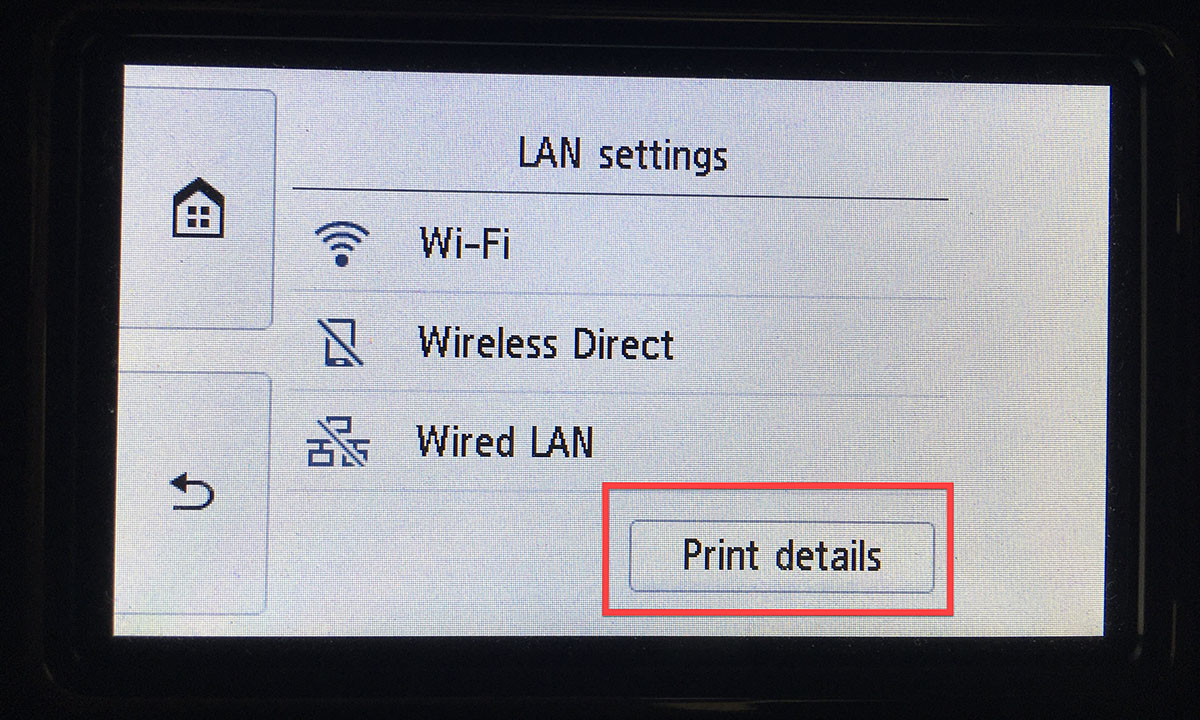
- Network Assessment: Begin by assessing your home network to gather relevant information. Identify the current IP address assigned to your HP printer and take note of the subnet mask and default gateway settings. This information is typically accessible through the printer’s control panel or by printing a network configuration page.
- Access Printer Documentation: Refer to the user manual or online documentation provided by HP for your specific printer model. Familiarize yourself with the recommended procedures for changing the IP address, as the process may vary based on the printer’s features and interface.
- Stable Network Connection: Ensure that your home network is stable and operational. Verify that the printer is connected to the network and is accessible from the devices you intend to use for the IP address change.
- Backup Printer Settings: If your HP printer allows for the backup of settings, consider creating a backup of the current configuration. This precautionary measure can be invaluable in case you need to revert to the original settings or encounter unexpected issues during the IP address change process.
- Allocate Static IP Address: Decide whether you want to assign a static IP address to your HP printer. While dynamic IP addresses are automatically assigned by the network’s DHCP server, opting for a static IP address can provide stability and consistency, especially for devices that require constant accessibility.
By diligently preparing for the IP address change, you can minimize potential disruptions and navigate the process with confidence. Understanding your network configuration and the specific requirements of your HP printer will set the stage for a successful transition to the new IP address.
Changing the IP Address on the HP Printer
Once you’ve completed the preparatory steps and are ready to proceed with changing the IP address of your HP printer, you can follow these systematic guidelines to accomplish the task effectively:
- Access Printer Settings: Begin by accessing the control panel or display interface of your HP printer. Navigate to the network or wireless settings menu, where you should find an option to view or modify the current network configuration.
- Enter Administrative Credentials: If prompted, enter the administrative credentials or authentication details required to access and modify the printer’s network settings. This step ensures that only authorized users can make changes to the printer’s configuration.
- Locate IP Address Settings: Within the network settings menu, look for the option to modify the IP address, subnet mask, default gateway, and DNS server settings. Depending on the printer model, these settings may be accessible under a “TCP/IP” or “IP Address” submenu.
- Modify IP Address Details: Select the option to modify the IP address and enter the new IP address that you wish to assign to the printer. Ensure that the new IP address is within the range of your home network and does not conflict with any existing devices or network allocations.
- Adjust Subnet Mask and Gateway: If necessary, modify the subnet mask and default gateway settings to align with the IP address change. These details are essential for proper network communication and routing, so it’s crucial to update them accordingly.
- Save and Apply Changes: After entering the new IP address and adjusting the related settings, proceed to save and apply the changes. The printer may prompt you to confirm the modifications before finalizing the new network configuration.
- Restart the Printer: To ensure that the new IP address settings take effect, consider restarting the HP printer. This step allows the printer to reestablish its network connection with the updated configuration.
Following these steps will enable you to successfully change the IP address of your HP printer, empowering you to align its network settings with your smart home environment’s requirements. Once the IP address change is complete, it’s essential to verify the new configuration to confirm its accuracy and functionality.
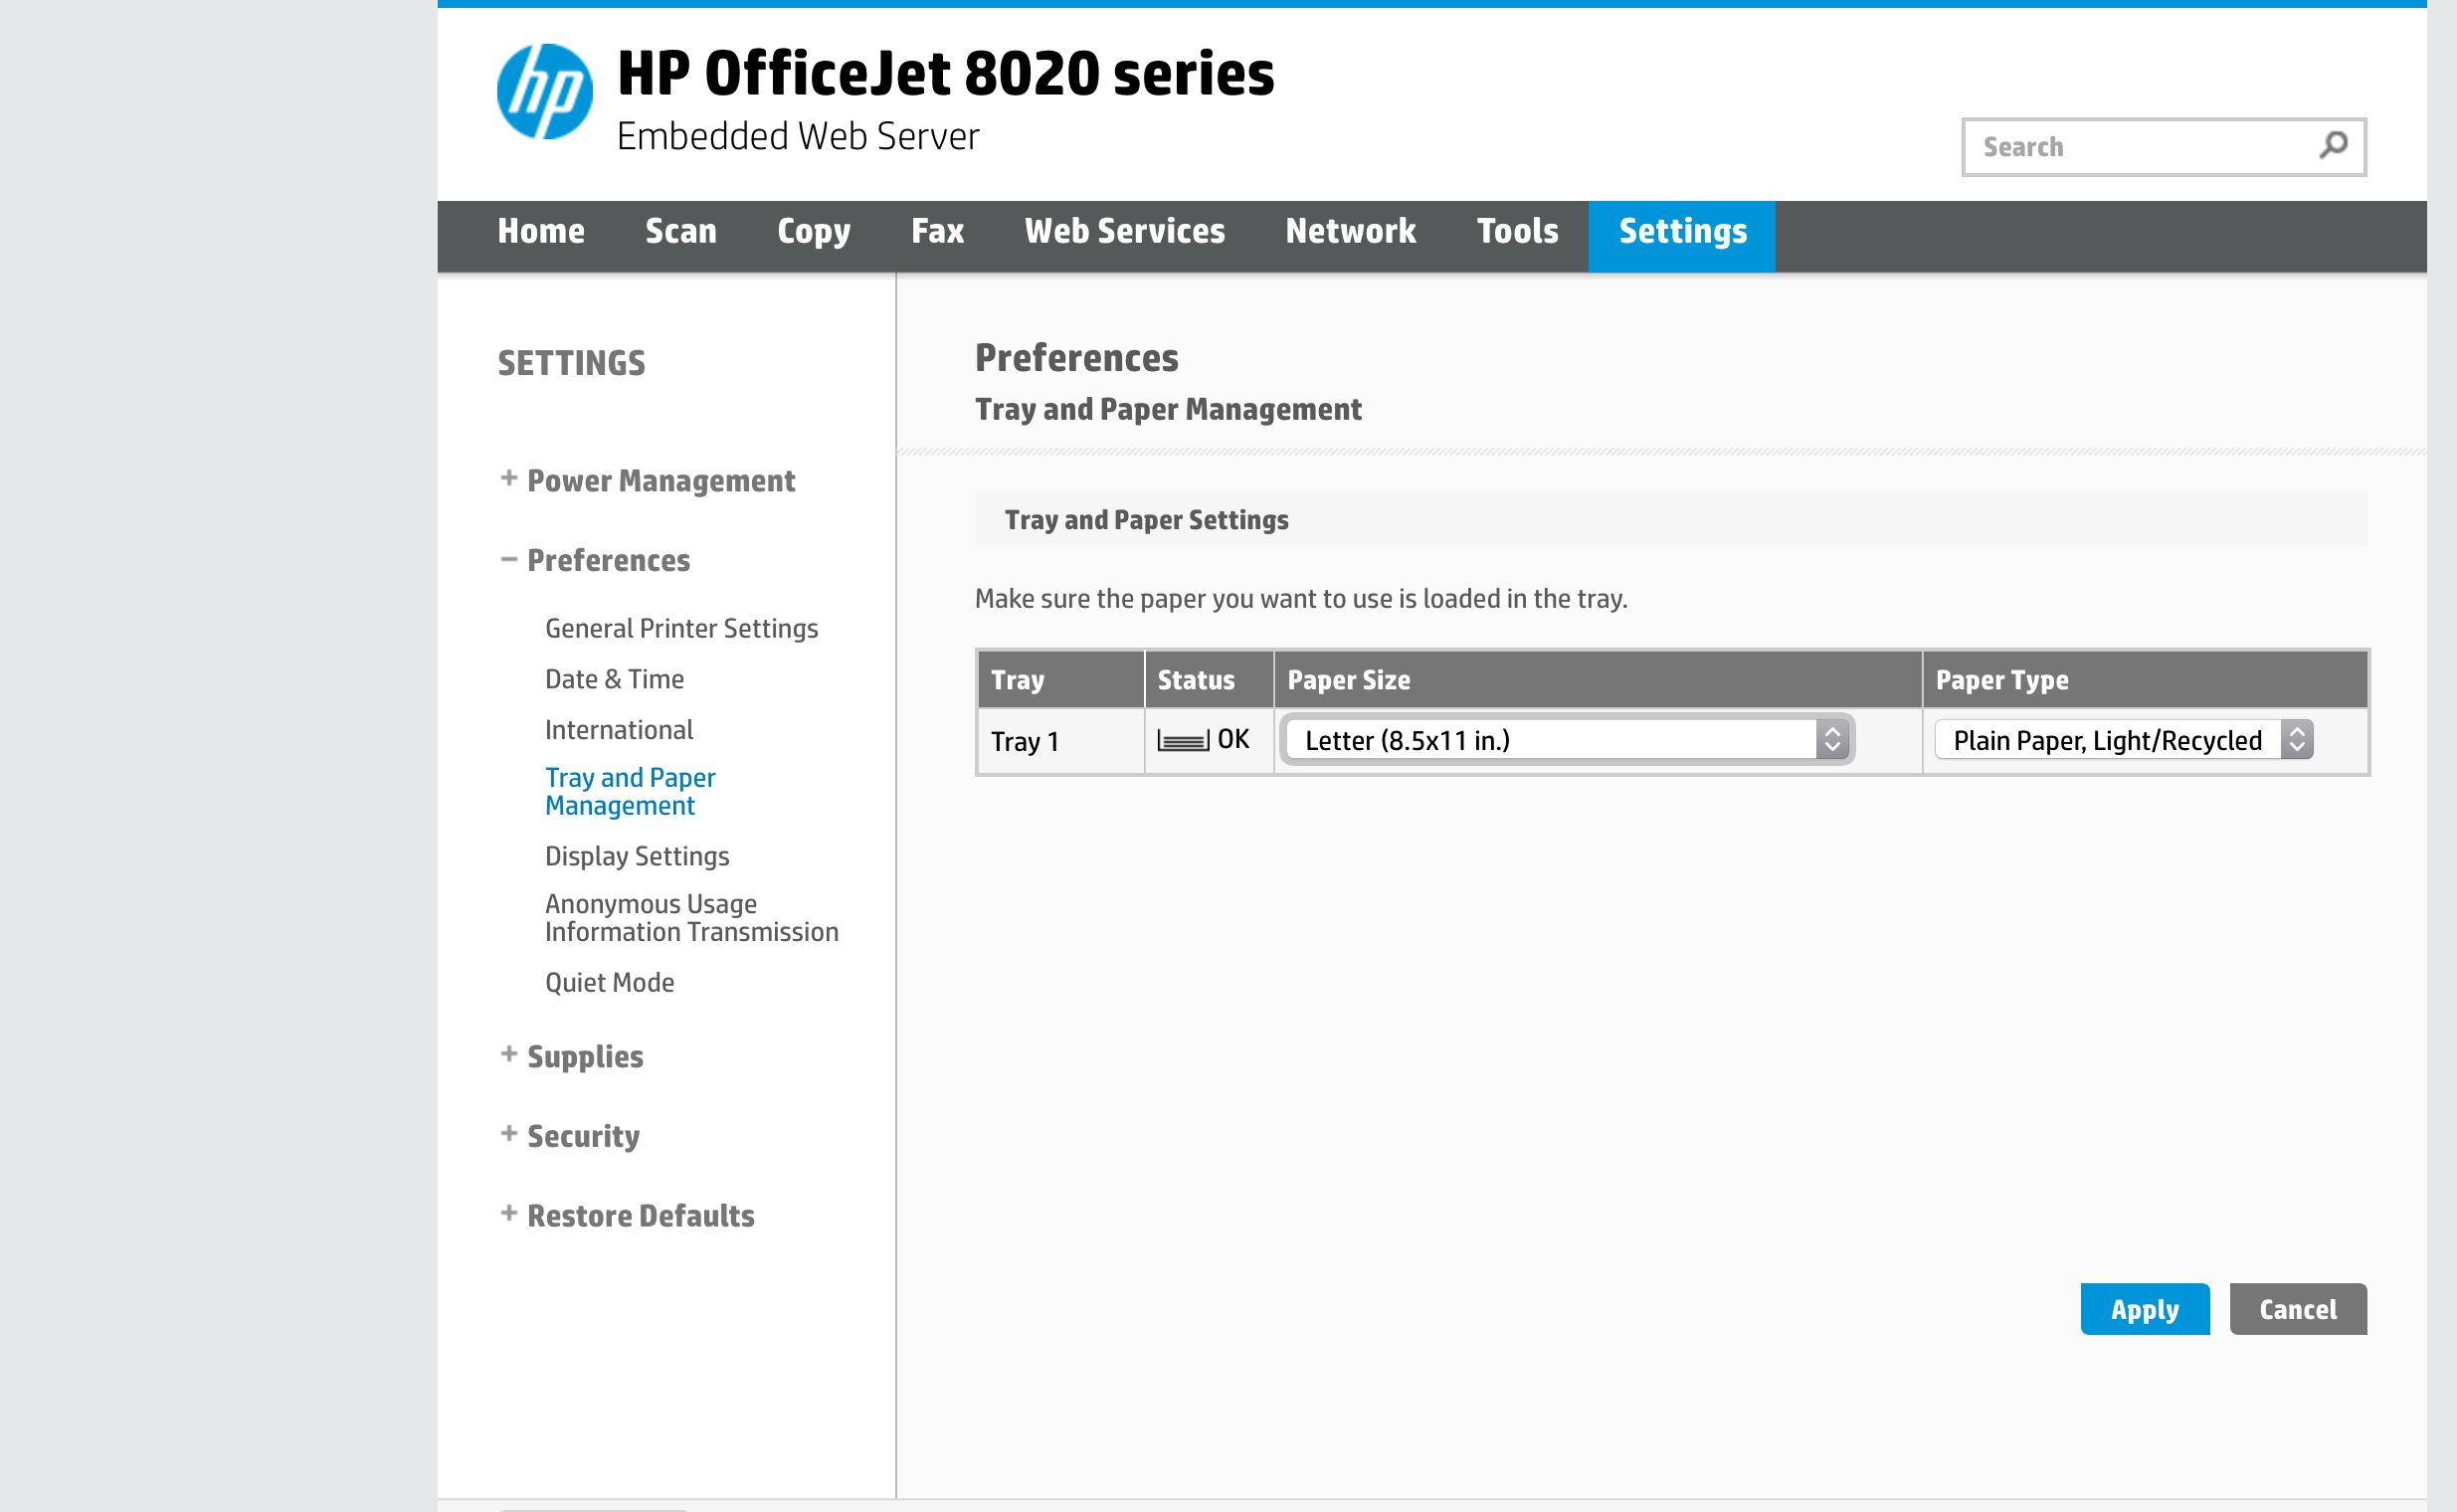
To change the IP address of your HP printer, access the printer’s web interface using its current IP address. Then, navigate to the network settings and update the IP address to the desired one.
Verifying the IP Address Change
After completing the process of changing the IP address of your HP printer, it’s crucial to verify the new configuration to ensure that the printer is successfully communicating within your home network. Here are the key steps to verify the IP address change and confirm its functionality:
- Print Network Configuration Page: Utilize the printer’s control panel or interface to print a network configuration page. This page provides detailed information about the printer’s network settings, including the newly assigned IP address, subnet mask, default gateway, and other relevant details.
- Check Network Connectivity: Using a computer or mobile device connected to the same network, attempt to access the HP printer by entering its new IP address in a web browser. If the printer’s web interface or configuration page is accessible, it indicates that the IP address change was successful and the printer is reachable within the network.
- Test Printing Functionality: Send a test print job to the HP printer from a connected device to verify that it can receive and process print requests using the new IP address. Confirm that the printer responds to print commands and produces the expected output, demonstrating seamless communication within the network.
- Monitor Network Stability: Over the following days, monitor the stability and performance of the HP printer within the network. Ensure that it maintains consistent connectivity and responds reliably to print jobs from various devices, validating the effectiveness of the IP address change.
- Update Printer Details on Devices: If you’ve assigned a static IP address to the printer, ensure that you update the printer’s details on all connected devices. This includes updating the printer’s IP address in the printer settings of computers, mobile devices, and any network-dependent applications.
By diligently verifying the IP address change and confirming the printer’s functionality within the network, you can instill confidence in the successful transition to the new network configuration. This validation process ensures that the HP printer remains seamlessly integrated into your smart home environment, ready to fulfill your printing needs with enhanced network connectivity.
Troubleshooting Common Issues
While changing the IP address of your HP printer can significantly enhance network performance and connectivity, it’s essential to be prepared for potential challenges that may arise during or after the IP address change. Here are some common issues you may encounter and practical troubleshooting steps to address them:
- Network Communication Errors: If the printer becomes unresponsive or encounters communication errors after the IP address change, verify that the new IP address is correctly configured and falls within the network’s address range. Additionally, check the subnet mask and default gateway settings to ensure proper network routing.
- Print Job Failures: In the event of print job failures or incomplete prints, confirm that the devices sending print commands have been updated with the printer’s new IP address. Additionally, check for any print queue issues or pending print jobs that may be affecting the printer’s performance.
- Intermittent Connectivity: If the printer exhibits intermittent connectivity issues following the IP address change, consider restarting both the printer and the network router to establish a fresh connection. This can help resolve temporary network disruptions and stabilize the printer’s communication within the network.
- IP Address Conflict: Should you encounter IP address conflicts within the network, where multiple devices have the same IP address, utilize your router’s administration interface to view and manage connected devices. Identify and reconfigure conflicting IP addresses to ensure unique assignments for each device.
- Security Firewall Restrictions: If the printer experiences restricted access or firewall-related issues, review the network’s security settings and firewall configurations. Ensure that the new IP address is whitelisted or exempted from any firewall restrictions that may impede the printer’s network communication.
By proactively addressing these common issues and implementing targeted troubleshooting steps, you can swiftly resolve any challenges that may arise during the IP address change process. Furthermore, staying attuned to the printer’s performance post-change and promptly addressing any issues contributes to a seamless transition to the new IP address configuration.
Conclusion
Changing the IP address of your HP printer is a pivotal aspect of managing your smart home network, ensuring optimal connectivity and performance for your printing needs. By understanding the reasons for an IP address change, preparing diligently, and following a systematic process, you can seamlessly transition your HP printer to a new network configuration.
Throughout this guide, we explored the significance of changing the IP address to optimize network performance, resolve conflicts, enhance security, and troubleshoot connectivity issues. By proactively preparing for the IP address change, accessing the printer settings, and verifying the new configuration, you can effectively align your HP printer with your evolving home network requirements.
Additionally, we addressed common issues that may arise during or after the IP address change, offering practical troubleshooting steps to resolve network communication errors, print job failures, intermittent connectivity issues, IP address conflicts, and security firewall restrictions.
As you navigate the process of changing the IP address of your HP printer, remember that thorough preparation, attention to detail, and proactive troubleshooting are key elements in ensuring a successful transition. By leveraging the insights and guidelines presented in this comprehensive guide, you can confidently manage the IP address of your HP printer within your smart home environment, fostering seamless network integration and reliable printing capabilities.
Embrace the opportunity to optimize your smart home network by empowering your HP printer with a well-aligned IP address, ultimately enhancing your printing experience and network efficiency.
Frequently Asked Questions about How To Change HP Printer IP Address
Was this page helpful?
At Storables.com, we guarantee accurate and reliable information. Our content, validated by Expert Board Contributors, is crafted following stringent Editorial Policies. We're committed to providing you with well-researched, expert-backed insights for all your informational needs.

0 thoughts on “How To Change HP Printer IP Address”