Home>Articles>How Do I Get Rid Of Calcium Deposits In My Ice Maker
Articles
How Do I Get Rid Of Calcium Deposits In My Ice Maker
Modified: August 25, 2024
Learn how to remove calcium deposits in your ice maker with our informative articles. Get rid of build-up for cleaner, more efficient ice production.
(Many of the links in this article redirect to a specific reviewed product. Your purchase of these products through affiliate links helps to generate commission for Storables.com, at no extra cost. Learn more)
Introduction
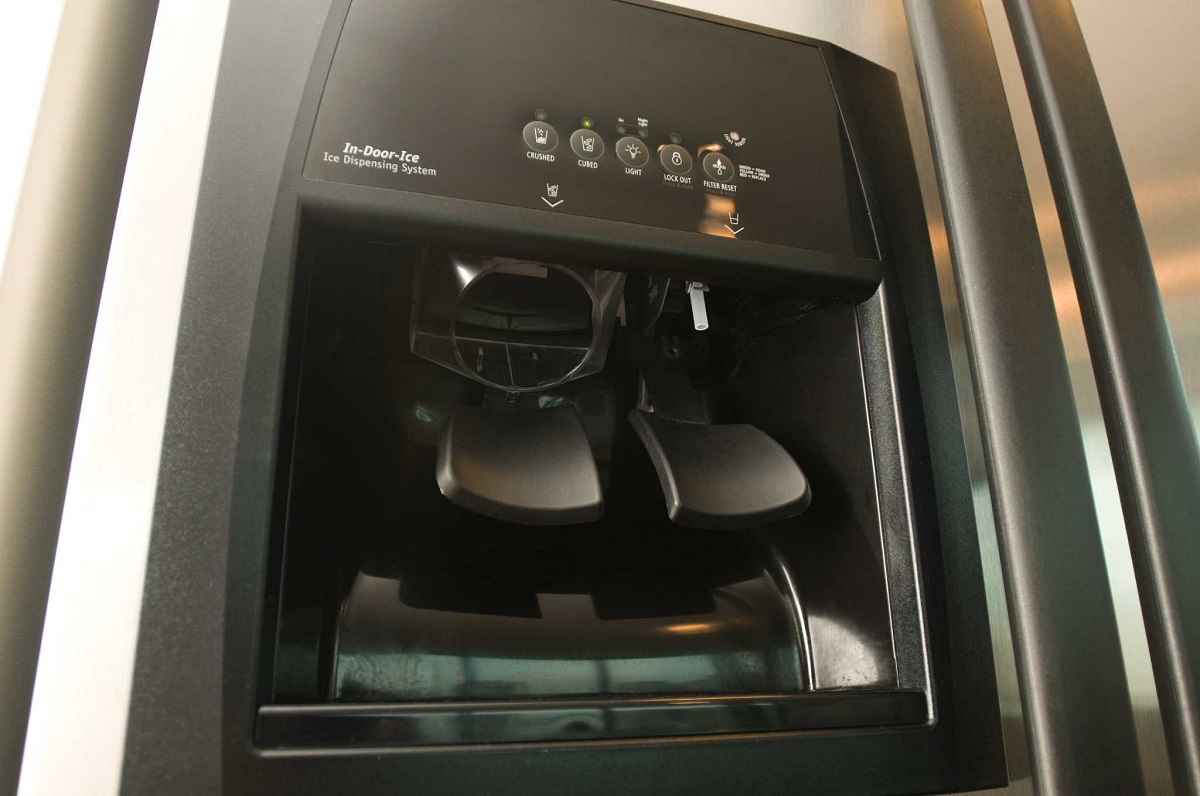
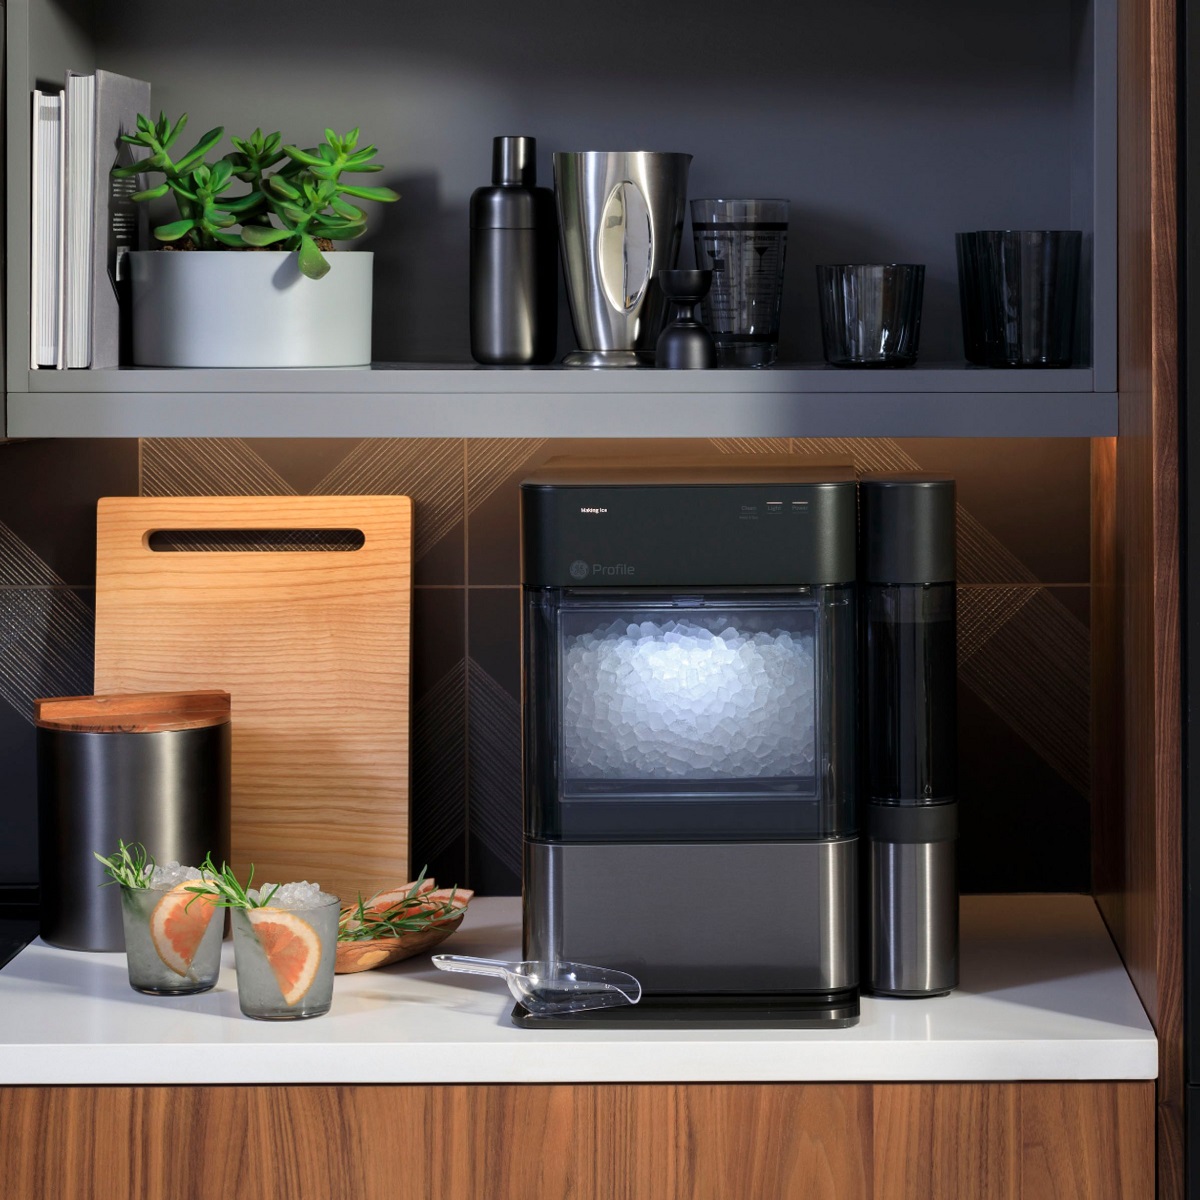
Welcome to the world of ice makers, where frozen cubes are a convenient luxury to have on hand for those hot summer days or special occasions. However, if you notice that your ice cubes have a filmy appearance, strange taste, or your ice maker is not producing ice as efficiently as it used to, there is a good chance that calcium deposits are to blame. In this article, we will delve into the topic of calcium deposits in ice makers and explore effective methods to get rid of them.
Calcium deposits, also known as limescale or hard water stains, are a common issue that can occur in ice makers due to the presence of minerals in the water supply. When water is frozen to create ice, these minerals can accumulate and solidify, leading to the formation of unsightly and potentially harmful deposits. These deposits can clog up the inner mechanisms of the ice maker and affect its performance, resulting in lower ice production and potential damage to the appliance over time.
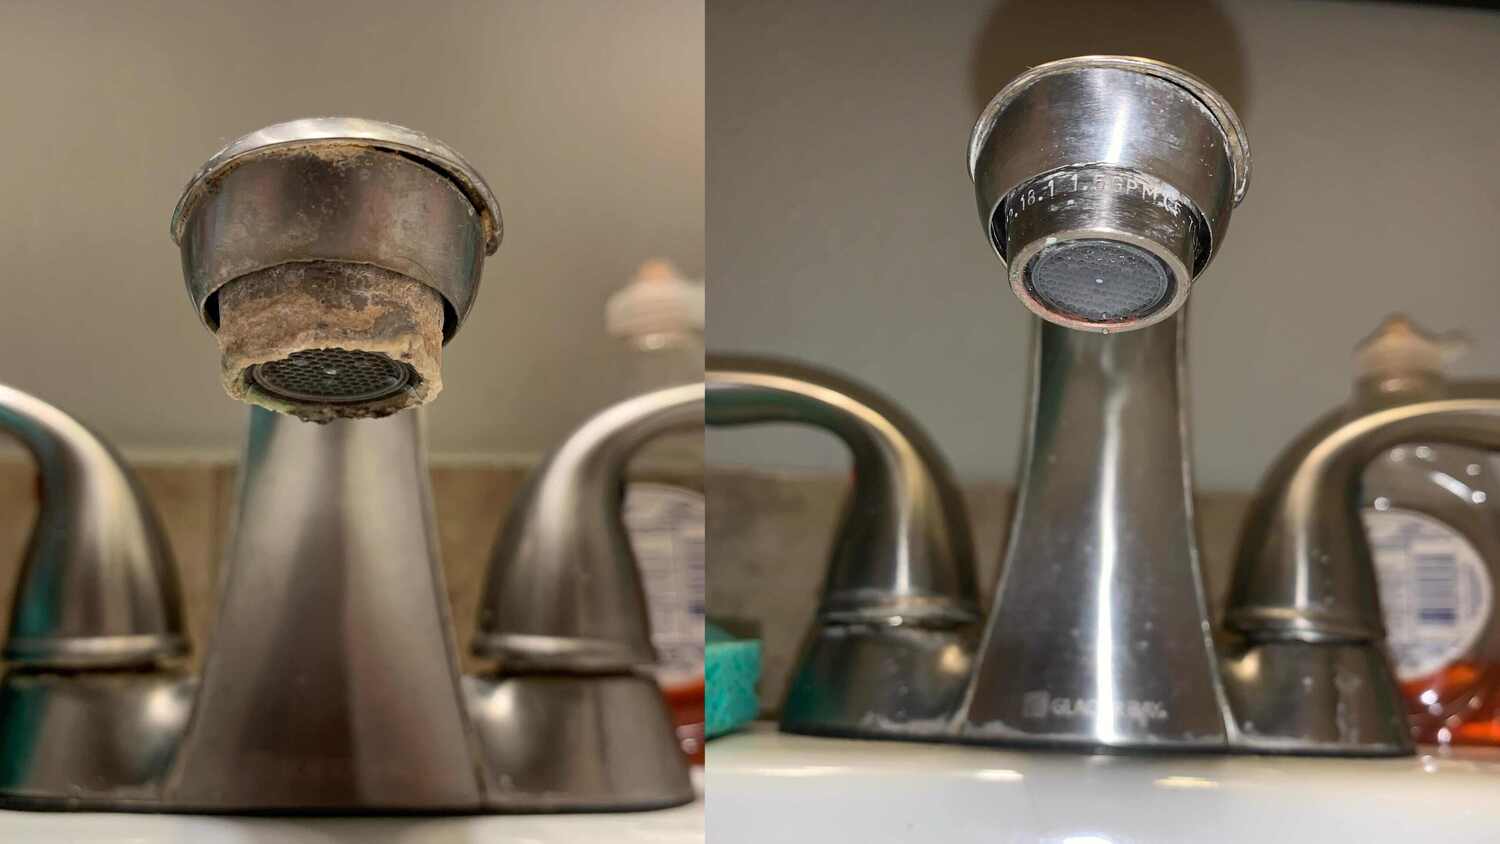
It is important to identify the common signs of calcium deposits in ice makers. One of the most noticeable signs is a cloudy or whitish appearance of the ice cubes. This is caused by the presence of mineral deposits that adhere to the surface of the ice. Additionally, you may notice a strange taste or odor coming from the ice cubes, which can be attributed to the minerals present in the water supply.
While calcium deposits may seem like a minor inconvenience, they can lead to more serious issues if left unaddressed. Over time, the build-up of mineral deposits can restrict the flow of water in the ice maker, resulting in decreased ice production and potentially causing the appliance to overwork. This can lead to increased energy consumption and may even lead to a breakdown of the ice maker if the problem is not rectified.
Now that we understand the negative effects of calcium deposits in ice makers, let’s explore some effective methods to get rid of them. It is important to note that the method you choose will depend on the severity of the deposits and your personal preferences. Here are some popular methods to consider:
Key Takeaways:
- Say goodbye to cloudy, strange-tasting ice cubes! Use vinegar, citric acid, or commercial cleaners to banish calcium deposits from your ice maker and enjoy crystal-clear, refreshing ice for your drinks.
- Keep your ice maker in top shape by incorporating regular maintenance and preventive measures. From cleaning removable parts to monitoring water quality, proactive care will ensure a constant supply of high-quality ice cubes.
Read more: How Do I Get Rid Of Ice In My Gutters
Understanding Calcium Deposits in Ice Makers
To effectively get rid of calcium deposits in ice makers, it is crucial to have a clear understanding of their formation and composition. Calcium deposits, also known as limescale or hard water stains, are caused by the presence of minerals, primarily calcium and magnesium, in the water supply.
When water is frozen to create ice, these minerals can solidify and accumulate within the ice maker, forming deposits. The hardness of water, which refers to the concentration of minerals, can vary depending on the source. Areas with hard water tend to have higher mineral content, making them more prone to calcium deposits.
Calcium deposits can cause several issues in ice makers. The most noticeable effect is the appearance of cloudy or whitish ice cubes. These deposits adhere to the surface of the ice, giving it a hazy or opaque look. Additionally, these deposits can affect the taste and odor of the ice cubes, resulting in a strange or unpleasant flavor.
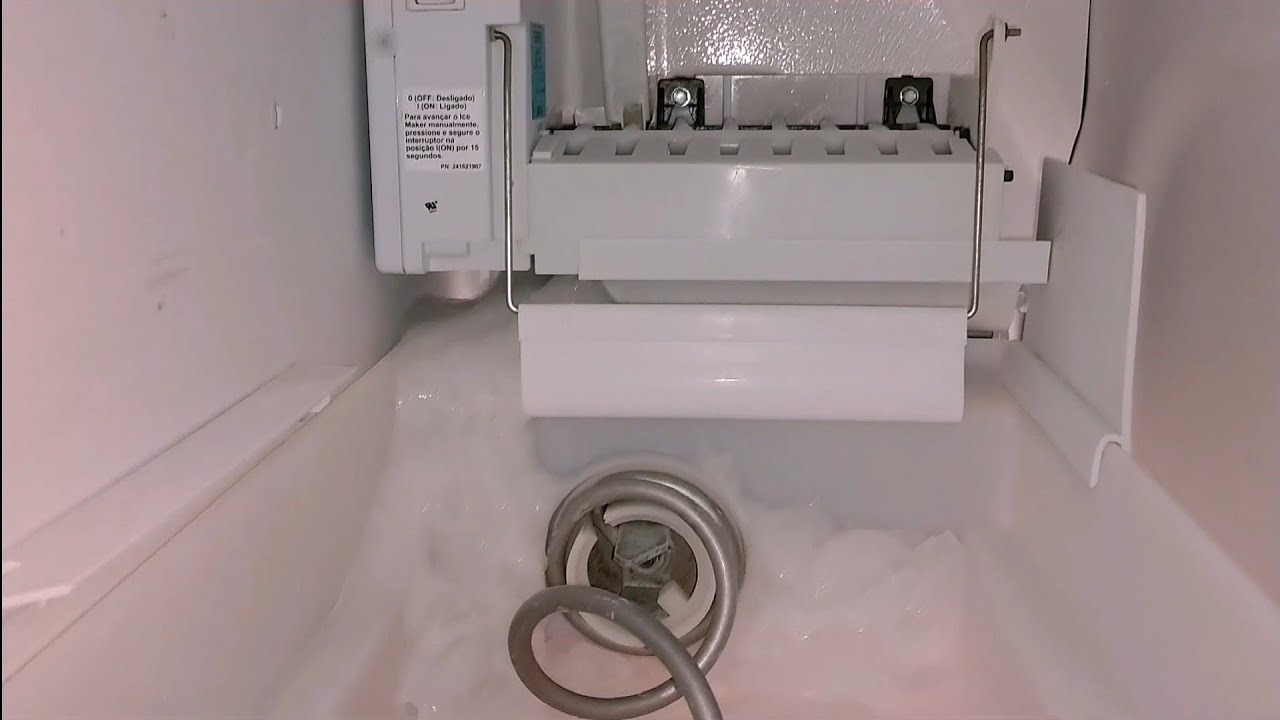
The accumulation of calcium deposits in an ice maker can also lead to decreased ice production. As the deposits build up within the appliance, they can obstruct the flow of water. This restricts the amount of water reaching the ice mold, resulting in smaller or incomplete ice cubes. In extreme cases, the deposits can completely block the water flow, causing the ice maker to malfunction.
Furthermore, calcium deposits can affect the overall performance and lifespan of the ice maker. The deposits can disrupt the proper functioning of the various components, such as the water supply valve, the evaporator plate, and the ice mold. This can lead to increased energy consumption, decreased efficiency, and potential damage to the appliance over time.
Preventing the formation of calcium deposits is crucial to maintaining the long-term health of your ice maker. This can be achieved by understanding the hardness of your water supply and taking appropriate measures. Water hardness can be measured using a test kit or obtained from your local water authority. If you live in an area with hard water, it is recommended to install a water softener or use a water filtration system designed to reduce mineral content.
Regular maintenance and cleaning of the ice maker are also essential in preventing calcium deposits. By regularly cleaning the various components of the ice maker and using descaling agents, you can remove any existing deposits and prevent their recurrence. This will help maintain optimal ice production and ensure the longevity of your ice maker.
In the next section, we will explore the common signs of calcium deposits in ice makers, which will help you identify the presence of these deposits and take appropriate action to remove them effectively.
Common Signs of Calcium Deposits in Ice Makers
Identifying the signs of calcium deposits in your ice maker is crucial in order to address the issue promptly and effectively. Here are some common signs that indicate the presence of calcium deposits:
- Cloudy or Whitish Ice Cubes: One of the most obvious signs of calcium deposits is the cloudy or whitish appearance of your ice cubes. When minerals, such as calcium and magnesium, solidify and accumulate within the ice maker, they can adhere to the surface of the ice, giving it a hazy or opaque look. If you notice that your ice cubes appear cloudy, it is likely that calcium deposits have formed.
- Strange Taste or Odor: Calcium deposits can also affect the taste and odor of the ice cubes. The minerals present in the water supply can give the ice cubes a strange or unpleasant flavor. Additionally, these deposits can contribute to an off-putting odor in the ice. If you detect any unusual taste or odor in your ice, it may be an indication of calcium deposits.
- Reduced Ice Production: Another sign of calcium deposits in ice makers is a decrease in ice production. As the deposits accumulate and solidify within the ice maker, they can obstruct the flow of water. This restricts the amount of water reaching the ice mold, resulting in smaller or incomplete ice cubes. If you notice a significant decline in the amount of ice being produced, calcium deposits may be to blame.
- Slow Dispensing or Clogged Chute: Calcium deposits can also affect the smooth dispensing of ice from the ice maker. Over time, the deposits can build up and clog the chute or the mechanism responsible for dispensing the ice. If you experience a slow or inconsistent dispensing of ice, it is likely that calcium deposits are obstructing the flow.
- Inefficient Cooling: Calcium deposits can interfere with the proper functioning of the evaporator plate in the ice maker. This can result in inefficient cooling and affect the overall performance of the appliance. If you notice that your ice cubes are melting faster than usual or that the ice maker struggles to maintain a consistently cold temperature, it may be a sign of calcium deposits.
It is important to address these signs of calcium deposits in ice makers promptly to prevent further damage and restore the optimal performance of the appliance. In the next section, we will explore effective methods to get rid of calcium deposits and restore your ice maker to its former glory.
Potential Issues Caused by Calcium Deposits in Ice Makers
Calcium deposits in ice makers can lead to various issues that can affect the performance, efficiency, and longevity of the appliance. Understanding these potential issues will emphasize the importance of addressing calcium deposits promptly. Here are some of the common problems caused by calcium deposits:
- Decreased Ice Production: One of the immediate effects of calcium deposits is a decrease in ice production. As the deposits accumulate and solidify within the ice maker, they can restrict the flow of water to the ice mold. This leads to smaller, incomplete, or irregularly-shaped ice cubes. If you rely on a consistent supply of ice, reduced ice production can be a significant inconvenience.
- Malfunctioning of the Ice Maker: Calcium deposits can lead to the malfunctioning of the ice maker. The deposits can clog up the water supply valve, the water lines, or the dispensing mechanism, which can result in erratic or completely halted ice production. In extreme cases, the deposits can cause the ice maker to stop working altogether, requiring costly repairs or replacement.
- Inefficient Cooling: When calcium deposits form on the evaporator plate of the ice maker, it can hinder the efficient transfer of heat, affecting the cooling process. The ice maker may struggle to maintain the desired temperature, leading to slower ice production and potential spoilage of perishable foods in the freezer. This can result in higher energy consumption and increased electricity bills.
- Damage to Components: Over time, the accumulation of calcium deposits can cause damage to the internal components of the ice maker. The deposits can cause corrosion, erosion, or blockages, affecting the proper functioning of the water valve, the ice mold, and other moving parts. This can lead to costly repairs or even the need for a replacement ice maker.
- Unpleasant Taste and Odor: Calcium deposits can contribute to a strange taste and odor in the ice cubes. As the ice is in direct contact with the deposits, the minerals can leach into the water, affecting its quality. This can result in ice cubes that have a metallic taste or an off-putting odor. This can be particularly bothersome when using the ice cubes in beverages or for entertaining guests.
It is evident that calcium deposits can cause several issues in ice makers, impacting not only the performance but also the overall lifespan of the appliance. Regular maintenance and prompt removal of calcium deposits are essential to prevent these potential issues and ensure that your ice maker operates efficiently for years to come.
Now that we understand the potential problems caused by calcium deposits in ice makers, let’s explore effective methods to get rid of them and restore the functionality of your ice maker in the next section.
Methods to Get Rid of Calcium Deposits in Ice Makers
When it comes to removing calcium deposits in ice makers, there are several methods you can use to effectively restore the performance and efficiency of your appliance. The choice of method depends on the severity of the deposits and your personal preference. Here are some popular methods to consider:
- Cleaning with Vinegar Solution: One of the simplest and most cost-effective methods to remove calcium deposits is by using a vinegar solution. Vinegar, specifically white distilled vinegar, is known for its acidic properties, which help to dissolve the mineral deposits. To clean your ice maker with vinegar, mix equal parts of vinegar and water and pour it into the water reservoir. Run a few ice-making cycles to circulate the solution, then empty the reservoir and rinse it thoroughly with clean water.
- Descaling with Citric Acid Solution: Citric acid is another effective natural option for removing calcium deposits. It can be found in powdered form or as concentrated lemon juice. To descale your ice maker with citric acid, mix a solution using one tablespoon of citric acid powder or lemon juice concentrate with one cup of water. Pour the solution into the water reservoir and run a few ice-making cycles. Flush the system with clean water to remove any leftover residue.
- Using Commercial Ice Machine Cleaners: If the deposits in your ice maker are stubborn or heavily built-up, you may opt for commercial ice machine cleaners. These cleaners are specifically designed to dissolve mineral deposits and sanitize the ice maker. Follow the manufacturer’s instructions for usage and safety precautions. Ensure thorough rinsing after cleaning to remove any residue from the cleaner.
- Scrubbing with a Soft Brush or Sponge: For particularly stubborn deposits in hard-to-reach areas, you may need to physically scrub them away. Use a soft brush or sponge to gently scrub the affected areas. Avoid using abrasive materials or harsh chemicals that may damage the surfaces of your ice maker.
- Regular Maintenance and Preventive Measures: Prevention is key when it comes to calcium deposits in ice makers. Regular maintenance and cleaning can help prevent the build-up of deposits. Remove and clean the removable parts, such as the ice bin and water reservoir, on a regular basis. Wipe down the interior surfaces and ensure proper ventilation to minimize the chances of mineral accumulation. Additionally, consider using a water filtration system or water softener to reduce the mineral content in your water supply.
It is important to note that regardless of the method you choose, always refer to the manufacturer’s instructions for your specific ice maker model. Some ice makers may have specific cleaning recommendations or may require certain maintenance procedures to ensure optimal performance.
By regularly cleaning and removing calcium deposits from your ice maker, you can extend the lifespan of the appliance, maintain efficient ice production, and enjoy clean and fresh-tasting ice cubes.
With the knowledge of these effective methods to get rid of calcium deposits, you can now restore the functionality of your ice maker and ensure a continuous supply of high-quality ice cubes. In the next section, we will conclude our discussion and summarize the key points we have covered.
Read more: How Do I Reset My Ice Maker
Cleaning with Vinegar Solution
Cleaning your ice maker with a vinegar solution is a simple and cost-effective method to remove calcium deposits and restore its performance. Vinegar, specifically white distilled vinegar, is known for its acidic properties, which help to dissolve mineral deposits effectively. Here’s how you can clean your ice maker using a vinegar solution:
- Mix the Solution: Start by mixing equal parts of vinegar and water in a container. For a standard cleaning, one cup of vinegar and one cup of water should be sufficient. Adjust the amounts accordingly if needed.
- Turn off the Ice Maker: Before you begin the cleaning process, make sure to turn off the ice maker and unplug it from the power source. Safety is paramount when working with electrical appliances.
- Pour the Solution: Carefully pour the vinegar solution into the water reservoir of your ice maker. Ensure that the solution covers all the affected areas where calcium deposits are present.
- Run Ice-Making Cycles: Once the solution is added to the reservoir, turn on the ice maker and allow it to run through several ice-making cycles. This will help circulate the vinegar solution throughout the ice maker, allowing it to come into contact with the mineral deposits.
- Empty the Reservoir and Rinse: After the ice-making cycles are complete, empty the vinegar solution from the reservoir. Make sure to thoroughly rinse the reservoir with clean water multiple times to flush out any remaining vinegar or dissolved deposits. This is important to prevent any residual taste or odor in your ice cubes.
- Wipe Down and Dry: Once the reservoir is rinsed clean, use a soft cloth or sponge to wipe down the interior surfaces of the ice maker. Pay extra attention to areas prone to mineral buildup. After wiping, let the ice maker air dry completely before plugging it back in and resuming normal operation.
It’s worth noting that if your ice-maker has a separate cleaning cycle or a cleaning mode, it is recommended to follow the manufacturer’s instructions for the specific cleaning process. Some ice makers may have specific procedures or additional steps for a thorough cleaning. Always refer to the manual to ensure you are following the correct cleaning guidelines for your ice maker model.
Cleaning your ice maker with a vinegar solution on a regular basis can help prevent and remove calcium deposits, ensuring efficient ice production and maintaining the quality of your ice cubes. Additionally, incorporating preventive measures such as using filtered water can further reduce the likelihood of calcium deposits and extend the lifespan of your ice maker.
Now that you are familiar with the process of cleaning your ice maker with a vinegar solution, let’s explore the next method to get rid of calcium deposits in ice makers: descaling with a citric acid solution.
To get rid of calcium deposits in your ice maker, mix equal parts water and vinegar and run it through the ice maker. Then, run a few cycles of plain water to rinse it out.
Descaling with Citric Acid Solution
Descaling your ice maker with a citric acid solution is an effective method to remove calcium deposits and restore optimal performance. Citric acid, found in powdered form or concentrated lemon juice, has natural acidic properties that help dissolve mineral deposits. Follow these steps to descale your ice maker using a citric acid solution:
- Mix the Solution: Start by mixing one tablespoon of citric acid powder or concentrated lemon juice with one cup of water. Stir the mixture well until the citric acid is fully dissolved.
- Turn off the Ice Maker: Before beginning the descaling process, turn off the ice maker and disconnect it from the power source to ensure safety.
- Add the Solution to the Reservoir: Carefully pour the citric acid solution into the water reservoir of your ice maker. Ensure that the solution covers all the areas affected by calcium deposits.
- Run Descale Cycles: Turn on the ice maker and activate the descale function or run several ice-making cycles. This will allow the citric acid solution to circulate within the ice maker and come into contact with the deposits.
- Flush with Clean Water: After the descaling cycles are complete, empty the citric acid solution from the reservoir. Thoroughly rinse the reservoir with clean water multiple times to flush out any remaining solution and dissolved deposits. This step is crucial to prevent any residual taste or odor in your ice cubes.
- Wipe Down and Dry: Use a soft cloth or sponge to wipe down the interior surfaces, removing any remaining traces of citric acid solution. Pay close attention to corners and crevices where calcium deposits may have been persistent. Allow the ice maker to air dry completely before plugging it back in and resuming normal operations.
It’s important to note that some ice makers have specific descaling procedures outlined in the manufacturer’s manual. If your ice maker has a dedicated descaling mode or cycle, it is recommended to follow the instructions provided by the manufacturer to ensure proper descaling.
Descaling your ice maker with a citric acid solution on a regular basis, as recommended by the manufacturer, can help prevent and remove calcium deposits. This will optimize ice production, maintain the quality of your ice cubes, and extend the lifespan of your ice maker.
Now that you are familiar with the process of descaling your ice maker with a citric acid solution, let’s explore the next method to get rid of calcium deposits: using commercial ice machine cleaners.
Using Commercial Ice Machine Cleaners
If the calcium deposits in your ice maker are stubborn or heavily built-up, using a commercial ice machine cleaner can be an effective solution. These cleaners are specifically formulated to dissolve mineral deposits and sanitize the ice maker. Here are the steps to safely and effectively use a commercial ice machine cleaner:
- Choose the Right Cleaner: Select a commercial ice machine cleaner that is compatible with your ice maker. Different brands may have specific cleaners designed for different models or types of ice makers. Read the instructions and product label carefully to ensure you have the correct cleaner for your appliance.
- Turn off the Ice Maker: Before starting the cleaning process, switch off the ice maker and unplug it from the power source to ensure safety.
- Prepare the Cleaner: Follow the instructions provided by the manufacturer for preparing the commercial ice machine cleaner. This may involve diluting the cleaner with water to the recommended concentration.
- Apply the Cleaner: Apply the prepared cleaner to the affected areas of the ice maker. Pay close attention to areas with visible calcium deposits or mineral build-up. Use a brush or sponge to gently scrub the surfaces, ensuring the cleaner comes into contact with the deposits.
- Follow the Dwell Time: Allow the cleaner to sit and work for the recommended dwell time specified in the product instructions. This allows the cleaner to penetrate and dissolve the calcium deposits effectively. Avoid leaving the cleaner on for longer than instructed, as it may damage the surfaces of the ice maker.
- Rinse Thoroughly: After the dwell time, thoroughly rinse the ice maker with clean water multiple times to remove any traces of the cleaner. This step is crucial to prevent any residual taste or odor in your ice cubes.
- Dry and Reassemble: After rinsing, wipe down the interior surfaces of the ice maker with a clean, soft cloth or sponge. Ensure that all components are dry before reassembling the ice maker and plugging it back in.
It’s important to carefully follow the manufacturer’s instructions for the commercial ice machine cleaner you choose. They will provide specific guidance on usage, safety precautions, and recommended cleaning frequencies for your particular ice maker model.
Using a commercial ice machine cleaner on a regular basis or as recommended by the manufacturer can effectively remove calcium deposits, prevent build-up, and keep your ice maker running optimally.
Now that you are familiar with cleaning your ice maker using commercial ice machine cleaners let’s explore the next method: scrubbing with a soft brush or sponge.
Scrubbing with a Soft Brush or Sponge
If you have stubborn calcium deposits in your ice maker that cannot be easily removed with liquid solutions alone, manually scrubbing with a soft brush or sponge can be an effective method. Here’s how you can remove stubborn deposits by scrubbing:
- Turn off the Ice Maker: Before starting the scrubbing process, make sure to turn off the ice maker and unplug it from the power source to ensure safety.
- Prepare the Cleaning Solution: Create a gentle cleaning solution by mixing warm water with mild dish soap. This solution will aid in loosening and removing the deposits during the scrubbing process.
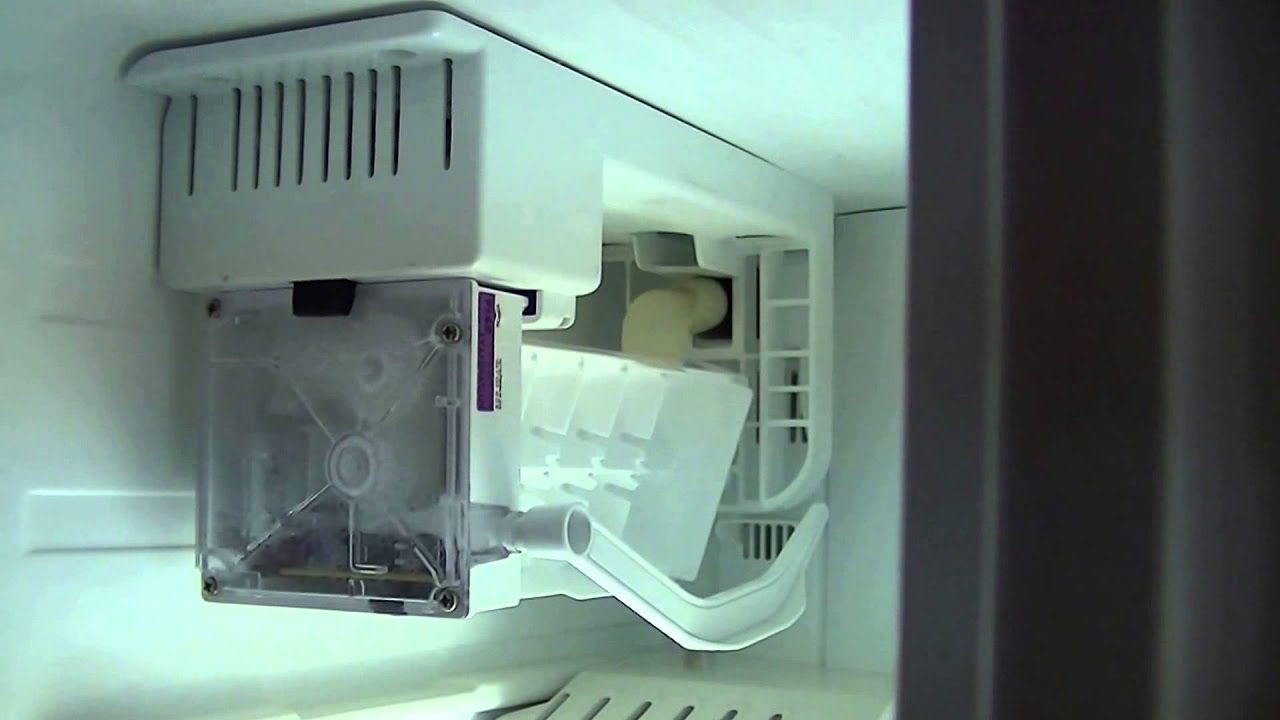
- Remove Removable Components: If possible, remove any removable components from the ice maker, such as the ice bin or the water reservoir. This will allow easier access to the affected areas and provide a more thorough cleaning.
- Dampen the Brush or Sponge: Wet a soft brush or sponge with the cleaning solution. Ensure that it is damp but not soaking wet, as excess water can damage the electrical components of the ice maker.
- Gently Scrub the Deposits: Begin scrubbing the affected areas of the ice maker using gentle circular motions. Focus on areas where calcium deposits are visible or heavily accumulated. A soft-bristled brush or sponge will help remove the deposits without causing damage to the surfaces of the ice maker.
- Rinse Thoroughly: After scrubbing the deposits, rinse the ice maker with clean water. Use a damp cloth or sponge to wipe away any remaining solution or loosened deposits. Repeat the rinsing process multiple times to ensure thorough removal of the cleaning solution and dissolved deposits.
- Dry and Reassemble: Once the ice maker is rinsed, use a clean, dry cloth to wipe down the interior surfaces and components, removing any excess moisture. Allow the ice maker to air dry completely before reassembling and plugging it back in.
It’s important to note that while scrubbing can effectively remove stubborn calcium deposits, it should be done with caution to prevent any damage to the surfaces and components of the ice maker. Always use a soft brush or sponge, avoid using abrasive materials or harsh cleaners, and follow the manufacturer’s guidelines for cleaning your specific ice maker model.
Regular maintenance and periodic scrubbing can help prevent the build-up of calcium deposits, maintain optimal ice production, and prolong the lifespan of your ice maker.
Now that you are familiar with the method of scrubbing with a soft brush or sponge, let’s move on to the final method: regular maintenance and preventive measures.
Read more: How Do I Reset My Kenmore Ice Maker
Regular Maintenance and Preventive Measures
Maintaining your ice maker through regular maintenance and taking preventive measures is essential in preventing the build-up of calcium deposits. Here are some key steps to incorporate into your routine to ensure optimal performance and minimize the formation of deposits:
- Regular Cleaning: Schedule regular cleaning sessions for your ice maker to remove any potential build-up of minerals or debris. Follow the manufacturer’s instructions for cleaning and use appropriate cleaning agents or solutions. This will prevent deposits from accumulating over time and maintain the efficiency of your ice maker.
- Clean Removable Components: Take extra care to clean and sanitize removable components, such as the ice bin and water reservoir. Use mild dish soap or vinegar solutions to clean these parts thoroughly. Rinse them with clean water before reassembling them back into the ice maker.
- Inspect Water Supply: Check the quality of your water supply and take appropriate measures to reduce mineral content if you have hard water. Install a water softener or use a water filter specifically designed to remove minerals. This will minimize the amount of mineral deposits entering your ice maker in the first place.
- Regularly Replace Water Filters: If your ice maker comes with a built-in water filter, make sure to replace it as recommended by the manufacturer. Clogged or expired filters can affect water quality and contribute to mineral deposits. Regularly replacing filters will ensure clean and purified water for your ice maker.
- Ensure Proper Ventilation: Proper airflow and ventilation are crucial for the optimal performance of your ice maker. Ensure that the vents and air passages are clear of dust and debris. This will prevent the ice maker from overheating and potentially causing mineral deposits to accumulate due to the interference of the cooling process.
- Monitor Ice Quality: Keep an eye on the quality of your ice cubes. If you notice any cloudiness, strange taste, or odor, it could be an early indication of mineral deposits. Address the issue promptly to prevent further build-up and ensure the production of clean and high-quality ice cubes.
By incorporating these regular maintenance practices and preventive measures, you can minimize the formation of calcium deposits, prolong the lifespan of your ice maker, and ensure a continuous supply of clean and refreshing ice cubes.
Regular maintenance and preventive measures work hand in hand with the other methods mentioned earlier to effectively remove and prevent calcium deposits in your ice maker. With consistent care and attention, you can enjoy optimal performance and enjoy ice that is both visually appealing and free from mineral impurities.
By utilizing a combination of these methods, you can effectively get rid of calcium deposits and maintain the efficiency of your ice maker. Remember to follow the recommended cleaning procedures and frequency specific to your ice maker model for best results.
Now that we have explored the various methods and preventive measures, you are well-equipped to tackle calcium deposits in your ice maker and ensure a steady supply of clean and refreshing ice cubes.
Is there anything else I can assist you with?
Conclusion
Calcium deposits in ice makers can be a common and frustrating problem, but fortunately, there are effective methods to get rid of them. By understanding the formation and potential issues caused by calcium deposits, you can take proactive steps to address and prevent their accumulation in your ice maker.
We explored several methods to remove calcium deposits from ice makers, including cleaning with vinegar solution, descaling with citric acid solution, using commercial ice machine cleaners, scrubbing with a soft brush or sponge, and regular maintenance with preventive measures. Each of these methods has its own benefits and can be used in conjunction with one another to achieve optimal results.
Remember to follow the manufacturer’s instructions for your specific ice maker model, as certain cleaning methods may be more suitable or recommended. Regular maintenance, such as cleaning removable components, inspecting the water supply, and ensuring proper ventilation, can play a crucial role in preventing the formation of calcium deposits in the first place.
By removing calcium deposits and implementing preventive measures, you can optimize ice production, maintain the quality of your ice cubes, and extend the lifespan of your ice maker. Not only will this result in better ice for your beverages, but it will also save you from potential appliance damage and costly repairs.
Take the time to regularly clean and maintain your ice maker, paying attention to signs of calcium deposits, and address the issue promptly. This way, you can enjoy sparkling clean ice cubes that enhance the taste and experience of your favorite drinks.
With the knowledge and methods provided in this article, you can confidently tackle calcium deposits in your ice maker and ensure a continuous supply of ice that is free from unsightly deposits and impurities.
Remember, proper maintenance and care are key to keeping your ice maker in optimal condition. By making it a regular habit, you can enjoy ice cubes that are clean, refreshing, and perfect for any occasion.
If you have any further questions or concerns, feel free to reach out. Cheers to clean ice!
Now that you've mastered clearing out calcium deposits from your ice maker, why not give all your appliances a thorough cleanup? Our next guide walks you through effective methods for keeping every appliance in tip-top shape. Maintaining spotless appliances not only ensures their efficiency but also extends their lifespan. Don't miss our detailed, easy-to-follow advice on sprucing up everything from your dishwasher to your dryer. Dive into our comprehensive cleaning routine and see how simple upkeep can be!
Frequently Asked Questions about How Do I Get Rid Of Calcium Deposits In My Ice Maker
Was this page helpful?
At Storables.com, we guarantee accurate and reliable information. Our content, validated by Expert Board Contributors, is crafted following stringent Editorial Policies. We're committed to providing you with well-researched, expert-backed insights for all your informational needs.


0 thoughts on “How Do I Get Rid Of Calcium Deposits In My Ice Maker”