
Articles
How To Clean A Commercial Ice Maker
Modified: January 7, 2024
Discover effective techniques and tips in our comprehensive articles on how to clean a commercial ice maker. Keep your equipment running smoothly and maintain high-quality ice production.
(Many of the links in this article redirect to a specific reviewed product. Your purchase of these products through affiliate links helps to generate commission for Storables.com, at no extra cost. Learn more)
Introduction
Welcome to our guide on how to clean a commercial ice maker. Keeping your ice maker clean is essential to ensure it functions properly and produces clean and safe ice for your business. A dirty ice maker can lead to impurities in the ice, which can affect the taste and quality of the beverages served to your customers. Regular cleaning and maintenance will help prolong the lifespan of your ice maker and prevent any potential health hazards.
In this article, we will provide you with step-by-step instructions on how to clean your commercial ice maker effectively. Before we proceed, it’s important to note that the process may vary slightly depending on the specific make and model of your ice maker. Always refer to the manufacturer’s instructions and guidelines for best practices.
It’s also crucial to follow safety precautions during the cleaning process. Ensure you wear protective gloves and goggles to safeguard yourself from any potential harm. Let’s dive in and discover how to clean your commercial ice maker in a few simple steps.
Key Takeaways:
- Regularly cleaning and sanitizing your commercial ice maker is crucial for producing clean, safe, and high-quality ice, ensuring customer satisfaction and business reputation.
- Prioritizing safety, following manufacturer’s guidelines, and conducting regular tests and inspections will help maintain the functionality and cleanliness of your commercial ice maker, prolonging its lifespan and preventing unexpected issues.
Read also: 10 Best Commercial Ice Maker for 2025
Safety Precautions
Prior to cleaning your commercial ice maker, it’s essential to take certain safety precautions to protect yourself and prevent any accidents or injuries. Here are some safety guidelines to follow:
- Turn off the ice maker and unplug it from the power source before starting the cleaning process. This will prevent any electrical accidents or shocks.
- Wear protective gloves and safety goggles to shield yourself from any chemicals or debris that may be present during the cleaning.
- Ensure you have proper lighting in the area where you will be working, as it will make it easier to see any dirt, grime, or potential hazards.
- Be cautious while handling sharp objects, such as scrapers or brushes, to avoid any cuts or injuries.
- If you’re using any cleaning solutions or chemicals, carefully read and follow the instructions provided by the manufacturer.
- Keep children and pets away from the cleaning area to prevent any accidents or unintended contact with cleaning solutions.
- If you encounter any issues during the cleaning process or are unsure about any aspect, it’s recommended to contact a professional for assistance.
- Regularly check and maintain the ice maker to ensure it’s in good working condition. This will help prevent any potential hazards or malfunctions.
By adhering to these safety precautions, you can protect yourself and create a safe cleaning environment for your commercial ice maker.
Materials and Equipment Needed
Before you start cleaning your commercial ice maker, gather the necessary materials and equipment to ensure a smooth and efficient process. Here’s a list of items you’ll need:
- Protective gloves: To protect your hands from any chemicals or debris.
- Safety goggles: To shield your eyes from potential splashes or particles.
- Clean towels or rags: For wiping down and drying various parts of the ice maker.
- Warm water: A bucket or container filled with warm water for cleaning purposes.
- Mild cleaner or ice maker cleaner solution: Choose a cleaner that is safe for food-grade equipment and follow the manufacturer’s instructions.
- Scrub brush or soft bristle brush: For scrubbing away dirt, grime, and build-up.
- Scrapers: Used for removing stubborn residues or ice buildup.
- Sanitizing solution: A food-safe sanitizer to ensure the ice maker is properly sanitized after cleaning.
Make sure to gather all the necessary materials and have them readily available before you begin cleaning your commercial ice maker. This will save you time and make the process more efficient.
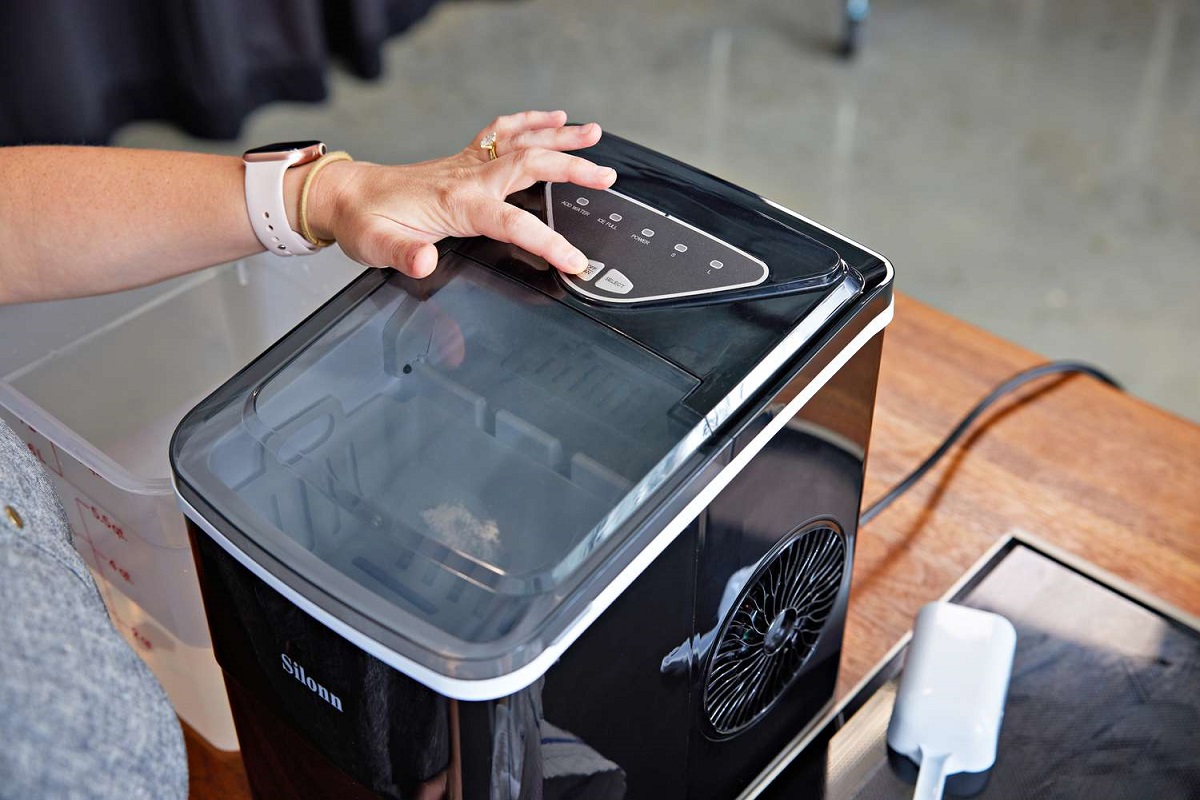
Step 1: Power Off the Ice Maker
The first step in cleaning a commercial ice maker is to power it off and disconnect it from the electrical source. This is essential to ensure your safety and prevent any accidents during the cleaning process.
Locate the power switch or circuit breaker for the ice maker and turn it off. If your ice maker has a power cord, unplug it from the electrical outlet. By doing so, you eliminate the risk of electric shock or damage to the ice maker while you work on it.
It’s important to note that some larger commercial ice makers may have multiple components or sections. In this case, ensure that all parts are powered off and disconnected.
Once the ice maker is safely powered off and disconnected, you can proceed with the next steps of the cleaning process without any electrical hazards.
Remember, safety should always be your top priority. Never attempt to clean a powered-on ice maker, as it can be extremely dangerous. Take the time to properly power off and disconnect the ice maker before moving forward with the cleaning process.
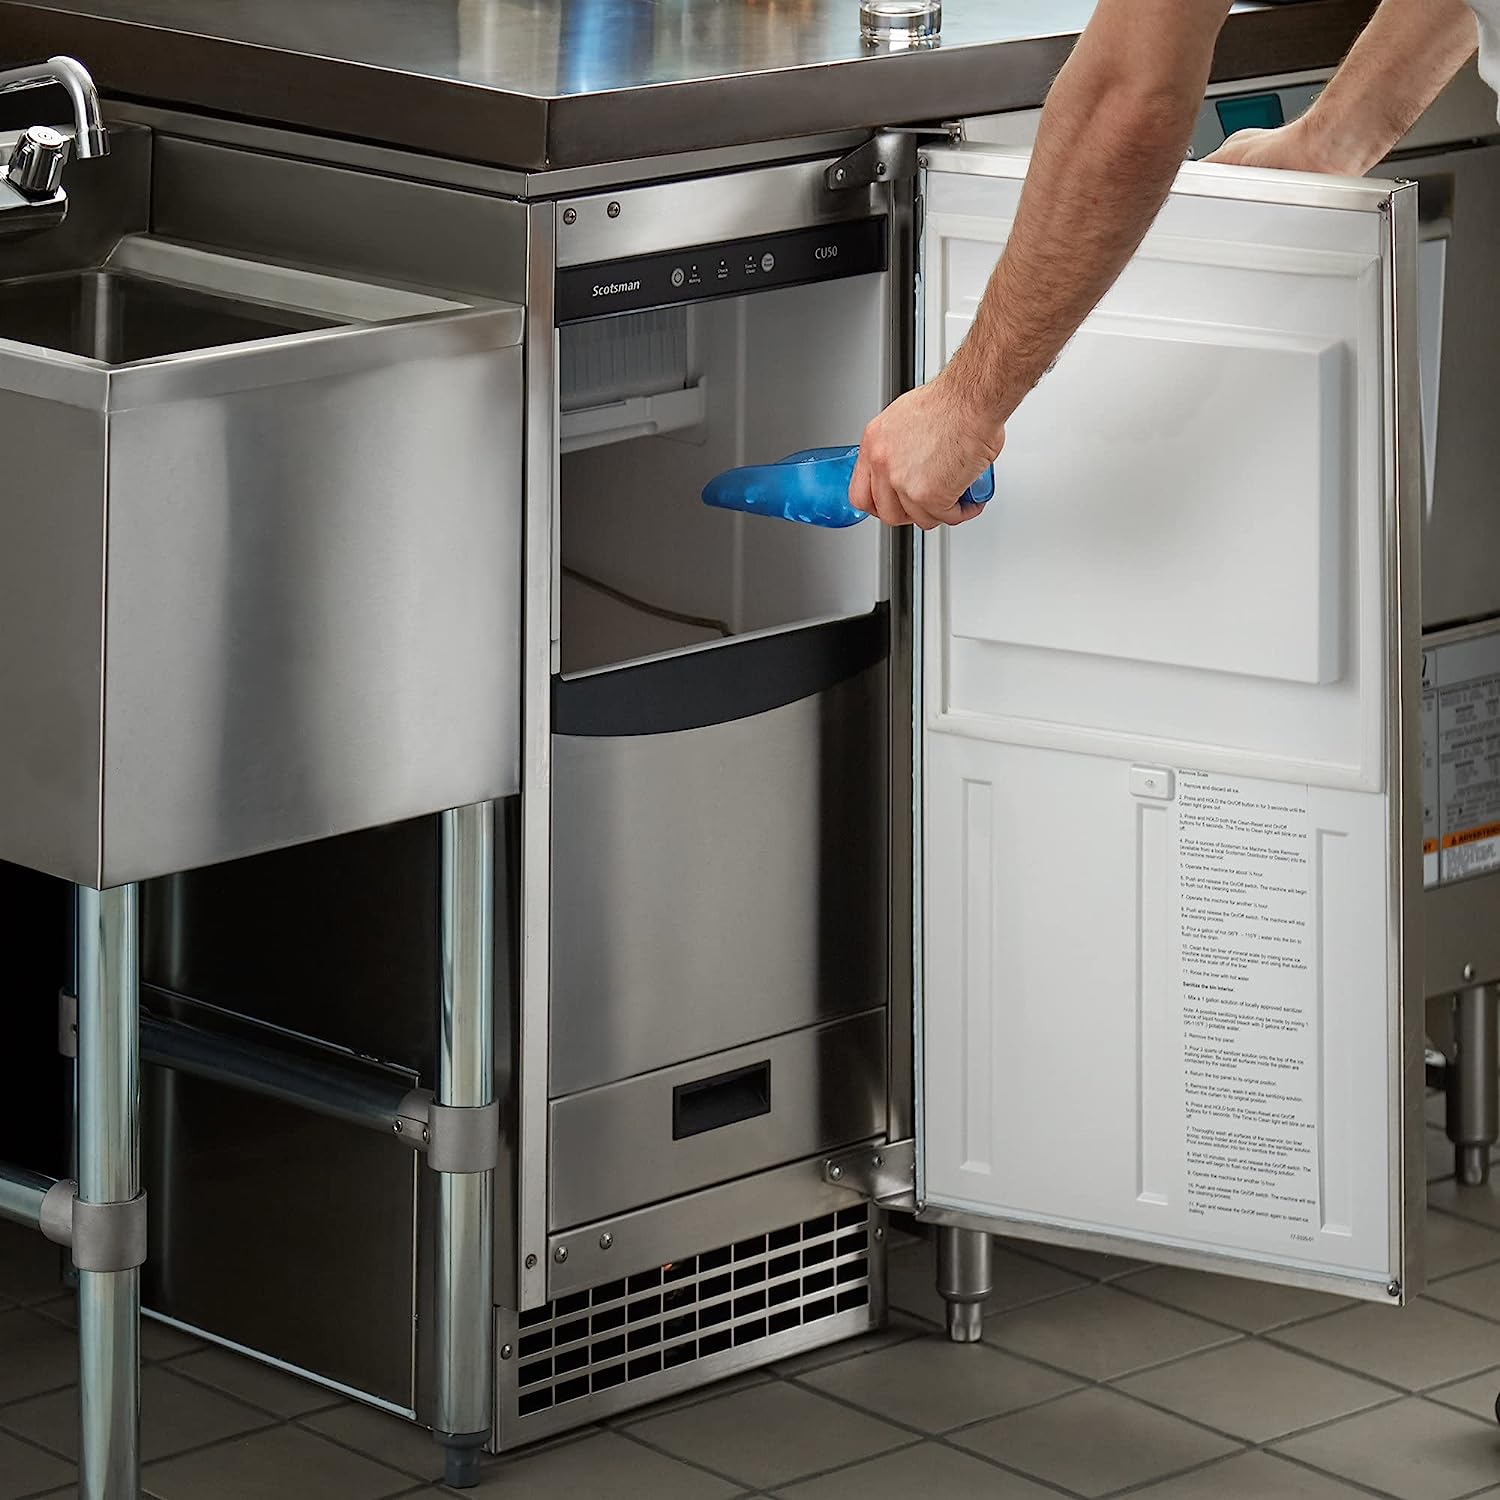
Step 2: Empty and Dispose of Any Ice
After you have powered off and disconnected the commercial ice maker, the next step is to empty and dispose of any ice that may be present in the ice bin or storage area.
Begin by removing the ice scoop or any other utensils from the ice bin. Carefully inspect the ice for any signs of contamination or unusual discoloration. If you notice anything suspicious, it’s best to discard all of the ice to ensure the safety of your customers.
Next, locate the drain plug or drain valve at the bottom of the ice bin. Depending on the design of your ice maker, you may need to remove a panel or cover to access it. Once found, open the drain plug or valve to allow the remaining ice to drain out. Make sure to have a bucket or container ready to collect the melted ice.
Dispose of the ice in a sanitary manner, following the guidelines and regulations set by your local health department. It’s important to maintain proper hygiene throughout the cleaning process to prevent any potential contamination.
Once the ice bin is empty, take the time to inspect it for any signs of damage or residue. If you notice any build-up or stubborn stains, make a mental note to address them during the cleaning process.
Emptying and disposing of any ice is a crucial step in preparing your commercial ice maker for thorough cleaning. By starting with a clean slate, you can ensure that your cleaning efforts are more effective and yield better results.
Read also: 13 Best Ice Maker Commercial for 2025
Step 3: Remove and Clean the Ice Bin
Now that you have emptied the ice from the commercial ice maker, it’s time to remove and clean the ice bin. The ice bin is where the ice is stored before it is dispensed.
Start by locating the release mechanism or screws that secure the ice bin to the ice maker. Depending on the model of your ice maker, you may need to remove a cover or panel to access these fasteners.
Once you have access to the release mechanism or screws, carefully detach the ice bin from the ice maker. Be cautious and support the weight of the ice bin to avoid any accidental dropping or damage.
Take the ice bin to a designated cleaning area with a sink or large basin. In the sink or basin, prepare a mixture of warm water and a mild cleaner or ice maker cleaner solution. Follow the manufacturer’s instructions for the appropriate dilution ratio.
Use a scrub brush or soft bristle brush to scrub the interior surfaces of the ice bin. Pay close attention to areas where ice is commonly in contact, such as the bottom and walls. Remove any dirt, mold, or residue that may have accumulated over time.
For stubborn stains or difficult-to-reach areas, you can use a scraper or a toothbrush to gently remove the debris. Avoid using abrasive materials or harsh chemicals that could damage the surface of the ice bin.
Rinse the ice bin thoroughly with clean water to remove any remaining cleaning solution. Ensure all traces of the cleaner are eliminated to prevent any potential contamination of the ice.
Once the ice bin has been cleaned and rinsed, dry it thoroughly with a clean towel or cloth. Pay extra attention to the seams and edges to prevent the growth of mold or mildew.
After the ice bin is dry, reattach it to the ice maker by securing the release mechanism or screws. Ensure it is properly aligned and securely fastened to prevent any potential leaks or issues.
Cleaning the ice bin is an important step in ensuring the overall cleanliness and functionality of your commercial ice maker. By thoroughly cleaning and drying the ice bin, you create a clean and hygienic environment for storing ice.
Step 4: Clean the Interior of the Ice Maker
With the ice bin removed and cleaned, it’s time to focus on cleaning the interior components of the commercial ice maker. This step will help eliminate any build-up, mold, or bacteria that may be present inside the machine.
Start by inspecting the interior of the ice maker for any visible debris or residue. Use a flashlight if needed to get a clear view of all the components.
Using a clean, damp cloth, wipe down the walls and surfaces of the interior. This will help remove any loose dirt or dust that may have accumulated. Pay attention to hard-to-reach areas and corners.
For stubborn stains or build-up, prepare a solution of warm water and a mild cleaner or ice maker cleaner. Gently scrub the affected areas with a soft bristle brush or sponge. Avoid using abrasive materials that could damage the surfaces of the ice maker.
Take extra care to clean the ice maker’s evaporator, which is responsible for freezing the water and forming ice. Follow the manufacturer’s guidelines on how to access and clean the evaporator. Use a specific cleaner recommended for the evaporator to ensure optimal performance.
Once you have cleaned all the interior components, rinse them thoroughly with clean water. This will remove any remnants of the cleaning solution and prevent any potential contamination of the ice.
After rinsing, use a dry, clean cloth or towel to wipe down the interior surfaces of the ice maker. Pay attention to areas where moisture tends to accumulate, such as the drainage channels or compartments.
It’s crucial to ensure that all the interior components are completely dry before reassembling the ice maker. Moisture or dampness can lead to the growth of mold or bacteria, compromising the cleanliness of your ice.
Once the interior is clean and dry, you can move on to the next step of the cleaning process to ensure a thorough maintenance of your commercial ice maker.
Regularly clean the ice maker’s condenser coils to ensure efficient operation. Use a soft brush or vacuum to remove dust and debris. This will help maintain the ice maker’s performance and extend its lifespan.
Step 5: Clean the Ice Maker’s Evaporator
The evaporator is a vital component of the commercial ice maker as it plays a crucial role in freezing the water and forming ice cubes. Cleaning the evaporator is essential to ensure optimum functionality and prevent the build-up of debris or contaminants.
Before you begin cleaning the evaporator, refer to the manufacturer’s guidelines for any specific instructions related to your ice maker’s model.
Start by locating the evaporator coils inside the ice maker. In some cases, you may need to remove a panel or cover to access the evaporator. Check for any visible signs of scale, lime, or mineral deposits on the coils.
Prepare a solution of warm water and a mild cleaning solution recommended for cleaning evaporator coils. Follow the manufacturer’s instructions for the appropriate dilution ratio.
Using a soft-bristle brush or sponge, gently scrub the evaporator coils to remove any accumulation of dirt, scale, or mineral deposits. Be careful not to apply excessive force that could damage the delicate coils.
If the scale or mineral deposits are stubborn, you can use a specific descaling solution designed for evaporators. Follow the instructions provided by the manufacturer of the descaling solution carefully.
Rinse the evaporator coils thoroughly with clean water to remove any traces of the cleaning or descaling solution. Ensure no residue is left behind, as it can affect the quality and cleanliness of the ice produced by the machine.
Once the coils are cleaned and rinsed, allow them to dry completely. It’s important to ensure that no moisture remains on the coils before reassembling the ice maker.
Remember to exercise caution and follow safety guidelines when cleaning the evaporator. Avoid using sharp objects or abrasive materials that could damage the coils or cause injury.
By regularly cleaning the evaporator, you can maintain the efficiency and performance of your commercial ice maker, ensuring the production of high-quality and sanitary ice cubes.
Step 6: Clean the Ice Maker’s Water System
Cleaning the water system of your commercial ice maker is crucial to ensure that the water used for making ice is clean and free from any contaminants. This step will help prevent the growth of bacteria, mold, and scale buildup that can affect the quality of the ice.
Start by turning off the water supply to the ice maker to prevent any water flow during the cleaning process. Locate the water shut-off valve, usually located near the ice maker or behind the machine, and turn it off.
Next, remove any filters or water lines connected to the ice maker. Carefully detach the water lines, ensuring you have a towel or container ready to catch any water that may spill.
Inspect the water lines and filters for any signs of dirt, debris, or scale. If you notice any build-up or clogs, clean or replace the filters as necessary. Follow the manufacturer’s instructions for cleaning and maintenance of the specific filters used in your ice maker.
To clean the water lines, prepare a solution of warm water and a mild cleaning agent. You can use a brush or a cloth to gently scrub the interior of the water lines to remove any deposits or impurities. Ensure thorough cleaning of both the inlet and outlet ends of the water lines.
Once the water lines are clean, rinse them thoroughly with clean water to remove any traces of the cleaning solution. It’s important to eliminate any residual cleaning agents to prevent contamination of the ice maker’s water supply.
After cleaning and rinsing the water lines, reattach them to the ice maker. Ensure they are securely connected and free from any leaks.
Turn on the water supply to the ice maker and allow the water to flow for a few moments to flush out any remaining debris or cleaning solution from the system. Check for any leaks or abnormalities in the water flow.
Regularly cleaning the water system of your commercial ice maker will help maintain the quality and purity of the ice. It is recommended to perform this cleaning process periodically, following the manufacturer’s guidelines and considering the water quality in your area.
Read more: How To Clean A Igloo Ice Maker
Step 7: Sanitize the Ice Maker
Sanitizing your commercial ice maker is vital to eliminate any bacteria, viruses, or other microorganisms that may be present. This step ensures that the ice produced by the machine is safe and hygienic for consumption by your customers.
Before you proceed with sanitization, ensure that the ice maker has been thoroughly cleaned and that all visible dirt, debris, and scale have been removed.
Start by preparing a solution of warm water and a food-grade sanitizer approved for use on ice makers. Follow the manufacturer’s instructions for the appropriate dilution ratio.
Using a clean cloth or sponge, apply the sanitizing solution to all the surfaces of the ice maker, including the inside walls, ice bin, and water lines. Pay extra attention to areas prone to bacterial growth or contamination.
Allow the sanitizing solution to remain in contact with the surfaces for the specified time recommended by the manufacturer. This ensures that the sanitizer effectively kills any harmful microorganisms present.
After the contact time has elapsed, thoroughly rinse the ice maker with clean water. This step is crucial to remove any residue or remaining traces of the sanitizing solution.
Take extra care to rinse all parts, including the ice bin, water lines, and internal components. Ensure that there is no residual sanitizing solution left behind that could affect the taste or quality of the ice.
Once the ice maker has been completely rinsed, allow it to air dry. Ensure that all surfaces are thoroughly dried before reassembling the machine or turning it back on.
Sanitizing your ice maker on a regular basis, in addition to routine cleaning, will help maintain a high level of cleanliness and hygiene. It is recommended to follow a sanitization schedule according to the guidelines provided by the manufacturer for optimal results.
Step 8: Reassemble the Ice Maker
After completing the cleaning and sanitization process, it’s time to reassemble the different components of your commercial ice maker. Proper reassembly ensures that the ice maker functions correctly and maintains its cleanliness.
Start by referring to any notes or pictures you may have taken during the disassembly process. This will help you remember the proper order and placement of each component.
Carefully reattach the ice bin to the ice maker, ensuring that it is securely fastened. Double-check that any release mechanisms or screws are properly tightened to prevent any leaks or dislodging of the ice bin.
If you had removed any filters or water lines, reconnect them to their respective positions. Make sure the connections are secure and free from any leaks. Pay attention to any gaskets or seals that may need to be properly aligned.
If you had removed any panels or covers to access certain parts of the ice maker during the cleaning process, reattach them securely. This helps protect the internal components and ensures the machine operates as intended.
Give the ice maker a final visual inspection to ensure that all components are in their proper places. Check for any loose screws or fittings that may need adjustment.
Once you are satisfied with the reassembly, perform a final wipe down of the exterior of the ice maker using a clean, damp cloth. This helps remove any fingerprints or smudges that may have accumulated during the cleaning process.
By carefully reassembling your commercial ice maker and ensuring all components are securely in place, you can maintain its functionality and preserve the cleanliness and hygiene of the machine.
Step 9: Power On the Ice Maker
Now that you have reassembled the different components of your commercial ice maker, it’s time to power it back on. This step will allow the machine to resume its normal operation and start producing ice once again.
Before you proceed, ensure that all connections are secure and there are no visible leaks or issues with the reassembled ice maker.
Locate the power switch or circuit breaker for the ice maker and turn it on. If your ice maker has a power cord, plug it back into the electrical outlet.
Allow the ice maker a few moments to power up and initialize. You may hear sounds of the machine starting its operation, such as the compressor running or the sound of water being fed into the ice maker.
Observe the ice maker closely during the startup process to ensure that everything is functioning as expected. Look out for any unusual noises, leaks, or error messages that may indicate a problem. If you notice any issues, immediately power off the machine and consult the manufacturer’s manual or contact a professional for assistance.
Once the ice maker is powered on and running smoothly, it will start the ice-making process. Be patient, as it may take some time for the machine to reach its optimal ice production capacity.
Remember to regularly monitor the performance of the ice maker, including the temperature, ice production, and any signs of malfunction. This will help you detect any potential issues early on and ensure the continued operation of the machine.
By safely and properly powering on your commercial ice maker, you can enjoy the benefits of freshly made ice for your business and ensure the smooth operation of the machine.
Step 10: Perform a Test Run
After powering on your commercial ice maker, it’s essential to perform a test run to ensure that it is functioning properly and that the ice produced meets your standards of quality and cleanliness.
Start by allowing the ice maker to run for a reasonable amount of time to reach its optimal operating temperature. This typically takes around 1 to 2 hours, but may vary depending on the specific model and capacity of your ice maker.
Monitor the ice production during the test run. Check the quality and appearance of the ice cubes to ensure they are clear, odorless, and free from any impurities.
Periodically check the ice bin to make sure it is filling up with ice as expected. Verify that the ice is being properly dispensed and that the machine is not producing excessive amounts of ice or experiencing any jamming issues.
Observe the overall functionality of the ice maker during the test run, paying attention to any unusual noises, leaks, or error messages that may indicate a problem. If you notice any issues, immediately power off the machine and consult the manufacturer’s manual or contact a professional for assistance.
Take note of the ice maker’s performance and make any necessary adjustments to temperature settings or ice production levels based on your specific needs and requirements.
During the test run, it’s recommended to thoroughly inspect the ice maker for any potential areas that may require additional cleaning or maintenance. This will help ensure the long-term efficiency and lifespan of the machine.
Once you are satisfied with the results of the test run and confident in the performance of the ice maker, you can begin using it to produce ice for your business.
Regularly monitor and maintain your commercial ice maker to ensure optimal performance and cleanliness. Follow the manufacturer’s guidelines and perform routine cleanings and maintenance as recommended.
By performing a test run, you can ensure that your commercial ice maker is operating effectively, producing high-quality ice, and ready to meet the demands of your business.
Read more: How To Clean Out An Ice Maker
Conclusion
Cleaning and maintaining your commercial ice maker is essential for ensuring the production of clean, high-quality ice that meets the standards of hygiene and safety in your business. By following the steps outlined in this guide, you can effectively clean your ice maker and keep it in optimal working condition.
From powering off the ice maker and emptying the ice bin to cleaning the interior components, sanitizing the machine, and performing a test run, each step plays a crucial role in maintaining the cleanliness and functionality of your ice maker.
Remember to prioritize safety by wearing protective gear and following safety precautions throughout the cleaning process. Take the time to gather the necessary materials and equipment, and follow the manufacturer’s instructions for cleaning and maintenance specific to your ice maker’s model.
Regularly cleaning and sanitizing your ice maker not only ensures the production of clean and safe ice but also extends the lifespan of the machine. It helps prevent the accumulation of dirt, mold, and scale that can lead to malfunctions and reduced performance.
Additionally, conducting regular tests and inspections of your ice maker allows you to identify any potential issues early on and take proactive measures to address them. This ensures that your ice maker operates at its best and minimizes the risk of unexpected breakdowns or disruptions to your business.
By following the proper cleaning and maintenance procedures, you can provide your customers with ice that is free from contaminants, ensuring their satisfaction and safety. A clean ice maker reflects a commitment to excellence and hygiene, enhancing your business’s reputation and ensuring repeat customers.
Remember, always refer to the manufacturer’s guidelines and consult professionals when needed. And above all, continue to prioritize the cleanliness and maintenance of your commercial ice maker to ensure the production of high-quality ice for all your business needs.
Frequently Asked Questions about How To Clean A Commercial Ice Maker
Was this page helpful?
At Storables.com, we guarantee accurate and reliable information. Our content, validated by Expert Board Contributors, is crafted following stringent Editorial Policies. We're committed to providing you with well-researched, expert-backed insights for all your informational needs.

0 thoughts on “How To Clean A Commercial Ice Maker”