Articles
How Do I Refill Freon In My Kegerator
Modified: October 20, 2024
Learn how to refill freon in your kegerator with this informative article. Find step-by-step instructions and expert tips to keep your kegerator running smoothly.
(Many of the links in this article redirect to a specific reviewed product. Your purchase of these products through affiliate links helps to generate commission for Storables.com, at no extra cost. Learn more)
How Do I Refill Freon In My Kegerator
A kegerator is a refrigerated device specifically designed for storing and dispensing draft beer. Over time, a kegerator may require a Freon refill to maintain its cooling efficiency. Freon is a type of refrigerant that is responsible for removing heat from the cooling system and keeping the interior of the kegerator at a low temperature.
Key Takeaways:
- Ensure safety by wearing protective gear, following manufacturer guidelines, and checking for leaks when refilling Freon in your kegerator. Proper maintenance ensures consistently cold and refreshing draft beer.
- Refilling Freon in your kegerator involves locating the inlet valve, using the correct type of refrigerant, and monitoring pressure and volume. Thorough testing and maintenance guarantee optimal cooling performance for your draft beer.
Read more: How To Clean Kegerator Freon
Understanding Freon
Freon, also known as a hydrochlorofluorocarbon (HCFC), is a chemical compound commonly used as a refrigerant in cooling systems. It plays a crucial role in the cooling process by absorbing heat from the air inside the kegerator and releasing it outside.
Signs of Low Freon
If your kegerator is not cooling as effectively as before, it may be a sign that the Freon levels are low. Other indicators of low Freon include longer cooling cycles, increased electricity consumption, and ice buildup on the evaporator coils.
Safety Precautions
Before attempting to refill Freon in your kegerator, it is important to take the necessary safety precautions. Make sure to wear protective gloves and safety goggles to avoid any contact with the refrigerant. Additionally, ensure proper ventilation in the area where you’ll be working.
Gathering the Necessary Tools and Materials
To refill Freon in your kegerator, you will need the following tools and materials:
- Refrigerant gauge
- Freon refill kit
- Screwdrivers
- Adjustable wrench
- Leak detection solution
Read more: How Do I Know If My HVAC Needs Freon
Locating the Freon Inlet Valve
Before starting the refill process, locate the Freon inlet valve on your kegerator. This valve is usually located at the back of the unit, near the compressor. It may be covered by a protective cap that needs to be removed.
Determining the Correct Freon Type
It is important to use the correct type of Freon for your kegerator. Check the manufacturer’s guidelines or consult the kegerator’s user manual to determine the specific type of refrigerant recommended for your model.
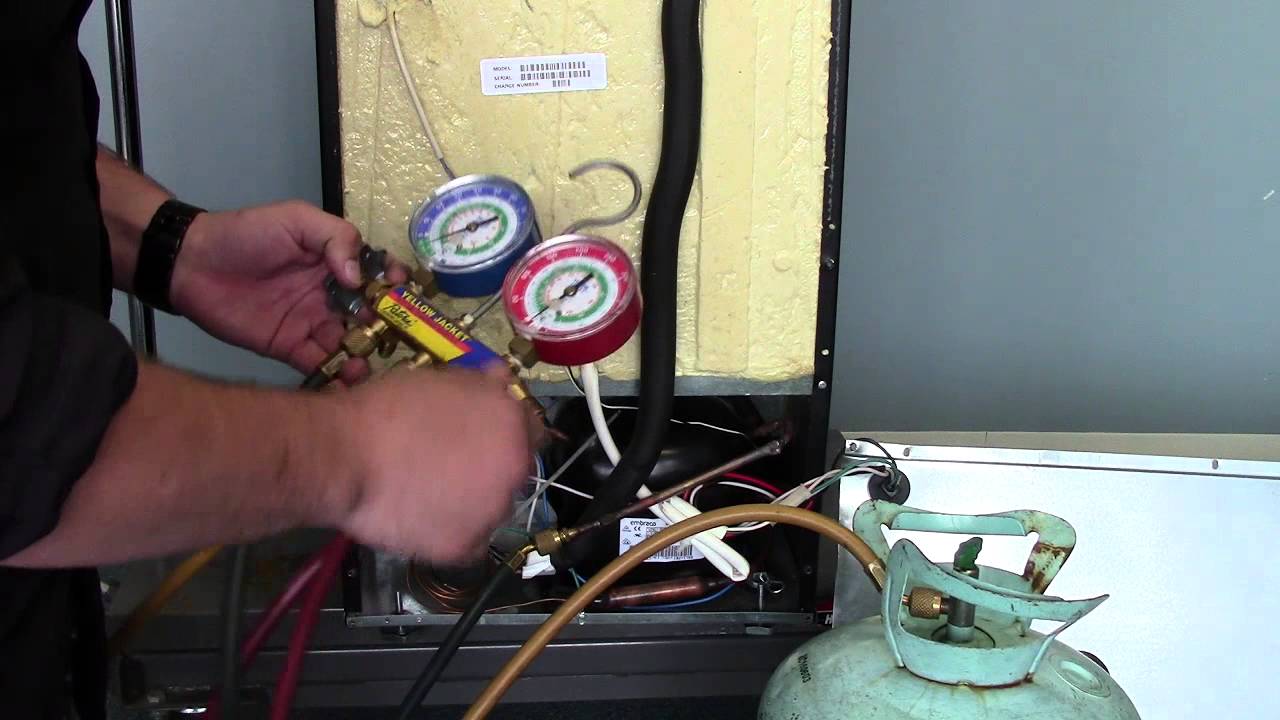
Connecting the Refrigerant Gauge
Attach the refrigerant gauge to the Freon inlet valve. Follow the instructions provided with the gauge to ensure a proper connection. This gauge will allow you to monitor the pressure and volume of the Freon during the refill process.
Refilling Freon
Begin the Freon refill process by slowly introducing the refrigerant into the kegerator. Refer to the manufacturer’s instructions or the refill kit for the appropriate pressure and volume specifications. Take care not to overfill the system, as it can lead to damage.
Read more: How Do I Know If My AC Needs Freon
Checking for Leaks
After refilling the Freon, it is crucial to check for any potential leaks. Apply a leak detection solution to the connections and look for any bubbles or signs of escaping refrigerant. If leaks are found, tighten the connections or seek professional help to fix the issue.
Properly Sealing the Freon Inlet Valve
Once the refill and leak checks are complete, securely seal the Freon inlet valve. This will prevent any Freon from escaping and ensure the system maintains its cooling efficiency.
Testing the Kegerator
After completing the Freon refill and sealing process, it is time to test the kegerator. Plug the unit back in and monitor its performance. Confirm that the cooling system is working effectively and that the temperature inside the kegerator is stable.
By following these steps, you can safely and effectively refill the Freon in your kegerator, ensuring optimal cooling performance for your draft beer dispensing needs.
Remember to always refer to the manufacturer’s instructions or consult a professional if you are unsure about the process or encounter any difficulties during the Freon refill.
Introduction
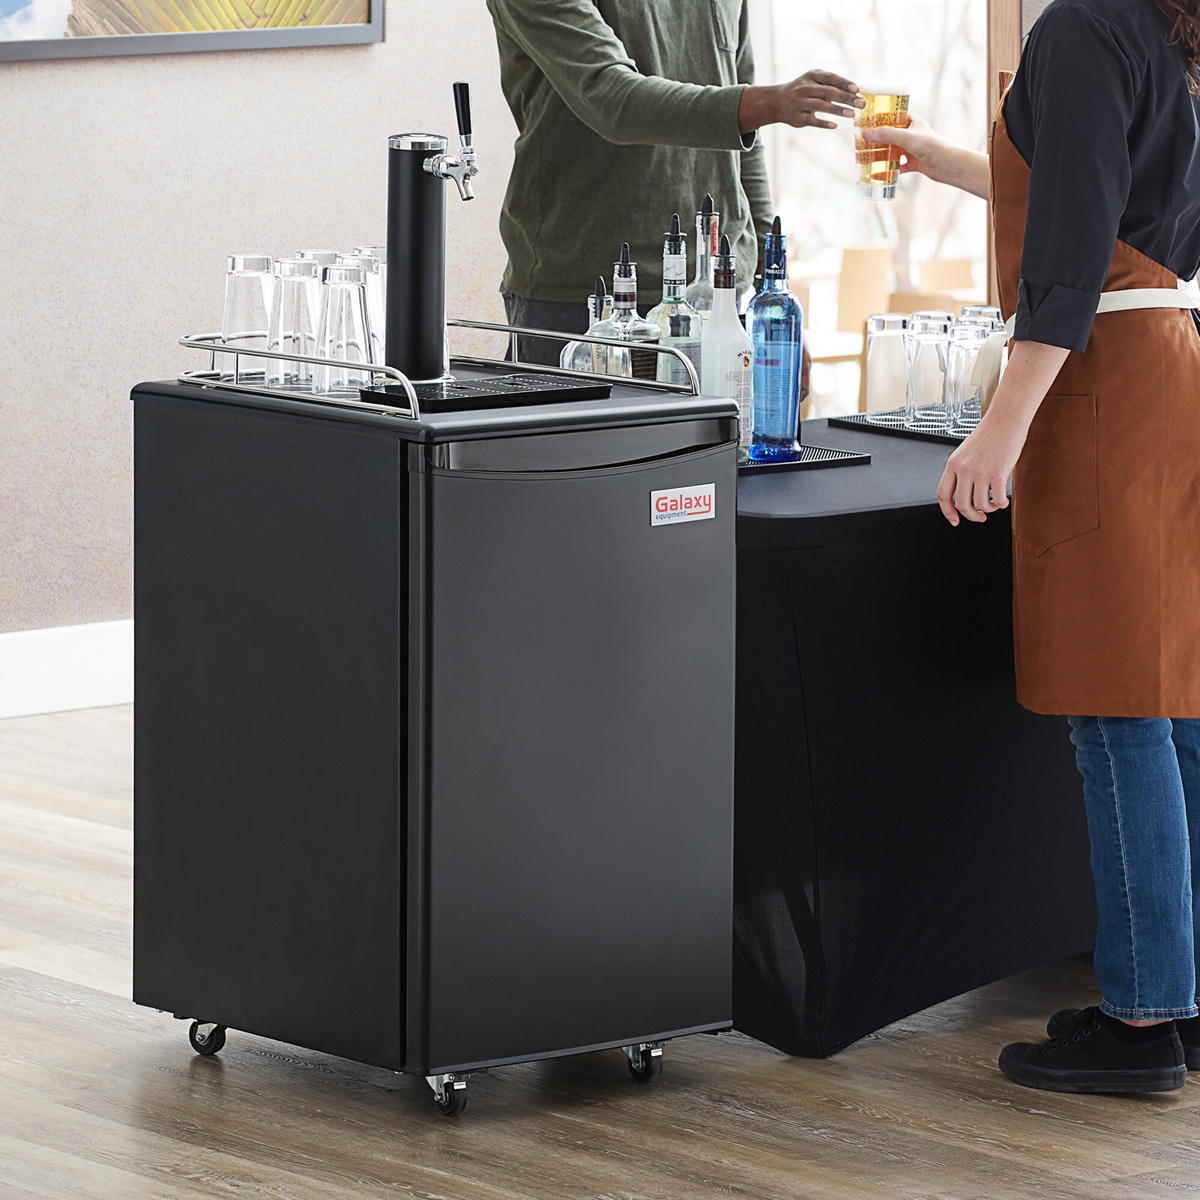
A kegerator is a specially designed refrigerated device that allows you to store and dispense draft beer. It is an essential appliance for beer enthusiasts or those who enjoy hosting parties and gatherings. The kegerator provides a convenient and cost-effective way to have a constant supply of fresh, cold beer on tap right in your own home or establishment.
Just like any other refrigeration system, a kegerator relies on a cooling mechanism to maintain a low temperature inside the unit. One of the key components of this cooling system is Freon, a type of refrigerant that plays a vital role in the refrigeration process.
Over time, a kegerator may experience a decrease in its cooling efficiency, resulting in warmer beer temperatures and an unsatisfactory beer drinking experience. This can be attributed to a decrease in the levels of Freon, which is responsible for absorbing heat from the kegerator’s interior and expelling it to maintain the desired temperature.
A Freon refill becomes necessary when the levels of this refrigerant in the kegerator drop, leading to inadequate cooling performance. Understanding how to refill Freon in your kegerator will ensure that your beer always stays cold and refreshing, preserving its taste and quality.
It is important to note that attempting to refill the Freon in a kegerator requires careful attention to safety protocols and proper knowledge of the procedure. If you are not comfortable or confident in your abilities to perform this task, it is recommended to seek the assistance of a professional refrigeration technician to avoid any potential risks or damage to the unit.
In the following sections, we will explore the steps and precautions involved in refilling Freon in a kegerator, ensuring that you can continue to enjoy the pleasures of fresh and cold draft beer at your convenience.
Key Takeaways:
- Ensure safety by wearing protective gear, following manufacturer guidelines, and checking for leaks when refilling Freon in your kegerator. Proper maintenance ensures consistently cold and refreshing draft beer.
- Refilling Freon in your kegerator involves locating the inlet valve, using the correct type of refrigerant, and monitoring pressure and volume. Thorough testing and maintenance guarantee optimal cooling performance for your draft beer.
Read more: How To Clean Kegerator Freon
Understanding Freon
Freon, a commonly used term for hydrochlorofluorocarbon (HCFC), is a chemical compound that serves as a refrigerant in cooling systems like your kegerator. It plays a crucial role in the overall cooling process, ensuring that the interior of the kegerator stays at the optimal temperature for serving refreshing draft beer.
The primary function of Freon is to absorb heat from the air inside the kegerator and transfer it outside. This thermodynamic process occurs through a series of phase changes that allow Freon to change states from a gas to a liquid and vice versa. As it absorbs heat, the gas form of Freon inside the kegerator evaporates, converting into a high-pressure, high-temperature vapor.
Once the vapor form of Freon leaves the kegerator, it enters the compressor, which is a key component of the cooling system. The compressor compresses the Freon gas, causing its temperature and pressure to rise significantly. This compressed, high-pressure gas then moves to the condenser.
In the condenser, the high-pressure, high-temperature Freon gas is exposed to cool air or condenser coils. As the Freon comes into contact with the cooler environment, its temperature decreases, causing it to condense and transform into a liquid state. This liquid Freon then flows through the expansion valve, which reduces its pressure and allows it to return to the evaporator coils inside the kegerator.
Once the liquid Freon reaches the evaporator coils, it undergoes another phase change, transitioning from a liquid to a gas. This evaporation process absorbs heat from the interior of the kegerator, effectively cooling the air inside and maintaining the desired temperature for serving cold beer. The cycle repeats itself as the gas form of Freon returns to the compressor to start the process anew.
It’s important to note that Freon is well-regulated due to its environmental impact. Older kegerators may require R-22, also known as chlorodifluoromethane, as the refrigerant. However, newer kegerators typically use R-134a, a hydrofluorocarbon (HFC) refrigerant that has a lower environmental impact.
Understanding the role of Freon in the cooling process of your kegerator allows you to appreciate its importance and ensure proper maintenance to keep your draft beer consistently chilled and enjoyable.
Signs of Low Freon
Low Freon levels can significantly impact the cooling efficiency of your kegerator, leading to warmer beer temperatures and potentially affecting the overall taste and quality of your draft beer. It’s important to be aware of the following signs that indicate low Freon levels in your kegerator:
- Warmer Beer: If you notice that your draft beer is not as cold as it should be, even when the temperature settings are properly adjusted, it could be a sign of low Freon levels. The inadequate cooling caused by low Freon can result in the beer being served at a higher temperature than desired.
- Prolonged Cooling Cycles: Another indication of low Freon levels is increased compressor run times. Normally, the cooling cycles of a well-functioning kegerator are relatively short. However, if the Freon levels are low, the cooling cycles will be longer as the compressor works harder to try to maintain the desired temperature.
- Higher Energy Consumption: Low Freon levels can put a strain on your kegerator’s compressor, causing it to work longer and consume more energy. If you observe a significant increase in your kegerator’s energy consumption without any apparent changes in usage, it could be a sign that the Freon levels need to be replenished.
- Ice Buildup: In some cases, low Freon levels can cause ice to accumulate on the evaporator coils of the kegerator. This ice buildup restricts the flow of cool air, making the cooling system less efficient. If you notice ice forming on the coils or any other part of the kegerator, it’s a strong indication of a potential Freon issue.
- Poor Cooling Performance: Overall, if you find that your kegerator is simply not cooling as effectively as it used to, despite proper temperature settings and maintenance, it suggests a possible decrease in Freon levels. A noticeable decline in the cooling performance of your kegerator is a clear indication that it requires a Freon refill.
It’s important to address low Freon levels in your kegerator promptly to ensure that your draft beer is served at the optimal temperature and maintains its refreshing taste. If you suspect that your kegerator is experiencing low Freon levels, it’s recommended to follow the necessary steps to replenish the refrigerant or seek the assistance of a professional technician for proper diagnosis and refill.
Safety Precautions
Before attempting to refill the Freon in your kegerator, it is essential to prioritize safety. Handling refrigerants can be hazardous if proper precautions are not taken. By following these important safety measures, you can ensure a safe and successful Freon refill process:
- Protective Gear: Wear appropriate protective gear, including gloves and safety goggles, to protect your hands and eyes from potential contact with the refrigerant. This will minimize the risk of skin irritation or injury.
- Ventilation: Perform the Freon refill in a well-ventilated area. Open doors and windows to allow for proper air circulation and avoid inhaling any potentially harmful fumes or gases that may be released during the refill process.
- Avoid Open Flames and Sparks: Make sure to keep all sources of open flames, sparks, or ignition sources away from the area. Freon is highly flammable, and any ignition source can result in a fire or explosion.
- Adequate Lighting: Ensure that the work area is well-lit to allow for clear visibility. This will help prevent accidents and ensure accurate connections and procedures during the Freon refill.
- Sealed Containers: Freon should be stored and handled in tightly sealed containers to prevent leakage or release of the refrigerant. Properly dispose of any empty or used containers in accordance with local regulations.
- Proper Disposal: If you are removing old or expired Freon during the refill process, it is important to dispose of it responsibly and in compliance with local regulations. Improper disposal can harm the environment and pose a risk to human health.
- Professional Assistance: If you are uncertain or uncomfortable with the process of refilling Freon, it is best to seek the assistance of a professional technician. They have the knowledge and experience to safely handle refrigerants and ensure that the refill is done correctly.
- Follow Manufacturer Guidelines: Always refer to the kegerator’s user manual or manufacturer’s instructions for specific recommendations and safety guidelines related to Freon refill. These guidelines may provide additional safety precautions or customized instructions for your specific kegerator model.
By adhering to these safety precautions, you can minimize the risks associated with handling Freon and ensure a safe and successful Freon refill for your kegerator. Safety should always be a top priority when working with refrigerants to protect yourself and others in the vicinity.
Gathering the Necessary Tools and Materials
Prior to refilling the Freon in your kegerator, it is important to gather all the necessary tools and materials. Having everything prepared beforehand will ensure a smooth and efficient refill process. Here is a list of the tools and materials you will need:
- Refrigerant Gauge: A refrigerant gauge is a vital tool for monitoring the pressure and volume of the Freon during the refill process. It allows you to accurately measure and regulate the amount of refrigerant being added to the kegerator.
- Freon Refill Kit: A Freon refill kit typically includes a canister of the appropriate Freon refrigerant, along with the necessary adapters and hoses required for the refill process. Make sure to choose a kit that is compatible with your kegerator’s specific Freon requirements.
- Screwdrivers: Flathead and Phillips screwdrivers may be needed to remove any covers, panels, or protective caps to gain access to the Freon inlet valve and other components of the kegerator.
- Adjustable Wrench: An adjustable wrench can be useful for loosening and tightening connections during the refill process. It allows for a secure and tight fit when working with various components of the kegerator.
- Leak Detection Solution: A leak detection solution is applied to the connections and fittings to check for any potential refrigerant leaks. This solution creates bubbles when it comes into contact with escaping refrigerant, making it easier to identify and rectify any leaks.
- Gloves and Safety Goggles: It is crucial to protect your hands and eyes during the refill process. Wear gloves to safeguard your hands from contact with the refrigerant, and safety goggles to shield your eyes from any potential splashes or leaks.
- Additional Tools: Depending on your kegerator’s specific requirements, you may need additional tools such as pliers, pipe cutters, or tape for sealing connections. Refer to the manufacturer’s instructions or consult a professional if you are unsure about any specialized tools that may be necessary.
Before starting the Freon refill process, double-check that you have all the required tools and materials readily available. This will ensure that the refill can be done efficiently and without any interruptions. In addition, always follow the manufacturer’s instructions for any specific tools or materials recommended for your kegerator model.
Read more: How Do I Know If My HVAC Needs Freon
Locating the Freon Inlet Valve
Before you can begin the process of refilling the Freon in your kegerator, it is crucial to locate the Freon inlet valve. The Freon inlet valve is where the refrigerant is injected into the system. Follow these instructions to find the Freon inlet valve in your kegerator:
- Disconnect the Power: To ensure your safety, unplug the kegerator from the power source before starting the process. This will prevent any accidental electrical shocks or damage as you locate the Freon inlet valve.
- Access the Back of the Kegerator: Move the kegerator away from the wall or any obstructions to gain access to the back. This will allow you to locate the various components of the kegerator, including the Freon inlet valve.
- Identify the Compressor: The compressor is a key component located at the back of the kegerator. It is usually a cylindrical or box-shaped device that is responsible for circulating the refrigerant and maintaining the cooling process. The Freon inlet valve is typically located near the compressor.
- Look for a Protective Cap: The Freon inlet valve may be covered by a protective cap or rubber plug. This cap serves to prevent contaminants from entering the system when the Freon is not being refilled. Remove the cap carefully to expose the valve.
- Inspect the Area: Once you have located the compressor and uncovered the Freon inlet valve, take a moment to familiarize yourself with the surrounding area. Look for any visible signs of wear, damage, or leaks that may require attention during the refill process.
It’s important to note that the location of the Freon inlet valve can vary depending on the specific model and design of your kegerator. If you are having trouble locating it, consult the kegerator’s user manual or contact the manufacturer for assistance. They can provide you with specific guidance and diagrams for your particular kegerator model.
Once you have successfully located the Freon inlet valve, you can proceed with the process of refilling the Freon in your kegerator, following the instructions provided by the manufacturer or a professional refrigeration technician.
Determining the Correct Freon Type
When it comes to refilling the Freon in your kegerator, it is essential to use the correct type of refrigerant to ensure optimal performance and prevent any damage to the cooling system. Here are some guidelines to help you select the appropriate type of Freon for your kegerator:
- Refer to the Manufacturer’s Instructions: The first and most reliable source of information is the kegerator’s user manual or the manufacturer’s guidelines. These documents will typically specify the recommended type of Freon for your specific kegerator model. Always follow the manufacturer’s instructions to ensure compatibility and proper functioning.
- Consult a Professional Technician: If you are unsure about the type of Freon your kegerator requires, it is advisable to consult a professional refrigeration technician. They have the expertise and experience to identify the specific refrigerant needs of your kegerator model and can provide you with accurate information and guidance.
- Check the Existing Refrigerant: If your kegerator has undergone previous servicing or repairs, check for any labels or markings on the unit that indicate the type of refrigerant previously used. This can serve as a clue to guide you in selecting the correct Freon type.
- Research the Model and Age of Your Kegerator: Conduct some research specific to your kegerator model and its manufacturing period. This can help you identify any common refrigerants used during that time and provide insight into the most appropriate Freon type for your kegerator.
- Consider Environmental Regulations: It’s important to keep in mind that some types of Freon, such as R-22 (chlorodifluoromethane), have been phased out due to environmental concerns. Ensure that the selected refrigerant aligns with current environmental regulations and sustainability practices to minimize any negative impact on the environment.
- Seek Professional Advice for Older Kegerators: If you own an older kegerator, particularly one that predates recent environmental regulations, it may require specialized knowledge to determine the appropriate Freon type. In such cases, professional guidance is highly recommended to ensure compliance and proper functioning.
It is crucial to select the correct Freon type for your kegerator to prevent any damage to the cooling system and maintain optimal cooling performance. Following these guidelines and seeking professional advice when necessary will help you make an informed decision and ensure a successful Freon refill process.
Connecting the Refrigerant Gauge
Attaching the refrigerant gauge to the Freon inlet valve is an important step in the process of refilling the Freon in your kegerator. The gauge allows you to monitor the pressure and volume of the refrigerant during the refill process, ensuring accurate and controlled replenishment. Follow these step-by-step instructions to connect the refrigerant gauge to the Freon inlet valve:
- Gather the Necessary Tools: Before you begin, ensure that you have the refrigerant gauge and any accompanying adapters or hoses that are required for your specific kegerator model and refrigerant type.
- Prepare the Gauge and Hoses: Familiarize yourself with the refrigerant gauge and hoses that will connect it to the Freon inlet valve. Check for any compatibility or size requirements specified by the manufacturer.
- Inspect the Freon Inlet Valve: Before attaching the refrigerant gauge, take a moment to inspect the Freon inlet valve. Ensure that it is clean, free from any obstructions, and in good working condition. If there are any protective caps or covers, remove them carefully.
- Identify the Connection Point: Locate the appropriate connection point on the refrigerant gauge that corresponds to the Freon inlet valve on your kegerator. This may involve matching thread sizes, fittings, or adapters. Refer to the manufacturer’s instructions or consult a professional if you are uncertain.
- Attach the Hoses to the Gauge and Valve: Carefully connect one end of the refrigerant gauge hose to the designated connection point on the gauge. Ensure that it is securely fastened and free from any leaks. Then, connect the other end of the hose to the Freon inlet valve on your kegerator. Again, ensure a secure and tight connection.
- Perform a Leak Check: Once the refrigerant gauge is properly connected to the Freon inlet valve, it is important to perform a leak check. Apply a small amount of leak detection solution to all the connections and fittings. Observe for any bubbles or signs of refrigerant leakage, indicating the need for adjustment or tightening of connections.
- Secure the Gauge and Hoses: After confirming that there are no leaks, secure the refrigerant gauge and hoses in a position where they will not interfere with the refill process or any other components of the kegerator. Make sure that the gauge and hoses are out of the way and will not be accidentally bumped or dislodged.
- Double-Check the Connections: Before proceeding with the Freon refill, double-check all the connections to ensure they are properly secured. This will help prevent any potential leaks or disruptions during the refill process.
By following these step-by-step instructions, you can successfully connect the refrigerant gauge to the Freon inlet valve of your kegerator. This will allow you to monitor and control the refill process accurately, ensuring optimal replenishment of the Freon for efficient cooling performance.
Refilling Freon
Refilling the Freon in your kegerator is a critical step in ensuring proper cooling performance for your draft beer dispensing needs. Follow this detailed procedure to effectively refill Freon in your kegerator, including pressure and volume specifications:
- Prepare the Freon: Before refilling, ensure that the Freon canister is in a vertical position and at room temperature to achieve accurate pressure readings and optimal performance.
- Attach the Refrigerant Gauge: Connect the refrigerant gauge to the Freon inlet valve, as outlined in the previous section. Ensure that the connections are secure and free from any leaks. Double-check that the gauge readings are accurate and functioning properly.
- Open the Freon Valve: Slowly open the valve on the Freon canister in a controlled manner. This will start the flow of Freon into the kegerator’s cooling system. It’s crucial to avoid rapid or excessive release of the refrigerant to prevent damage or over-pressurization.
- Monitor the Pressure: As the Freon flows into the system, carefully monitor the pressure readings on the refrigerant gauge. Refer to the manufacturer’s guidelines or consult with a professional for the recommended pressure range and volume specifications specific to your kegerator model.
- Refill the Freon: Adjust the flow of Freon according to the desired pressure and volume specifications. It’s important to add the refrigerant slowly and gradually to prevent overfilling or exceeding the optimal levels. Take periodic breaks to allow the Freon to settle and distribute evenly within the cooling system.
- Monitor the Temperature: During the refill process, keep an eye on the temperature inside the kegerator. Adjust the Freon flow as needed to maintain the desired cooling temperature for your draft beer. This will ensure that your beer remains cold and refreshing.
- Perform Pressure and Leak Tests: Once the desired pressure and volume specifications are achieved, close the valve on the Freon canister. Conduct pressure and leak tests to ensure the integrity of the system. Apply a leak detection solution to all connections and observe for any bubbles, indicating a potential refrigerant leak. Address any leaks promptly.
- Secure the Freon Inlet Valve: Once the refill process is complete, securely seal the Freon inlet valve on your kegerator. This will prevent any refrigerant from escaping and ensure the system maintains its cooling efficiency.
- Clean and Reassemble: Take the time to clean any dirt or debris from the kegerator and reassemble any components that were temporarily removed during the refill process. Ensure that all connections are properly tightened and sealed.
- Test the Kegerator: Plug in the kegerator and test its functionality. Check that the cooling system is operating correctly and that the temperature inside the kegerator remains stable. Verify that your draft beer is being dispensed at the desired temperature.
It is essential to refer to the manufacturer’s instructions or consult a professional for specific pressure and volume specifications tailored to your kegerator model. Following these guidelines will ensure a successful and effective Freon refill, allowing you to enjoy perfectly chilled draft beer.
Read more: How Do I Know If My AC Needs Freon
Checking for Leaks
After refilling the Freon in your kegerator, it is crucial to thoroughly inspect the system for any potential leaks. Detecting and addressing leaks promptly will help maintain proper refrigerant levels and prevent any damage to the cooling system. Follow these instructions to effectively check for Freon leaks in your kegerator:
- Prepare the Leak Detection Solution: Mix a small amount of leak detection solution according to the manufacturer’s instructions. This solution is typically a soap-based substance that creates bubbles when it comes into contact with escaping refrigerant, making leaks more visible.
- Turn on the Kegerator: Plug in the kegerator and let it run for a few minutes to allow the refrigerant to circulate and build pressure within the system. This will make it easier to detect any leaks during the inspection.
- Apply the Leak Detection Solution: Dip a sponge or cloth into the prepared leak detection solution. Apply the solution along all the connections, fittings, and joints in the kegerator’s refrigerant lines. Focus on areas that are prone to leaks, such as the Freon inlet valve, compressor connections, and any visible piping or tubing.
- Observe for Bubbles: Carefully inspect the applied solution for any signs of bubbles. If there is a refrigerant leak, the escaping Freon will cause the solution to bubble or foam. Pay close attention to the areas where bubbles form and note any significant leaks that require attention.
- Tighten Connections if Needed: If you observe bubbles or suspect a leak, use an adjustable wrench or appropriate tool to tighten the connections. Be careful not to overtighten, as this can damage the fittings. Repeat the leak detection test in those areas to ensure that the leak has been properly sealed.
- Repeat the Leak Detection Test: After tightening any loose connections, reapply the leak detection solution to the previously identified leak areas. Observe for any remaining bubbles or signs of leakage. This will confirm that the leaks have been successfully addressed.
- Monitor for Persistent Leaks: After performing the leak detection test, continue to monitor the kegerator for any persistent leaks over the next few hours. Check the connections periodically to ensure they remain tight and leak-free. Address any ongoing leaks promptly to prevent further refrigerant loss.
Checking for Freon leaks in your kegerator is a crucial step in maintaining its cooling efficiency. By following these instructions and promptly addressing any leaks, you can ensure that your kegerator continues to operate optimally and preserve the quality of your draft beer.
Properly Sealing the Freon Inlet Valve
Sealing the Freon inlet valve correctly is essential to prevent any potential leaks and maintain the efficiency of your kegerator’s cooling system. Follow this step-by-step guide to securely seal the Freon inlet valve:
- Ensure the Freon Flow is Stopped: Before sealing the Freon inlet valve, make sure the flow of Freon is properly stopped. Ensure that the valve on the Freon canister is closed to prevent any refrigerant from escaping.
- Clean the Valve and Surrounding Area: Use a clean cloth or alcohol wipe to clean the Freon inlet valve and the surrounding area. Removing any dirt, dust, or debris will ensure a proper seal when you secure the valve.
- Inspect the Valve Threads: Take a moment to inspect the threads of the Freon inlet valve. Make sure they are clean and free from any damage or debris that could hinder the sealing process. If needed, use a soft brush or cloth to clean the threads.
- Apply Thread Sealant: Apply a small amount of thread sealant to the threads of the Freon inlet valve. Thread sealant helps create a tight and secure seal, preventing any refrigerant from leaking out. Be sure to use a sealant that is compatible with the refrigerant and suitable for the conditions of the kegerator.
- Tighten the Valve: Using an adjustable wrench or an appropriate tool, carefully tighten the Freon inlet valve onto its connection point. Ensure that it is tightened securely but avoid over-tightening, as it can damage the valve threads or components of the kegerator.
- Perform a Leak Test: After sealing the Freon inlet valve, perform a leak test to confirm the integrity of the seal. Apply a leak detection solution to the valve connection and check for any bubble formation. If bubbles appear, tighten the valve further until the seal is secure and leakage stops.
- Monitor for Additional Leaks: Once the initial leak test is successful, monitor the Freon inlet valve and its surrounding area for any signs of additional leaks over the next few hours. Keep an eye on the connections and check for any refrigerant odor or noticeable moisture that could indicate a leaking seal.
- Repeat the Sealant Application if Needed: If you detect any leaks or signs of potential leakage, double-check the tightness of the valve and consider reapplying the thread sealant to ensure a proper seal. Repeat the leak test to verify that the sealant and tightening have successfully resolved the issue.
- Record Maintenance and Date: It is essential to keep a record of the maintenance activities, including sealing the Freon inlet valve, along with the date. This will help you keep track of the last sealing and plan future maintenance accordingly.
Properly sealing the Freon inlet valve is crucial in preventing leaks and maintaining the efficiency of your kegerator’s cooling system. By following these step-by-step instructions, you can ensure a secure and reliable seal, allowing your kegerator to provide consistent cooling performance for your draft beer enjoyment.
Testing the Kegerator
After completing the Freon refill in your kegerator, it is essential to conduct thorough testing to ensure that the unit is functioning properly and ready to dispense cold, refreshing draft beer. Follow these final steps to test your kegerator and verify its performance:
- Allow the Kegerator to Stabilize: After the Freon refill, give the kegerator sufficient time to stabilize its temperature. Allow it to run uninterrupted for at least 12 to 24 hours, depending on the manufacturer’s recommendations or the size of your kegerator.
- Check the Temperature: Monitor the temperature inside the kegerator using a reliable thermometer. Place the thermometer in a central location to get an accurate reading of the cooling performance. Ensure that the temperature remains stable within the desired range for storing and serving draft beer.
- Inspect the Cooling System: Carefully inspect the kegerator’s cooling system, including the evaporator coils, compressor, and condenser. Look for any signs of frost or ice buildup, as well as unusual noises or vibrations. These could indicate potential issues with the cooling system that may require the attention of a professional technician.
- Test Beer Temperature: Pour a glass of draft beer from your kegerator and check its temperature using a beer thermometer or a temperature probe. The beer should be served at the desired temperature specified for the style of beer you are dispensing. Adjust the kegerator’s temperature settings, if necessary, to achieve the desired beer temperature.
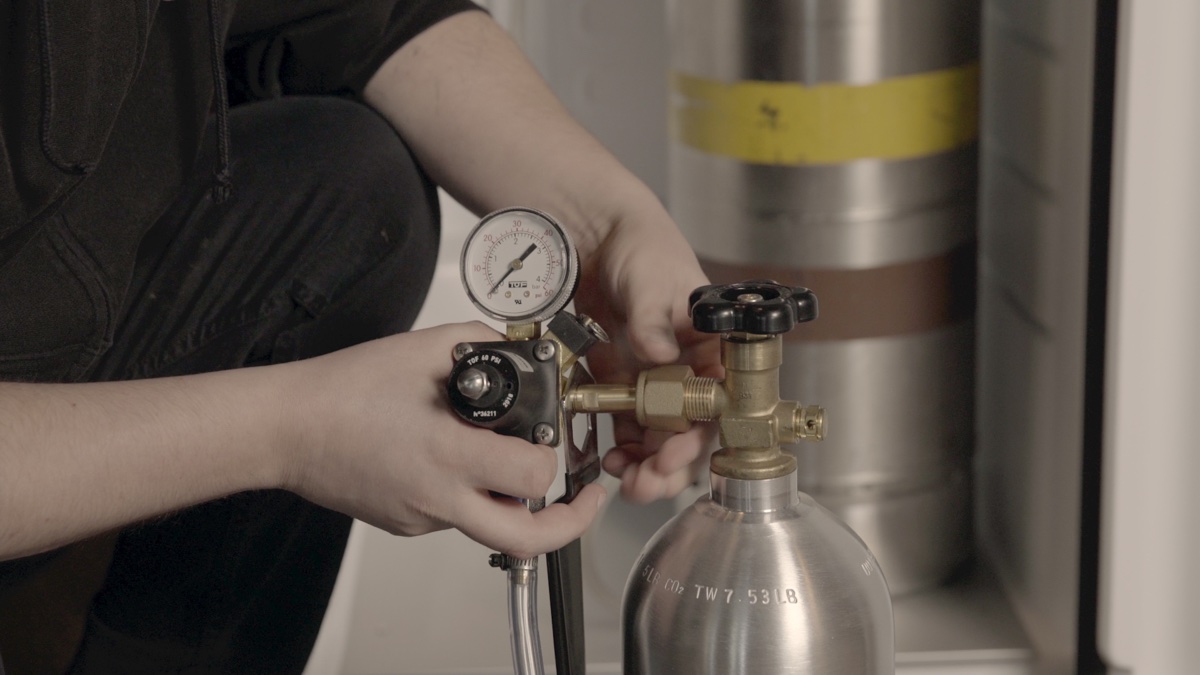
- Check Pressure and Carbonation: Test the pressure and carbonation of the dispensed beer by pouring a small sample into a glass. Observe the carbonation level and ensure that it meets your preferences. Adjust the kegerator’s CO2 pressure settings, if needed, to achieve the desired carbonation level.
- Monitor for Changes: Over the next few days, continue to monitor the kegerator’s performance. Pay attention to any changes in cooling efficiency, beer temperature, or pressure levels. Address any unexpected fluctuations promptly to maintain optimal performance.
- Repeat Testing if Issues Arise: Should you encounter any issues or inconsistencies with the kegerator’s performance, repeat the testing process and consider seeking professional assistance. A qualified technician can diagnose and address any underlying problems that may be affecting the unit’s functionality.
- Maintain Regular Cleaning and Maintenance: To ensure long-term performance and quality dispensed beer, maintain a regular cleaning and maintenance routine for your kegerator. Follow the manufacturer’s guidelines for cleaning and sanitizing the unit, as well as periodic maintenance tasks such as cleaning the beer lines and replacing any necessary components.
By following these final testing steps and performing regular maintenance, you can ensure that your kegerator operates efficiently and delivers cold, refreshing draft beer consistently. Enjoy your well-maintained kegerator and savor the satisfaction of pouring the perfect pint every time!
Conclusion
In conclusion, refilling the Freon in your kegerator is an important maintenance task that ensures optimal cooling performance, allowing you to enjoy refreshing draft beer. Let’s recap the key points and importance of maintaining proper Freon levels in a kegerator:
Firstly, we explored the process of refilling Freon in a kegerator, starting with understanding what Freon is and its role in the cooling system. We discussed the signs of low Freon levels, such as warmer beer temperatures, prolonged cooling cycles, increased energy consumption, and ice buildup on the evaporator coils.
Next, we emphasized the importance of safety precautions, including wearing protective gear, ensuring proper ventilation, and avoiding open flames or sparks during the Freon refill process. We also highlighted the importance of gathering the necessary tools and materials, such as a refrigerant gauge, Freon refill kit, screwdrivers, adjustable wrench, and a leak detection solution.
We provided instructions on locating the Freon inlet valve and determining the correct type of Freon for your kegerator. We also outlined how to connect the refrigerant gauge to the Freon inlet valve, followed by a detailed procedure for refilling the Freon, including pressure and volume specifications.
We recognized the significance of checking for Freon leaks and provided instructions for inspecting the kegerator for potential leaks using a leak detection solution. Additionally, we emphasized properly sealing the Freon inlet valve to prevent leaks and provided a step-by-step guide for securely sealing the valve.
Lastly, we discussed the importance of testing the kegerator to ensure its proper functioning after the Freon refill. We highlighted the significance of monitoring the temperature, checking the cooling system, testing the beer temperature and carbonation, and regularly maintaining and cleaning the kegerator.
Maintaining proper Freon levels in your kegerator is crucial for ensuring optimal cooling performance and enjoying consistently cold, refreshing draft beer. By following the necessary steps and adhering to safety protocols, you can preserve the integrity of your kegerator’s cooling system and enhance your draft beer experience.
Remember, if you are uncertain or uncomfortable with the Freon refill process, it is always advisable to seek the assistance of a professional technician. They have the expertise to handle refrigerants safely and ensure that your kegerator operates at its best.
Cheers to maintaining proper Freon levels and enjoying the perfect pour of draft beer from your kegerator!
Frequently Asked Questions about How Do I Refill Freon In My Kegerator
Was this page helpful?
At Storables.com, we guarantee accurate and reliable information. Our content, validated by Expert Board Contributors, is crafted following stringent Editorial Policies. We're committed to providing you with well-researched, expert-backed insights for all your informational needs.


0 thoughts on “How Do I Refill Freon In My Kegerator”