Articles
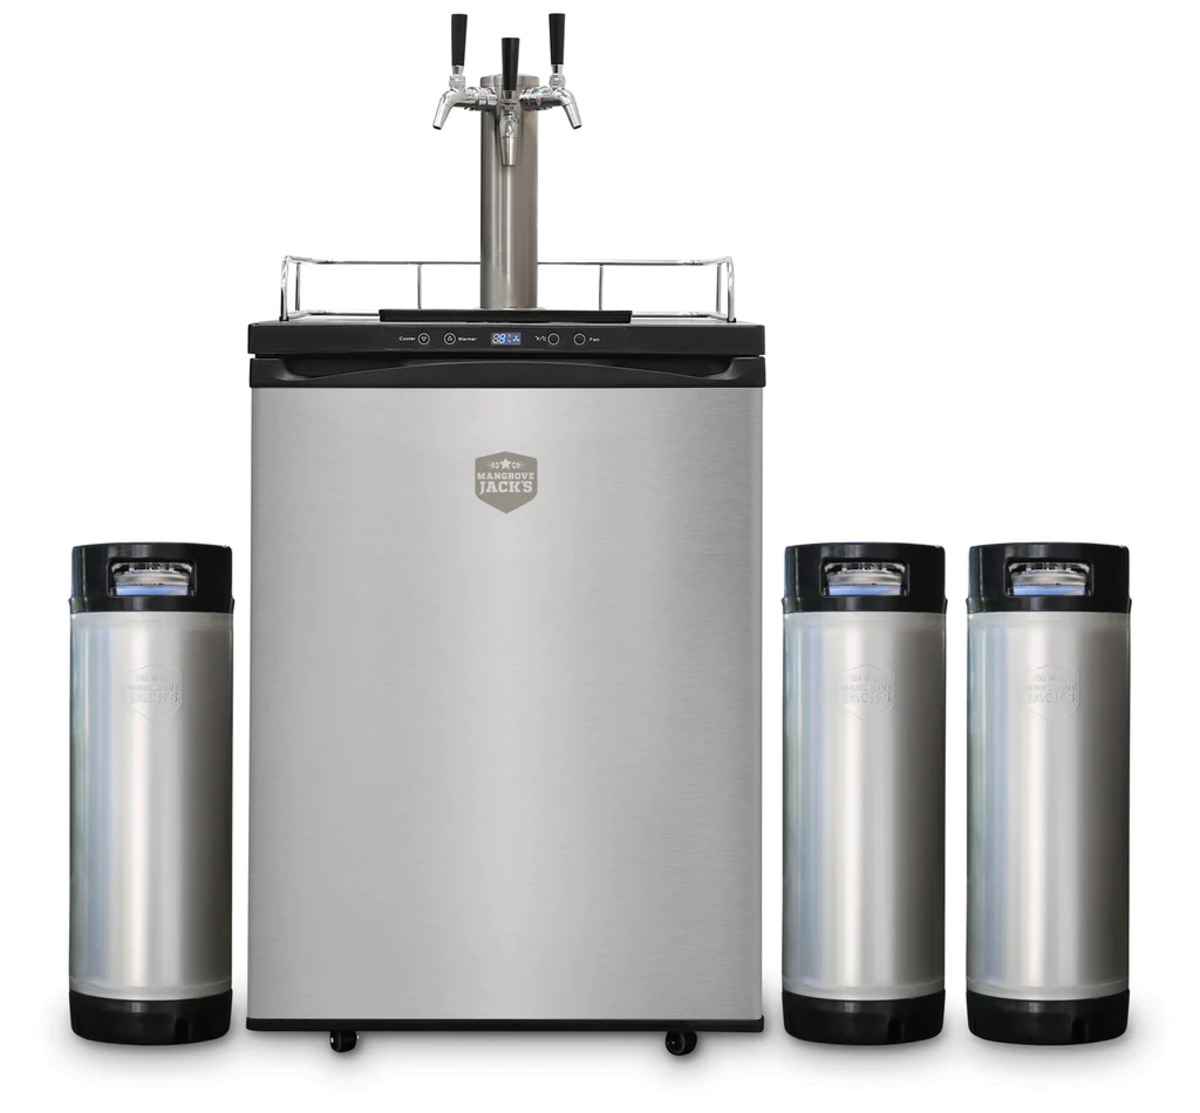
How To Fix My Kegerator
Modified: March 25, 2024
Learn the step-by-step process of fixing your kegerator with helpful articles. Enhance your knowledge and troubleshoot common issues efficiently.
(Many of the links in this article redirect to a specific reviewed product. Your purchase of these products through affiliate links helps to generate commission for Storables.com, at no extra cost. Learn more)
Introduction
Welcome to the comprehensive guide on how to fix your kegerator. If you have a kegerator at home and you’re encountering some issues with it, fret not! This article will provide you with step-by-step instructions on diagnosing and fixing common problems that may arise with your kegerator.
A kegerator is a fantastic appliance for beer enthusiasts. It allows you to have your favorite beers on tap, right in the comfort of your own home. However, like any other machine, kegerators can experience problems over time. Whether it’s issues with temperature regulation, dispensing problems, or other malfunctions, this guide has got you covered.
We will start by diagnosing the problem. Understanding the root cause behind the issue is crucial to fixing it effectively. Then, we’ll move on to cleaning the kegerator. This step is often overlooked, but regular cleaning is essential for maintaining optimal functionality and ensuring your beer tastes its best.
Next, we’ll discuss checking and replacing components. From the CO2 regulator to the beer lines, various parts of the kegerator can wear out or break down. Learning how to inspect and replace these components will help you get your kegerator back in working order.
Regulating temperature and pressure is another vital aspect of kegerator maintenance. We’ll provide detailed instructions on adjusting the temperature and pressure settings to ensure your beer is dispensed at the perfect conditions.
Dispensing issues can be frustrating, but fear not! In step five, we’ll troubleshoot common problems such as foamy beer, slow pours, and leaks. By following our tips and tricks, you’ll be pouring a flawless pint in no time.
Lastly, we’ll cover some general maintenance tips to keep your kegerator running smoothly. From regular cleaning and sanitizing to storing spare parts, we’ll provide you with all the information you need to prolong the lifespan of your kegerator.
Now that you have a brief overview of what this guide entails, let’s dive in and learn how to fix your kegerator so you can continue enjoying perfectly chilled, freshly tapped beer anytime you want.
Key Takeaways:
- Keep your kegerator in top shape by diagnosing, cleaning, and maintaining it regularly. Troubleshoot dispensing issues and regulate temperature and pressure for the perfect pour every time.
- Regular maintenance, including checking and replacing components, cleaning, and monitoring temperature and pressure, is essential for ensuring your kegerator continues to dispense quality beer.
Read more: How To Fix Leaky Kegerator
Step 1: Diagnose the Problem
Before you can fix your kegerator, you need to identify the problem. There can be various issues that can arise with your kegerator, and understanding the root cause is essential for effective troubleshooting.
Start by observing the symptoms your kegerator is exhibiting. Is it not cooling properly? Is there a leak? Is the beer dispensing slowly or foaming excessively? These observations will help you narrow down the potential problems.
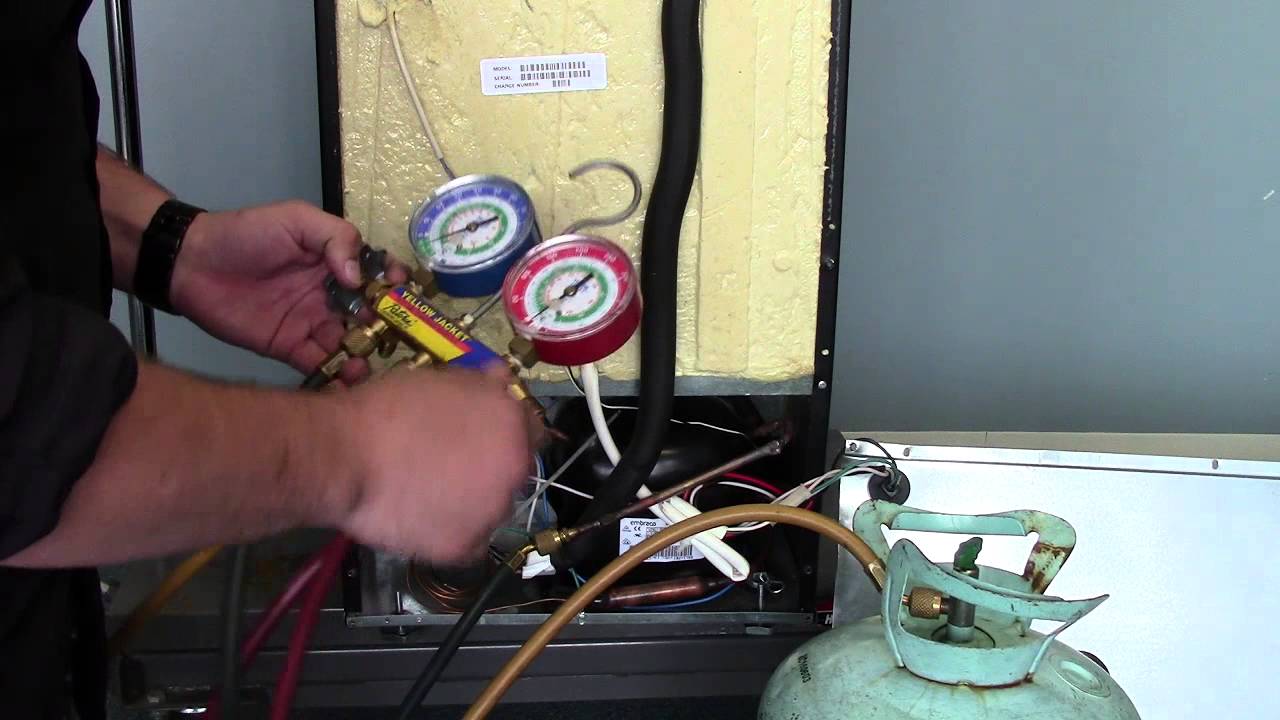
One common issue is a malfunctioning thermostat. If your kegerator is not cooling properly, check if the temperature settings are accurate. Adjust the thermostat and monitor the temperature to see if it improves. If the problem persists, you may need to replace the thermostat.
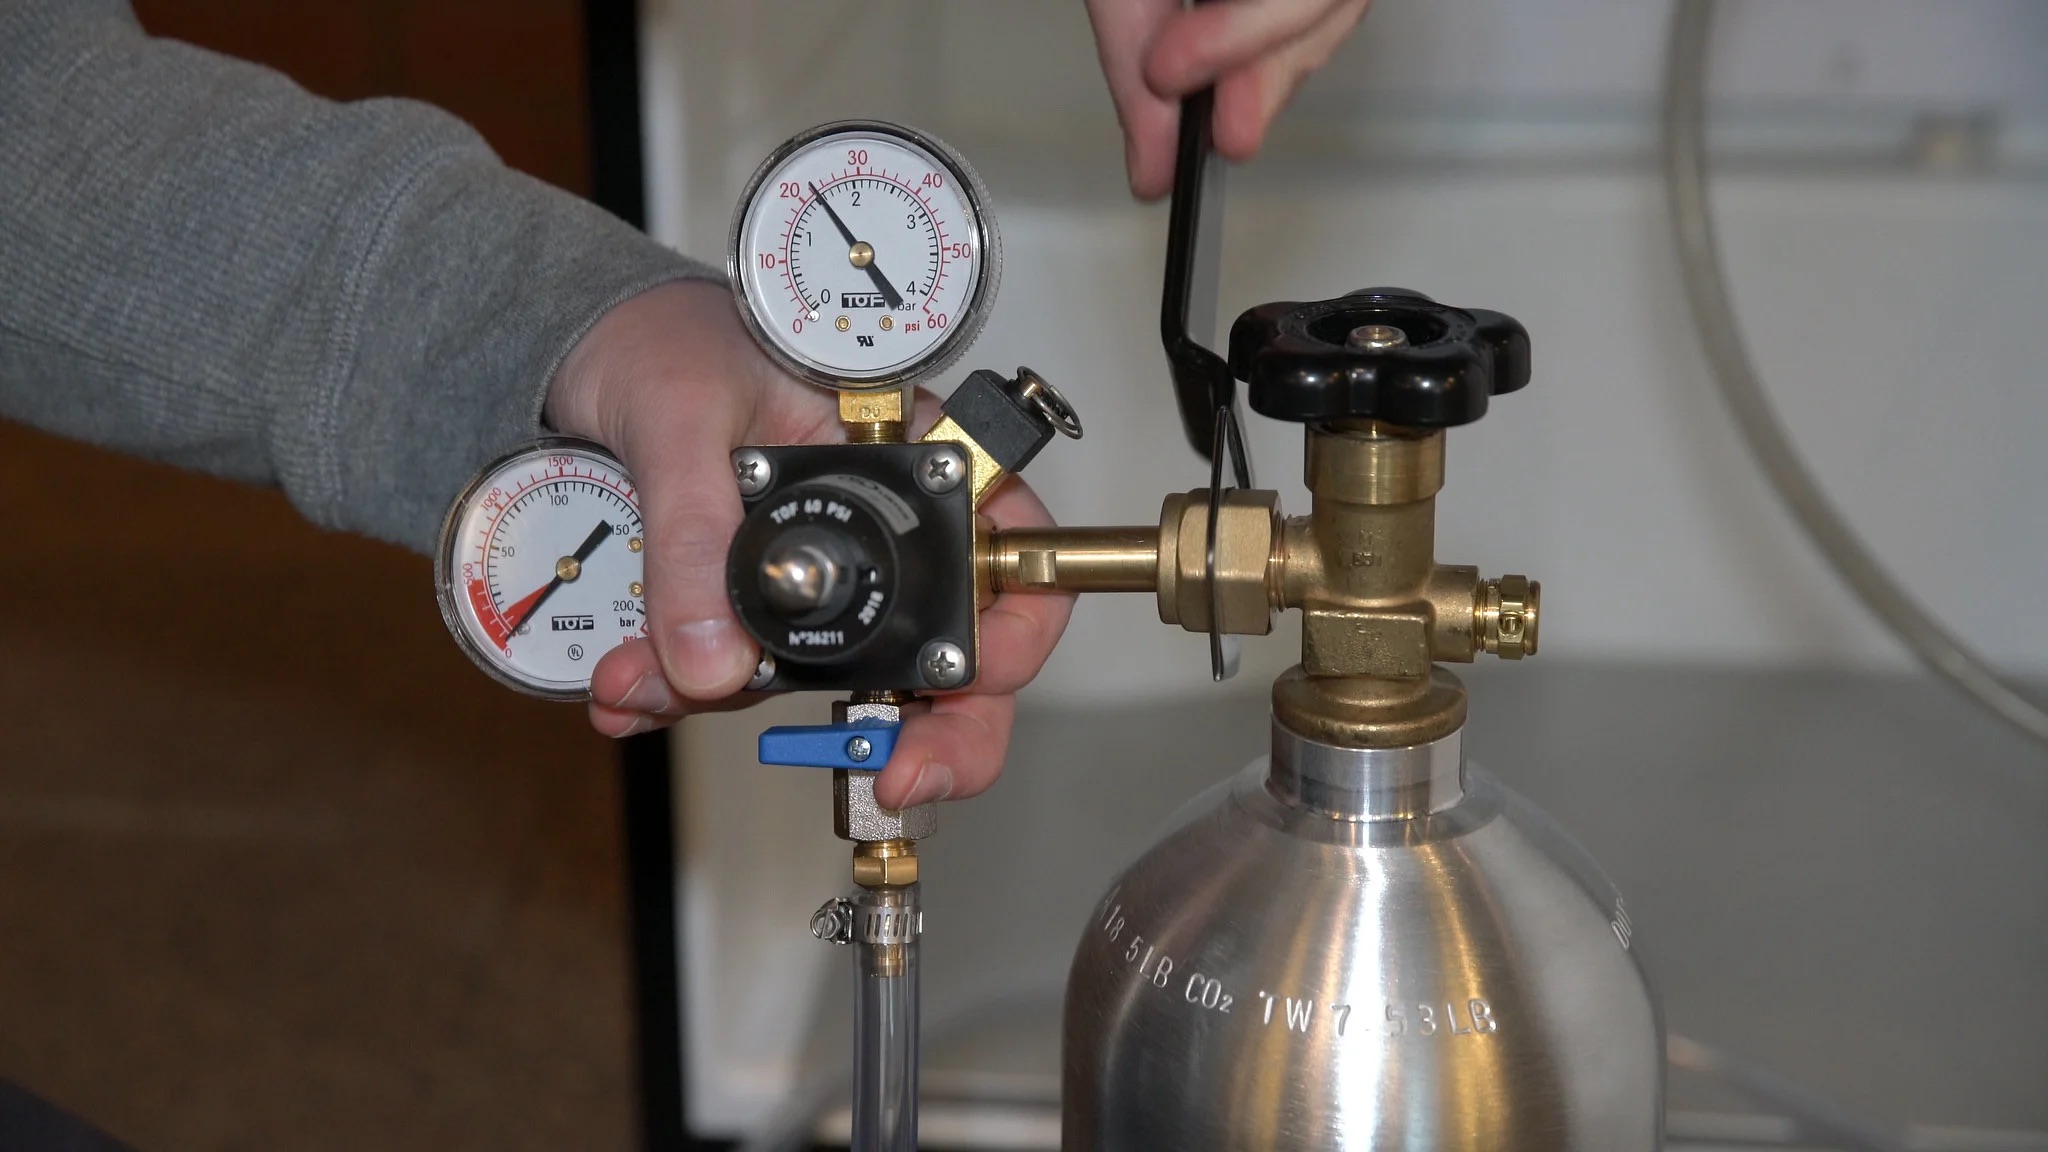
Another frequent problem is a faulty CO2 regulator. If the pressure in the kegerator is inconsistent or there is no pressure at all, it could indicate a problem with the regulator. Start by checking the gas tank to ensure it is not empty. If the tank is full, inspect the regulator for any visible damage or signs of wear. If necessary, replace the regulator to restore proper pressure.
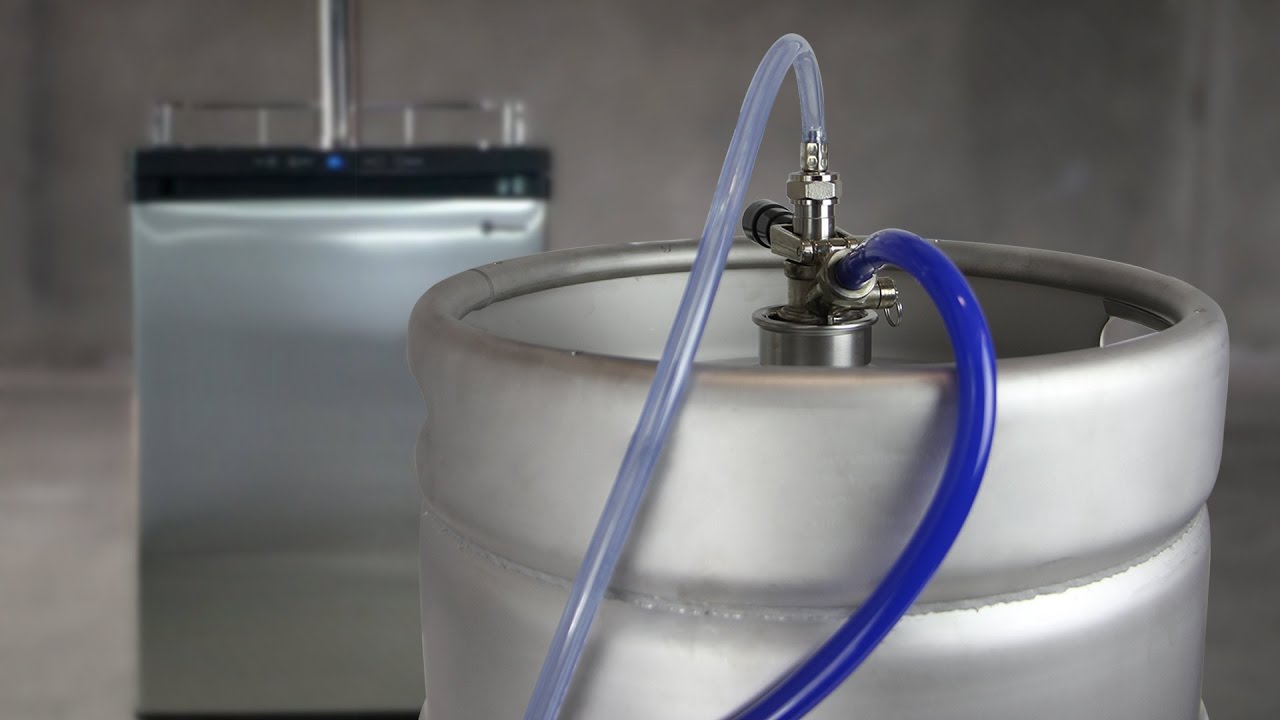
Leaking is another issue you may encounter. Check all the connections, including the beer lines, CO2 lines, and faucet connections, to ensure they are tight and secure. If you notice any leaks, tighten the connections or replace any damaged parts.
If your beer is excessively foamy, it could be due to a few factors. First, check the temperature – if it’s too high, the beer can become overcarbonated. Adjust the temperature to the recommended range for the beer you’re dispensing. Additionally, ensure that the beer lines are clean and free from obstructions. Dirty lines can cause excessive foaming. Clean them using specialized cleaning solutions or line brushes.
These are just a few examples of problems you may encounter with your kegerator. Remember to observe the symptoms carefully and try to diagnose the problem accurately before moving on to the next steps. In the following sections, we will provide detailed solutions for the most common issues you may encounter with your kegerator.
Now that you have identified the potential problem with your kegerator, it’s time to move on to the next step and begin fixing it. Let’s dive into step two: cleaning the kegerator.
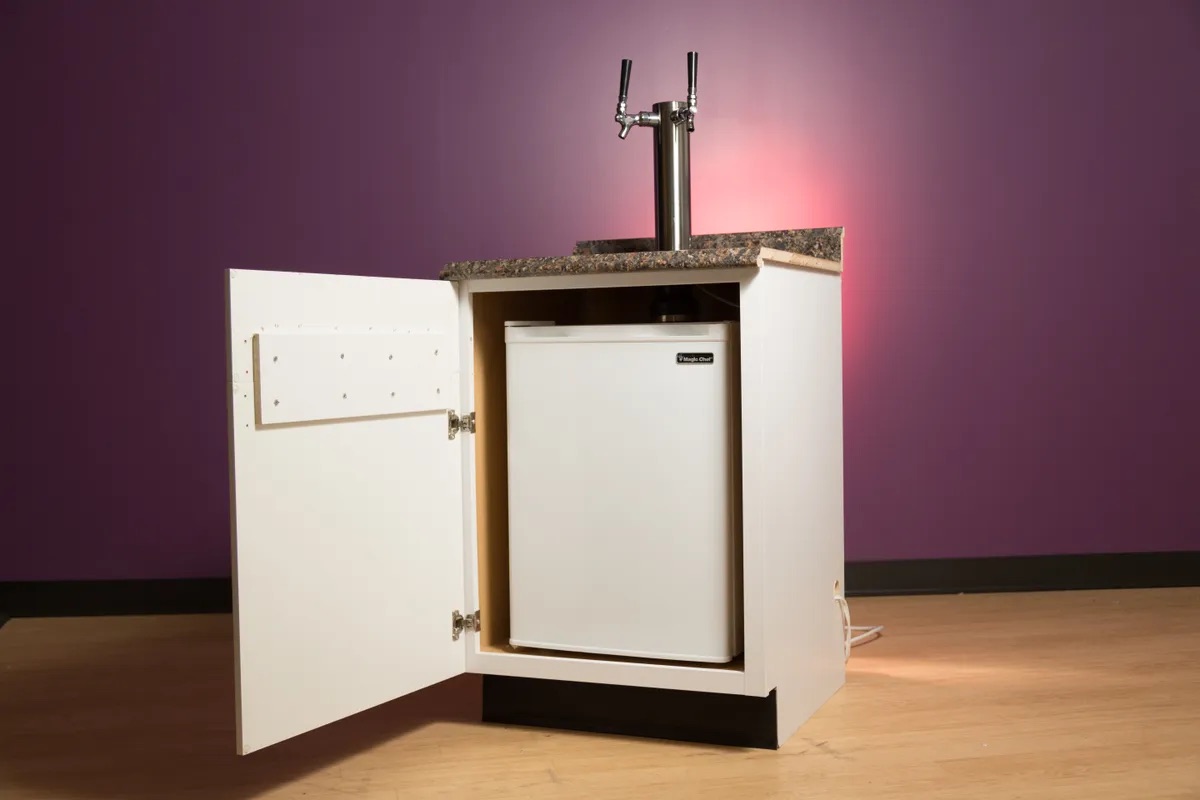
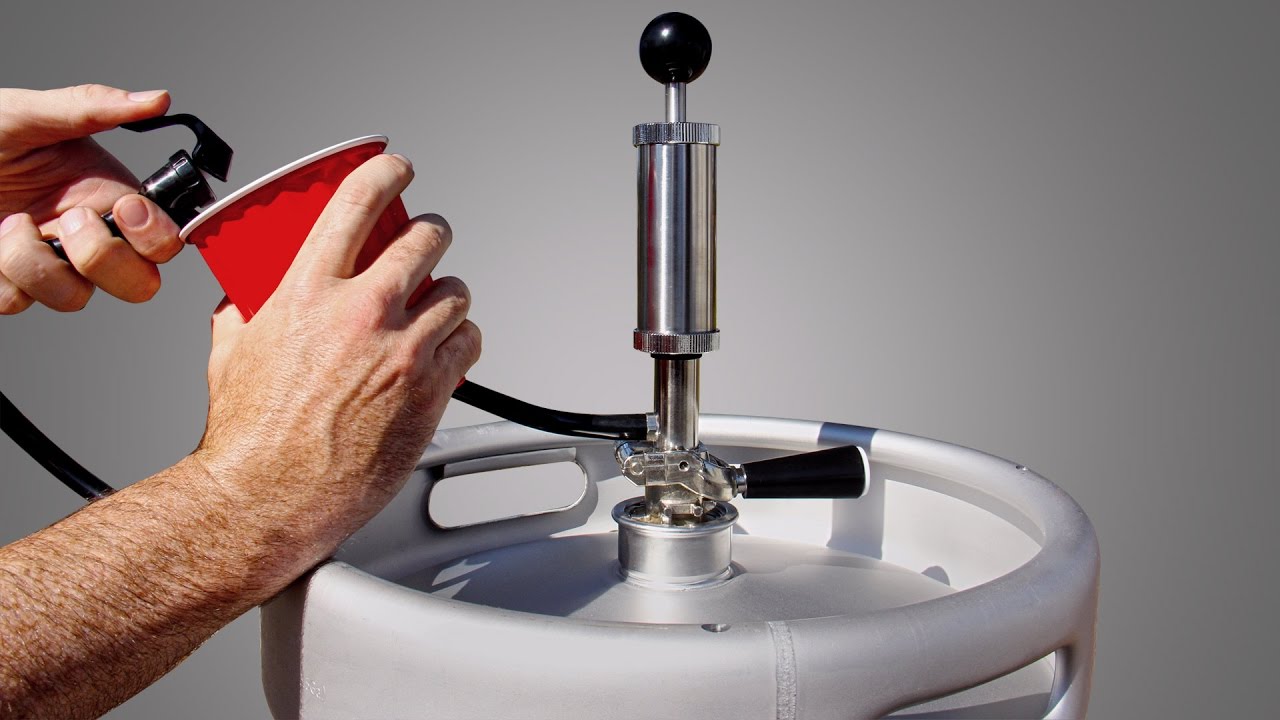
Step 2: Clean the Kegerator
Regular cleaning is vital for maintaining optimal functionality and ensuring that your kegerator continues to dispense clean and great-tasting beer. Over time, beer residue, mold, and bacteria can build up inside the kegerator, affecting both the flavor of your beer and the performance of the appliance.
Here’s a step-by-step guide on how to clean your kegerator:
- Start by unplugging the kegerator and removing all the kegs and components inside. This includes the beer lines, faucets, drip tray, and CO2 tank.
- Mix a cleaning solution using warm water and a keg line cleaning solution or a mixture of mild dish soap and water. Follow the instructions provided by the manufacturer for the proper dilution ratio.
- Using a cleaning brush or a soft cloth, scrub the interior surfaces of the kegerator. Pay particular attention to areas that come into contact with beer, such as the beer lines, couplers, and shanks. Remove any beer residue or buildup that you see.
- Soak the beer lines, faucets, and other detachable components in the cleaning solution for a recommended period. This will help to loosen and dissolve any debris or bacteria present. Take this opportunity to thoroughly clean and sanitize these parts.
- After soaking, rinse all the components with clean water to remove any cleaning solution or residue. Pay attention to ensure that no soap or cleaning agent is left behind. This step is crucial to avoid any unwanted flavors or contamination in your beer.
- Dry all the components completely before reassembling them back into the kegerator. Moisture can lead to mold or mildew growth, which can negatively impact the quality of your beer and the performance of the kegerator.
- Once everything is dry, reattach the beer lines, faucets, and CO2 tank. Ensure that all connections are tight and secure.
- Plug the kegerator back in and allow it to reach the desired temperature before tapping a fresh keg of beer.
By regularly cleaning your kegerator, you ensure that it maintains optimal performance and delivers clean, delicious beer every time. Aim to clean your kegerator at least once every few months or as needed, depending on usage. Following these cleaning steps will significantly extend the lifespan of your kegerator and enhance your overall drinking experience.
With your kegerator now sparkling clean, it’s time to move on to the next step: checking and replacing components.
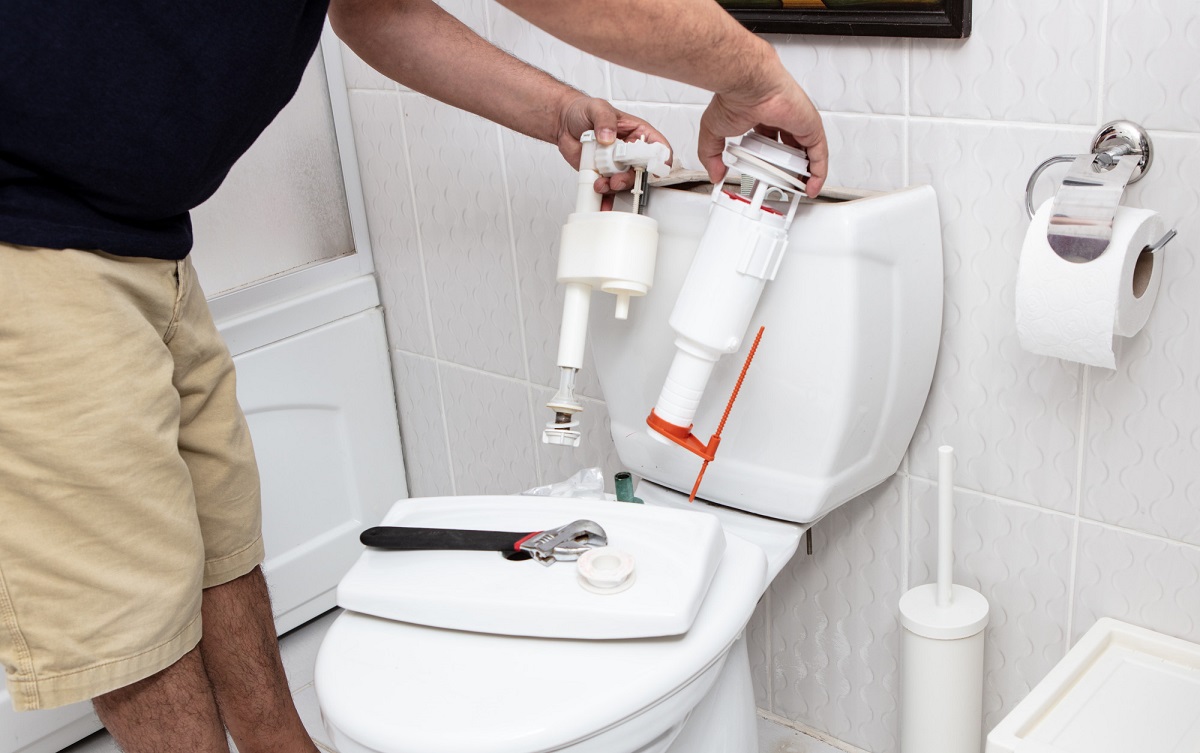
Step 3: Check and Replace Components
Checking and replacing components in your kegerator is essential to ensure that it operates smoothly and dispenses beer correctly. Over time, parts can wear out or become damaged, leading to issues such as inconsistent temperature, leaks, or improper carbonation. Here’s a step-by-step guide on how to check and replace components in your kegerator:
- Start by unplugging the kegerator and removing all kegs and components from the inside.
- Inspect the CO2 regulator and gauge for any signs of damage or wear. Check for leaks around the regulator and ensure that the pressure adjustment knob is functioning properly. If you notice any issues, it may be necessary to replace the regulator.
- Examine the beer lines for any signs of wear, cracks, or leaks. If you notice any damage, it’s crucial to replace the affected lines to prevent beer leakage or contamination. Make sure to measure the length of the existing lines before purchasing replacements.
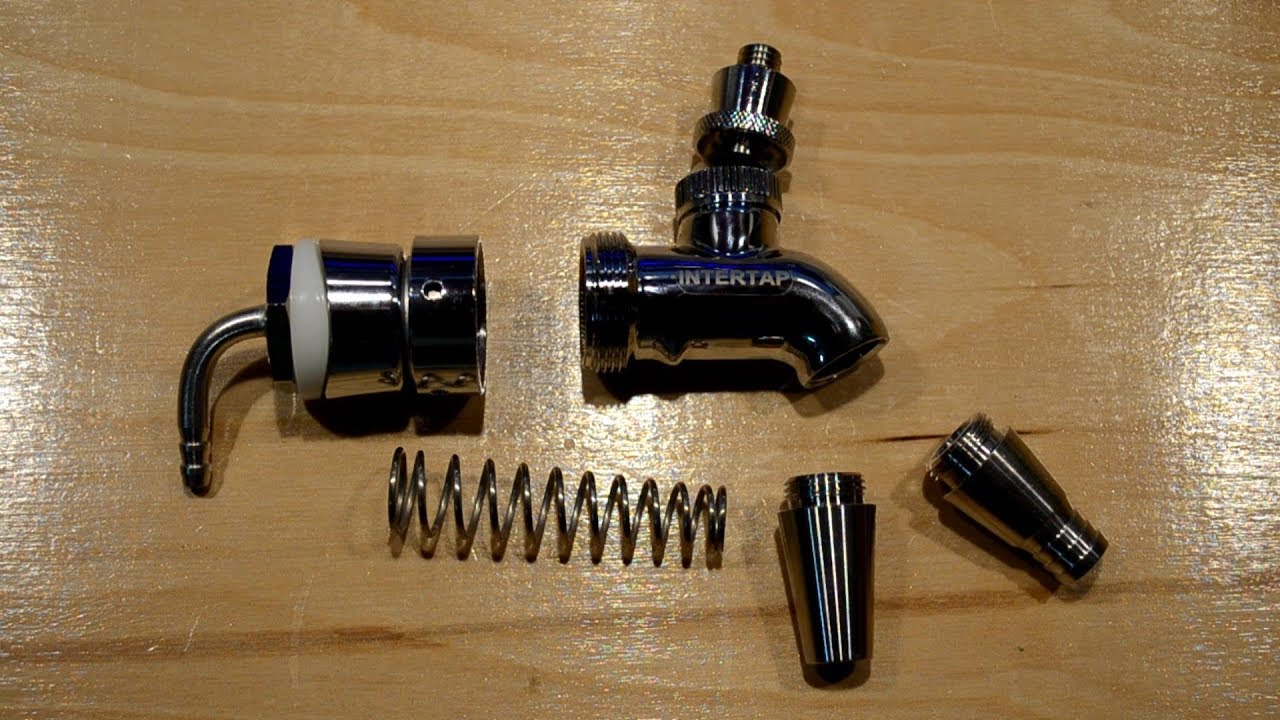
- Check the connections between the beer lines, couplers, and faucets. Ensure that all connections are secure and tight. If you notice any leaks, tighten the connections or replace any damaged O-rings or washers to ensure a proper seal.
- If you’re experiencing temperature control issues, inspect the thermostat. Test it by adjusting the temperature settings and observing if the cooling unit responds accordingly. If the thermostat is unresponsive or inaccurate, it may need to be replaced.
- Inspect the drip tray for any signs of damage or rust. If necessary, clean or replace it to maintain cleanliness and aesthetics.
- Check the CO2 tank for any visible damage or leaks. Ensure that it is properly secured and the valve is in good working condition. If the tank is damaged or leaking, it must be replaced.
- Reassemble all the components back into the kegerator, making sure that all connections are secure and tight. Plug the kegerator back in and allow it to reach the desired temperature before tapping a keg.
Regularly checking and replacing components in your kegerator is crucial for maintaining its performance and ensuring that you can enjoy delicious, properly carbonated beer. By following these steps and addressing any issues you may encounter, you can keep your kegerator in excellent working condition for years to come.
With the components checked and replaced if necessary, it’s time to move on to the next step: regulating temperature and pressure.
Check the temperature of your kegerator to ensure it’s set to the optimal range for serving beer, typically between 36-40°F. This will help maintain the quality and taste of your beer.
Step 4: Regulate Temperature and Pressure
Regulating the temperature and pressure in your kegerator is crucial for maintaining the quality of your beer. Incorrect temperature and pressure settings can result in overcarbonated or undercarbonated beer, affecting the taste and texture. Additionally, improper temperature control can lead to spoilage or off-flavors. Here’s a step-by-step guide on how to regulate temperature and pressure in your kegerator:
- Start by ensuring that your kegerator is properly leveled. Use a level to check the alignment of the appliance and adjust the feet or placement as needed. A level kegerator helps in accurate temperature control and prevents any potential mishaps.
- Next, locate the temperature control or thermostat in your kegerator. Refer to the manufacturer’s instructions to understand how to adjust the temperature settings. Set the temperature to the recommended range for the type of beer you’re dispensing. Generally, a temperature range of 36-40°F (2-4°C) is suitable for most beers, but certain styles may have specific temperature requirements.
- Monitor the temperature inside the kegerator using a thermometer. Place the thermometer where the beer is stored to ensure an accurate reading. Check the temperature periodically and make adjustments to the thermostat if necessary to maintain a stable, desired temperature.
- Now, let’s move on to regulating the pressure. Start by checking the pressure gauge on the CO2 regulator. Adjust the pressure using the adjustment knob on the regulator. The recommended pressure varies depending on the style of beer and personal preference, but a typical range is 10-14 PSI (pounds per square inch).
- If you’re unsure about the recommended pressure for a specific beer, consult the brewery’s recommendations or do some research. Note that different beer styles may require different levels of carbonation. Adjust the pressure accordingly to achieve the desired level of carbonation and head on your beer.
- Allow the kegerator to stabilize at the desired pressure and temperature settings for a few hours before sampling the beer. This gives the beer time to absorb the carbonation and reach optimal flavor.
- If you notice any issues with temperature or pressure, make small adjustments and allow time for the changes to take effect. It may take some trial and error to find the ideal settings for your kegerator.
Regulating temperature and pressure properly ensures that your beer is served at its best, with the right carbonation levels and refreshing coolness. By following these steps and regularly monitoring and adjusting the temperature and pressure, you can have a consistent and enjoyable beer experience every time you pour from your kegerator.
With the temperature and pressure regulated, it’s time to move on to the next step: troubleshooting dispensing issues.
Read more: Why Is My Kegerator Not Pouring
Step 5: Troubleshoot Dispensing Issues
Dispensing issues can be frustrating, but with a little troubleshooting, you can overcome them and enjoy a perfectly poured beer from your kegerator. Common dispensing problems include excessive foaming, slow pours, and leaks. Here’s a step-by-step guide on how to troubleshoot these dispensing issues:
- Excessive Foaming: If your beer is foaming excessively, it could be due to several reasons. Start by checking the temperature of the kegerator. If the temperature is too high, the beer can become overcarbonated, causing excess foam. Adjust the temperature to the recommended range for the style of beer you’re serving.
- Next, inspect the beer lines for any obstructions or blockages. Build-up of dirt or residue in the lines can cause turbulence and produce excessive foam. Clean the lines using a specialized cleaning solution or line brush to remove any clogs.
- Check the pressure settings on the CO2 regulator. If the pressure is too high, it can cause the beer to overcarbonate and foam excessively. Adjust the pressure to the appropriate level based on the beer style and preferences.
- Slow Pours: If the beer is dispensing too slowly, first check the temperature. If the temperature is too low, the beer may become too viscous and pour slowly. Adjust the temperature to the optimal range for the beer style.
- Inspect the beer lines for any kinks or bends that may restrict the flow of beer. Straighten any kinks and ensure that the lines are properly connected without any obstructions.
- Check the pressure settings on the CO2 regulator. If the pressure is too low, it may result in a sluggish pour. Increase the pressure slightly, but be careful not to overcarbonate the beer.
- Leaks: Leaks can occur at various points in the kegerator setup, such as the connections between the beer lines, couplers, and faucets. Inspect all the connections and ensure that they are tight and secure. Replace any damaged O-rings or washers to ensure a proper seal.
- If you encounter persistent leaks, it may be necessary to replace the affected parts, such as the beer lines or faucet seals. Be sure to use the correct size and type of replacements for your kegerator.
By following these troubleshooting steps, you can address common dispensing issues and ensure that your kegerator delivers a smooth and enjoyable beer-drinking experience. Remember to make small adjustments and give the system time to stabilize after any changes. With a little patience and persistence, you’ll be pouring the perfect pint in no time.
With the dispensing issues troubleshooted, it’s time to move on to the final step: maintenance tips.
Step 6: Maintenance Tips
Maintaining your kegerator is key to its longevity and continued performance. Regular maintenance ensures that your kegerator operates at its best and provides you with consistently great-tasting beer. Here are some essential maintenance tips to keep your kegerator in top shape:
- Clean and Sanitize: Regularly clean and sanitize your kegerator to remove any build-up of beer residue, mold, or bacteria. Follow the manufacturer’s instructions for cleaning solutions and procedures. Pay close attention to the beer lines, faucets, and other components that come into contact with beer.
- Store Spare Parts: Keep spare parts on hand, such as O-rings, washers, and gaskets. These small components can wear out over time and lead to leaks or other issues. Having spare parts readily available allows for quick replacements when needed.
- Check for Leaks: Regularly inspect all connections for any signs of leaks. This includes the beer lines, CO2 lines, and faucet connections. Address any leaks immediately by tightening connections or replacing damaged parts to prevent beer wastage and maintain carbonation levels.
- Monitor CO2 Levels: Keep an eye on the CO2 tank gauge to ensure that you have enough gas for carbonation. If the gauge shows low pressure, it’s time to refill or replace the CO2 tank. Regularly check for any leaks in the system that may cause a loss of CO2.
- Periodically Adjust Temperature and Pressure: Monitor the temperature and pressure settings to ensure that they remain within the recommended ranges. Adjust as necessary to accommodate different beer styles or personal preference. Be mindful that too frequent or drastic adjustments can affect the quality and taste of the beer.
- Beer Line and Faucet Maintenance: Routinely clean the beer lines using specialized cleaning solutions or line brushes. This helps remove any residue or build-up that may affect the taste and quality of your beer. Also, disassemble and clean the faucets regularly to prevent clogs and ensure smooth dispensing.
- Keep the Kegerator Level: Maintain the levelness of your kegerator to ensure proper performance and avoid any potential mishaps. Check the leveling periodically and adjust the feet or placement as needed.
- Regularly Check the Drip Tray: Clean or replace the drip tray as needed to maintain cleanliness and prevent any unpleasant odors. Wipe it down regularly to remove any spilled beer or other residues.
- Follow Manufacturer’s Instructions: Lastly, always follow the manufacturer’s instructions for your specific kegerator model. The manufacturer’s recommendations for cleaning, maintenance, and troubleshooting may vary, so it’s essential to refer to their guidelines for proper care and usage.
By incorporating these maintenance tips into your routine, you can keep your kegerator in optimal condition for years of enjoyment. A well-maintained kegerator not only ensures the best beer-drinking experience but also helps to avoid costly repairs or replacements.
With these maintenance tips in mind, you’ll be able to consistently enjoy fresh, delicious beer straight from your kegerator. Cheers to the perfect pour!
Now, armed with all these troubleshooting and maintenance tips, you have the knowledge and skills to fix any common issues that may arise with your kegerator. By following this comprehensive guide, you will ensure that your kegerator continues to dispense quality beer, providing you with a delightful and hassle-free home draught experience. Cheers to perfectly poured pints!
Conclusion
Congratulations! You have reached the end of this comprehensive guide on how to fix and maintain your kegerator. By following the step-by-step instructions outlined in this article, you now have the knowledge and expertise to diagnose and resolve common problems that may arise with your kegerator, ensuring that you can enjoy your favorite beers on tap at home.
From diagnosing the problem and cleaning the kegerator to checking and replacing components, regulating temperature and pressure, troubleshooting dispensing issues, and implementing regular maintenance, you have acquired a comprehensive understanding of kegerator repair and upkeep. With these skills, you’ll be able to overcome challenges such as excessive foaming, slow pours, leaks, and more.
Remember, regular maintenance and proper care are key to preserving the performance and lifespan of your kegerator. By following the maintenance tips provided, you can ensure that your kegerator continues to deliver the perfect pour every time, with clean and fresh-tasting beer.
Whether you’re a beer enthusiast, a handy DIYer, or someone who simply enjoys the convenience of having a kegerator at home, this guide has equipped you with the knowledge and confidence to tackle any issues that may arise. From understanding how to troubleshoot and repair common problems to implementing regular maintenance practices, you now have the tools to keep your kegerator running smoothly.
Now, it’s time to put your newfound skills into action! Apply the steps outlined in this guide to diagnose and fix any issues you may encounter with your kegerator. By taking proper care of your kegerator, you’ll ensure that it continues to provide you with perfectly chilled, freshly tapped beer for years to come.
Cheers to your repaired and well-maintained kegerator, and to enjoying the ultimate home beer experience!
Frequently Asked Questions about How To Fix My Kegerator
Was this page helpful?
At Storables.com, we guarantee accurate and reliable information. Our content, validated by Expert Board Contributors, is crafted following stringent Editorial Policies. We're committed to providing you with well-researched, expert-backed insights for all your informational needs.


0 thoughts on “How To Fix My Kegerator”