Articles
How Long To Let Kegerator Before Plugging In
Modified: October 20, 2024
Learn how long you should let your kegerator sit before plugging it in. Read our informative articles for helpful tips and advice.
(Many of the links in this article redirect to a specific reviewed product. Your purchase of these products through affiliate links helps to generate commission for Storables.com, at no extra cost. Learn more)
How Long To Let Kegerator Before Plugging In
When you purchase a new kegerator, it’s an exciting moment. You can’t wait to start pouring the perfect pint of your favorite beer. However, before you hastily plug in your new kegerator, it’s important to allow it some time to settle. This settling period is crucial for the kegerator to function optimally and provide you with the best beer-drinking experience possible.
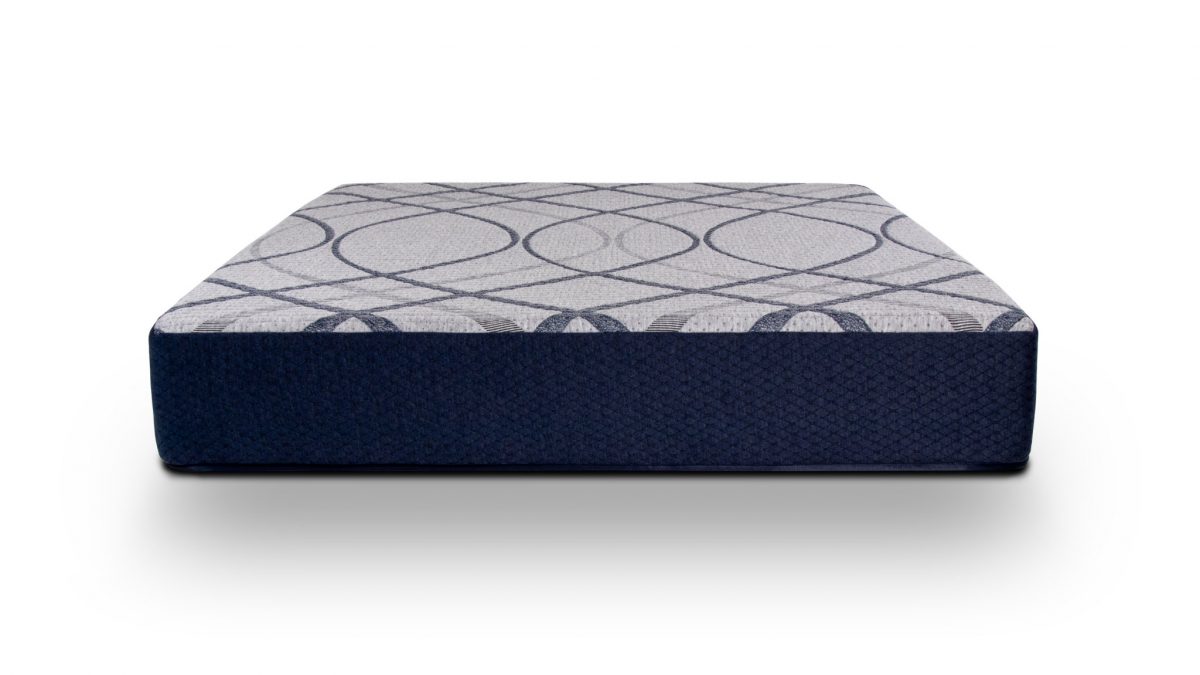
Read more: How Long To Let A Box Mattress Expand
Understanding Kegerators
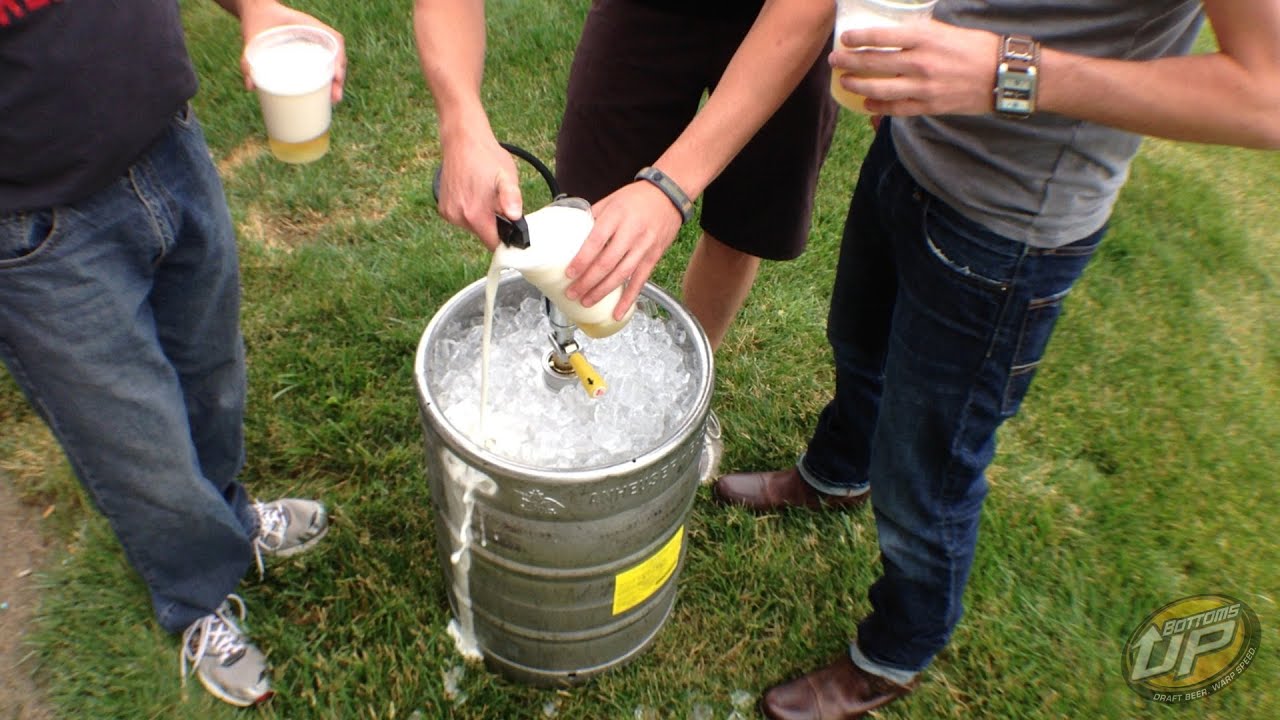
Kegerators are appliances designed to store and dispense draft beer. They consist of a refrigeration unit, a keg chamber, and a dispensing system. This system allows beer to be stored at the ideal serving temperature and dispensed with the right amount of carbonation and pressure.
Why It’s Important to Let the Kegerator Settle
When a kegerator is shipped or transported, it undergoes jostling and movement that can cause sediment and debris to settle inside. Additionally, the refrigerant may need time to stabilize, and the components of the kegerator may need to adjust to room temperature.
Allowing the kegerator to settle before plugging it in helps to minimize potential issues such as foaminess in the beer, clogged lines, and damage to the internal components. It also gives you the opportunity to thoroughly clean and sanitize the keg chamber and ensure everything is in proper working order.
Factors Affecting Settling Time
The amount of time required for a kegerator to settle can vary depending on several factors, including:
- The distance the kegerator was transported
- The overall condition of the kegerator upon arrival
- The type and quality of beer you plan to dispense
- The ambient temperature
A general rule of thumb is to let a new kegerator settle for at least 24 to 48 hours. However, it’s always best to consult the manufacturer’s instructions for the specific model you have purchased, as they may provide more precise recommendations.
Recommended Settling Time for New Kegerators
While the settling time can vary, here is a step-by-step guide to help you prepare your new kegerator for optimum performance:
- Unpack the kegerator, being careful to remove any packing materials.
- Give the kegerator a visual inspection to ensure there are no visible damages or loose parts.
- If necessary, clean the keg chamber with a gentle cleanser and rinse thoroughly.
- Allow the kegerator to come to room temperature, usually around 70°F (21°C).
- Connect the CO2 tank and regulat
How Long To Let Kegerator Before Plugging In
When you purchase a new kegerator, it’s an exciting moment. You can’t wait to start pouring the perfect pint of your favorite beer. However, before you hastily plug in your new kegerator, it’s important to allow it some time to settle. This settling period is crucial for the kegerator to function optimally and provide you with the best beer-drinking experience possible.
A kegerator is an appliance specifically designed for storing and dispensing draft beer. It combines a refrigeration unit, a keg chamber, and a dispensing system to provide you with fresh, cold beer on tap in the comfort of your own home.
Now you may be wondering, “Why do I need to let my kegerator settle before plugging it in?” The answer lies in the transportation and construction of the kegerator itself. During shipping or transportation, the kegerator may experience jostling and movement, which can cause sediment and debris to settle inside. Furthermore, the refrigerant used in the cooling system may need time to stabilize, and the various components of the kegerator may need to adjust to room temperature.
By allowing your kegerator to settle before plugging it in, you minimize the risk of certain issues arising. Foaminess in the beer, clogged lines, and potential damage to internal components can all be avoided by giving your kegerator some time to adjust. This settling period also provides you with the opportunity to clean and sanitize the keg chamber thoroughly and ensure that everything is in proper working order.
The length of time required for a kegerator to settle can vary depending on factors such as the distance it was transported, the condition it was in upon arrival, the type of beer you plan to dispense, and the ambient temperature. While a general guideline is to let a new kegerator settle for at least 24 to 48 hours, it’s always best to consult the manufacturer’s instructions for your specific model, as they may provide more precise recommendations.
Now that you understand the importance of letting your kegerator settle before use, you’re well on your way to enjoying the perfect draft beer in the comfort of your own home. In the following sections, we will explore the factors that affect settling time, the recommended settling time for new kegerators, and the steps you should take to prepare your kegerator for plugging in.
How Long To Let Kegerator Before Plugging In
Understanding Kegerators
Before diving into the details of how long to let your kegerator settle before plugging it in, let’s first take a closer look at what a kegerator is and how it works.
A kegerator is essentially a specialized refrigerator designed to store and dispense draft beer. It is equipped with a refrigeration unit, a keg chamber, and a dispensing system that allows you to enjoy fresh, carbonated beer on tap in the comfort of your own home.
The refrigeration unit in a kegerator is responsible for maintaining a consistent and optimal temperature for storing beer. Most kegerators feature a digital temperature control that allows you to set the desired temperature, ensuring your beer is chilled to perfection.
The keg chamber is where the keg of beer is placed and kept. It is designed to accommodate various sizes of kegs, usually from standard half-barrels to smaller sixth-barrels or even homebrew kegs. The keg chamber is well-insulated to preserve the temperature and freshness of the beer while minimizing energy consumption.
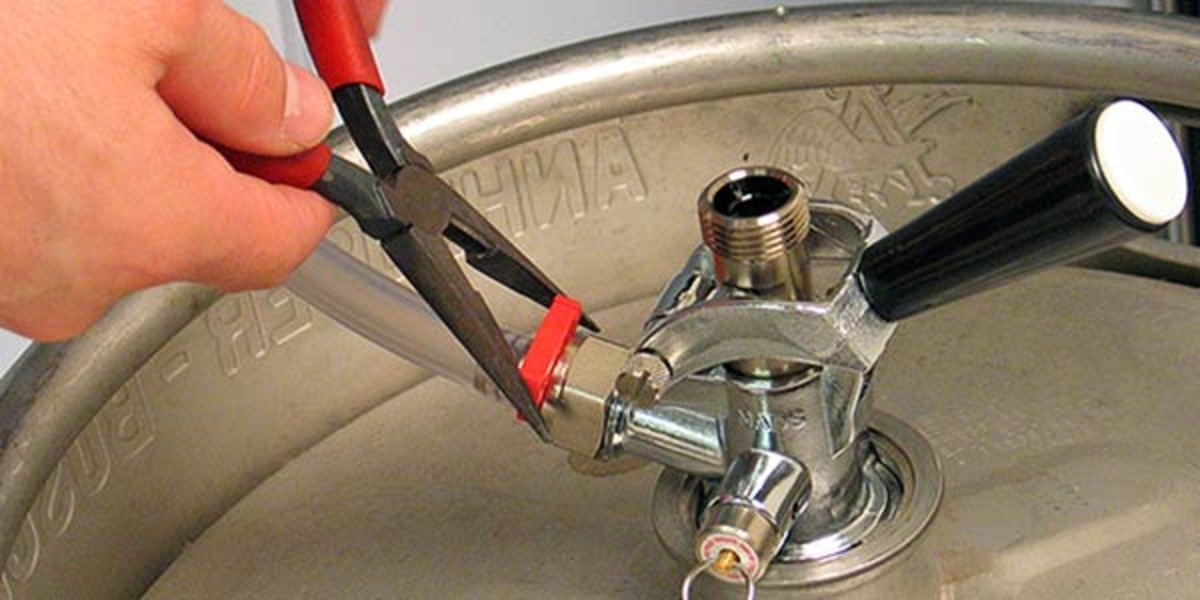
The dispensing system is the heart of the kegerator, responsible for serving the beer in a controlled manner. It typically includes a CO2 tank for carbonation, a pressure regulator to control the CO2 flow, and various valves and connectors to transfer the beer from the keg to the tap. The dispensing system ensures that the beer is properly carbonated and poured with the right amount of pressure, resulting in a perfect pint every time.
Kegerators can be a great addition to your home bar, man cave, or outdoor entertaining area. Not only do they provide convenience and the ability to enjoy a wide selection of beers on tap, but they also add a touch of sophistication and novelty to your drinking experience.
It’s important to note that kegerators come in different sizes and configurations to suit various needs and preferences. Some kegerators are designed specifically for commercial use, such as in bars and restaurants, while others are more compact and suitable for residential use. When selecting a kegerator, consider factors such as the number of kegs you plan to store, the space available, and the features that are important to you.
Now that you have a better understanding of what a kegerator is and how it works, we can delve deeper into why it’s important to let your new kegerator settle before plugging it in and using it to dispense your favorite brew.
How Long To Let Kegerator Before Plugging In
Understanding Kegerators
Before diving into the details of how long to let your kegerator settle before plugging it in, let’s first take a closer look at what a kegerator is and how it works.
A kegerator is essentially a specialized refrigerator designed to store and dispense draft beer. It is equipped with a refrigeration unit, a keg chamber, and a dispensing system that allows you to enjoy fresh, carbonated beer on tap in the comfort of your own home.
The refrigeration unit in a kegerator is responsible for maintaining a consistent and optimal temperature for storing beer. Most kegerators feature a digital temperature control that allows you to set the desired temperature, ensuring your beer is chilled to perfection.
The keg chamber is where the keg of beer is placed and kept. It is designed to accommodate various sizes of kegs, usually from standard half-barrels to smaller sixth-barrels or even homebrew kegs. The keg chamber is well-insulated to preserve the temperature and freshness of the beer while minimizing energy consumption.
The dispensing system is the heart of the kegerator, responsible for serving the beer in a controlled manner. It typically includes a CO2 tank for carbonation, a pressure regulator to control the CO2 flow, and various valves and connectors to transfer the beer from the keg to the tap. The dispensing system ensures that the beer is properly carbonated and poured with the right amount of pressure, resulting in a perfect pint every time.
Kegerators can be a great addition to your home bar, man cave, or outdoor entertaining area. Not only do they provide convenience and the ability to enjoy a wide selection of beers on tap, but they also add a touch of sophistication and novelty to your drinking experience.
Why It’s Important to Let the Kegerator Settle
Now that you have a better understanding of what a kegerator is and how it works, let’s discuss why it’s important to let your new kegerator settle before plugging it in and using it to dispense beer.
When a kegerator is shipped or transported, it undergoes jostling and movement that can cause sediment and debris to settle inside. Additionally, the refrigerant used in the cooling system may need time to stabilize, and the various components of the kegerator may need to adjust to room temperature.
By allowing your kegerator to settle before plugging it in, you minimize the risk of potential issues arising. Foamy beer, clogged lines, and damage to internal components can all be avoided by giving your kegerator some time to adjust.
Allowing the kegerator to settle also provides you with an opportunity to thoroughly clean and sanitize the keg chamber. This ensures that any residues or contaminants from the manufacturing or transportation process are eliminated, giving you a clean and fresh environment for storing your beer.
Furthermore, giving your kegerator time to settle allows you to perform any necessary checks and adjustments. You can inspect the keg chamber for any damages or loose parts, as well as check the CO2 tank and connections to ensure everything is properly set up and in working order.
Ultimately, by letting your kegerator settle before plugging it in, you set a solid foundation for optimal performance and an enjoyable beer-drinking experience. In the following sections, we will explore the factors that can affect the settling time of a kegerator and provide you with the recommended settling time for new kegerators.
How Long To Let Kegerator Before Plugging In
Understanding Kegerators
Before diving into the details of how long to let your kegerator settle before plugging it in, let’s first take a closer look at what a kegerator is and how it works.
A kegerator is essentially a specialized refrigerator designed to store and dispense draft beer. It is equipped with a refrigeration unit, a keg chamber, and a dispensing system that allows you to enjoy fresh, carbonated beer on tap in the comfort of your own home.
The refrigeration unit in a kegerator is responsible for maintaining a consistent and optimal temperature for storing beer. Most kegerators feature a digital temperature control that allows you to set the desired temperature, ensuring your beer is chilled to perfection.
The keg chamber is where the keg of beer is placed and kept. It is designed to accommodate various sizes of kegs, usually from standard half-barrels to smaller sixth-barrels or even homebrew kegs. The keg chamber is well-insulated to preserve the temperature and freshness of the beer while minimizing energy consumption.
The dispensing system is the heart of the kegerator, responsible for serving the beer in a controlled manner. It typically includes a CO2 tank for carbonation, a pressure regulator to control the CO2 flow, and various valves and connectors to transfer the beer from the keg to the tap. The dispensing system ensures that the beer is properly carbonated and poured with the right amount of pressure, resulting in a perfect pint every time.
Kegerators can be a great addition to your home bar, man cave, or outdoor entertaining area. Not only do they provide convenience and the ability to enjoy a wide selection of beers on tap, but they also add a touch of sophistication and novelty to your drinking experience.
Read more: How Long Should You Let Candles Burn
Factors Affecting Settling Time
The length of time required for a kegerator to settle before plugging it in can vary depending on several factors. Some of the key factors that affect settling time include:
- Distance of Transportation: If your kegerator had to travel a long distance before reaching your location, it may require more time to settle. The vibrations and jostling during transportation can cause sediment and debris to settle, and the refrigerant may need more time to stabilize.
- Condition Upon Arrival: The condition of your kegerator upon arrival can also impact the settling time. If the package or unit was damaged during shipping, it may require additional time for inspection and potential repairs before being plugged in.
- Type of Beer: Different types of beer may have varying settling requirements. For example, beers with higher carbonation levels may need more time to settle compared to beers with lower carbonation. It’s always a good idea to consult the specific recommendations from the brewery or beer manufacturer.
- Ambient Temperature: The ambient temperature of the room where you plan to set up your kegerator can also affect the settling time. Warmer temperatures may contribute to longer settling times, as the components of the kegerator need to adjust to the optimal operating temperature.
While these factors can influence the settling time, a general guideline is to let a new kegerator settle for at least 24 to 48 hours. However, it’s essential to consult the manufacturer’s instructions for your specific model, as they may provide more accurate recommendations based on their product’s characteristics.
By considering these factors and allowing adequate settling time for your kegerator, you can ensure optimal performance, minimal issues, and a delightful beer-drinking experience. In the following sections, we will explore the recommended settling time for new kegerators and guide you through the steps to prepare your kegerator for plugging in.
How Long To Let Kegerator Before Plugging In
Understanding Kegerators
Before diving into the details of how long to let your kegerator settle before plugging it in, let’s first take a closer look at what a kegerator is and how it works.
A kegerator is essentially a specialized refrigerator designed to store and dispense draft beer. It is equipped with a refrigeration unit, a keg chamber, and a dispensing system that allows you to enjoy fresh, carbonated beer on tap in the comfort of your own home.
The refrigeration unit in a kegerator is responsible for maintaining a consistent and optimal temperature for storing beer. Most kegerators feature a digital temperature control that allows you to set the desired temperature, ensuring your beer is chilled to perfection.
The keg chamber is where the keg of beer is placed and kept. It is designed to accommodate various sizes of kegs, usually from standard half-barrels to smaller sixth-barrels or even homebrew kegs. The keg chamber is well-insulated to preserve the temperature and freshness of the beer while minimizing energy consumption.
The dispensing system is the heart of the kegerator, responsible for serving the beer in a controlled manner. It typically includes a CO2 tank for carbonation, a pressure regulator to control the CO2 flow, and various valves and connectors to transfer the beer from the keg to the tap. The dispensing system ensures that the beer is properly carbonated and poured with the right amount of pressure, resulting in a perfect pint every time.
Kegerators can be a great addition to your home bar, man cave, or outdoor entertaining area. Not only do they provide convenience and the ability to enjoy a wide selection of beers on tap, but they also add a touch of sophistication and novelty to your drinking experience.
Recommended Settling Time for New Kegerators
While the settling time for a new kegerator can vary depending on various factors, a general recommendation is to let it settle for at least 24 to 48 hours before plugging it in and using it to dispense beer. However, it’s important to note that the specific settling time may differ based on the manufacturer’s instructions for your particular kegerator model.
During this settling period, the kegerator has time to stabilize, allowing any sediment or debris to settle and the components to adjust to room temperature. Additionally, it offers you the opportunity to thoroughly clean and sanitize the keg chamber, ensuring there are no residues or contaminants left from the manufacturing or transportation process.
To ensure you follow the recommended settling time for your new kegerator, you can follow these steps:
- Unpack the kegerator from its packaging, ensuring all packing materials are removed.
- Inspect the kegerator visually for any damages or loose parts.
- If necessary, clean the keg chamber using a gentle cleanser and rinse it thoroughly.
- Allow the kegerator to come to room temperature, usually around 70°F (21°C).
- Connect the CO2 tank and regulator, ensuring they are properly secured and the connections are leak-free.
- Set the desired temperature on the digital temperature control, typically between 38°F to 45°F (3°C to 7°C) for most beers.
- Let the kegerator sit for the recommended settling time before plugging it in.
By following these steps and allowing the recommended settling time, you can ensure that your kegerator functions optimally, providing you with a delightful beer-drinking experience.
In the next section, we will provide you with some additional tips for optimal kegerator performance to help you maintain and enjoy your kegerator to the fullest.
How Long To Let Kegerator Before Plugging In
Understanding Kegerators
Before diving into the details of how long to let your kegerator settle before plugging it in, let’s first take a closer look at what a kegerator is and how it works.
A kegerator is essentially a specialized refrigerator designed to store and dispense draft beer. It is equipped with a refrigeration unit, a keg chamber, and a dispensing system that allows you to enjoy fresh, carbonated beer on tap in the comfort of your own home.
The refrigeration unit in a kegerator is responsible for maintaining a consistent and optimal temperature for storing beer. Most kegerators feature a digital temperature control that allows you to set the desired temperature, ensuring your beer is chilled to perfection.
The keg chamber is where the keg of beer is placed and kept. It is designed to accommodate various sizes of kegs, usually from standard half-barrels to smaller sixth-barrels or even homebrew kegs. The keg chamber is well-insulated to preserve the temperature and freshness of the beer while minimizing energy consumption.
The dispensing system is the heart of the kegerator, responsible for serving the beer in a controlled manner. It typically includes a CO2 tank for carbonation, a pressure regulator to control the CO2 flow, and various valves and connectors to transfer the beer from the keg to the tap. The dispensing system ensures that the beer is properly carbonated and poured with the right amount of pressure, resulting in a perfect pint every time.
Kegerators can be a great addition to your home bar, man cave, or outdoor entertaining area. Not only do they provide convenience and the ability to enjoy a wide selection of beers on tap, but they also add a touch of sophistication and novelty to your drinking experience.
Steps to Prepare Your Kegerator for Plugging In
Once you have allowed your new kegerator to settle for the recommended time, it’s time to prepare it for plugging in and using it to dispense beer. Follow these steps to ensure the proper setup and optimal performance of your kegerator:
- Unpack and inspect: Remove any packaging materials from the kegerator and conduct a visual inspection. Check for any damages, loose parts, or signs of mishandling during shipping. If you notice any issues, contact the manufacturer or retailer for assistance.
- Clean the keg chamber: Use a gentle cleanser to clean the keg chamber, ensuring that no residues or contaminants from the manufacturing or transportation process remain. Rinse thoroughly and allow the chamber to dry completely before proceeding.
- Connect the CO2 tank and regulator: Securely attach the CO2 tank to the kegerator and ensure that it is properly connected to the pressure regulator. Double-check for any leaks by applying a soapy water solution to the connections and looking for bubbles. Tighten any loose connections as needed.
- Set the desired temperature: Adjust the digital temperature control on your kegerator to the recommended temperature for the beer style you plan to dispense. Most beers are best served between 38°F to 45°F (3°C to 7°C), but consult the specific recommendations for your chosen beer to ensure the optimal serving temperature.
- Insert the beer keg: Place the beer keg into the keg chamber, ensuring it is properly positioned and securely in place. Take care not to damage any hoses or connections during this process.
- Clean and sanitize the beer lines: Prior to attaching the beer lines to the keg, clean and sanitize them using a beer line cleaning solution according to the manufacturer’s instructions. This step is crucial to maintain the quality and taste of your beer.
- Attach the beer lines and tap: Connect the beer lines to the keg and attach the tap to the top of the keg. Ensure that all connections are secure and tight.
After following these steps, your kegerator is now prepared for plugging in and using it to dispense beer. However, it is still recommended to give it a final check to ensure everything is in proper working order before enjoying your first pour.
Keep in mind that these steps are general guidelines, and it is always important to refer to the specific instructions provided by the manufacturer for your kegerator model. By properly preparing your kegerator, you can ensure its optimal performance and the best possible beer-drinking experience.
In the next section, we will provide you with some additional tips to maintain and optimize the performance of your kegerator in the long run.
How Long To Let Kegerator Before Plugging In
Understanding Kegerators
Before diving into the details of how long to let your kegerator settle before plugging it in, let’s first take a closer look at what a kegerator is and how it works.
A kegerator is essentially a specialized refrigerator designed to store and dispense draft beer. It is equipped with a refrigeration unit, a keg chamber, and a dispensing system that allows you to enjoy fresh, carbonated beer on tap in the comfort of your own home.
The refrigeration unit in a kegerator is responsible for maintaining a consistent and optimal temperature for storing beer. Most kegerators feature a digital temperature control that allows you to set the desired temperature, ensuring your beer is chilled to perfection.
The keg chamber is where the keg of beer is placed and kept. It is designed to accommodate various sizes of kegs, usually from standard half-barrels to smaller sixth-barrels or even homebrew kegs. The keg chamber is well-insulated to preserve the temperature and freshness of the beer while minimizing energy consumption.
The dispensing system is the heart of the kegerator, responsible for serving the beer in a controlled manner. It typically includes a CO2 tank for carbonation, a pressure regulator to control the CO2 flow, and various valves and connectors to transfer the beer from the keg to the tap. The dispensing system ensures that the beer is properly carbonated and poured with the right amount of pressure, resulting in a perfect pint every time.
Kegerators can be a great addition to your home bar, man cave, or outdoor entertaining area. Not only do they provide convenience and the ability to enjoy a wide selection of beers on tap, but they also add a touch of sophistication and novelty to your drinking experience.
Additional Tips for Optimal Kegerator Performance
To ensure optimal performance and the best possible beer-drinking experience, consider the following tips for maintaining and optimizing the performance of your kegerator:
- Clean the beer lines regularly: Beer lines can accumulate bacteria, yeast, and other residues over time, which can affect the taste and quality of your beer. Clean the beer lines periodically using a beer line cleaning solution to maintain a clean and hygienic dispensing system.
- Check for leaks: Regularly inspect the connections, hoses, and valves in your kegerator for any signs of leaks. Leaks can lead to carbonation loss, foamy beer, and inefficient operation. If you spot any leaks, tighten the connections or replace faulty parts as needed.
- Keep your kegerator clean: Clean the keg chamber regularly to prevent any build-up of dirt, mold, or bacteria. Use a mild cleanser and warm water to wipe down the interior surfaces, and ensure thorough rinsing before drying to prevent any soapy residue.
- Monitor CO2 levels: Keep an eye on the levels of CO2 in your kegerator. Low CO2 levels can result in flat beer, while high levels can cause excessive foam. Adjust the pressure regulator accordingly to maintain the proper carbonation levels for your specific beer.
- Store beer properly: If you have beer left in the keg after use, make sure to store it properly to maintain its quality. Seal the keg with a pressure relief cap or similar device to prevent oxygen exposure, which can cause the beer to spoil.
- Be mindful of temperature: While it’s tempting to adjust the temperature frequently, try to maintain a consistent temperature for your kegerator. Frequent temperature changes can affect the carbonation level and overall quality of the beer.
By following these additional tips, you can ensure that your kegerator operates optimally and consistently delivers a great beer-drinking experience. Regular cleaning, inspections, and maintenance will help prolong the lifespan of your kegerator and keep it in top-notch condition.
Now that you are armed with knowledge of how long to let your kegerator settle before plugging it in, steps to prepare the kegerator, and tips for optimal performance, you can confidently set up your kegerator and enjoy the pleasure of pouring delicious draft beer at home. Cheers!
How Long To Let Kegerator Before Plugging In
Understanding Kegerators
Before diving into the details of how long to let your kegerator settle before plugging it in, let’s first take a closer look at what a kegerator is and how it works.
A kegerator is essentially a specialized refrigerator designed to store and dispense draft beer. It is equipped with a refrigeration unit, a keg chamber, and a dispensing system that allows you to enjoy fresh, carbonated beer on tap in the comfort of your own home.
The refrigeration unit in a kegerator is responsible for maintaining a consistent and optimal temperature for storing beer. Most kegerators feature a digital temperature control that allows you to set the desired temperature, ensuring your beer is chilled to perfection.
The keg chamber is where the keg of beer is placed and kept. It is designed to accommodate various sizes of kegs, usually from standard half-barrels to smaller sixth-barrels or even homebrew kegs. The keg chamber is well-insulated to preserve the temperature and freshness of the beer while minimizing energy consumption.
The dispensing system is the heart of the kegerator, responsible for serving the beer in a controlled manner. It typically includes a CO2 tank for carbonation, a pressure regulator to control the CO2 flow, and various valves and connectors to transfer the beer from the keg to the tap. The dispensing system ensures that the beer is properly carbonated and poured with the right amount of pressure, resulting in a perfect pint every time.
Kegerators can be a great addition to your home bar, man cave, or outdoor entertaining area. Not only do they provide convenience and the ability to enjoy a wide selection of beers on tap, but they also add a touch of sophistication and novelty to your drinking experience.
Read more: How Long Tubing On Home Kegerator
Conclusion
In conclusion, it is important to let your kegerator settle for a recommended time before plugging it in and using it to dispense beer. This settling period allows the kegerator to stabilize, ensuring optimal performance and a delightful beer-drinking experience.
By letting your kegerator settle, you minimize the risk of issues such as foamy beer, clogged lines, and damage to internal components. It also gives you the chance to clean and sanitize the keg chamber thoroughly, ensuring a clean and fresh environment for storing your beer.
The settling time for a new kegerator can vary depending on factors such as transportation distance, condition upon arrival, type of beer, and ambient temperature. However, a general guideline is to let a new kegerator settle for at least 24 to 48 hours. Always refer to the manufacturer’s instructions for your specific model to ensure you follow their recommended settling time.
To prepare your kegerator for plugging in, follow the steps of unpacking, inspecting, cleaning the keg chamber, connecting the CO2 tank and regulator, setting the desired temperature, and attaching the beer lines and tap. These steps ensure that your kegerator is properly set up and ready to provide you with a perfect pint of beer.
To optimize the performance of your kegerator, follow additional tips such as regular cleaning of the beer lines, checking for leaks, keeping your kegerator clean, monitoring CO2 levels, and storing beer properly. These practices will help maintain the quality of your beer and prolong the lifespan of your kegerator.
Now that you have a comprehensive understanding of how to let your kegerator settle and prepare it for use, you can confidently enjoy the convenience and pleasure of having draft beer on tap in your own home. So raise your glass, toast to your kegerator, and savor the smooth and refreshing taste of perfectly poured draft beer. Cheers!
Frequently Asked Questions about How Long To Let Kegerator Before Plugging In
What are the benefits of letting a kegerator sit before plugging it in?Letting a kegerator sit before plugging it in allows any refrigerant that may have been disturbed during transportation to settle, ensuring optimal cooling performance. It also gives time for any lubricant that may have shifted to redistribute within the compressor, prolonging its lifespan.Is there a specific duration for letting a kegerator sit before plugging it in?It is recommended to let a kegerator sit for at least 24 hours before plugging it in. This allows ample time for the internal components to stabilize and reach their optimal operating conditions.What happens if I plug in a kegerator immediately after setting it up?Plugging in a kegerator immediately after setting it up can lead to inefficient cooling and potential damage to the compressor. It may also result in foamy beer due to unstable temperature control.Can I expedite the process of letting a kegerator sit before plugging it in?While it is not advisable to rush the process, you can gently rock the kegerator back and forth to help settle any disturbed refrigerant. However, it is still crucial to allow sufficient time for the unit to stabilize before plugging it in.Are there any additional steps to take before plugging in a kegerator?Before plugging in a kegerator, it is important to ensure that it is placed on a level surface to prevent any potential damage to the internal components. Additionally, double-checking the connections and ensuring that the unit is properly ventilated can contribute to its overall performance.
Was this page helpful?
At Storables.com, we guarantee accurate and reliable information. Our content, validated by Expert Board Contributors, is crafted following stringent Editorial Policies. We're committed to providing you with well-researched, expert-backed insights for all your informational needs.


0 thoughts on “How Long To Let Kegerator Before Plugging In”